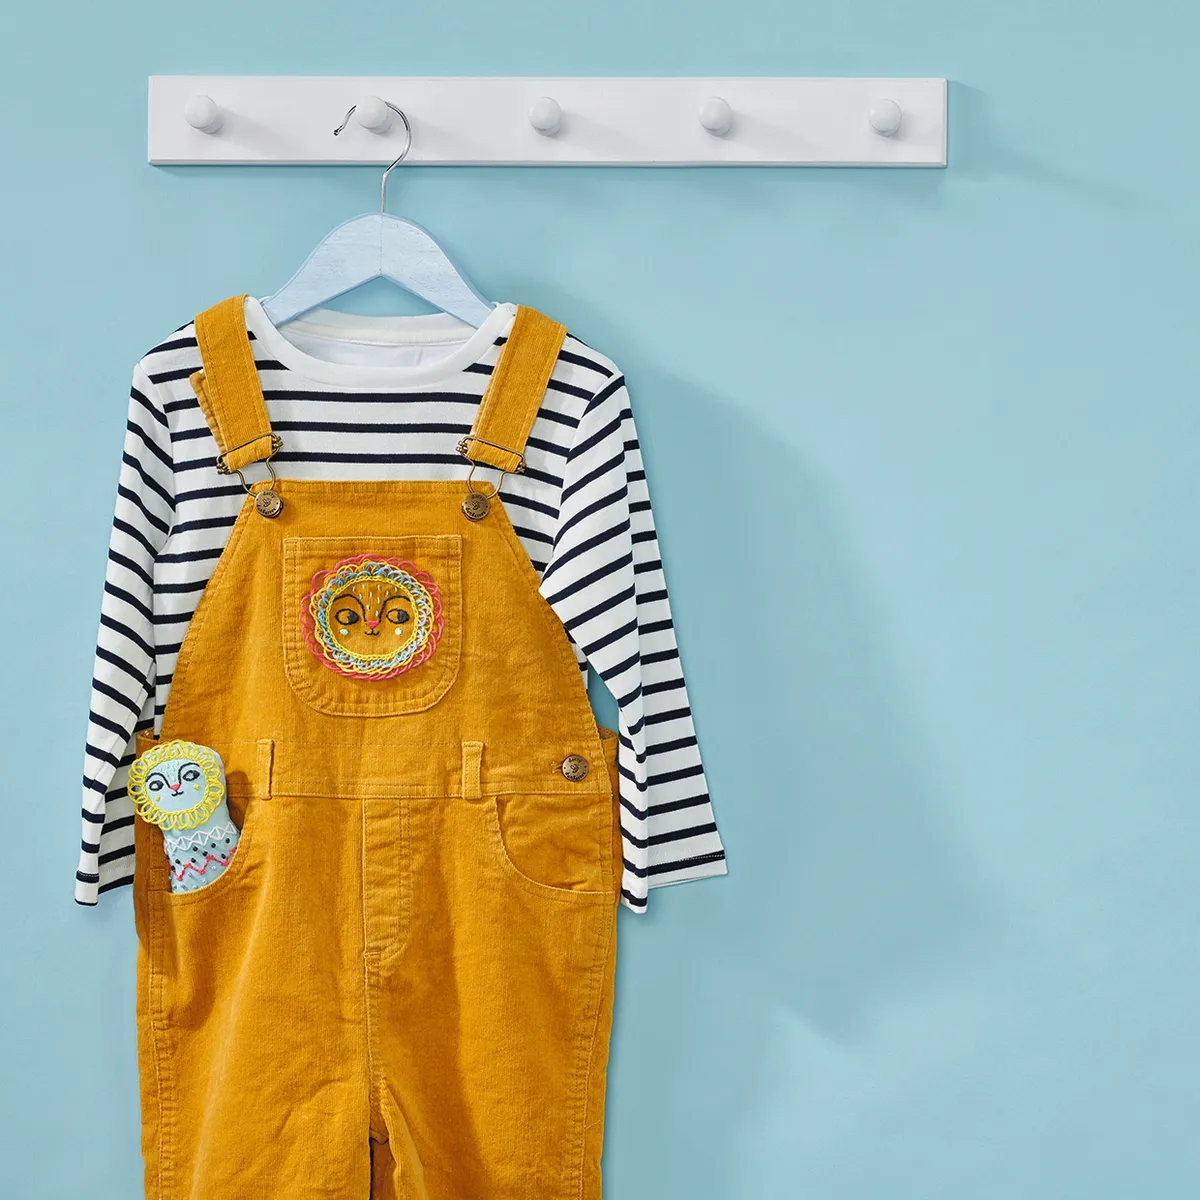
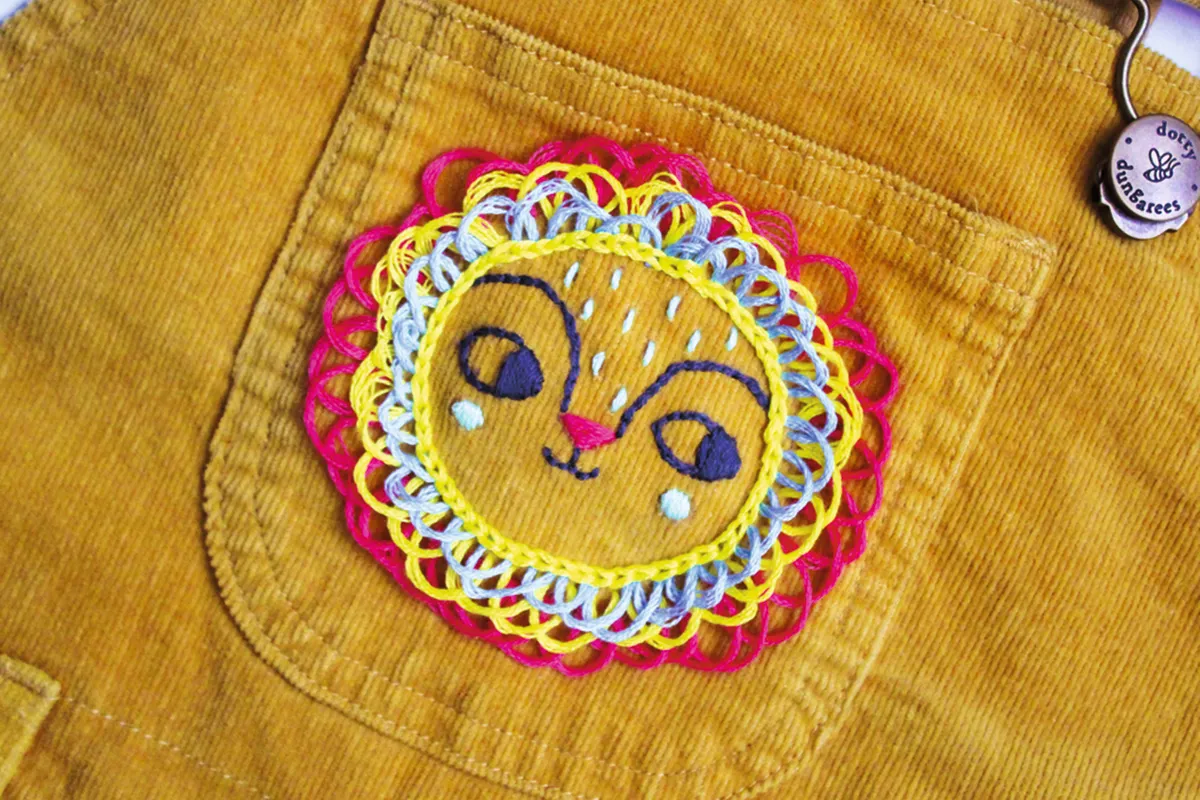
Children will love this cheery embroidery animal motif – loop stitch a lion onto a favourite outfit, then use it to make a matching plushie, too. You can add the embroidery animal to the front of dungarees, as we have, or loop stitch it into a T-shirt, the pocket of a favourite pair of jeans or even a hat!
Check out our guide to embroidery on clothes for more information, tips and tricks.
This brilliant loop stitch lion was originally published in Love Embroidery magazine issue 3.
Embroidery animals lion stitch guide
This embroidery animals projects uses loop stitch and chain stitch for the lion's mane, Split Stitch for the eyes, eyebrows and mouth, Satin Stitch for the nose and cheeks plus Backstitch for the forehead detail. For technique guidance, see our how to do Satin Stitch article, how to Backstitch and our how to do Chain Stitch tutorial. The plushie also includes French knots, Stem Stitch and Bullion knot details. For motor on these embroidery stitches, check out how to do Stem Stitch or visit how to do French knots and our Hand embroidery tutorial: Bullion knot.
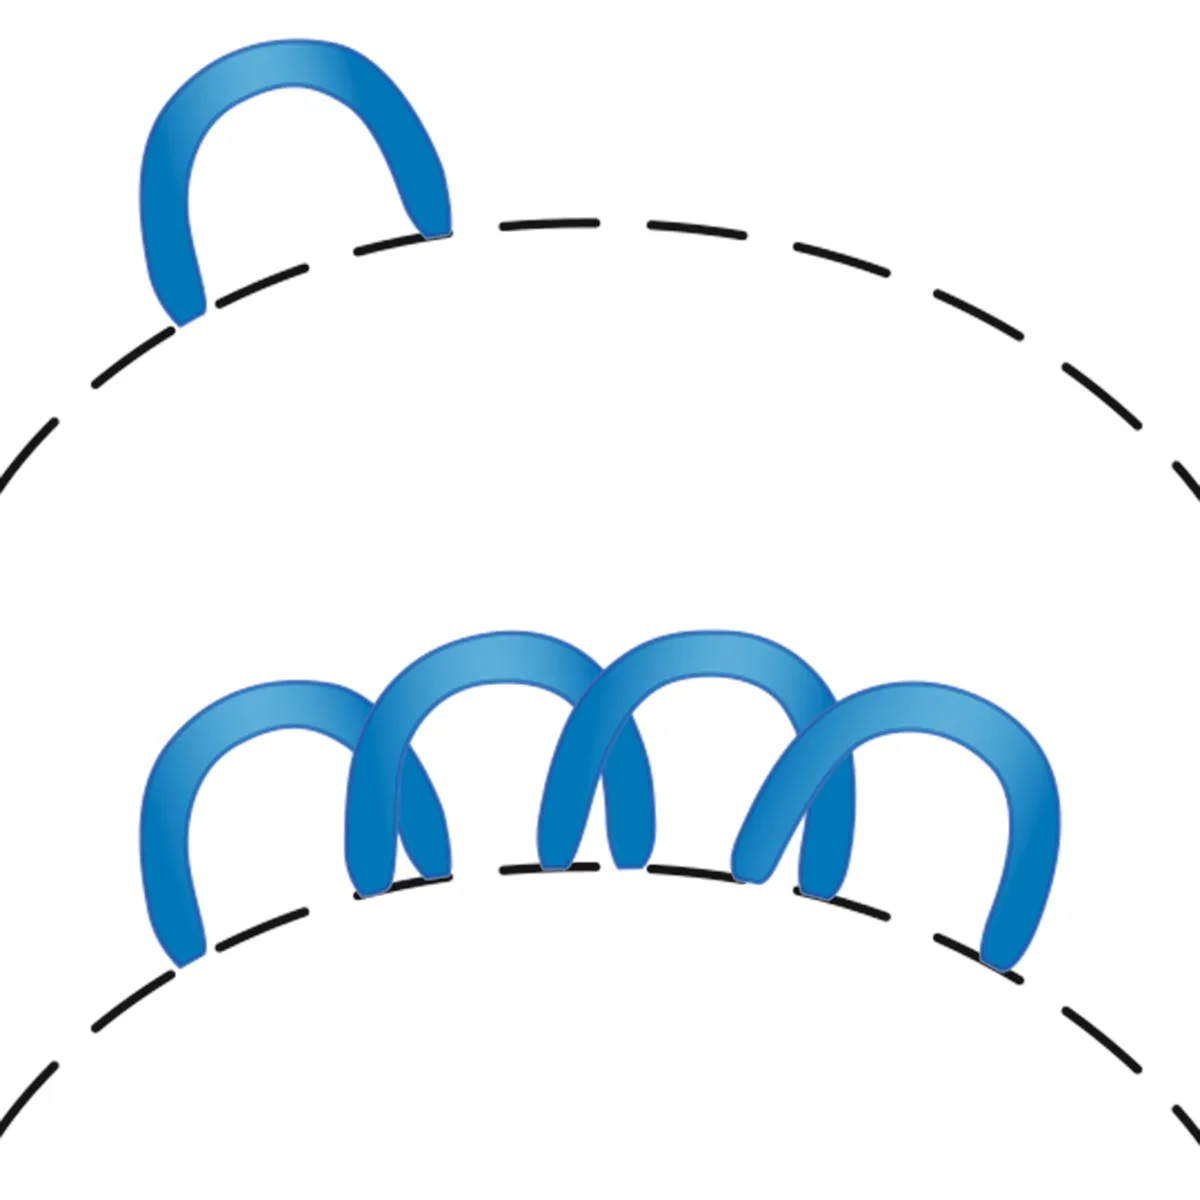
To work Loop stitch, bring your needle up on the design line then down a short distance along the design line, pulling the thread so it leaves a loop on the surface. Next bring the needle up again a little further back on the design line, so it sits between the loop you made with your first loop stitch. Take the thread back into the fabric on the design line, a short distance from the place it came out, and clear of the original loop. Make sure your loops are all the same size and that you place the stitches the same distance apart.
Embroidery animals lion materials
- Children’s dungarees, pinafore or other piece of clothing with a pocket
- Cotton fabric: 30x60cm, for the toy
- Stranded cotton: blue, coral, grey, mint, yellow
- Polyester filling
- Basic embroidery kit
- Embroidery animals lion template
How to embroider the loop stitch lion
Step 1
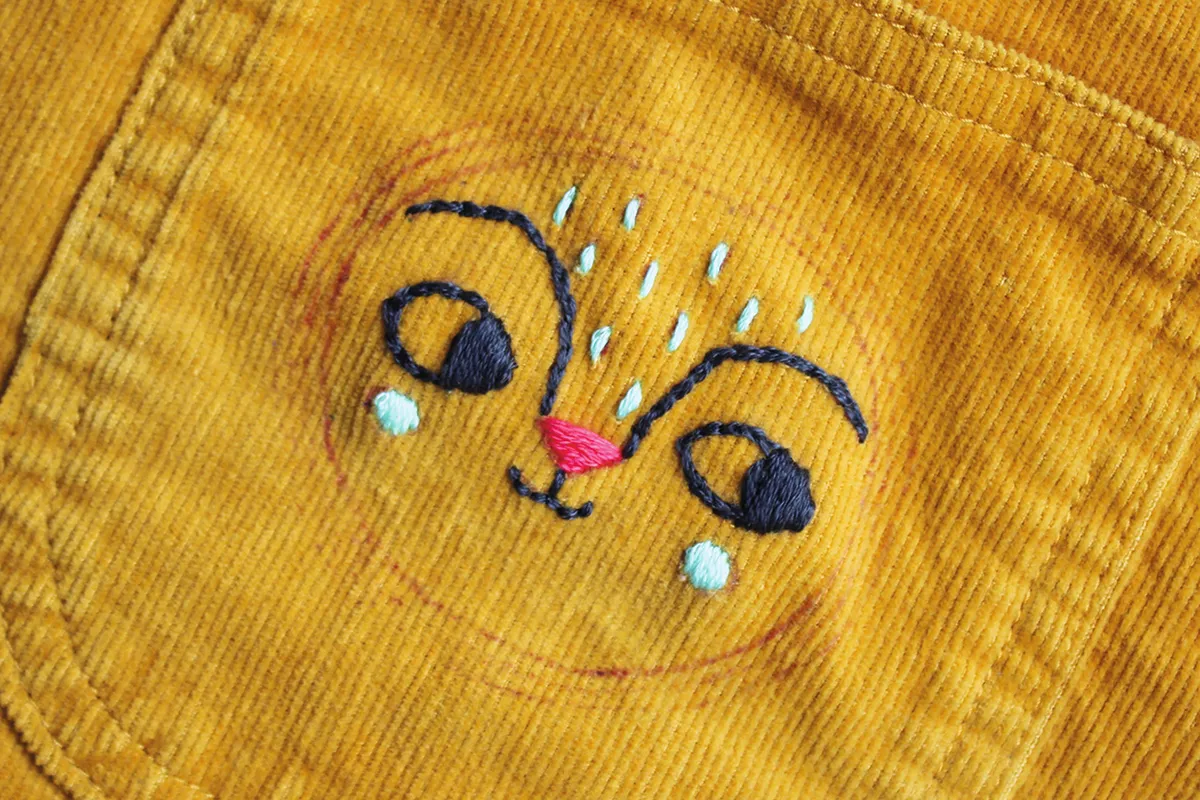
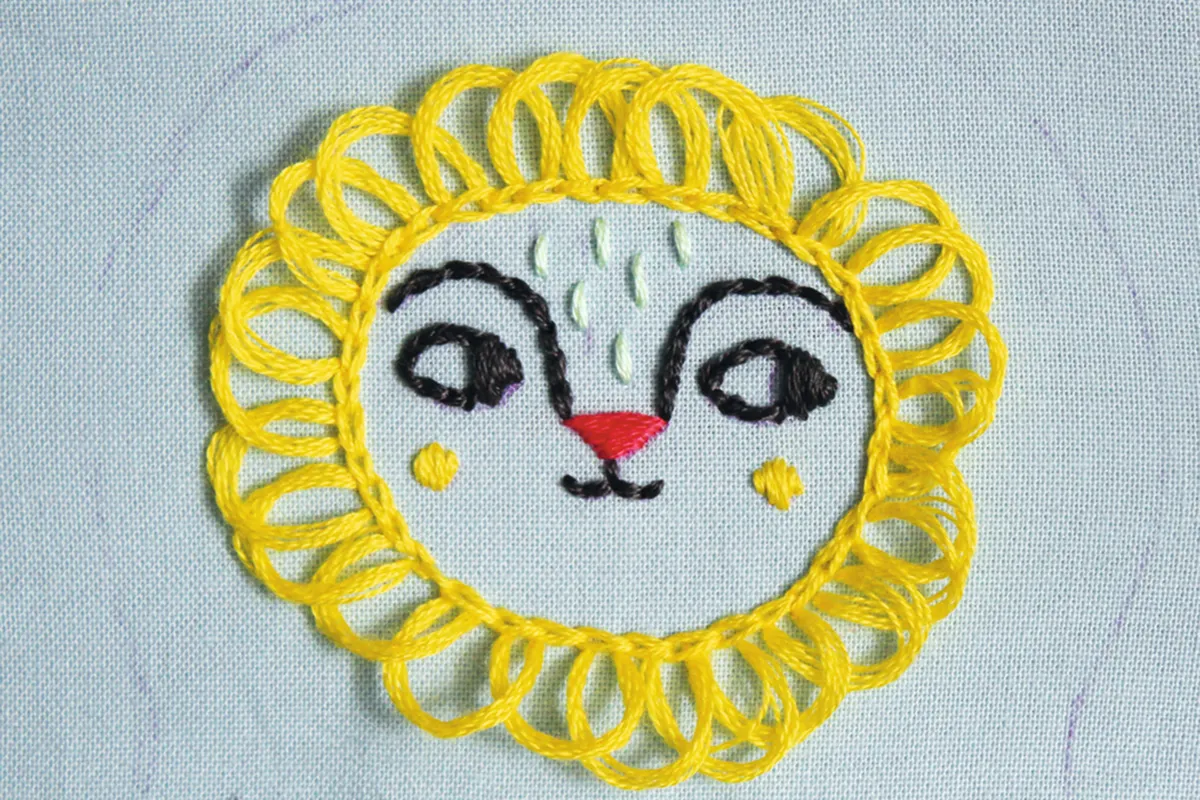
Transfer the design from the template onto the dungarees pocket. Work the eyes, eyebrows and mouth in Split Stitch using four strands of grey. Work the pupils in Satin Stitch using four strands of grey. Work the nose in Satin Stitch using three strands of coral. Work the cheeks in Satin Stitch using four strands of green. Add the details to the forehead in Backstitch using four strands of green.
Step 2

Work Loop Stitch around the outer ring of the face using six strands of coral.
Step 3
Work another layer of Loop Stitch around the middle ring using six strandsof yellow. Add the final circle using six strands of blue following the inner ring. Finally, sew a ring of Chain Stitch using six strands of yellow.
Step 4
To make the plushie, cut the fabric into two 30x30cm squaresfor the front and back. Transfer the design onto the centre of the front fabric. Embroider the design in the same way as for the pocket, but this time work the Satin Stitch on the cheeks in yellow and add just one ring of Loop Stitch with Chain Stitch beneath in yellow.
Step 5
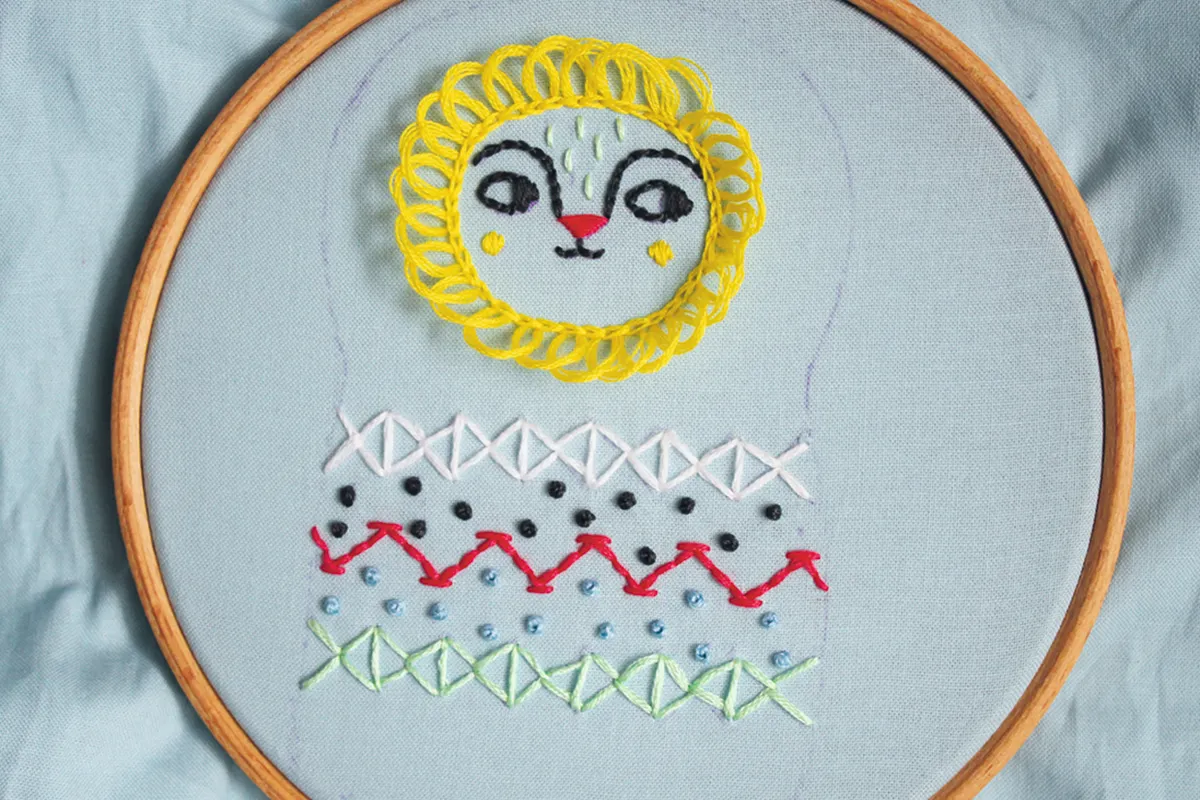
Stitch the patterns on the body in Backstitch using six strands of white, coral and green. Work French Knots using six strands of grey and blue in between the rows.
Step 6
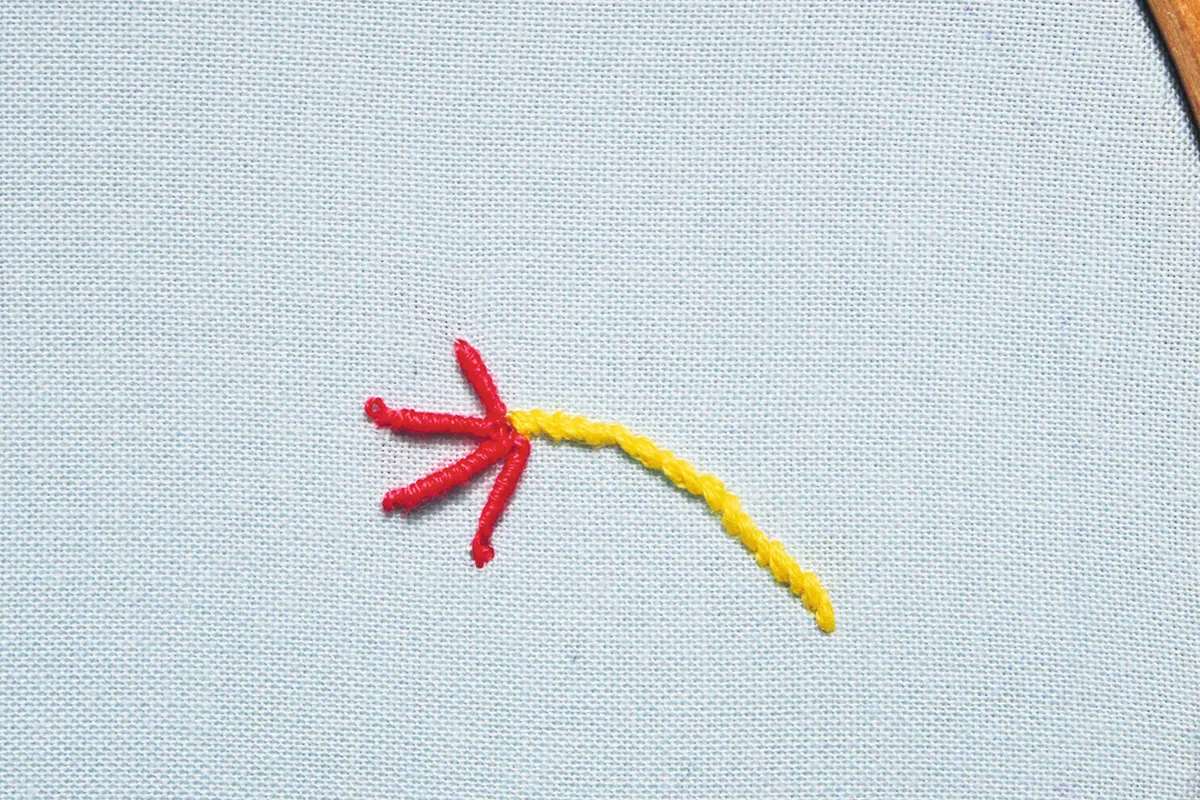
Transfer the lion outline onto the centre of the back fabric. Draw a simple tail, then go over this in Stem Stitch using four strands of yellow. Add four Bullion Knots at the top using three strands of coral.
Cut out the front and back, 1cm outside the outline. Place the front and back RS facing and stitch together all around, leaving a turning gap in the centre of the bottom edge. Turn RS out, then fold the edges of the turning gap to the inside. Press. Stuff with polyester filling, then slip stitch the turning gap closed.
More embroidery animals
We hope to have patterns for many more embroidery animals for you to stitch! For now, check out our cat embroidery pocket design.