Step 1
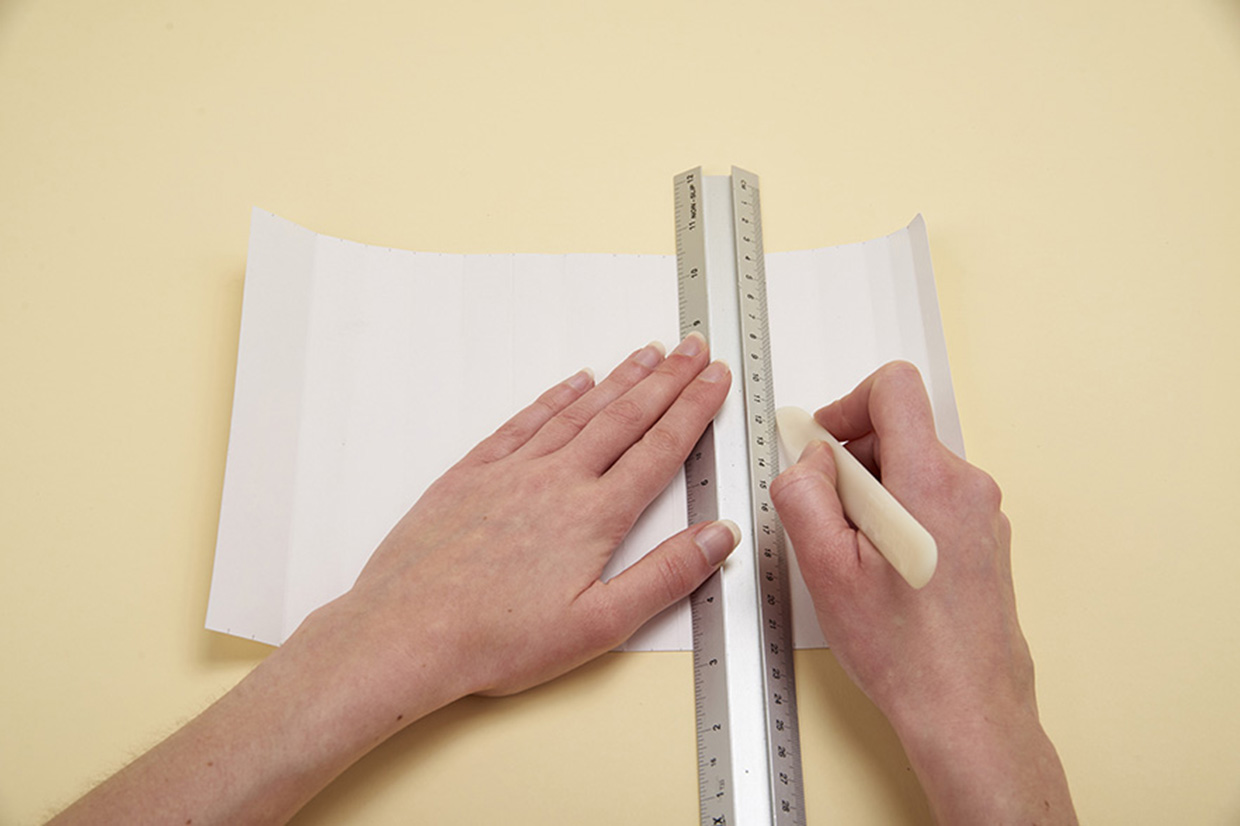
First, download our free origami lampshade template, and take a look at where you need to fold. Working with an A4 piece of card, concertina fold the parallel straight lines – they should be approximately 1cm apart. It helps if you score the lines first using a blunt tool like a bone folder or even an old pen.
Two pieces of A4 card will create a small paper origami lampshade, but you can increase the dimensions to create a large paper origami lampshade!
Step 2

Now, score the diagonal lines as indicated on the free origami lampshade template. When you’ve made all your score marks, you’re ready to fold! Fold the parallel straight lines inwards (valley fold), and fold the diagonal lines outward (mountain fold). It may seem a little fiddly at first, so take it slow and you’ll soon become an expert at making paper origami lampshades!
Step 3
Blend Distress Ink into the edges of each piece of A4 card. It might be easier to do this before folding your paper, as this will give you a nice smooth surface to work on. Use a blending tool, and starting at the edge of the paper gradually blend inwards towards the centre. As the ink on the blender runs out, you’ll get a nice gradient which gradually fades to the colour of your paper. We are using the Tim Holtz Distress Ink in the colour Peacock Feathers!
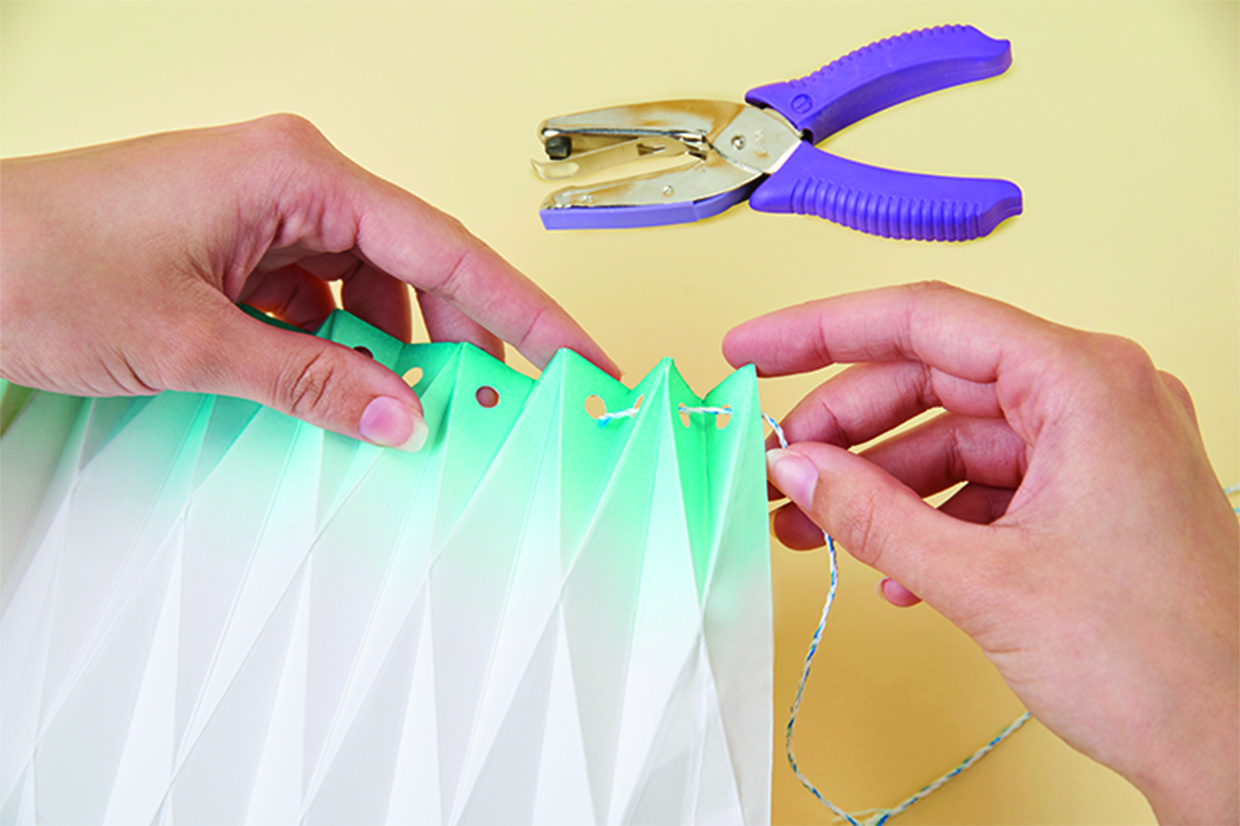
Stick the two A4 pieces of paper together to create one long piece. Next, punch a small hole through the top of each folded pleat and thread twine through each hole. We are using baker’s twine, but string works just as well! Just make sure you are using a yarn that does not stretch.
Step 4

To form the slightly conical shape of the shade, you’ll need to gently pull the cord, so all the pleats fold neatly together in a circle at the top of the design.
Pull the shade into shape by gathering the pleats together on the cord. Once the shade is the size you require, secure the ends of the cord together. Our example has a closed top and an open bottom, but you can make a version with both ends open too, which is ideal if you are making a lampshade for a hanging ceiling light.