Here at Love Patchwork & Quilting magazine we work hard to make sure no errors slip into our patterns and we check every pattern as thoroughly as we can before we go to print, but every so often, the occasional error can slip through the net!
This page contains a full list of any pattern errata, errors or corrections that we have spied in our past issues of the magazine. We'll keep it up-to-date and add any new pattern corrections and errata that we spot.
Use this list to skip to the pattern you want or scroll down to see pictures of the projects.
Any further questions, please do get in touch with us by emailing lovequilting@immediate.co.uk
- Issue 53: Snowflake
Fabric Flock, issue 135
In step 7, you need to cut six(6) 21/2in x 41/2in Fabric G pieces, instead of the three listed in the instructions. Fabric quantities in the You Will Need list remain unchanged.
Greener Pastures, issue 109
In the 'Fabrics Used' section for the quilt, Fabric D should be listed as "Spritz Balmy". Also, the descriptions for Fabrics A and B have been swapped. Fabric A should be "Spritz Tropic" (turquoise spot) and Fabric B should be "Spark Tropic" (turquoise).
Into the Jungle, issue 107
In step 10, we refer to small yellow HRTs, when we should have said “orange”. This change does not affect any fabric requirements, cutting out or making up instructions.
Setting Suns - Block C, issue 107
In step 7, the instructions should say to have the Fabric E strip on the right (not the left). However, if you follow along with the figures as shown, you will have the correct units to make the blocks.

Piecing Party, issue 100
We accidentally printed the wrong piece for Template M. We have updated our online template download, so you can grab it here (see issue 100 templates, page 19) for a full size template to print out. You can also find all the other templates for printing at 100%, so no need to work out the enlargement at home!
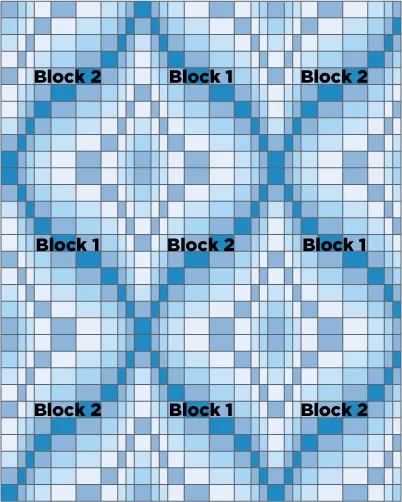
New Horizons quilt, issue 99
When the sample was made for this quilt, it was slightly different than our published Layout Diagram. If you make it following the instructions, you will get a mirror image version of the photo on page 46. To make as in the photo, in Step 13 make only four of Block 1 and make five of Block 2. Then follow the below updated Layout Diagram when joining the blocks in Step 14. All fabric requirements and cutting out instructions remain the same.
Sparkle Motion cushion, issue 98
We missed out one bit of cutting for the background fabric to make the Sparkle Motion cushion. In step 5, you should also cut one 6.5in square, subcutting along both diagonals to make a total of four small triangles. The amount of background fabric listed in the requirements remains correct. It also may be helpful to note that once you've made up your Split QST units in step 7, you will want to trim them to 5.5in square.
Tails and Whiskers, issue 93
When making the zip case, featured on pages 62-67, you will only need a 23in two-way zip (not a 32in one!). However, if you've already purchased your supplies, don't worry. When installing the zip in steps 14-16, simply centre the zip between the panels and trim excess zip tape as described in step 16 of the instructions.
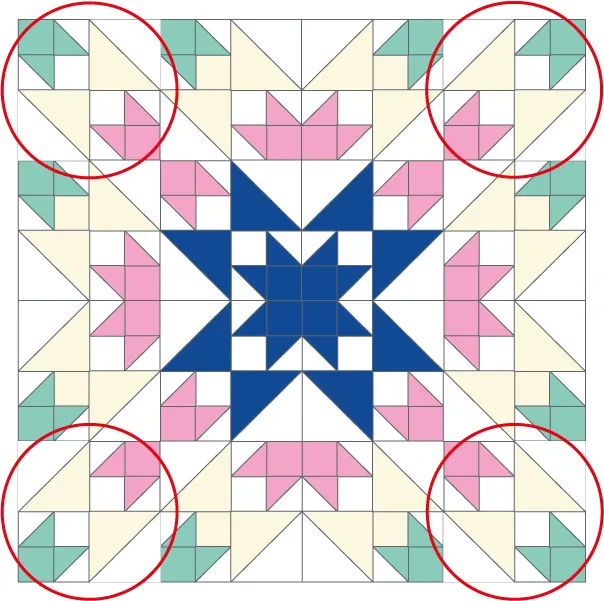
Shooting Star Quilt, issue 92
The Layout Diagram, on page 17, for this quilt has a small error. The cream and white HST units in each corner should be turned to point toward each other to match the quilt Lou made. We have updated the Layout Diagram below, with the affected HSTs circled in red.
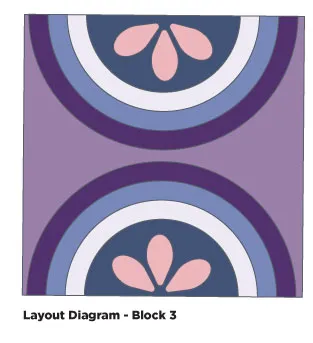
Blomma Block of the Month 7 of 12, issue 92
Oops! We forgot to add the fabric requirements and layout diagram for the third variation of this block. There are no changes to the instructions in the mag, or the fabric requirements for the final quilt. Use the instructions as they appear in issue 92, but refer to the following list for fabric needed and the Layout Diagram to make the third block.
To make Block 3: Dark blue: 81/2in x 8in White: 121/2in x 61/2in Light blue: 15in x 8in Dark purple: 18in x 9in Peach: 41/2in x 8in Medium purple: 13in square
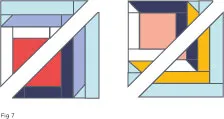
Geo Lines Quilt, issue 89
There is an error in Figure 7 for the Geo Lines quilt. Please refer to the updated figure below when subcutting the three red/blue blocks, in step 12 of the quilt.
Falling Stars Quilt, issue 88
We have noticed a cutting error in step 7. For the second bullet point, when cutting the strips for Templates 6 & 7, you will need to cut two (2) 83/4in x WOF strips (not 43/4in strips). This also means that the listed yardage for the background should be 21/8yd. However, if you have already purchased your fabrics, you may be able to cut the six Template 3 pieces from the remainder of the previously cut strips (instead of cutting the 21/2in x WOF strip, as outlined in the third bullet of step 7).
Alphabet Soup Quilt, issue 83
There is an error in the HST instructions, for making the letter 'a' quilt. In step 10, you should make six (6) orange/background HSTs (discarding one for a total of five). This means that in step 4, you will need to cut a total of three (3) 31/2in squares. And in step 7, you will need to cut a total of sixteen (16) 31/2in squares. The total yardage for the project is unaffected, and you should have plenty to cut the additional squares as required.
Sunset Shades Quilt, issue 82

The Layout Diagram for this quilt was incorrectly printed. The HST blocks should be rotated, to form the "X" pattern, as shown below.
Peppermint Swirl Quilt, issue 80
We've noticed an error in the cutting out instructions. For step 2, the third bullet should read "Twenty four (24) 61/2in x 11in pieces". This longer length will allow you to correctly trim the template, and should be used in step 10, which should read "...and another 61/2in x 11in piece to the side..."
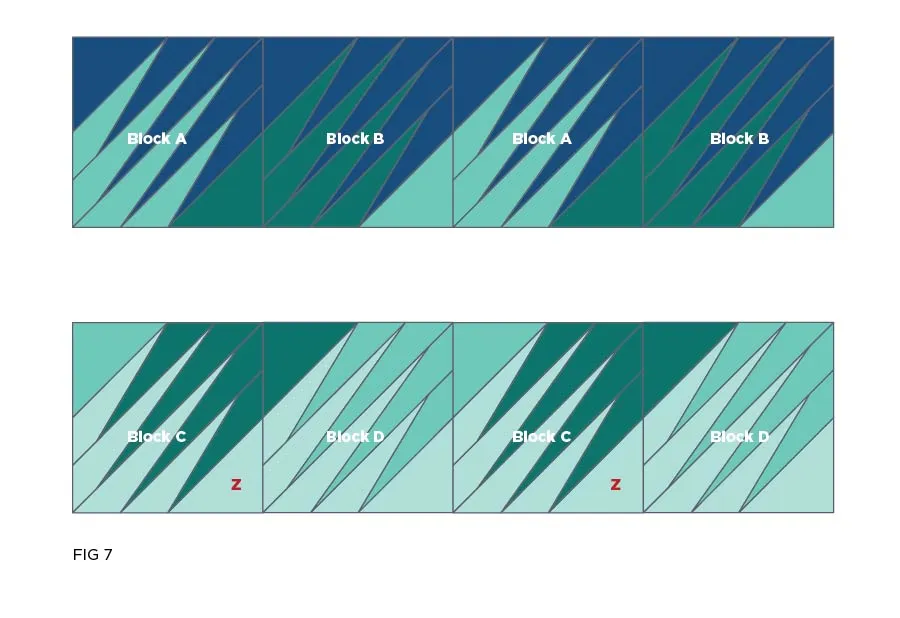
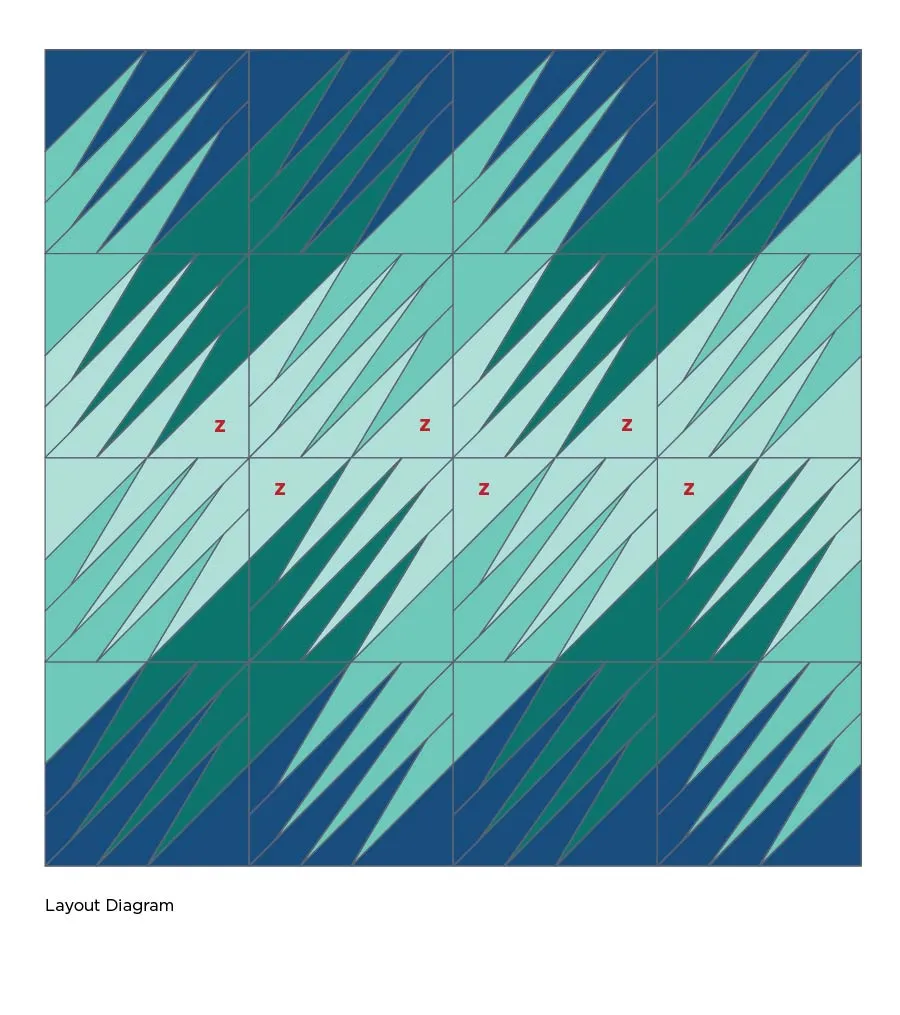
Northern Lights Quilt, issue 80
There is a small error in Figure 5 of the quilt, showing how Block C is constructed. The fabric placement for sections C1 and C2 are correct, however when the figure shows both sections combined one triangle was incorrectly coloured. It should appear as shown below, with the bottom right corner in Fabric Z.
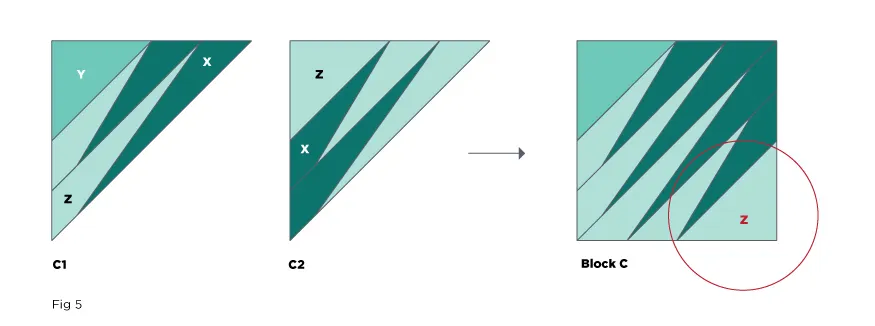
This mis-coloured corner is repeated again in Figure 7 and the Layout Diagram. The corrected versions are shown below, with the updated corners marked with a red 'Z'. All written instructions and cutting out instructions are correct.
40 Modern Quilt blocks cover booklet, issue 77
There are a few errors in the "Crosses" section of the cover booklet.
On page 8, the cutting instructions should read "From the dark blue fabric cut: four (4) 11/2in x 31/2in (A)".
On page 18, the grey fabric triangles (A) should be cut from 51/4in squares. So the cutting instructions for step 1 should read: "From the grey fabric cut: two (2) 51/4in squares. Cut each square in half on the diagonal."
Popsicle Party Quilt, issue 77
We’ve noticed a few errors in the instructions for Popsicle Party from issue 77.
On p20, 21 and 22, the cutting instructions should read:
Step 1: Cut two (2) 91⁄4in squares. Step 2: Cut seven (7) 51⁄4in squares. Step 3: Cut four (4) 51⁄4in squares. Cut two (2) 91⁄4in squares. Step 5: Cut four (4) 51⁄4in squares. Step 6: Cut two (2) 91⁄4in squares. Step 8: Cut two (2) 51⁄4in squares. Step 9: Cut two (2) 51⁄4in squares. Step 10: Cut four (4) 51⁄4in squares. Step 13: Cut two (2) 51⁄4in squares. Step 16: Cut two (2) 91⁄4in squares. Step 18: Cut two (2) 51⁄4in squares. Step 19: Cut one hundred (100) 27⁄8in squares. Cut thirty two (32) 47⁄8in squares. Cut one hundred (100) 41⁄2in squares. Seven (7) 21⁄4in x WOF strips.
On p22, the heading before step 20 should read
“4-in-1 Flying Geese” instead of 8-in-1.
Step 20 should read
“Position two RST with a Fabric A (Fabric B) 91/4in square”
Step 22 should read
“…using Fabric A, C, F (J, M) and P…”
On p 23, step 23 should read
“…using Fabric B, C, E, H, I, J, M and R…”
Step 26 should read
“…using Fabric E, I, J, M and R…”
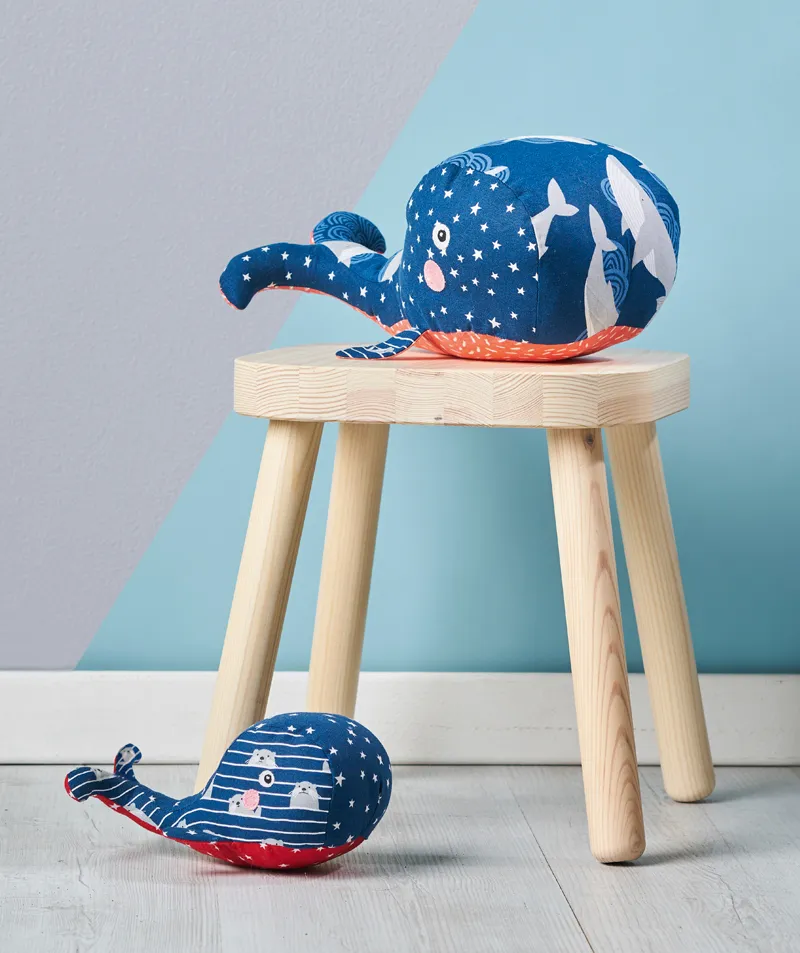
Ahoy there! Whale softies, issue 74
Oops! Our latest issue includes a playful pair of whale squishy toys for you to sew, but when we included the templates in the magazine, we didn’t feature them at 100%. Get the correct size here.
New whale sewing pattern (PDF)
Now all you have to do is pick your favourite nautical prints and get sewing.
Walk in the Park quilt, issue 73
On p36,
Step 2 should read:
Eight (8) 21⁄2in x WOF strips (three for strips and five for binding)
Step 3 should read:
‘From the navy and hot pink prints cut three (3) 21⁄2in x WOF strips’, rather than three (3) 41⁄2in strips’.
Total Eclipse Quilt, issue 71
We’ve noticed a small error in the instructions for Shannon Fraser’s Total Eclipse quilt in issue 71.
On page 63, in Piecing Block Two: step 18, it should read:
Repeat steps 15–16 using Template Y and W pieces. Make eighteen of block two. Note, you will have nineteen Template W pieces remaining, which will be used in block three.
The ‘You Will Need’ list and the rest of the project instructions are all correct.
Petal Power quilt, issue 71
We’ve noticed a small error in the instructions for the Petal Power quilt in issue 71.
On page 18, in the cutting directions, step 3, should say:
From each of the eight (8) petal fabrics cut:
- Sixteen (16) 4½in squares. Discard four (4) squares from each of two (2) prints for a total of one hundred and twenty (120) 4½ in squares.
The ‘You Will Need’ list and the rest of the project instructions are all correct.
Desert Skies, issue 70
In step 7, it shouldn’t say “Place a Fabric A and Fabric B” (there are no pink and teal HST) – instead, it should be “Place a Fabric A and Background 6in square together”
Then the first line of Step 8 – “ Fabric A/Background: eight (8) HSTs.” Should be removed, because the instruction for that is given in step 7.
Patchwork pouch, issue 67
We’ve noticed a small error in the instructions for the Patchwork Pouch that we featured issue 67. On p63, step 1 should read: 'From the solid fabric cut four (4) 10in squares', rather than three (3).' The 'You Will Need' list is correct however, so you should have ample fabric to cut enough pieces.
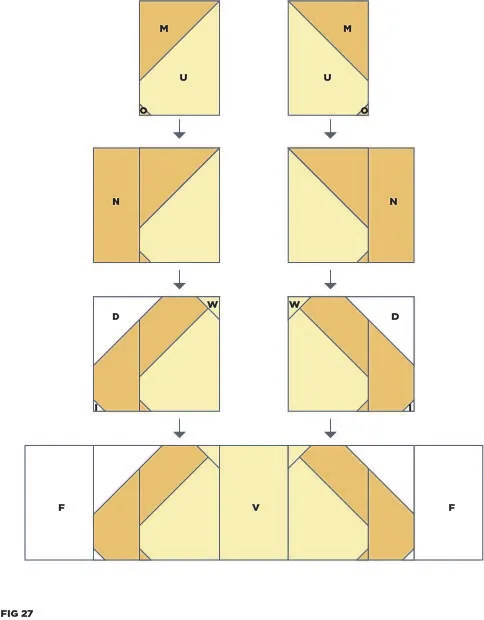
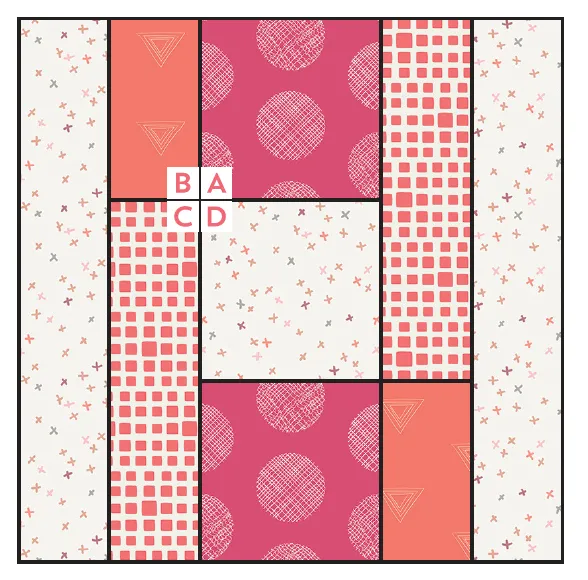
Gingerbread quilt, issue 66
We’ve noticed a few small errors in the instructions for the Gingerbread House quilt by Gracey Larson in issue 66.
On p33, step 13 should instruct to cut twelve (12) 1¾in squares (E) (instead of 11⁄4in squares).
On p38, the 'D' and 'W' on Fig 27 should be the other way round, as per the updated Fig below.
On p34, the Corner-square Triangle on Fig 4 should be marked 'E' (instead of 'C'), as per the updated Fig below.
Dark Knight Issue 65
One of the templates was labelled incorrectly and is in fact Template 4A.
Updated templates with the correct label can be found here.
Cushions booklet, issue 63
We’ve noticed an error in issue 63’s Fabric Tales cushion in our Simply Stylish Cushions supplement.
It should say that the pattern design is by Susan Standen (canadianabroad-susan.blogspot.com).
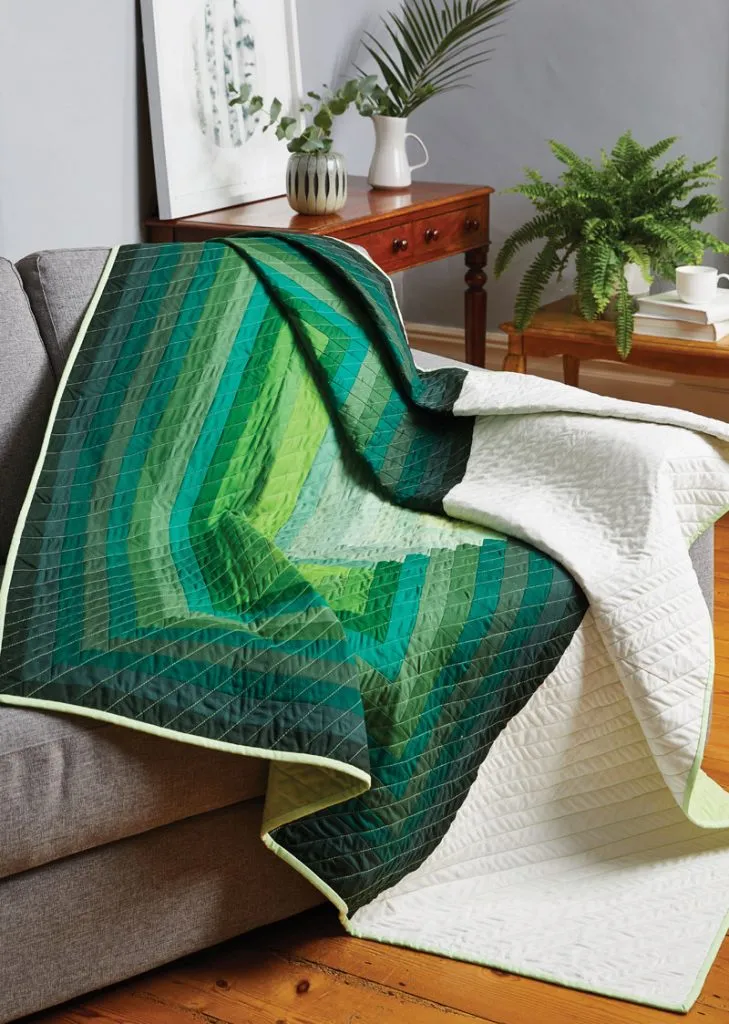
Forest Fade Quilt, issue 59
We’ve noticed an error in the cutting instructions for issue 59’s Forest Fade quilt by Jenn Nevitt
On p84, the third bullet point in step 21 should say ‘From Fabric U cut four (4) 2in squares’, rather than ‘two (2) 2in squares’.
Block of the month, issue 59
We’ve noticed an error in the templates for issue 59’s Block of the Month by Susi Bellingham.
On p92 the FPP templates are incorrectly listed as Actual Size. This should read as Enlarge by 200%.
Neon Kicks Quilt, issue 56
We’ve noticed a small error in the instructions for the Neon Kicks quilt by Nicole Calver in issue 56.
- On p18, step 2 should instruct to cut seventy two (72) 23⁄4in squares (not 21⁄2in squares).
- On p19, step 12 should read ‘one of your navy 23⁄4in squares”.
Up and Away Kite quilt, issue 43
We’ve spotted a small error in the instructions for our FPP rainbow kits, designed by Michelle Curtis, in issue 43 of Love Patchwork & Quilting magazine. If you’re making Michelle’s high-flying patchwork kites, read on to make sure you cut your finished kites to the correct size!
We have a small update to step number 8 in the instructions… when you get to page 26 and you’ve finished foundation paper piecing your kite, you should trim your unit on the outer SOLID line of the template (not the dashed line, as we stated in the magazine). The outer solid outline includes seam allowance for future steps in the instructions.
There’s no change to any of the other instructions or the templates – and if you fancy giving this project a go, you can download our FPP kite patchwork templates here – head to our issue 43 templates PDF download to get them!

Rows of Rainbows Quilt, issue 55
We’ve noticed a small error in the instructions for the Rows of Rainbows quilt by Lynne Goldsworthy in issue 55.
On p79, step 6 should read: ‘Foundation Paper Piece the diamond templates using the dark fabric 3.5in x 6.5in rectangles for Section 1, then charcoal 2.5in x 5in rectangles for Sections 2 and 5 and the background fabric 2.5in x 5in rectangles for Sections 3 and 4.’
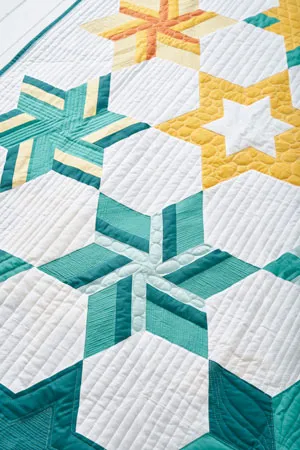
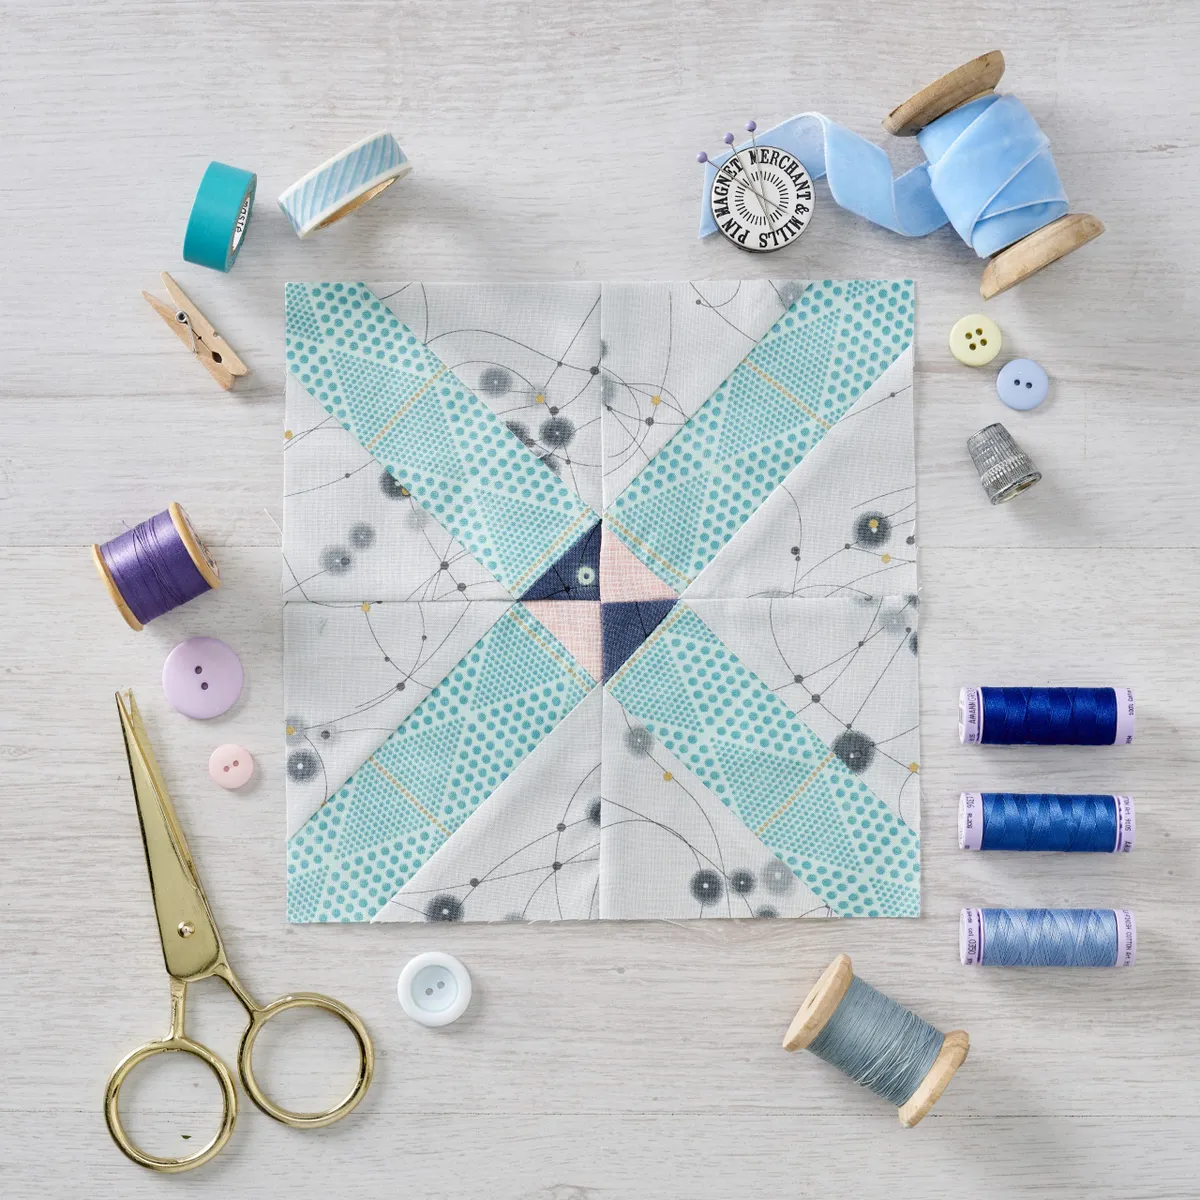
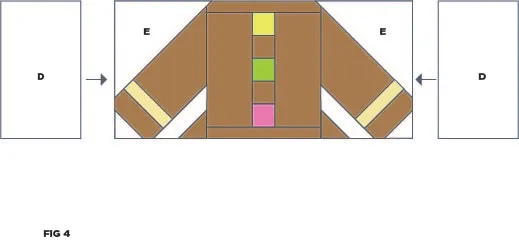
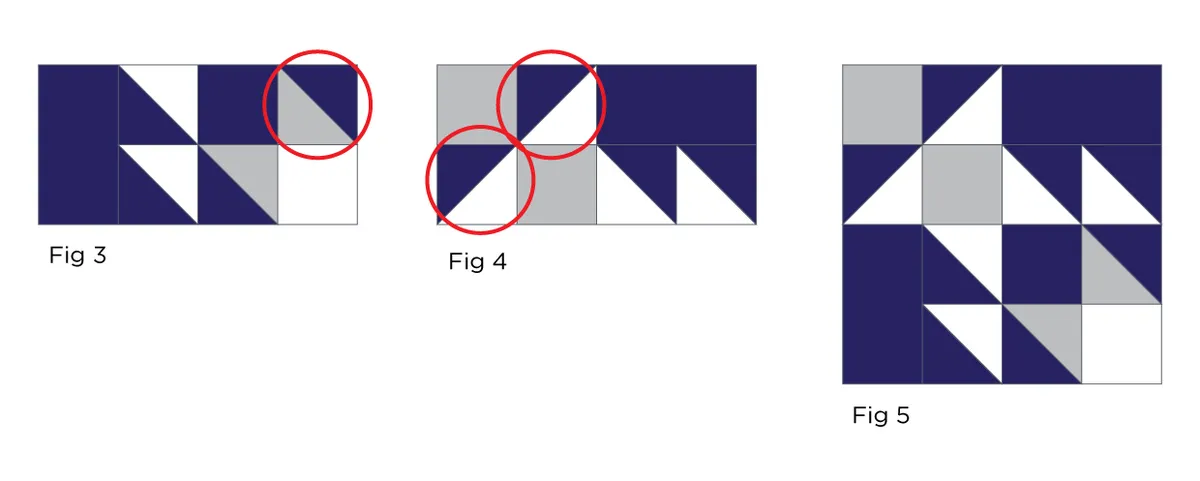
Snowflake, Issue 53
For steps 8–10, the corresponding figures show a few of the HSTs rotated incorrectly. To make the corner blocks, follow the instructions referring to Figures 3–5 as shown below. The HSTs with a different orientation than those printed in the mag are circled.
32 Modern Quilt Blocks, issue 50
We’ve noticed a couple of errors in our upcoming 32 Modern Quilt Blocks booklet. We’re really sorry about this – we check every pattern as thoroughly as we can before we go to print, but this time some errors have slipped through the net!
We’ve updated the digital edition to reflect these amends but if you have the print version, please find them below:
Crosses

In the Crosses block on p20, step 2 should read:
To make the top and bottom rows, sew one Fabric A 1½in square to one Fabric B 1½in square.Repeat to make a total of four Fabric AB units.
Squares
In the Squares block on p54, cutting out instructions should read:
- Fabric A: two (2) 2½in squares.
- Fabric B: Two (2) 1½in x 2½in.
- Fabric C: Two (2) 1½in x 4½in.
- Fabric D: Two (2) 1½in x 6½in and one (1) 2½in square.
Stripes
In the Stripes block on p80, the cutting out instructions should read:
- Fabric A: One (1)1in x 6½in and two (2) 1½in x 4½in.
- Fabric B: Two (2) 1¼in x 6½in and two (2) 1½in x 2½in.
- Fabric C: Four (4) 1½in squares and four (4) 1½in x 2½in.
Row of rainbows quilt, issue 36
On p18, step 2, the fourth bullet point should read:
“B: two (2) 2½in x 6½in strips;”
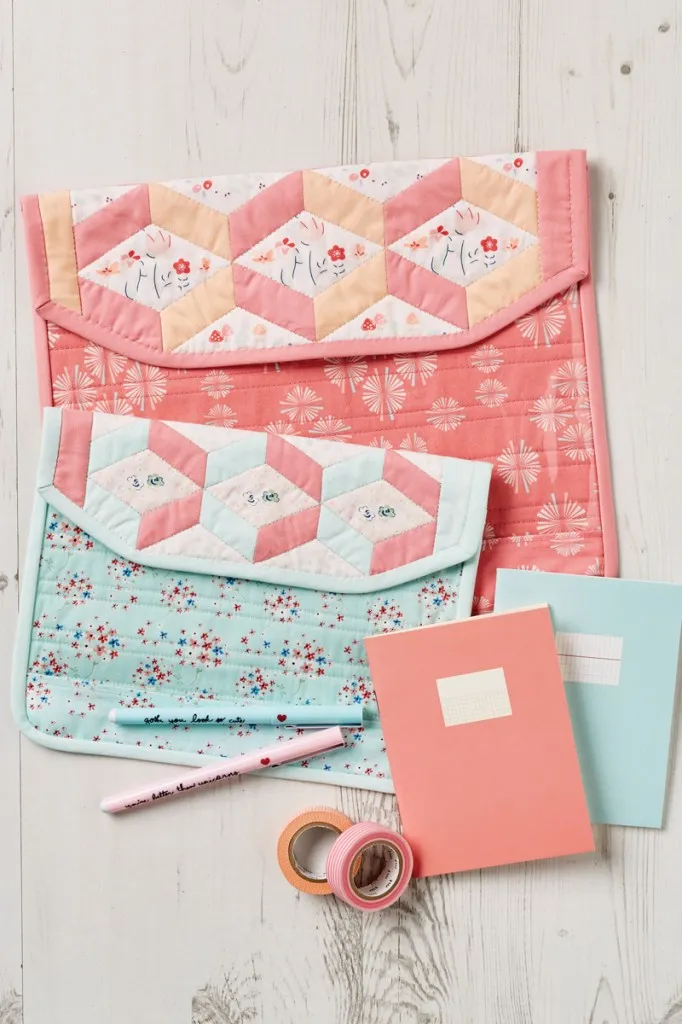
Sew Sweet Envelopes, issue 36
We’ve noticed a small error in the instructions for the Small Envelope in our Sew Sweet project in issue 36.
On p75, step 4, the third bullet point should read:
“One (1) 10in x 1 ¾in strip for the plastic panel bottom trim.”
Retro curve quilt, issue 38
We’ve noticed a small error in the instructions for the Retro Curve quilt in issue 38.
On p80, step 3 should read: ‘From each of Fabrics D, E, F and G cut nine (9) of Template A and nine (9) of Template B.’
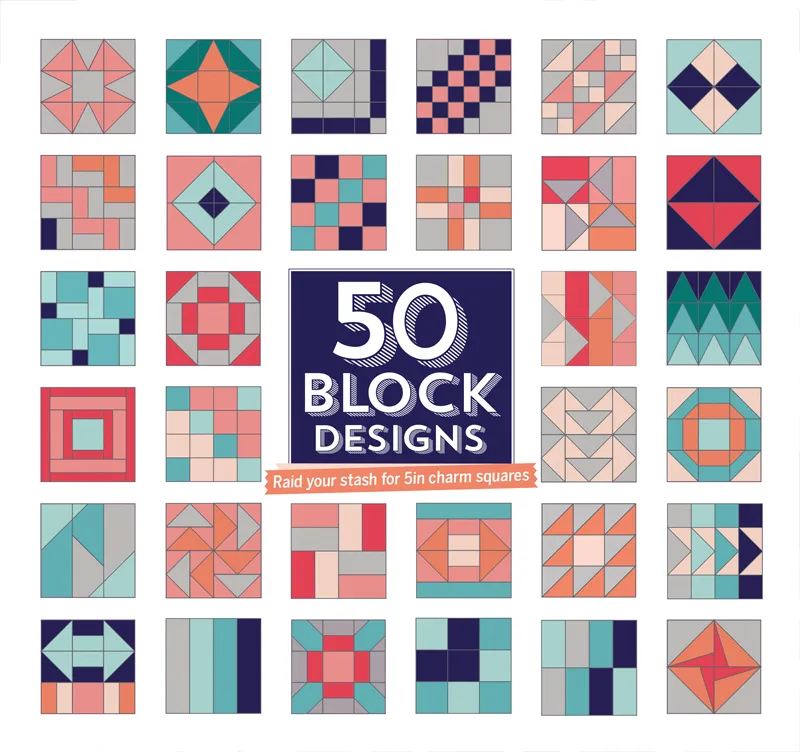
50 Block Designs Coverbook: issue 36
We’ve just discovered that there was an error our figs for the Triangle Points technique on p8 of our issue 36 coverbook.
We have now drawn up some amended figs, which you can download here: Triangle quilt blocks correction, but the written instructions on p8 for the Triangle Points will still work with these new figs.
This means that each block that contains this unit will need the following amended size fabric pieces:
- One (1) 2in square and two(2) 2in x 1 1/8in rectangles.
Colour Splash Quilt, issue 34
Oops! The templates for the Colour Splash Quilt were sized incorrectly in the printed mag. Get the correct size here.
New Colour Splash triangle templates (PDF)
Onward and Upwards Quilt, issue 32
We’ve just discovered that there was an error in the fabric requirements for the Onward and Upward quilt featured on pages 12-16 of issue 32. We’re so sorry about this – we check each pattern as thoroughly as we can before we print, but this time an error has slipped through the net! We have now worked out the correct fabric requirements and cutting instructions:
You will need
Variety of print fabrics (Fabric A): a minimum of 18 fat quarters
Cutting out
From each Fabric A fat quarter cut:
One (1) 9¼in square (eighteen total);
Eight (8) 2½ in square (one hundred and forty-four total);
Four (4) 2½ in x 4½ in rectangles (seventy-two total).
The rest of the pattern should then follow on as in the magazine. UK readers may not be affected by this issue as UK fat quarters are often larger than US fat quarters – it’s best to measure your fabric first to check.
Mix and match medallion quilt, issue 26
We’ve noticed an error in the instructions for Mix Match Medallion by Jo Avery in issue 26.
On p15 step 16 should just list to cut ‘Twelve (12) 4½in squares, for round one’ from Fabric P. You do not need the seven 1½in strips for round three. This reduces the fabric requirements of Fabric P to ¼yd.
Block of the Month, issue 16
On p94, step 2, the last bullet point should read:
“Four (4) 4in x 41/2in rectangles (for section 13 on Template C).”
Scandi Christmas cushion, issue 13
On page 80–81, step 6 should mention the dashed line for fabric and step 7 should mention the solid line for freezer paper to match the note in the template section.
Hourglass Twist cushion, issue 10
On page 20, step 2 should read "Cut fourteen (14) 6in squares"
Cover Star cushion, issue 9
On page 8 in step 1, you will also need to cut two 61/2in x 12in pieces. On page 9, step 11 should read "Hem the long edge..." (not the short edge).
Window Boxes quilt, issue 7
On page 75, Step 5 should read "Fold a 24in batting square..." (not fold a 9in square), which matches with the nine batting squares cut in step 3 of the project
Goosing Around cushion, issue 6
On page 72, step 2, the last bullet should read "A9 - four (4) 5in x 21/4in."
Ultimate Quilt Block Collection
We’ve noticed a few errors in the instructions from the Ultimate Quilt Block Collection by Lynne Goldsworthy.
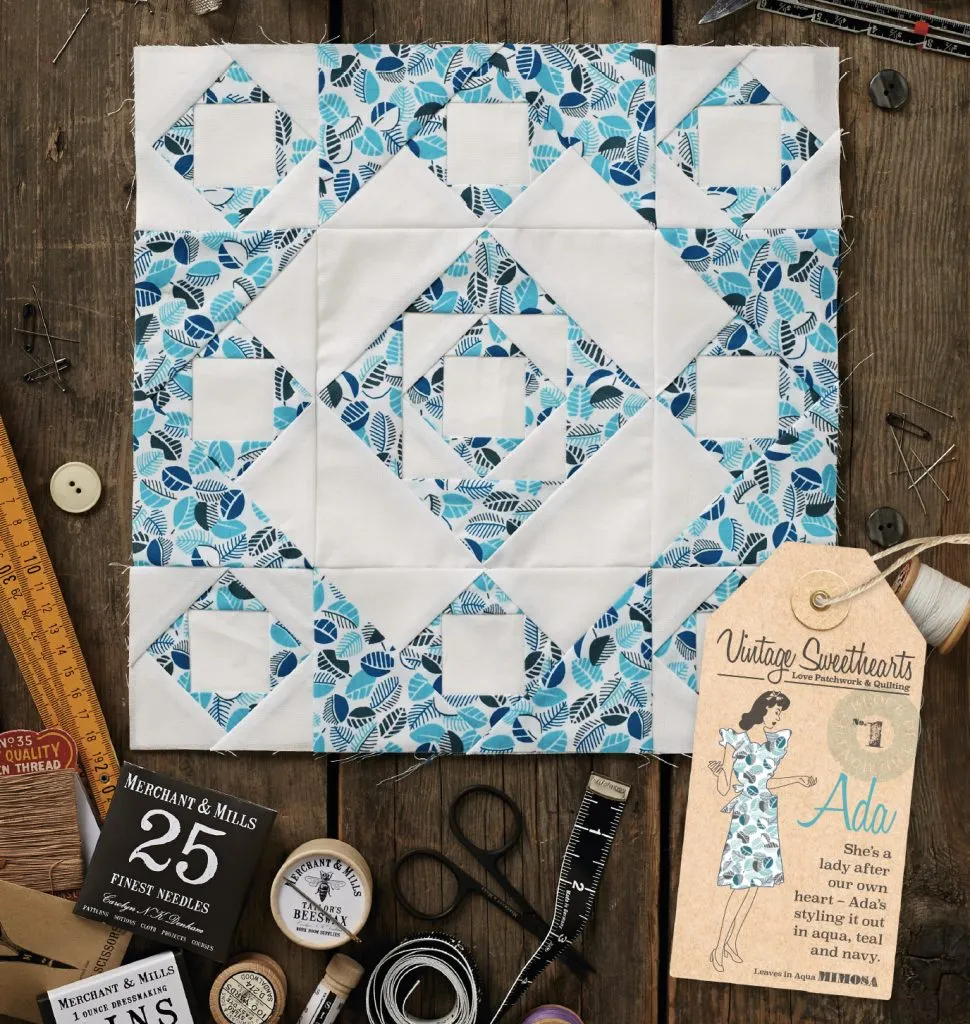
- For Enchanting Ada, Template C should be labelled ‘Enlarge 200%’, instead of ‘Actual size’.
- For Esme Restyled, you should cut four (4) 4in x 4½in rectangles (for section 13 on Template C), rather than four (4) 21⁄2in x 41⁄2in rectangles.