Free mushroom crochet patterns perfect for autumn makes
Our team independently selects products featured in our editorial content. Some articles may contain affiliate links and we may earn a small commission through them. For more information, please see our Affiliates FAQ
Free mushroom crochet patterns perfect for autumn makes
Autumn lovers rejoice! Here are three fantastic amigurumi mushroom patterns to make!
Free mushroom crochet patterns perfect for autumn makes
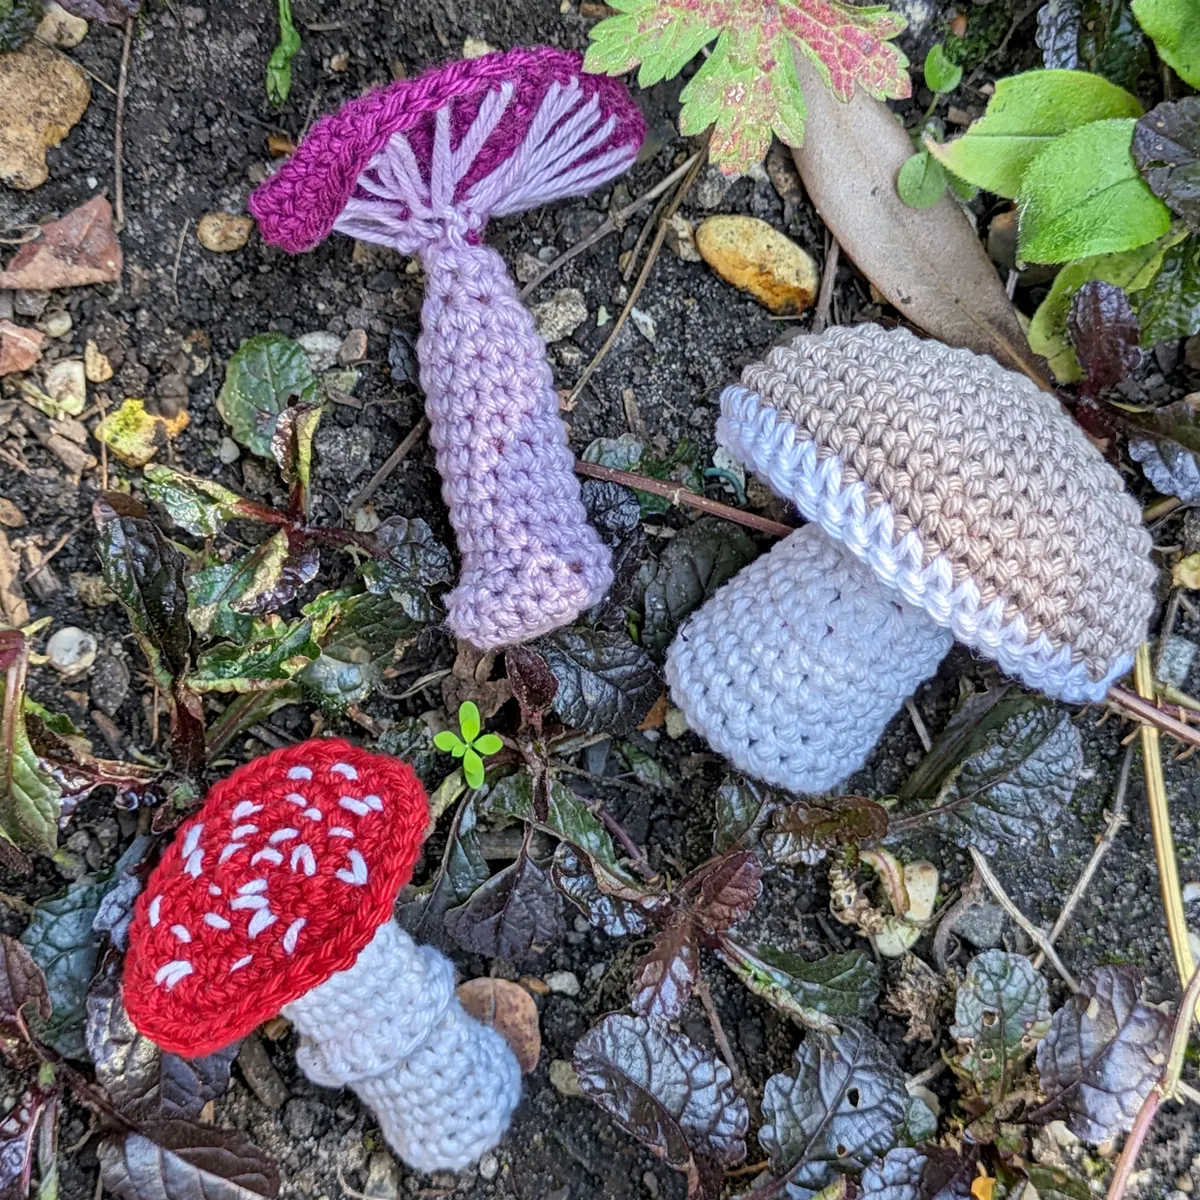
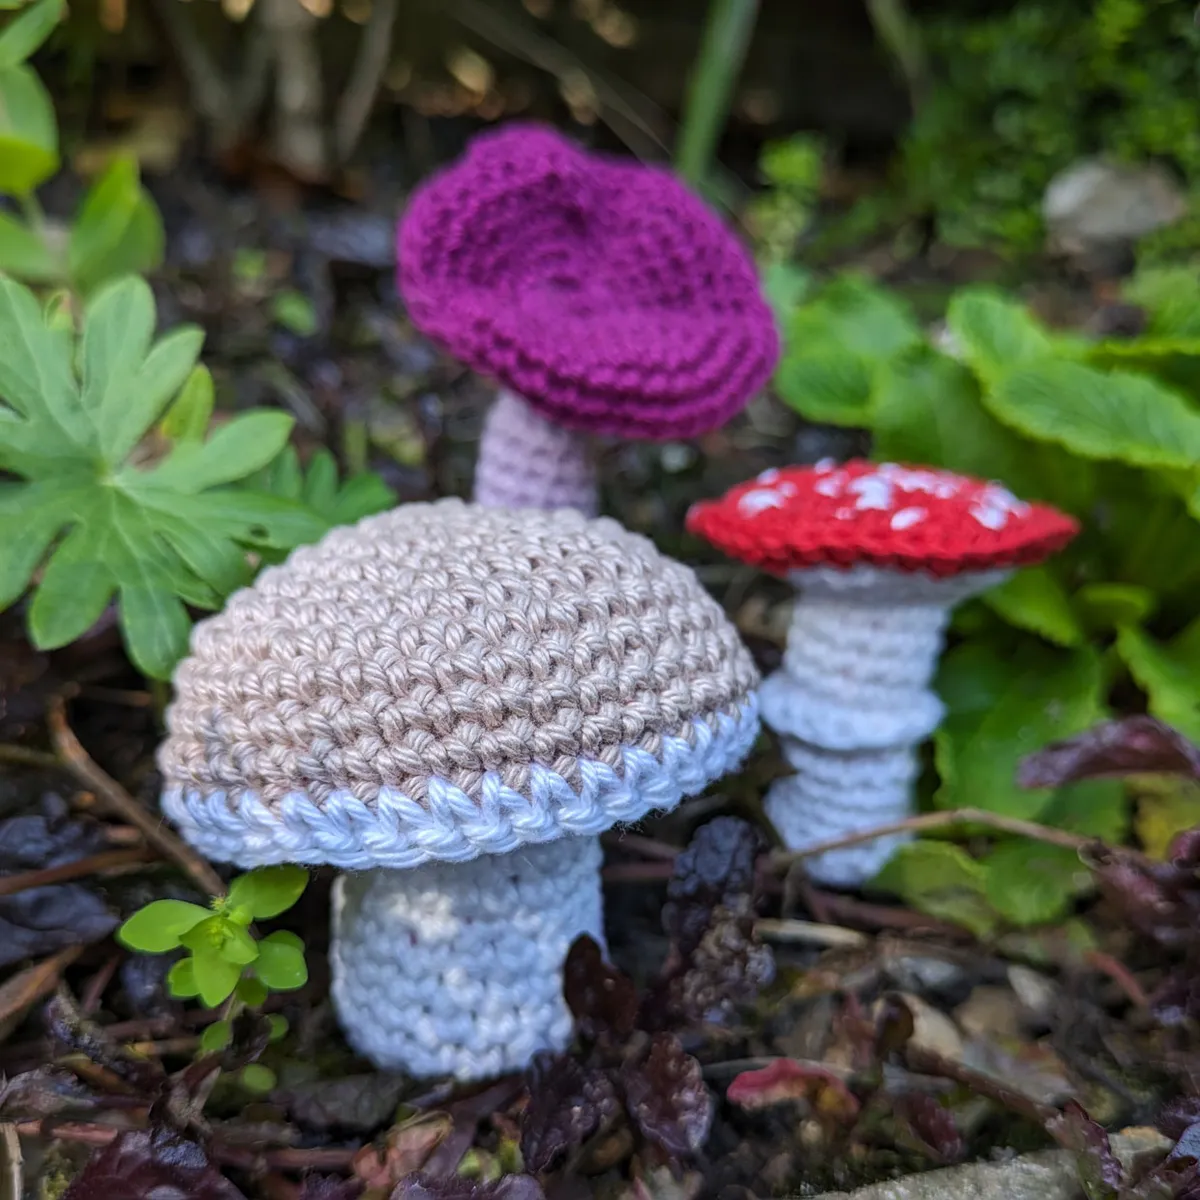
What could be more enchanting than a trio of squishy fungi made in colourful cotton yarn? Use your amigurumi skills and these crochet mushroom and toadstool patterns to create a Penny Bun, Amethyst Deceiver and a Fly Agaric mushroom.
With whimsical hand-embroidered details, these oh so autumnal crochet mushrooms are the perfect project for fungi lovers and anyone who’s tried amigurumi before but fancies levelling up their embellishment skills. Each mushroom has coins placed at the bottom of the stem so they can stand freely.
And if you're completely new to crochet, then you can always check out our complete crochet guide for beginners, as well as finding more amigurumi projects in our free crochet patterns section.
These mushroom patterns are written in UK crochet terms and use the amigurumi technique. This means working in spiral rounds without fastening off at the end of each round. You will use a crochet stitch marker to mark the beginning of each round, moving it up as you work.
The caps and stems of each of the mushrooms are worked separately. These pieces are embellished and stuffed before being joined with a double crochet seam.
Tension
Tension isn’t important for this project, just make sure to keep stitches tight to prevent stuffing from showing through.
The Penny Bun mushroom measures approx 5.5cm tall and 6.5cm wide
The Amethyst Deceiver mushroom measures approx 6cm tall and 8cm wide
The Fly Agaric mushroom measures approx 5cm tall and 6cm wide
Penny Bun Mushroom Crochet Pattern
Step 1
Boletus edulis, known as the Penny Bun mushroom or Cep, is a widespread and prized edible mushroom.
Penny Bun crochet mushroom cap
Using 3mm hook and Raffia yarn, ch4, ss to join into a ring.
Round 1 Ch1 (does not count as st), 6dc to ring. [6 dc]
Round 2 2dc in each st around. [12dc]
Round 3 *Dc in next st, 2dc in next st, rep from * to end of Round. [18 dc]
Round 4 *Dc in next 2 sts, 2dc in next st, rep from * to end of Round. [24 dc]
Round 5 *Dc in next 2 sts, 2dc in next st, dc in next st; rep from * to end. [30 dc]
Round 6 *Dc in next 2 sts, 2dc in next st, dc in next 2 sts; rep from * to end. [36 sts]
Round 7 *Dc in next 5 sts, 2dc in next st, rep from *to end of Round. [42 dc]
Rounds 8-10 Dc in each st to end. [42 dc]
Fasten off.
Step 2
Penny Bun crochet mushroom stem
Using 3mm hook and White yarn, ch4, ss to join into a ring.
Rounds 1-3 Work as for Rounds 1-3 of Penny Bun Cap.
Rounds 4-11 Dc in each st. [18 dc]
Rounds 12 *Dc in next st, 2dctog, rep from *to end of Round. [12 dc]
Round 13 *Dc in next st, 2dc in next dc, rep from *to end of Round. [18 dc]
Round 14-17 As Rnds 4-7 of Cap. [42 dc]
Fasten off.
Step 3
Making up the Penny Bun crochet mushroom
Push 2 two pence coins into the bottom of the stem, this will help weight the mushroom so that it can stand up by itself (you should avoid this if the mushrooms are likely to be played with by children)
Fill the stem with yarn offcuts or toy stuffing. Fill the cap generously with yarn offcuts or toy stuffing too.
Using 3mm hook and White yarn, join the Stem and Cap together by working a double crochet seam around the edges.
The Amethyst Deceiver (Laccaria amethystina) is a tiny, brightly coloured beautiful mushroom. The deceiver part of it’s name refers to the fact that the colour can vary and fade as it ages.
Amethyst Deceiver crochet mushroom cap
Using 3mm hook and Fuchsia yarn, ch4, ss to join into a ring.
Round 1 Ch1 (does not count as st), 6dc to ring. [6 dc]
Round 2 2dc in each st around. [12dc]
Round 3 *Dc in next st, 2dc in next st, rep from * to end of Round. [18 dc]
Round 4 *Dc in next 2 sts, 2dc in next st, rep from * to end of Round. [24 dc]
Round 5 *Dc in next 2 sts,, 2dc in next st, dc in next st; rep from * to end. [30 sts]
Round 6 *dc in next 2 sts,, 2dc in next st, dc in next 2 sts,; rep from * to end. [36 sts]
Rounds 7-8 Dc in each st around. [36 dc]
Fasten off.
Step 2
Amethyst Deceiver crochet mushroom stem
Using a 3mm hook and Lilac yarn, ch4, ss to join into a ring.
Round 1 Ch1 (does not count as st), 6dc to ring. [6 dc]
Round 2 2dc in each st around. [12dc]
Rounds 3-13 Dc in each st around. [12 dc]
Round 14 2dctog to end. [6 dc]
Rounds 15-17 Dc in each st around. [6 dc]
Fasten off leaving a long tail for sewing up.
Step 3
Making up the Amethyst Deceiver crochet mushroom
Push 2 one pence coins into the bottom of the stem, then fill the stem with yarn offcuts or toy stuffing. Use a tapestry needle and the remaining yarn tail to sew the top of the stem closed.
To embroidery the gills, cut a 1m length of Lilac yarn and thread on the tapestry needle. Sew long running stitches evenly around the underside of the cap, taking care to work only partially through the work so the lilac stitches are not visible on the top of the cap.
Use the tapestry needle to sew the top of the stem to the centre of the underside of the cap. Weave in ends.
Fly Agaric (Amanita muscaria) is perhaps one of the most iconic and well-known mushrooms. This toadstool is synonymous with fairies and folklore, is native to the UK and highly toxic.
Fly Agaric crochet mushroom cap
Using 3mm hook and Red yarn, ch4, ss to join into a ring.
Round 1 Ch1 (does not count as st), 6dc to ring. [6 dc]
Round 2 2dc in each st. [12dc]
Round 3 *Dc in next st, 2dc in next st, rep from * to end of Round. [18 dc]
Round 4 *Dc in next 2 sts, 2dc in next st, rep from * to end of Round. [24 dc]
Round 5 *Dc in next 2 sts, 2dc in next st, dc in next st; rep from * to end. [30 sts]
Do not fasten off.
Using White yarn and a tapestry needle, and referring to the images, sew small irregular stitches across the top of the cap following the circular shape.
Step 2
Fly Agaric crochet mushroom stem
Using 3mm hook and White yarn, ch4, ss to join into a ring.
Round 1 Ch1 (does not count as st), 6dc to ring. [6 dc]
Round 2 2dc in each st. [12dc]
Rounds 3-14 Dc into each dc to end. [12 dc]
Round 15 *Dc in next st, 2dc in next st, rep from * to end of Round. [18 dc]
Round 16 *Dc in next 2 sts, 2dc in next st, rep from * to end of Round. [24 dc]
Round 17 *Dc in next 2 sts, 2dc in next st, dc in next st; rep from * to end. [30 sts]
Fasten off.
Step 3
Making up the Fly Agaric crochet mushroom
Push 2 five pence coins into the bottom of the stem, then fill the stem with yarn offcuts or toy stuffing. Do not fill the cap.
Using 3mm hook and the live Red yarn on the Cap, join the Stem and Cap together by working the following round in place of a dc seam:
Joining round Dc in next 2 sts, *2dc in next st, dc in next 4 sts, rep from* to last 2 sts, dc in next 2 sts. [36 dc]
Fasten off and weave in ends.
To make the skirt on the stem, rejoin White yarn halfway down the Stem with 3mm hook.
Round 1 Ch 1 (does not count as st), 1dc in each dc on top of your chosen round to form a three-dimensional ring around the centre of the Stem, ss to top of beg ch-1, fasten off and weave in ends.
Now you’ve used this free crochet pattern to master three whimsical mushrooms, how about experimenting and coming up with your own versions of fantastic fungi?
Have a go at switching up the yarn colours and embellishments to recreate other forager favourites, or your own fantastical imagined mushrooms. These amigurumi creations make wonderful autumnal decor, or thoughtful gifts for fungi lovers.
Improve your amigurumi skills
Ready for your next crochet challenge? Find lots more exciting amigurumi patterns in Gathered’s collection of Top 40 amigurumi patterns. You can make everything from dolls and dinosaurs to snacks and sea creatures!
Becca Parker is the yarn wrangler behind accessories brand To Be Adorned. She lives by the seaside on the south coast, dreaming up knit and crochet designs, hosting workshops and writing about all things craft. You can find her colourful handmade accessories and patterns online at https://tobeadorned.square.site/, and follow her craft and slow fashion adventures on Instagram @tobeadorned.
This website is owned and published by Our Media Ltd. www.ourmedia.co.uk