Getting started - How to crochet amigurumi shapes
Step 1
Almost all crochet amigurumi projects are made using simple double crochet (US Single crochet) stitches and are centred around an important crochet technique – crocheting in the round! Most amigurumi projects will use the spiral method (or amigurumi method) of crocheting in the round – this is covered in our how to crochet in the round tutorial, and is essentially where you do crochet rounds without joining with slip stitches at the end of each round. Your amigurumi project is meant to be played with and viewed from every angle, and using the spiral method will mean you get a nice consistent crochet fabric without any obvious joins in it. This does however mean that it’s very easy to lose count of your stitches, so using a stitch marker on the first stitch of every round is an essential amigurumi technique.

Step 2
If you’re comfortable with how to crochet in the round, then your first major decision is going to be how you’re actually going to start your amigurumi project. Many patterns will advise you to ch2, then work your first round of stitches into the first chain. This is a perfectly acceptable starting technique, however some people can find that it does leave a bit of a hole where your stitches open up that chain. A way of getting around that is with the crochet magic loop! This clever little loop allows you to make all your stitches, and then you can tighten up the loop and completely closing that hole! It can be a little tricky to start with, but once you’ve learnt it you’ll never go back!

Step 3
Once you’ve made your initial crochet circle, you’ll quickly progress onto crocheting a double crochet into each stitch without any increases. This will start to turn your flat circle into a 3D shape

Occasionally with amigurumi projects you may need to create a tube that is open at both ends. This is relatively straightforward, and your pattern will give you specific instructions for this. Usually you will start with you making a specific number of chains (which will set the circumference of your tube), then join with a ss in your first chain to create a ring. You will then normally chain 1 and work a dc into each chain, then go straight onto your next round without joining to continue working in the spiral/amigurumi method.
Step 4
Once your crochet is starting to take shape, you’ll want to start stuffing your crochet shape.
When you’re stuffing, it’s important to make sure each body part is stuffed firmly so it’s solid and not too squishy – but don’t overdo it or else the stuffing may be visible between stitches and the shape of the body part might be distorted.
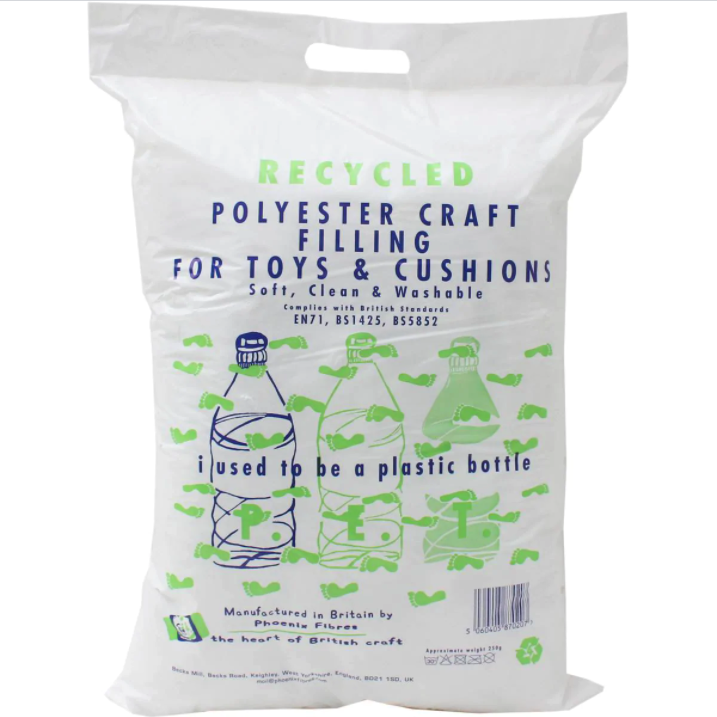
There’s quite a few different types of toy stuffing available, from natural wool to cheap synthetics. But if you’re looking for some eco-friendly super-soft toy stuffing, we’d recommend this
Recycled Polyester Toy Stuffing from Hobbycraft!
Before stuffing, it can help to add weight to the feet or legs of a figure to help it stand up. To do this, you could use weighted pellets, sand or dried rice – place this inside a separate fabric pouch, such as the toe of an old pair of tights. Insert this pouch into the feet or legs, then add the stuffing. Again this is something to be cautious of if you are making amigurumi for particularly young children though.
When it comes to stuffing your shapes, your pattern will advise you of the best place to do this – but as a general rule you want to be doing this before you’ve done too many decrease rounds – it you leave it too late it can be difficult to squeeze your stuffing into your shape. If you’re adding safety eyes onto your crochet amigurumi, you will also need to do this before stuffing – we’ll show you how to use safety eyes later on in this tutorial.
Step 5
Once you’ve set the diameter and height of your crochet shape, it’s time to start decreasing to close your crochet shape. This can be done with a standard dc2tog decrease (you can find out more in our how to decrease in crochet tutorial), or alternatively for a slightly neater decrease you can use the invisible decrease technique – you can also find out how to do this in our how to do the crochet invisible decrease tutorial.

When you have decreased to your last round (most often where you’ve decreased back to the same amount of stitches as your very first round), you will then have to close that last round. The easiest way of doing this is to fasten off your work, then using a yarn needle, weaving your yarn tail from the inside to the outside of each of the remaining stitches. You can then pull on the tail, which will pull the stitches together and close the hole. Then weave in your end and making a knot to ensure that it is secure and won’t come undone.
And that’s essentially the basic starting point of any amigurumi project, but amigurumi is so much more than just a plain crochet shape – it’s all about the details! So now we’ll guide you through how to add features to your amigurumi characters!
How to add safety eyes
Step 1
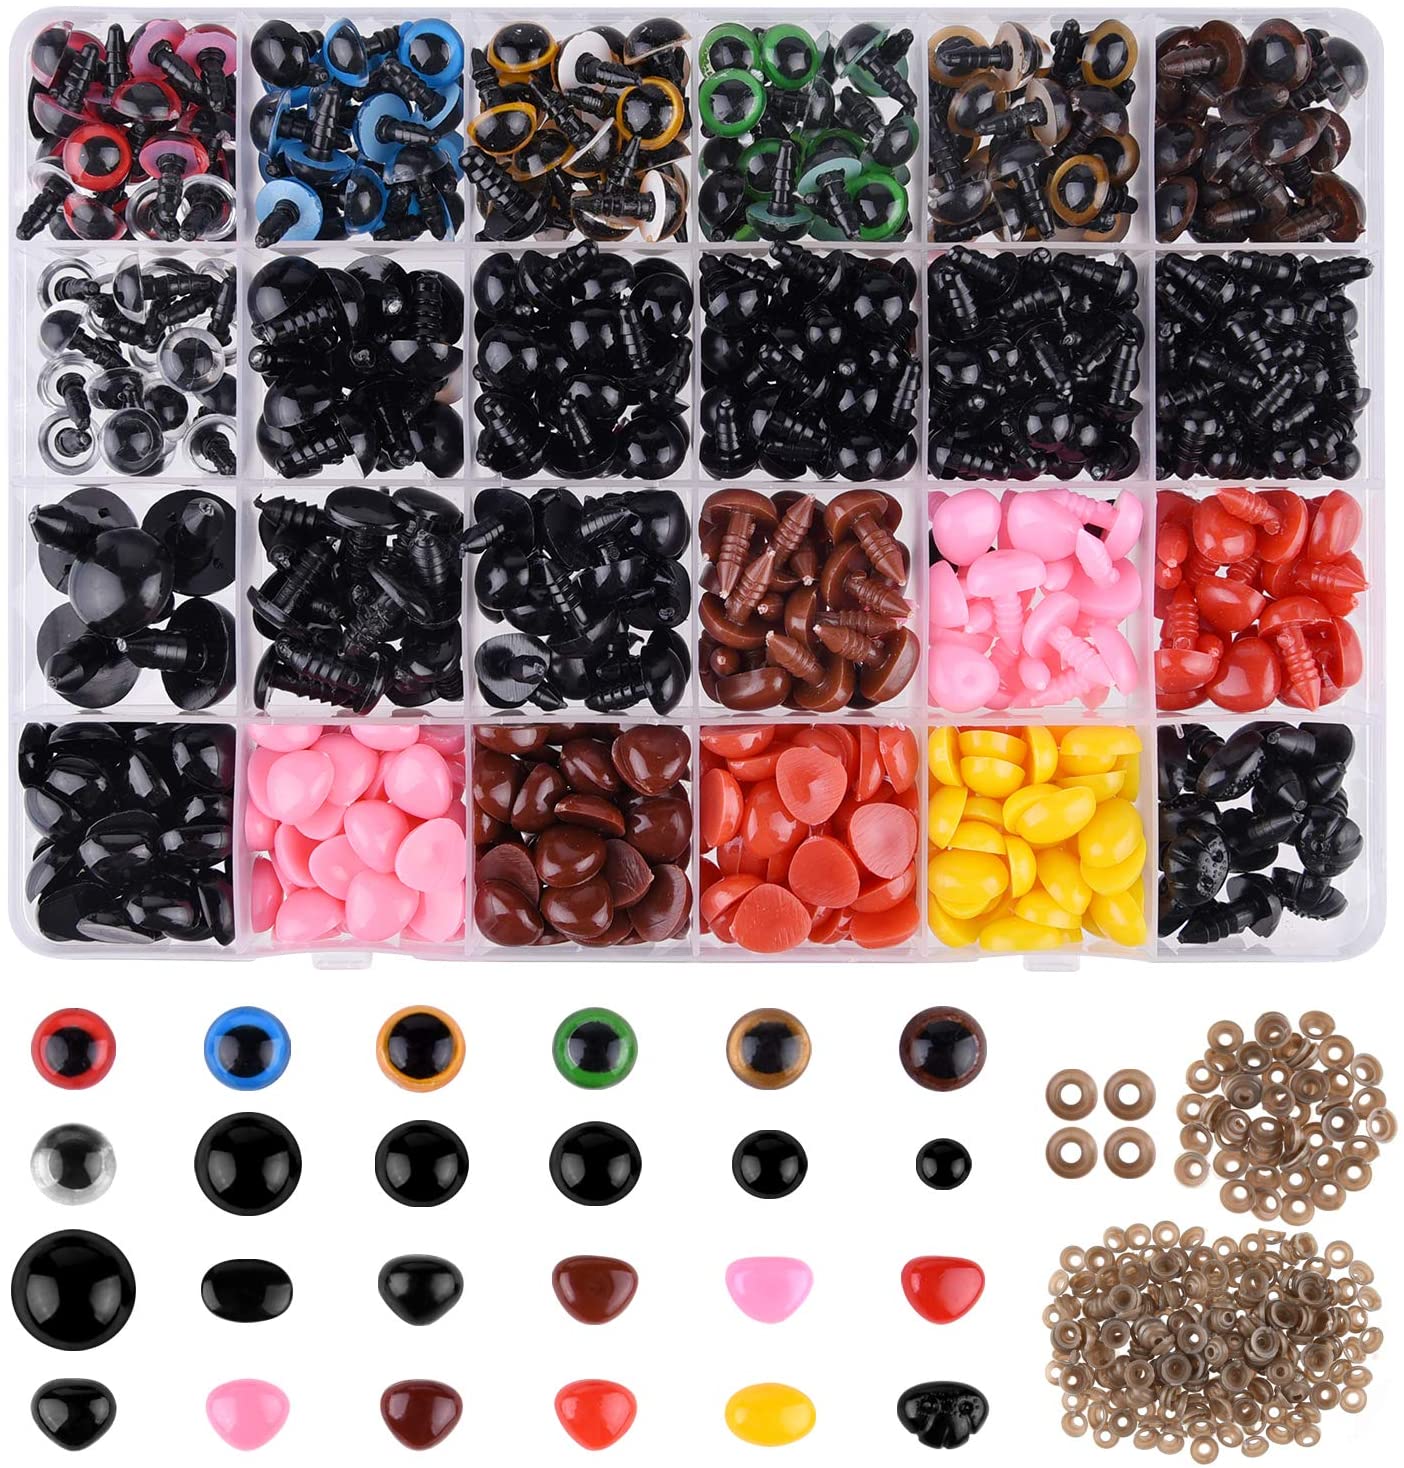
Nothing gives amigurumi toys character like their eyes – whether you choose beads, crochet or felt circles, embroidery or shop-bought safety eyes.Safety eyes are robust domed plastic pins with a screw back. Plain black pairs are the cheapest, but you can also get eyes with a black pupil and coloured iris, or with eyelashes and even realistic animal eyes. They are called ‘safety eyes’ because they are difficult to remove if making toys. However, always check the packaging for details on recommended ages – if you’re making a toy for a baby or a very young child then it’s better to avoid safety eyes or buttons as there’s always the risk that they could be pulled off or swallowed.
Once you know the basics of how to crochet amigurumi, you’ll be hooking up all sorts of amigurumi characters. But no matter what sort of amigurumi you’re making, you’ll always have the perfect features with this
Safety eyes and nose set from Amazon.
Safety eyes need to be attached when you can still get to the back of the fabric, so it’s best to add them before closing up and stuffing. Attaching them is very simple – the eye piece is like a small screw, then there’s a small plastic washer that fits on the back.
Take the eye piece and carefully insert it into the gap in your fabric. Make sure you’re happy with the placement and move it around if you need to (once safety eyes are secured on, it’s very difficult to get them off again, so you really want to be sure before you commit to the placement).

Step 2
Turn the fabric over to the other side, where the stem of the eye piece is protruding and place the washer over the top, making sure that the washer is positioned with its domed side facing away from the fabric.

Step 3
Press down hard on the washer until it snaps in place over the eye piece.

How to make face details
Step 1
Once your eyes are attached, you can add extra facial features if you want to. Apart from embroidery there are other ways to add facial details, using small circles of felt to form cheeks on a doll for example or adding a plastic safety nose in the same way as you would a pair of safety eyes.

Embroidery stitches tend to be the most popular method and can be worked before or after your amigurumi crochet pieces are joined, although it is advisable to do embroidery details once your eyes have been added. You can use any embroidery stitches you like, but simple straight stitches and chain stitches tend to be the most popular.
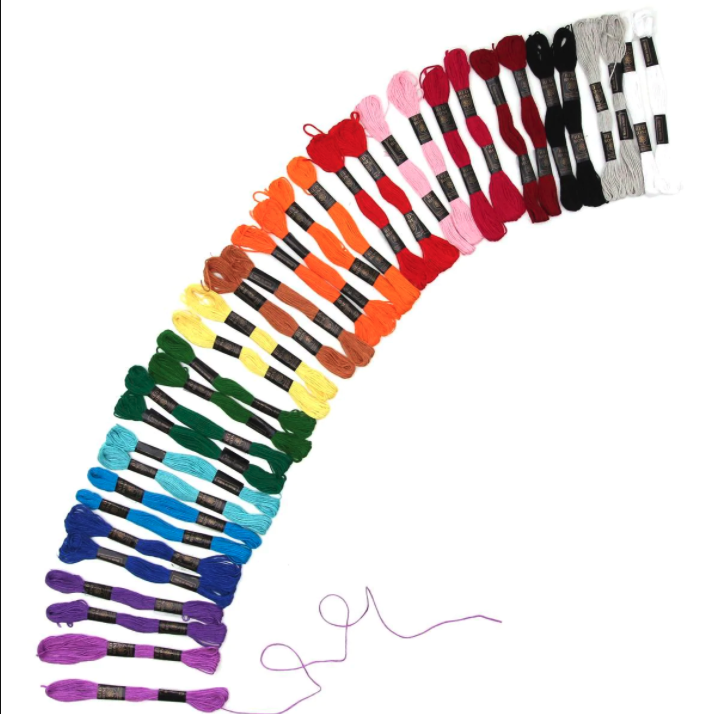
You can embroider details onto your amigurumi using any yarn, but if you want to do anything particularly detailed and want a really professional result, then we'd recommend using embroiddery thread. Why not treat yourself to this pack of
36 Bright Embrodery threads from Hobbycraft, then you'll always have the perfect coloured thread to hand!
To work embroidery stitches on your amigurumi, thread a tapestry needle with your chosen thread or yarn. Insert the needle into the back of the head and bring it out at the front, where you want to start your stitch. Pull the yarn through slowly, leaving a long tail (approx 12cm) at the back of the head.

Step 2
Work your choice of stitch here – we worked a variation on chain stitch by inserting the needle two stitches to the left and bringing it out one stitch down in between the first and second hole to form a triangle shape.

Step 3
Make sure the needle exits the fabric over the top of the yarn. Pull the yarn through gently until the yarn sits next to the fabric, making sure it isn’t pulled too tight. Bring the needle over the stitch and insert it back into the same hole it’s coming out of, over the top of the stitch you just made – this will hold that stitch in place.

Step 4
Take the needle out of the back of the head at the same point you went in.

Step 5
Pull the thread through gently to complete the face detail.

Step 6
You’ll be left with two tails at the back of the head that you will need to secure – to do this, knot the two ends together gently making sure you don’t pull on or distort the stitches of the face.

Step 7
Thread the two tails onto a tapestry needle and insert the needle into the head at the hole next to the knot, bringing it out at the top of the head. Pull the tails through until just the knot remains.

Step 8
Pull gently to tuck the knot inside the head. Trim the tails close to the head and push any remaining yarn that’s visible inside the head using the blunt end of a crochet hook or tapestry needle.

How to make amigurumi hair
Step 1
Hair is key to many amigurumi projects, especially so if you're making amigurumi dolls. Whether you attach a shaped hair-coloured crochet cap, embroider straight stitches over a hair cap, add yarn lengths to your hair cap, or attach lengths of yarn directly onto the head of your doll, it’s up to you. You can even stitch lengths of yarn together down the centre to create a hair piece with a parting, and attach it to your toy by itself (see below). Whichever method you use, making hair takes time and patience, but is definitely worth it in the end.
Adding lengths to the head
To attach lengths of yarn directly onto the head of your doll, work in the same way as you would if you were creating fringing. To do this, start by cutting approx 50 lengths of yarn, each approx 20cm long or the length you’d like – cut more lengths as you need them. Starting at the back of the head, as low down as you’d like the hair to go, insert your crochet hook from top to bottom around one stitch. *Take one of your yarn lengths and fold it in half. Place the halfway loop onto your hook and gently pull the loop through the head.

Step 2
Use the hook to catch the two strands of yarn on the other side of the loop and pull the two strands through the loop.

Step 3
Pull gently on the tails of yarn, making sure you keep them even, until the length is secure. Repeat from * to attach more yarn lengths, working around every other stitch around to the face. Once you complete one row, move upwards to the next row and insert yarn lengths into alternate stitches again, but this time work in between the stitches you worked into on the previous row.

Step 4
Continue to attach yarn lengths in this way until you’ve reached the top of the head.

How to make an amigurumi hair piece
Step 1
To create a hair piece with a parting, start by cutting approx 20 lengths of yarn, each one approx 15cm long or the length you’d like. Cut a piece of sticky tape approx 20cm long and place it sticky side up on your worktop – use two more pieces of tape to secure the ends in place. Place the lengths of yarn one by one across the sticky tape, lining up the centre of the yarn with the centre of the tape to keep the lengths even.

Step 2
Place the yarn lengths as close together as you can to get good coverage of hair on the head. Cover approx 5cm of the tape, or the length specified in your pattern.

Step 3
Thread a sharp sewing needle with thread that matches your yarn colour and stitch down the centre of the piece using backstitches, working through the tape. Try working across two strands of yarn at a time to the end, then stitch back again, working across alternate strands to secure them firmly. Carefully remove the hair piece from the tape – it should easily break away from where you’ve worked the stitches.

Step 4
Place the hair piece on top of the doll’s head and stitch it in place using the same thread, stitching over the backstitches in the hair parting piece. Once you’re happy that the hair piece is secure, trim the hair into your doll’s chosen hairstyle.

If you're looking for a crochet kit to get you started on your amigurumi journey, you'll find some fabulous amigurumi kits as well as other fantastic projects in our list of the
best crochet kits for 2021.
How to join your amigurumi pieces
Step 1
So you’ve spent hours carefully crocheting a variety of body parts for your latest amigurumi project and now you just want to get the toy finished – well, hang on just a minute! Spending a bit of extra time thinking about how to join the body parts together will make a big difference to the finished look of your new hooky friend.

A secure head join is essential, while poseable limbs make toys infinitely more fun. We’ll show you just what to do to nail these two features, using simple techniques that anyone can master.
During the hooking process, there are a few things you can do to help yourself make the joining process easier. As you finish each body part, pin a little label to the back to keep track of which ones you’ve made and which is which – sometimes there are subtle differences between a left and right leg, for example.
It’s a good idea to weave in ends as you go, although this is usually easily solved with amigurumi because most tails can be tucked inside before stuffing. Some yarn ends can be left long, to be used in sewing up, but your pattern should tell you when to do this. As a general rule, all the ends on the main body piece can be tucked inside, while each body part needs a long tail at the place where it will be joined to the body, such as leg tops, arm tops and the base of the head.

When you’re ready, arrange your finished parts on a clean work surface and check that you have long tails in the right places for sewing up. Before joining, some toy makers like to add a few extra details, such as the face, but feel free to do whatever you prefer.
Attaching the head to the body is a great place to begin the joining process – this is when your toy will start to come to life! Starting here will help to ensure that the head is aligned well with the body, which in turn will help to position the limbs.
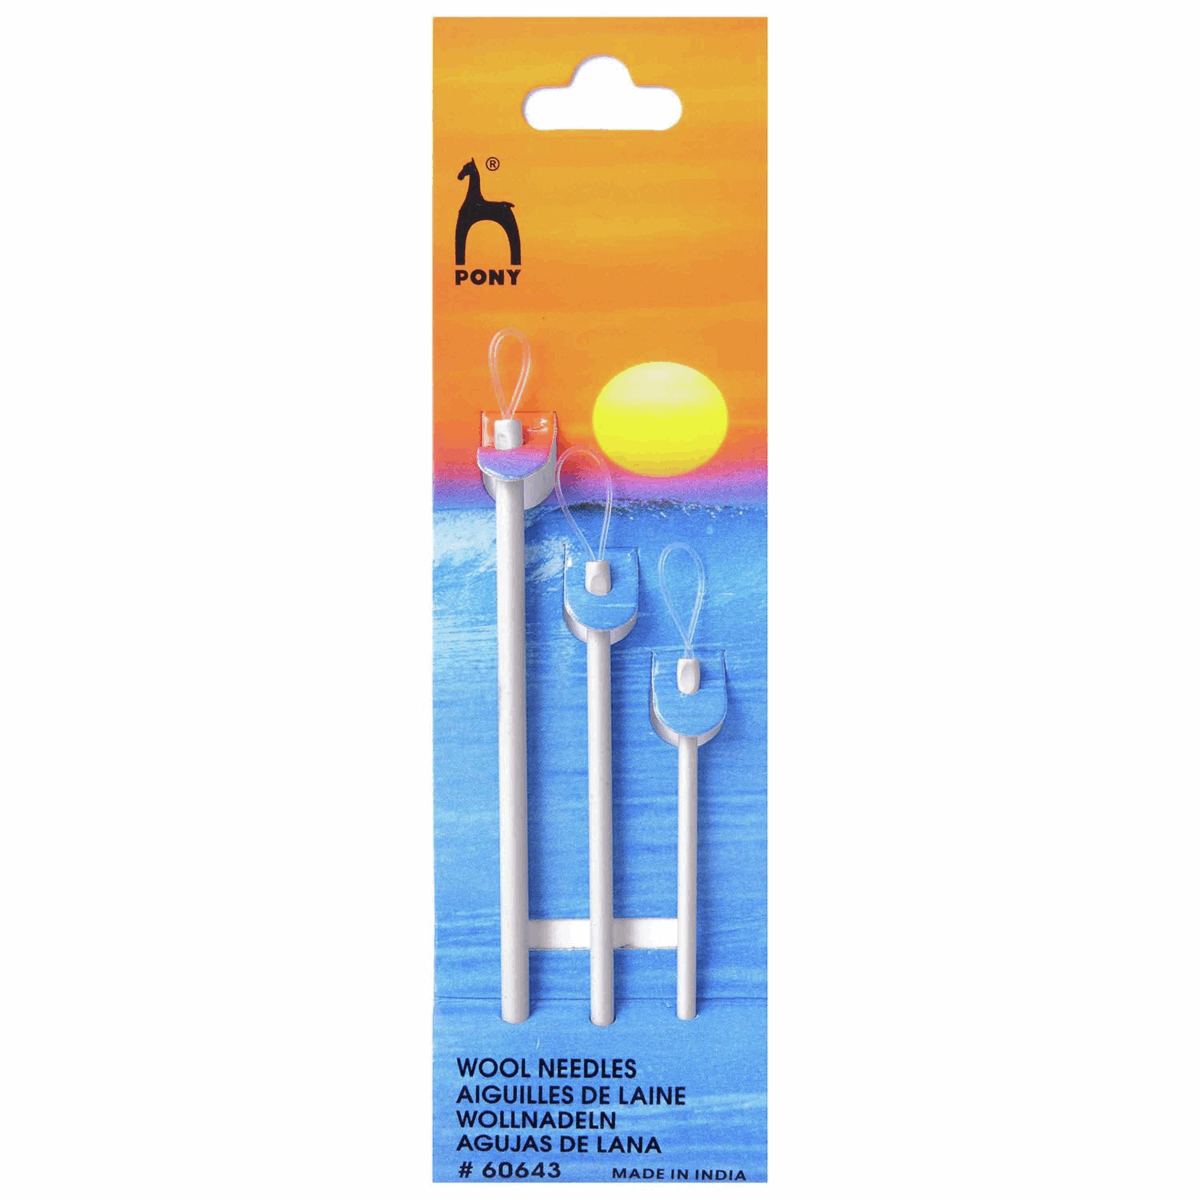
A good yarn needle is essential for anyone making amigurumi, as trying to thread yarn through a normal needle is tricky to say the least. These fab
Pony wool needles come in 3 sizes and have a handy loop that means you can easily thread even chunky yarn through it!
To start, make sure the long tail at the base of the head is right at the centre. Then locate the centre point at the top of the body – this is often the gap where you started the body with a magic loop.
Thread the tail end of the head onto a tapestry needle and insert into the centre-top hole of the body.

Step 2
Bring the needle out a short distance away, at the outer point where you want the head to be attached to the body.

Step 3
Pull the thread tightly and align the head in the position you want – if you like, you can use pins to help hold the head in position. Locate one hole on the head that’s aligned with the thread that’s emerging from the body. Insert the needle into this hole and bring it out one hole to the left (or right if you’d prefer to work in the opposite direction). Pull the thread through loosely.

Step 4
Insert the needle into the hole in the body where the thread from the previous stitch is emerging. Bring it out one hole to the left and pull through loosely.

Step 5
Insert the needle into the hole in the head where the thread from the previous stitch is emerging. Bring it out one hole to the left and pull through loosely.

Step 6
Repeat Steps 4-5, bringing the needle out two holes to the left if needed to make sure the head is aligned with the body. We’ve left the stitches loose to show you how they look, but you’ll need to pull the thread tight after every two or three stitches to create a firm join.

Step 7
Once you reach the starting point, continue with a few more stitches to overlap the previous ones.

Step 8
Now you can fasten off. To do this, push the needle into the head, bringing it out at the back of the head.

Step 9
Trim to approx 2cm, then push this end inside using the blunt end of a crochet hook or tapestry needle.

How to join amigurumi arms and legs
Step 1
Next up are the limbs and you can really bring your amigurumi make to life by joining the limbs in a way that makes them poseable. It’s fairly simple and we’ll show you just what to do. Start with the arms so you can align them with the head.Take one arm and thread the tail onto a needle. Insert the needle into the body where you want the arm to sit (we’ll call this hole 1). Push the needle straight through to the other side of the body, bringing it out approximately where you’ll position the other arm (we’ll call this hole 2). Keep the thread loose for now.

Step 2
Insert the needle back into the body one stitch over. Push the needle back through to hole 1, but leave the needle inserted as shown in the photo.

Step 3
Now thread the arm onto the needle, passing the tip through the back of the arm and bringing it out at the front of the arm. By doing this, you can use the needle as a sort of pin to position the arm, adjusting until it’s how you want it.

Step 4
When ready, pull the needle through. Insert it back into the arm one stitch over, pushing it into hole 1 in the body and through to hole 2 as before. Pull firmly to tighten. Insert the needle back into the body one stitch over and bring it out somewhere less visible, such as the base of the body, ready to fasten off.

Step 5
Repeat the process in Steps 1-4 with the second arm on the other side (swapping holes 1 and 2) – gently lift the first arm to bring the needle out underneath it. To fasten off, bring both ends to the base of the body, knot together firmly, trim the ends and push them inside the body.

Step 6
Next you can attach the legs. Take one leg and thread the tail onto a needle. Insert the needle into the leg near the top, from one side to the other, making sure the needle is straight.

Step 7
Position the leg next to the body and identify the holes that you want to align the leg with. Insert the needle into the first hole in the body, bringing it out at the second hole. Pull through loosely.

Step 8
Insert the needle back into the leg from one side to the other, as in Step 6.

Step 9
You will have formed a type of hinge, which will allow the legs to rotate so the toy can sit down as well as stand up. Repeat the process to strengthen the hinge, then insert the needle into the body again, bringing it out somewhere less visible.

Step 10
Repeat Steps 6-9 with the second leg. Test the legs and add some extra stitches to strengthen the join if you need to. Fasten off both ends together in the same way as the arms.