A beginner’s guide to 3D embroidery + free pumpkin project
Are you looking to try something new, or hoping to take your stitching to the next dimension? 3D embroidery (also known as Stumpwork or Raised Embroidery) is a great way to give your stitching some extra flair.
- The ultimate guide to thread painting
- How to embroider letters like a pro (even if you're a beginner!)
- How to do Sashiko embroidery
There isn’t really a ‘correct’ way to go about it, but here we’ll explain some of the easiest and most frequently used methods to get you started on your 3D embroidery journey. Once you've got the techniques you can try them out on the pumpkin embroidery hoop by Amy Burt below.
What is the history of 3D embroidery?
3D embroidery is steeped in tradition, with examples of ‘raised work’ dating back to the 15th century. It was at the height of its popularity in the 17th century, but it’s having a resurgence of popularity in modern embroidery practice – and in the fashion industry too!
Looking for more stitching inspiration? Check out our free embroidery patterns for lots more ideas.
6 commonly used 3D embroidery stitches
These raised surface stitches can add depth to your design without the need for supplies beyond your standard needle and thread.
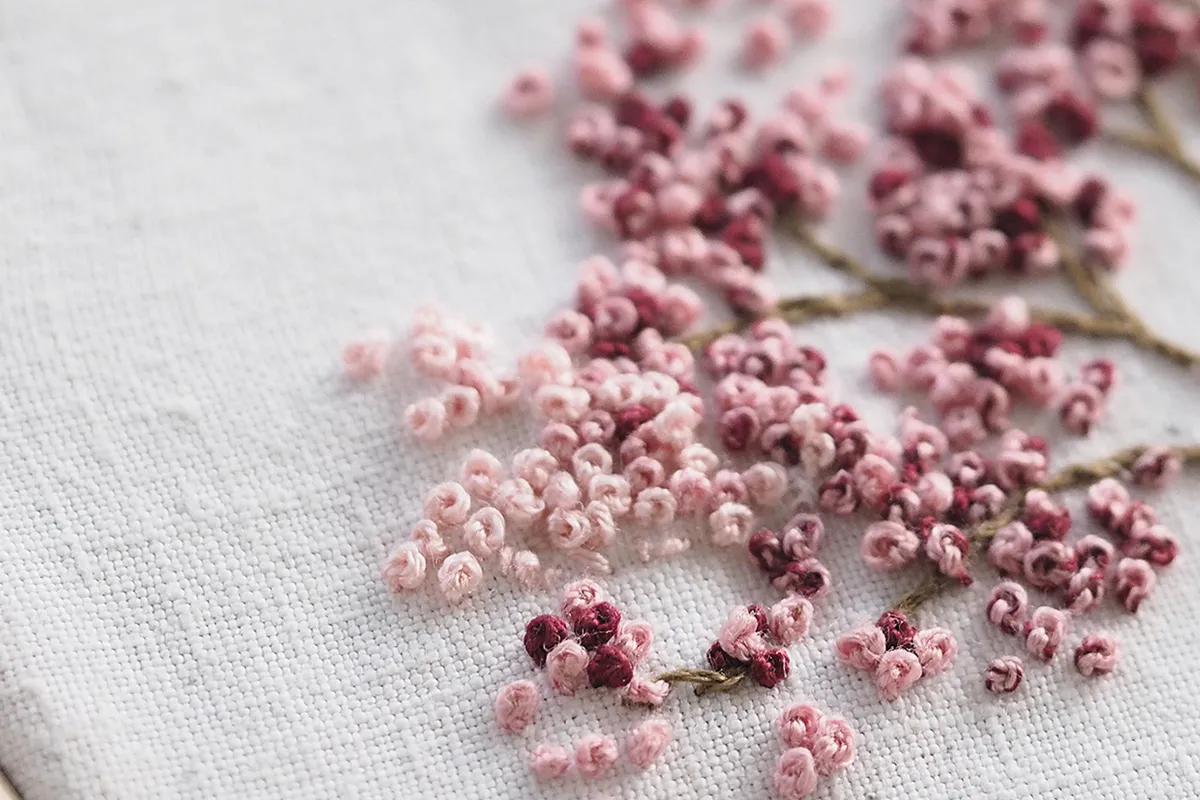
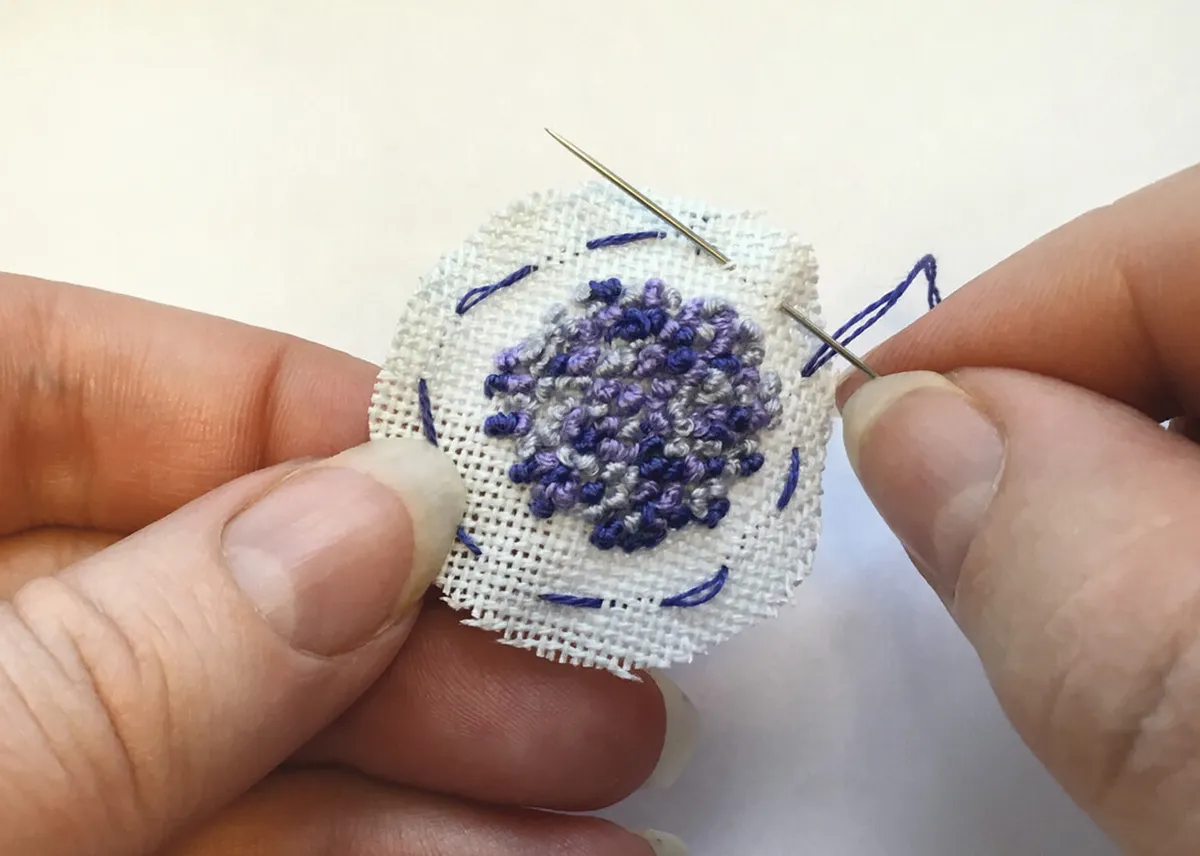
French Knot
French knots are the easiest of the 3D embroidery techniques. Individually, they work for stitching small round objects, such as berries – but when clustered together, they create a bumpy or fluffy appearance that’s ideal for stitching things like clouds or curly hair.
You can increase the number of thread strands or twists around the needle to adjust the size of the knot, making them protrude from the fabric more.
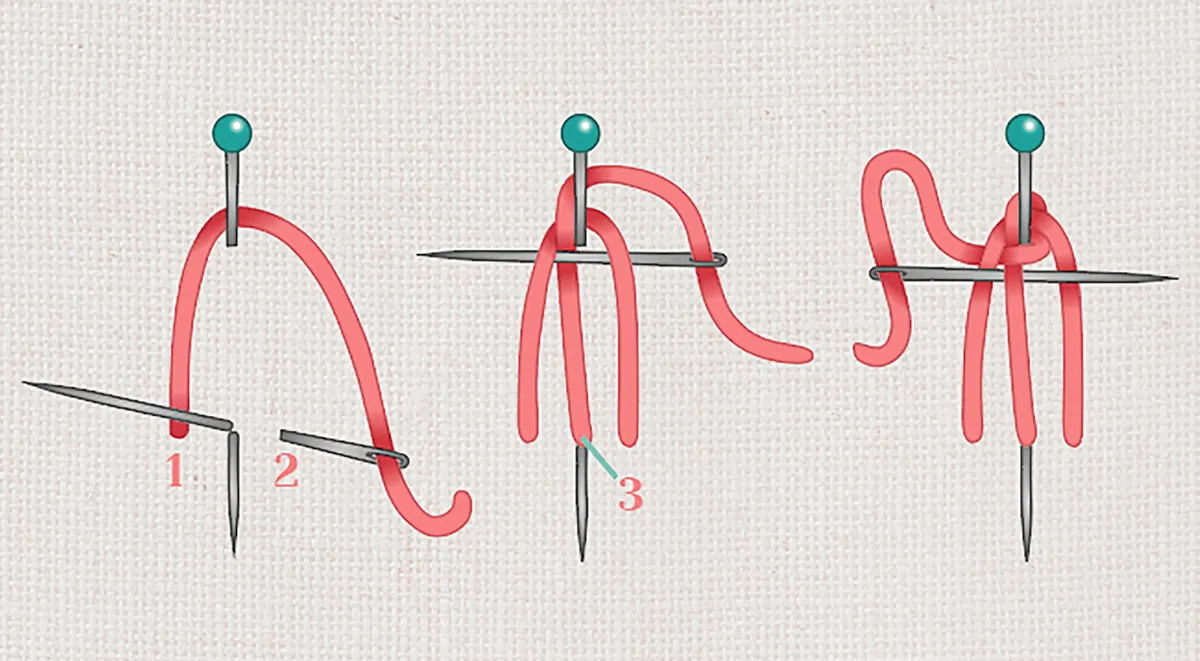
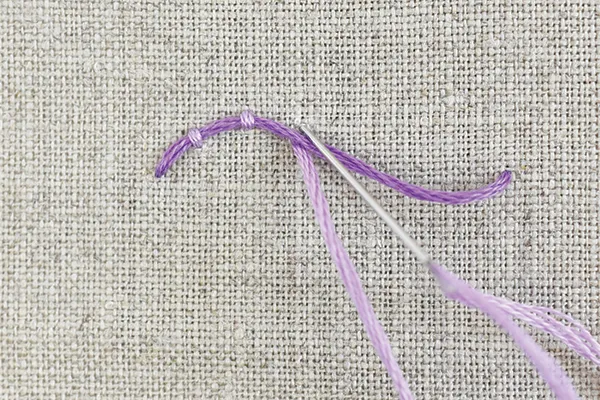
Bullion Knot
This elongated knot (also sometimes referred to as caterpillar stitch) can be worked as a straight line or with multiple knots spiralled together to make a rose shape.
The bullion knot can also be laid flush with the fabric or raised up to form an arch. To create a raised arch, simply increase the number of wraps around the needle.
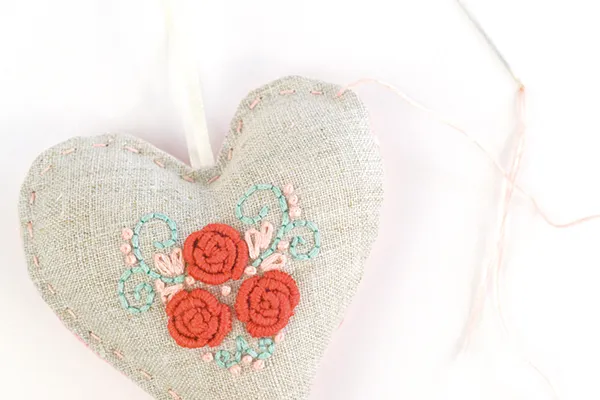
Padded Satin Stitch
Padded satin stitch is a great way of adding volume to an area of solid stitching. Simply work your ‘padding’ stitches across an area (we recommend seed stitch or satin stitch, but you can also use backstitch or chain stitch) before covering it with satin stitch.
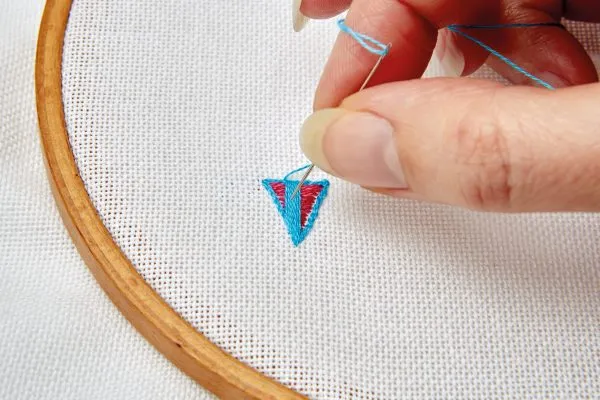
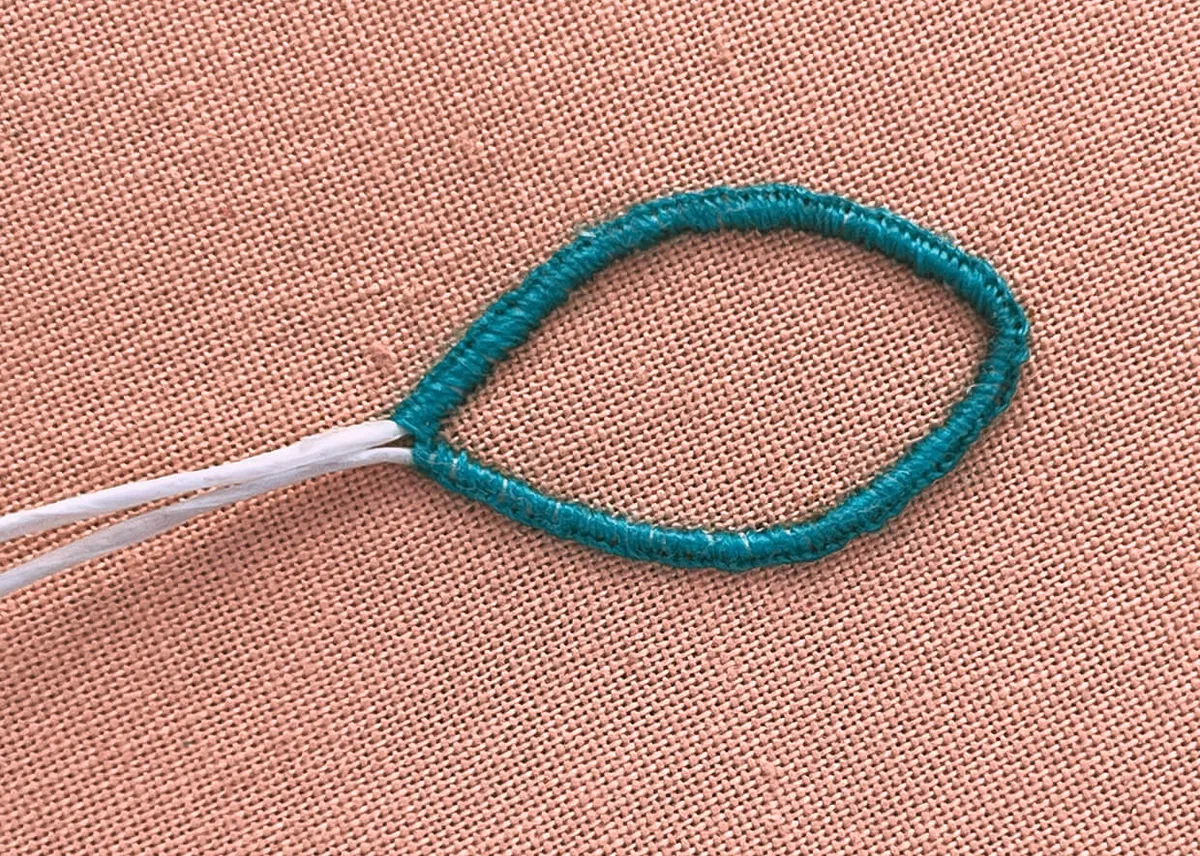
Woven Picot Stitch
There are a few varieties of woven picot stitch, but the version explained here has three prongs, is attached to the fabric on one edge and extends out in a triangular shape.
This stitch is perfect for working flower petals and leaves.
Turkey Stitch
Turkey stitch can be used to add loops or fringing to your design, which makes it great for creating amazing, realistic-looking hair and fur.
Couching Stitch
Couching stitch is a technique that involves laying a length of thread, cord or string onto the fabric and then stitching over the top to hold it in position. It’s great for creating chunky lines or filling an area with texture.
For more illustrated stitch guides check out our embroidery stitches library.
3D embroidery methods
Wired Shapes
These are formed by laying a wire loop around the edge of your chosen shape and then affixing it onto the fabric by stitching over the top. The inside of the shape can then be left as fabric or filled with stitching.
Once happy with the shape, cut out the fabric 2mm away from the outer edge of your stitching to form a mouldable piece of fabric in your desired shape.
The ends of the wire can then be inserted into the fabric of a design and secured in place.
Felt Padding
This is where you use felt to pad the area under your stitching to create a raised form.
This can be done by layering felt fabric or by needle-felting carded felt wool onto the surface of your fabric.
Then, stitch over the area using satin stitch or long and short stitch, or by laying other fabric over the top.
Fabric Slips
A fabric slip is made by first stitching a piece of lightweight and malleable fabric.
You then cut it out with a small border and work a single line of running stitch around the outside of the shape.
Pull the thread to gather the border of fabric toward the back. At this point, you can lightly pad the form for more volume if desired.
Then, whip stitch the shape into position on your design. Make sure not to make the shape of your slip too complex, as it can be hard to form.
Thread Wrapping
This is the practice of wrapping strands of thread (or ribbon) around objects before attaching them to your fabric.
Wrapping large beads, wire or even pieces of card will help them blend in with the rest of your stitching, creating a cohesive aesthetic.
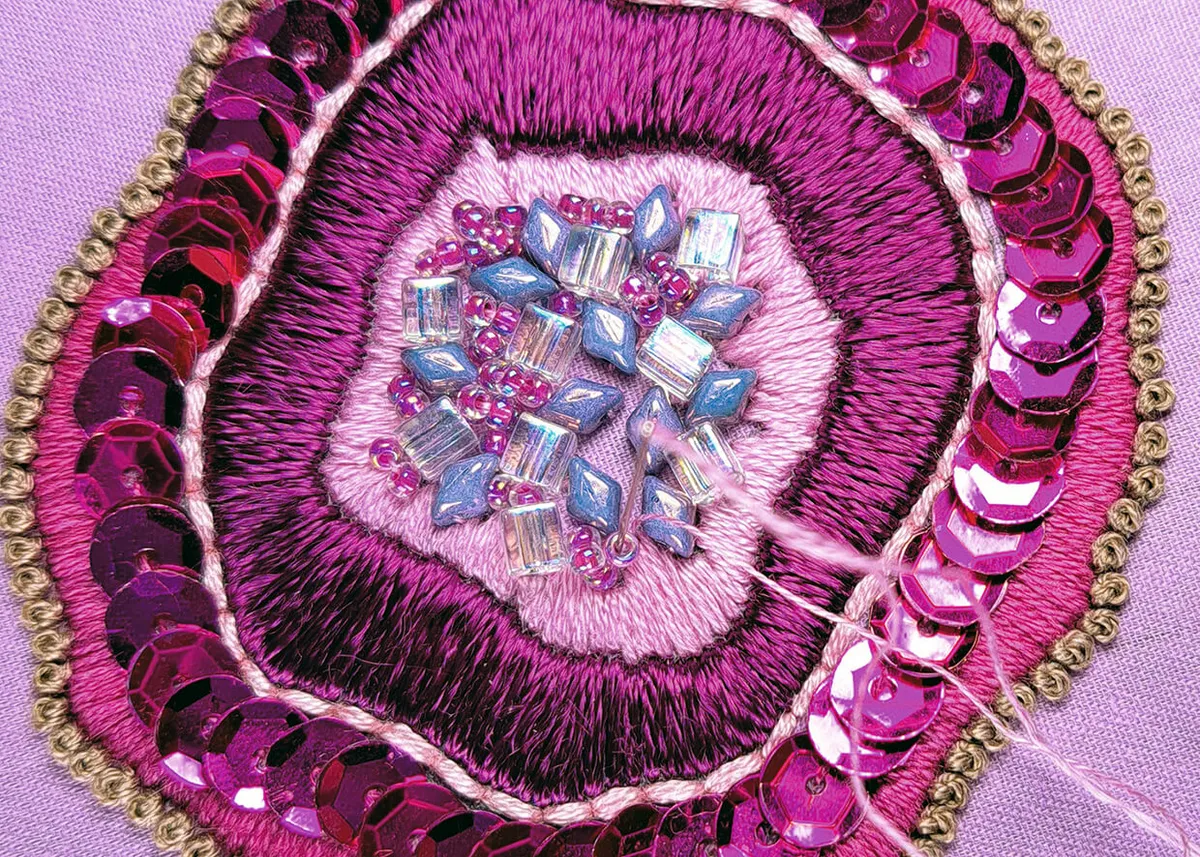
Beads, Sequins, and Buttons
These are a great way to give your design a tactile quality and a variety of visible textures.
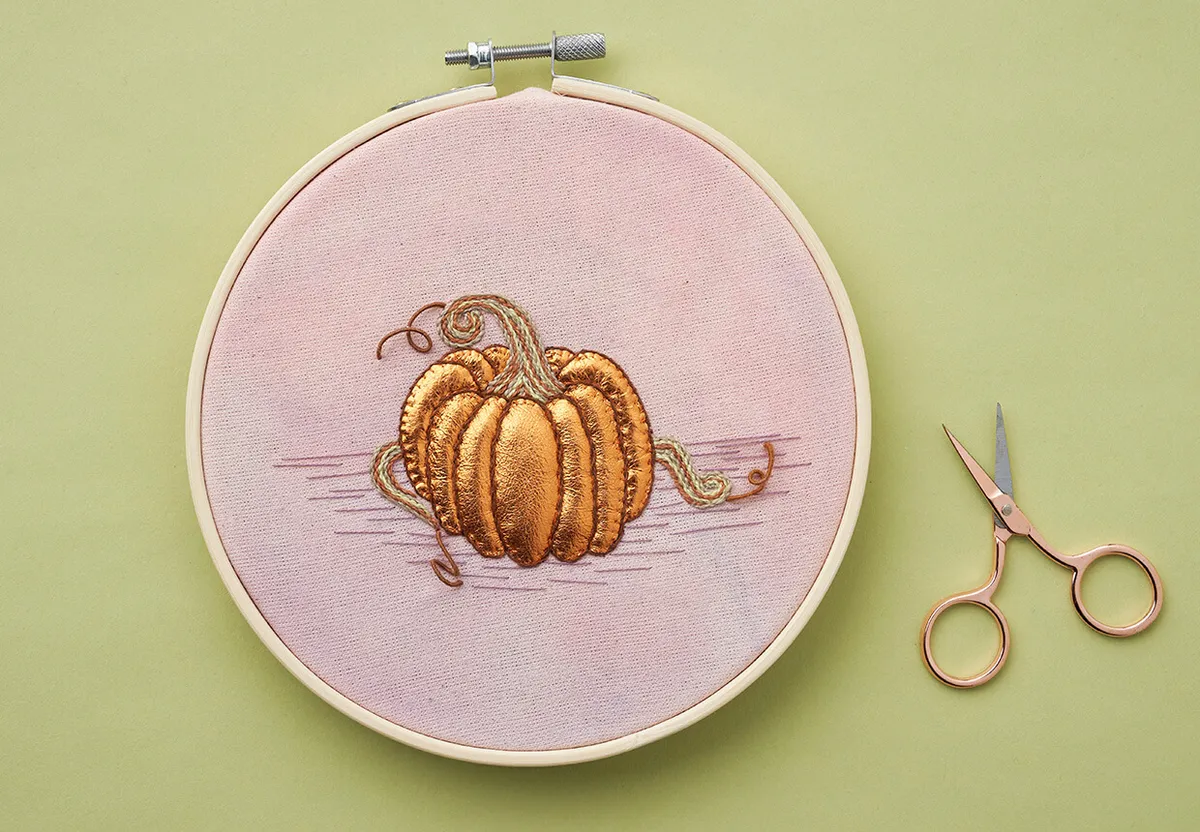
3D embroidery workshop: Pumpkin embroidery
Now you know a bit about 3D embroidery, you can try it out for yourself with our amazing felt-padded pumpkin. This project was designed by Amy Burt and first published in Love Embroidery issue 31.
Sign up for our embroidery newsletter to receive more beautiful embroidery patterns every week.
What do I need to know about this 3D embroidery project?
Below you'll find first a 4-step techniques section for your reference which will help you to master the techniques needed for this 3D embroidery. After that, you'll see the step-by-step to create your pumpkin embroidery hoop.
Which stitches do I need to know?
You will need
- Calico fabric - 25x25cm, white x2
- Kid leather (or thin pleather) - 10x20cm, copper
- Stranded cotton - 1 skein each of brown, dark brown, green, pale green, grey
- Machine thread - Orange
- Embrdoiery hoops - 15cm and 18cm diameters
- Paper-covered cake wire
- Pricker (size 10 embroidery needle with a holder)
- Pounce powder and soft brush
- Thick tracing paper
- Watercolour paints and paintbrush
- Wool felt - 20x20cm, orange
- Spare felt (rolled into a bundle)
- Basic embroidery kit
Pumpkin embroidery template
You'll also need the pumpkin embroidery template.
Techniques for the pumpkin project
Attaching the felt to your fabric
Attach each layer to the centre of the area using the stab stitch method; where you come up through the fabric first and then go back down in a separate motion.
Work a few stitches equidistantly around the edge and then fill the gaps with the stitches 1mm apart.
Alternatively, you can attach just one felt shape using the stab stitch method and then stuff to create the dome shape.

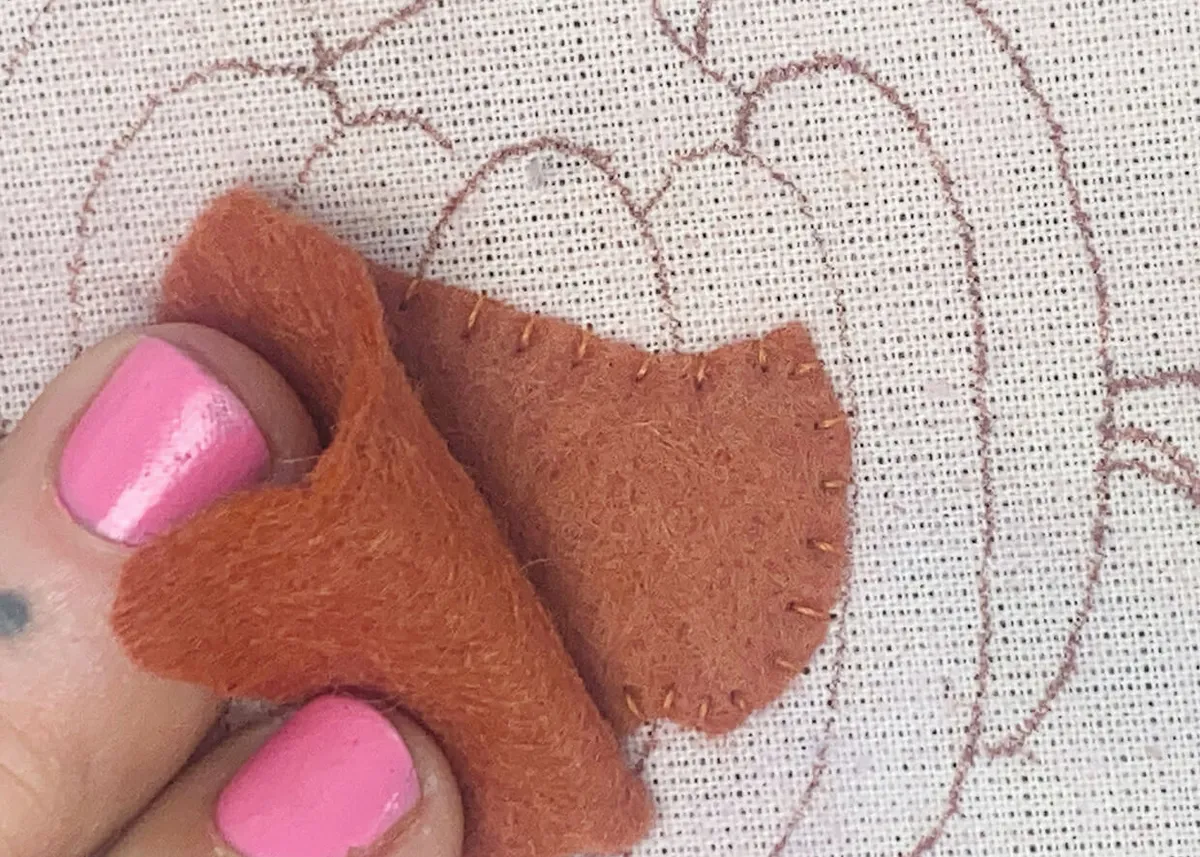
Covering the felt with leather
To cover the felt, we used panels of leather that were placed on top of the felt and then secured around the edges using the stab stitch method.
Always bring the needle up through the fabric and down into the leather, angling the needle at a slight diagonal to prevent it from ripping the leather.
You could also use other types of fabric or Satin Stitch to cover the felt.

How to make wrapped wire
To make a wrapped wire, start wrapping thread tightly around the wire 1cm from the end, trapping the tail under the wrapping to secure it. Secure the end by threading the tail through a few loose wraps and pulling it taut.
Attach it to the fabric by inserting the end through a hole made using a large needle. Bend the wire end back on itself and stitch it to the reverse of the fabric.

Your pumpkin project! Steps to make your pumpkin hoop
Step 1 - Mount your hoop and paint
Mount your fabric in the 18cm hoop and dampen it with water. Then, use heavily diluted watercolours in pink and purple to cover your fabric in a random pattern. Leave to dry in the hoop.
Remove from the hoop and insert into the smaller hoop with another piece of fabric behind.
Step 2 - Transfer the design from the template onto the fabric using the prick-and-pounce method
Start by transferring the pumpkin design onto some tracing paper, leaving off the thin vines.
Use a pricker to pierce template lines on the paper every 2mm.
Pin the tracing paper to the fabric centrally, then use a felt bundle to rub the pounce powder over the tracing paper in small circles.
You will be left with a dotted outline. Draw over the design with a fabric-safe pen then use a soft brush to remove the excess powder.

Step 3 - Transfer the design to your orange felt
Again, use prick and pounce to transfer the design onto the orange felt.
Cut out the pumpkin shape four times, trimming each subsequent piece 3-4mm smaller. (See How to pad with felt above).
Attach the felt with orange thread, using the method described in the How to pad with felt section above.
When all four layers are secured, work Backstitch in orange over the lines to create grooves.

Step 4 - Transfer the template to the leather
Prick and pounce transfer the template onto the wrong side of the leather, with the template reversed, and then draw over it.
Do this twice and then cut out the two back sections from one and the front section from the other – cutting out the leather slightly larger than the design.
Using orange thread, apply the two back sections using the stab stitch method, then work Backstitch over the leather to create the grooves of the pumpkin. (See Covering the felt with leather section above).

Step 5 - Create the pumpkin stalk
Now, work the pumpkin stalk and vines using Stem Stitch in two strands, alternating between green, pale green, and brown. Then, outline the leather with Stem Stitch using two strands of dark brown.

Step 6 - Continue adding the leather
Next, apply the front section of leather using the same method as described in step 4. Then, go over the curved lines using Stem Stitch in two strands of dark brown.

Step 7 - Finishing the stalk with wire
Add some horizontal Straight Stitches in one strand of grey around the base of the pumpkin.
Take the wire and cut it into three 10cm pieces. Wrap the wire using one strand of brown. Curl the wires to the desired shape. (See How to make wrapped wire section above).
Use a large needle to make holes through both layers of fabric and then insert the wire ends.
Bend the ends back on themselves and secure by stitching over the ends of the wire and catching the reverse layer of fabric only.

Expand your skills with 3D embroidery
There are so many possibilities for your projects when using 3D embroidery. It adds something extra to them and brings them to life! Try mixing and matching different techniques to create a design that really stands out.
Try another 3D embroidery project
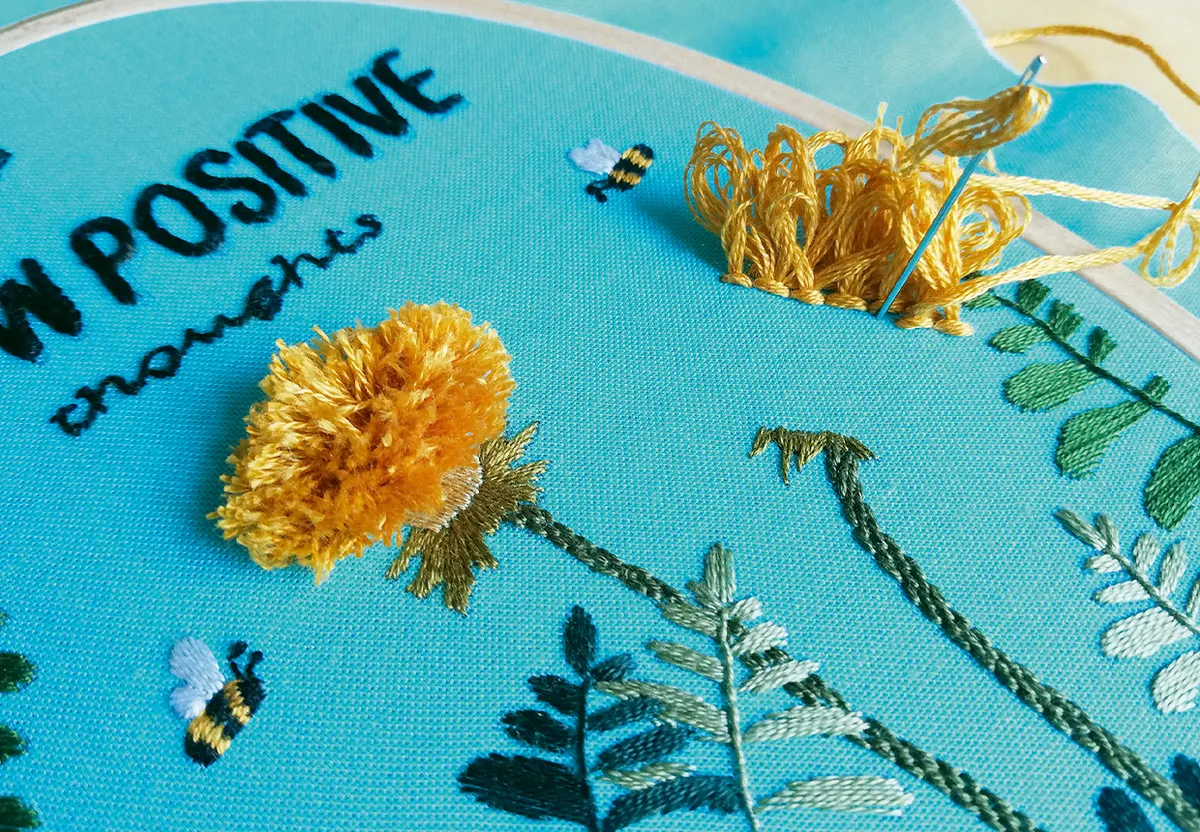
Why not get creative and incorporate some of these 3D techniques into your designs? If you need some help getting started, try this modern botanical embroidery hoop design, which creates 3D fluffy dandelions using Turkey Stitch. Happy stitching!

Read more: