How to make an origami tulip

Fold, create and bloom! This origami tulip is made from three pieces of paper, and is ideal for beginners.

Try our magazines – get 6 issues from just £9.99!

Published: February 28, 2024 at 12:24 pm

Make this beautiful origami tulip following our simple tutorial. By following our clear instructions and step-by-step photography, you’ll find yourself gaining confidence as you learn this fantastic project. 

This origami tulip is made from three sections: a flower, leaf and stalk. The stalk can be made from either a tightly coiled piece of paper, or a paper straw – depending on what you have to hand. 

Experiment with different colours for the flowers, different lengths of stalk and even different paper textures, as this will influence the ’feel’ of your final origami tulip. 

There are no tricky folds in this origami tulip tutorial, but you will need some glue and a pair of scissors. The reverse side of the paper is visible in the middle of the flower, so we recommend opting for double-sided paper if possible. If you don’t have any double-sided paper, you can either colour the reverse yellow, or leave it white if you prefer. 

Once complete, the origami tulip is strong enough to stand up by itself, so you can display it in a vase to brighten up your home or workspace.  

Read on to learn how to make an origami tulip from paper!

Origami tulip

undefined

How to make an origami tulip step by step

You will need:

  • Paper (1 sheet, 10cm x 10cm)
  • Green paper (7.5cm x 15cm)
  • Green paper (or paper straw) (7.5cm x 15cm)

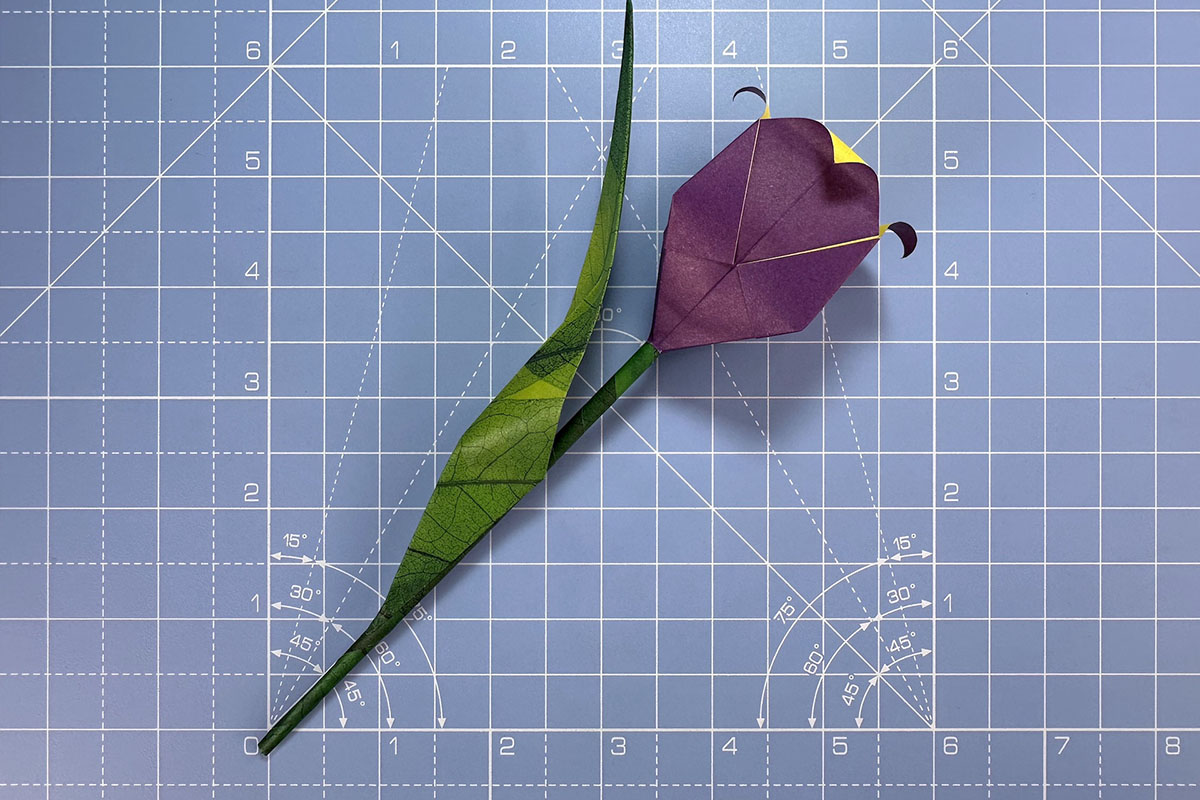
How to make the tulip flower

Step 1

This tutorial is made up of three parts: a flower, leaf and stalk. The flower is made from a piece of paper 10 x 10cm, and both the leaf and stalk are made from a piece of paper 7.5 x 15cm (the easiest way to do this is to cut a regular 15x15cm piece of origami paper in half). 

You don’t need to use dedicated origami paper for this tutorial as there are no tricky folds. Regular paper will do!

For the purpose of this origami tulip tutorial, we are using paper that is purple on one side and yellow on the other.  

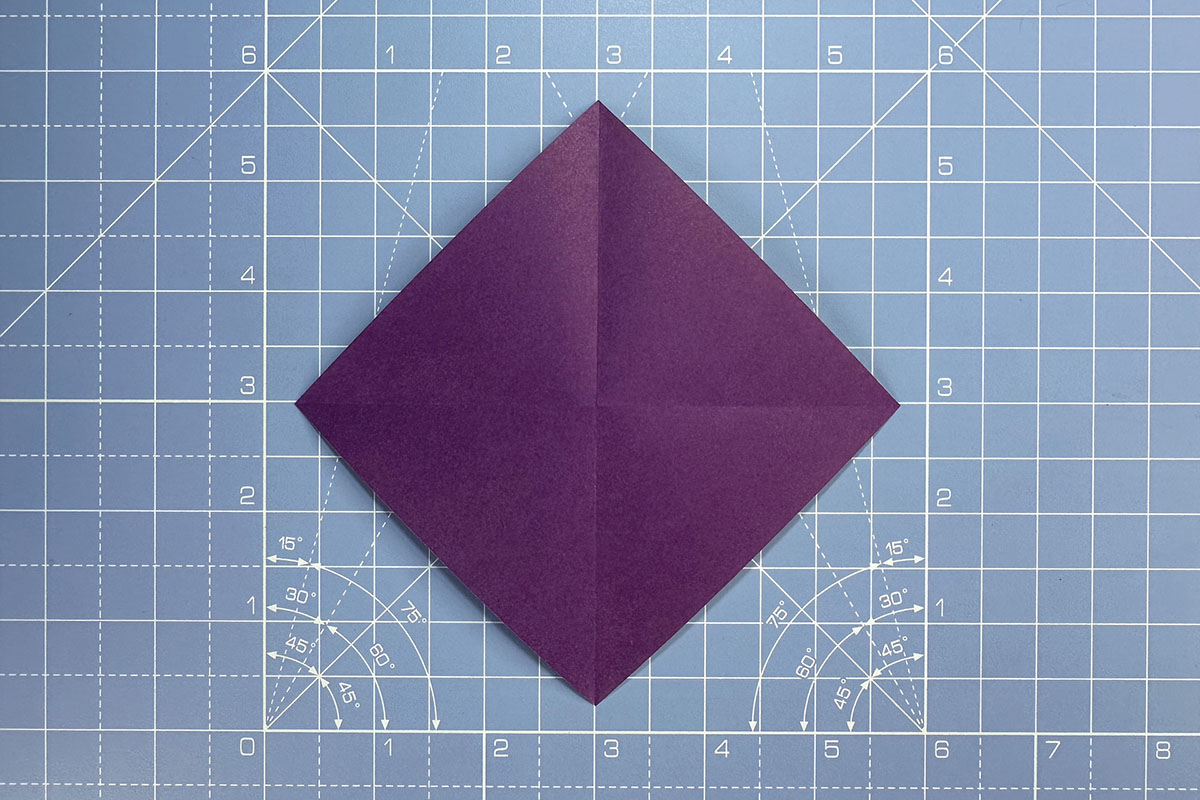
Start with the coloured side facing up (the side you want on the outside of your flower). 

Fold along the diagonals. Unfold.

How to make an origami tulip, step 1

Step 2

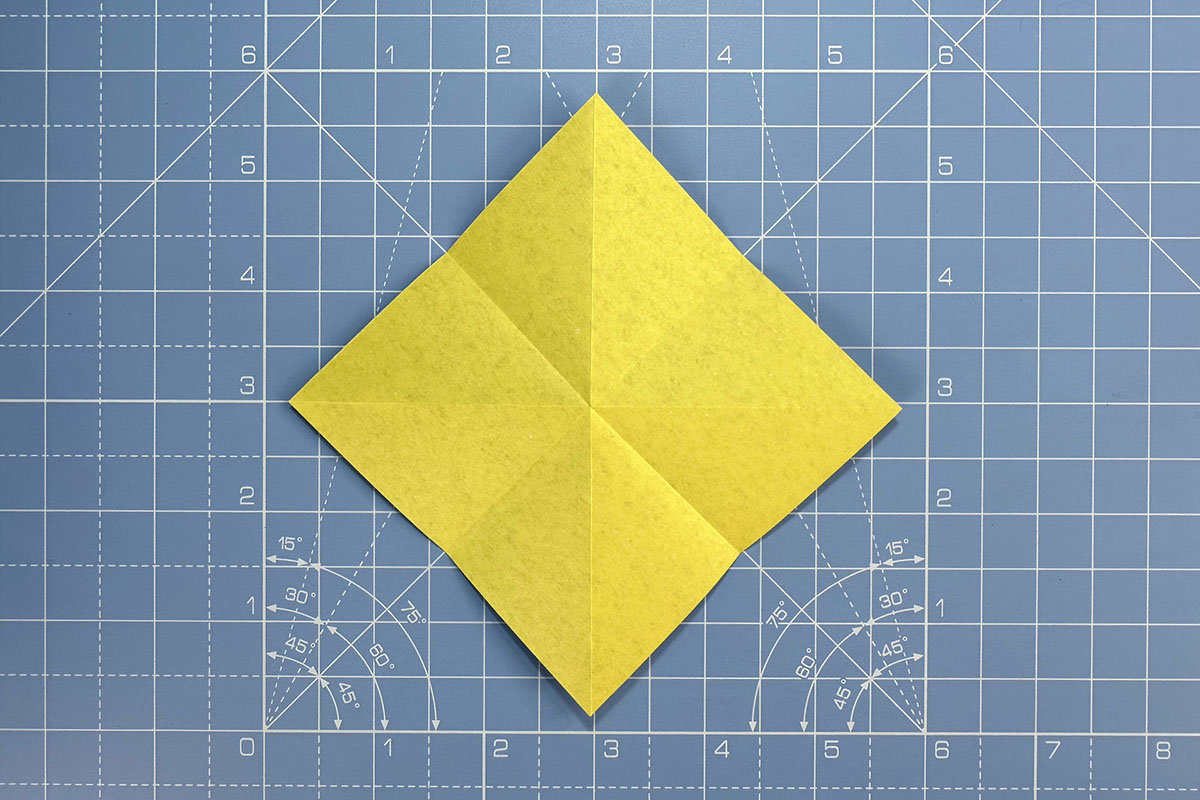
Turn the paper over. 

Book fold along the horizontal and vertical. Unfold.
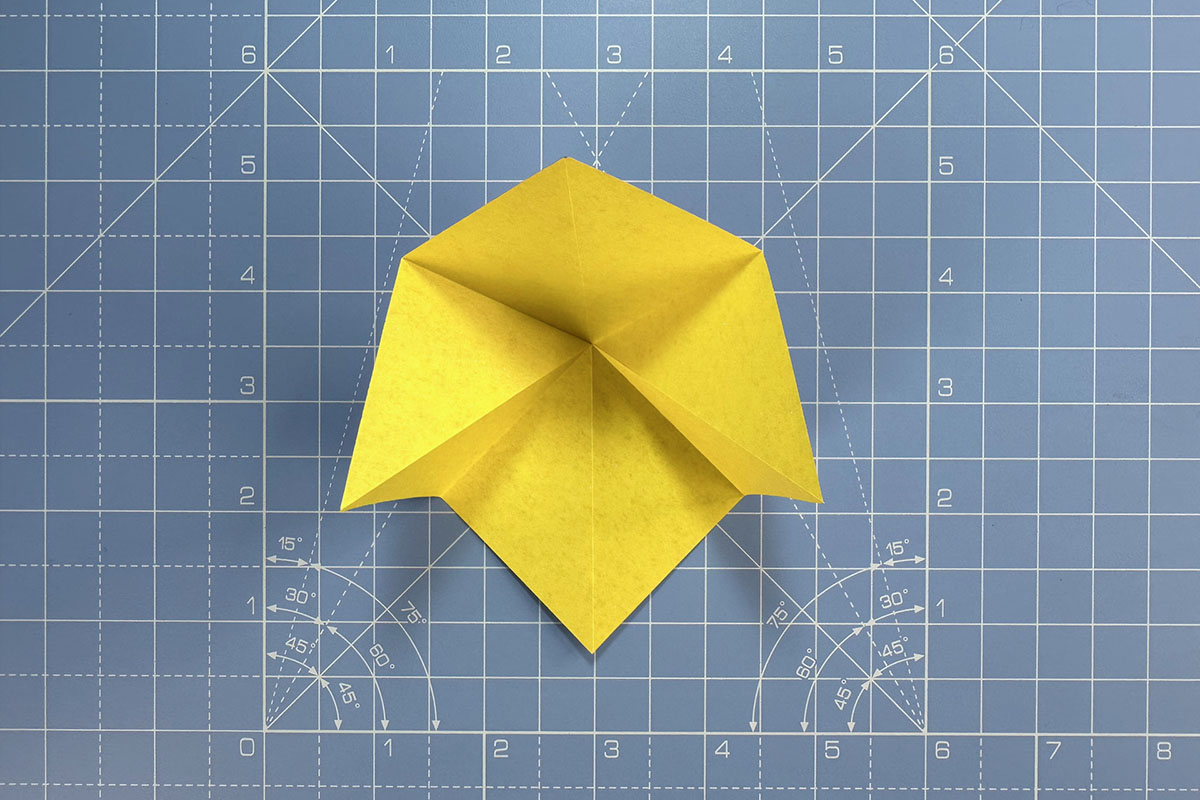
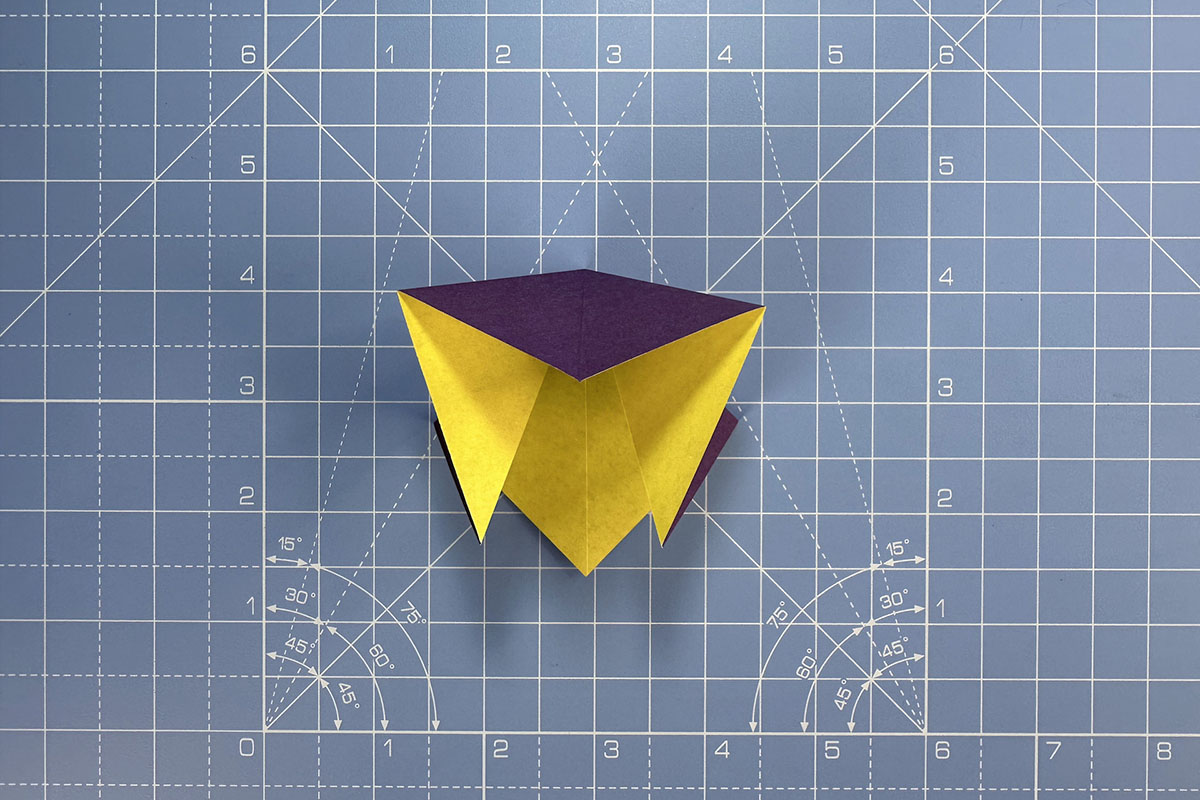
How to make an origami tulip, step 2

Step 3

Bring the corners together so they meet. You’re essentially collapsing the paper in on itself, and the end goal is a square shape. When you do this, make sure you end up with two flaps on either side.
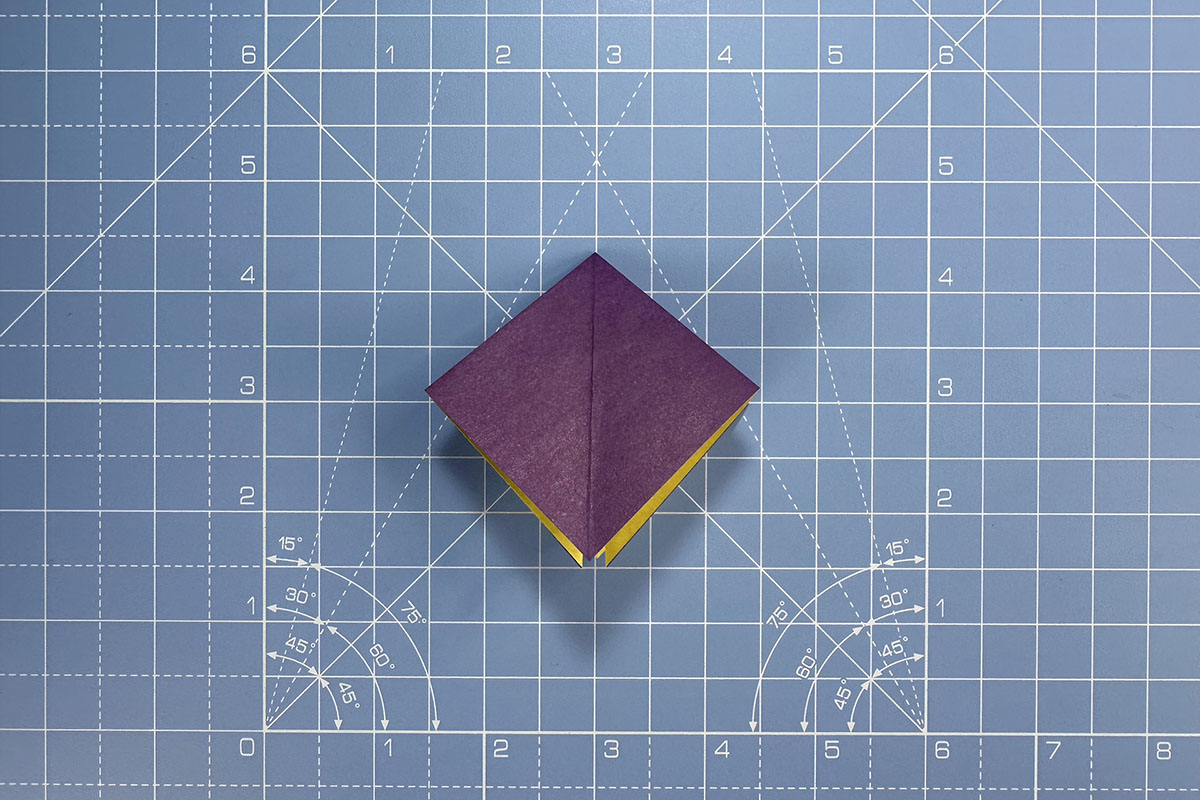
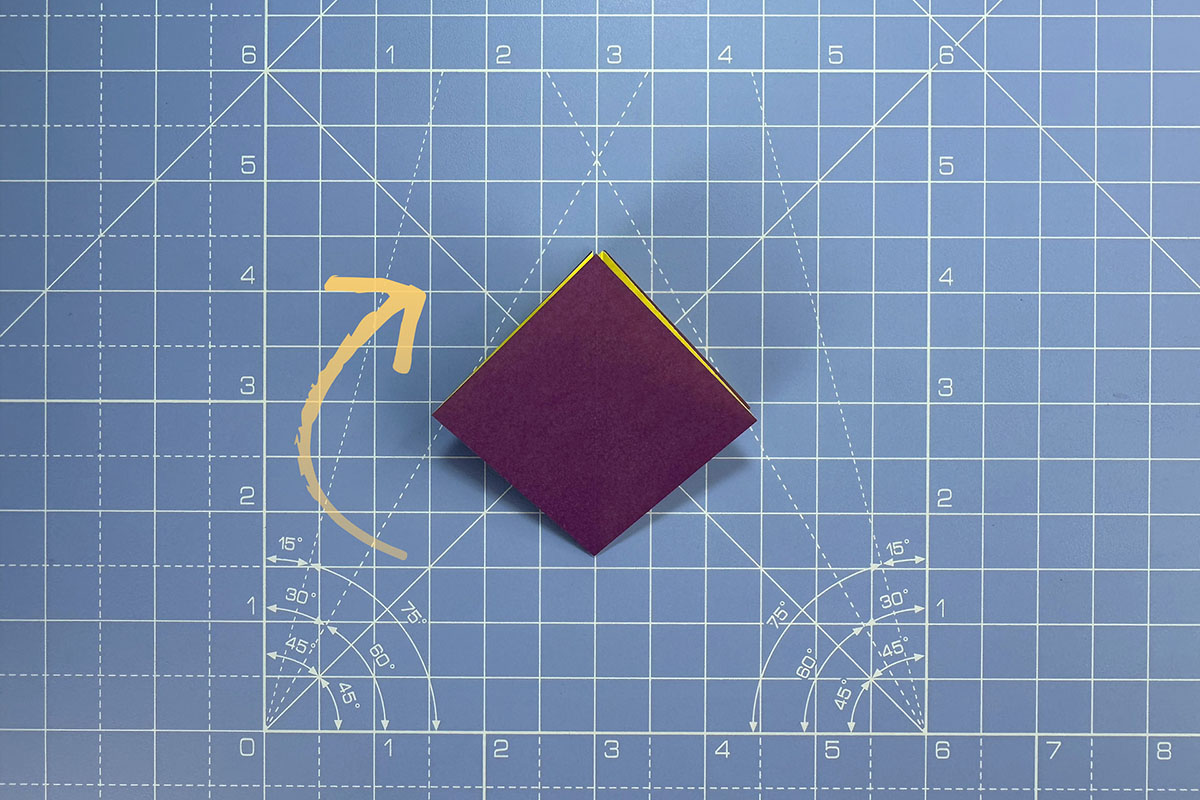
How to make an origami tulip, step 3a How to make an origami tulip, step 3b How to make an origami tulip, step 3c

Step 4

Rotate the paper so the open end is facing upwards.

How to make an origami tulip, step 4

Step 5

Working on the top layer only, fold the right-hand flap over, so that the outside corner now touches the centre line. Leave a small gap at the top, as shown. Burnish the fold.
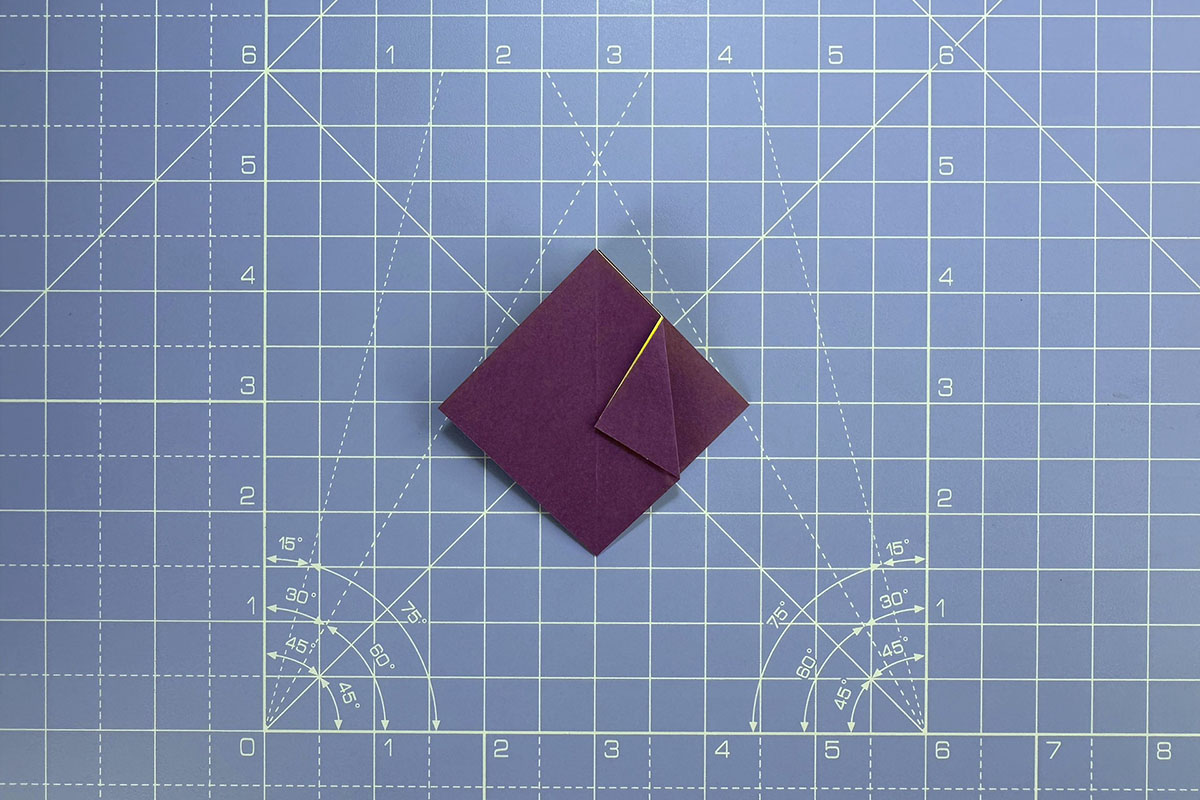
How to make an origami tulip, step 5

Step 6

Repeat step 5 on the left-hand side.

How to make an origami tulip, step 6

Step 7

Turn the model over, and repeat steps 5-6 on the other side.
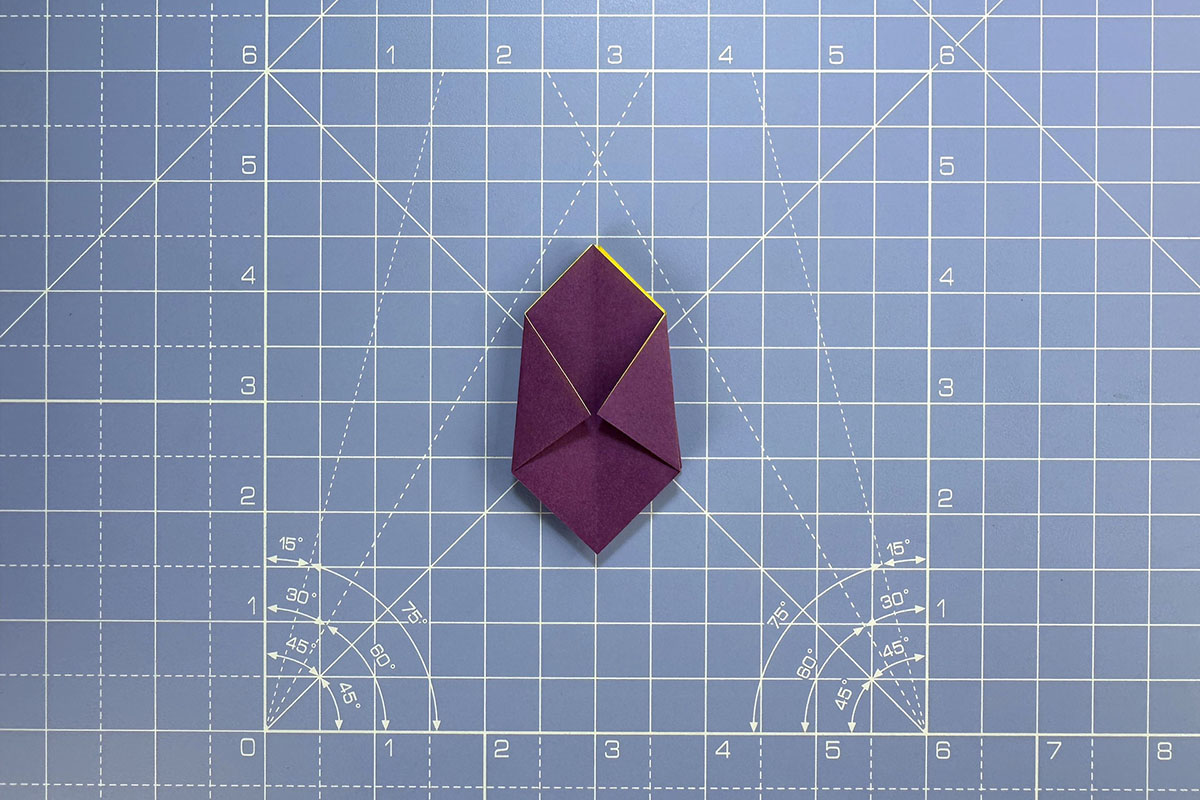
How to make an origami tulip, step 7

Step 8

Fold one layer over at the front, and the opposite layer over at the back to hide the folds you just made. 
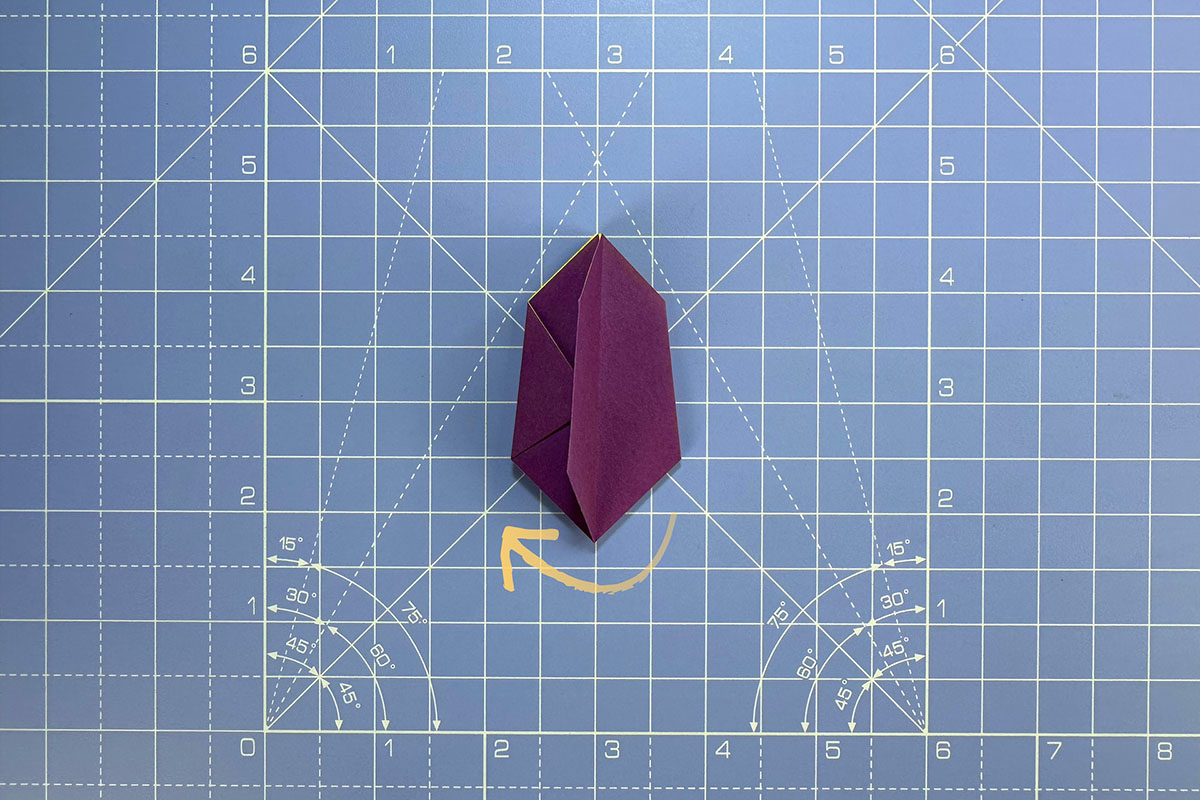
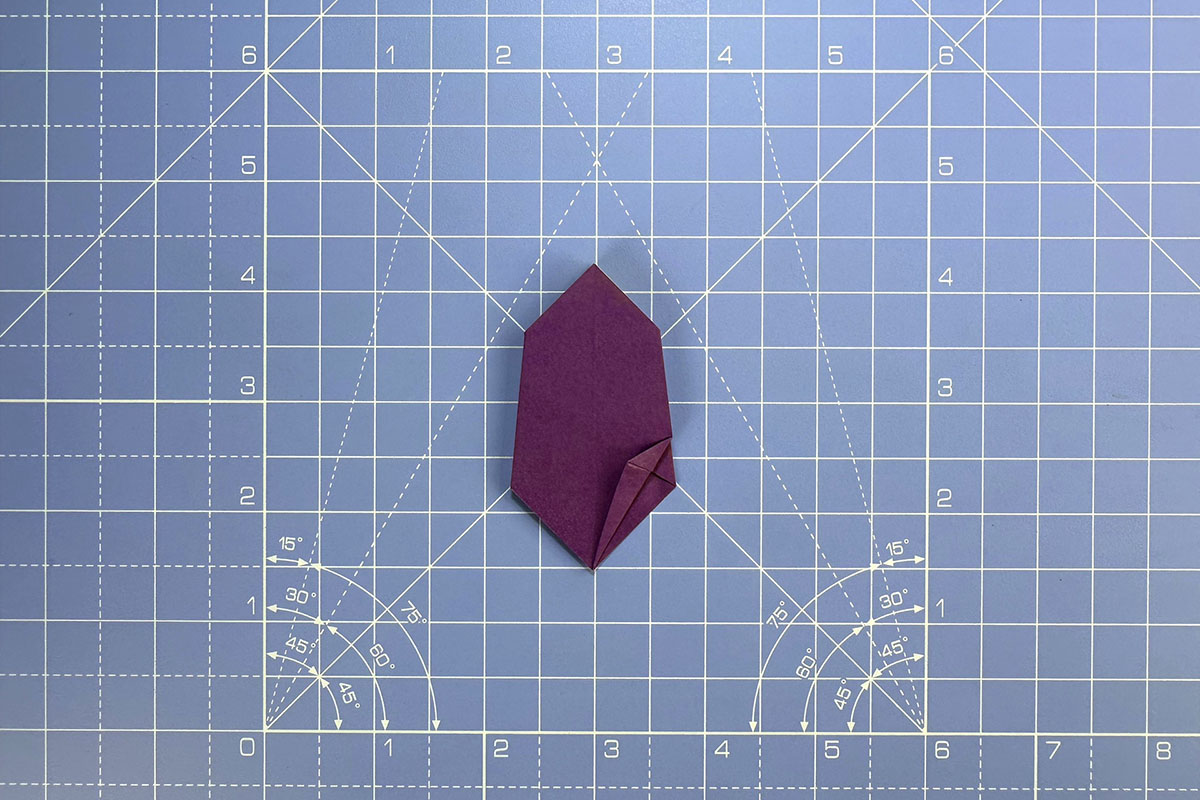
How to make an origami tulip, step 8a How to make an origami tulip, step 8b


Step 9

Working on the base (closed end) of the flower now, fold the bottom right-hand corner up to create a mini kite shape.

Don’t fold all the way to the centre line; leave a gap approximately the same width as the section you folded up.
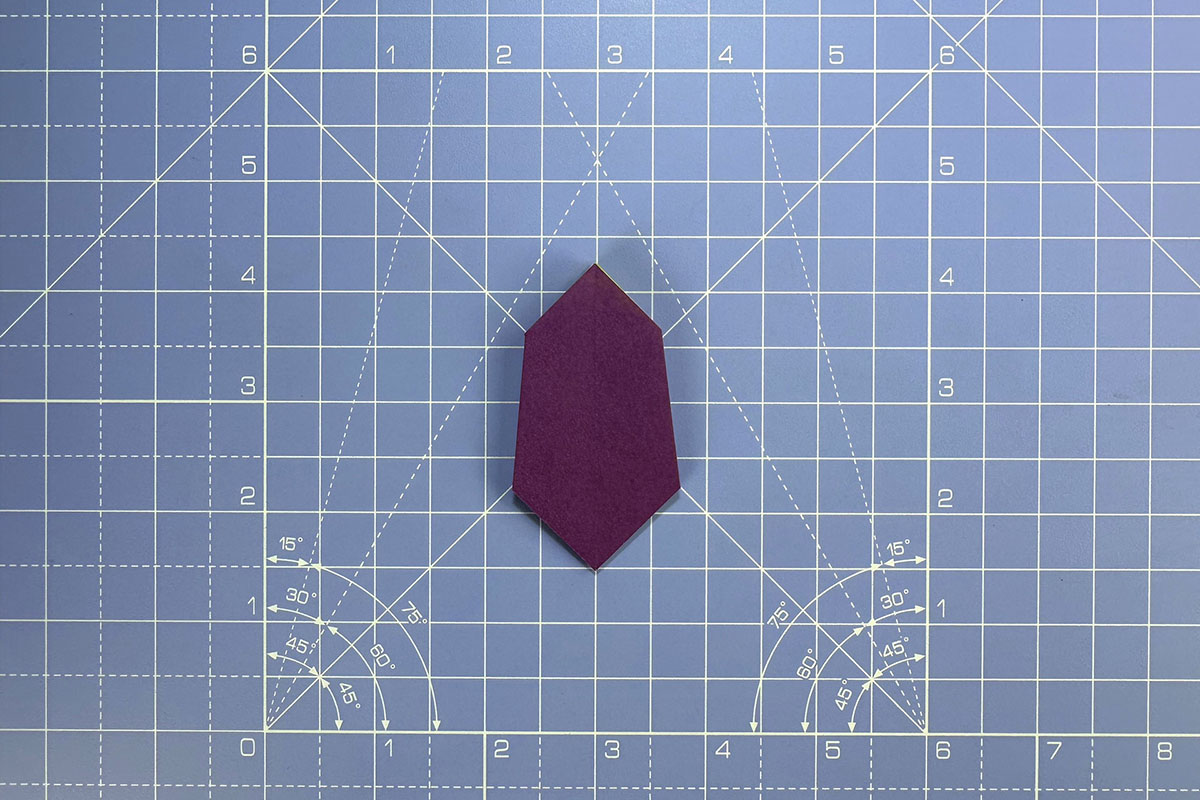
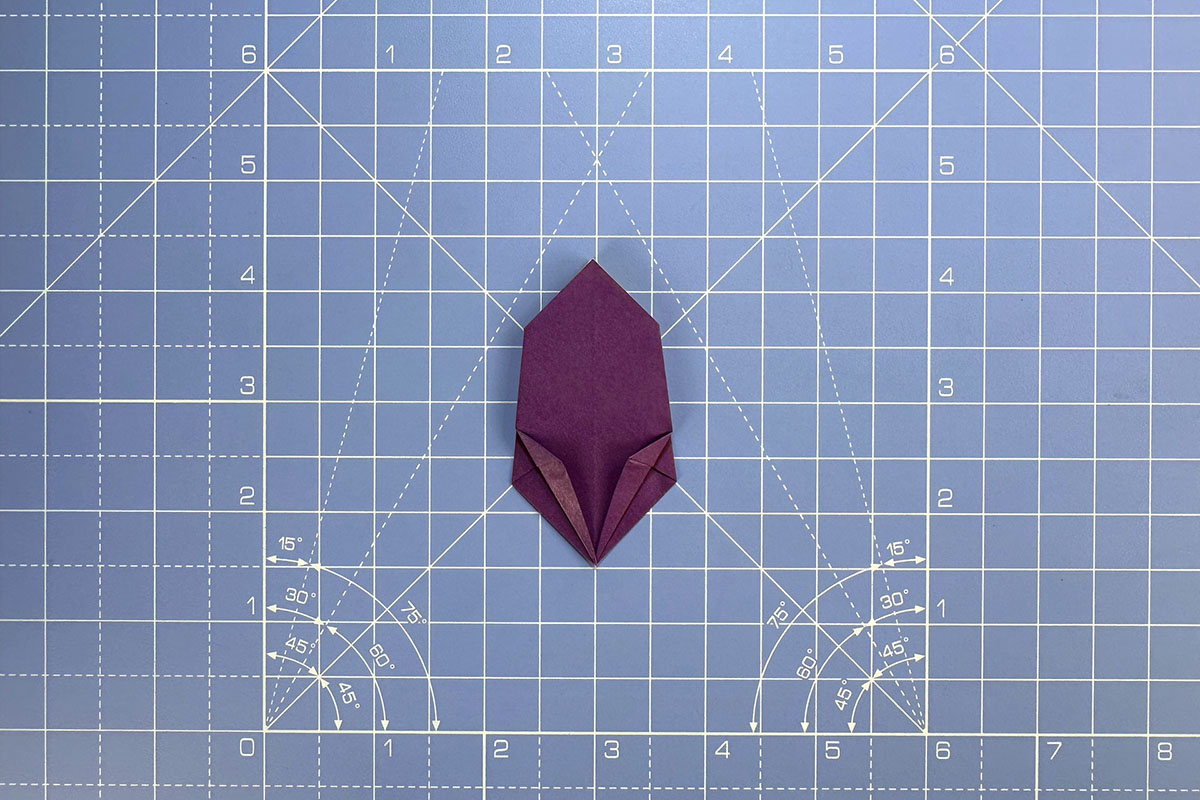
How to make an origami tulip, step 9

Step 10

Repeat with the bottom left-hand corner.
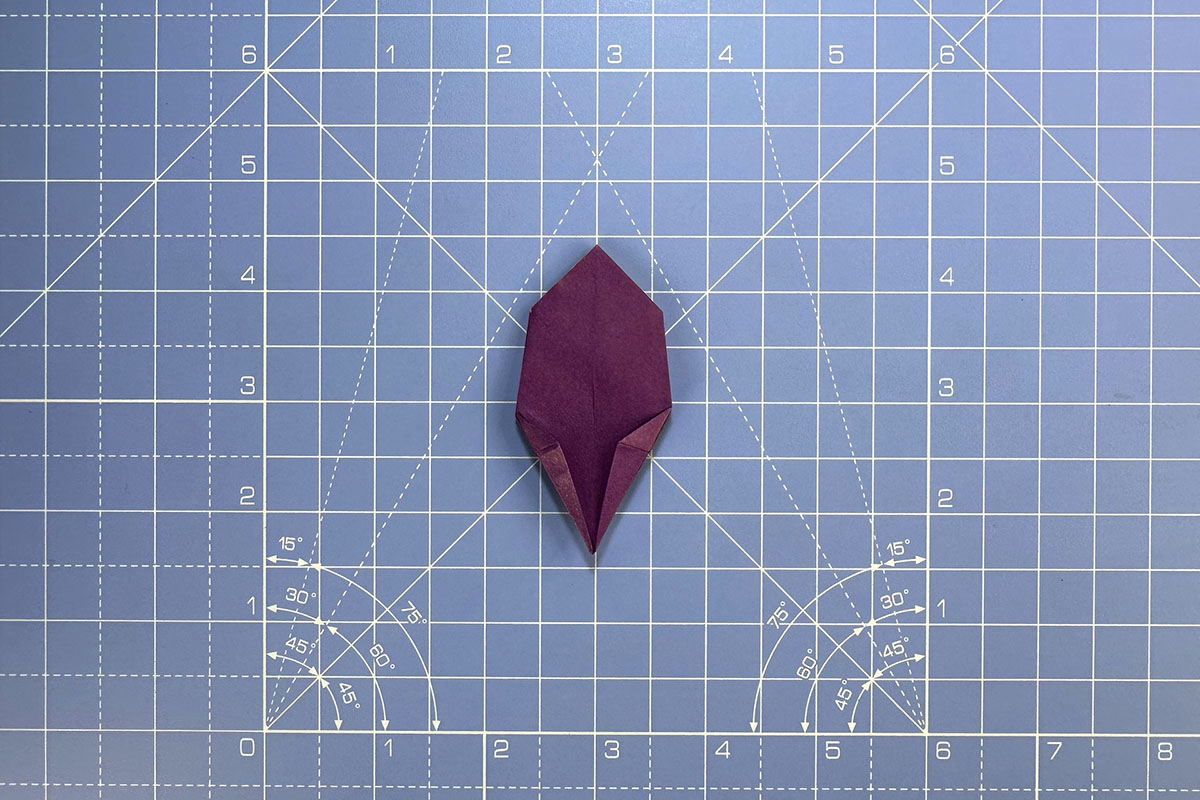
How to make an origami tulip, step 10

Step 11

Turn the model over and repeat steps 9-10 on the other side.
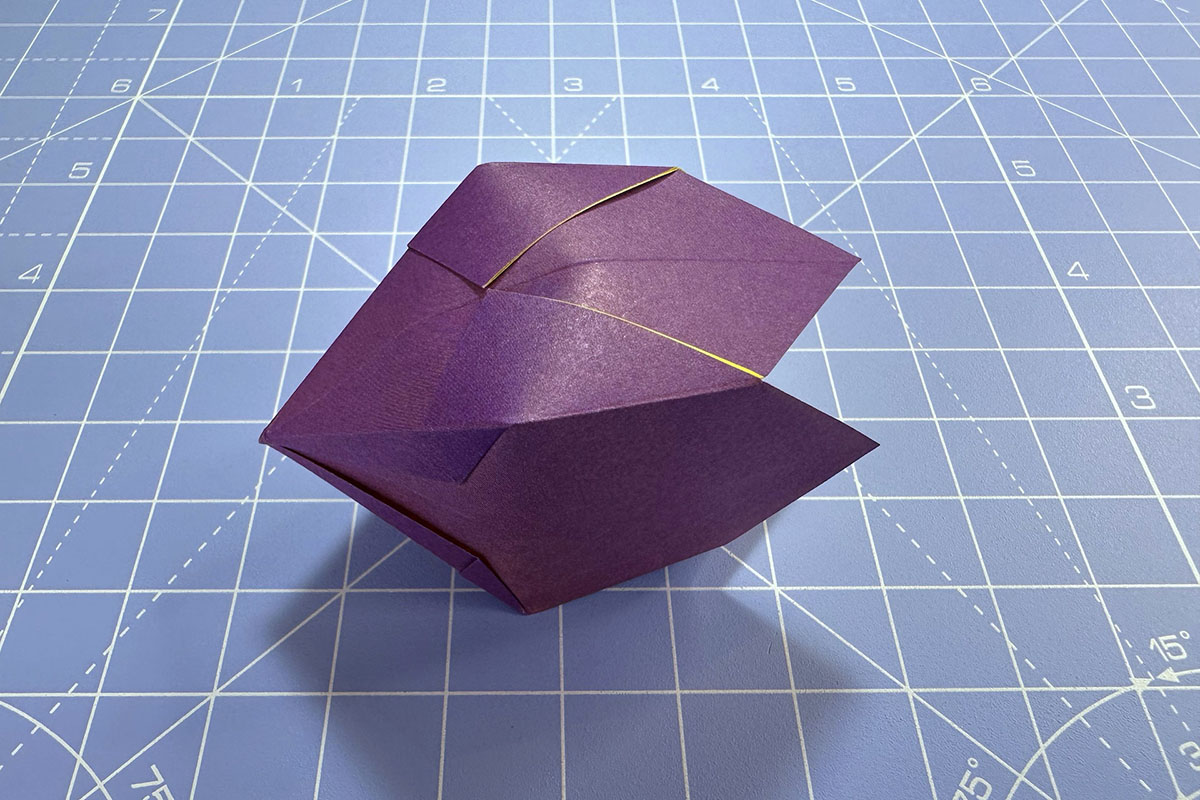
How to make an origami tulip, step 11

Step 12

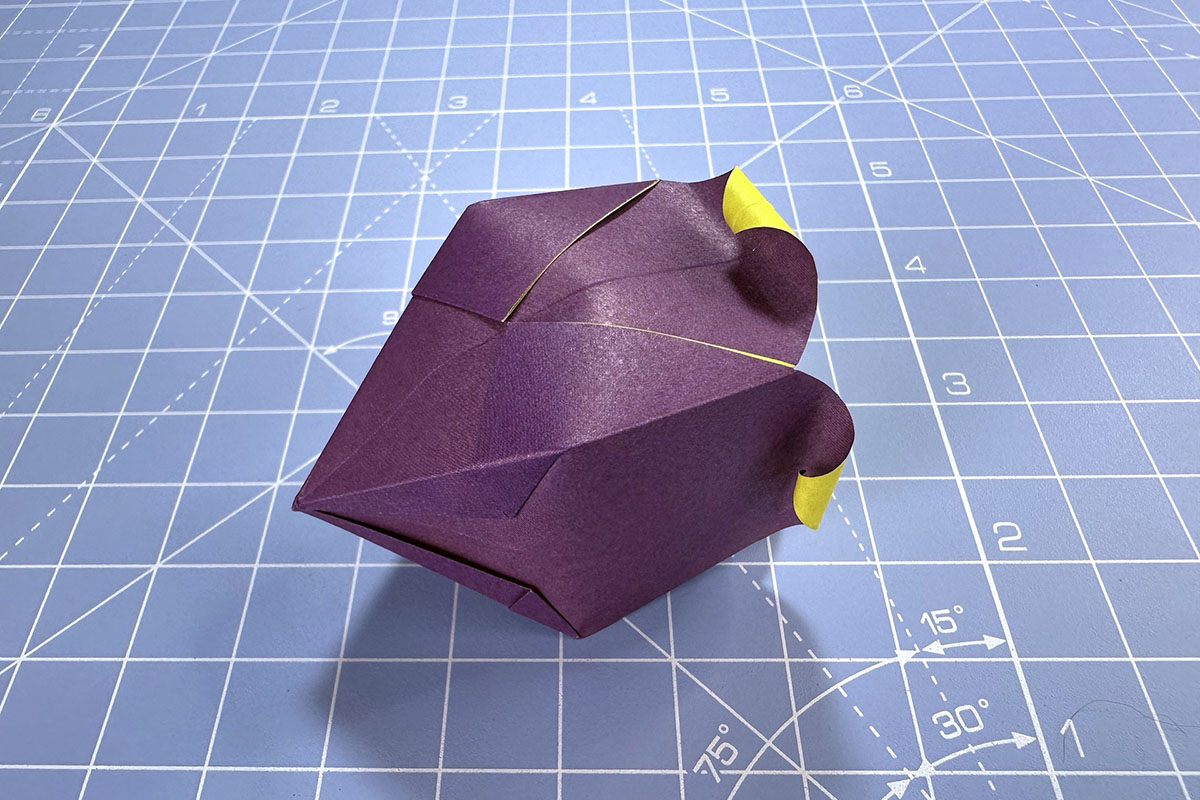
Open the model up by gently wiggling your fingers inside the origami tulip.

How to make an origami tulip, step 12

Step 13

Finally, if you wish, curl the edges of your petals outwards for a more realistic look.

That’s the first part of your origami tulip completed!

How to make an origami tulip, step 13

How to make the origami tulip leaf

Step 1

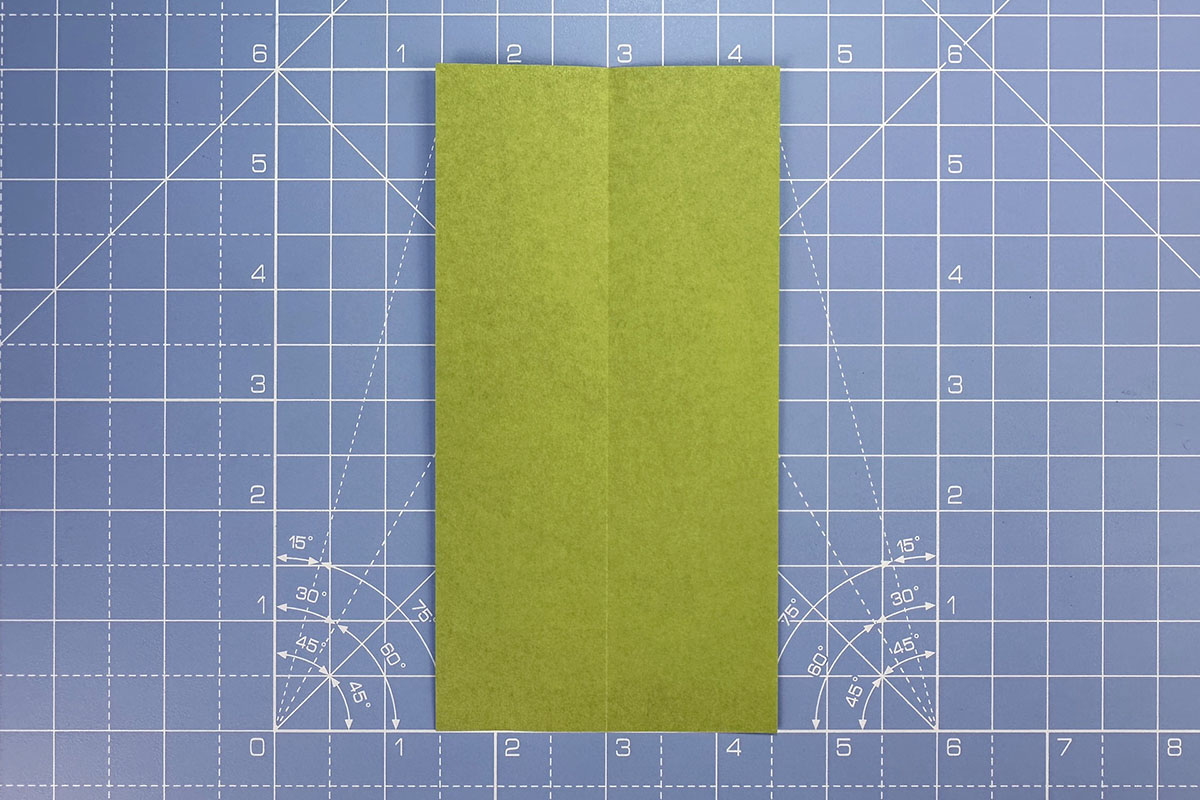
Next, we’ll make the leaf. Cut a piece of paper to 7.5 x 15cm. If you have some origami paper to hand, this is exactly half a standard sheet of 15 x 15cm. 

Fold the paper in half longways. Unfold.

How to make an origami tulip, step 14

Step 2

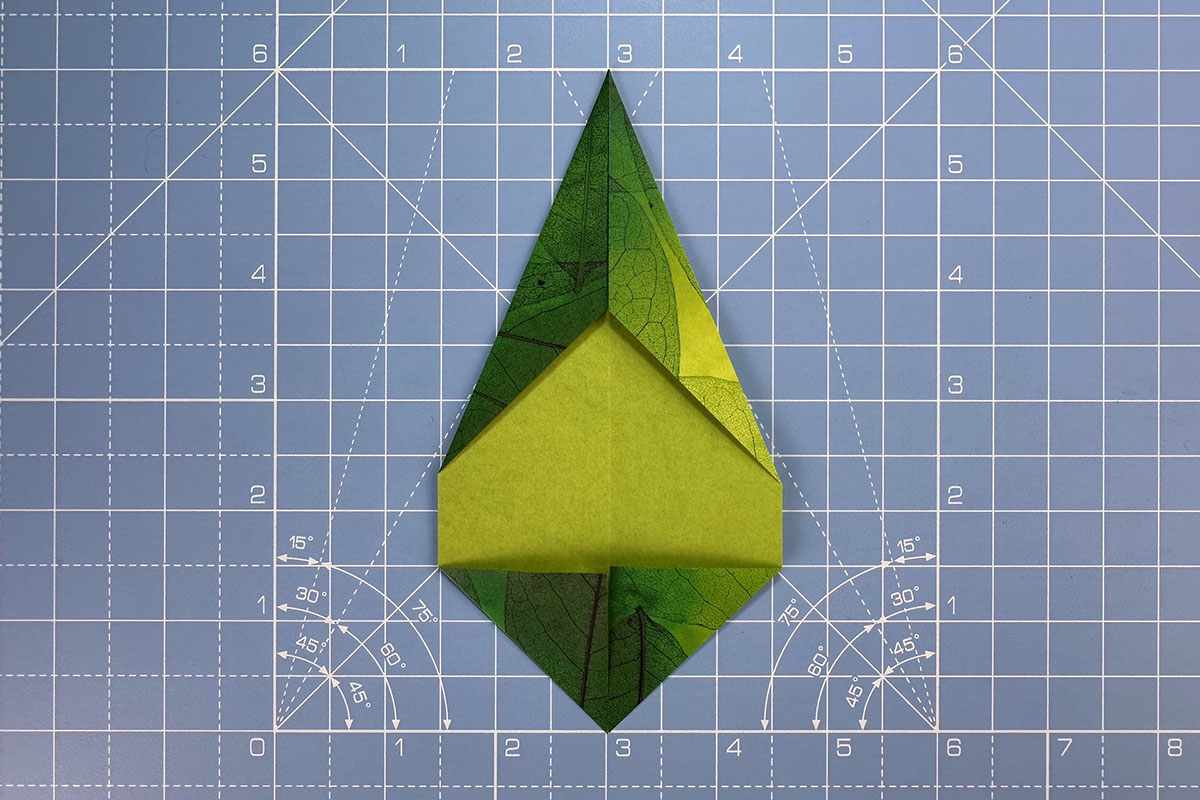
Fold the corners in to meet the centre line, as shown. 

How to make an origami tulip, step 15

Step 3

Next, we’re going to narrow the leaf. 

Fold the top two diagonal edges inwards to meet the centre line.

How to make an origami tulip, step 16

Step 4

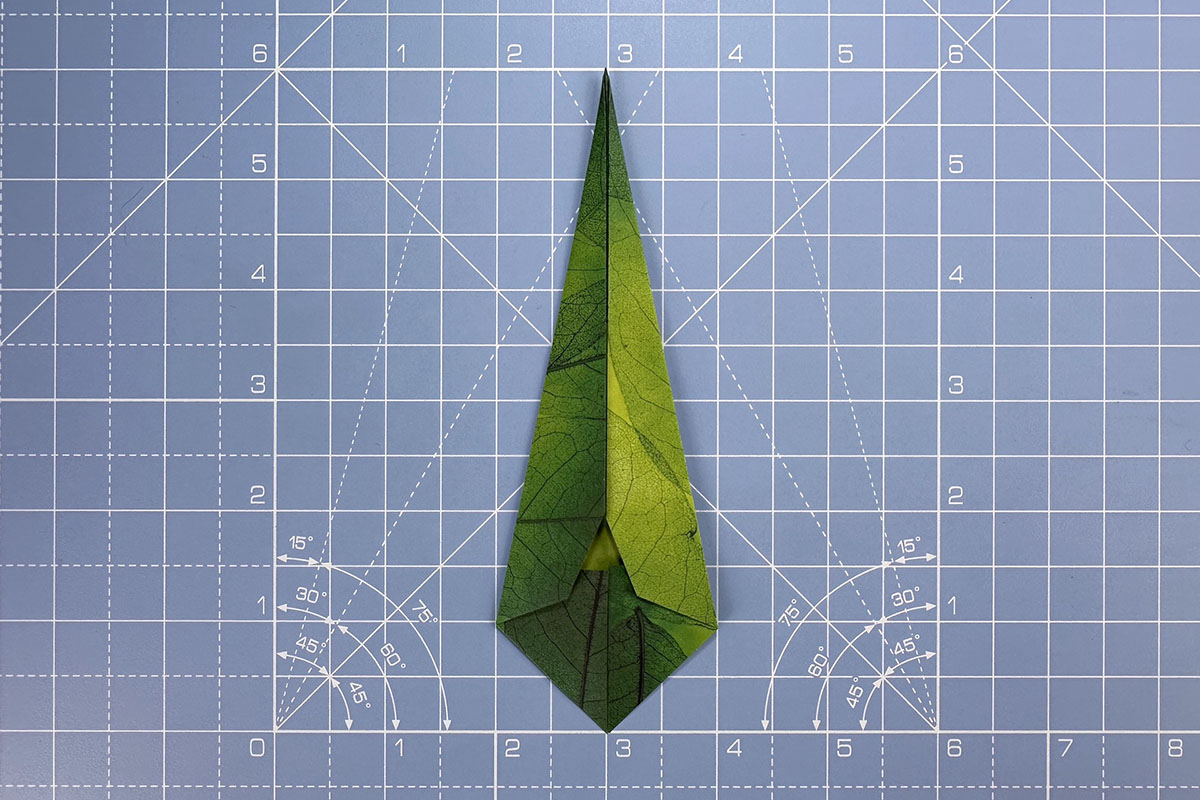
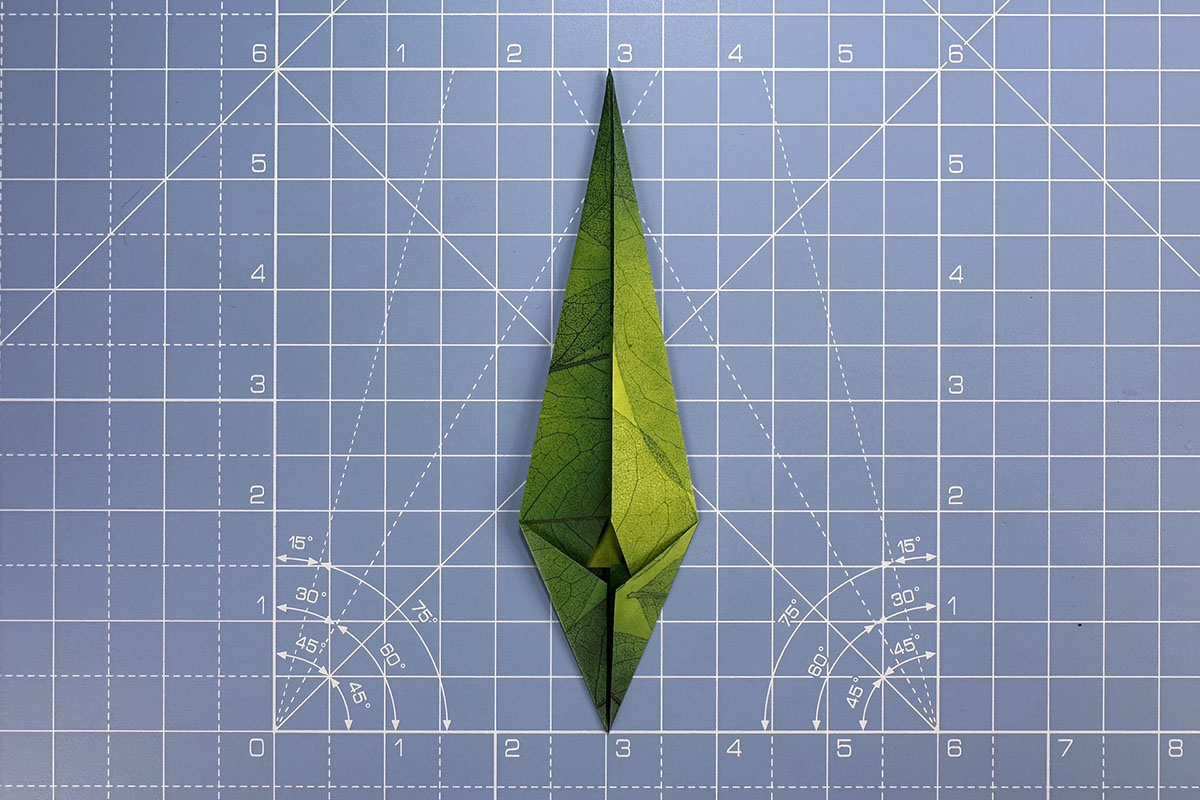
We’re going to narrow the leaf just a little more, so grab those same top two corners and fold them in to meet the centre line, one more time. 

You’ll end up with an elongated diamond shape, where the longer, narrower part forms the top of the leaf.

How to make an origami tulip, step 17

Step 5

Working on the other end now, fold the two bottom edges in to meet the centre line.
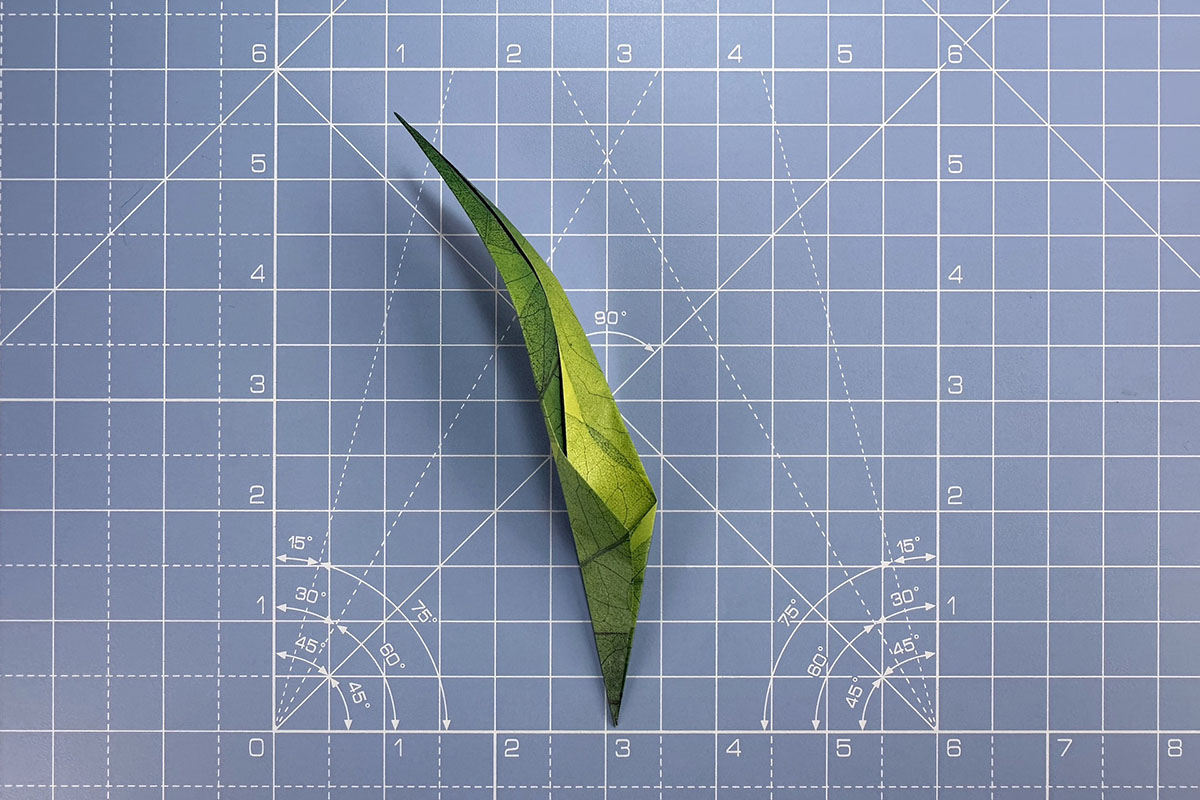
How to make an origami tulip, step 18

Step 6

Finally, shape the leaf by pinching the short end together, and curling the long end outwards.

How to make an origami tulip, step 19

How to make the origami tulip stalk

Step 1

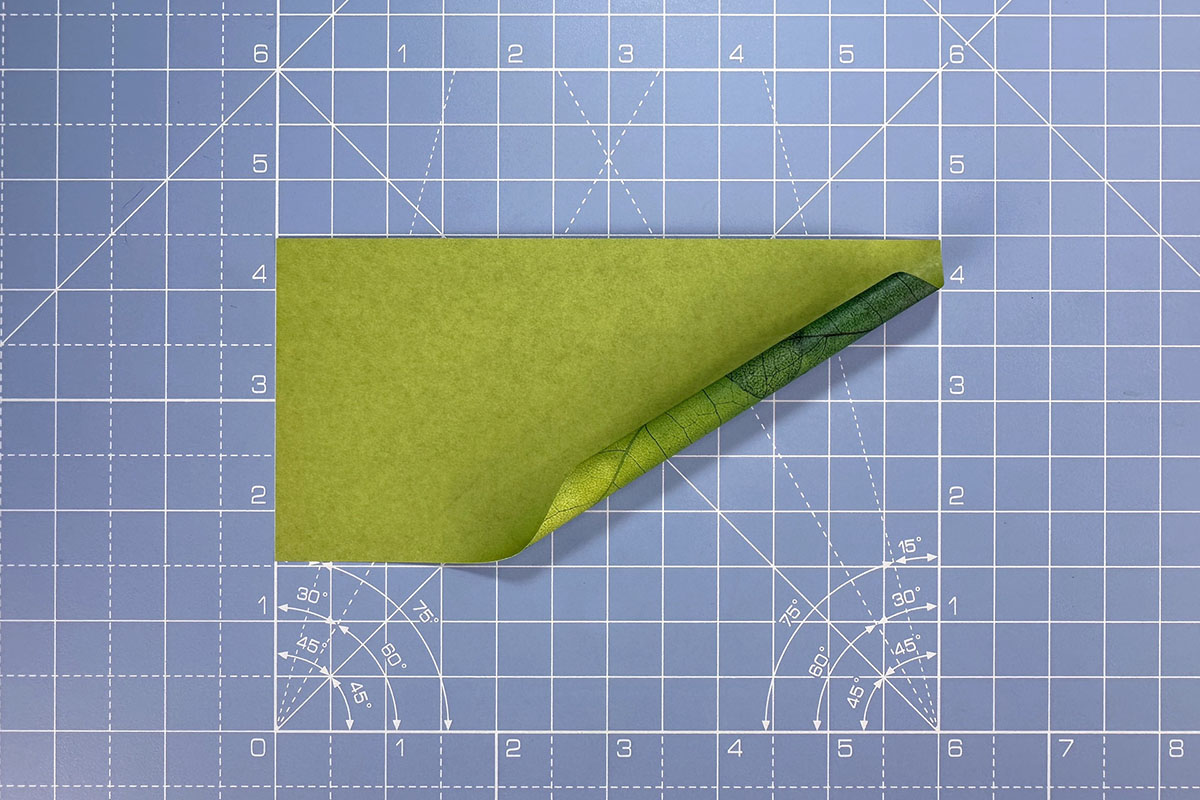
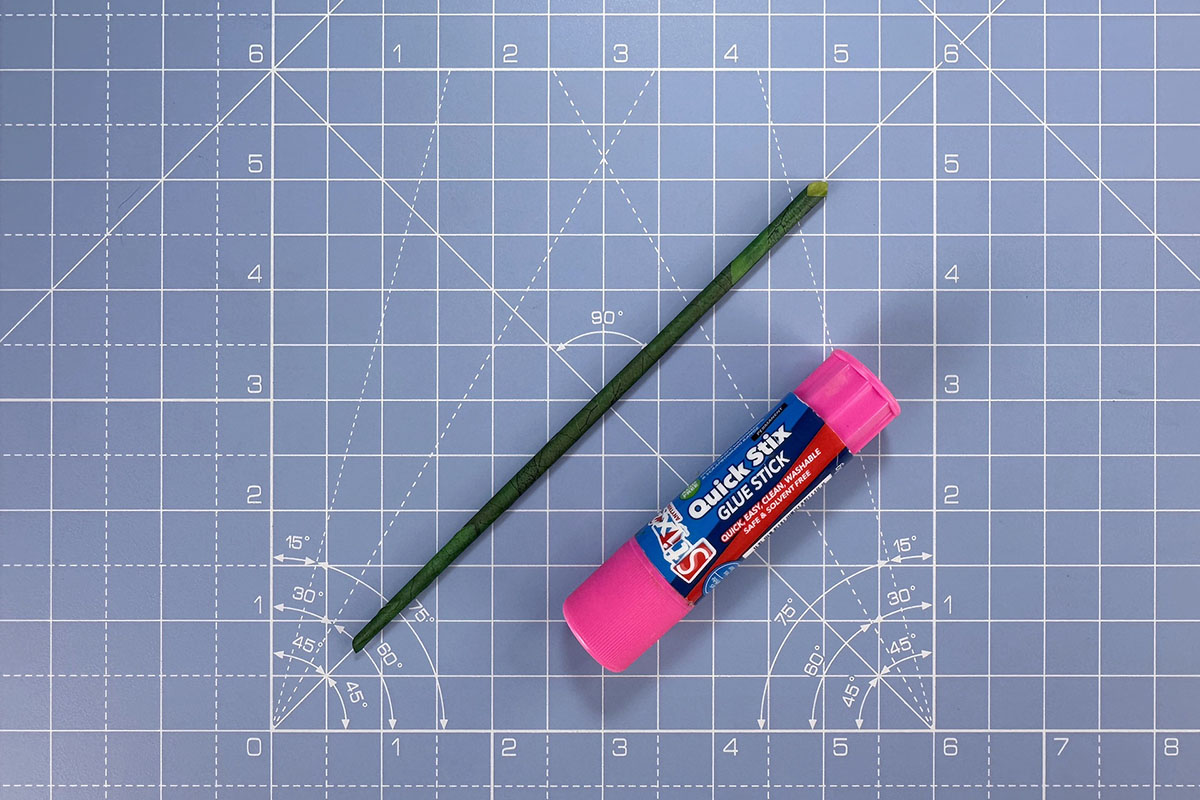
For the stalk, use either a paper drinking straw, or a tightly curled piece of green paper (you could use the other half of the green paper you used for the leaf).

If you’re using a piece of paper, make sure the ends of the paper are secured into place with glue or tape (so that it doesn’t unravel).

How to make an origami tulip, step 20a How to make an origami tulip, step 20b

How to put the origami tulip together
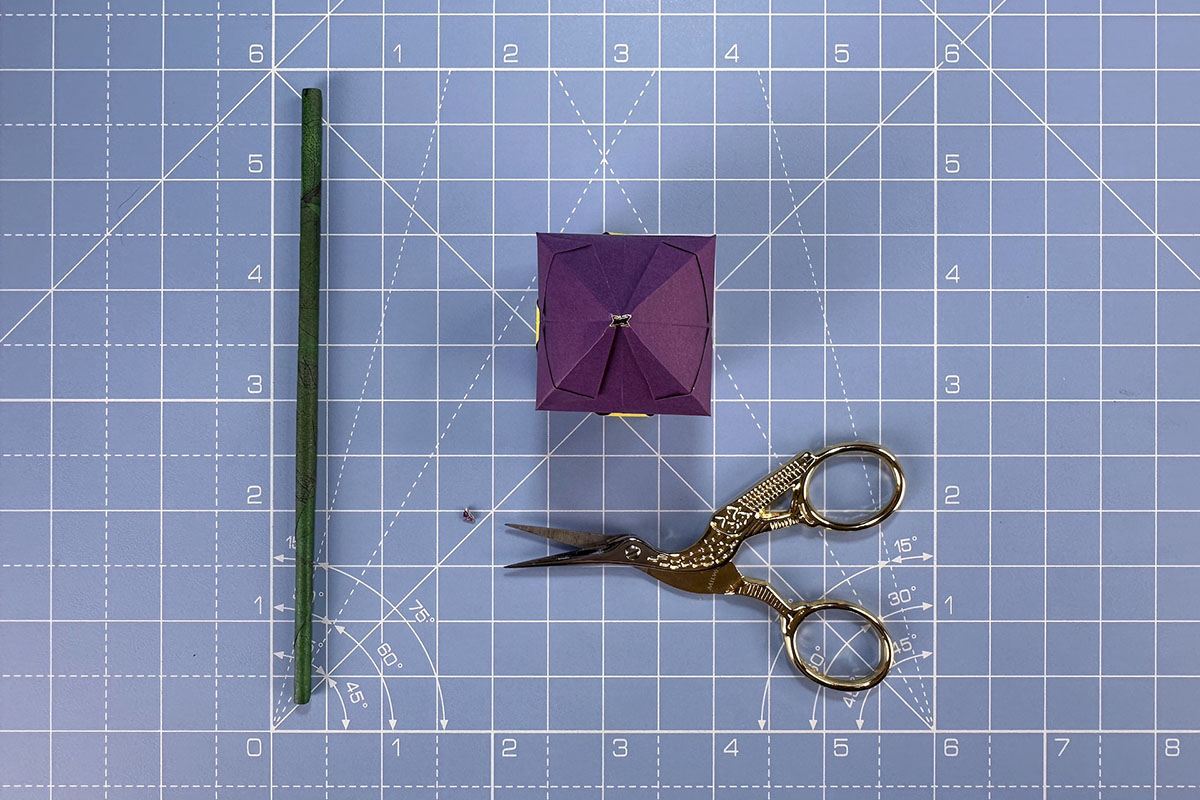
Step 1

Snip the point at the very base of the origami tulip off, to create a small hole.
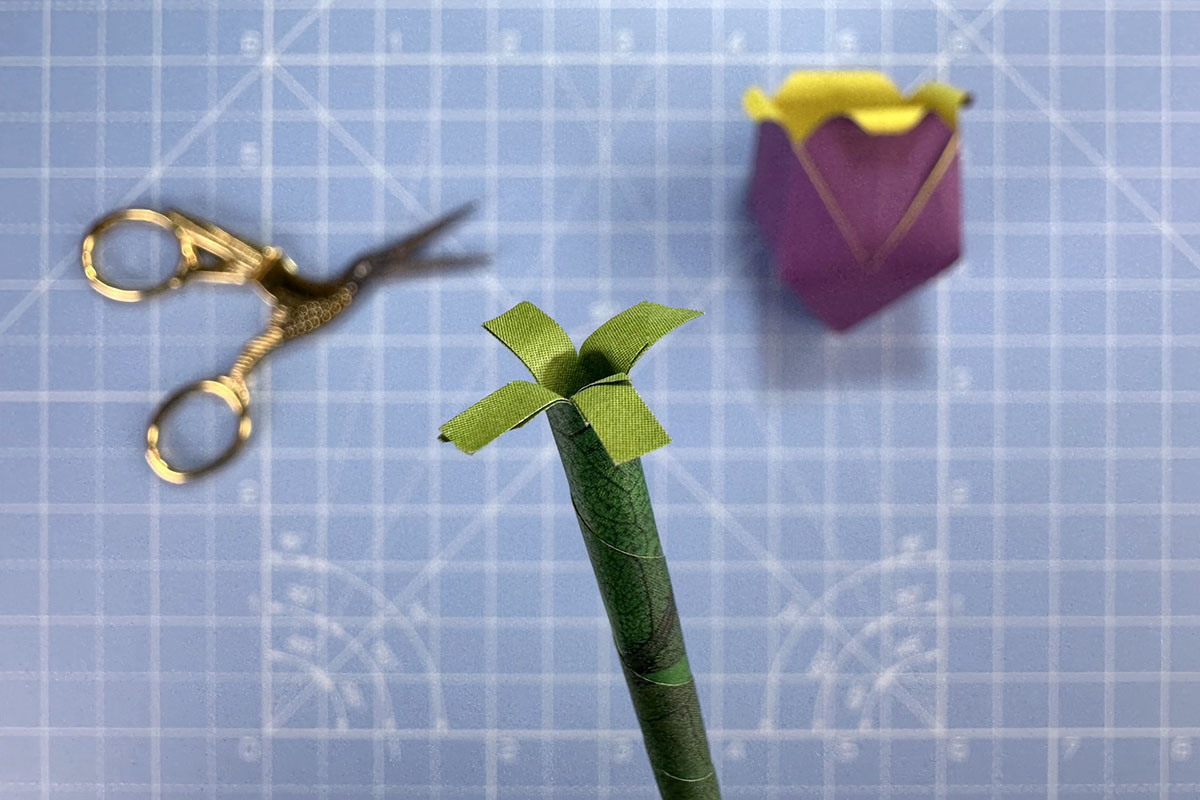
How to make an origami tulip, step 21

Step 2

Cut a fringe at the top of the stalk, and fold outwards.

How to make an origami tulip, step 22

Step 3

Put glue on the bottom of the fringe, and thread the stalk through the flower. Make sure the glued part of the stalk is in contact with the inside of the flower, so that it stays in place. 
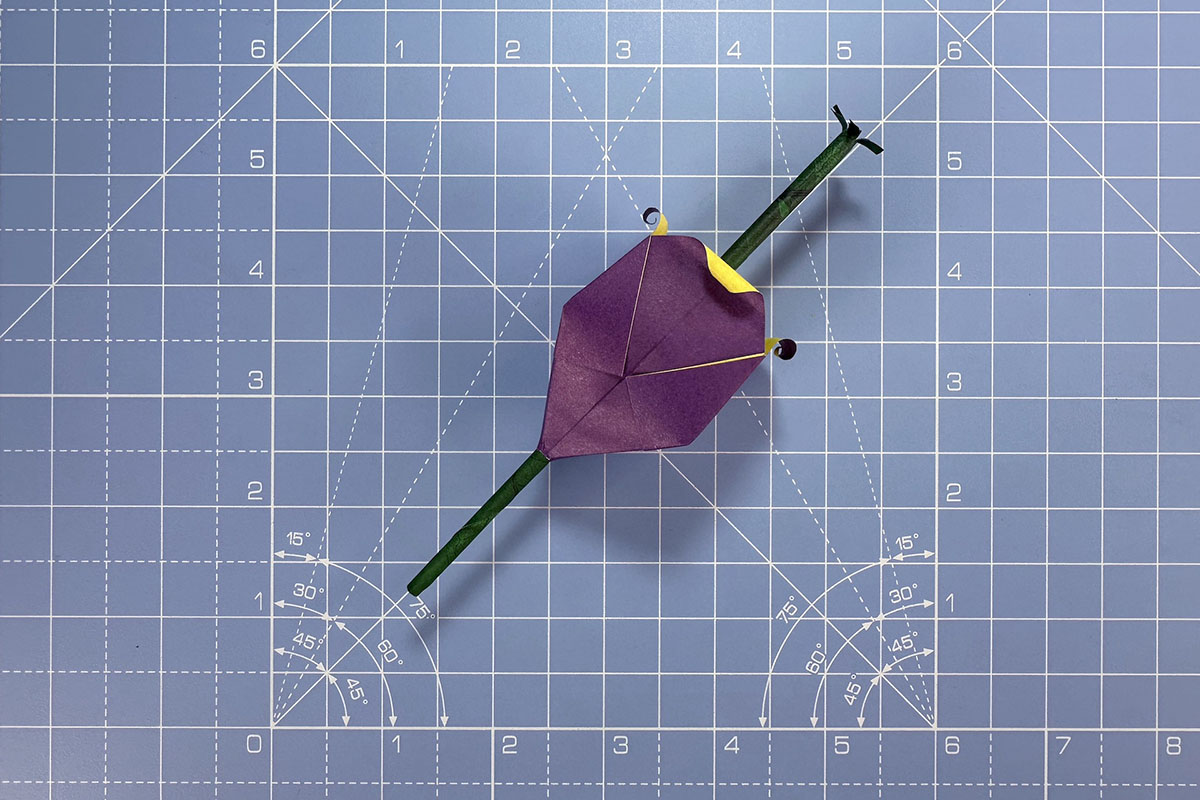
How to make an origami tulip, step 23

Step 4

Finally, glue the leaf onto the stalk. 

Congratulations! You’ve completed an origami tulip.

How to make an origami tulip, step 24

Make an origami tulip to brighten up your office desk

This origami tulip is made of three parts: the flower, leaf and stem. It’s an easy tutorial that anyone can follow, and produces beautiful results every time. 

Whether you’re just starting out on your origami journey, or you’ve already dabbled in origami and are looking for more projects, this origami tulip is sure to impress. 

You don’t need to use special origami paper for this origami tulip tutorial, regular copy paper will do. And don’t worry too much about being neat – origami is as much about the process and losing yourself in the craft, as it is about creating the final model. 

Use a wet glue like PVA glue to secure the pieces of the origami tulip together and get the best possible adhesion. Just remember to hold the pieces in place for a few moments while the glue begins to set. 

Why not make multiple origami tulips in a variety of colours, and arrange them in a glass for a super-easy desk display? Vary the length of the stalks, or make them all the same height for the perfect bunch of paper tulips.

Discover more easy-to-follow origami projects with Gathered

We have a growing collection of origami flowers, right here on Gathered

If you like this tutorial, how to make an origami tulip, you might like to check out our traditional origami lotus, or origami lily