There are many ways to bind off knitting (also known as casting off), and they all have different uses. Sometimes you need a sturdy edge, and sometimes you need something more stretchy.
In this article we'll look at some stretchy bind off techniques that enable you to create a flexible, elastic edge that's perfect for cuffs and hems.
When you're following knitting patterns for hats, socks and more, consider swapping your regular bind off technique for one of the methods below.
Stretchy bind off knitting techniques
There's nothing wrong with using the same basic bind off for every project, but we think that once you've tried these stretchy bind offs you won't want to go back!
Many patterns don't specify a particular bind off method, so it's worth having a few different techniques at your fingertips. With a bit of practice you'll soon be able to identify the best one for each project.
You might sometimes see the instruction to "bind off loosely", but how loosely? Choosing a stretchy bind off instead takes the guesswork out of the process.
There are a few different ways of doing a stretchy bind off, but they all effectively add a bit of extra yarn to the bind-off row in order to make it more relaxed. You can do this with yarnovers, with suspended stitches, or by sewing your bind off rather than knitting it.
You may find that there's one method you prefer, or you might want to swap between them depending on the project (and whether you have a tapestry needle to hand!).
If you're uncertain about your choice, try threading a lifeline into your knitting before you bind off – that way you can try the item on and rip back if you don't like the result.
When to use a stretchy bind off
Items such as toe-up socks can really benefit from having a more elastic edge. After all, you don't want to have trouble pulling those gorgeous new socks over your heel.
Stretchy bind offs can also be useful for baby and children's clothes, as they make sweaters and hats easier to put on and take off.
They're good for lace shawls too! These often need a flexible edge that can be blocked to shape.
You might want to use them for the cuffs and hems of garments as well. They’re ideal for people who want the edges of their clothing to feel looser around their wrists and body.
There are of course occasions when a stretchy bind off is not suitable.
If your yarn already has plenty of stretch, or your knitting tension is naturally loose, then an elastic bind off on top may result in your socks sliding down to your ankles. If you notice flaring on your edge then this may be a sign that the bind off is too loose.
How to do a stretchy bind off
Our first method, Elizabeth Zimmermann’s sewn bind off, is worked into the stitches using a tapestry needle.
The second method, Jeny’s surprisingly stretchy bind off, is worked on two needles in a similar way to a regular bind off, but with added yarnovers before each stitch. It's designed for use on rib stitch, and we show you versions for 2x2 and 1x1 rib below.
Both produce very neat results, the former making a great replica of the cast-on edge if you’re looking for this sort of finish.
Our final technique, the suspended bind off, looks similar to the basic bind off. If you love the appearance of a regular bind off but need it to have more stretch, this is a great choice.
Follow the links below to jump to each step-by-step guide:
Stretchy bind off knitting tutorials
You will need:
- Tapestry needle
- Yarn
- Knitting needles
- Scissors
Elizabeth Zimmermann's sewn bind off
This bind off method is worked the same whichever stitch pattern it is worked over, and there are just a couple of simple steps.
Step 1
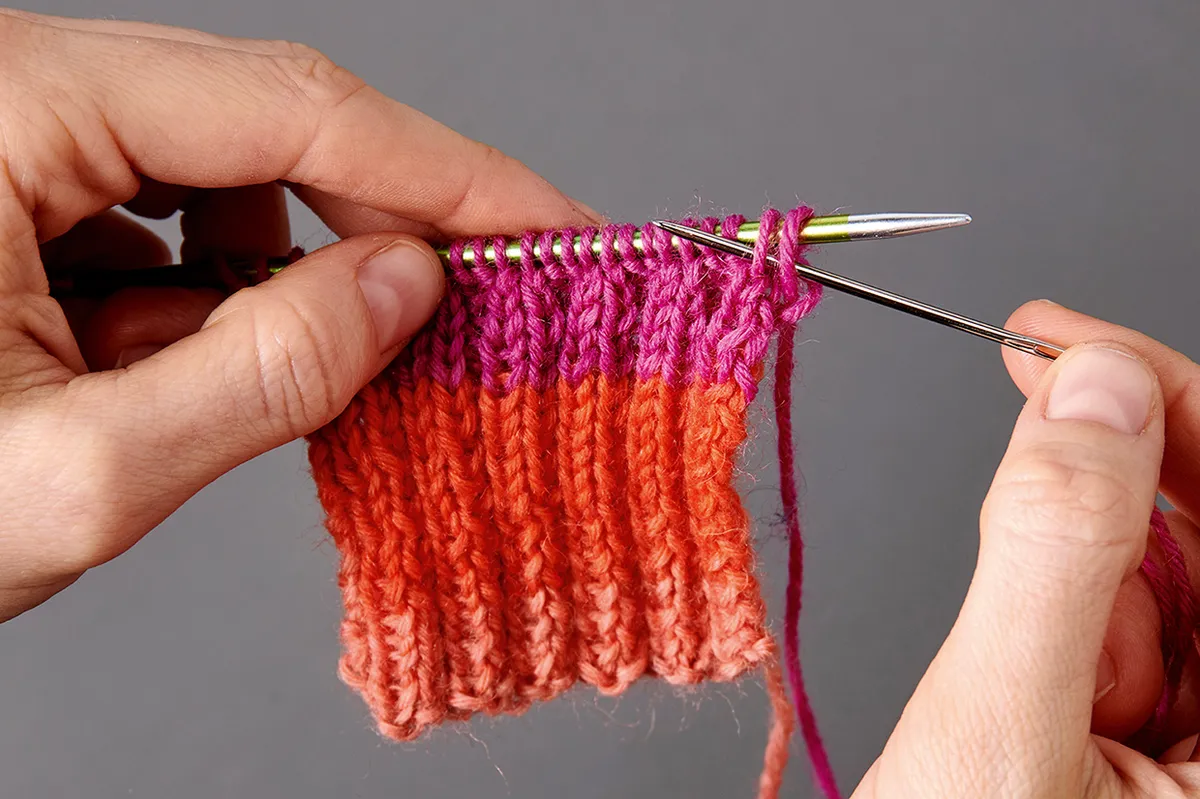
Cut the yarn so it’s at least four times the length of the piece you wish to finish.
Thread the end through a tapestry needle.
Insert the tapestry needle purlwise into the first two stitches and pull through.
Step 2
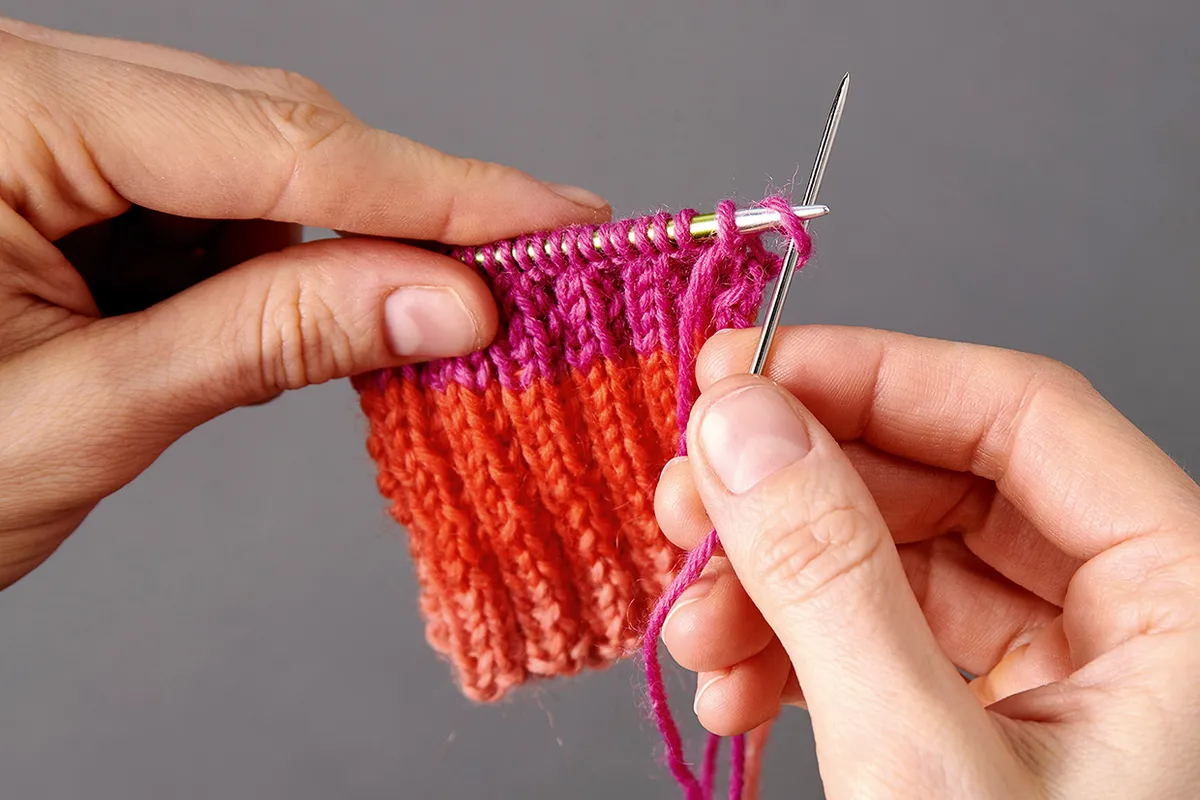
Insert the tapestry needle knitwise into the first stitch on the needle and pull through, knocking this stitch off the needle.
Repeat these two steps until all the stitches have been bound off.
Step 3
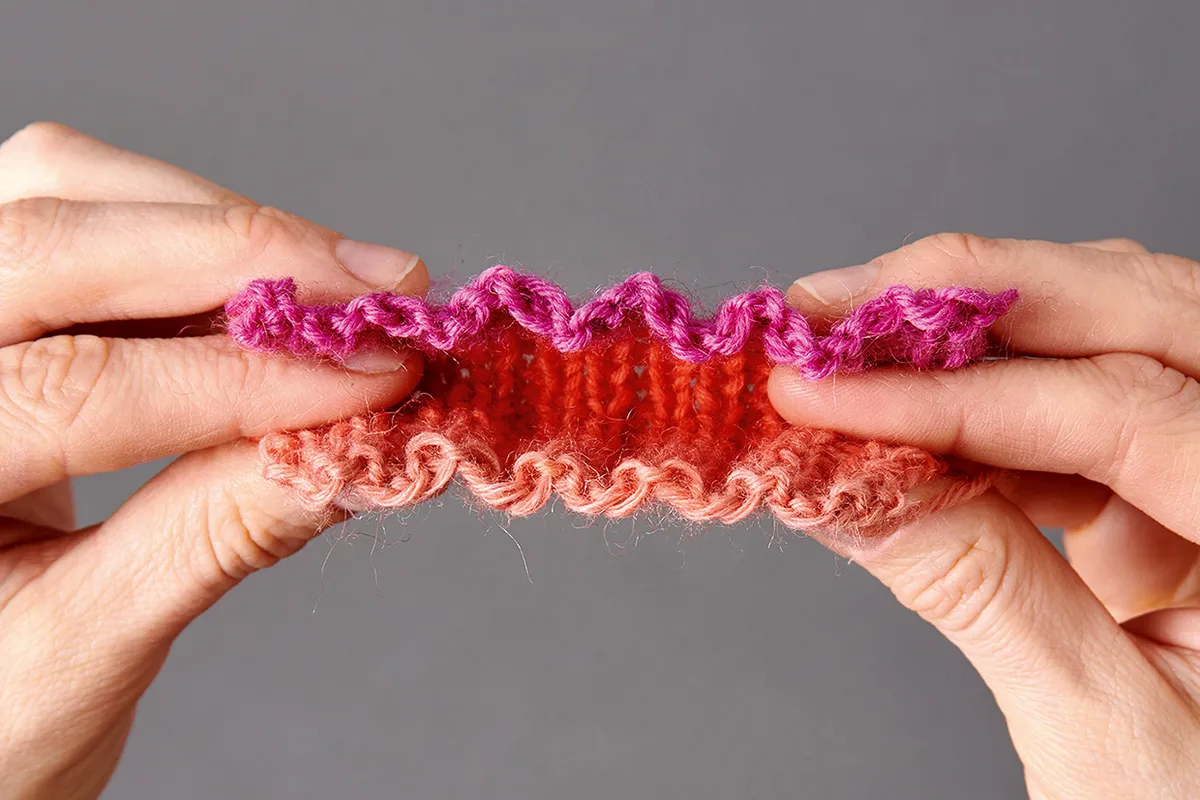
The cast-on and bind-off edges look remarkably similar when the bind-off is complete!
Brilliant bind offs
Learn a bind off technique for every occasion with our guide on how to cast off knitting.
Jeny's surprisingly stretchy bind off
The basics for this bind-off are: before binding off a knit stitch, work a reverse yarnover (yo), knit the next stitch and then pass the yo over.
Before binding off a purl stitch, work a regular yarnover, purl the next stitch then pass the yo over.
When there are two stitches on the needle (knitted or purled), pass the first over the second to bind off one stitch. It becomes easier to remember when you get into the rhythm!
Note that the photo example and step-by-step below is based on 2x2 rib stitch, beginning with K2. Instructions for 1x1 rib are given at the end of this section.
 Make a reverse yarnover by going up behind the right-hand needle, over the top and underneath.
 Knit the next stitch.
 ** Make a reverse yarnover in the same way as before.
 Knit the next stitch.
 Pass the yo over the knitted stitch (2 sts now on the needle).
 Make a regular yo (front over to back and around to the front).
 Purl the next stitch.
 Pass the yo over the purled stitch to bind off (2 sts now on the needle).
 Make a regular yo.
 Purl the next stitch.
 Pass the yo over the purled stitch to bind off (2 sts now on the needle).
 Pass the first purled stitch over the second.


