Guide to pottery techniques: everything you need to know
Pottery is one of the oldest crafts in the world and even in today’s age of mass production popularity handmade ceramics are still hugely popular.
In recent years YouTube, TV and social media platforms have further enhanced people’s interest in this ancient craft, and of course The Great Pottery Throwdown has helped to engage a wider audience and encourage more people to try making pottery.
We’ve teamed up with pottery expert Katrina of Katrina Pechal Ceramics to create this complete guide to making pottery. So whether you’re a pottery beginner looking to make your first pinch pot, or a more experienced ceramicist thinking about investing in a new potter’s wheel, you’ll find plenty of info and advice in this guide.
I remember as a little girl of 11 being introduced to pottery at school. As I watched the potter on the wheel, I was filled with excitement and wonder. That lovely brown gooey mud from the earth was being turned into something before my eyes, a pot, a vessel, an object that you could drink or eat from. Like a magician working his magic. A kind of earthy alchemy that was transformative for me then and still is 45 years later. I’m a working potter and I run a school that teaches pottery and I’m still enthralled by that process.
Katrina of Katrina Pechal Ceramics
A large part of pottery’s appeal is that it doesn’t take years to become proficient enough to be able to make pots that can be used and enjoyed.
There are also many mindful benefits to the process of making pottery. The concentration and patience required help to provide a feeling of well-being and being lost in the moment while you’re making, soothing many of the stresses and troubles of a busy modern life.
Read on to discover our complete guide to pottery techniques, or use the handy links below to go straight to the information you’re looking for.
Your complete guide to pottery techniques: Contents
- How do you start pottery for beginners
- Pottery materials and tools
- Can you do pottery at home without a kiln?
- Do I need a Pottery wheel?
- What is slip in pottery
- What is the easiest form of pottery?
- Pinch pottery
- Coil pottery
- Slab built pottery
- Carving pottery
- Throwing on a potter's wheel
- Pottery tips for beginners
- Main stages in the pottery process
- How to decorate pottery before firing
- How to glaze pottery
- How to fire pottery
- A short history of pottery

How do you start pottery for beginners
Pottery doesn’t have to be a difficult or expensive activity to start and it certainly doesn’t need a lot of specialist tools.
The only issue will be getting pots fired, but finding a friendly potter or pottery centre that would be happy to fire your pots in their kiln will help you get underway until you decide whether it’s a hobby you want to invest in.
If you just can’t wait to get stuck in, we’ve rounded up some of the best pottery kits for adults for all budgets.
Progressing to throwing however means you will need access to a potter’s wheel and we would suggest you start throwing lessons at a class or workshop before purchasing a wheel, as they can be very expensive.
However, for hand-building all you need to get started is the following:
Pottery materials and tools

Clay for pottery
Clay is essentially a type of natural soil that contains various types of clay minerals and is sourced from below ground.
Pottery clay falls into three main categories: earthenware, stoneware and porcelain (technically there are five types as there’s ball clay and fire clay too, but these are actually powders that are combined with other clays).
The main differences between the three clay types are the mineral compositions and the firing temperatures, each producing different clay strengths and flexibility as well as the final colour.
Different clays are used to create different results, with some types being better suited to certain glazes or firing methods than others.
As a rule, pottery beginners will want to start with earthenware clay as it’s easier to work with before firing and requires lower temperatures, but as such produces a more porous and breakable final clay.
At the opposite end of the spectrum, Porcelain clay can be tricky to work with so isn’t the best type of pottery for beginners, but produces an incredibly strong final clay that is white with almost translucent qualities.
Most types of clay are readily available nowadays, including from big online retailers such as Amazon, but you can order clay from specialist ceramic suppliers – we've listed our favourites below.
Where to buy pottery clay
- Potterycrafts 01782 745000 www.potterycrafts.co.uk
- Bathpotters 01761 411077 www.bathpotters.co.uk
- Claymans 01243 265845 www.claymansupplies.co.uk
What are the essential tools for pottery

You can of course buy a huge range of specialist ceramic tools, but most of the tools you require can easily be found in your home:
- Modelling tools – A spoon, knife or other implement can be used to model the clay
- Clay cutting wire – Alternatively, you can use a strong thread tied to a button at each end to use as a wire to cut the clay
- A potters rib tool, used for smoothing clay surfaces – An old plastic credit card or membership card will also work
- A fork to texture the clay
- Wooden spoon to paddle the clay
- Rolling pin to roll out the clay
- Sponge
You’ll also need access to a kiln
Let’s face it, not many of us can afford to buy a kiln or fit one in our homes. Though if this is something you're considering, you can pick up kilns on Etsy these days.
But the good news is that here in the UK there are a number of companies across the country who offer kilns for hire. You can drop off your clay to be fired in the kiln on your behalf and then pick it up later. Here are a few examples:
- British Ceramics Biennial (Stoke on Trent): www.britishceramicsbiennial.com
- The Ceramics Co-op (London): www.ceramicsstudio.coop
- Glasgow Studio Ceramics (Glasgow): glasgowceramicstudio.com
- Rochester Square (London): www.rochestersquare.co.uk
- Kiln Services (Hamilton): offers a portable kiln and wheel hire service www.kiln-services.co.uk
- Ulster Ceramics (Northern Ireland): www.ulsterceramicspotterysupplies.co.uk
- Fired Up (Bristol): www.firedupceramics.org
- Cardiff Pottery Workshops (Cardiff): try a pottery workshop – www.cardiffpotteryworkshops.com
Love the Great Pottery Throwdown? Then you should check out our special podcast episode featuring The Throwdown's Keith Brymer Jones.
Can you do pottery at home without a kiln?
Technically you can make pottery without a kiln, but most of the methods involved will still need you to fire your clay at high temperatures which will require building a large fire or makeshift kiln – so may not be practical for trying at home.
We list a few different methods of firing pottery further down in this article, alongside the kilns for hire above.
One of the easiest ways to try pottery without a kiln is to have a go with polymer clay. This will give you an idea of if you enjoy the process of hand-building pots, and is also great for getting kids involved too.
You may be surprised to learn that you can also bake polymer clay in an oven to harden your creations. Check out our beginner's guide to polymer clay for everything you need to know.
Alternatively, you can also try using air dry clay, which is different to polymer clay as the temperature of the air is enough to make it cure/harden, so no need for baking.
You can learn all about it in our guide on how to use air dry clay, or you might like to try one of our recommended air dry clay kits so you can get making straight away! Once you’ve got your hands on some air dray clay, you can also check out our air dry clay ideas for some fab inspiration.
You don’t need to own or have access to a potter's wheel when starting out on your pottery journey – there are several methods of shaping clay and using a pottery wheel is just one of them. There are other, beginner-friendly pottery techniques where you shape the clay with your hands and simple tools, which are referred to as ‘hand-building’ techniques.
If you do catch the pottery bug, there are companies who offer the service of hiring a wheel. Once you start getting really serious about your ceramics, a potter's wheel can be a valuable investment, but they do come at a cost. Take a look at our pick of the best pottery wheels to buy, or check out these pottery wheels for sale on Amazon.
What is slip in pottery

If you’ve been watching The Great Pottery Throwdown or have been looking at pottery tutorials, you may have heard people referring to ‘slip’ when building their ceramic pieces.
Slip is a liquid ‘clay slurry’ which is mainly used for joining two pieces of clay together, although it can be used for decorative purposes too.
Commonly it is used with the ‘slip and score’ technique, where you scratch or ‘score’ a texture into the clay surfaces that you want to join, then you paint on slip onto the area that you scored. Because the slip is liquid, it can soak and run into the grooves and scratches, which helps to create a stronger join as the clay and slip dry together.
How to make slip for clay
You don’t actually need any different materials to make clay slip – it’s simply clay and water, so it’s essentially liquid clay. There are a few different ways of making slip depending on the purpose you want to use it for, however your everyday joining slip is simple to make.
You just need some pieces of bone dry clay and water. The clay has to be bone dry for this to work – you can’t simply pop a lump of fresh clay in water.
Once you’ve been making pottery for a while, you can easily collect leftover dry pieces in a jar. If you don’t have any, simply make a few thin discs of clay and leave them out to dry on a piece of wood or a wire baking tray for a few days.
Then you just need to break up the pieces of clay as small as you can with your hands (wear a mask when you do this so you don’t inhale the dust), place in a jar and fill with enough water so that the pieces are completely covered.
Leave it overnight to do its magic – as the clay absorbs the water it will start to break down. For a good joining slip you want it to be the consistency of thick cream – not too thick and not too runny. You can add more water or dry clay to alter the consistency if it’s not quite right for your purposes.
What is the easiest form of pottery?
The easiest form of pottery is pinch pottery, as it is simply sculpting a ball of clay with your hands. It can be done with any type of clay, be it polymer, air dry or potter’s clay (most commonly used is earthenware although it is technically possible to make pinch pots with porcelain or stoneware too).
However, most of the hand building pottery methods are suitable for beginners, with the different pottery techniques being used to achieve different shapes and results. The most difficult form of making pottery is definitely spinning on a potter’s wheel.
Can I teach myself pottery?
Many potters are self-taught and most hand-building methods can easily be learnt yourself at home with the help of books or online tutorials (you’ll find links to our tutorials in the next section).
The only exception is using a potter’s wheel, which can be very tricky to master at first. We would recommend attending a class or lesson if you wish to learn to throw on a wheel, as a teacher will be able to help explain and assist with problems much quicker than if you try and figure it out yourself.
How to make clay: 5 pottery techniques
There are five main techniques used in making pottery, which we’ve listed below in order of difficulty.
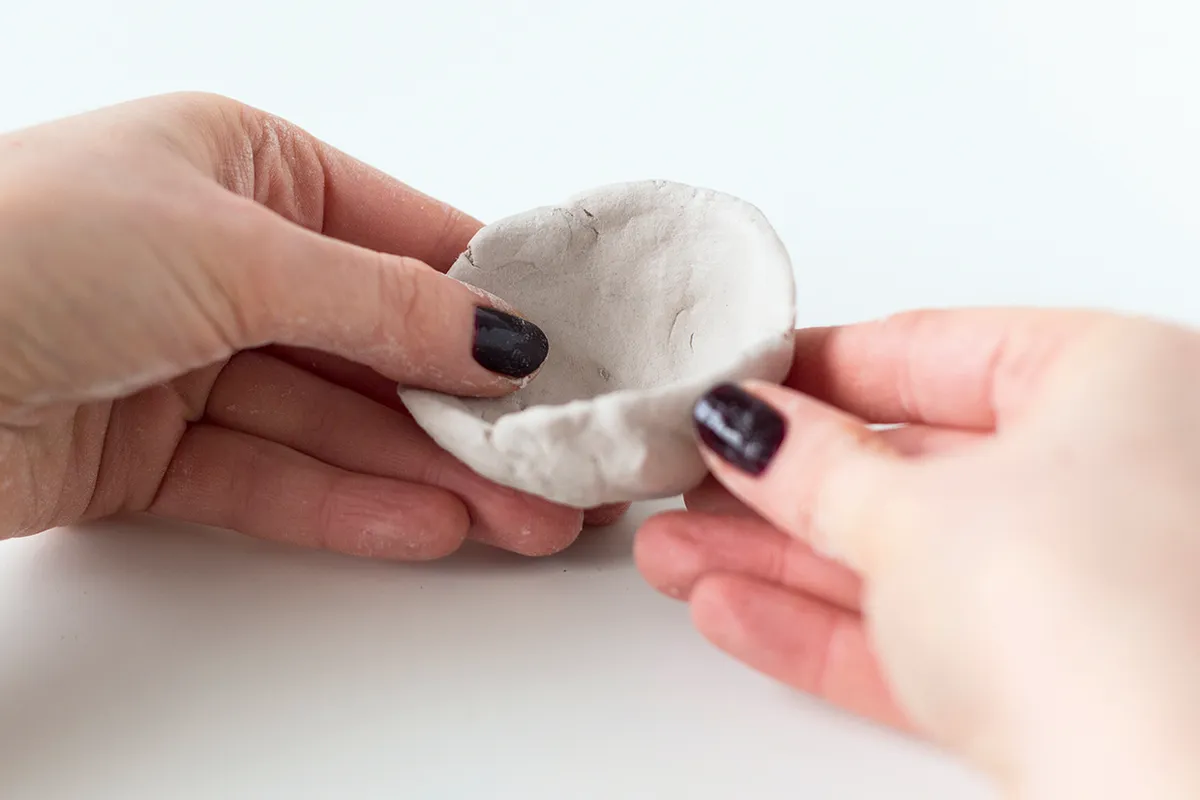
How to do pinch pottery
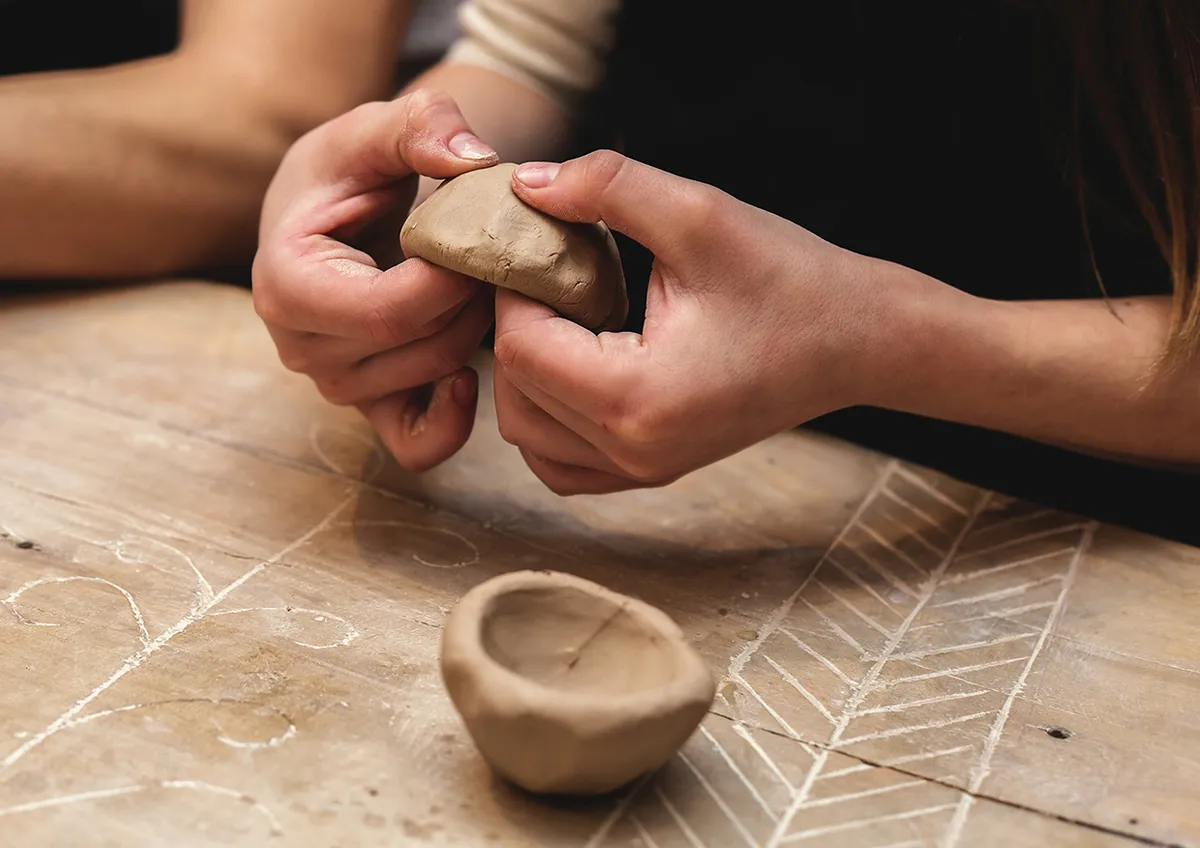
A pinch pot is the simplest way of making ceramic objects, usually used to create smaller pots and items.
You start by rolling a ball of clay in your hands. Then holding the ball in one hand, you use the thumb of your other hand to press into the middle for the clay making a hole, then your fingers can start pinching the clay wall repeatedly as you slowly and evenly turn the ball around.
You need to aim to keep your fingers and thumb straight to get an even pressure, pinching between your thumb on the inside and your fingers on the outside. You continue around until you get the desired thickness and evenness to the wall.
For more information, check out our tutorial on how to make pinch pots.

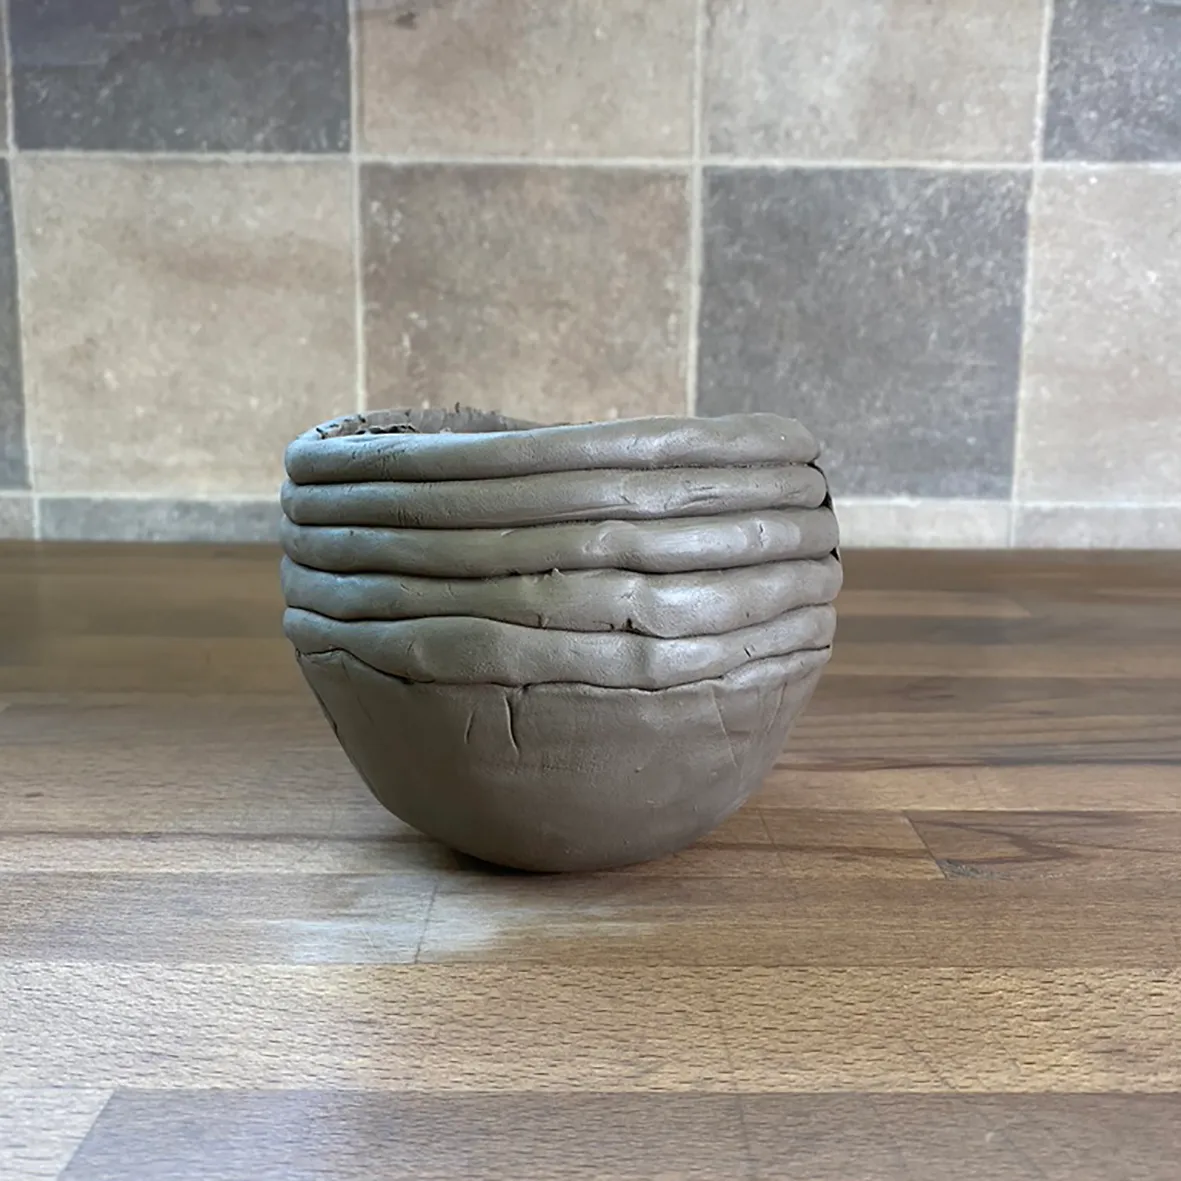
How to do coil pottery

Coil pottery is a fun technique used to create items of all sorts of shapes and sizes. You start with a clay slab bottom, which is either flat or held in a curved form such as a bowl placed on a mat or board that can be easily turned as you work.
Rolled coils of clay are then attached around the edge of the base, with more being added one on top of the other to increase the height and size.
The coils are blended together using a tool or your fingers and can be smoothed afterwards.
The above shows the rolling of the coils, adding and attaching the coils to the top of clay pressed into a bowl which helps to create a curved bottom.
The fabric stops the clay from sticking to the bowl. The beauty of using the coil pottery technique is that you can adjust the size and shape of your piece as you go, using shorter or longer coils to alter the contour of your pot.
Similarly, the thickness of your coils can be altered to obtain thicker or thinner walls of your pot, affecting the final size and strength of your piece.
Give it a go by taking a look at our coil pottery guide.

How to do slab built pottery
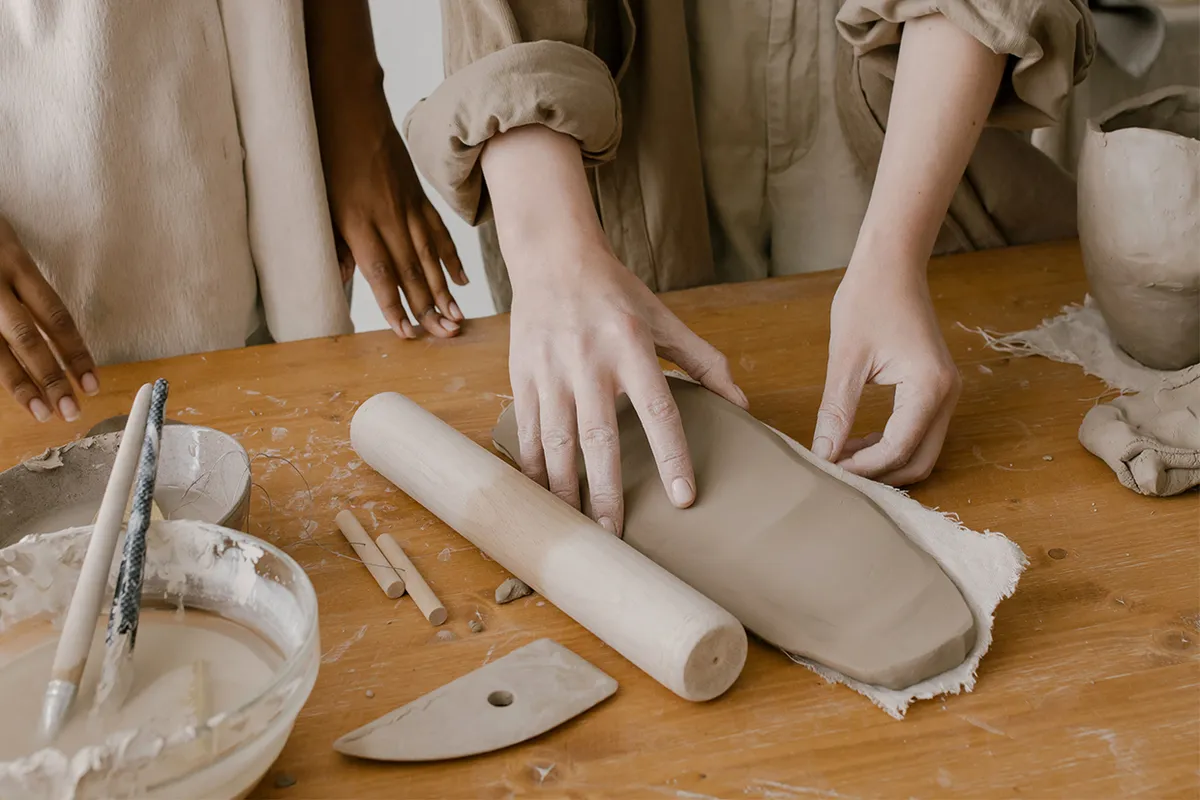
Slab building is the method used for creating geometric shapes and more structural builds. Clay is rolled out into flat sheets that can be curved or left flat, allowed to dry, cut up and finally attached together to make all sorts of forms.
It can be a bit of a balancing act when preparing and perfecting your slabs, as the thickness and dryness of your slab will alter how flexible it is as well as whether it can support its own weight.
However, slab building allows you to make angles and shapes that you could not achieve with other hand-building methods.
Find out more in our Guide to slab building article.

Your guide to carving pottery

This technique in Japan is called Kurinuki. Pottery carving is essentially sculpture in its purest form, where a solid piece of clay is carved out with cutting and scooping tools to make a form.
However, this technique isn’t quite as simple as it sounds. While you can carve your sculpture straight from a block of clay, if you put it straight in the kiln as normal then it’s likely to crack – if not explode!
It’s technically possible to fire solid clay sculptures by using very low and slow firing temperatures and specific clays, however most potters that do pottery carving first carve their shape and then hollow out the insides afterwards.
As you can imagine, the more complicated your carving the harder it is to hollow out, so this is a technique best suited to relatively simple forms or reserved for more advanced potters.
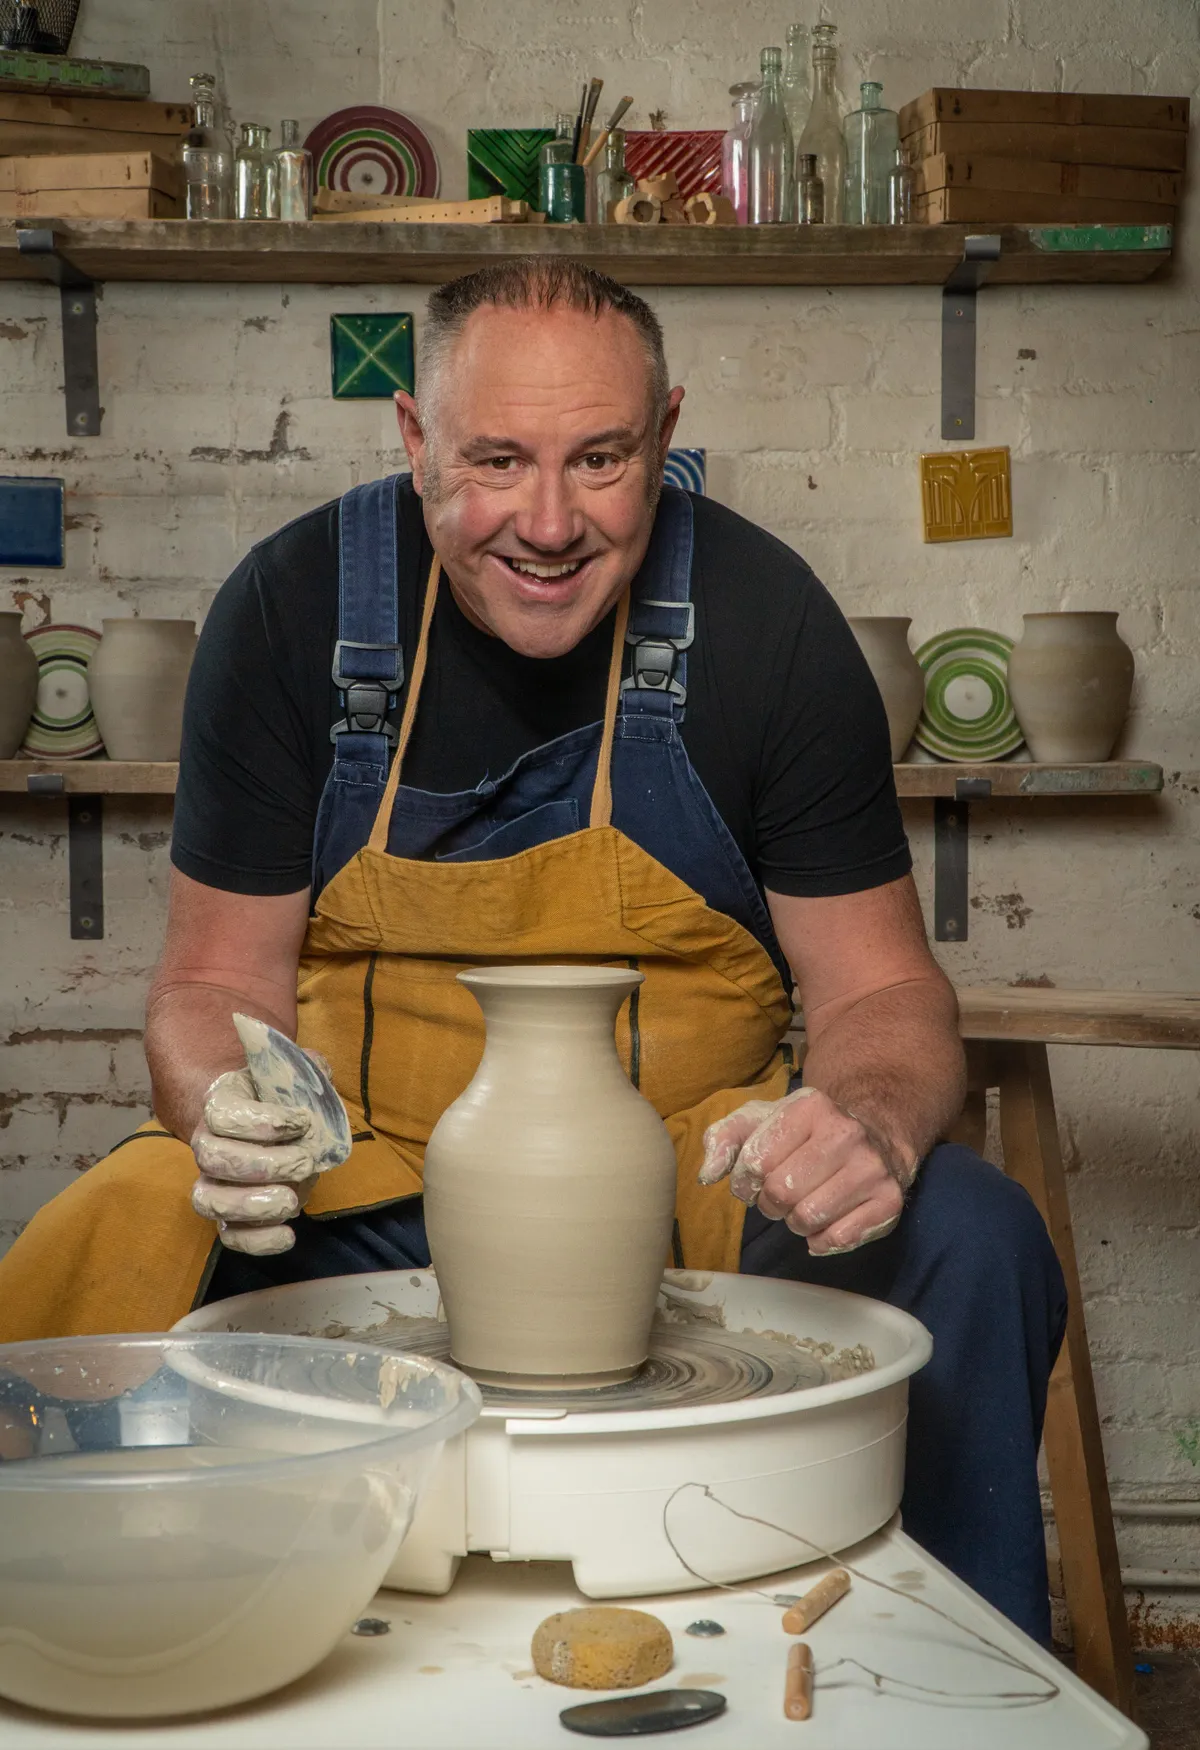
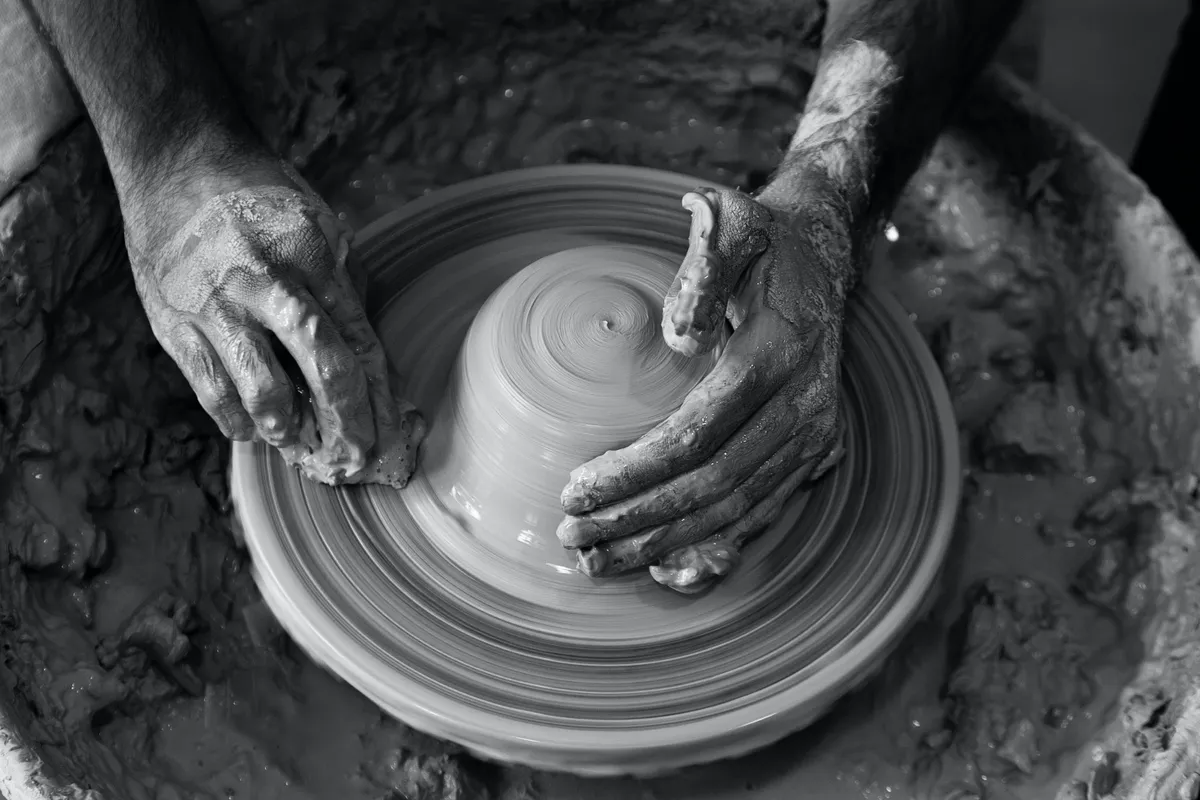
How to do throwing on a potter's wheel
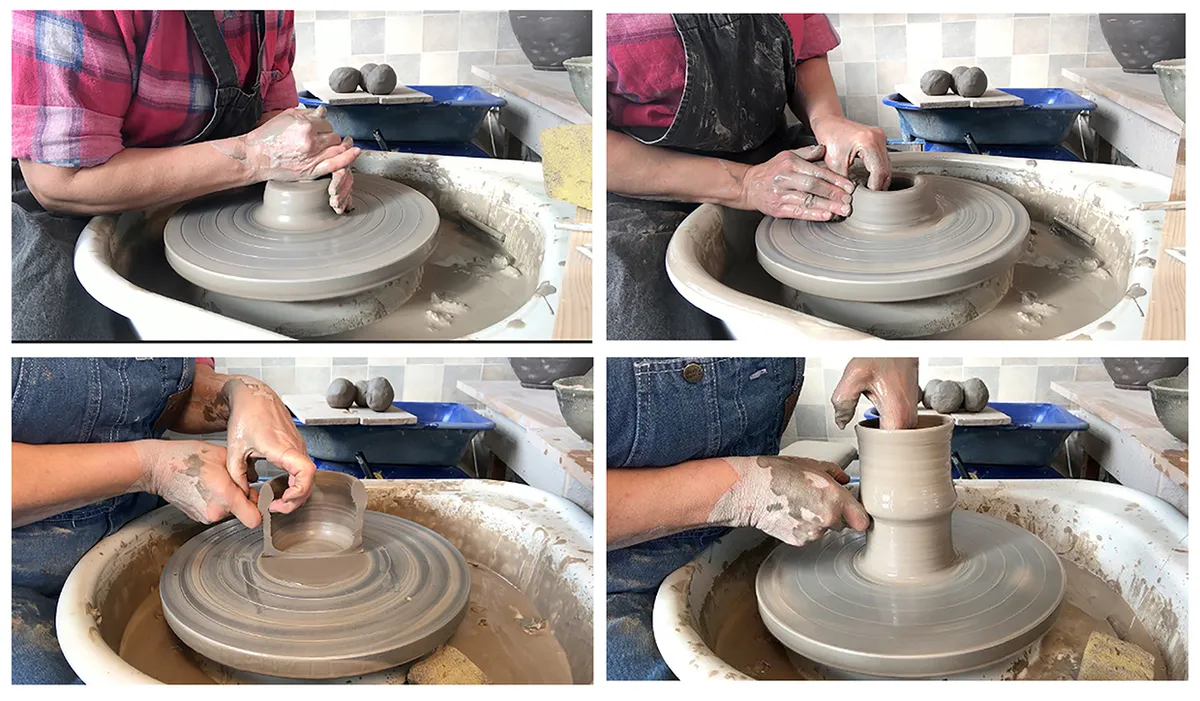
Finally, it’s the technique all of us first think of when we think of pottery – throwing on a spinning potter's wheel.
To simply describe the process, a wet ball of clay is held steady on the spinning wheel and a hole is made in the centre.
The wall is pinched between the fingers of each hand, moving upwards and lifting the clay as the wheel spins. Sounds simple, but there’s a lot more to it than that – speed, pressure, gravity and centrifugal force can all contribute to your pot going wrong in a split second!
A few pottery throwing tips to help you get started:
- Keep your working movements, pressures and speeds steady, even and firm at all times
- Try to keep contact between your hands and use them as one tool
- Keep your body still as you work
- Be firm and confident – not timid and scared
Pottery tips for beginners
- With hand building techniques, as the piece gets bigger or wider, allow it to dry a little before you continue building otherwise your pieces could collapse under the pressure
- Works in progress need to be looked after, wrapped and sprayed with water to stop them drying out or to keep it in a desired consistency between working sessions
- Clay joins are best between clay that is wet or firm but not dry, and with each piece being the same consistency
- To join, the clay should be scored and a little water or slurry/slip applied, then pressed firmly together. Soft clay can be smeared over the join for reinforcement
- The consistency of your clay when working is really important, and can make or break your piece when it comes to shaping, joining or adding texture or decoration. It’s so easy to get this wrong by being too eager and using the clay while it is still too soft, which can lead to it collapsing. Conversely, if you leave the clay too long it dries out and will then crack as you work
- Keep your supply of clay that you’re not using wrapped well to stop it drying out
- Recycling the clay – all dried bits or scrap clay can be collected together in a bucket and covered with water. The dry clay breaks down into a slurry that can wither be used as a slip, or dried on boards and then kneaded back into a useable consistency
Main stages in the pottery process
Making your piece of pottery is just the beginning. You’ll then move on to drying, decorating and firing, so it’s important to be aware of the different stages in making pottery.
- Making and decorating
- Drying
- Biscuit firing
- Glazing
- Glaze firing
How to decorate pottery before firing
Once you’ve made your pot, you need to allow your piece to dry. This is done in two stages; the first is described as leather-hard, where it’s dried and stable but not completely dry and still a little cool to the touch – the perfect time for trimming and tidying up edges or adding texture.
Then it is left to dry further, to what is called the bone dry stage, which is where the clay has lost all of the moisture possible at room temperature – at this point the clay should no longer be cool to the touch.
Before we launch straight into the wonderful world of glazes, we quickly wanted to highlight some of the ways you can decorate your pieces by adding texture to your clay before you fire it:
- Add texture to the clay surface by marking, stamping or incising it at the leather hard stage
- Burnish the surface – by smoothing and compressing the surface until highly shiny
- Try slip decorating – painting, printing, inlaying or trailing coloured clay slips or liquid clays on the clay surface
Here you can see some slip decorating techniques, mono printing with orange slip, scratching through a painted layer of green slip, pressing dried white porcelain crumbs into the clay and using a decorative wooden leaf stamp to texture and pattern the clay.

How to glaze pottery
Pottery glazes open up the creative potential of pottery even further, with a massive range of colours and effects that can be achieved. Glazing pottery is an almost magical process, where chemical reactions occur that can completely transform your piece – the colour of the glaze that you apply before firing can be completely different to how it’ll look after firing.
Find our more about this fascinating process in our complete guide to glazing pottery.

Biscuit firing pottery
Glazes are applied either before or after an initial low temperature firing called a biscuit (or bisque) firing, which is normally fired between 900-1000०C. The biscuit firing leaves the clay strong, but still porous which means it will absorb the glaze.
Glazing pottery
The main glazing methods are dipping, pouring, spraying and painting. Glazes melt in the firing and become a waterproof, glassy, durable surface.
Potters buy prepared glazes or mix up their own from the dry materials purchased from ceramic suppliers. There can be all sorts of textures and colours obtained from different glazes depending on the elements and chemicals used.
How you apply your glazes is of course completely down to your own personal preference. We’ve collected some of our favourite pottery painting ideas to help inspire you!

Glaze firings
There are three main temperature ranges for glaze firings. Potters choose their firing temperatures depending on the effects they want to achieve or the clays used. Glazes on earthenware clay can run or even melt completely at stoneware or porcelain temperatures. Likewise, earthenware temperatures would not be sufficient to mature stoneware or porcelain glazes and clays.
Temperature ranges for glaze firing
- Earthenware – 1000 – 1150°C
- Stoneware – 1100 – 1300°C
- Porcelain – 1200 – 1400°C

Glazes also change depending on the atmosphere in the kiln. Different types of kilns and fuels used can cause different effects.
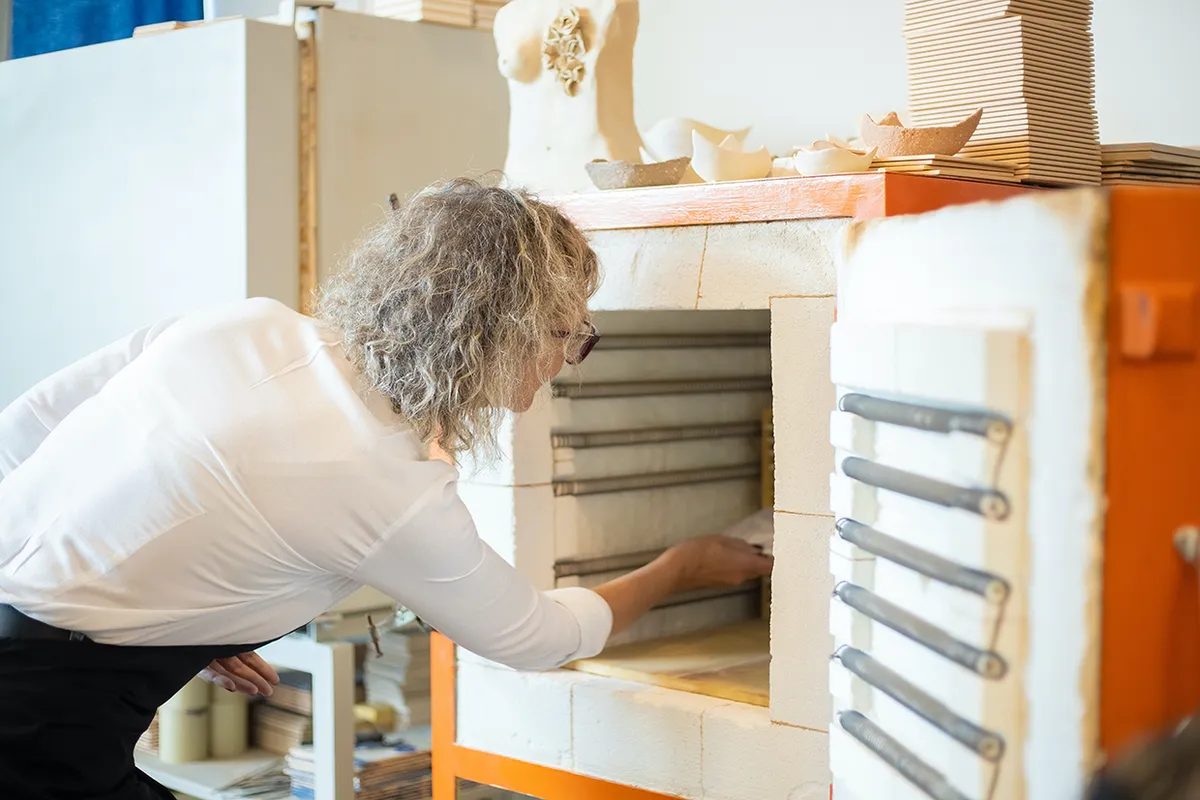
How to fire pottery
There are several different types of kilns and atmospheres used to fire pottery, each achieving different effects and temperatures. Here’s a brief overview of each type of firing process:
- Oxidation – a clean oxygen filled atmosphere achieved using an electric kiln.
- Reduction – an oxygen reduced atmosphere due to the live flame needing oxygen to burn, achieved with a gas wood or oil burning kiln.
- Vapour filled/salt or soda fired – produced by adding salt or soda to a reduction atmosphere at high temperatures.
- Raku firing – a post firing technique when you place your red-hot piece from the kiln into a pit or metal dustbin full of sawdust. The sawdust burns producing interesting effects.
- Smoke or pit firing – building a fire around a biscuit fired and burnished piece in a bin or pit dug in the ground, covering and leaving overnight.
Ready to start getting creative with clay? Check out our pottery ideas for beginners.
A short history of pottery

The oldest pots found in Mesopotamia (modern-day Iraq) are dated from Neolithic times 10,000 – 4,500 BC.
The discovery that clay, when heated, became hard and didn’t disintegrate in water led potters to fire their creations, building fire pits which evolved to what we now know as kilns.
The other invention of utmost importance is the invention of the potter’s wheel. Before the wheel, early potters would sit on the floor and starting with a thick pad of clay supported between their feet, they would beat the clay into a vessel form. Beating the clay from the outside with a paddle and supporting the inside with an anvil, a mushroom-shaped tool, rhythmically patting and turning the clay.
After the invention of the wheel in Mesopotamia around 3 – 4000 BC, potters started using stone or wooden wheels to make their pots on. The wheel was either pushed or kicked around as they worked, enabling potters to spin clay into rounded shapes. Groups of potters started working together, sharing kilns and skills, and so production potting began.
Glazes were almost certainly discovered by potters noticing that some clays, as well as ash deposits from the fire on the pots, were shiny. Ash and clay have all the ingredients needed to form a glaze at certain temperatures, sometimes matte or, when other reactions take place, highly shiny. The Far East, particularly China, were instrumental in the development of glazes and high fired porcelain.
As making methods developed further and slip casting (pouring of liquid clay) was invented in the 18th century by a British potter named Ralph Daniel, potters started using moulds to help form their pots. The era of mass production of pottery began – artists became designers with a team of skilled labourers producing the wares.

Britain led the way in the industrialisation of pottery, with huge pottery firms such as Wedgwood and Minton leading the world. In 1851, the Great Exhibition in Crystal Palace, London, showcased an incredible collection of ornate and spectacular porcelain objects made in Britain. Although it set the scene for a series of world fairs that helped make Britain famous for its pottery, the exhibition was the start of a movement away from mass production. Most of the artefacts exhibited, although skilled, were aesthetically disastrous. Artists and craftsmen had become separated in the vast mechanism that was the factory.
Demand for handmade work increased, which resulted in the Arts and Crafts movement and with it, a belief in a more honest approach to function and materials and a commitment to the enjoyment of the making process. Central to these developments was William Morris, whose ideas influenced artists and craftsmen all over the world. Art schools and museums were set up and, for the first time, artists could share skills and admire pots and objects from many distant countries.
After the first world war, The Bauhaus was established in Germany – arguably the single most influential modernist art school of the 20th century. Practical crafts were placed on a par with fine arts such as sculpture and painting. Functionalism and simplicity swept away the old ideas of fussy ornamental designs in all art forms including architecture, furniture making, as well as ceramics.
At the same time in 1920, Bernard Leach returned to Britain after a period of study in Japan to set up the St Ives Pottery with Shoji Hamada (1894-1978), a fellow student in Japan.
Bernard Leach is considered to be the father of studio pottery. His book A Potter’s Book, first published in 1940, is regarded as a bible of pottery. In it he outlines his working methods, influenced by the ideas of William Morris and the Arts and Crafts movement and by his philosophical approach which involved every aspect of life. He, along with Hamada and Soetsu Yanagi, were key figures in the introduction of Japanese aesthetic culture to the world of modern craftsmanship and of the modern arts of the West to Japan. This became known as the Mingei Movement, preserving traditions of handmade functional objects with Buddhist principles of simplicity to form. They were among the most significant voices in the world of craftsmanship in the 20th century.
Leach’s numerous students and followers developed his ideas taking them back to their home countries, studios and classrooms and his ideas still influence potters today as they continue to explore, discover and push clay to its limits.
Potters like Lucie Rie, Hans Coper and Peter Voulkos, among others, later challenged the craft-oriented tradition of pottery making non-functional sculptural forms.

Mend broken ceramics with kintsugi
Make your shattered pottery more beautiful with kintsugi! Learn the Japanese kintsugi method with Gathered.
Get stuck into the wonderful world of pottery
Now that you’ve learnt all about the main techniques and requirements for making pottery, all you need to do now is get started. This guide will hopefully have inspired you to take that first step into creating ceramics, and once you’ve got the hang of it there’s so much more to learn.
It really is a craft that allows you to experiment and discover new things all the time!
Gift inspiration for pottery fans
If you’re looking for more ways to feed your ceramics obsession, take a look at our pick of the best gifts for potters – you’ll find plenty of inspiring products from tools to books to kits – go on, treat yourself!