How to make a DIY macrame curtain

Give your home that boho edge with Isabella Strambio's DIY macrame curtains!

Try 6 issues of your choice of craft magazine from just £9.99

Published: July 15, 2021 at 8:30 am

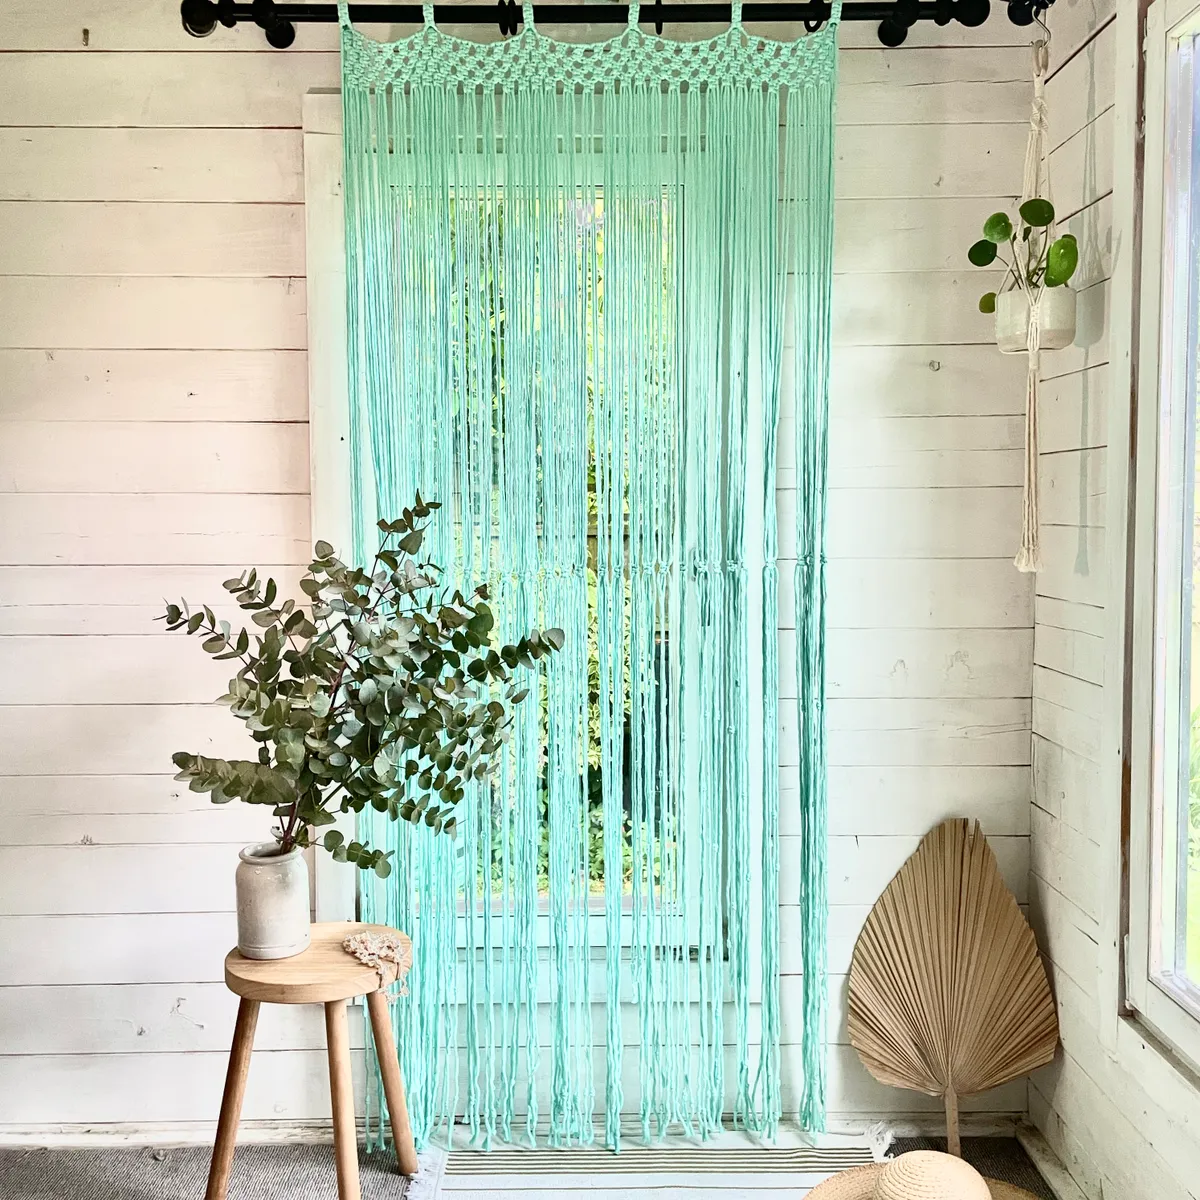
Ok so you've mastered all the basic macrame knots and whipped up a few small projects (macrame belt tutorial anyone?) but now you're ready for something a bit bigger. Queue our resident macrame expert Isabella Strambio and her DIY macrame curtain tutorial! It's a big macrame project but it's still beginner-friendly, meaning it's the next step for you in your macrame making journey. These macrame curtains are made from this gorgeous mint green cord (but you could make yours whatever colour you like) and will add a splash of colour and boho realness into your home. We can imagine it swaying in the summer breeze as it leads you to the garden or even over the door to your bedroom for a 70's boudoir experience. Coupled with a macrame plant hanger and a macrame wall hanging, they'll turn your home into a handmade dream. These macrame curtains would also make a great gift for a crafty pal or even as a project for a crafting session. Just grab your favourite macrame cord, a couple of pals and spend the afternoon knotting.

Once you've made your DIY macrame curtains make sure you check out our other free macrame patterns and maybe pick up Isabella's macrame book too! Now over to you Isabella for the tutorial...

How to make macrame curtains 2

Materials:

  • 190 meters of 5mm macrame string (we used colour Mint by Macrameuk.com)
  • Measuring tape
  • Masking tape
  • Scissors

Preparation:

Cut

  • 1 x 5 meters
  • 10 x 5 meters
  • 40 x 4.5 meters

Finished size

Size: 1 x 2 meters

Fits rod to max 25mm diameters

How to make DIY macrame curtains

You will need:

  • Macrame string
  • Measuring Tape
  • Masking tape
  • Scissors

Step 1

STEP 1

Take the 1 x 5-meter guide string and mark with a piece of masking tape on a flat surface with 2 meters on the left of the mark and 3 meters on the right.

Step 2

STEP 2

Place 2 x 5-meter strings on the guide string using the Lark’s Head Knot.

Step 3

STEP 3

Tie 9 to 10 consecutive Square knots about 10 cm long.

Step 4

STEP 4

Fold the sinnet of Square Knot on the back. Take the first and last string and fold once around the guide string.

Step 5

STEP 5Make a Square knot to fix the ‘ring’ of Square Knots.

Step 6

STEP 6

Tie 10 x 4.5-meter strings on the guide using the Reversed Lark’s Head Knot.

Step 7

Repeat steps 2-6 until you have all your strings on the guide and 5 ‘rings’ of Square Knots.

Step 8

Next, put aside for now the two ends of the guide string so you don’t use it by mistake.

Step 9

STEP 9Starting from the left, tie 2 consecutive Square knots and repeat with all your strings.

Step 10

STEP 10

Next, make a new row of 2 consecutive Square knots.

Step 11

STEP 11

Tie two more rows of 2 consecutive Square knots.

Step 12

STEP 12

Measure about 1 meter from the top and tie a new row of 2 consecutive Square knots.

Step 13

STEP 13

Add one or two Barrel knots to your strings to add detail and stop them unraveling.

Step 14

STEP 14

To tie a Barrel knot, take a string and make a loop.

Step 15

STEP 15

Tie the end of the string three times around the loop.

Step 16

STEP 16

Pull gently to make the knot.

Step 17

Trim the strings to the desired length and you're macrame curtain is complete!

We hope you’ve enjoyed Isabella’s DIY macrame curtain tutorial. For more macrame goodness make sure you check out Isabella’s other macrame tutorials like her macrame bunting, macrame bracelet, and her DIY Christmas macrame star.

Looking for more macrame projects? Check out our free macrame patterns.