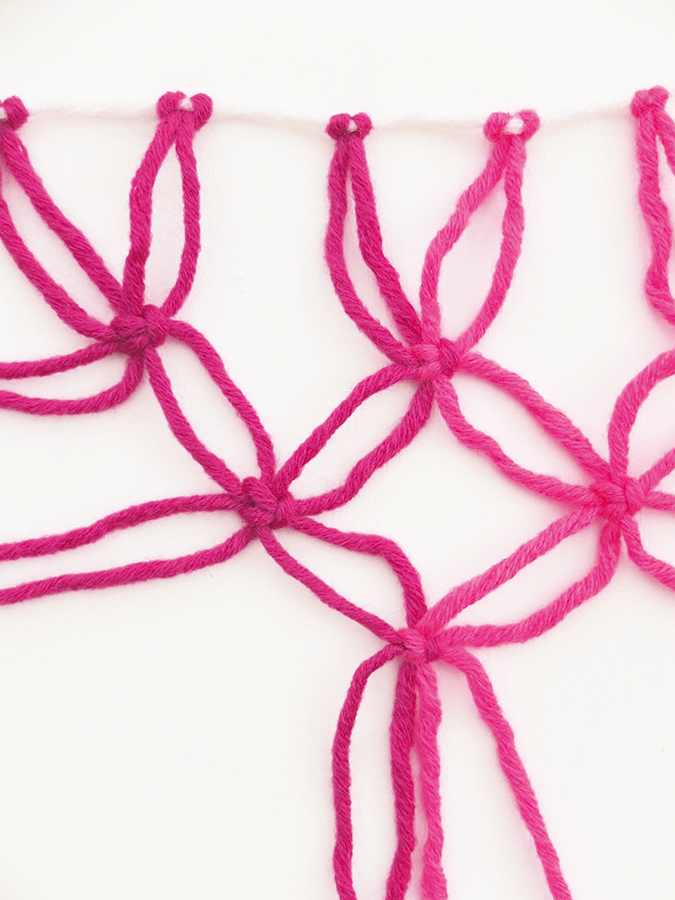
Beginner macrame wall hanging

Add a splash of colour to your walls with Chloe Hardisty’s fun beginner macrame wall hanging.

Try 6 issues of your choice of craft magazine from just £9.99

Published: October 29, 2020 at 11:37 am

Make your own mini yarn bomb with this fun jelly and ice cream- inspired macramé garland. Use any yarn you have lying around – just make sure it’s quite chunky, otherwise you may find it a bit fiddly. The Myboshi yarn by DMC that we used is an ideal thickness. We went for five different shades to create a fade-out effect, but you could use more or less. To add interest, you could attach some beads to the hanging yarn strands.

This project was created by Chloe for Mollie Makes magazine – for more easy-make craft projects and creative inspiration, subscribe to Mollie or click here to find out more.

Materials

  • DMC Myboshi yarn in Magenta 162, 6m (yarn 1), Neon Pink 182, 9m (yarn 2), Raspberry 139, 9m (yarn 3), Powder 142, 9m (yarn 4) and Ivory 182, 6m plus 2.25m for the baseline (yarn 5)
  • Scissors
  • Washi tape

Beginner macrame wall hanging tutorial

To learn more basic macrame skills and knots check out our library of basic macrame knots post. We also have a macrame for beginners post which is full of tips.

Looking for more macrame projects to make? Check out our pick of the best free macrame patterns.
You will need:

  • Yarn
  • Washi tape
  • Scissors

Step 1

Beginner macrame wall hanging step_1

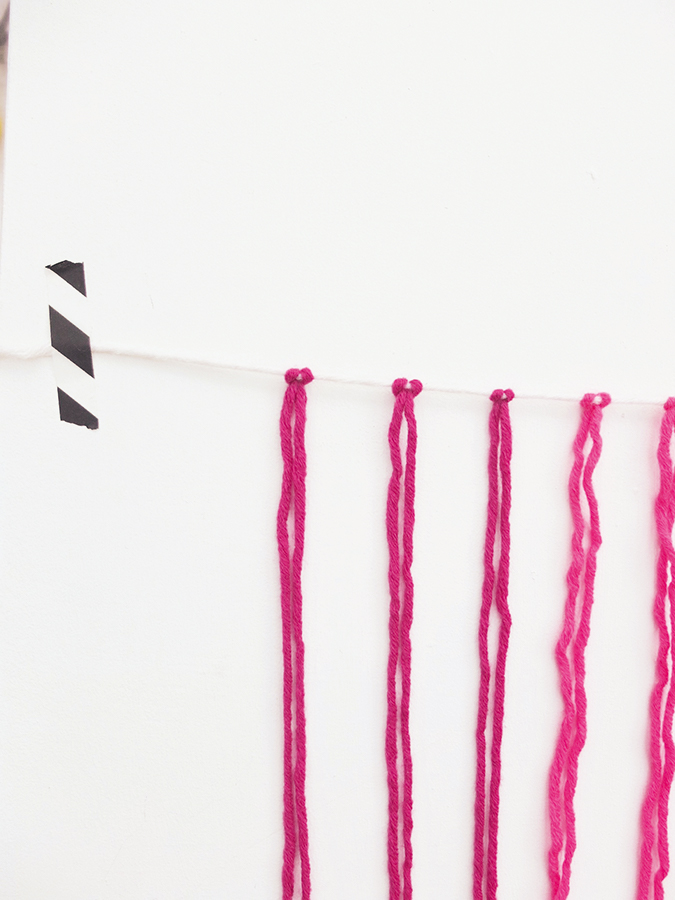
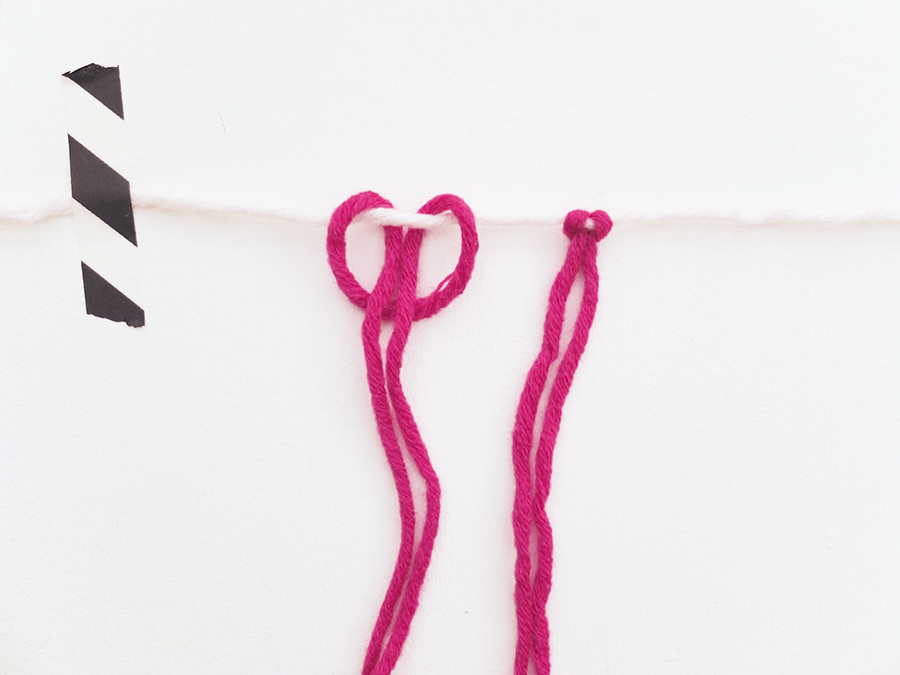
First measure out a length of yarn for tying your pieces to. This will form the base of your garland. Ours measured 2.25m (21⁄4yrd), but you can make it as long or as short as you like. Then cut the lengths for knotting on to 1m (1yrd) each. They’ll be tied onto the base yarn so they hang in two 50cm (193⁄4") lengths.

To follow our design cut three lengths of yarn, 1m (1yrd) long each, for each colour section using this pattern:1,2,3,4,5,4,3,2,1,2,3,4, 5. For the very last colour on the right hand side, you’ll only need two lengths instead of three.

Use some washi tape to secure your wool to a surface while you’re knotting, so that it stays fairly still. Don’t pull it too tight, though – leave it a little loose.

Step 2

Beginner macrame wall hanging step_2

Once you’ve tied all your threads on you can start to make your knots. We’ll be working the knots from left to right, and each one should be about 2.5cm (1") apart.

Step 3

Beginner macrame wall hanging step_3

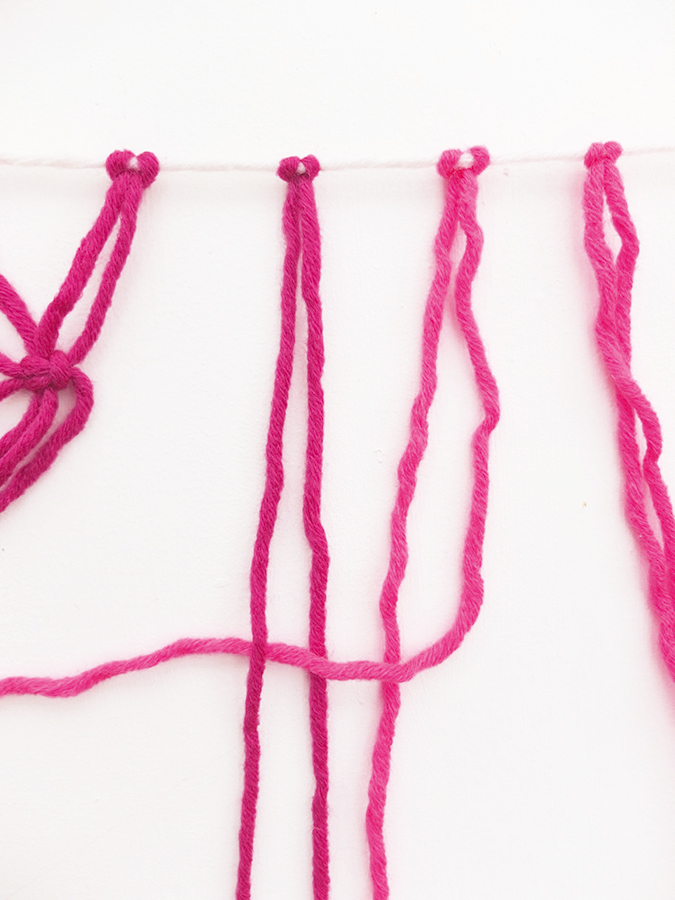
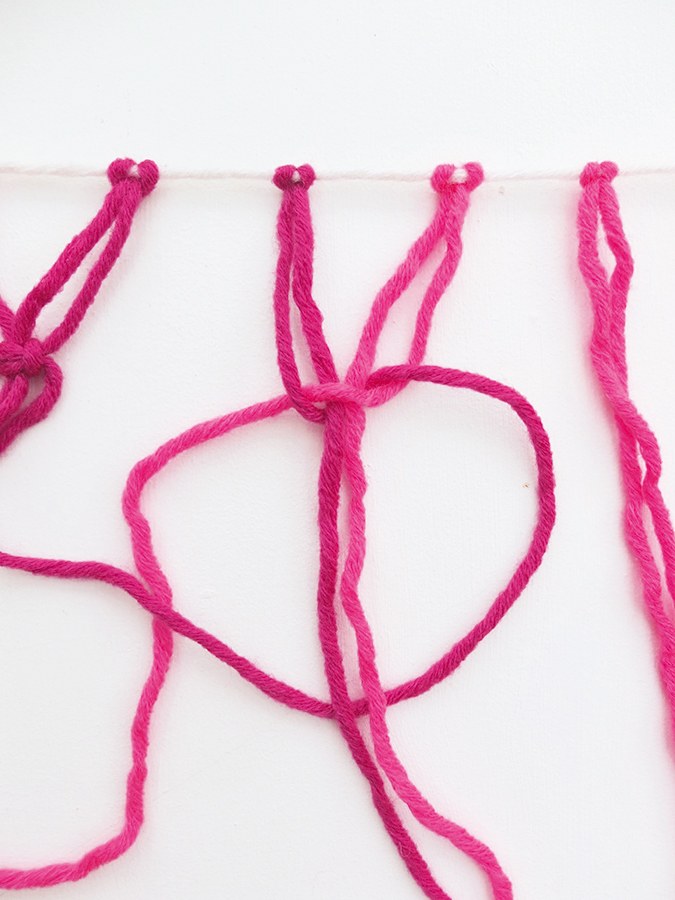
The knot we’re using is called a square knot. You need four strands in each knot, so you’ll be working with the first two sets of wool tied onto your line. The pictures show the second knot along to the right, as the different colour strands make it easier to see the technique.

The two middle strands stay still the whole time – you’re just moving the left and right hand strands. We’ll call the left strand A and the right strand B. Take B to the left over the two middle strands and under A.

Step 4

Beginner macrame wall hanging step_4

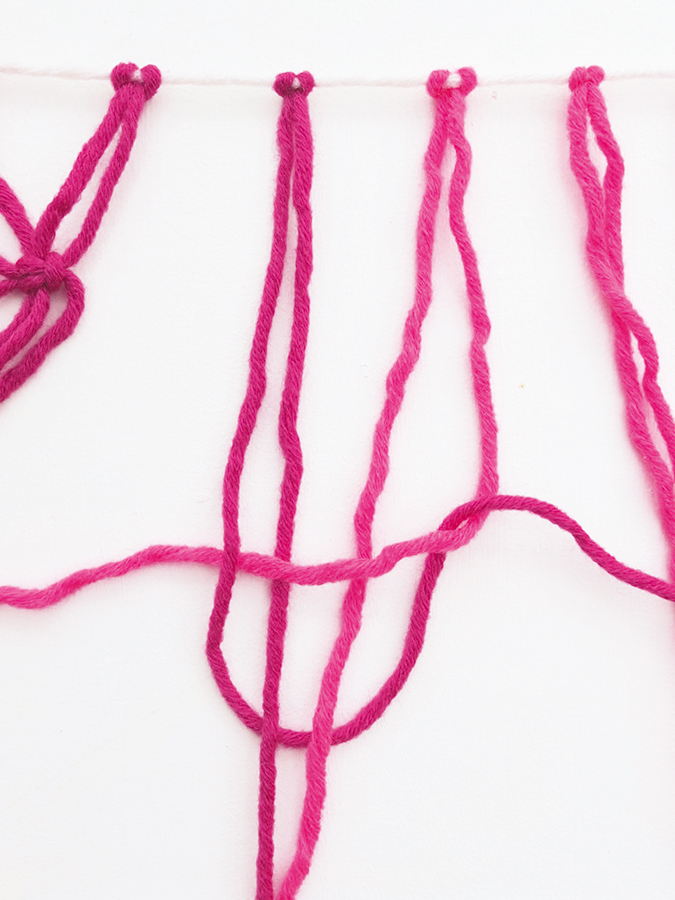
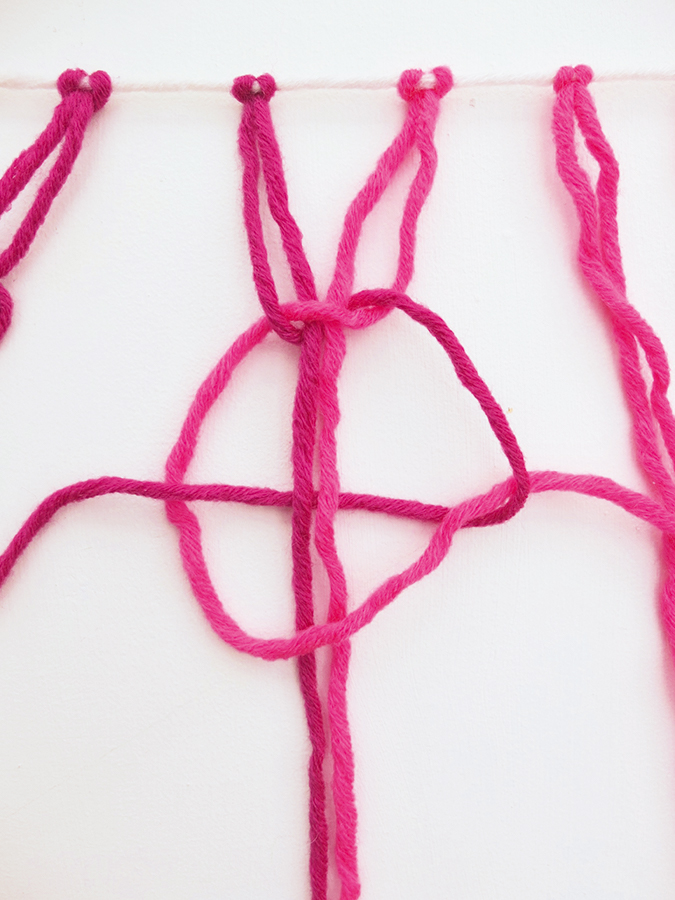
Bring A to the right, under the two middle strands, up through the loop and over strand B.

Step 5

Beginner macrame wall hanging STEP 5

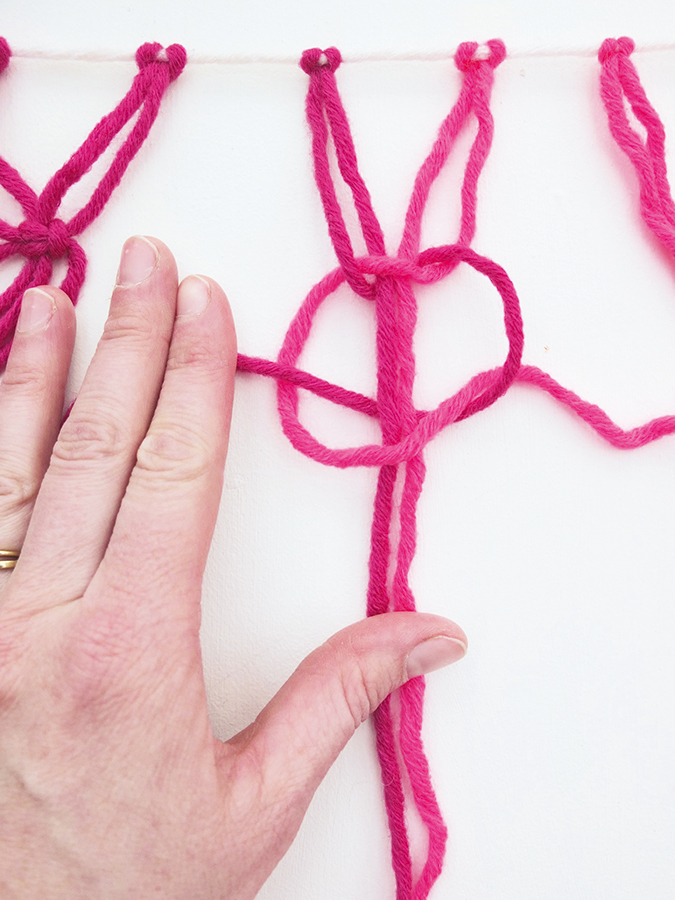
Pull the knot tighter so you have about 4cm (1 /8") between the base knot and this new knot you are tying.

Step 6

Beginner macrame wall hanging STEP 6

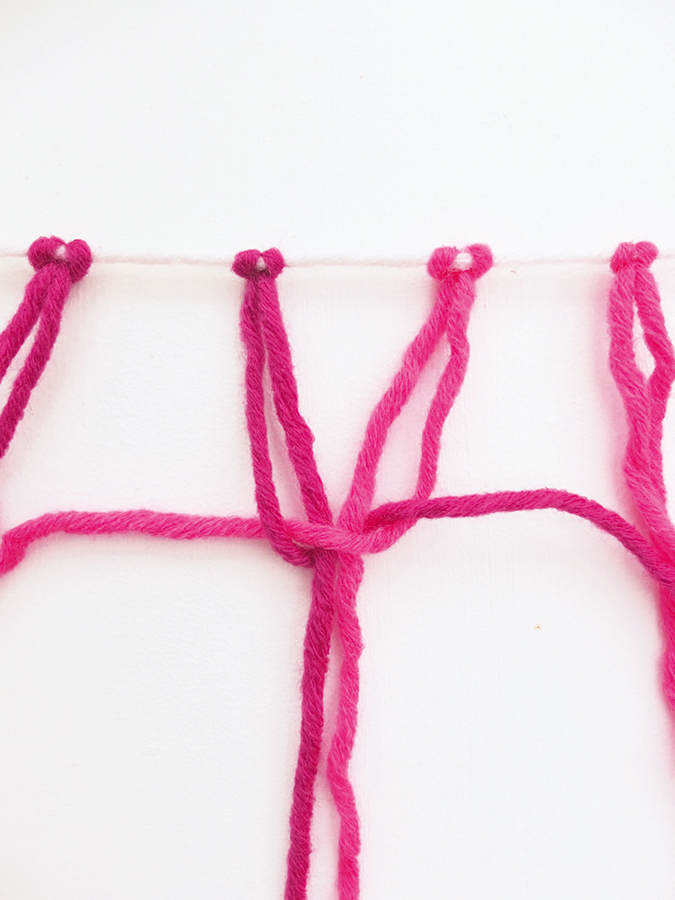
To finish the knot, bring strand A (which is now on the right hand side) to the left, going under the middle strands and over strand B.

Step 7

Beginner macrame wall hanging STEP 7

Bring strand B back to the right, going over the middle strands and through the loop that has been created with strand A.

Step 8

Beginner macrame wall hanging STEP 8

Pull the knot tight, keeping your thumb on the middle strands so they don’t ride up. You’ve now created your first knot. Push it to the side and start your second knot, repeating this all along your row of yarn from left to right. Once you’ve completed your first line of knots you’re ready to start again at the left hand side and create your second row.

Step 9

Beginner macrame wall hanging STEP 9

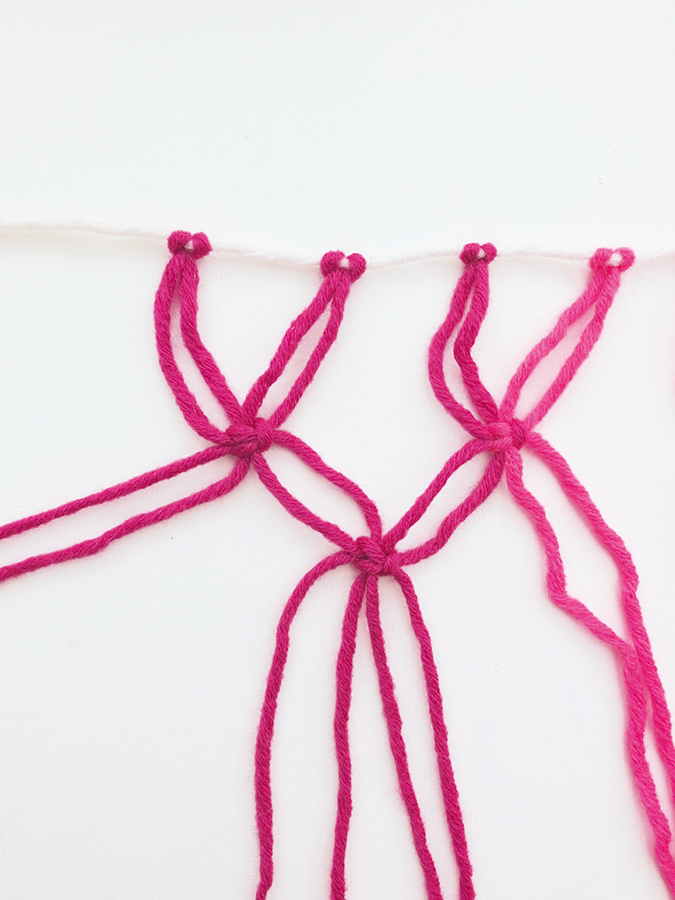
This time round you won’t use the first set of wool (the first two strands) in order to create an offset or ‘net’ effect. Knot along the line as you did before. To make the pattern even, don’t use the last two strands on the right hand side either.

Step 10

Beginner macrame wall hagning STEP 10

Now you’re ready to knot your third and final row. Again, don’t use the first two strands of wool, as shown in the picture, and don’t use the last two strands of wool on the right-hand end. Once you’ve completed this line, just trim the bottom ends of the garland, then find somewhere to show it off.

If you have some yarn leftover save it for our plant hanger project! Learn how to make a macrame plant hanger with our easy tutorial. 

We hope you enjoyed making Chloe’s project. Share a picture of your beginner macrame wall hangings with us on Instagram using #molliemakers, and don’t forget to subscribe to Mollie Makes to get creative inspiration delivered to your door every month!

For more macrame goodness check out our macrame bunting and DIY garden chair projects.