
Brighten up your look with this trio of pretty embroidered pendants in a variety of colours and styles. The first design is stitched on rich navy blue fabric featuring two woven wheel roses and white berries. The second is a cream fabric adorned with a spikey blue holly. Finally, the third is stitched on a dusky pink fabric featuring a duo of red woven wheel roses and surrounded by delicate mistletoe. Each design features realistic blooms of flowers created using the raised technique of woven wheel - also known as a woven spider web or woven rose.
These fabulous little pendants are quick to make and inexpensive to whip up, making them the perfect candidate for homemade gifts! If you know someone who loves jewellery, flowers and everything homemade, then these are perfect. They can also be made into brooches or used as trinkets if you prefer.
These are a great project for beginners and will make satisfyingly quick stitches for the pros out there. If you need some advice on embroidery or any of the stitches listed below please visit our embroidery guide for beginners.
The trio of embroidered pendants was designed by Rebecca Reid and first appeared in Love Embroidery issue 7. Looking for similar projects? Sign up for our newsletter to get weekly inspiration and free patterns.
- How to embroider clothes: Your guide to updating your wardrobe!
- Make a DIY tote bag with easy embroidered details
- How to make positive embroidered badges
Stitches key for the embroidered pendant
- Satin stitch
- Stem stitch
- French knot
- Lazy daisy stitch
- Woven wheel (see the guide below)
- Fishbone Stitch
Embroidered pendant materials:
- Cotton fabric: 15x15cm, cream, pink or navy
- Mini embroidery hoop frame: 4cm diameter (ours is from Love Crafts)
- Stranded cotton: 1 skein each of blue, green, pink, red, turquoise
and white - Craft glue
- Basic embroidery kit
Free embroidered pendant template
You’ll also need the free embroidered pendant template.
How to do a woven wheel stitch:
At the heart of this project is the woven wheel stitch. Below we will show you step-by-step how it is done! Each Woven Wheel is formed of a base of spokes made from Straight Stitches, then a separate thread is woven in and out of the spokes. You need to work an odd number of Straight Stitches to allow the weaving part to work. This is usually five stitches but if you’re working a large Woven Wheel then it will be better to work with seven or more to keep the woven stitches close to the fabric. Use a sharp needle for working the spokes and a blunt tapestry needle for weaving the stitches to guard against accidentally piercing the fabric as you weave.
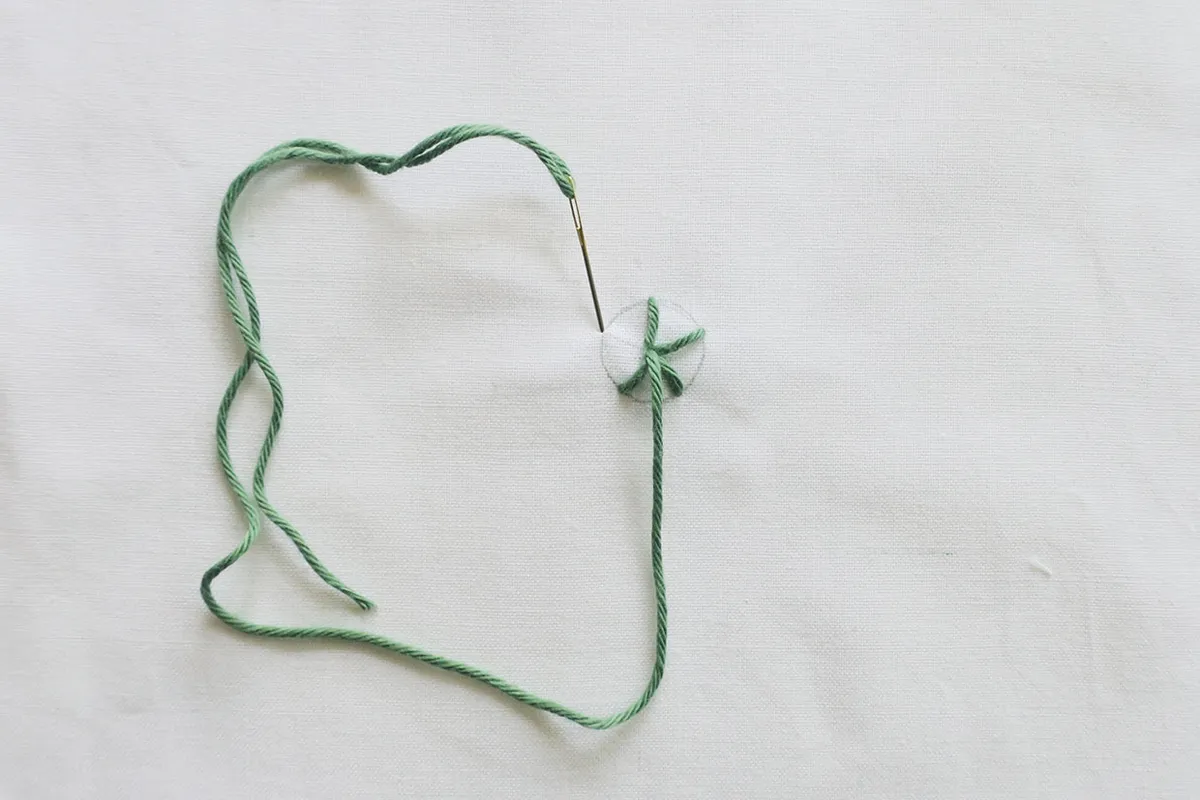
Step 1
Draw a circle on your fabric to the size you want your Woven Wheel to be, then mark evenly-spaced spokes around the circumference of the circle. To work the spokes, come out of the centre of the circle and then in at one of the marks you made on the edge of the circle. Come out again at the centre and in at the next outer mark and so on until you have worked all the spokes.
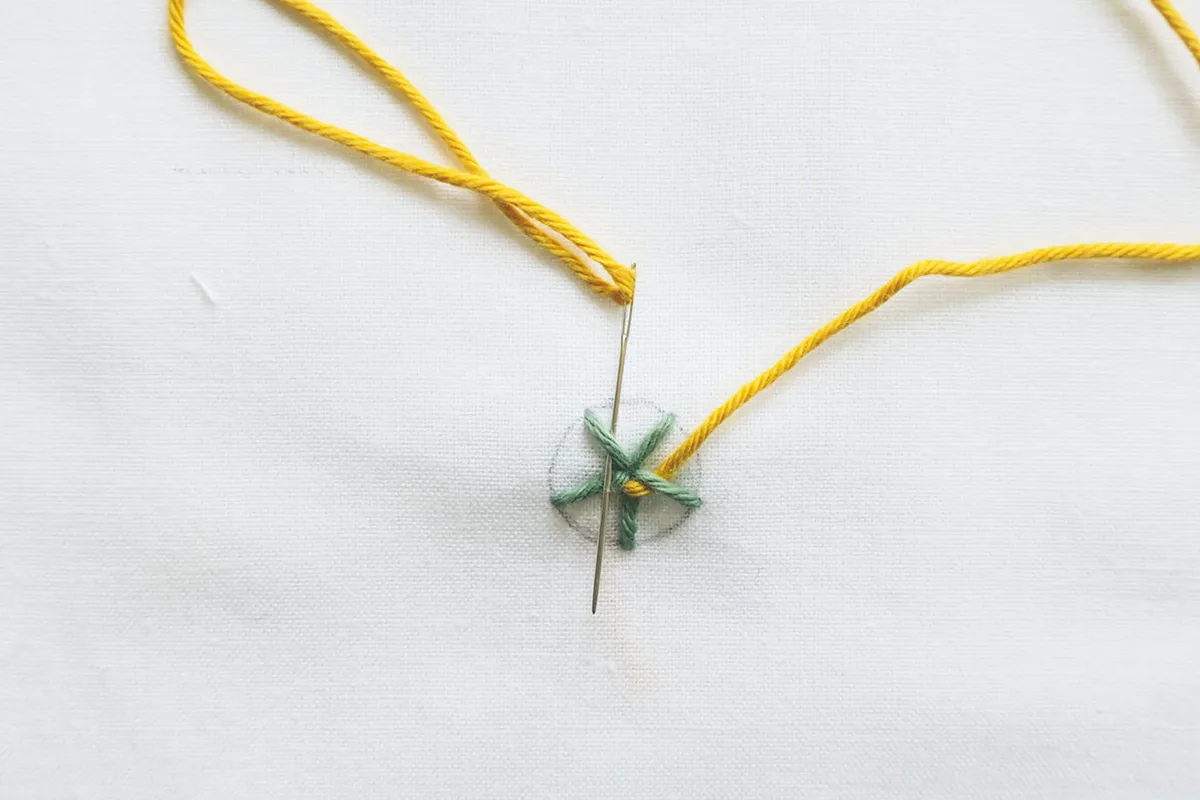
Step 2
Bring the weaving thread out under one of the spokes at the centre of the circle and then thread it into a blunt needle. Weave the thread under and over each spoke alternately. Usually, you would work the spokes and weaving stitches in the same colour so the spokes don’t show, but we have shown it here in a different colour to make it easier to see.
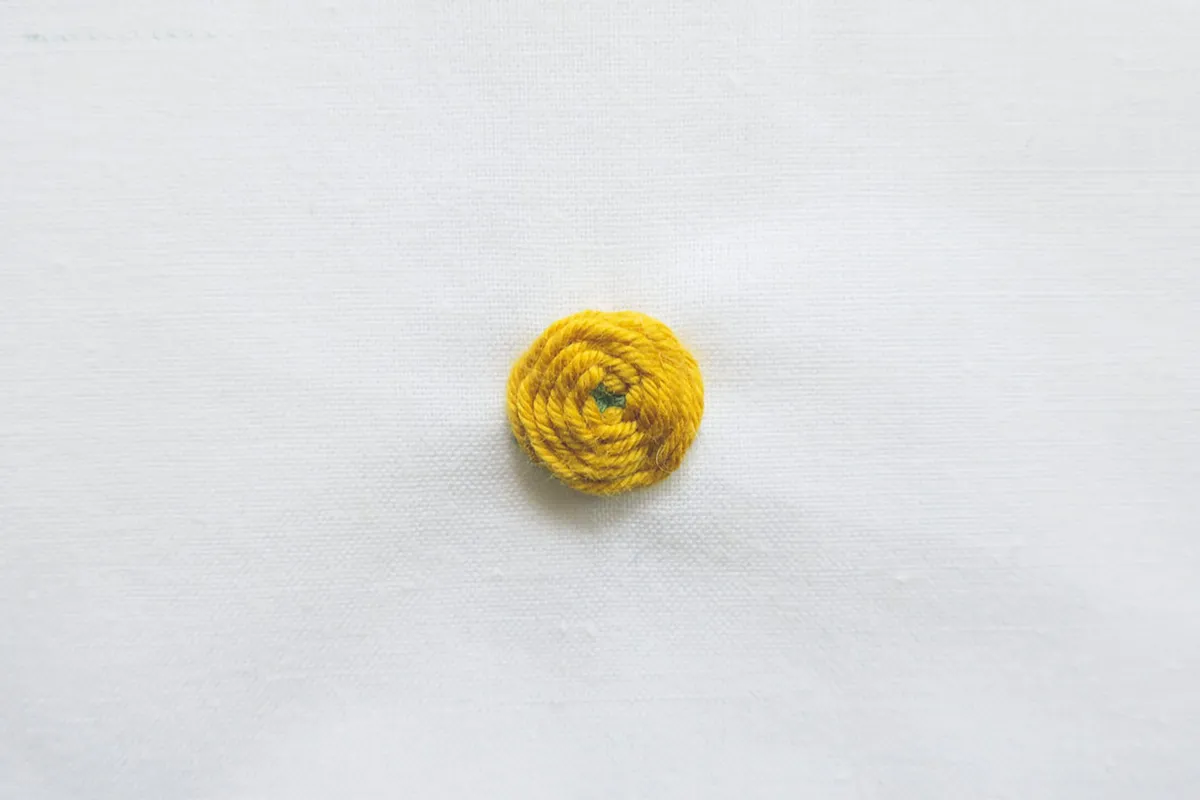
Step 3
Continuing to work with a blunt needle, take care not to pierce the fabric or the spokes’ thread and carry on weaving alternately (under and over) until you reach the outer edges of the spokes and they are completely covered. Then, take the needle back through the fabric to finish – you might find it easier to switch to a sharper needle at this point, in order to pierce the fabric.
Step 4
For a variation on the stitch, work a Whipped Woven Wheel. Stitch the spokes as before and then start to work the weaving part, only this time go under one spoke then back under it again to wrap it or ‘whip’ it before moving onto the next spoke. You won’t be working over and under but whipping each spoke in turn, so you can have an odd or even number of spokes.


