All products were chosen independently by our editorial team. This review contains affiliate links and we may receive a commission for purchases made. Please read our affiliates FAQ page to find out more.

Bzzzzz Stitch up our 2 bee embroidery patterns

Stitch our lovely bee embroidery patterns, with honeycomb hexies by Rebecca Reid and a busy bumble bee embroidery by Georgie K Emery

Try 6 issues of Love Embroidery magazine for just £9.99| SAVE 77%

Published: October 21, 2020 at 8:00 am

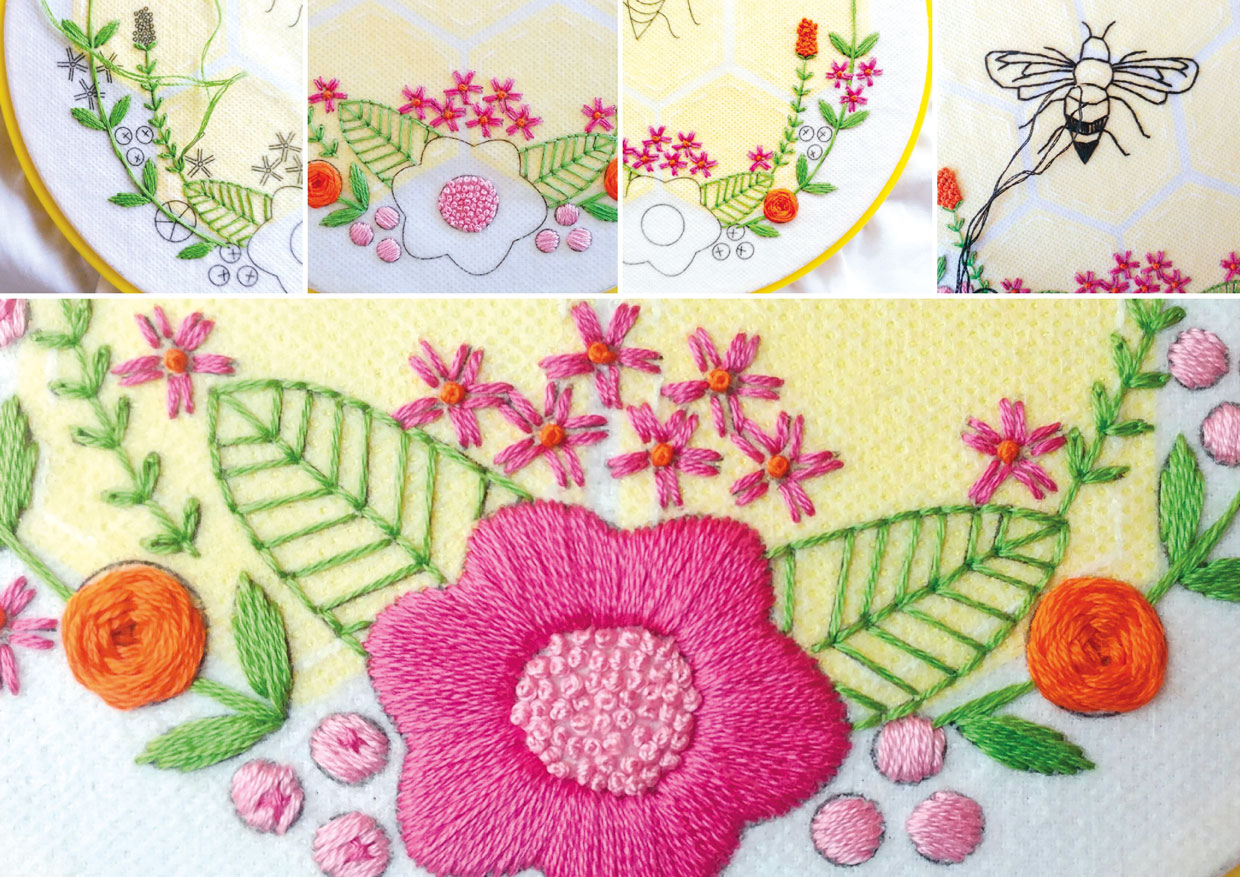
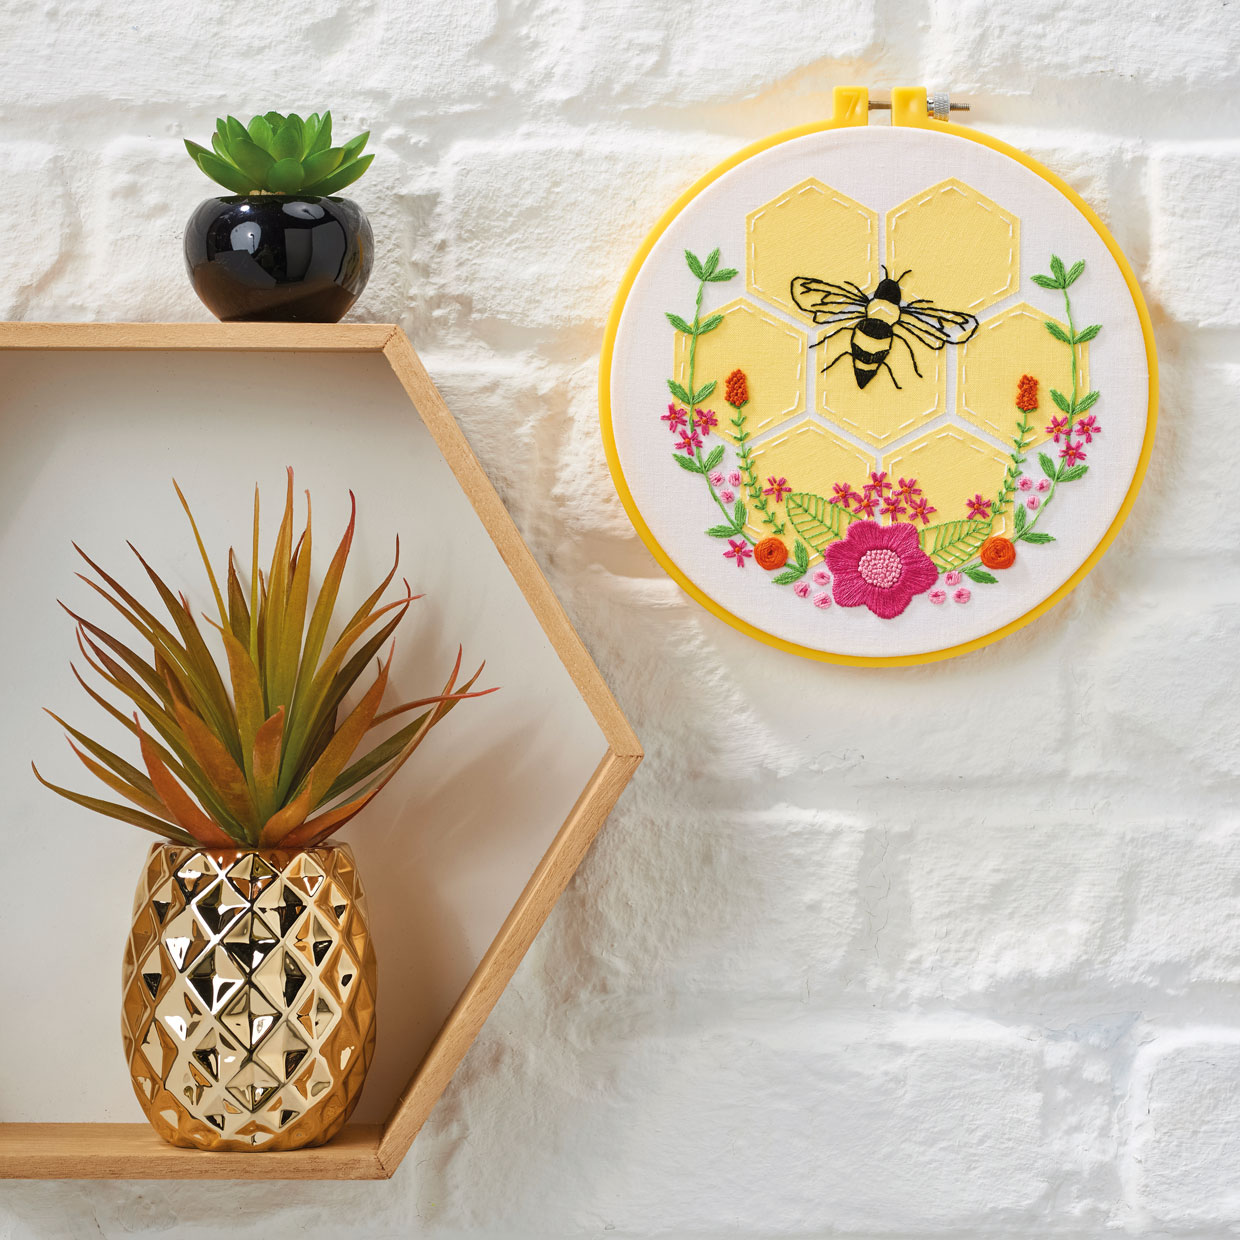
Say hello to spring with these beautiful free bee embroidery patterns! We have two lovely bee embroidery patterns for you to try. The first bee embroidery is designed by Rebecca Reid for Simply Sewing magazine. With it's fabric honeycomb background, delicate embroidered wildflowers and of course the star of the show, a lovely bee - it's a project that will help advance your embroidery skills as well as producing a lovely bee embroidery hoop inspired by the beauty of nature. We love this bee embroidery design, and it is great for beginners as the hexes make this bee embroidery pattern quick to stitch.

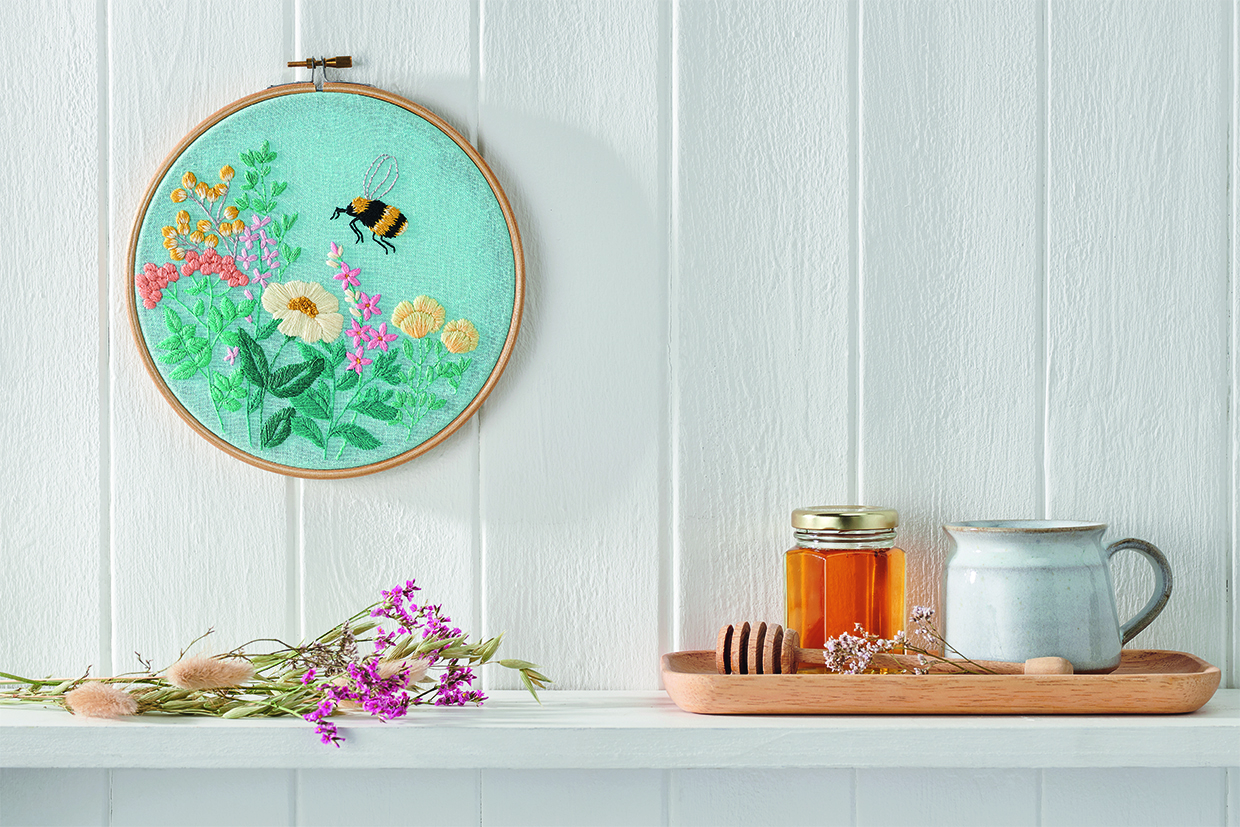
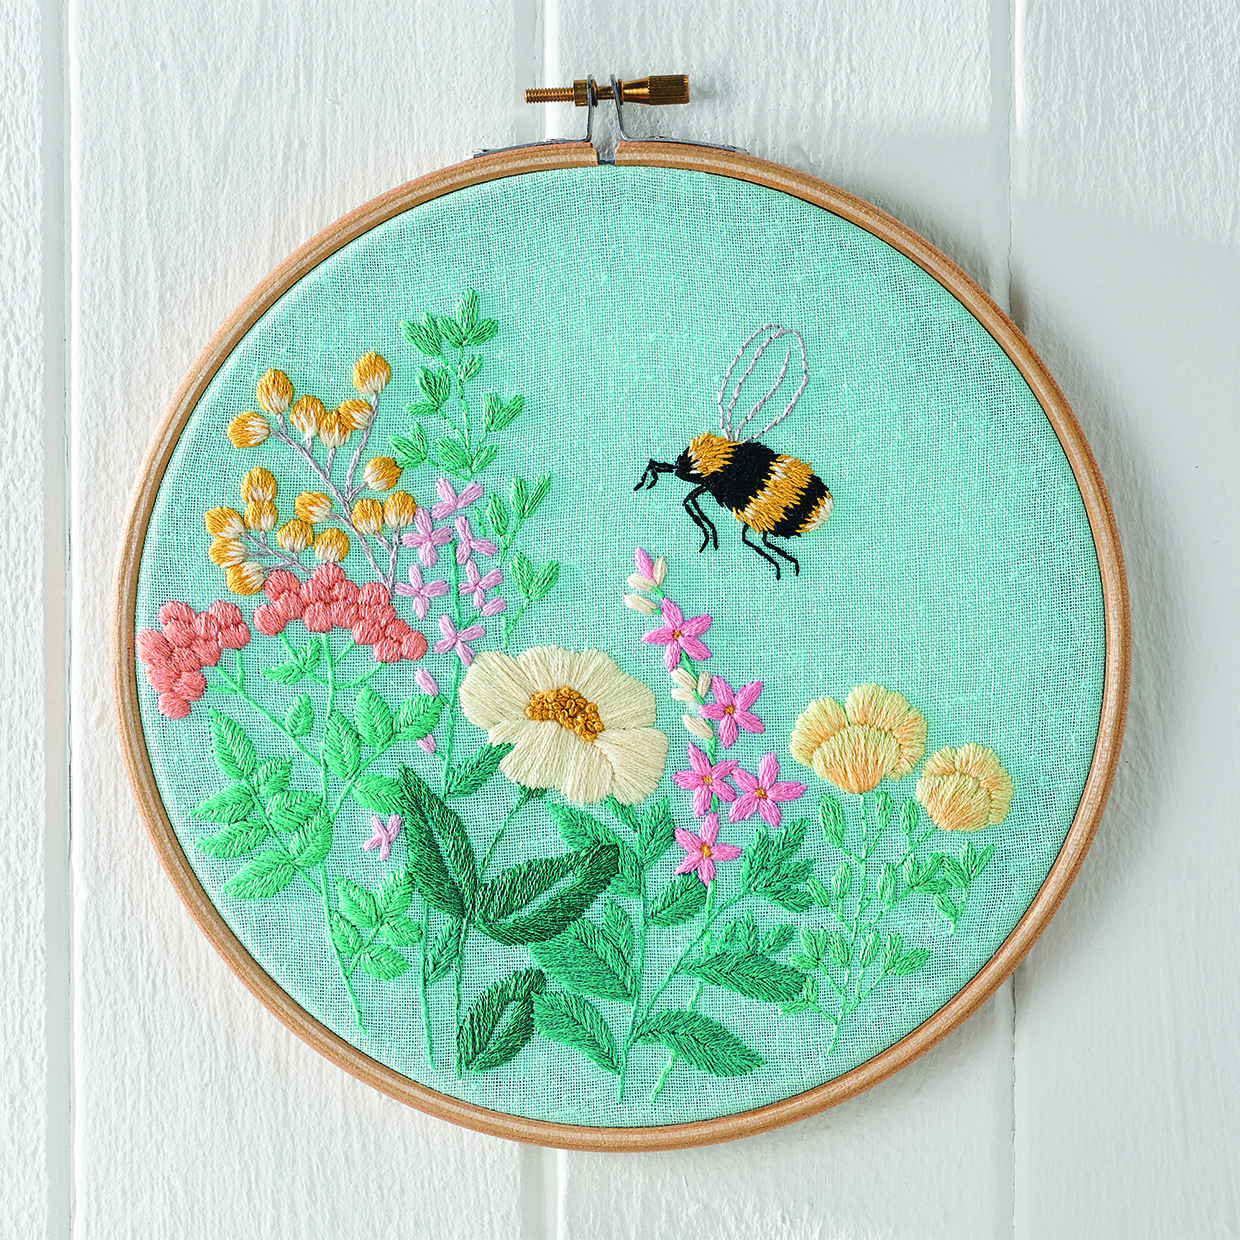
But what if you are in the mood for something a bit more showplace – bumbling, you could even say. The our bumble bee embroidery pattern is for you. This show stopping bee embroidery design is packed with glorious flowers are stunning hand embroidery stitches to create a real show stopping bee embroidery pattern that is an ideal focal point to display in your home! The bumble bee embroidery was created by Georgie K Emery for Love Embroidery magazine, and we can't think info a nicer design to while away some long summer evening with – or winter evenings, for that matter, as a spectacular Christmas gift for you or for somebody you really, really love. If you need any help with the stitches to make these free embroidery patterns, you can find them all in our guide to embroidery stitches for beginners.

Notes

Printable Sticky Fabri-Solvy Stabilizer by Sulky is a water-soluble fabric stabiliser with a self-adhesive backing. You can print or draw onto it, then stick it to your fabric and stitch through it. It’s perfect for detailed patterns and also for transferring designs onto dark- coloured fabrics. It washes away completely when you’ve finished. Available from many haberdashery shops or online.

Free hexie Bee embroidery pattern

You will need to download and print the Free Bee Embroidery Hoop template

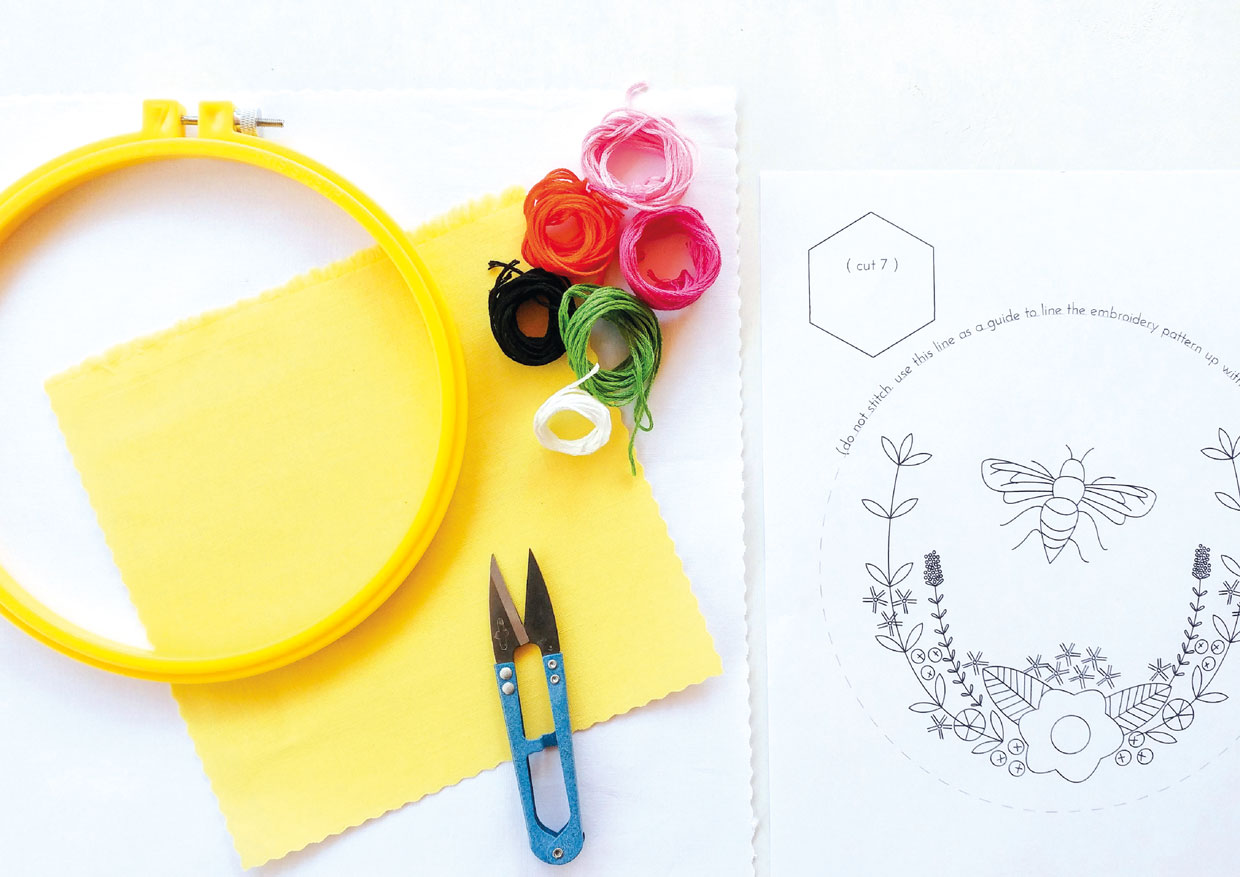
You will need:

  • Basic sewing kit
  • Fabric (Cotton fabric: 30x30cm (12x12in) white and 18x18cm (7x7in) yellow)
  • Embroidery hoop (18cm (7in) diameter)
  • Thread (DMC Stranded cotton - 310, blanc, 703, 947, 3805, 604)
  • Bondaweb (15x15cm (6x6in))
  • Fabric stabilizer (See notes above for where to buy) (Printable Sticky Fabri-Solvy Stabilizer)
  • Needle (Crewel embroidery needle: size 7)

Step 1

Attaching the hexagons

Download and print the hexagon template, embroidery template and the stitching diagram, which you can find here – Free Bee Embroidery Hoop

bumble bee embroidery 01

Step 2

Place the Bondaweb paper-side up on top of the hexagon template and draw around it seven times.

Step 3

Place the traced Bondaweb, paper- side up, onto the centre of the wrong side (WS) of the yellow fabric and press into place.

Step 4

Cut out all of the hexagons carefully.

Step 5

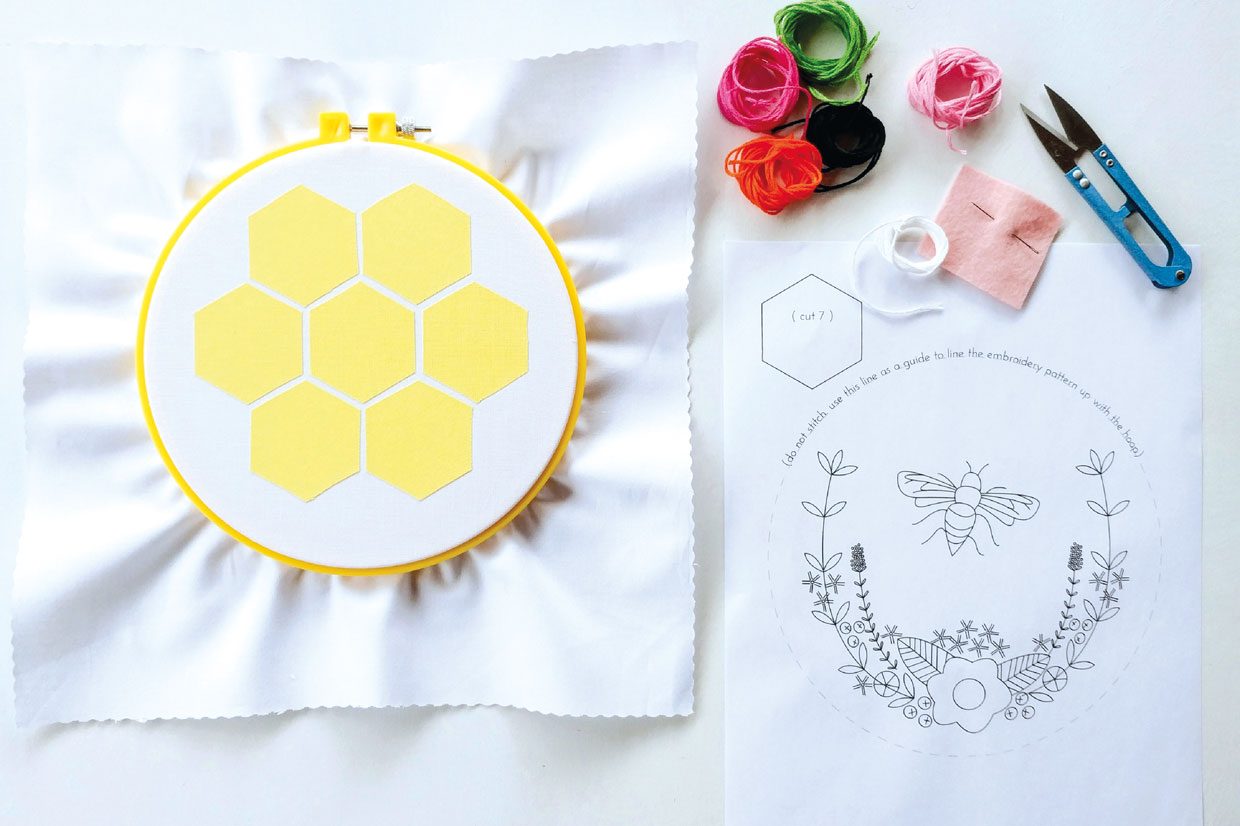
Peel off the paper backing then position the hexagons, right sides (RS) up centrally on the white fabric, leaving a small space in between each one. Start at the centre and work outwards, referring to the photograph for placement.

Step 6

Press them carefully into place and mount the fabric into the embroidery hoop.

bumble bee embroidery pattern 2

Step 7

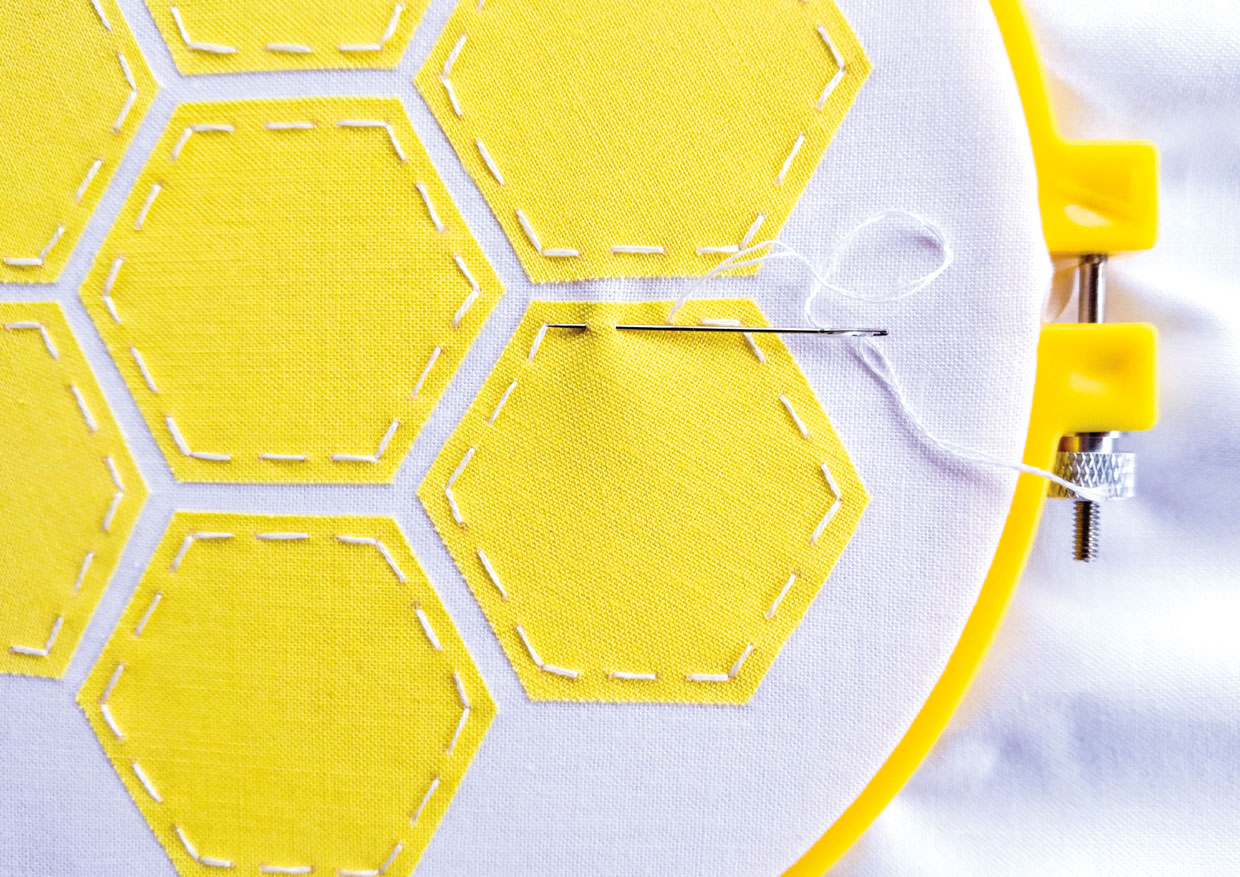
Using two strands of white stranded cotton, work a running stitch around each hexagon, just inside the edges.

bumble bee embroidery pattern 03

Transferring the design

Step 1

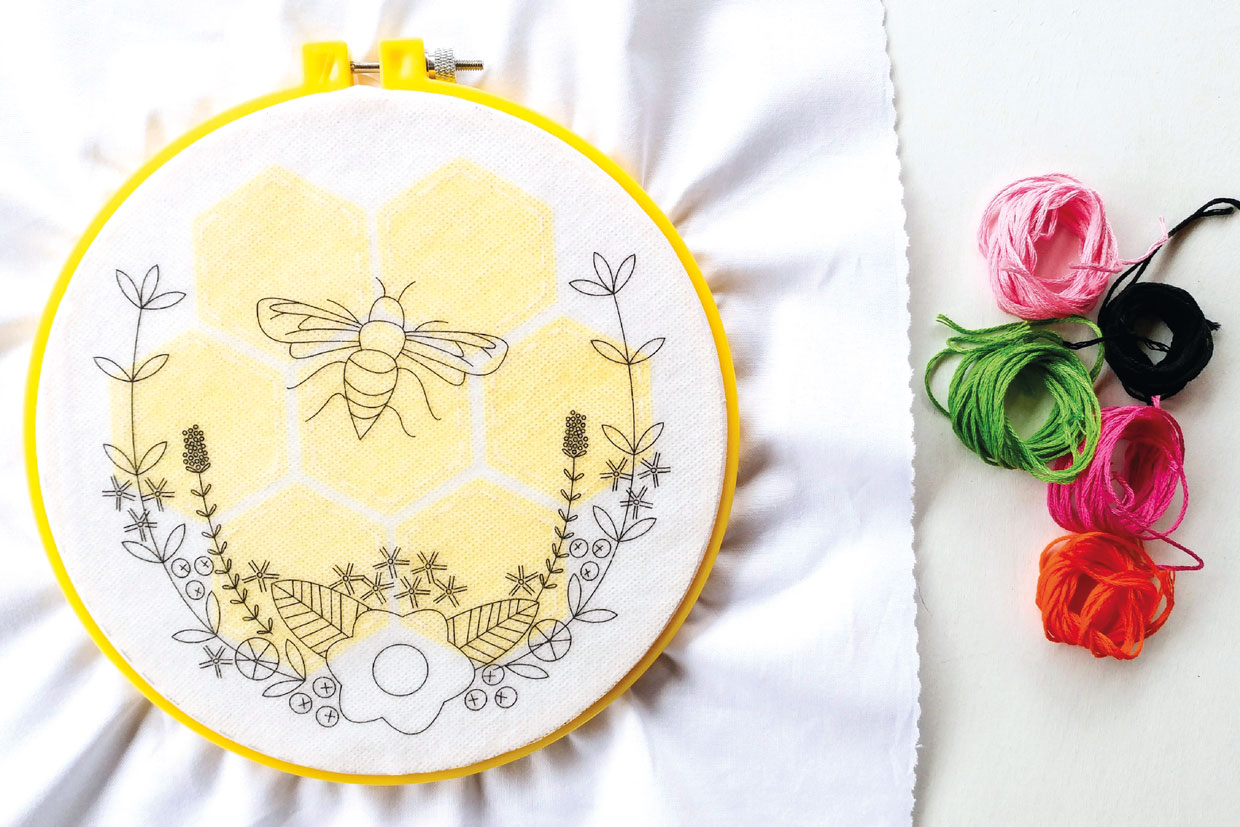
We have used Printable Sticky Fabri-Solvy Stabiliser to transfer our design. If you prefer, you can trace the design in pencil or erasable pen directly on top of the hexagons.

Step 2

Place the appliquéd fabric in the hoop, making sure it’s horizontally centred on the left and right sides but slightly above the centre vertically by about 1.5cm (5/8in).

Step 3

If you’re using the printable fabric stabiliser then peel the paper backing off and stick it smoothly onto the fabric, lining the outer cut circle with the edge of your hoop.

bumble bee embroidery 04

Working the embroidery

Step 1

You can now embroider the design. The stitching diagram tells you which colour to use where and how many strands. You can also refer to the photograph for guidance.

bumble bee embroidery 05

Step 2

Cut a length of thread then separate the strands and recombine the number you need in your needle for stitching with.

Step 3

Pre-threading your needles with different colours of stranded cotton makes it easy to change colours as you work the design.

Step 4

Follow the stitch guides if there are any you are unsure of.

Finishing off

Step 1

Once the stitching is complete, take the fabric out of the hoop and soak it in water for about 30 minutes to dissolve the stabiliser.

Step 2

Gently rinse with cool water to remove any remaining bits of stabiliser.

Step 3

Lay the fabric face down on a fluffy towel and gently press with another towel to remove excess water. Lay flat to dry.

Step 4

Once dry, press and then mount the bee embroidery in the embroidery hoop to frame it. Take a look at out our How to mount stitching a hoop for more details on this.

bumble bee embroidery 07

How to stitch a bumble bee embroidery pattern
bumble bee embroidery main

Indulge in some crafty you-time with this stunning bumble bee embroidery design from Georgie K Emery, originally published in Love Embroidery issue 1

To stitch the bumble bee embroidery, you will need

  • Fabric: 35x35cm
  • DMC stranded cotton, 1 skein of each: 19 (dark yellow), 151 (light pink), 310 (black), 452 (taupe), 728 (gold), 894 (dark pink), 991 (dark green), 3078 (light yellow), 3341 (orange), 3812 (medium green), 3815 (sage green), 3823 (cream), 3851 (light green).
  • Water-erasable marker pen
  • Embroidery hoop: 18cm diameter
  • Basic embroidery kit
  • Stitches:Backstitch, Chain Stitch, Fishbone Stitch, French Knot, Long and Short Stitch, Satin Stitch, Stem Stitch, Straight Stitch, Whipped Backstitch
  • Bumble bee embroidery template click to find the bumble bee embroidery template

How to stitch the bumble bee embroidery

Step 1
bee embroidery LE step 1

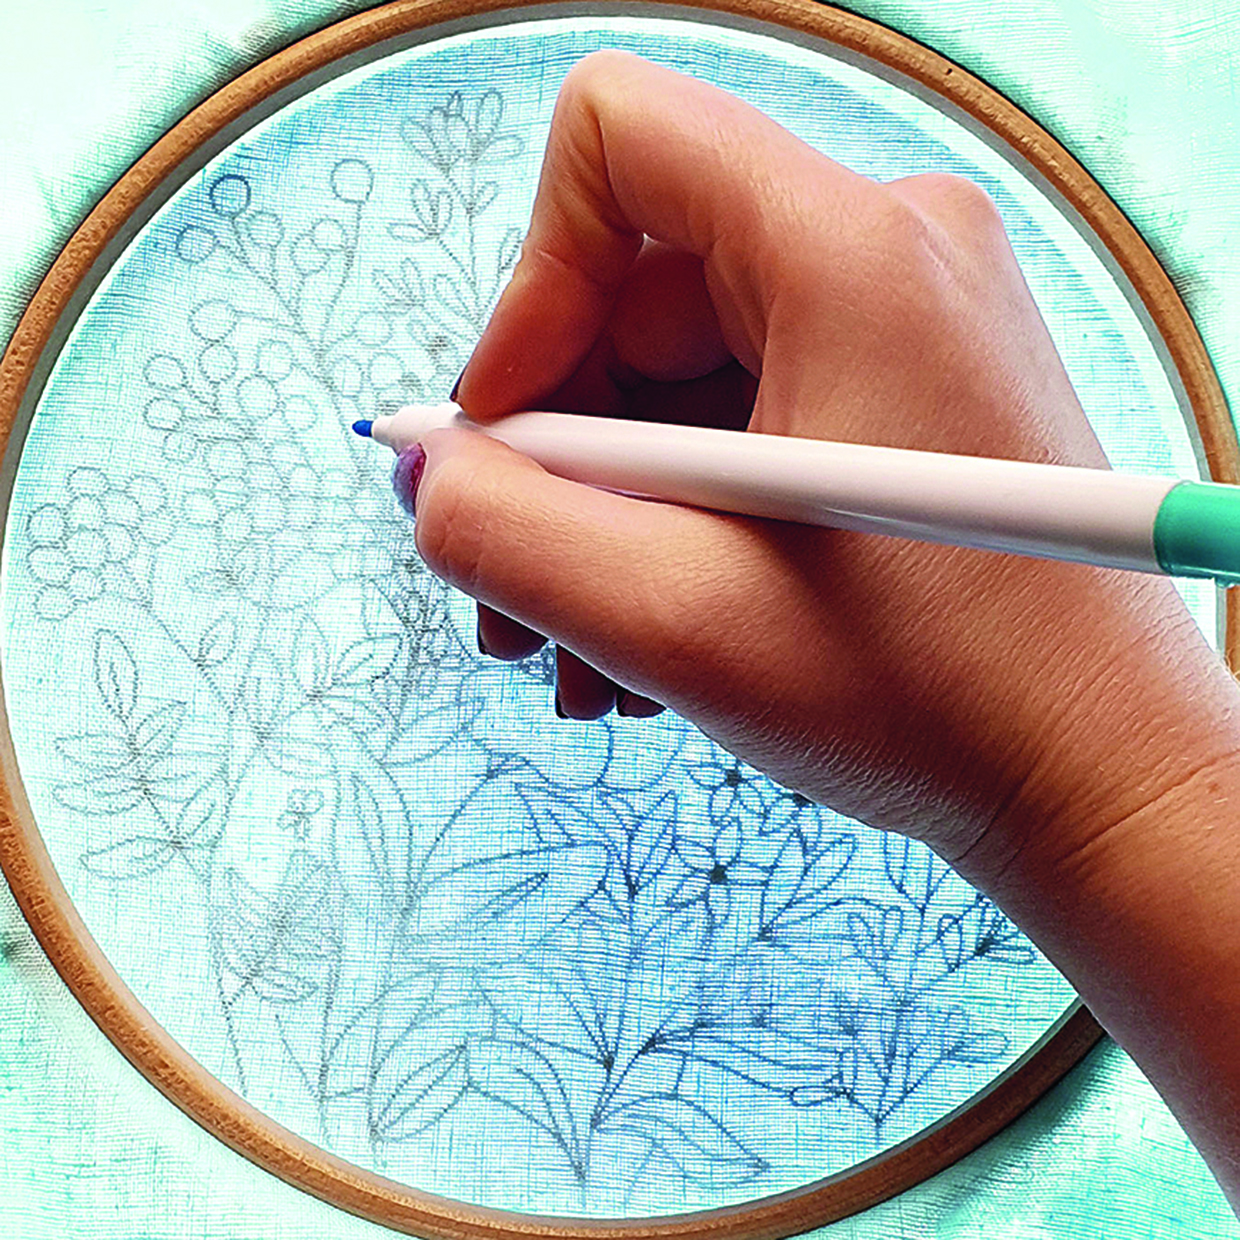
Before you begin, make sure your fabric is stretched tightly in the hoop. It should be like the surface of a drum. Keeping it tight will not only ensure your design transfers correctly and without distortion, but it will also help you keep your stitches neat and prevent any warping of the fabric. Transfer the design from the bumble bee embroidery template using your preferred method. 

Step 2
bumble bee embroidery step 2

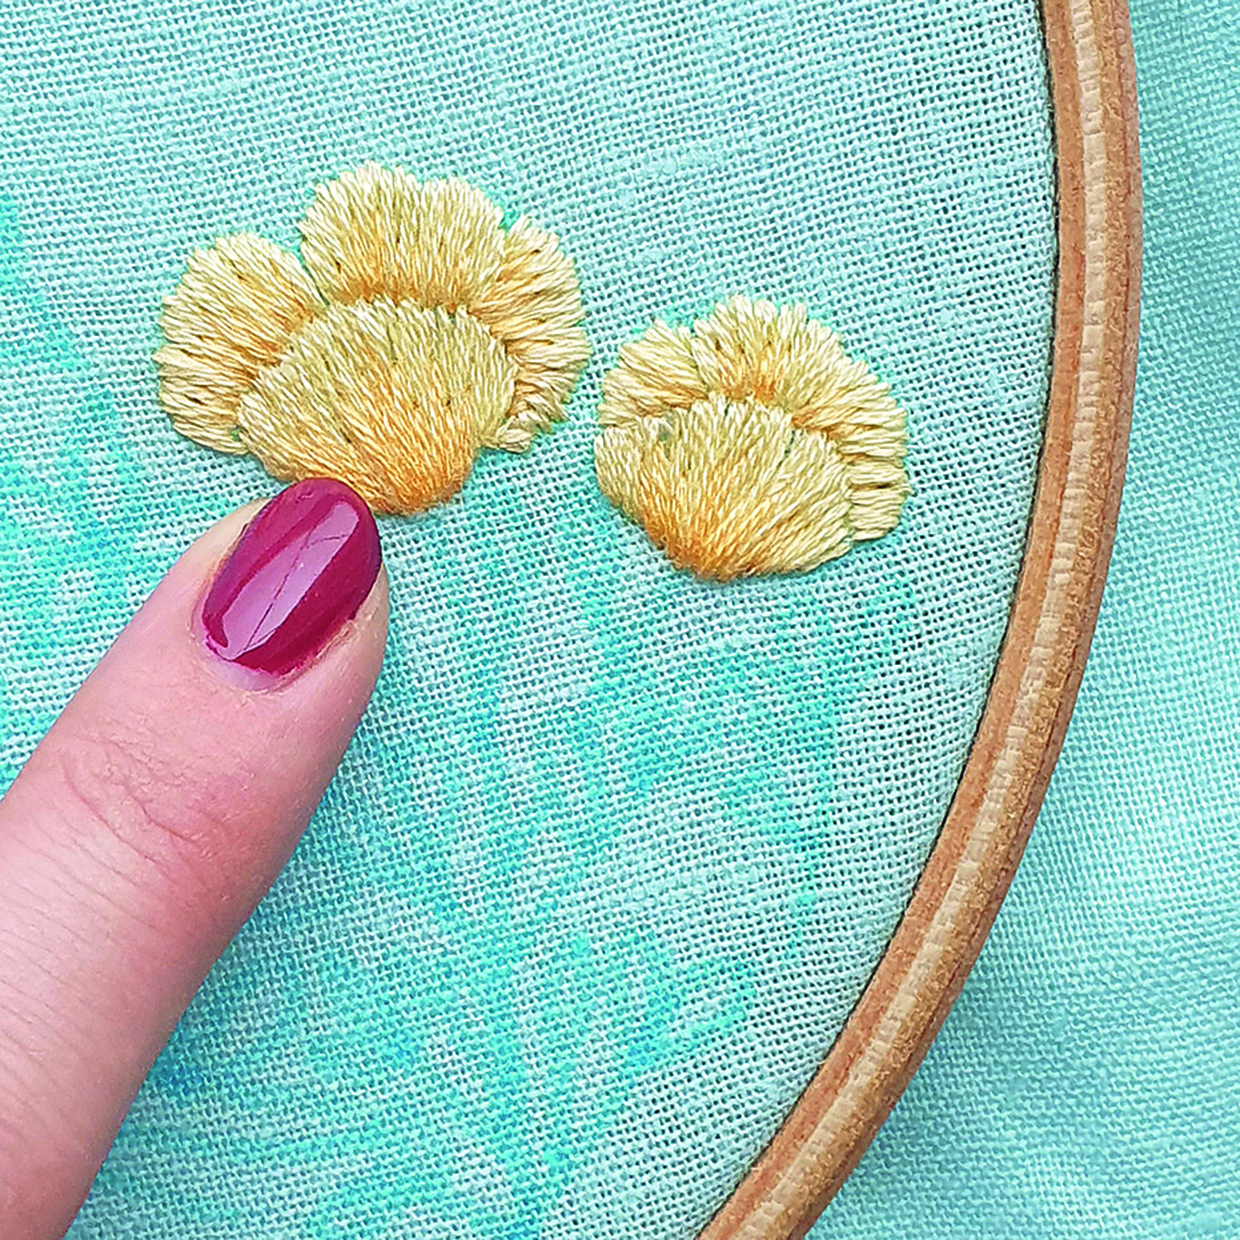
Buttercup flowers

Work the petals in Satin Stitch using three strands of light yellow. Start in the centre and stitch outwards, filling the petal with neat stitches worked close together. Once the petals have been filled, work Straight Stitches on top using two strands of dark yellow. Start your stitching at the bottom of each petal and stitch towards the middle, blending in to the stitches beneath.

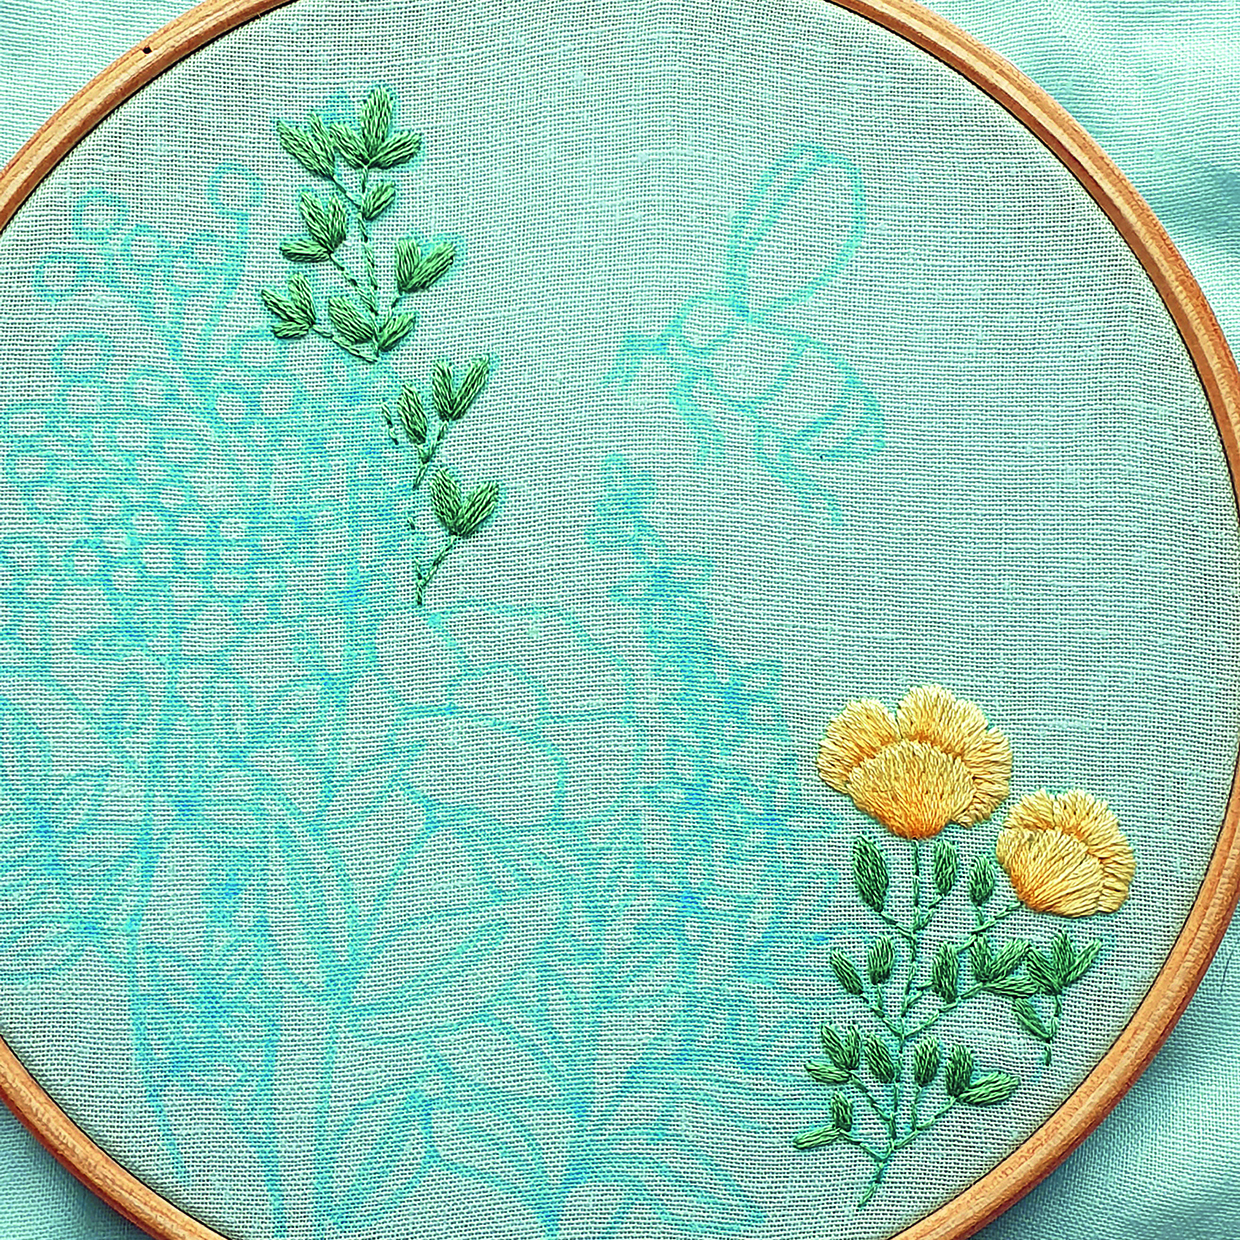
Step 3
bumble bee embroidery step 3

Buttercup Foliage

Work the stem in Backstitch using two strands of sage green. Work the leaves in Straight Stitch using two strands of sage green. Start each leaf with a Straight Stitch in the centre of the shape and stitch outwards filling in the shape. Stitch the sprig of leaves in the top left of the design in the same way using Straight Stitch.

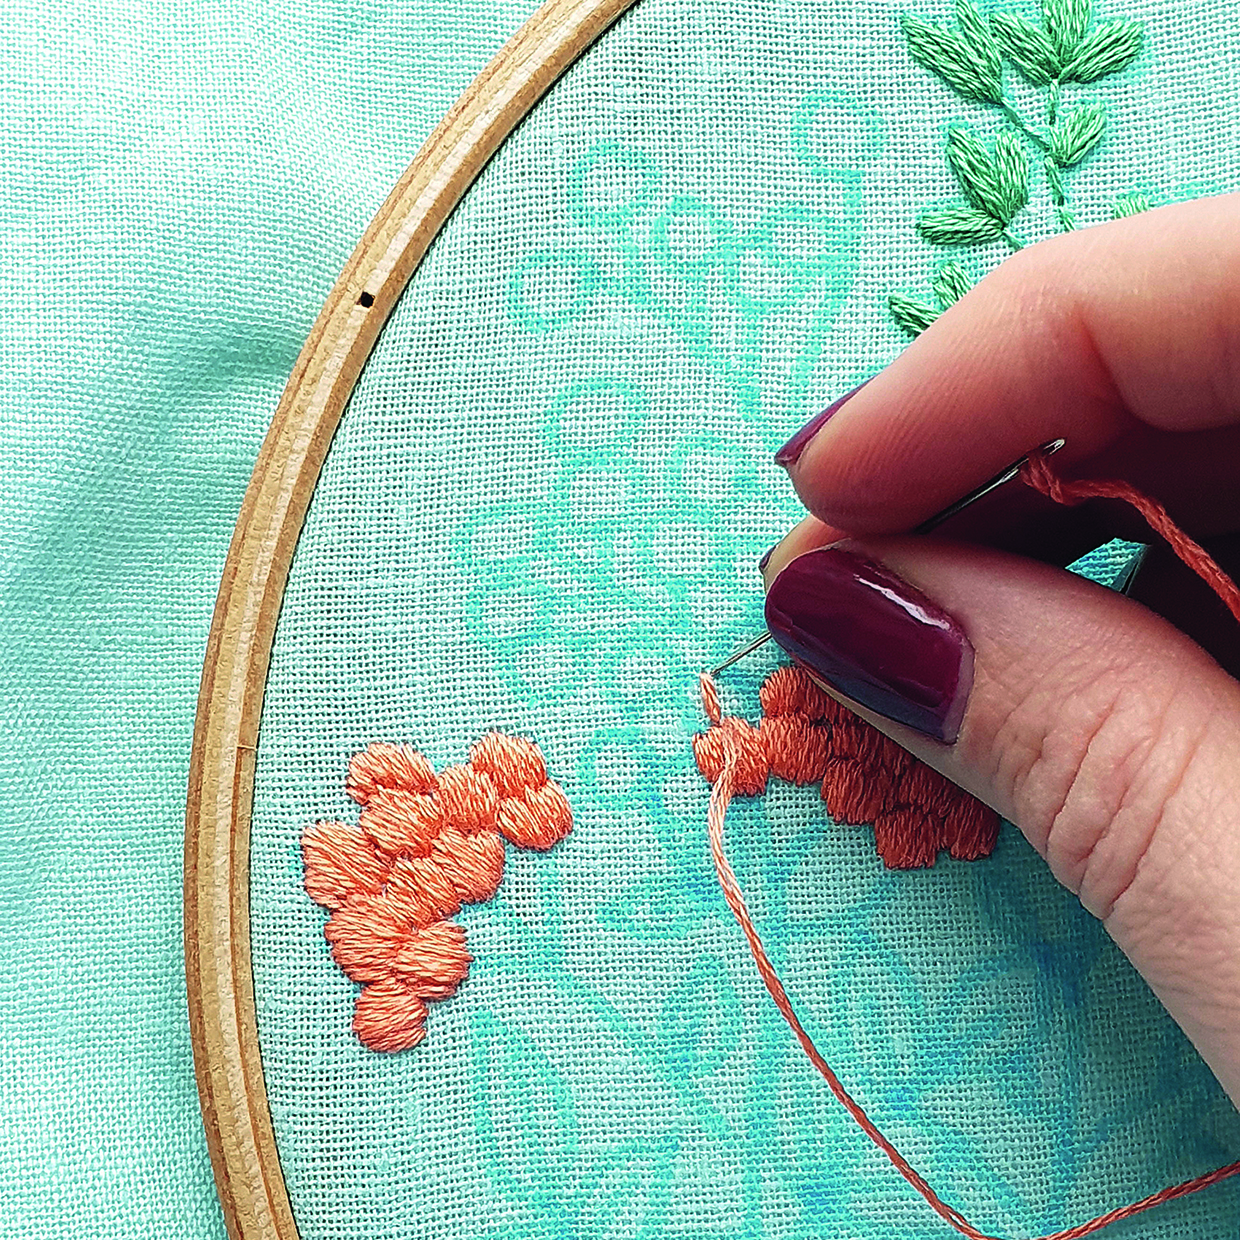
Step 4
bumble bee embroidery step 4

Orange sprig

Work the petals in Straight Stitch using three strands of orange. Begin your stitches in the centre of the shape and work outwards with stitches close together to fill the circle.

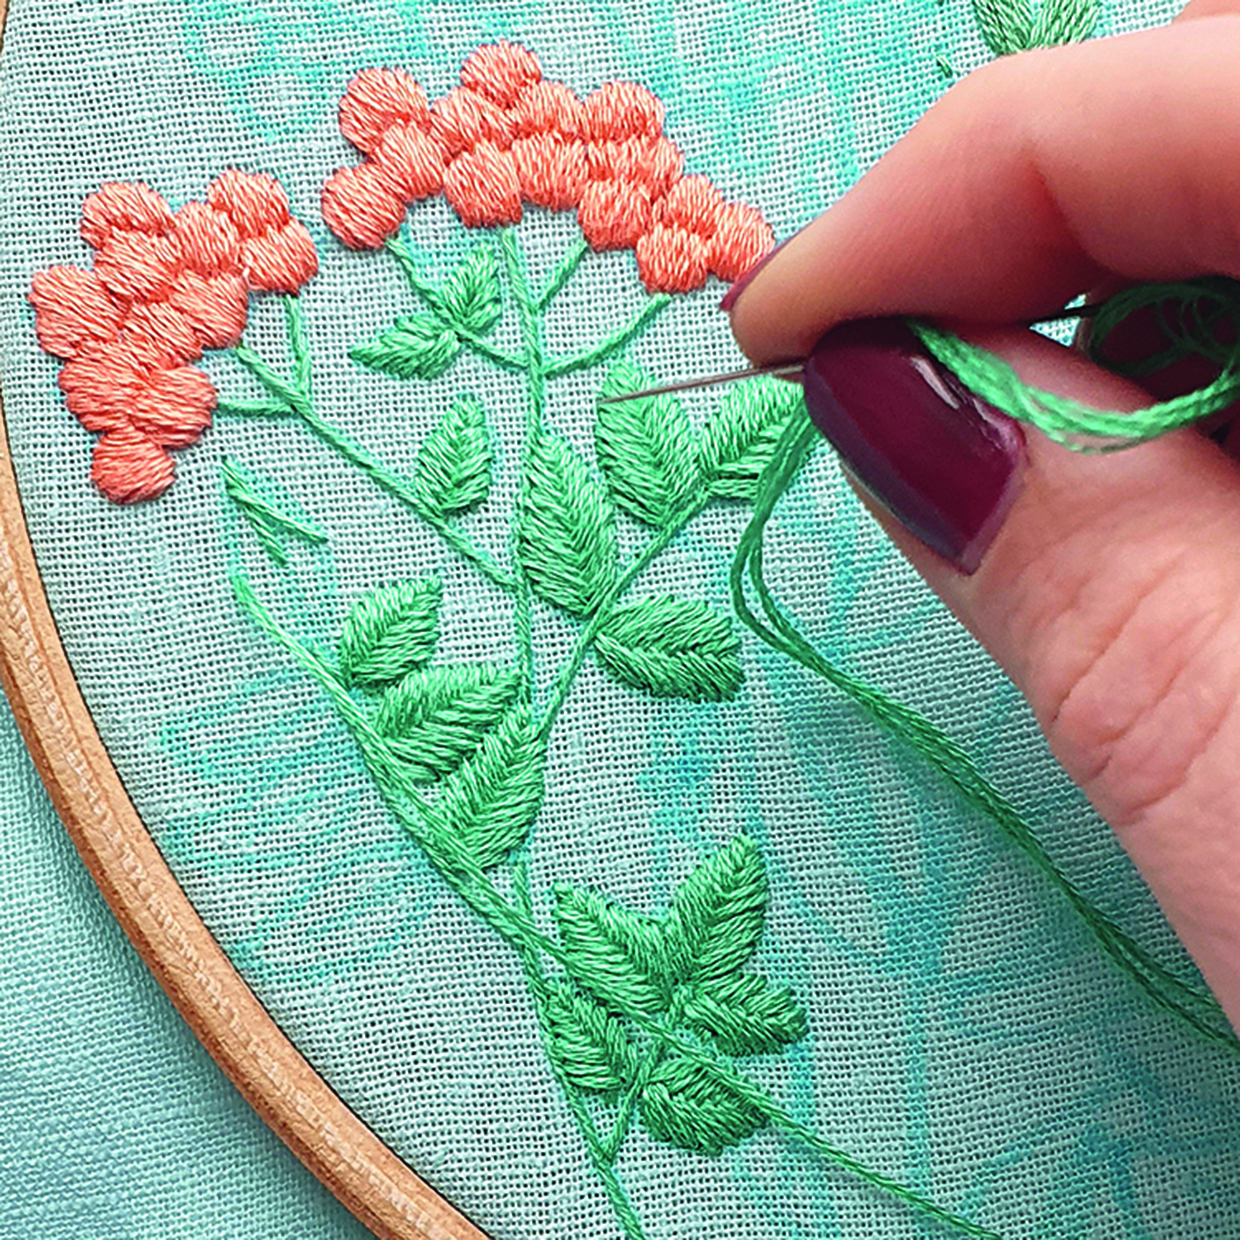
Step 5
bumble bee embroidery step 5

Stitch the stem first in Whipped Backstitch using two strands of light green. Stitch the leaves in Fishbone Stitch using three strands of light green.

Step 6
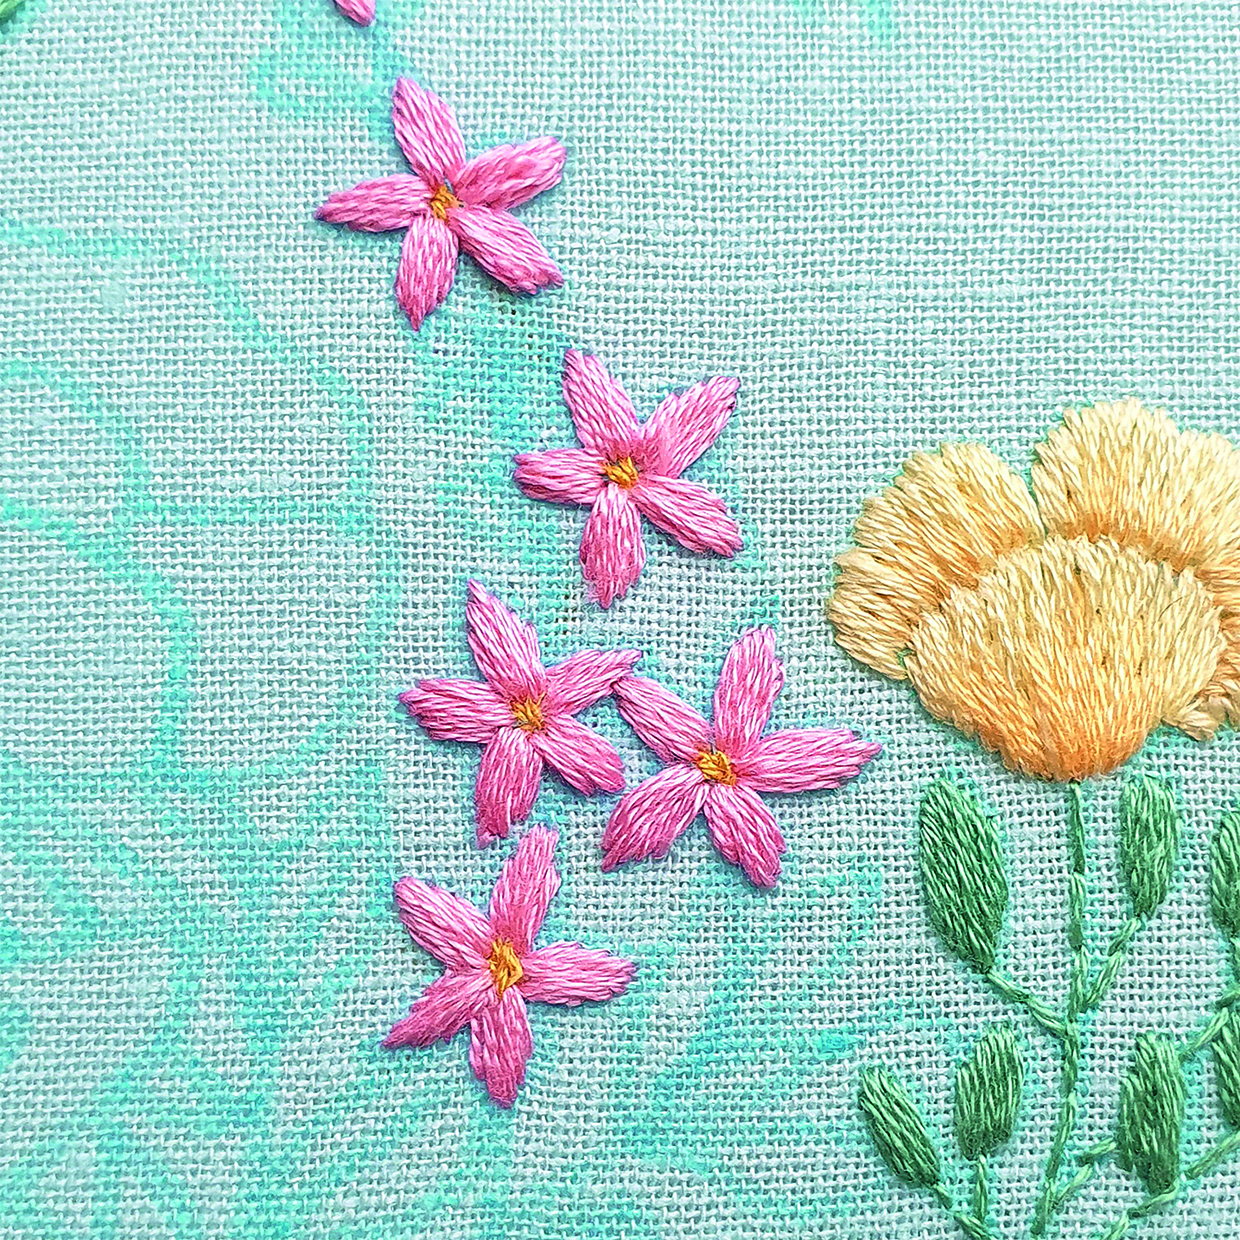
bumble bee embroidery step 6

Pink flowers

Fill in the centre of each flower with small Straight Stitches using two strands of gold. Fill in the petal shapes with Straight Stitch using three strands of dark pink.

Step 7
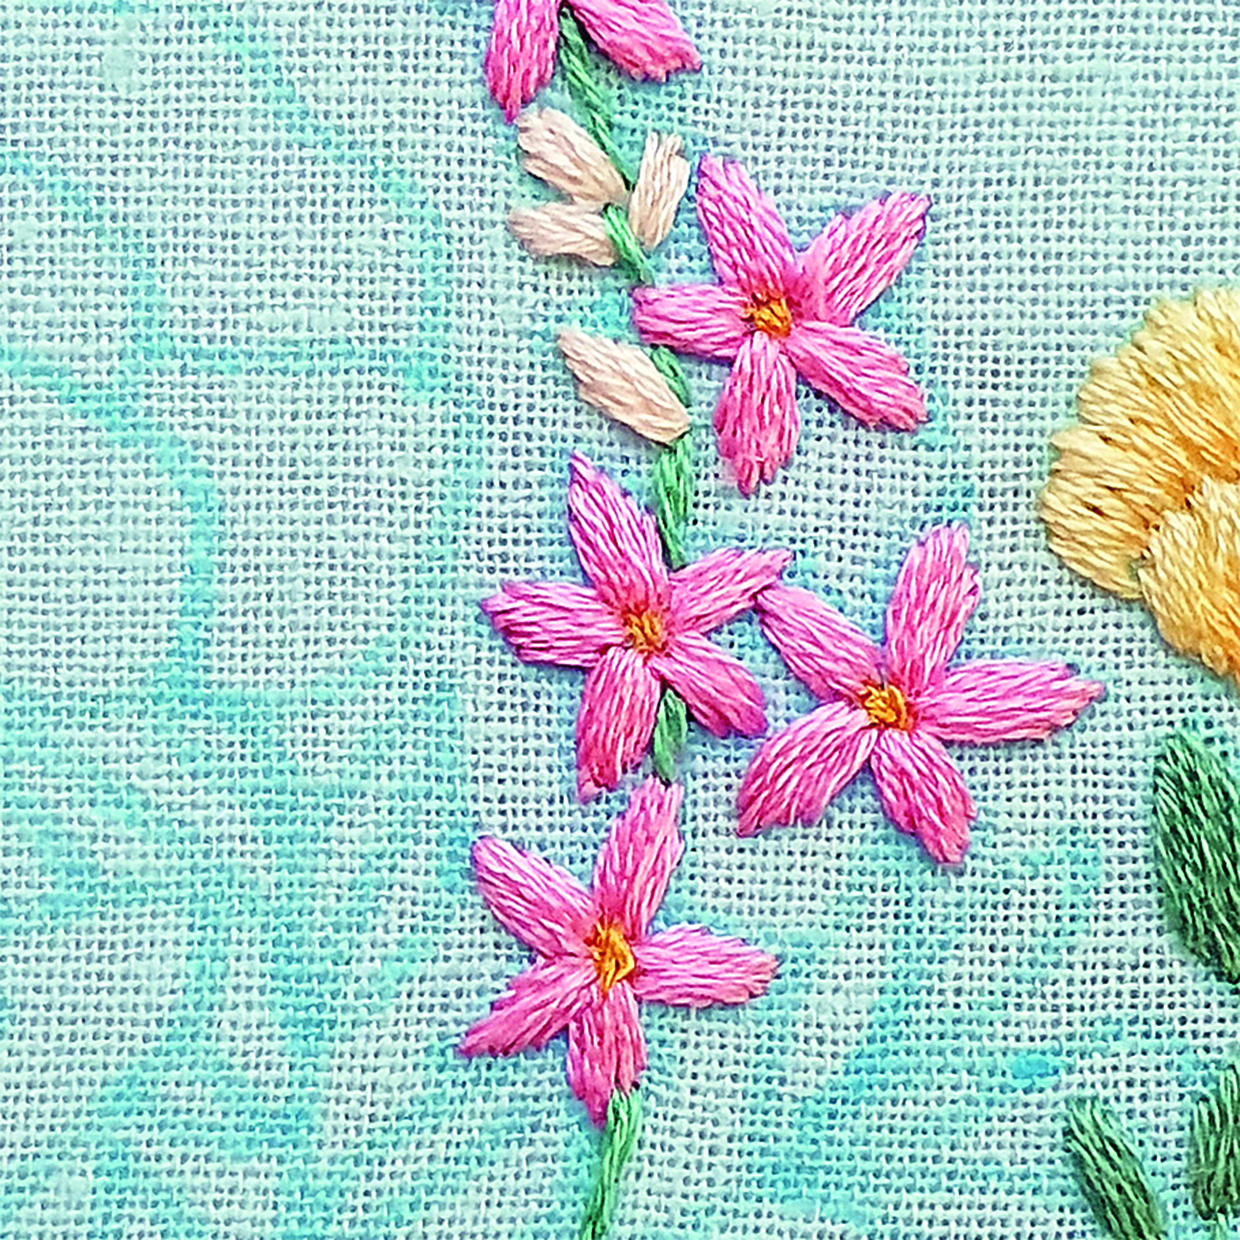
bumble bee embroidery step 7

Fill in the flower buds with Straight Stitches using three strands of cream. Work the stem in Stem Stitch using two strands of light green.

Step 8
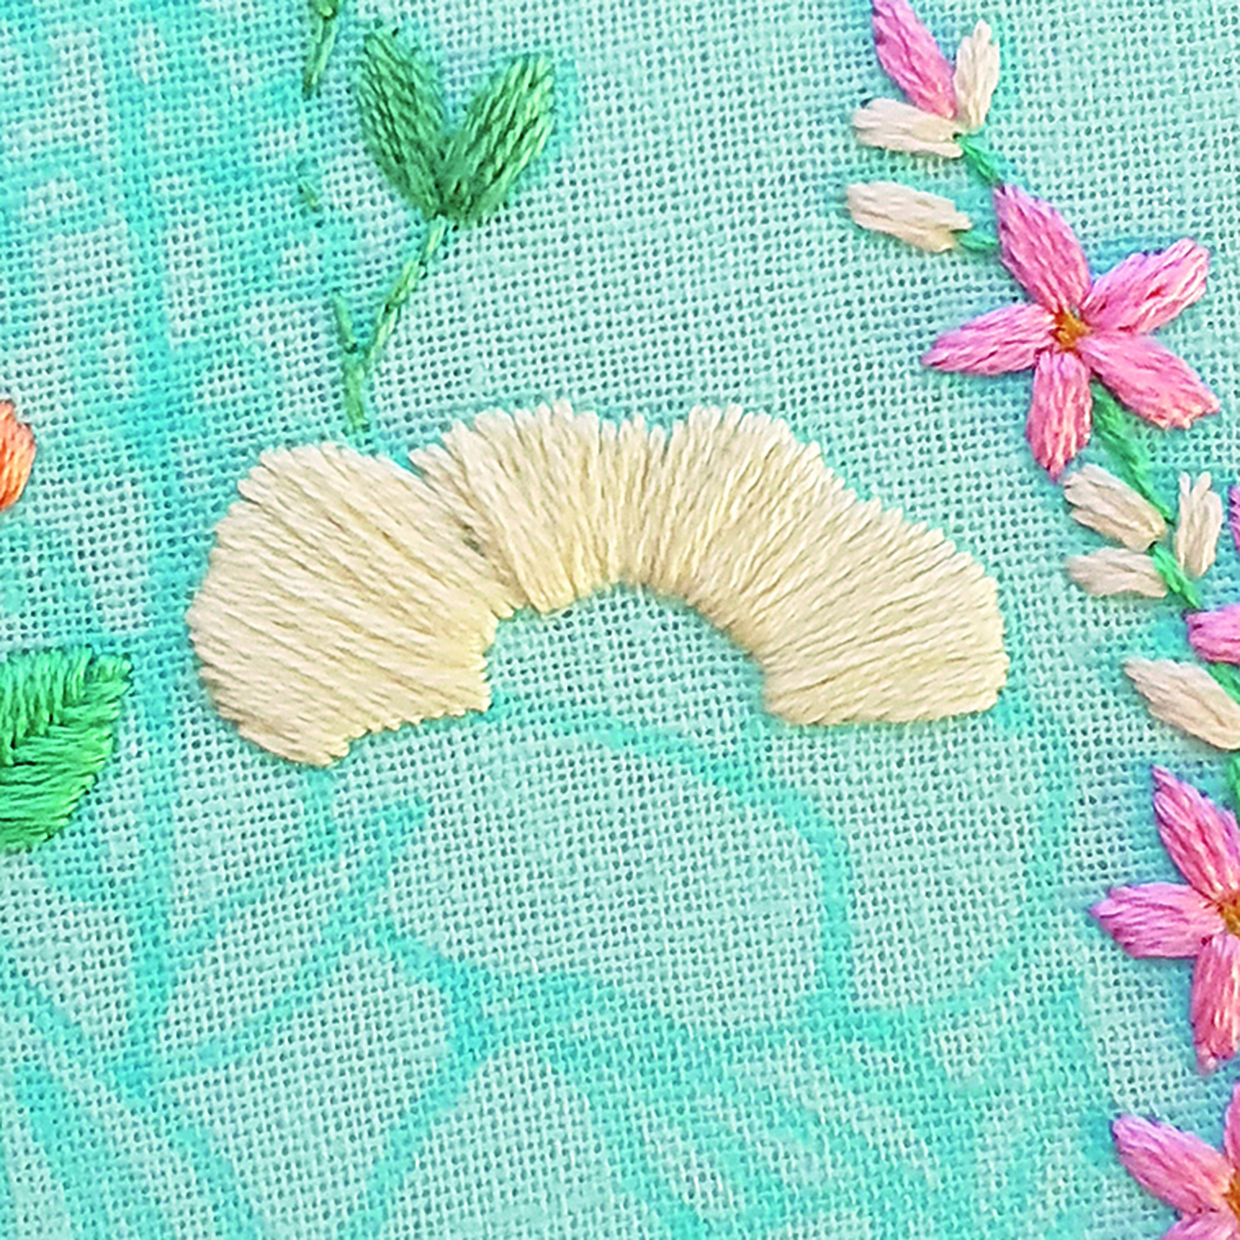
bumble bee embroidery step 8

Daisy flower

Fill in the petal shapes with Satin Stitch using three strands of cream. Curve the direction of your stitches around, following the shape of the petal.

Step 9
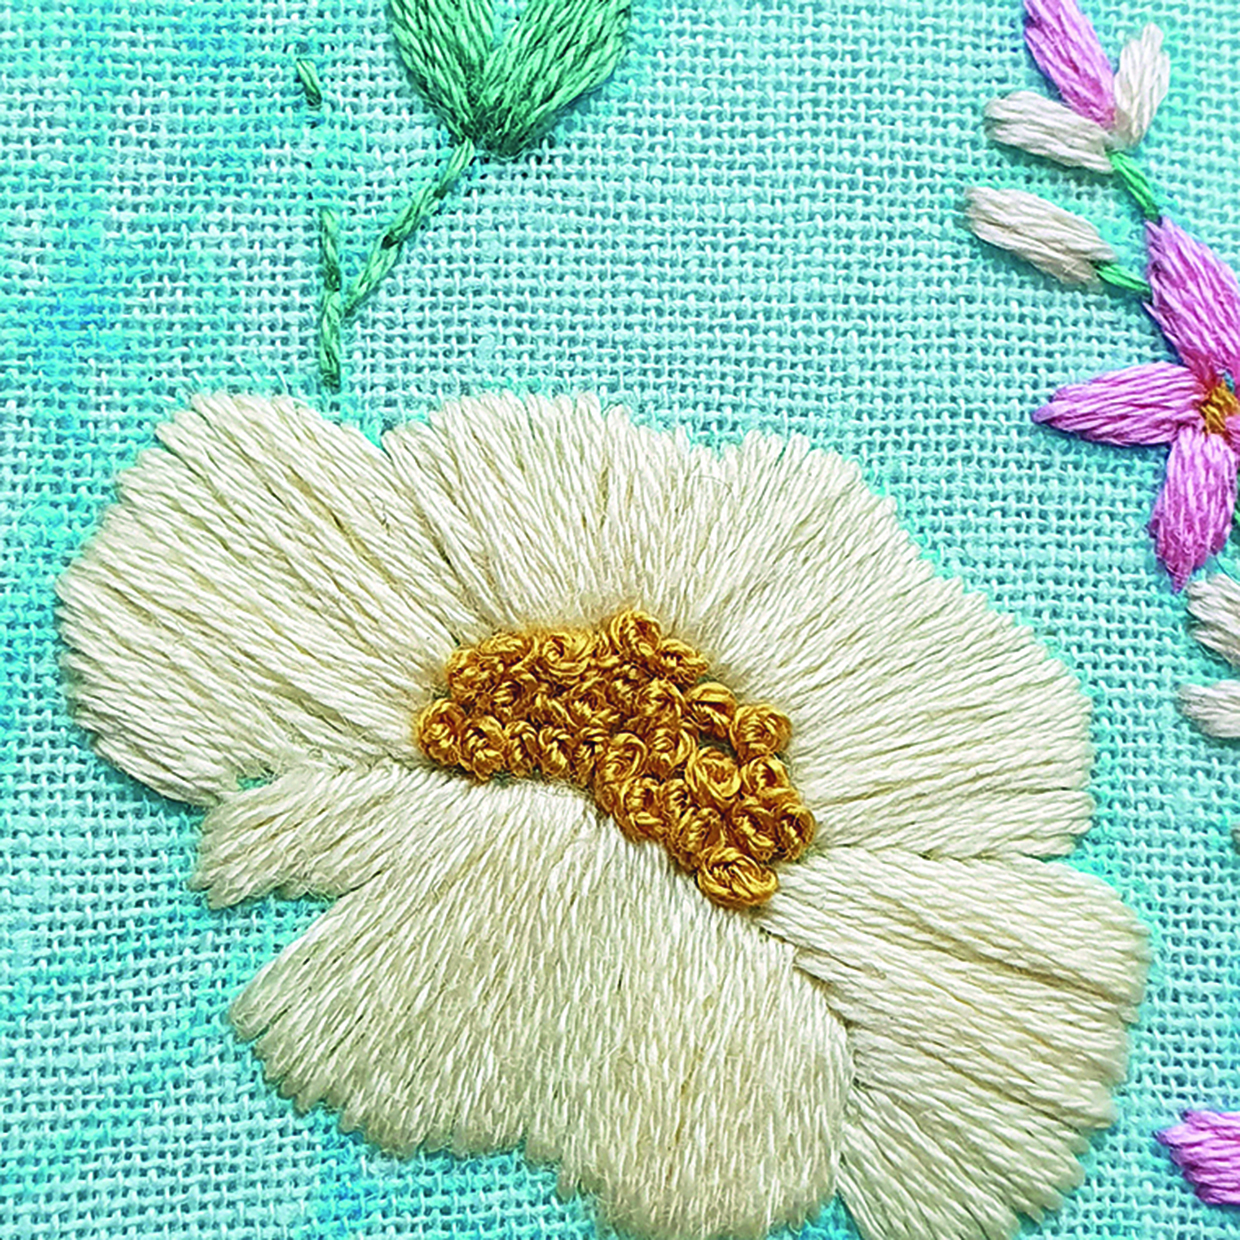
bumble bee embroidery step 9

Fill in the centre of the daisy with French Knots using three strands of gold.

Step 10
bee embroidery LE step 10

Daisy foliage

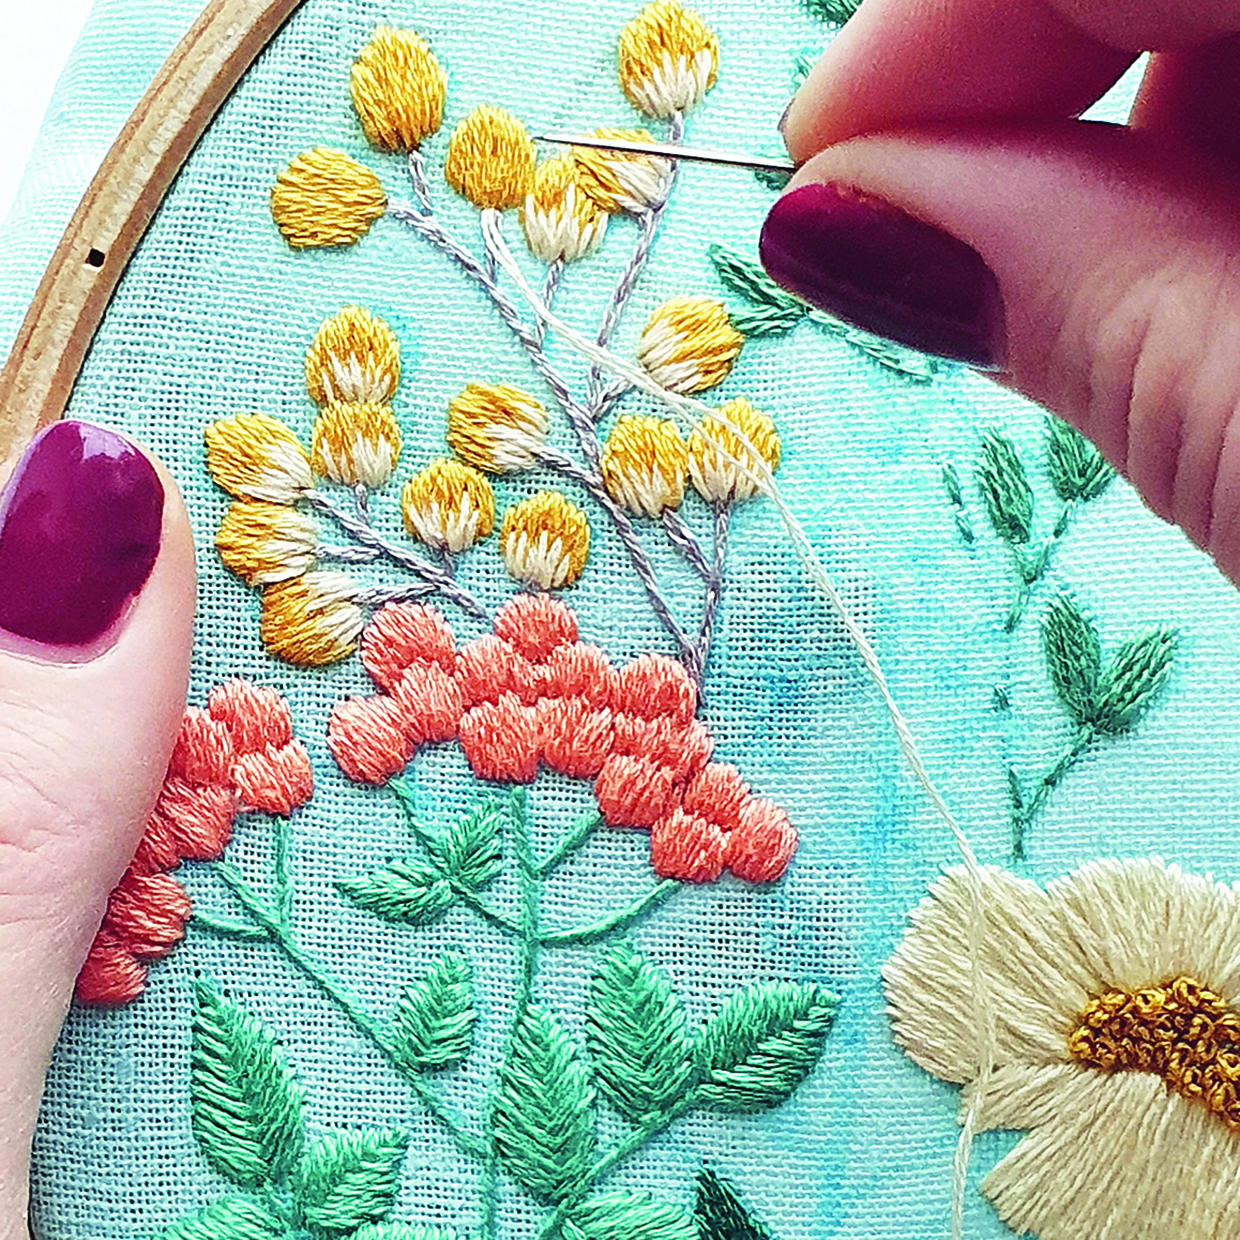
Use two strands of dark green for all the leaves and stem. Work the stem in Stem Stitch. Work the top part of the stem and the base of the flower using Straight Stitch. Stitch the leaves in Satin Stitch, placing your stitches diagonally and stitching up one side of the leaf first, then the other. 

Step 11
bumble bee embroidery step 11

Yellow Sprig

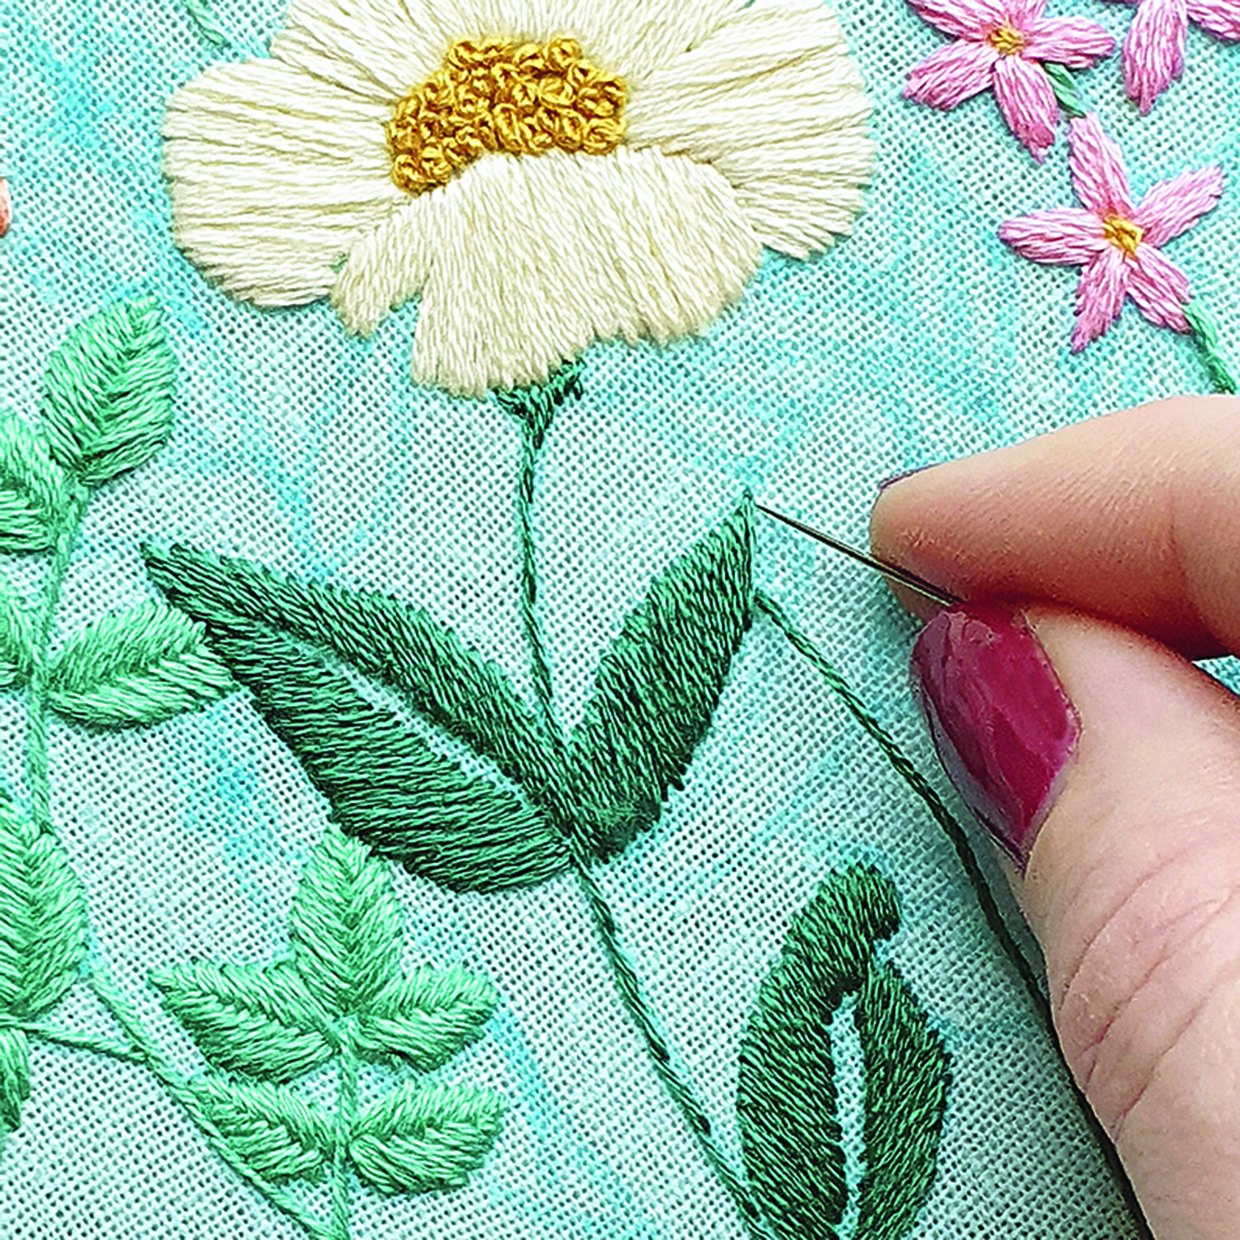
These delicate little flowers and stems are worked in three parts. Start by filling in the petals with Satin Stitch using three strands of gold. Then, stitch the stem in Chain Stitch using two strands of taupe. Finally, add four to five Straight Stitches to the bottom sections of the circle-shaped petals using two strands of cream.

Step 12
bumble bee embroidery step 12
Green Sprig
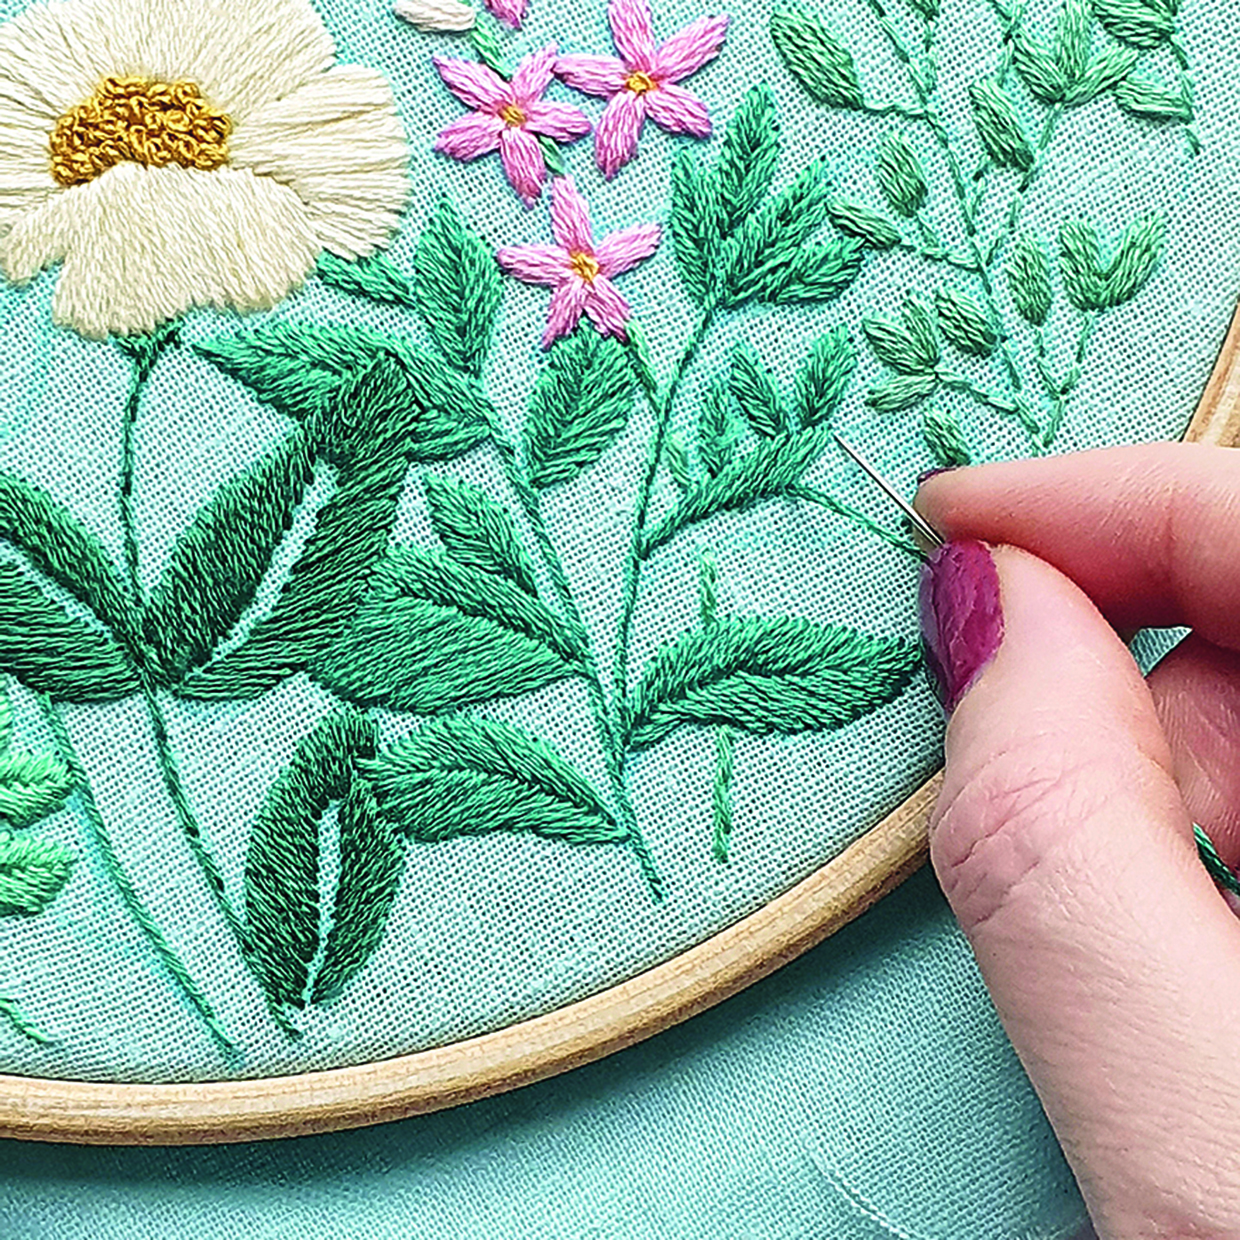
Stitch the stems first in Whipped Backstitch using two strands of medium green. Fill the leaves with Satin Stitch using three strands of medium green. Stitch one side of the leaf first with diagonal stitches and then use the same process to work down the other side of the leaf.

Step 13
bumble bee embroidery step 13

Pink Flowers
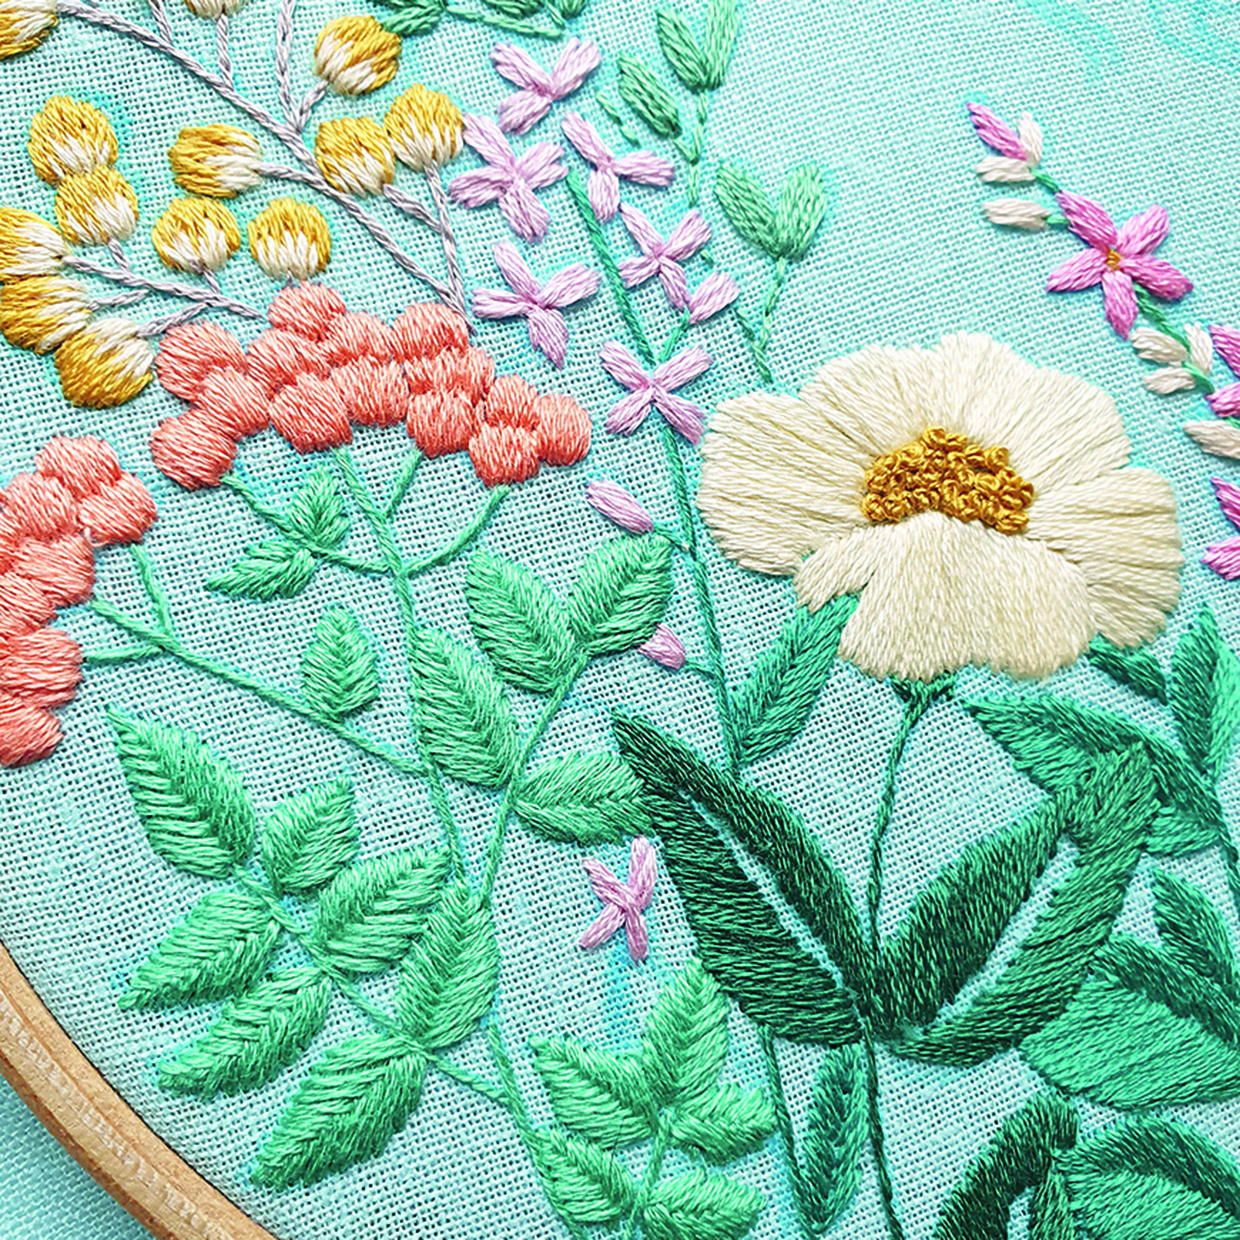
Work the stem in Whipped Backstitch using two strands of medium green. Fill the leaves with Satin Stitch using three strands of medium green, following the same instructions as for the leaves in Step 12. Stitch the pink flowers in Straight Stitch using three strands of light pink.

Step 14
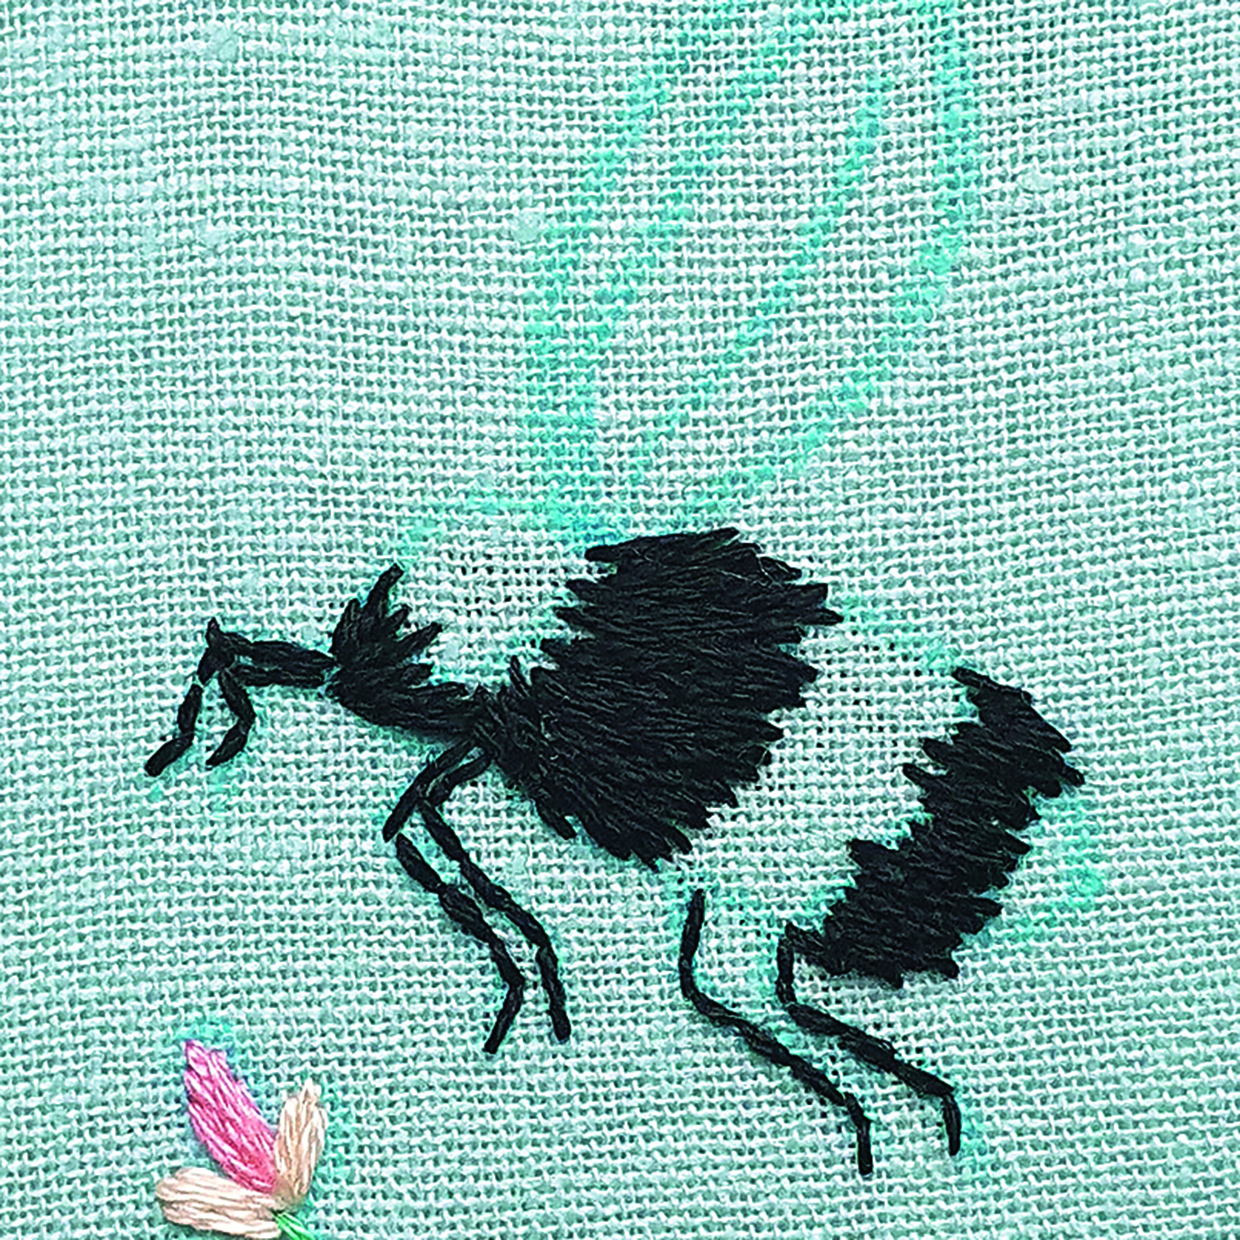
bee embroidery LE step 14

Bumble bee
Stitch the antennae and legs in small Backstitches using two strands of black. Fill in the face and two segments of the body in Long and Short Stitch, again using two strands of black.

Step 15
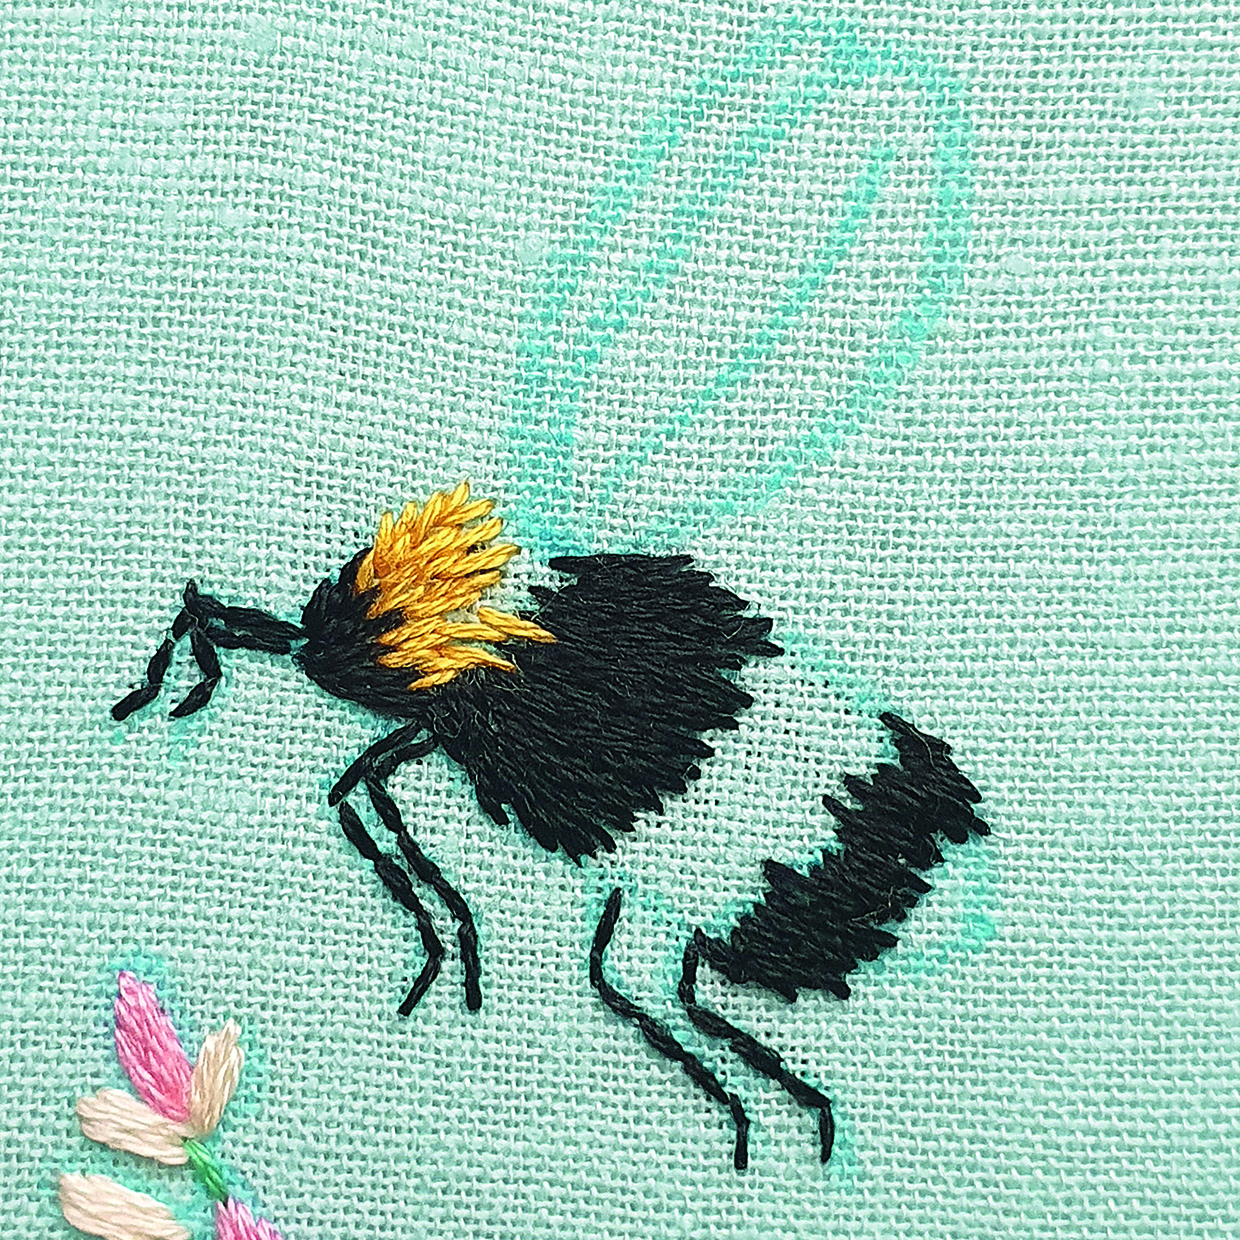
bumble bee embroidery step 15

Fill in the head and middle section of the body using two strands of gold in Long and Short Stitch, curving them around and down towards the bottom of the body.

Step 16
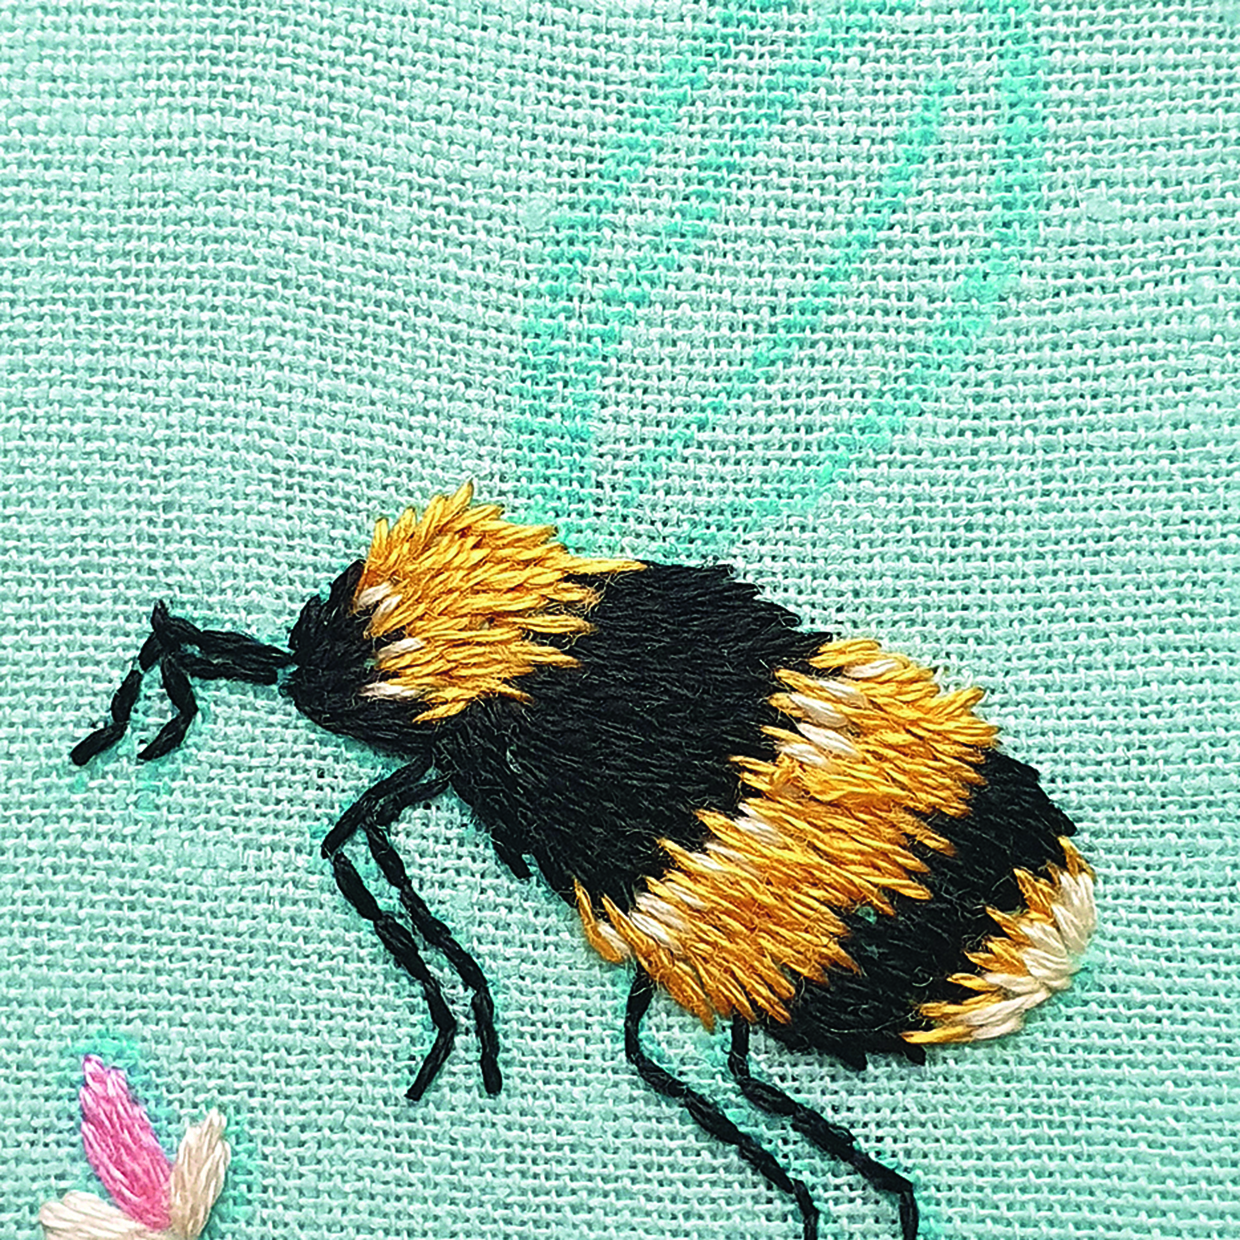
bee embroidery LE step 16

Fill in the final segment of the bumblebee in Long and Short Stitch using two strands of cream. Work a row of Long and Short Stitch where the black stitches meet the cream stitches using two strands of gold.
On the head and middle body section, work rows of Long and Short Stitch where the black stitches meet the gold stitches using two strands of cream.

Step 17
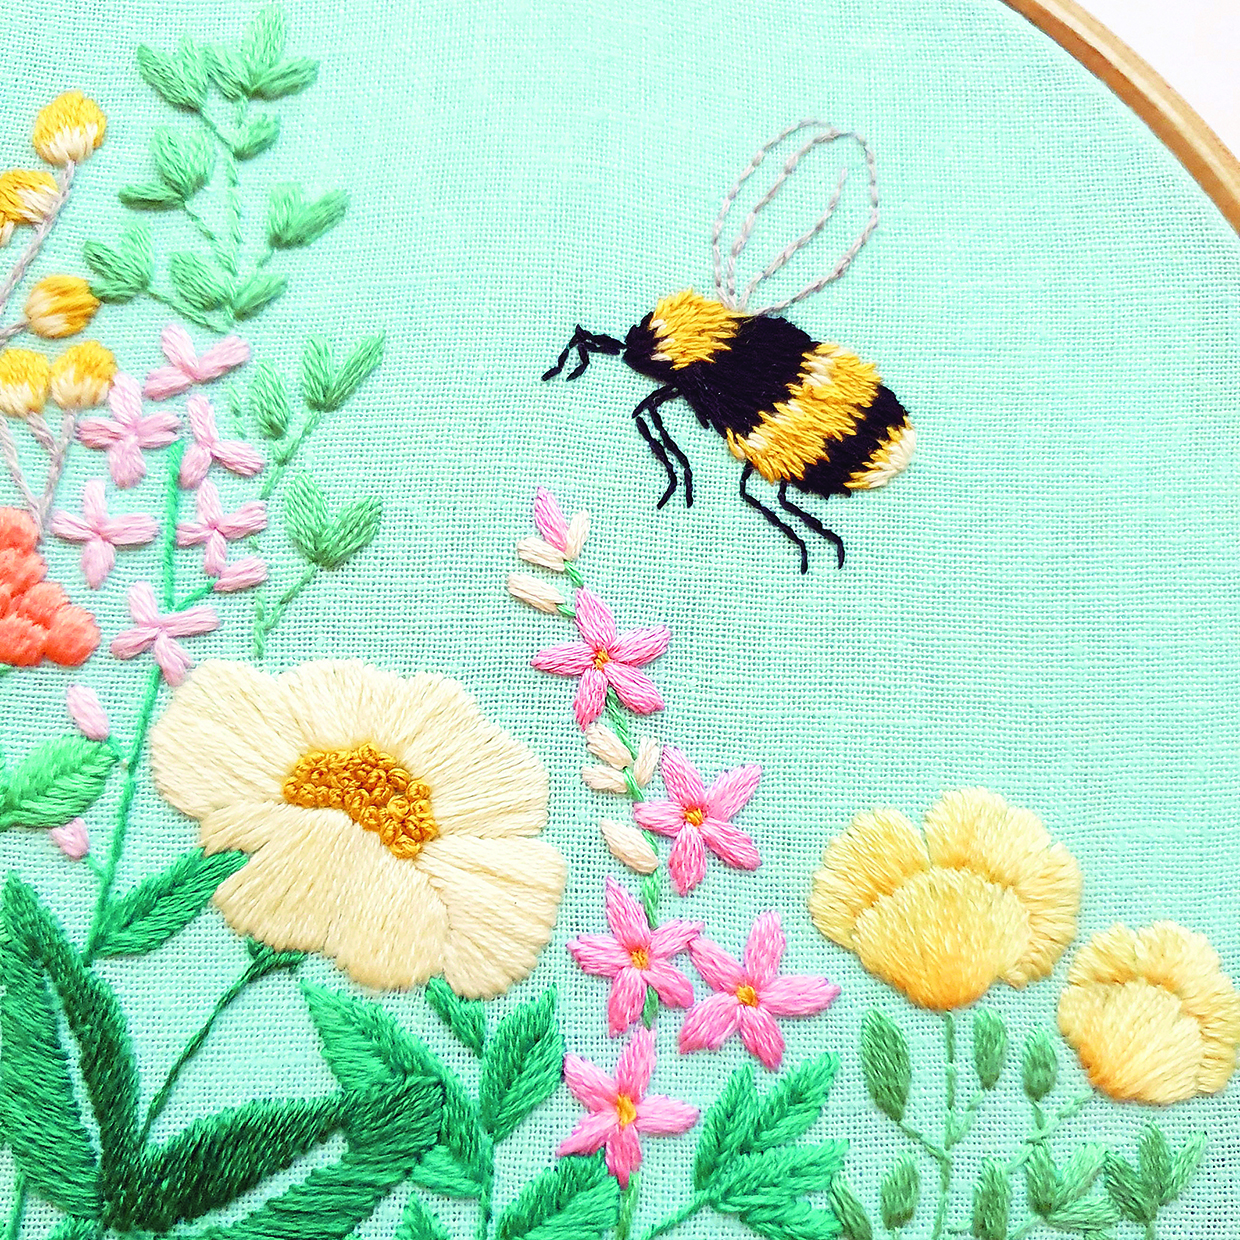
bumble bee embroidery 17

Work the wings in Backstitch using two strands of taupe.

Step 18
bumble bee embroidery 18

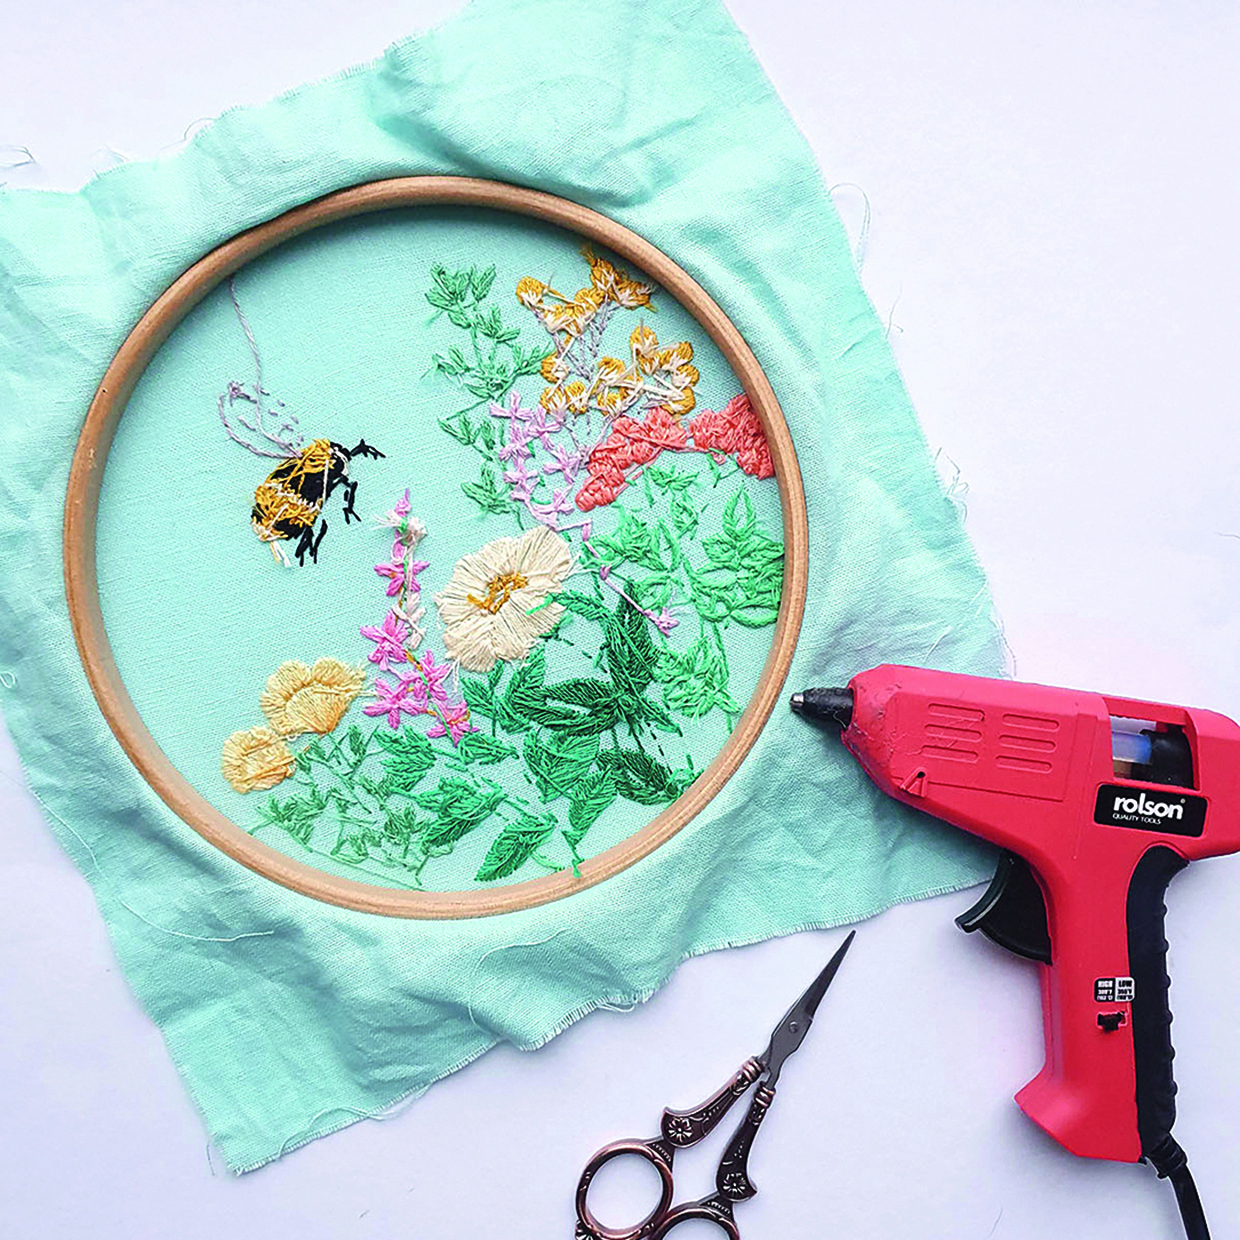
Once all the stitching is complete, gently wash away the soluble pen marks under water.

When the fabric is dry, mount your stitching in a hoop, making sure your stitched design is positioned correctly, and that the fabric is tight. Trim away the excess fabric, leaving a couple of centimetres all the way round.

Use liquid glue or a glue gun on the top edge of the inside hoop, pegging the fabric down as you go. Once the glue is dry, you can remove the pegs
bee embroidery LE square

Now that you’ve finished your lovely bee embroidery patterns, why not take a look at our other free embroidery patterns. We have lovely peach free machine embroidery patterns for you to try, too, or if you want to try hand embroidery on clothes, check out our cat embroidery to add cats to your pockets or How to make embroidered socks.