From cutting and joining the pieces, to understanding the markings and knowing how much fabric to buy, our essential guide is here to help.
Know your grainlines from your darts and notches! In this Sewing School post we'll talk you through the basics of how to turn your pattern into a kick-ass garment that's made to measure! Don't forget, we've got loads of sewing patterns for free here on Gathered, so you can get plenty of practice in!
This post includes:
- Using a sewing pattern: start here!
- What do sewing pattern markings mean?
- Pattern matching
- How much fabric should I buy?
- Tips for picking which fabric to use
- For example: cutting out and pattern matching a skirt piece

1. Using a sewing pattern: start here!
-
Before you begin
Preparing your fabric and cutting out the pattern correctly is just as important as the actual sewing. Always wash your fabric before you begin (if it’s washable!) as fabric can shrink and run, so get this out of the way before you start cutting and stitching. Once dry, press well to remove any folds and creases so that it’s flat and wrinkle-free. -
Prepare the pattern
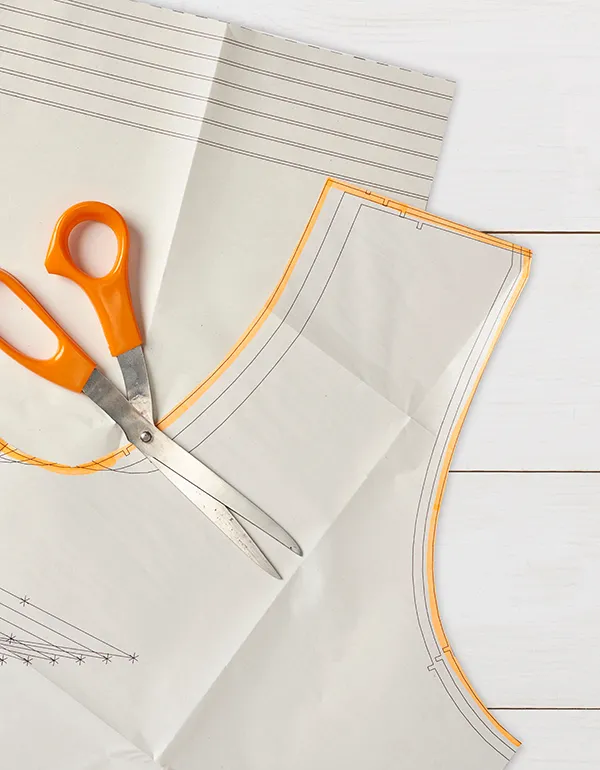
Many patterns come with lots of options for different finishes, so read the instruction sheet to work out which pieces you’ll need. Cut out all the pieces outside the lines as it’s easier to do this first. Use paper scissors for this rather than your fabric scissors as the paper will blunt them. Press your pattern pieces using a dry iron on a low heat to remove folds and creases so they will lie flat on your fabric when cutting out. -
Cutting out the pattern
Choose your size using your measurements and the size chart. You may well bea different pattern size for some of your measurements, but if you have a multisized pattern then follow the instructions for combining pattern sizes overleaf. Cut along the corresponding lines on your pattern. If they’re close together, draw over your chosen size with a highlighter pen first so you can easily see which line to cut. -
Cutting layouts
If your pattern has several cutting layouts then choose the correct one for the width of fabric you’re using, the size you’re cutting and the style of garment. -
Cutting out
Lay your fabric flat on a table or the floor and smooth it out so it’s crease and wrinkle free. Fold or place the fabric as shown on the cutting layout. Lay the pattern pieces in the order and right side or wrong side up as shown on the cutting layout. Check to make sure that the grainlines of the pattern are parallel with the selvedges by measuring. Now pin your pattern pieces carefully in place and cut around them through the fabric using a sharp pair of dressmaker’s shears. Use a pair of smaller, sharp scissors on fiddly sections for accuracy. -
Transferring pattern markings
All the markings on your pattern pieces need to be transferred to the fabric. Don’t miss out this step as these are really important for matching up fabric pieces later on and for positioning elements such as darts and pockets. You can mark these with snips on the fabric, using a fabric pen or with small tacking stitches. Keep all of your pattern pieces pinned to the fabric until you need them, so you’ll know exactly which piece is which when you come to sew them together.
2. What do sewing pattern markings mean?
Dressmaking patterns have markings on them to help you achieve the perfect cut, sew and fit. Follow these markings carefully and transfer them onto your fabric for a more professional finish.
Cutting lines
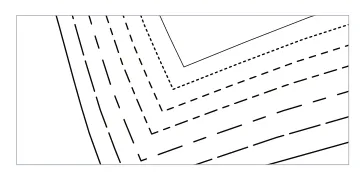
Multi-size patterns have different style lines for each size, such as dots and dashes. Cut along the line that matches your size.
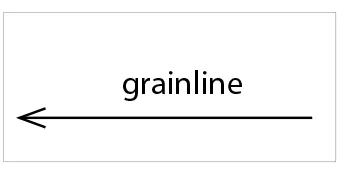
Grainline
Match up the direction the arrow is pointing with the grain on the fabric which runs parallel to the selvedges. Measure this for accuracy.
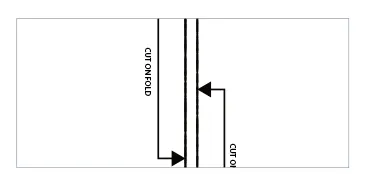
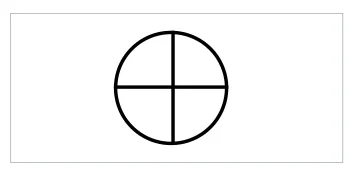
On the fold
To cut a pattern piece on the fold, line up and pin this marking with the fold on the fabric then pin the rest of the pattern in place.
Bust and hip indicators
These indicate the bustline, waistline or hipline on the pattern and are a good way of checking if the pattern fits your shape.

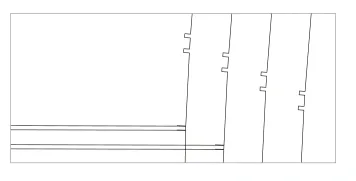
Notches
These triangles or lines are marked on the edges of a pattern to indicate where to match up two pattern pieces and fit them together.
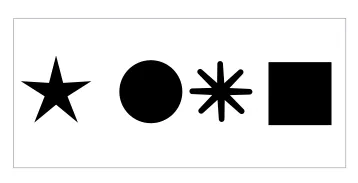
Other shapes
These are used to mark specific parts of the pattern, such as pocket placements, dart points, clipping, gathering and stay stitching.
Lengthen and shorten lines
Two horizontal, parallel lines which show the point on the pattern where you can lengthen or shorten it to suit your size.
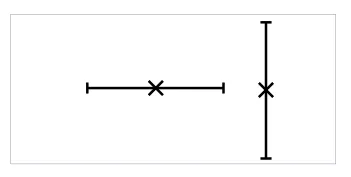
Buttonholes and buttons
Buttonholes are usually represented by a horizontal or vertical line and the button position is marked on this line with an X.

Darts
Dart lines on a pattern, used for shaping, are usually shown as a diamond shape or as two lines coming from one point.
3. Pattern matching
Deciding where to pattern match when you make a garment can be tricky, as it’s not always possible to pattern match on every seam. The first thing to look at is whether the pattern on the fabric runs in one direction, as it’s important that each pattern piece is cut in the same direction. If the fabric has a bold motif it’s best not to cut your pattern pieces on the fold. Instead, cut out one half, flip the pattern piece and then cut out the other half – this is the most accurate way of making sure that the pattern piece lies correctly and straight on your fabric.
Pattern matching straight seams is simple, but once curved seams are involved then you won’t be able to get a perfect match. However, if there is a seam where you can pattern match, for example the back seam of a skirt, then it really is worth doing this for a better finish. If it’s impossible as you have too many seams, then try to get the pattern running on the same plane horizontally around the garment, even if you can’t achieve a perfect vertical match. If you have a fabric with a large print, then decide where you want the motifs of the pattern to go on your garment. It will look more even if a larger motif runs down the centre of the bodice and skirt of a dress, but you need to check how this affects the rest of the pattern.
Always place your pattern pieces on your fabric and move them around to choose the positioning that works for you. Really, though, it’s all about what’s pleasing to your eye and what you think looks right.

4. How fabric should I buy?
If you are going to pattern match your pieces then you will, most likely, need to buy more fabric than is listed in the instructions.
The most accurate way to work this out is to measure each of your pattern pieces before you buy your fabric. Next, find out the pattern repeat of the fabric you want to use. The pattern repeat is the measurement of one whole pattern as it is printed on the fabric. To work this out, lay the fabric out flat and mark a prominent point of the pattern with a pin. Find the next place that this is repeated and mark with a pin. The space between these pins is the pattern repeat.
Each pattern piece needs to start and finish at the same point of the pattern repeat so calculate how much fabric you’ll need for this to happen.
If you have a striped or check fabric then you may want the pattern pieces to match horizontally, so bear this in mind when calculating your fabric. There will be some wasted fabric, but your finished garment will have a more professional look if the pattern is matched accurately.
5. Tips for picking which fabric to use
It’s important to choose the correct fabric for your pattern. Most patterns give suggested fabric types that will work best with the style of garment, so use this to guide you as some patterns need more drape, body or structure than others.
Fabric can be made from natural fibres such as cotton, linen, wool and silk, or synthetic fibres such as acetate, acrylic, nylon, polyester, rayon and viscose. All of these fabrics can be bought in varying thicknesses (called weights) to suit different garment types.
- Lightweight fabrics are ideal for making lingerie, nightwear and summer clothing, and include cheesecloth, chiffon, crepe de chine, georgette, lawn, muslin, organdie, organza and voile.
- Medium-weight fabrics work well for making dresses, tops, shirts, trousers and childrenswear, and include calico, cotton, crepe, dupion, linen, poplin and finer woolen fabrics.
- Heavy-weight fabrics are used for garments or projects that get lots of wear and so need more strength, like coats, jackets, winterwear and bags. Canvas, corduroy, denim, tweeds, velvet and wool are all in this category.
Some patterns require fabrics that are quite fluid and have a good drape to make them hang properly, such as challis or crepe. Stretch and knit fabrics such as jersey and lycra can be bought in a variety of thicknesses and qualities depending on their intended use.
6. Cutting out and pattern matching a skirt piece