There’s nothing more frustrating than accidentally scratching or damaging the surface of a cherished piece of furniture.
Who isn't familiar with the glaring circle left by a coffee cup popped down carelessly on a wooden chest of drawers or dainty side table?
If this sort of incident leaves you feeling in despair, then this article is for you!
There's a host of quick and simple ways to repair the surface and leave it looking as if nothing ever happened. Read on for our expert tips for repairing both fine and deep scratches.
How to prep the surface of your furniture ready for repair
Before you start, it's really important to check the wood carefully to ensure you know what you're dealing with. Sometimes the scratch may look deeper than it is, or the wood may have a sealant on it, meaning the scratch hasn't yet reached the wood.
When you're done fixing the scratch, remember to apply a sealant, such as wax or oil, or a varnish or lacquer, to protect both wood and filler material from damage.
How to fix fine scratches in wood furniture
There are a number of methods for repairing fine scratches in wood furniture, and most use inexpensive items that you may already have at home. Here are six methods to try:
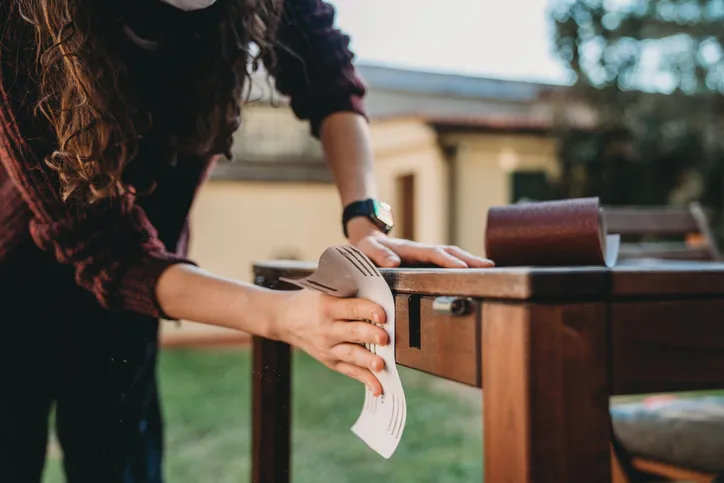
Method 1: Sandpaper
Most light or surface scratches can be removed by lightly sanding the area with a sanding block.
Always sand in the direction of the grain. This is because sandpaper puts scratches into the surface of the wood, so the lower the grit (80, 120) the coarser the paper and the deeper the scratches.
Working with the grain of the wood allows the scratches to blend in with the natural grain.
If you work across the grain the scratches will not blend in and will stand out.
Start by using fine sandpaper (180 grit) before moving on to something lighter (240 grit) to blend in and minimise the scratches caused by the 180 grit. If the scratches are deeper, you may want to consider a medium sandpaper (120 grit) before this step.
Finish sanding the area using finer sandpaper (240 grit) in the direction of the grain – this will blend in and remove the scratches caused by the lower grit paper.
Don’t be tempted to skip from coarse sandpaper (120 grit) straight to fine sandpaper (240) as you will see the scratch marks from the coarse paper.
Once you’ve removed the scratches, clean the dust off the surface using a damp cloth, before refinishing using a furniture oil, wax or varnish.
Method 2: White vinegar and olive oil
White vinegar typically consists of 5% acetic acid and 95% water, which not only makes it an ideal cleaning solution, but it also helps to repair minor scratches.
The acetic acid will work into the existing finish around the scratch to help fill it.
However, it’s important to mix the white vinegar with oil, as too high a concentration of acetic acid could cause damage to the surface finish.
The olive oil will improve the overall desired result as it soaks into the exposed wood within the scratch. This helps achieve a darker colour matching the rest of the finish, while also protecting the wood from moisture.
Combine 100ml (one part) white vinegar with 200ml (two parts) olive oil in a bowl and mix well. Soak a soft cotton cloth into the solution, then squeeze out any excess moisture from the cloth.
Apply the soaked cloth to the scratched area. Rub in a circular motion over the scratched area and then finish by rubbing the cloth in the direction of the grain.
Let the solution sit on the surface for 2 minutes. This allows the oil to soak into the scratches. Get a clean, dry rag and wipe off the excess solution. Then rub along the grain. Ensure there is no residue left on the surface.
This process can be repeated several times until the scratches disappear.
Method 3: Walnut oil
Take a walnut, crack it in half, and rub the inside of the walnut on your scratch. The walnut oil both stains and expands the wood, filling the crack and blending it with the surrounding wood.
It might take a few minutes for the walnut oil to actually stain the wood, but persevere and the scratch should disappear in about five minutes.
Method 4: Crayon
For scratches that are slightly deeper, try using a child’s crayon.
Ensure your table is clean and free of any dust and debris, especially around the area that you plan to repair. If the surface isn’t spotless it can impact the adhesion between the wax and wood.
Choose a crayon colour that matches the colour of the wooden surface you’re repairing.

Opt for a darker colour over something lighter, as this will improve how the repair blends in with the rest of the surrounding wood. Rub the crayon over the scratched area both sideways and lengthways until the scratch is full of wax.
Use an old loyalty or credit card to gently scrape away any excess wax off the surface. Ensure that the table surface is now level where the scratch used to be.
Use a clean cotton rag to buff the wax infill and help blend the wax into the tabletop. You can repeat this process several times to achieve a smooth, flat surface.
Method 5: Mineral oil and pumice
Make a paste with mineral oil and powdered pumice. Take some extra-fine-grade steel wool and rub the paste on the scratched area. Wipe it off with a damp paper towel, then buff with a clean, dry cloth to finish.
Method 6: Coffee grounds
Mix cooled coffee grounds with 60ml of warm water and 60ml of white vinegar and leave it to steep for at least one hour before applying it to the scratched surface with a rag.
Let the mixture sit on the scratches for 10 minutes and then wipe away gently with a clean cloth.
How to fix deep scratches in wood furniture
Method 1: Wood filler
Clean the damaged area using a soft cloth and a special hardwood cleaner and allow the area to dry completely. Alternatively, gently rub a soft cloth dipped in mineral spirits over the scratch, in case your furniture is coated with a layer of polyurethane, as this should be stripped off so you can fix the scratch.
Wipe with a dry cloth and let it dry off completely. Use a wood filler that matches the colour of your wooden surface to fill in the deep scratch.
You can use your finger to work the product into the scratch, making sure there are no trapped air pockets. Use a putty knife or an old credit/loyalty card to smooth the surface and remove any excess filler from the surface.
Wait for the filler to dry – drying times can vary so ensure you read the manufacturer’s instructions on the packaging for accurate drying times.
Use fine sandpaper (180 grit or 240 grit) on the dried area around the scratch. Always sand by following the direction of the wood’s grain. Finish by applying an appropriate oil or wax.
Top tip: Use masking tape to protect the surfaces next to your tiles – or the newly painted tiles themselves if you decide to re-grout.
Go for an all-over shade for a clean and crisp look, or try out some creative effects. We've shared some of our favourites below!
Method 2: Wax filler sticks
If you have a fairly deep scratch on a flat surface, wax works best.
Choose a coloured wax filler stick in the same colour as the damaged surface - if you can't get an exact colour match, blend colours using the warmth of your hands to soften the wax.
Rub the wax stick across the scratch to fill it. Remove any excess wax by wiping with a cloth and white spirit. Apply beeswax lightly to the scratch and the surrounding area and buff with a lint-free cloth.
Top tip: Use masking tape to protect the surfaces next to your tiles – or the newly painted tiles themselves if you decide to re-grout.
Go for an all-over shade for a clean and crisp look, or try out some creative effects. We've shared some of our favourites below!