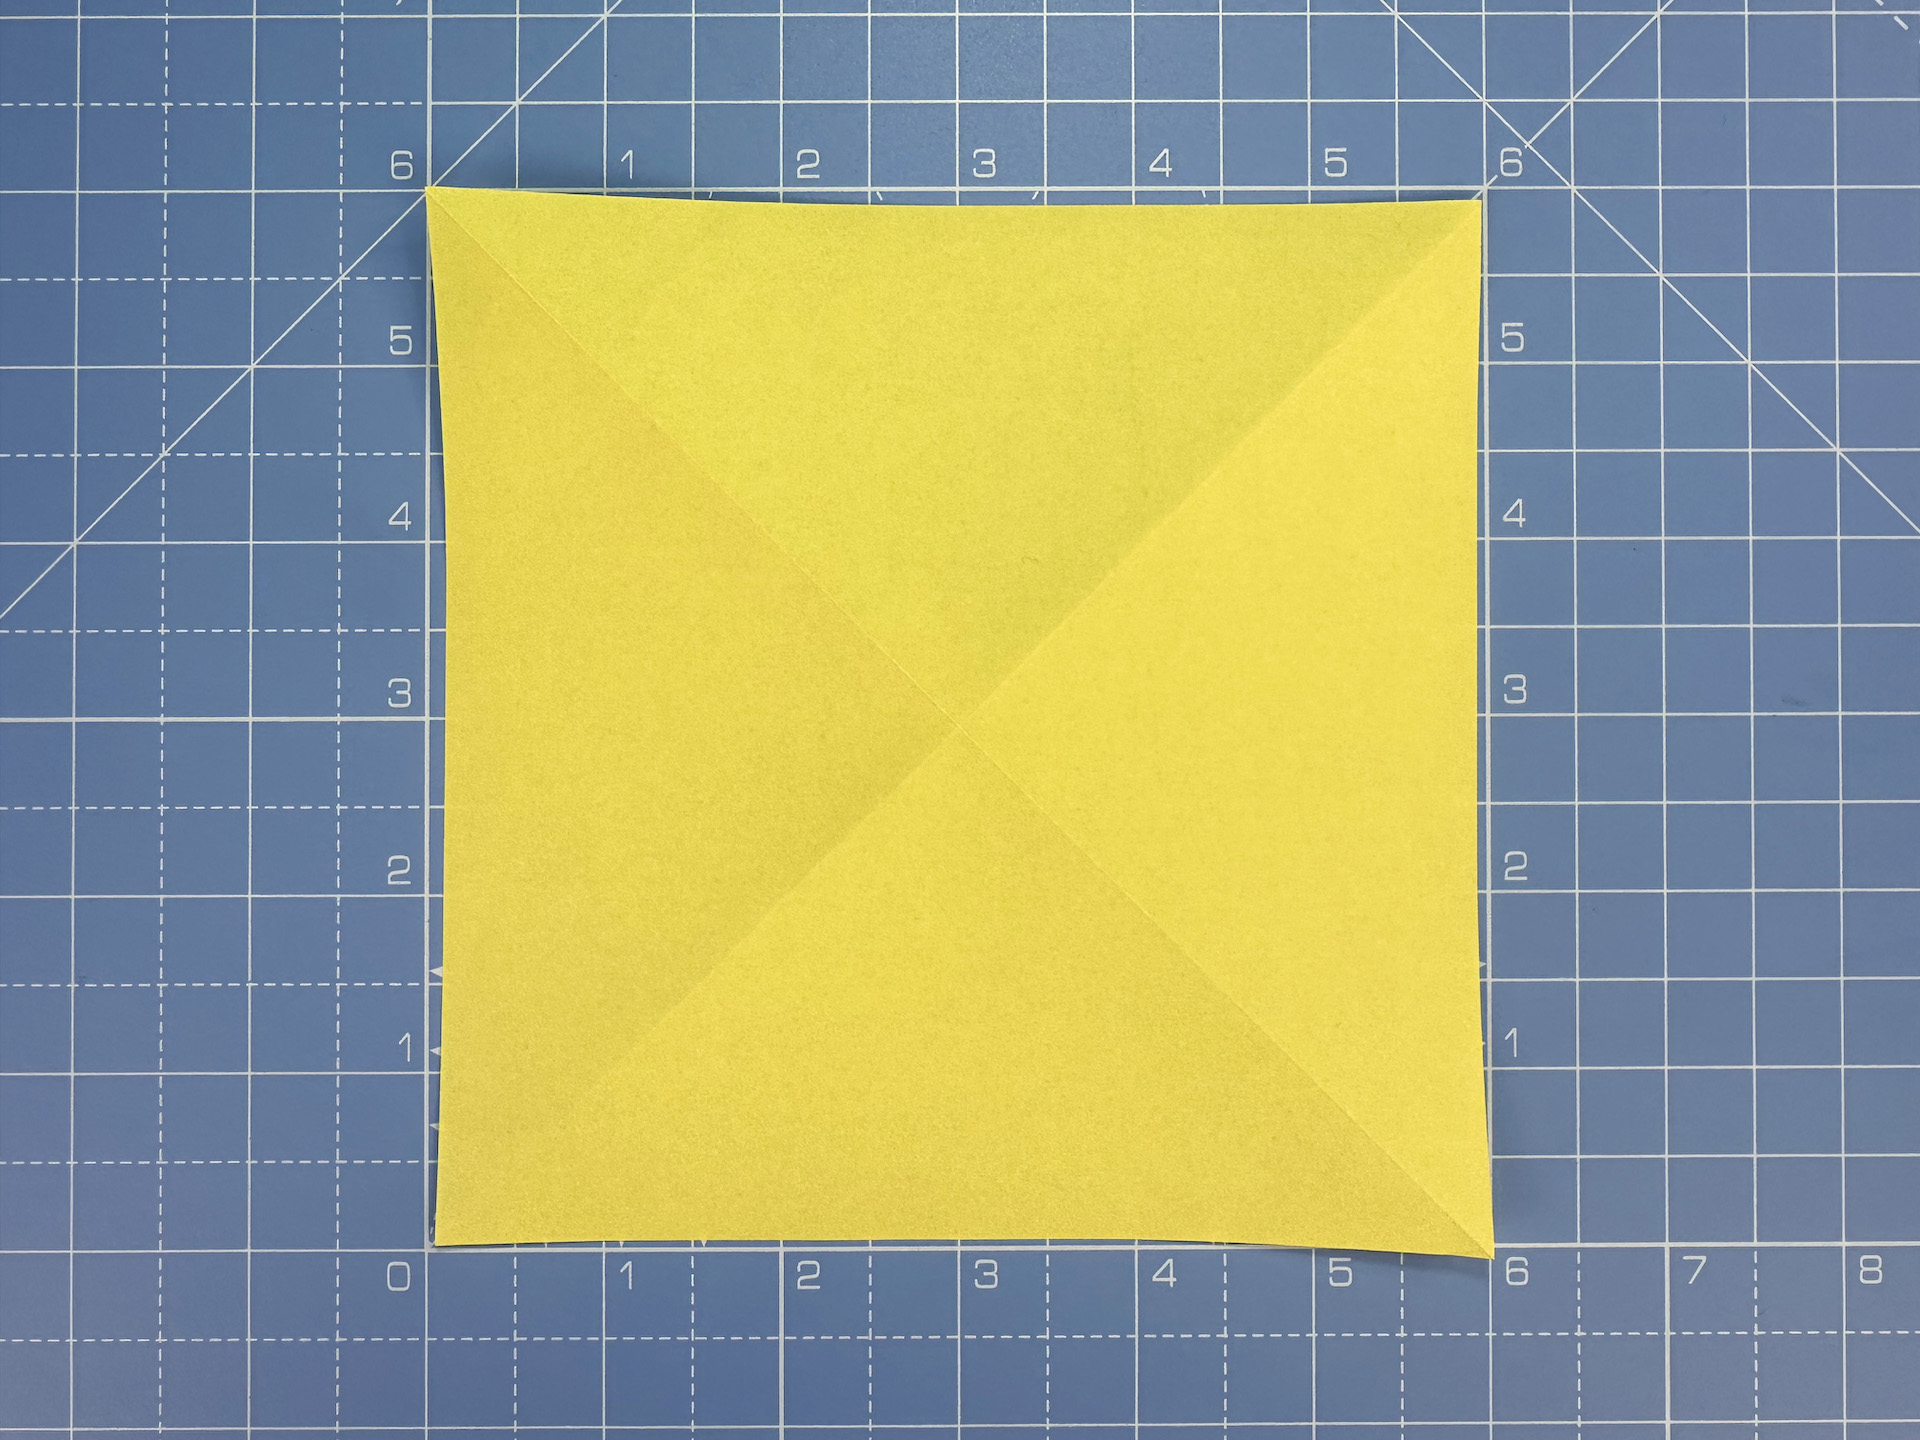
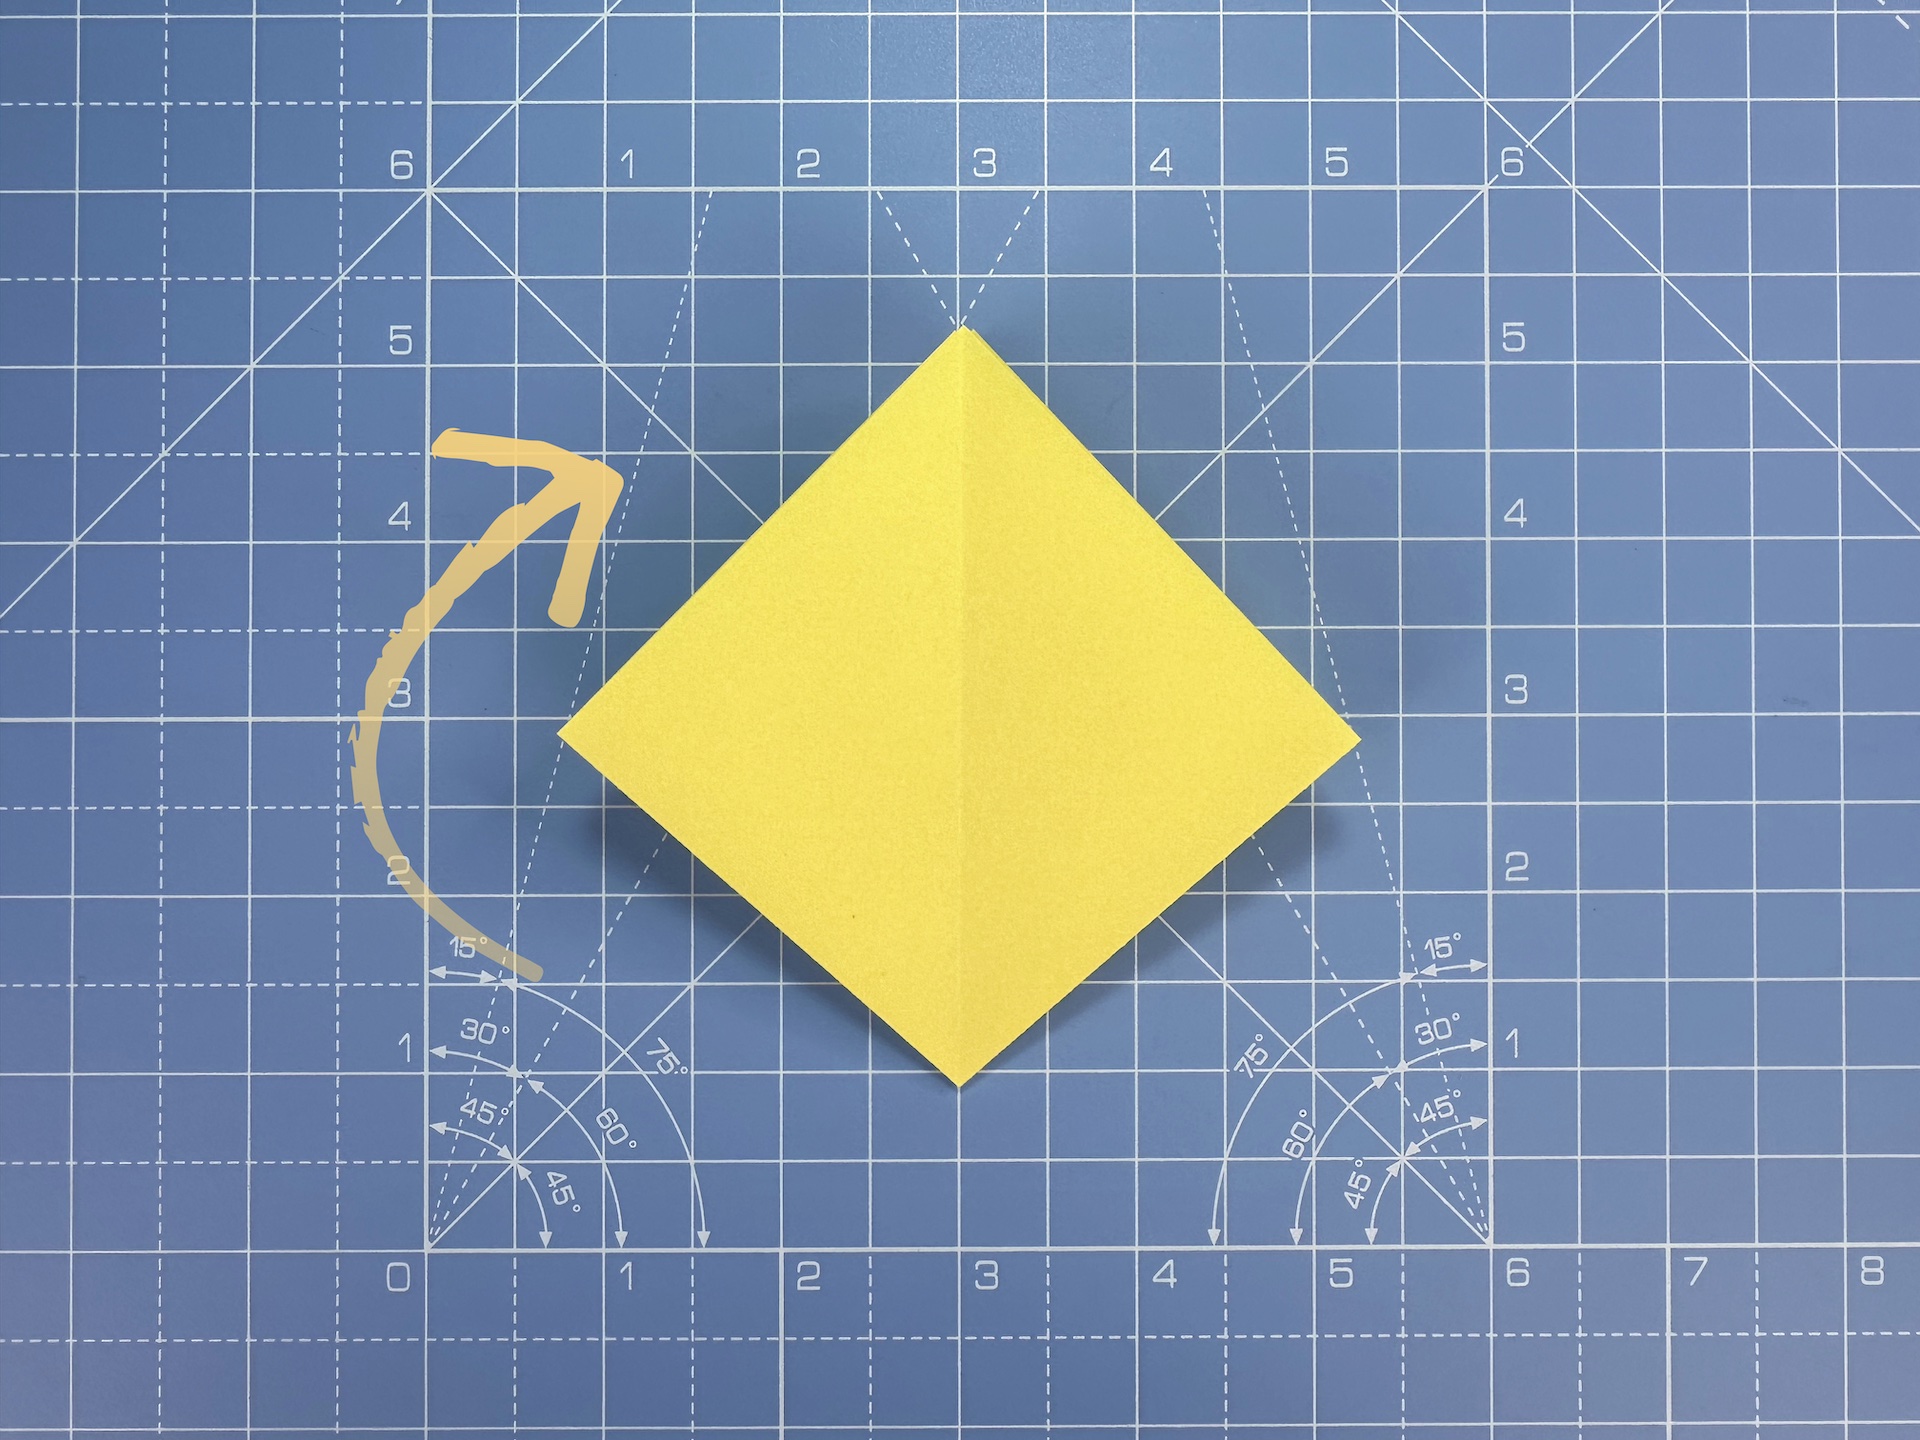
Step 1
Start with a square piece of paper. You can use any paper for this origami lily tutorial, it doesn’t need to be dedicated origami paper.
In this tutorial, we are using 15x15cm paper that is yellow on both sides.
Fold in half along the diagonals and unfold.
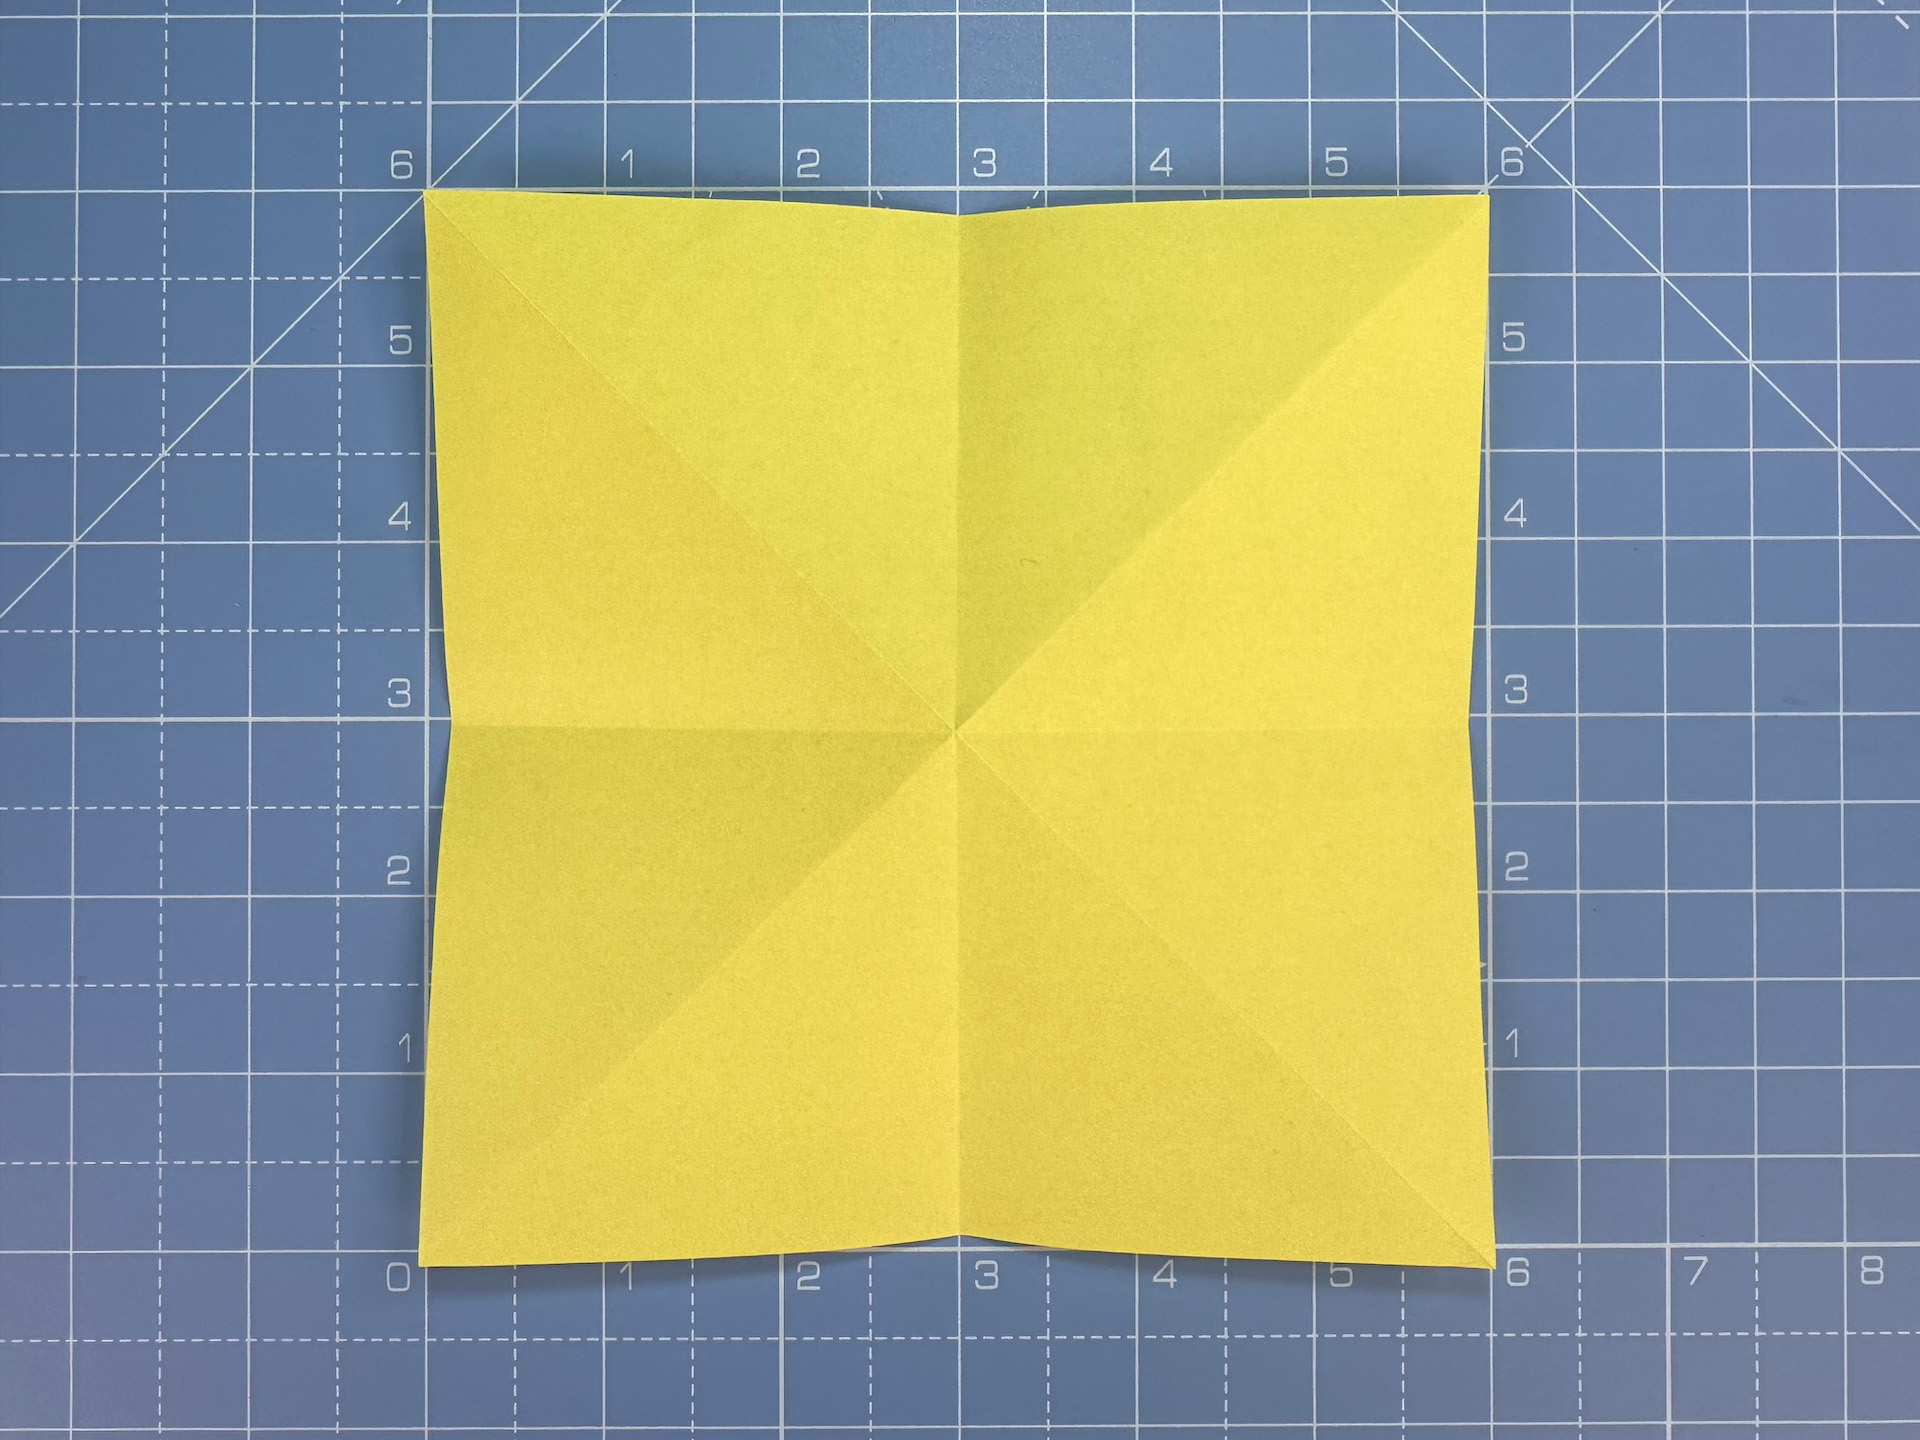
Step 2
Turn the paper over then book fold along the horizontal and vertical. Unfold.
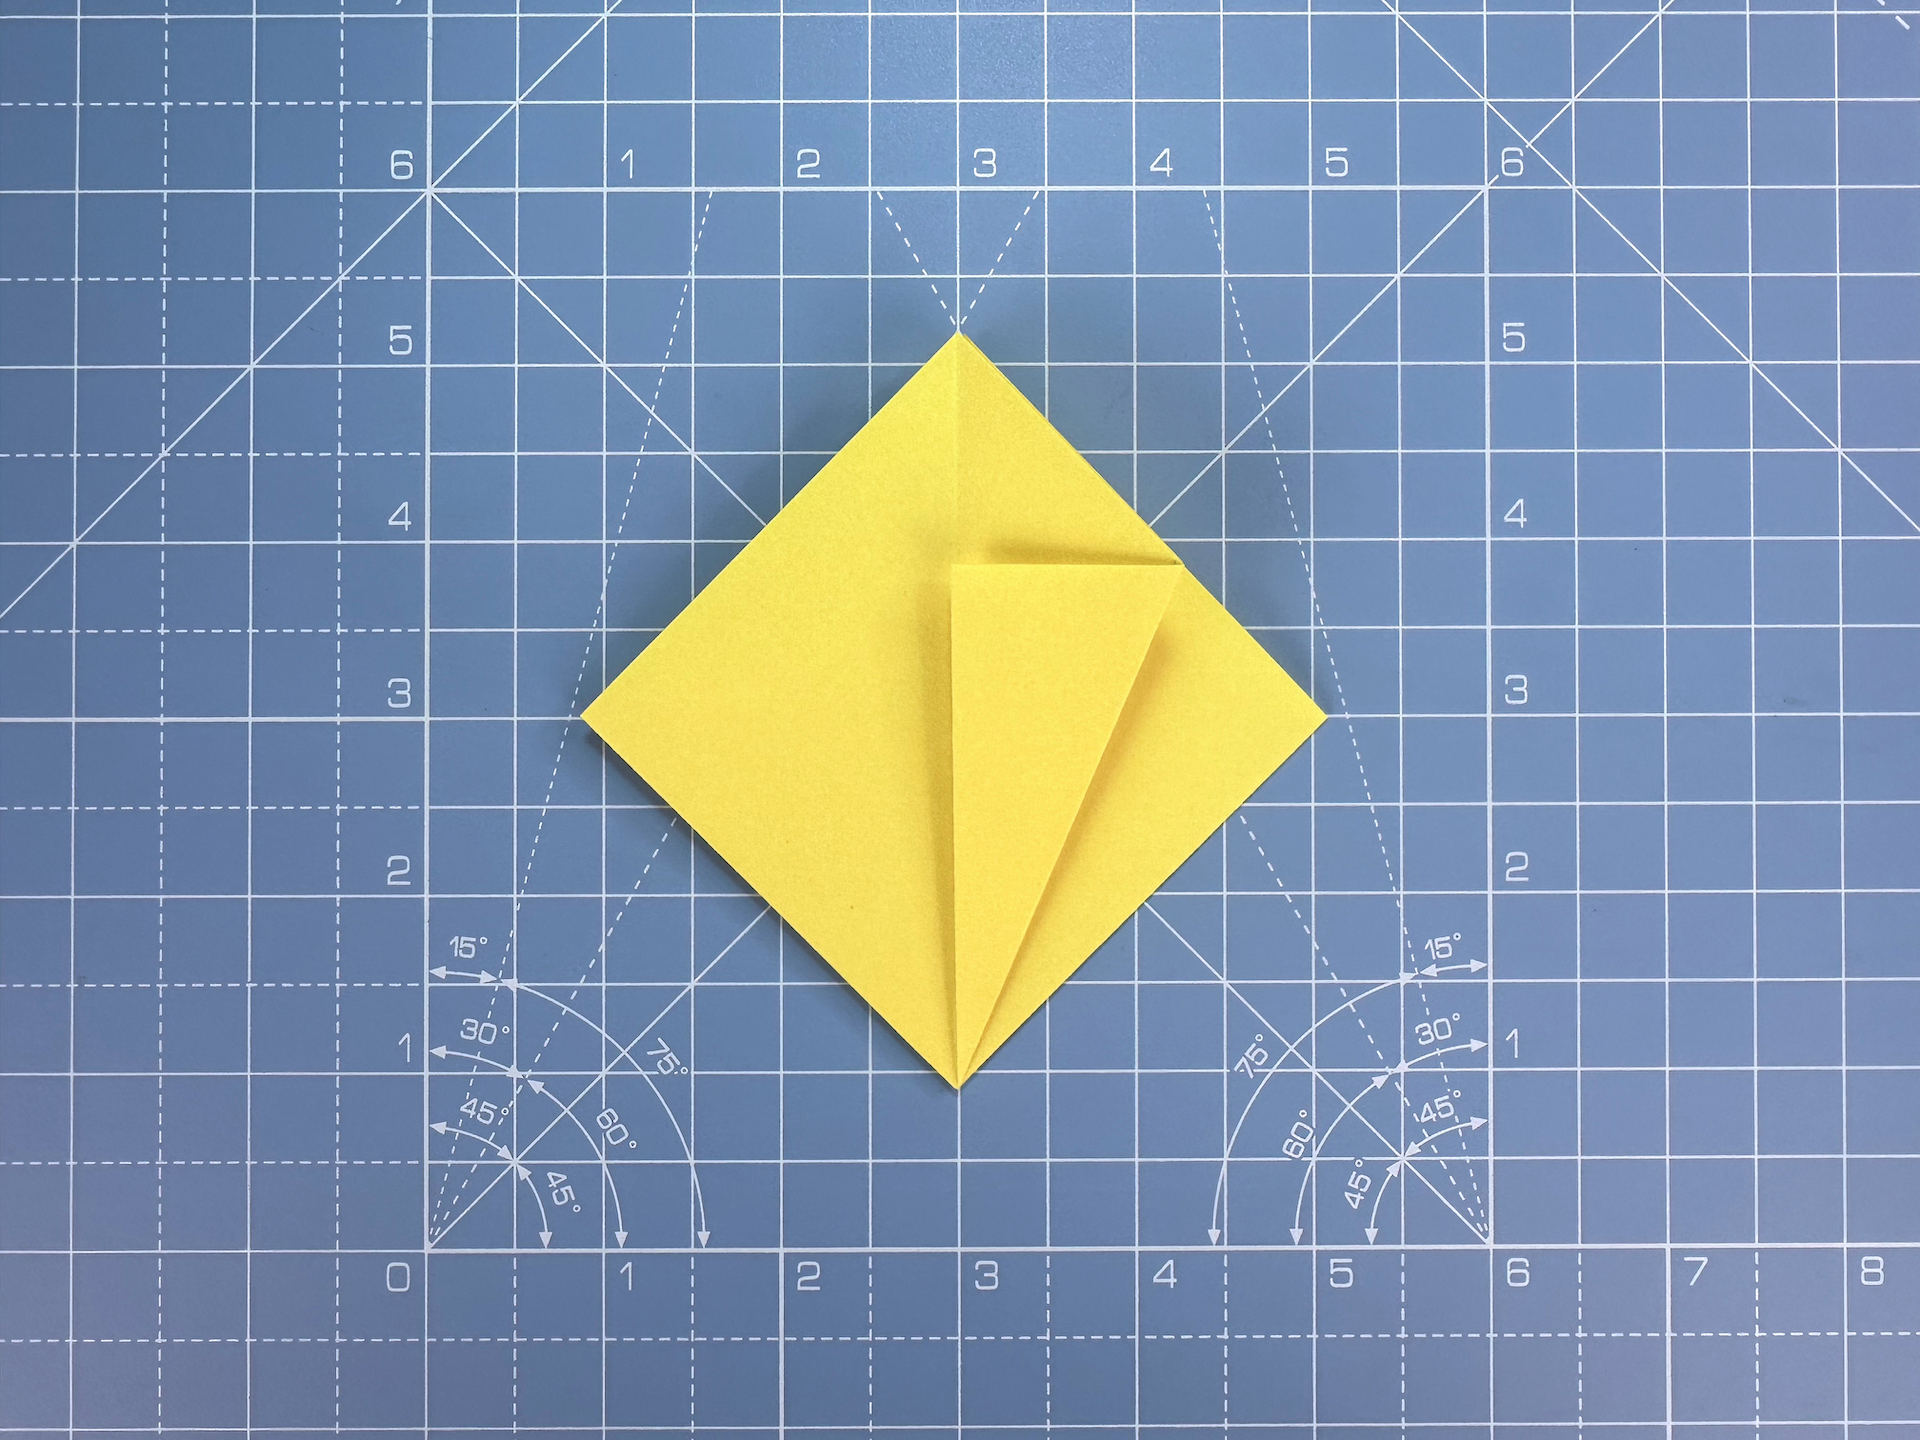
Step 3
Bring the corners together so they meet. You’re essentially collapsing the paper in on itself, and the end goal is a square shape, that’s open at the bottom and a closed point (what was the middle of the paper) at the top.

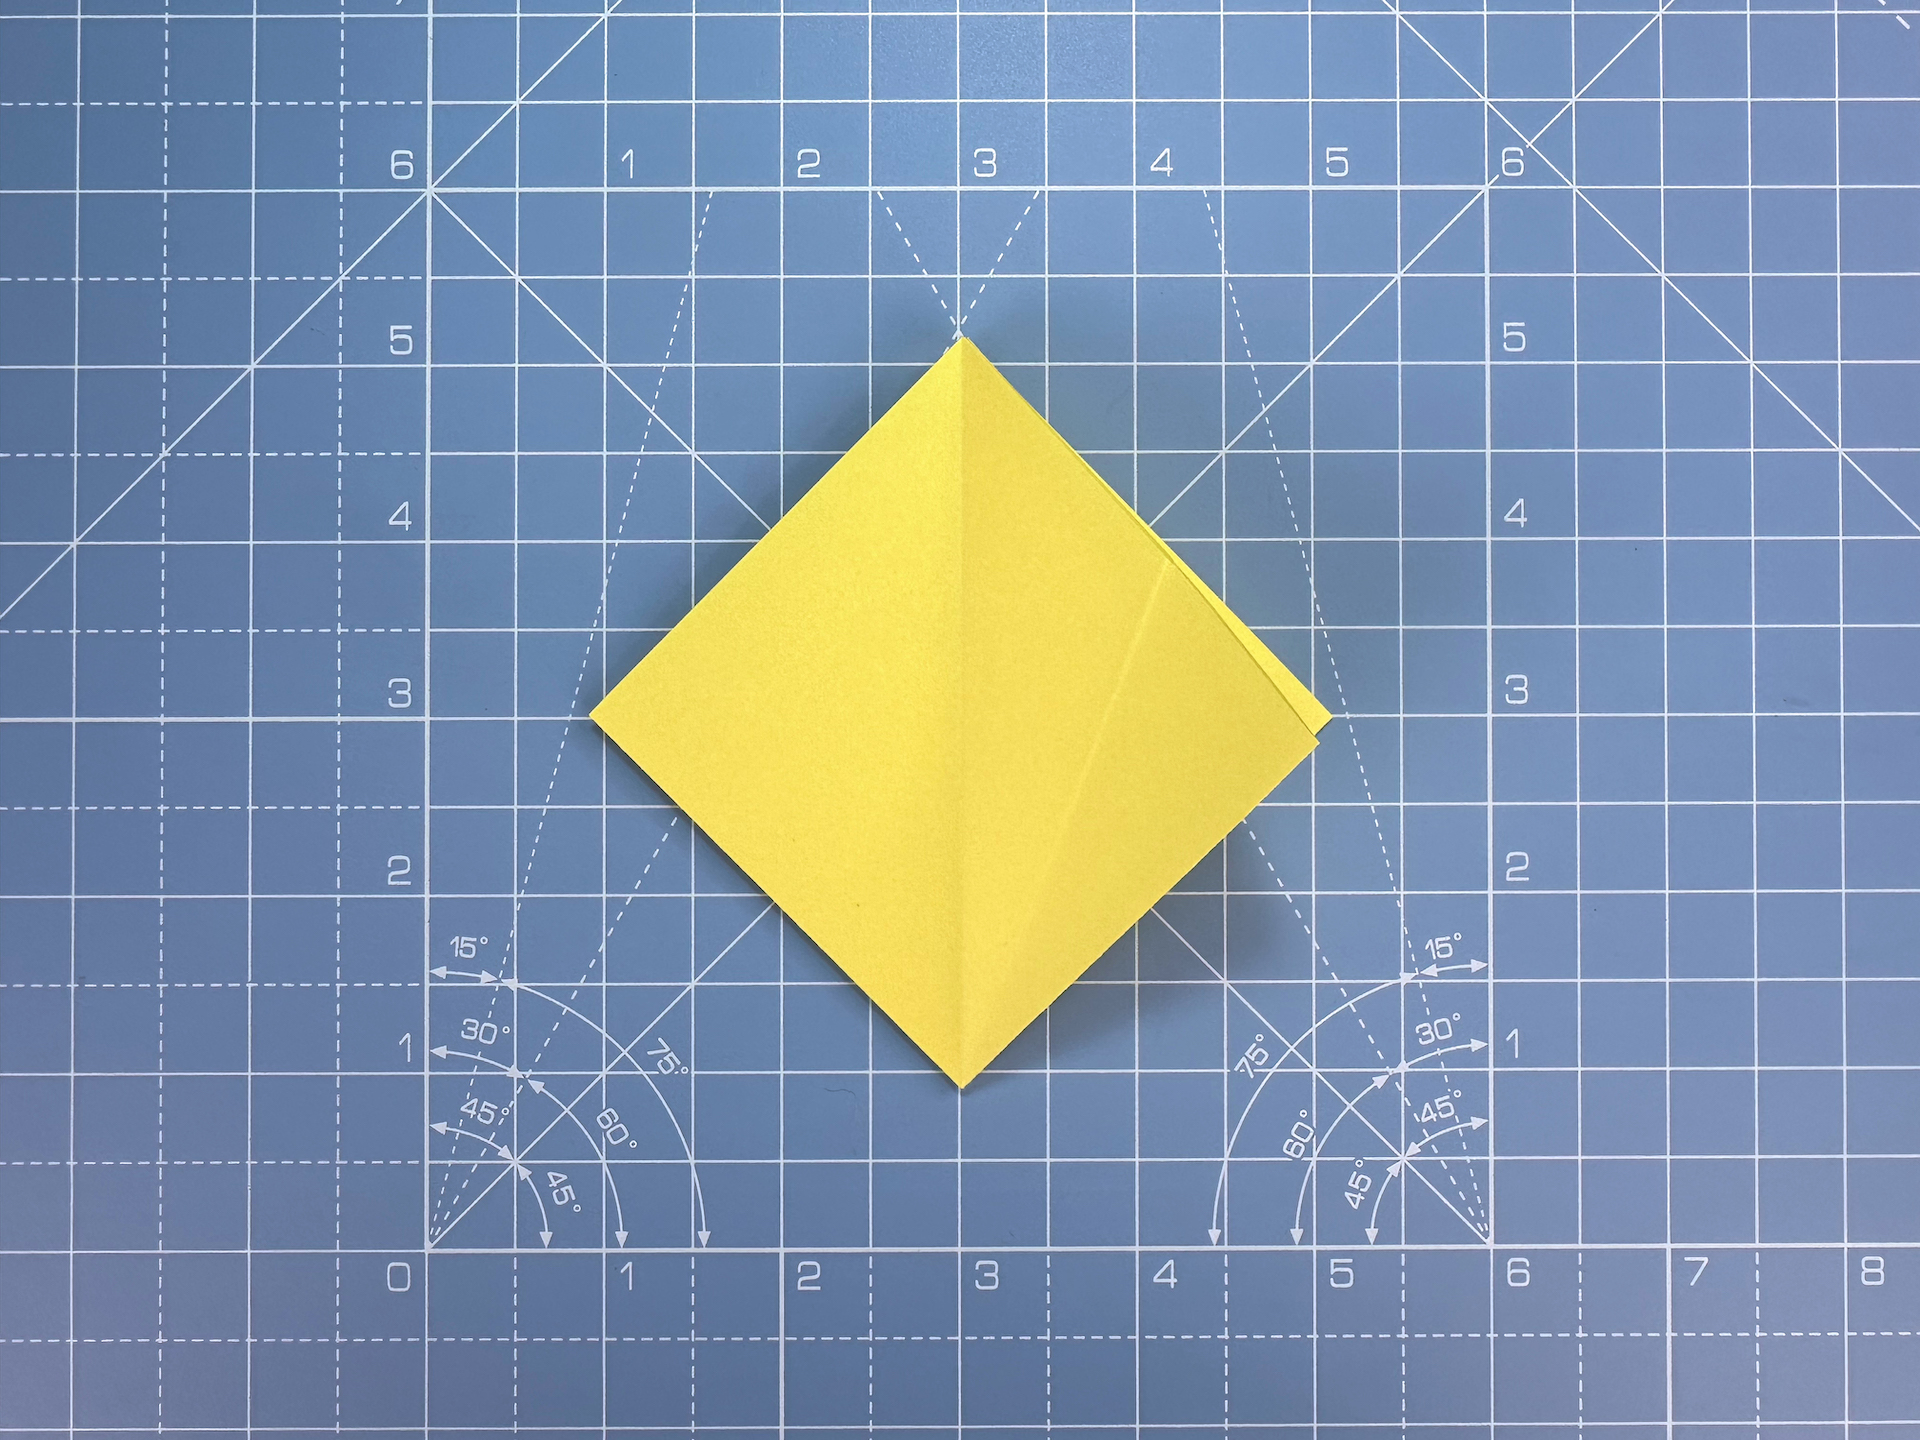
Step 4
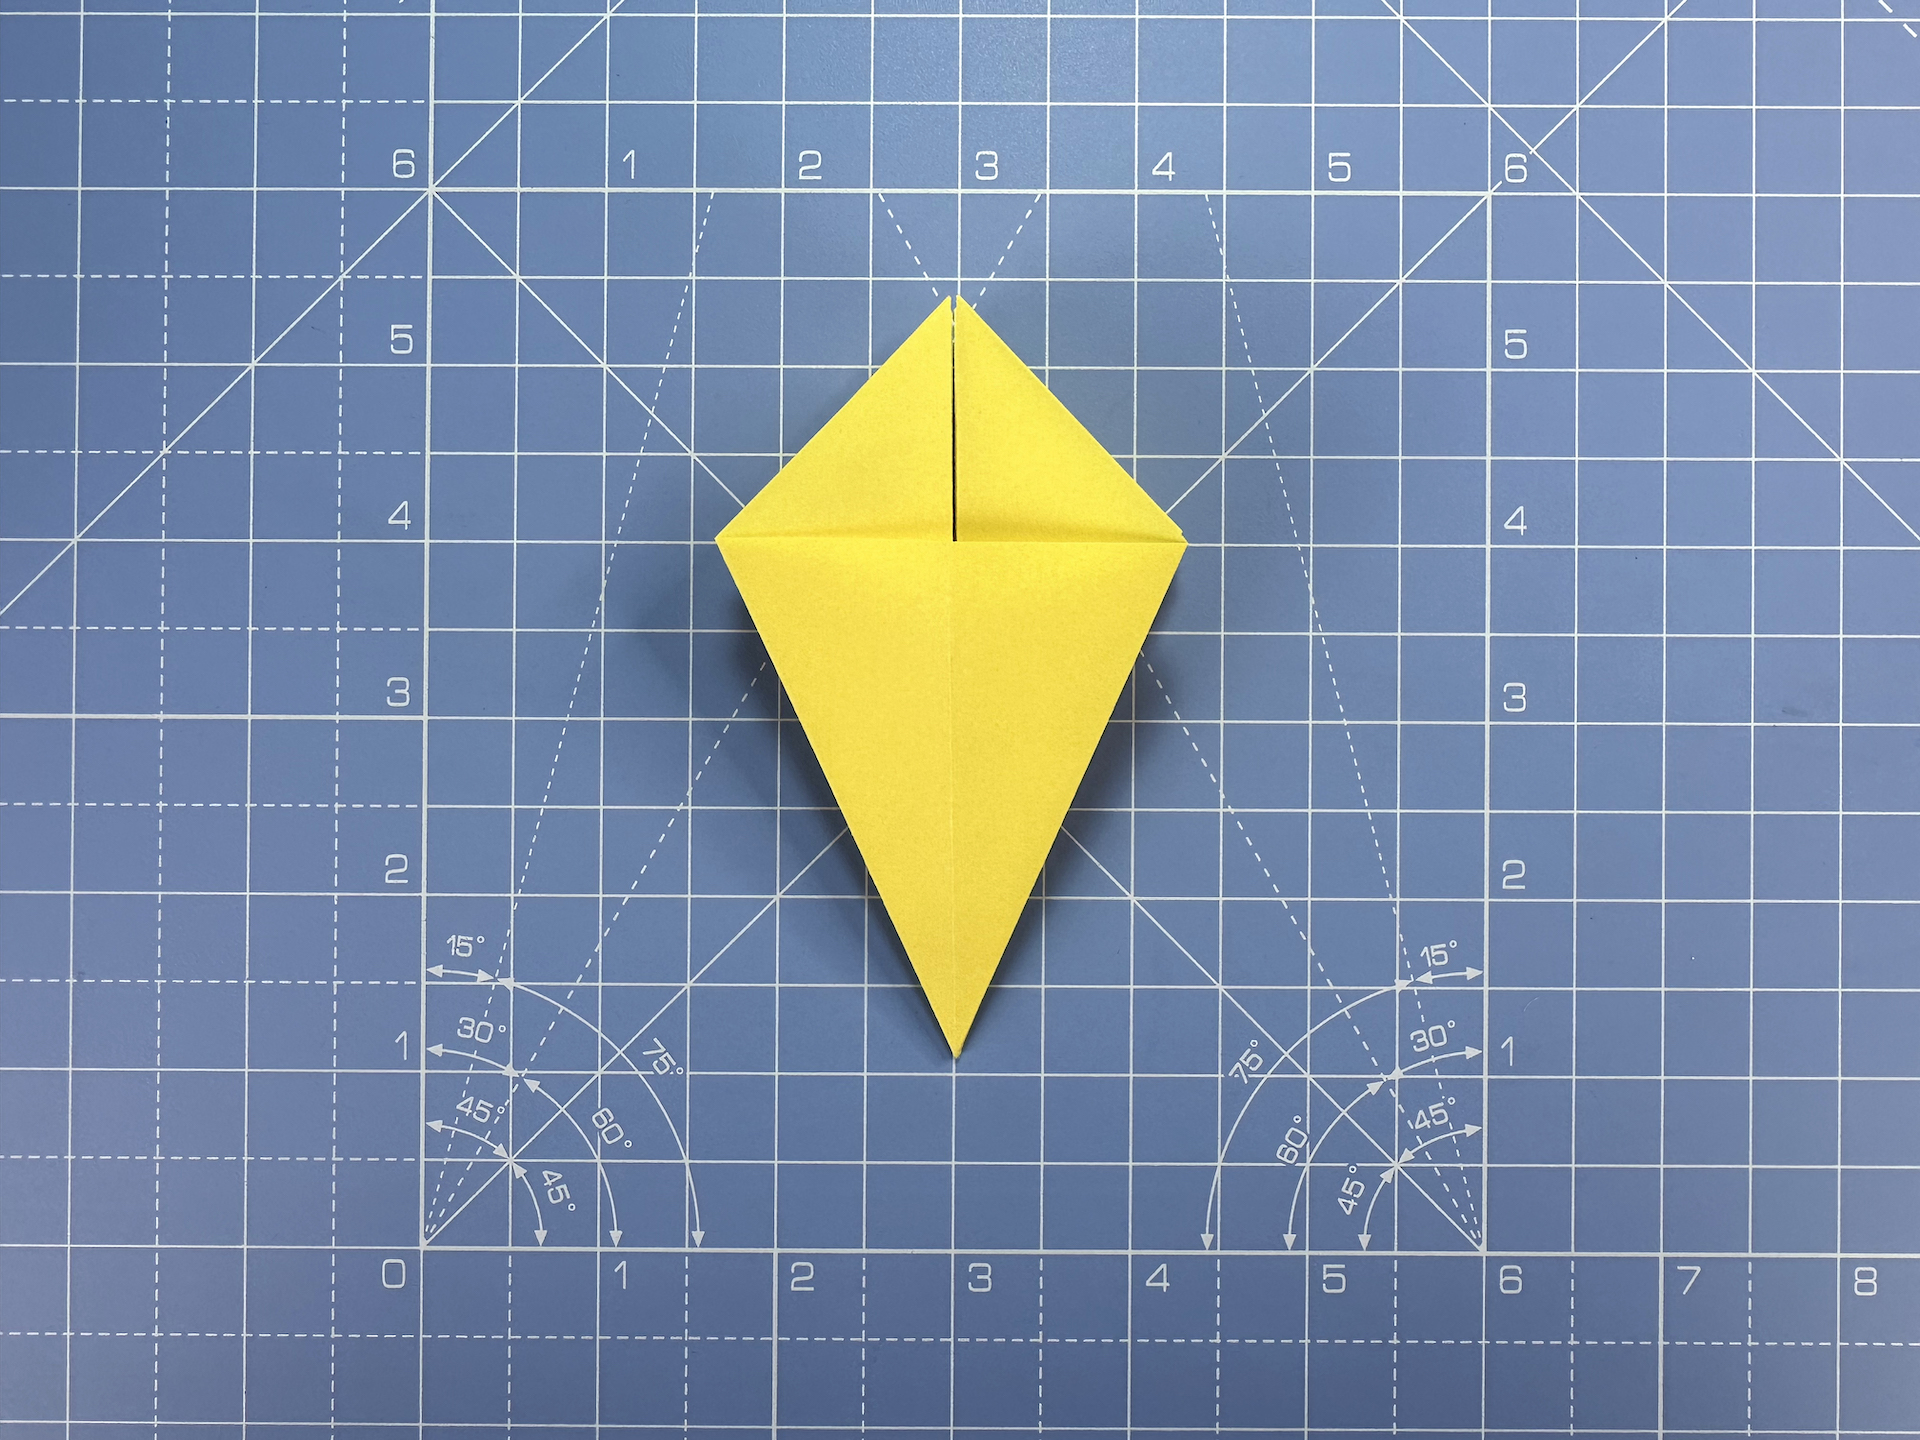
Rotate the paper so that the open corner is at the top.
Step 5
Fold one of the sides in to meet the centre line.
Step 6
Unfold.
Step 7
Using this fold you just made, open the flap and squash back down into a new kite shape. This type of fold is called a ‘squash fold’. 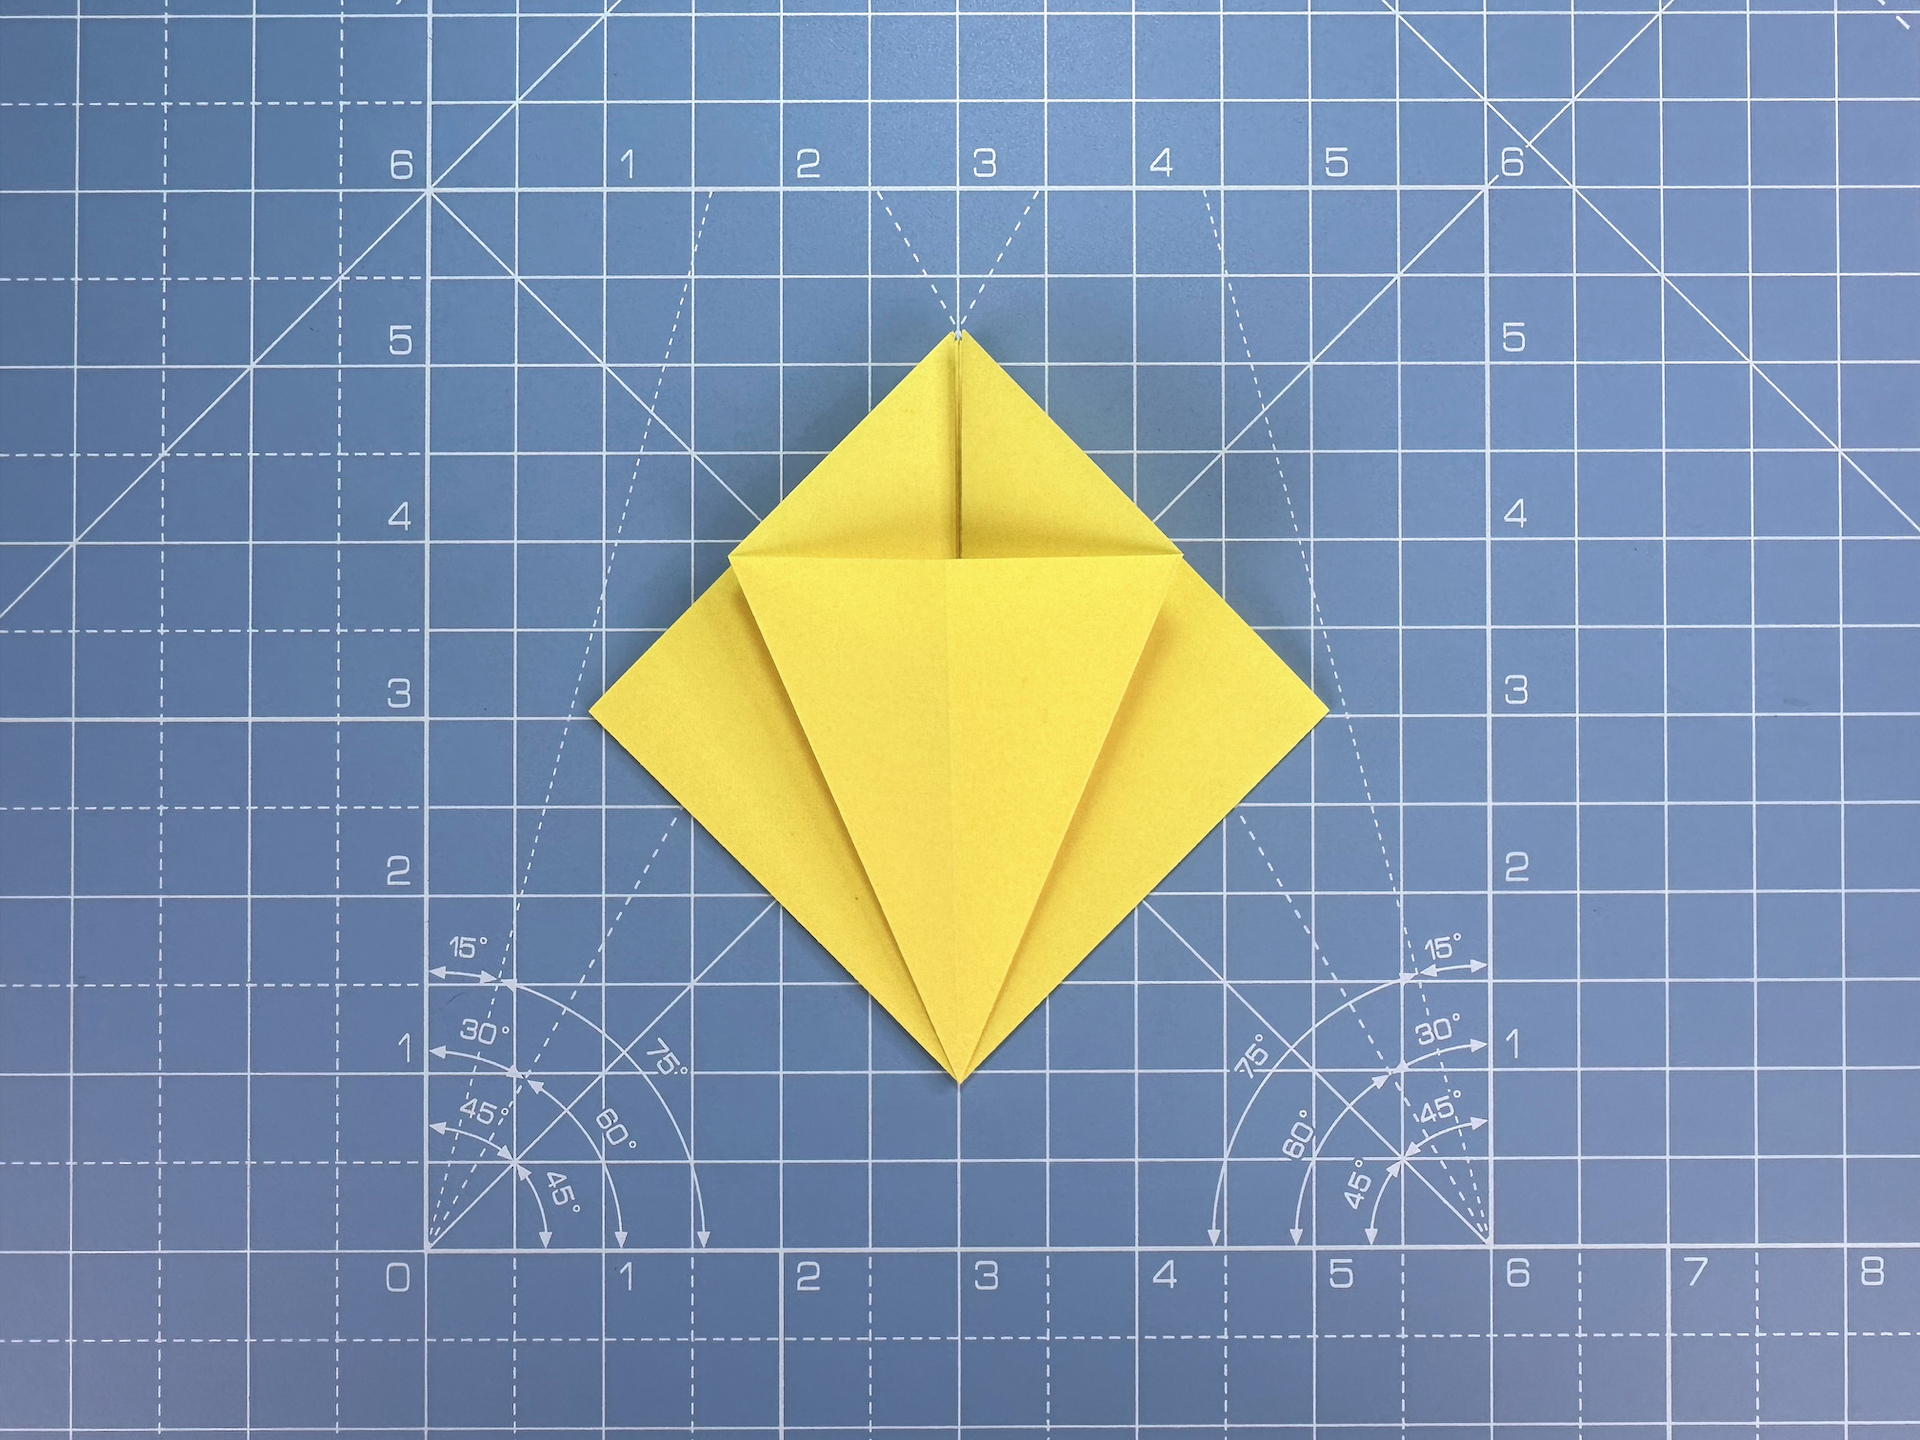
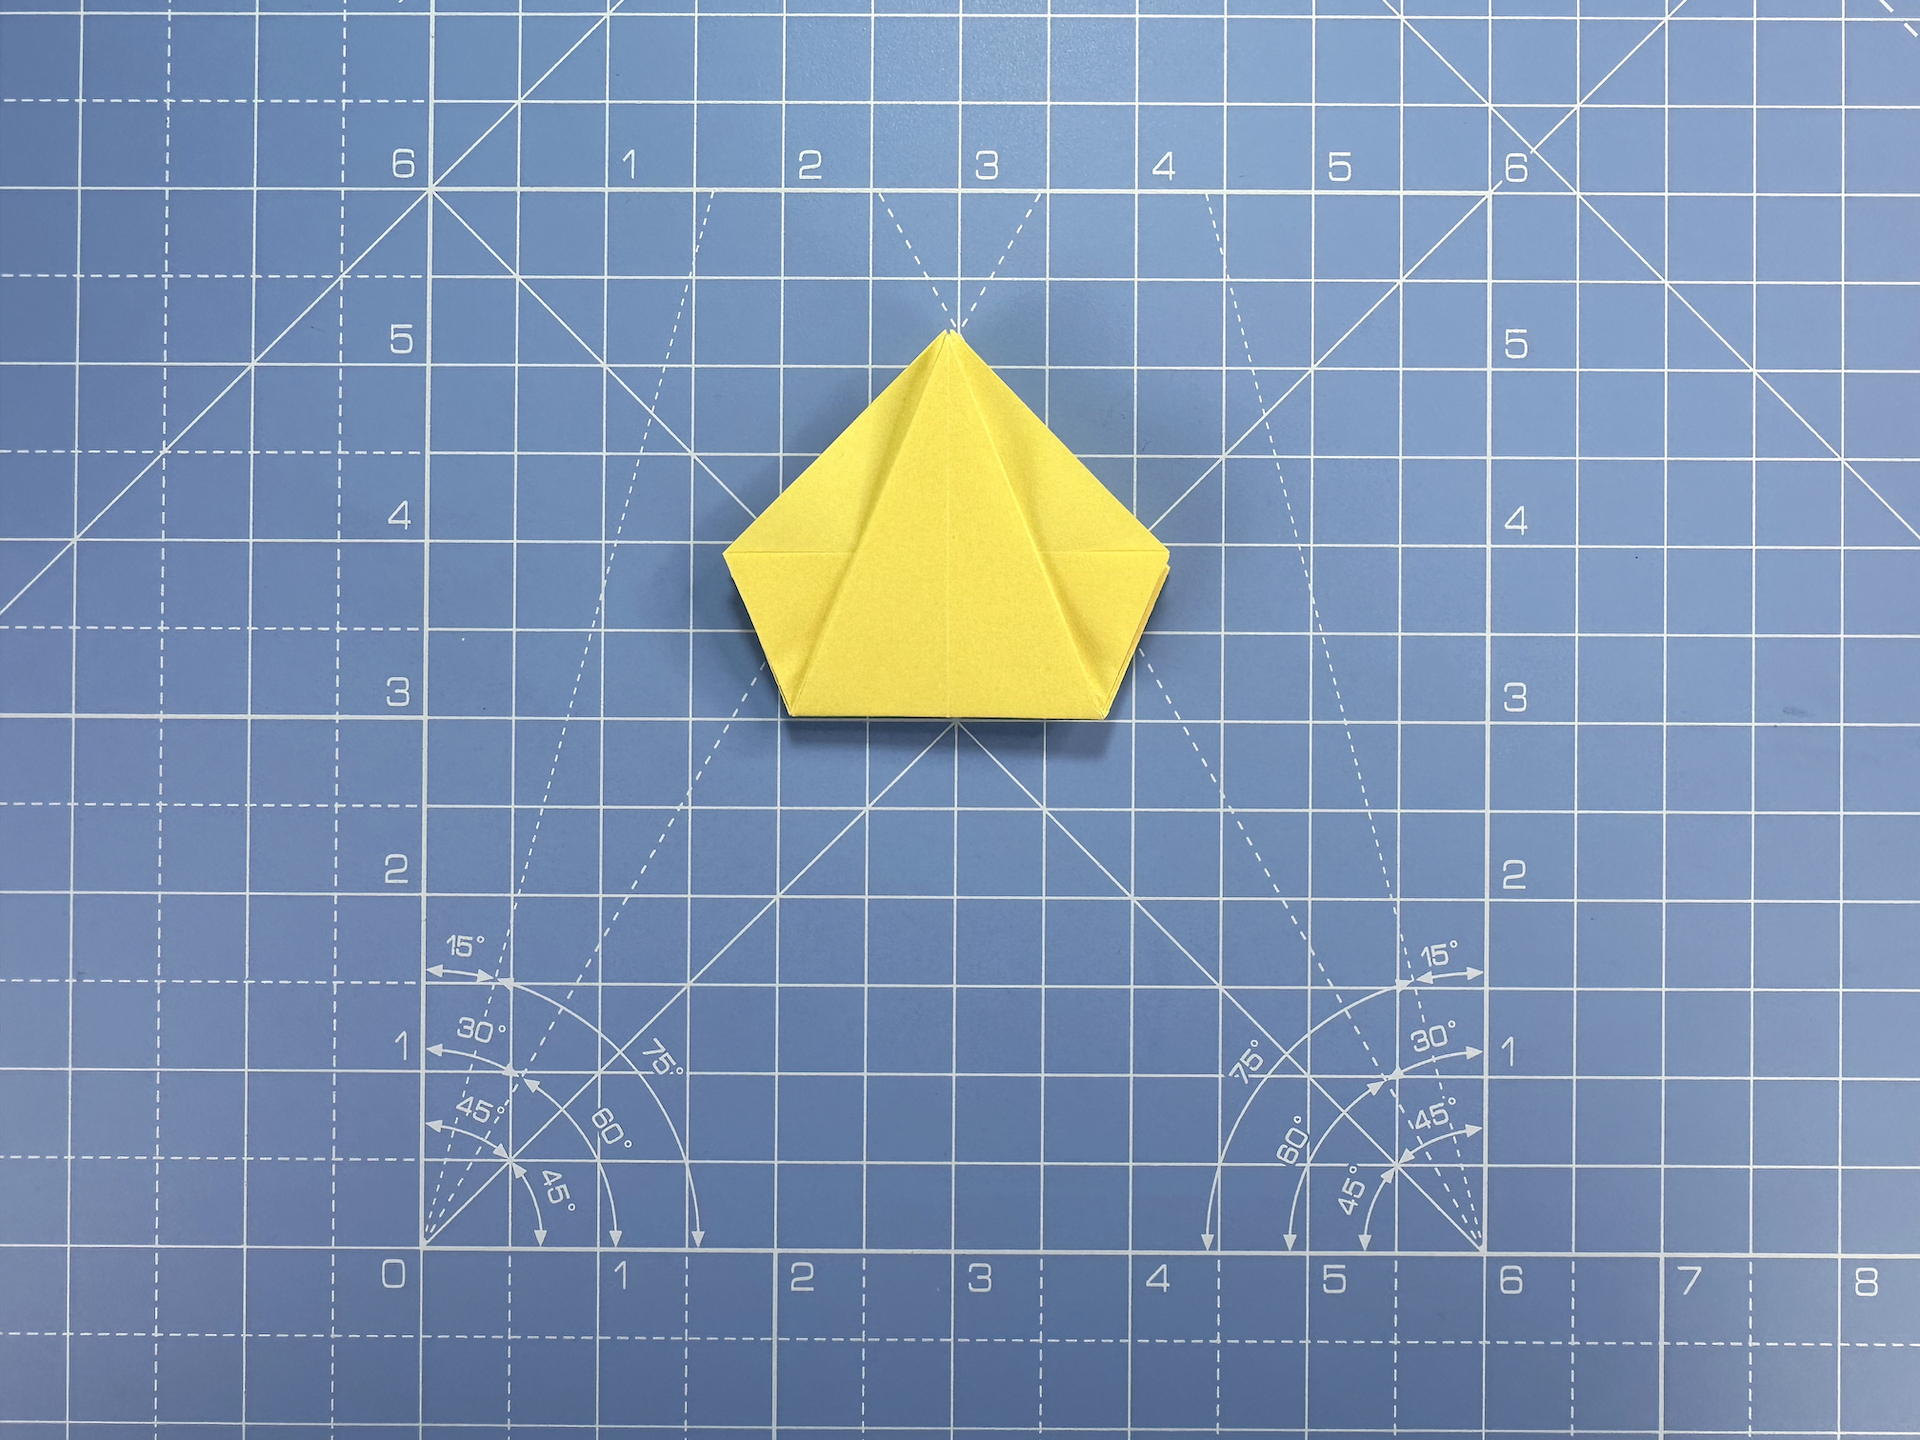
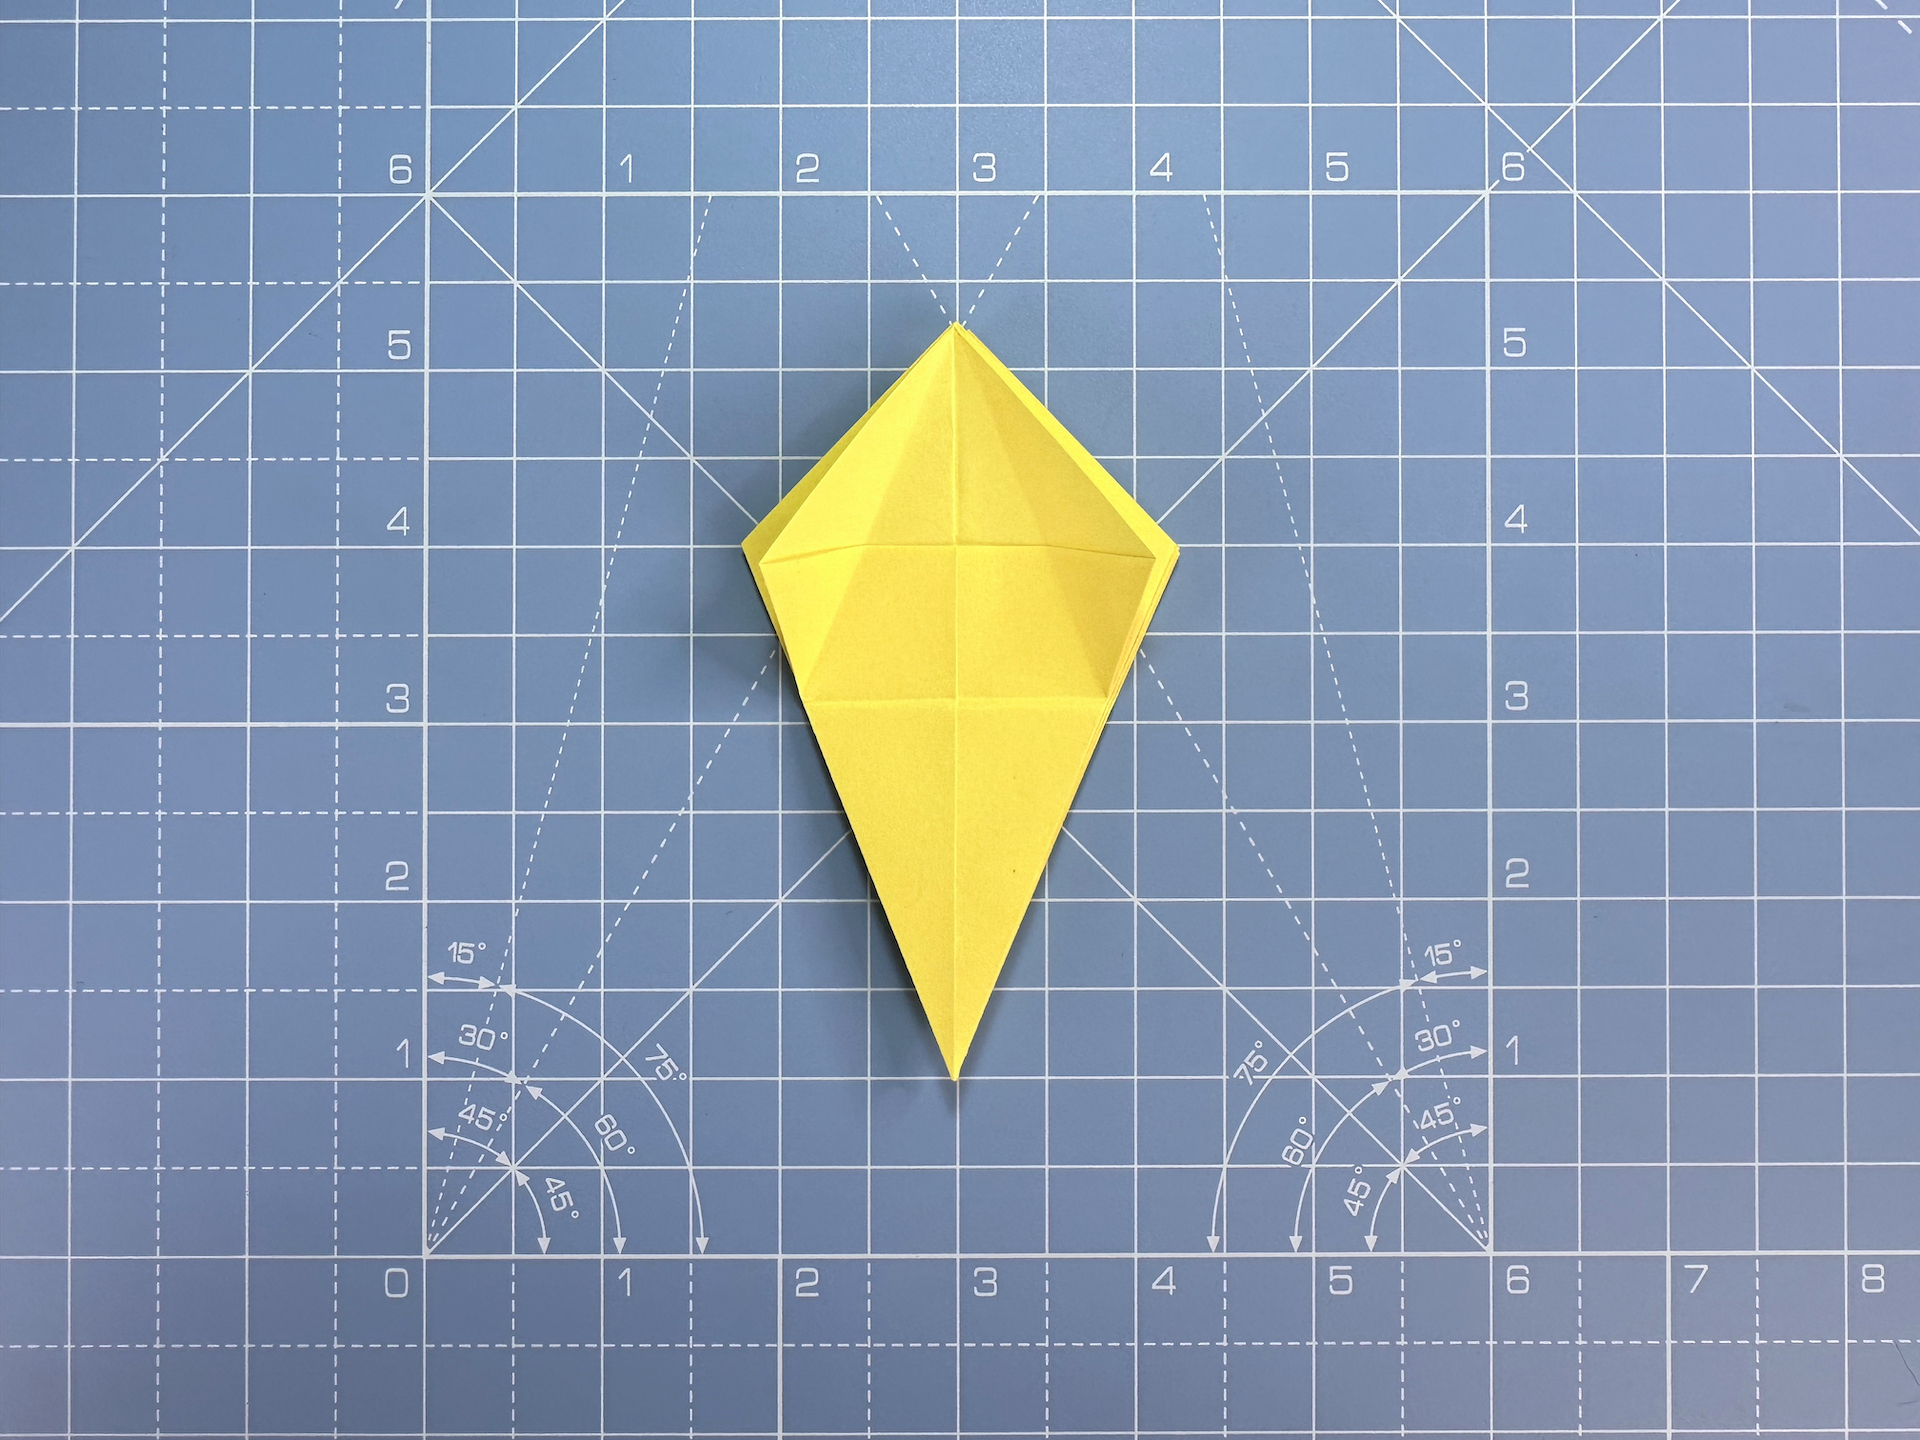
Step 8
Repeat step 7 on the other three sides, so the entire model resembles a kite.
Step 9
Fold the entire model in half and crease well. This will make future steps easier. Unfold.
Step 10
Working on the top layer only, fold the top left-hand edge down meet the centre line.
Step 11
Repeat step 10 on the other side, so that it looks like this. Burnish the folds on both sides.
Step 12
Unfold.
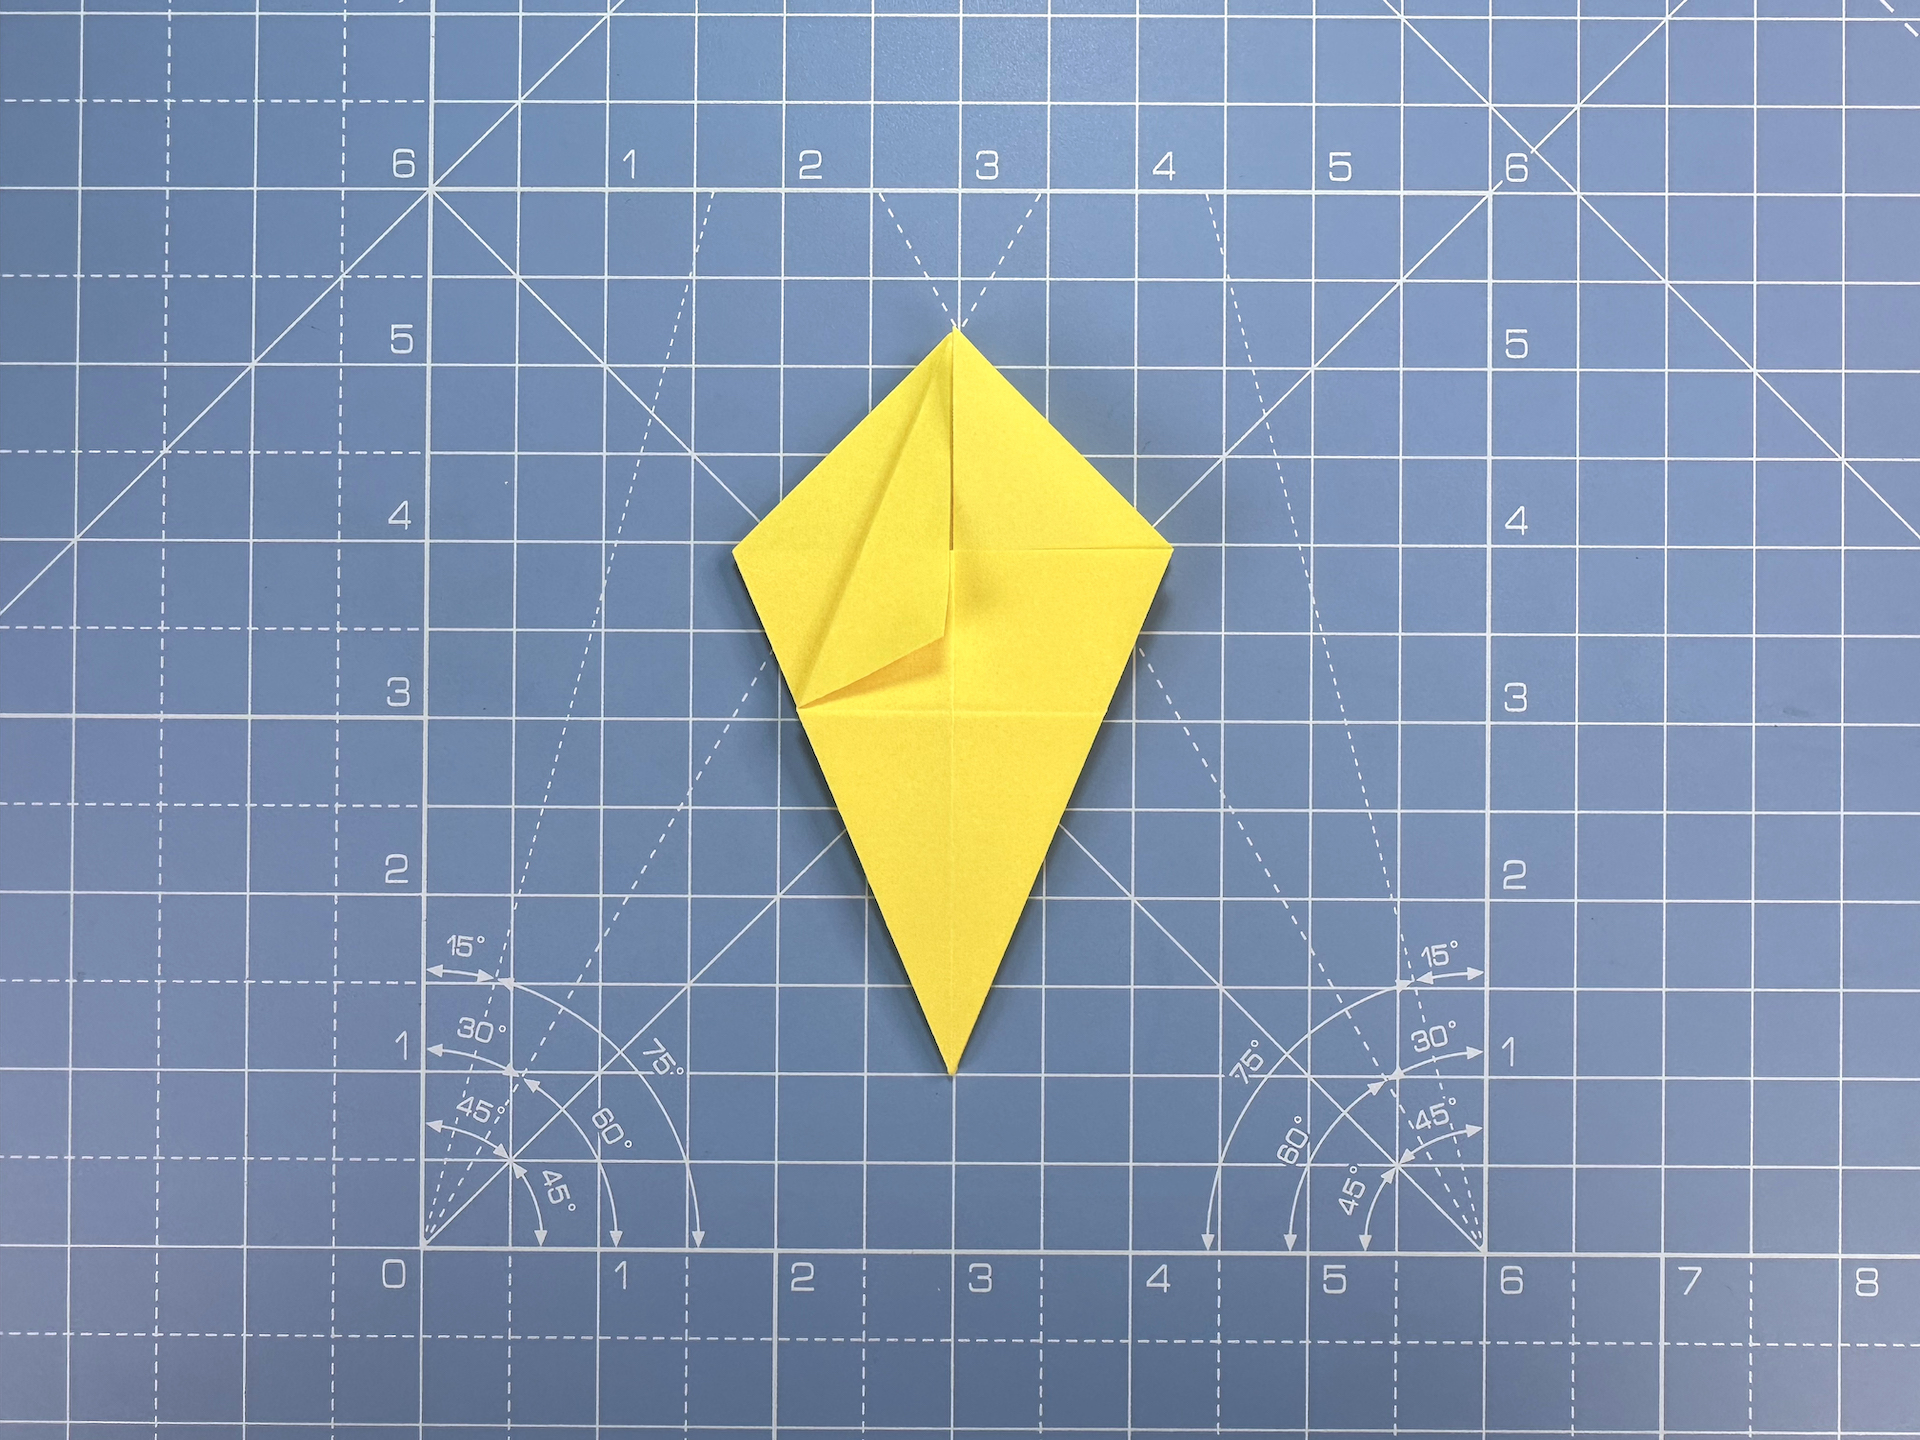
Step 13
Using these folds, open the model along the fold lines, and pull down the top layer. Fold the sides into the middle, using the horizontal fold you made in step 9 and press the crease.
You’ll end up with an upside-down kite shape within the larger kite outline of your model. This is called a ‘petal fold’. 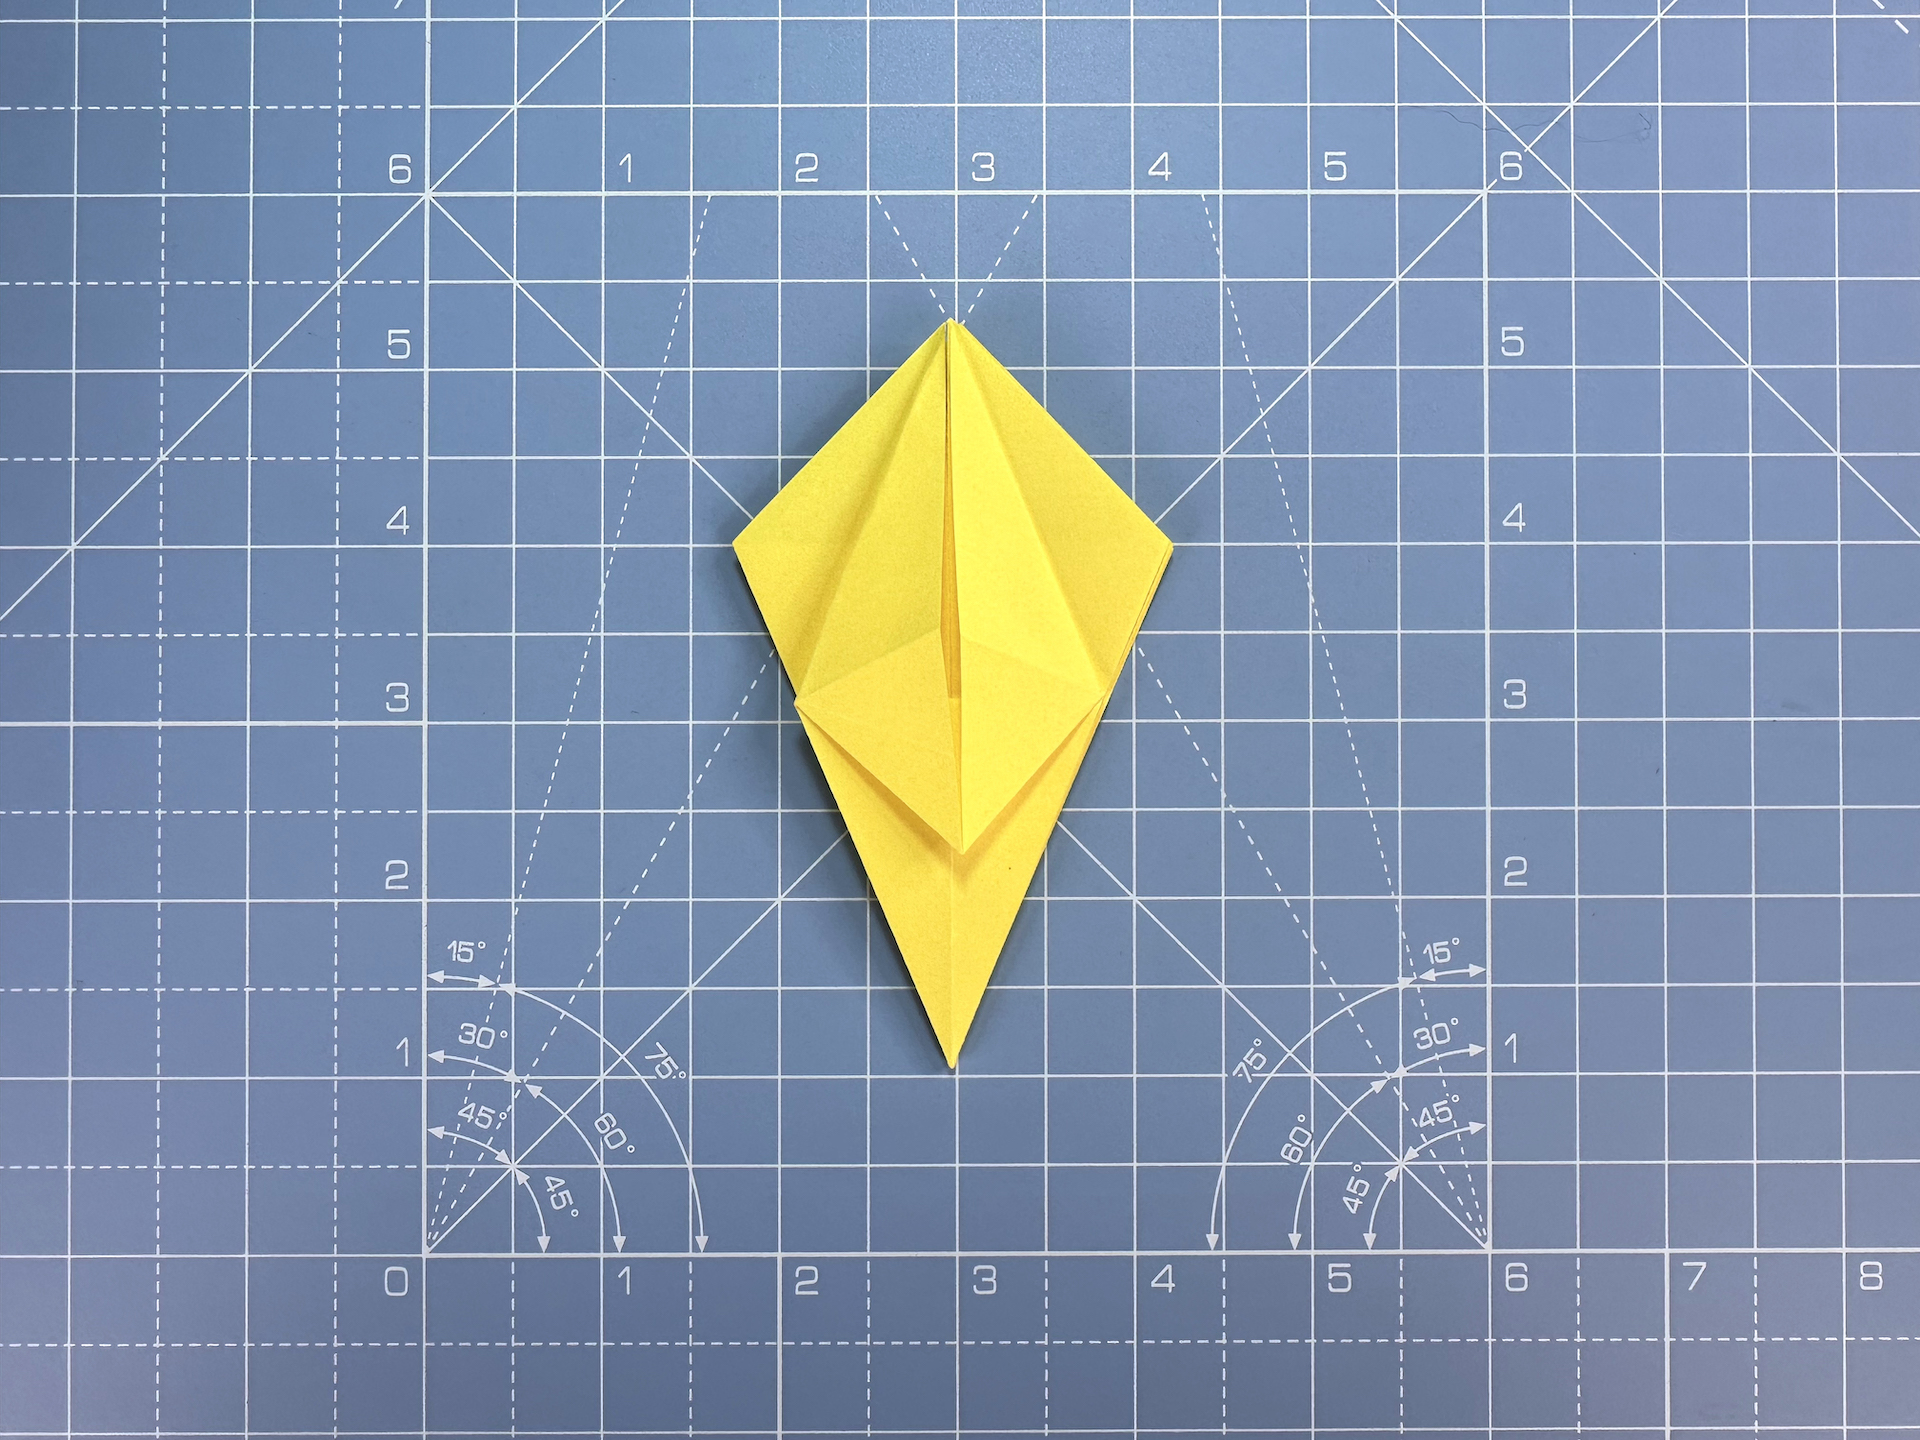
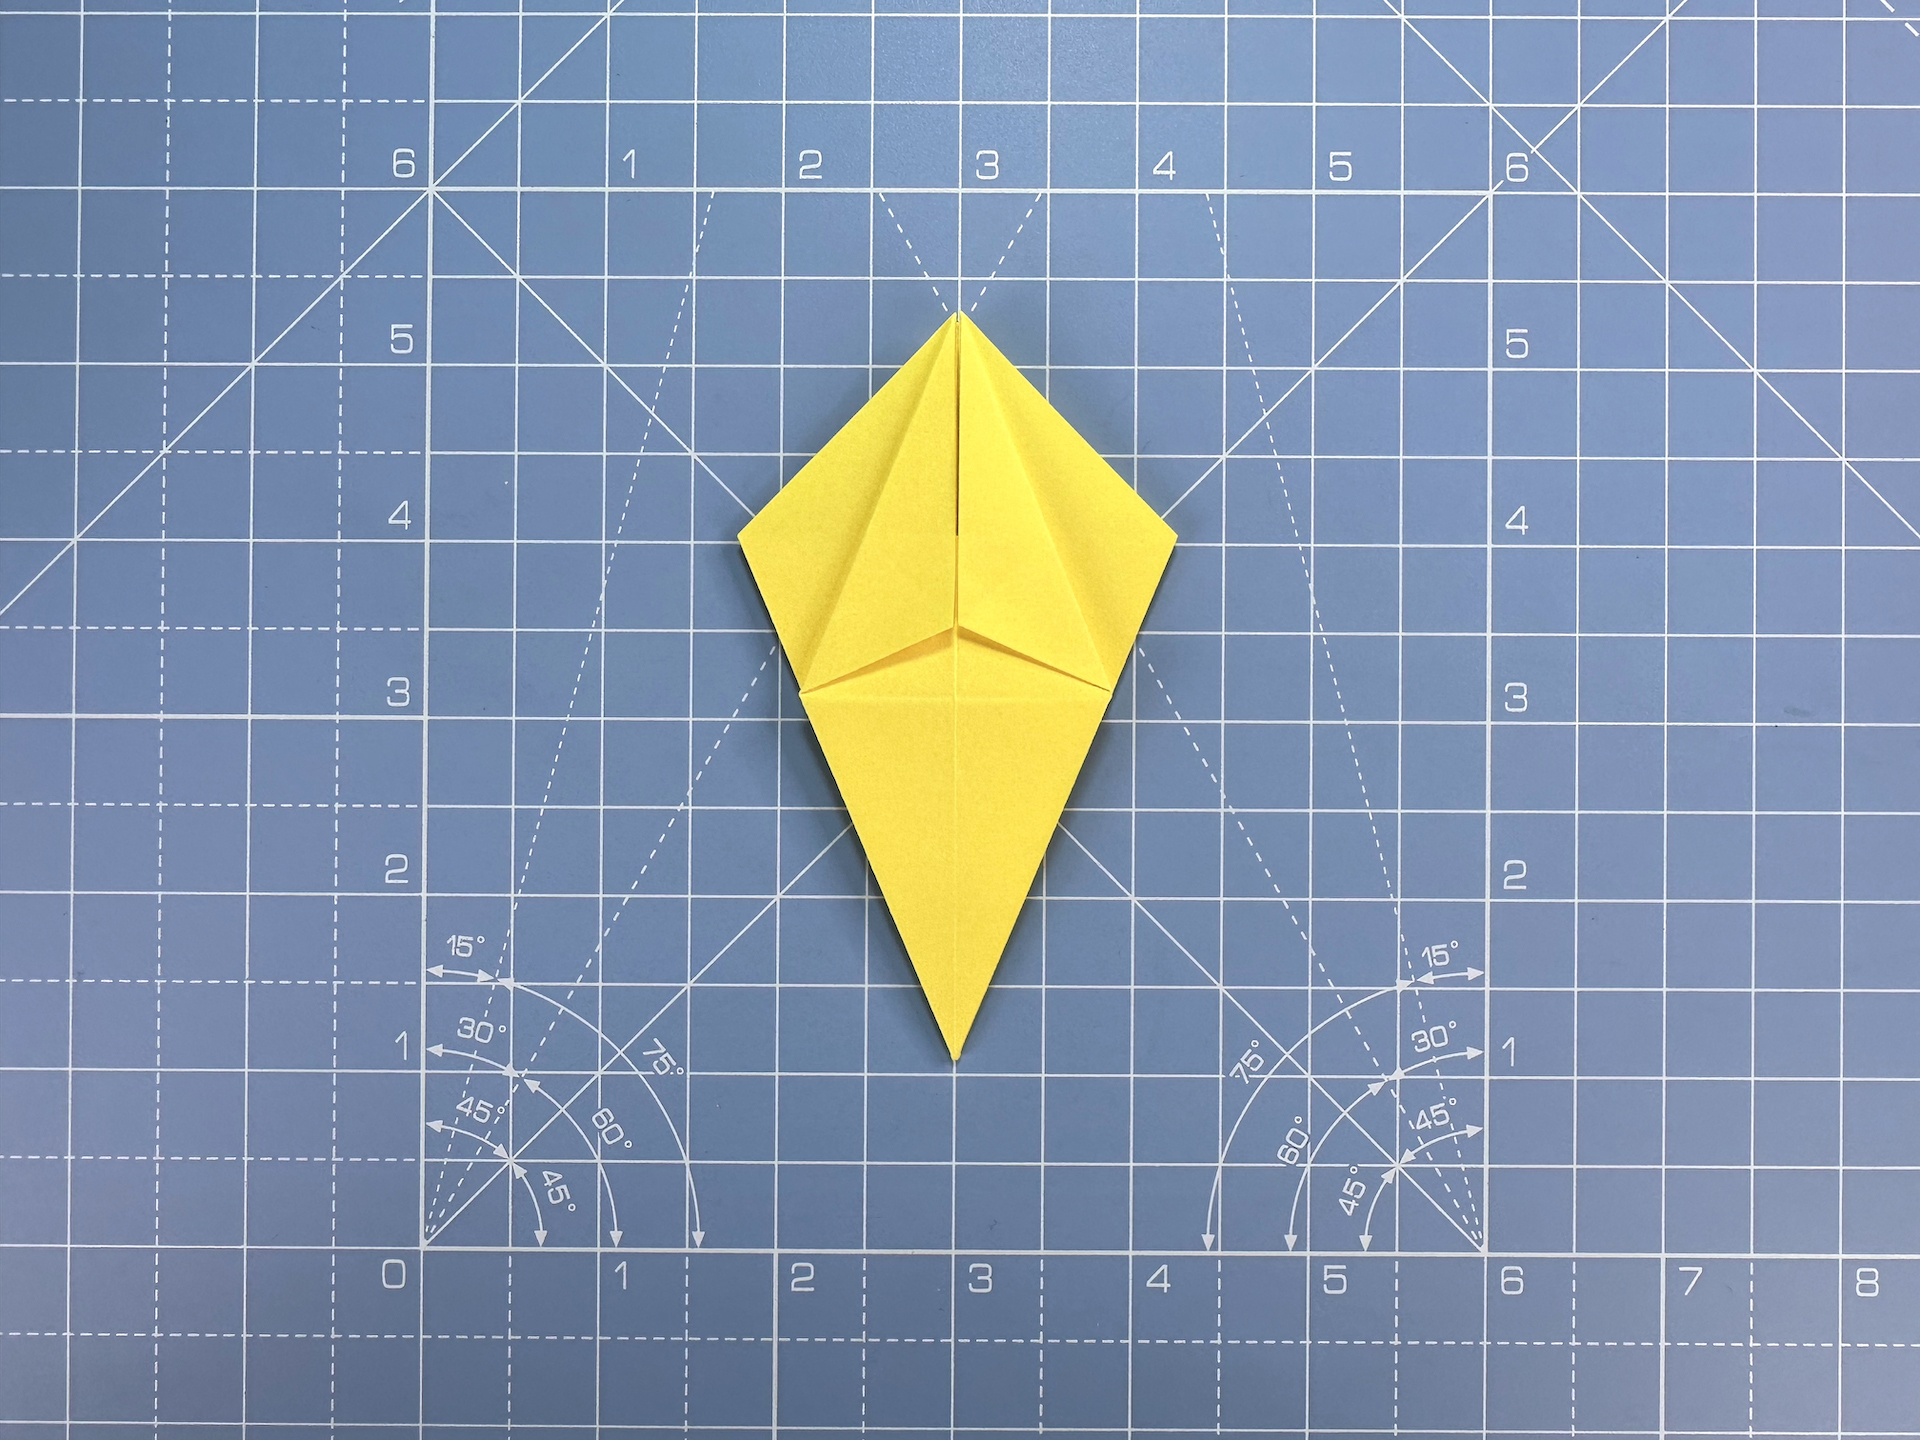
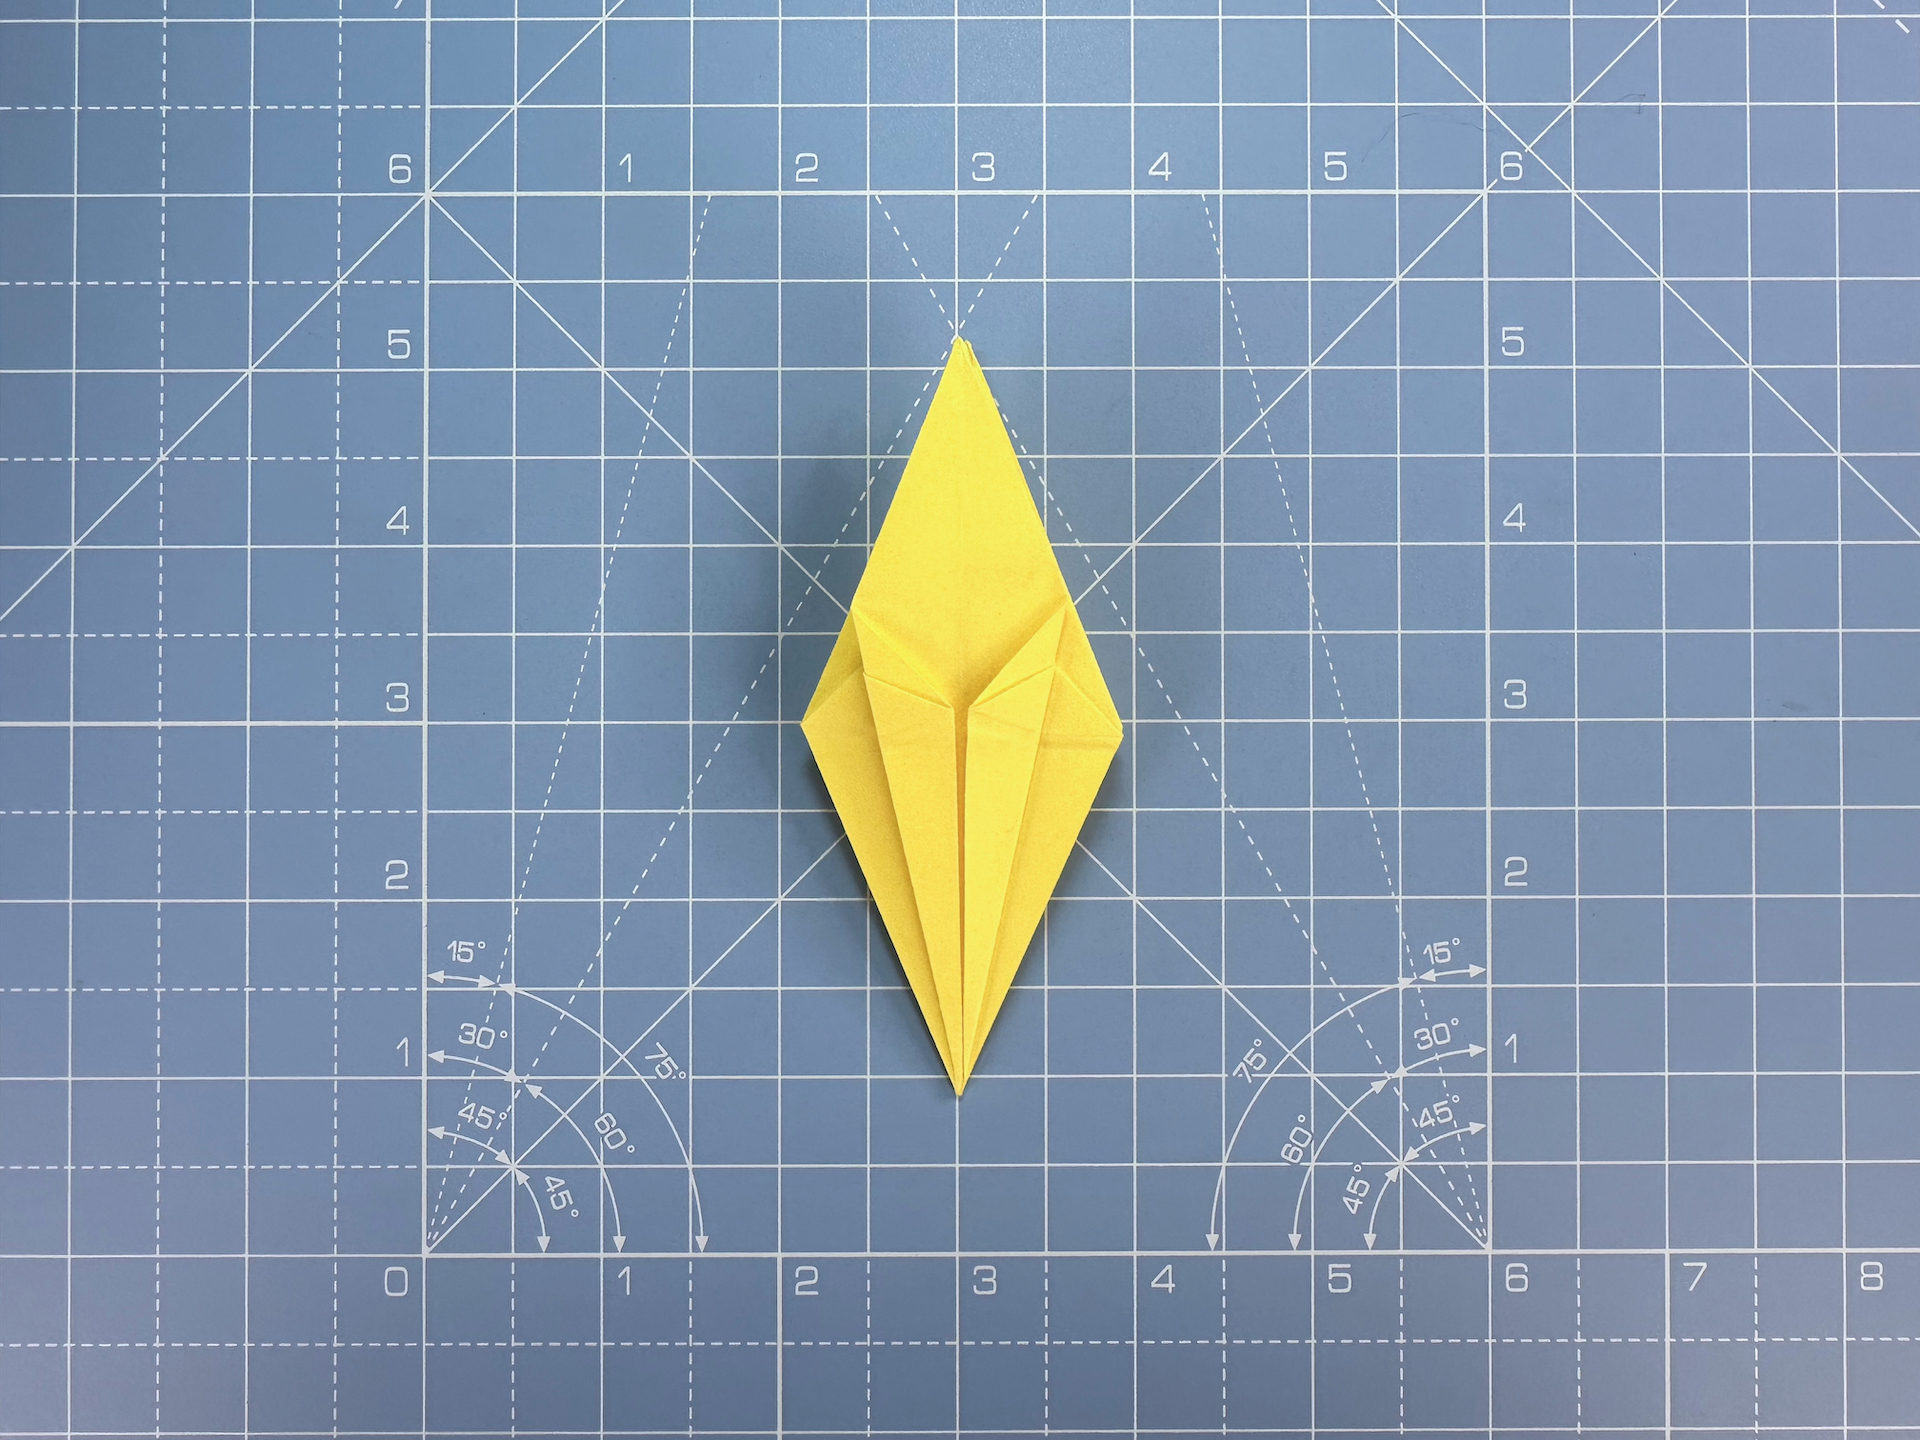
Step 14
Fold the small triangle flap in the middle upwards.
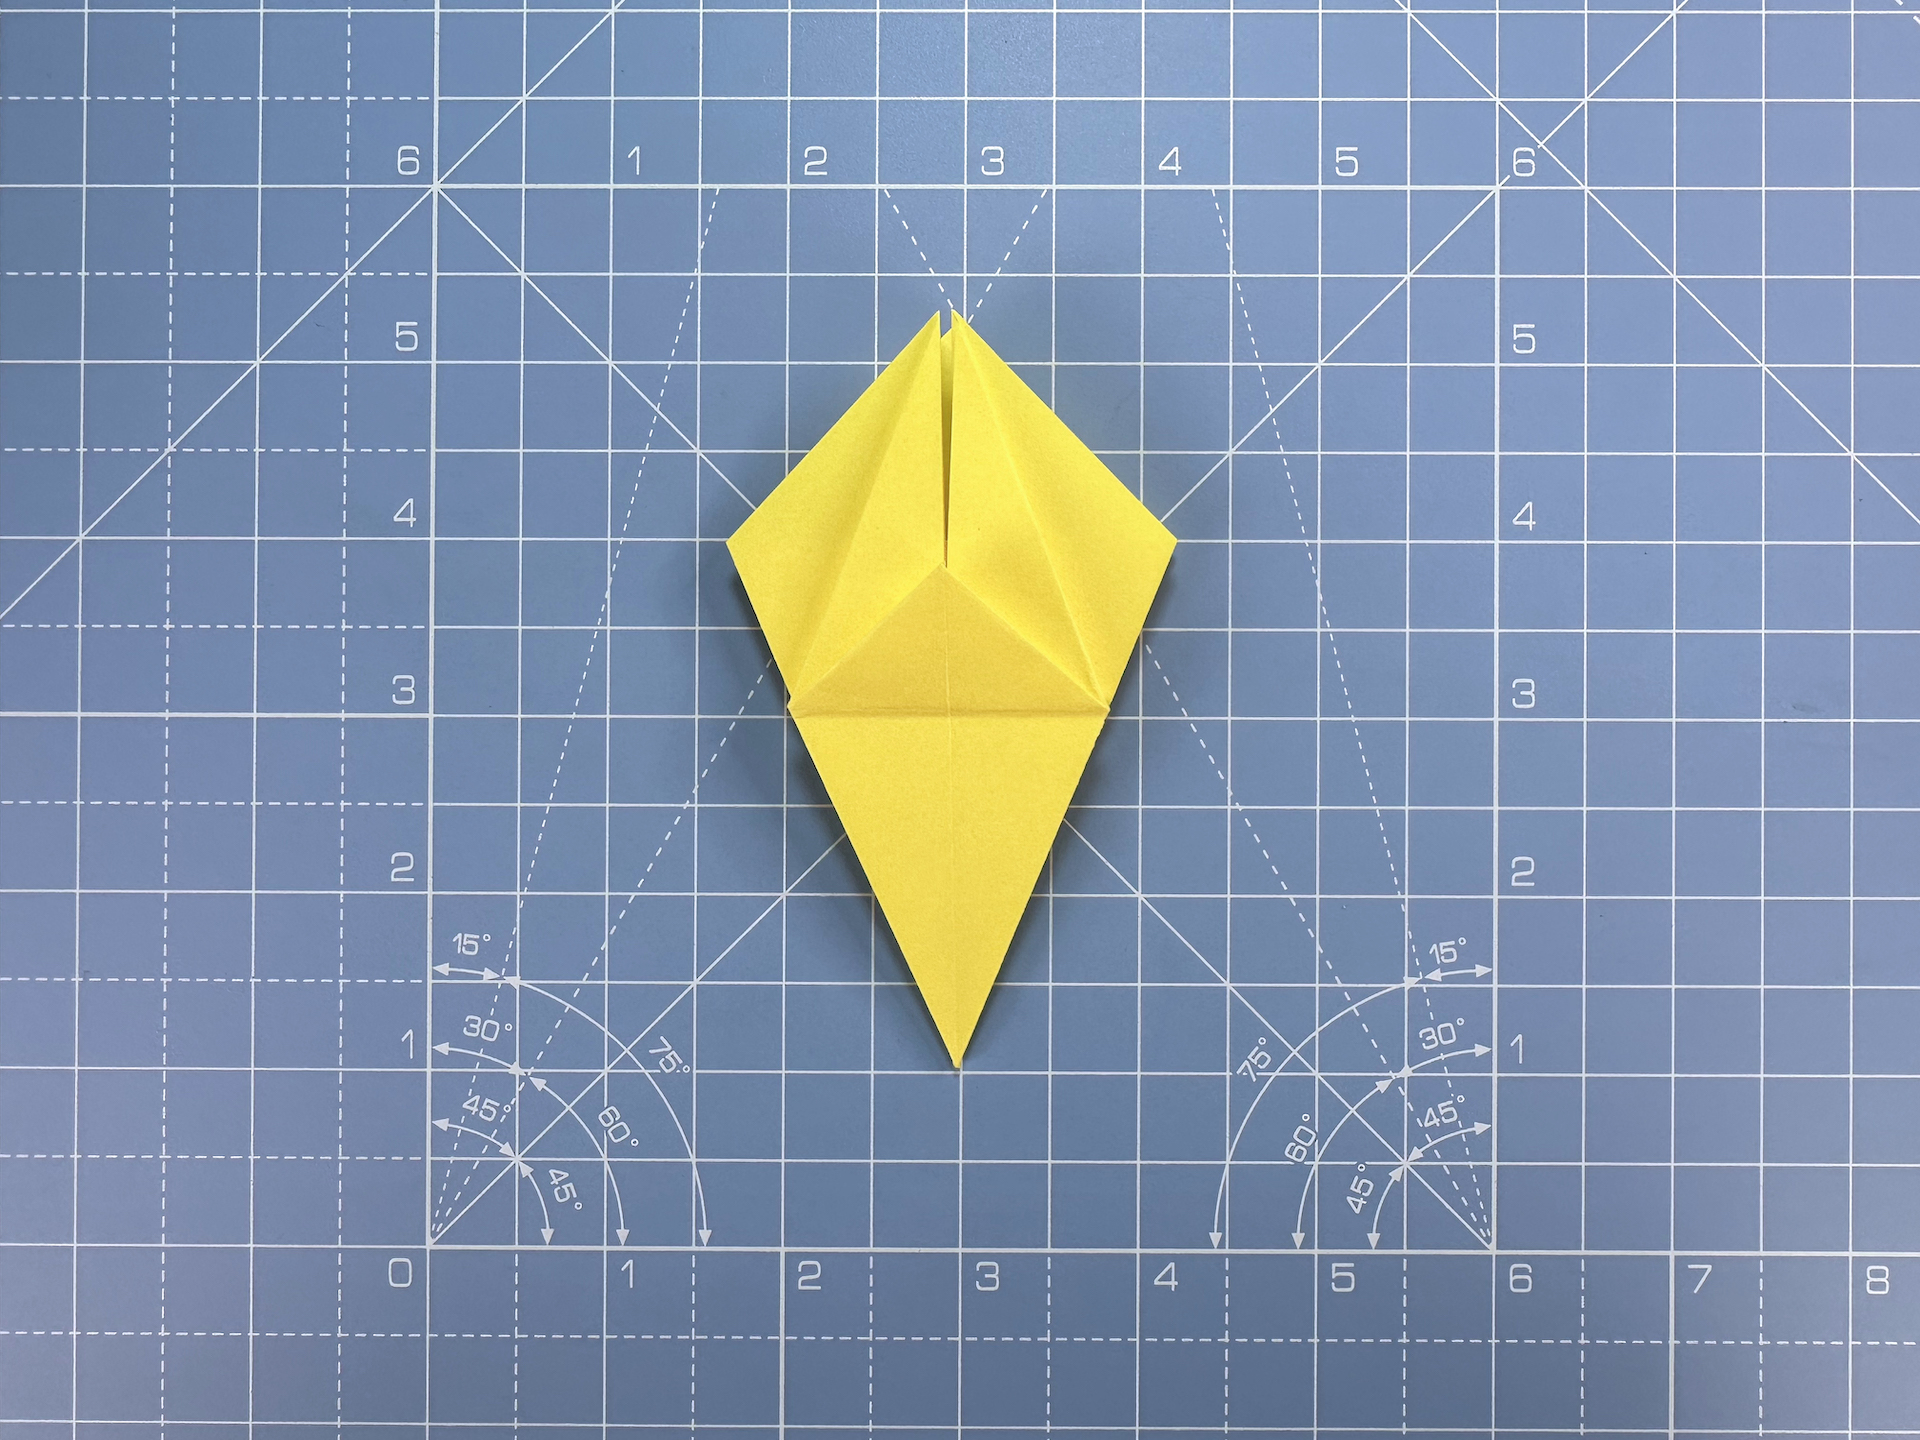
Step 15
Repeat steps 10-14 on the three remaining sides. Once all the sides are folded, your model should resemble a diamond shape.

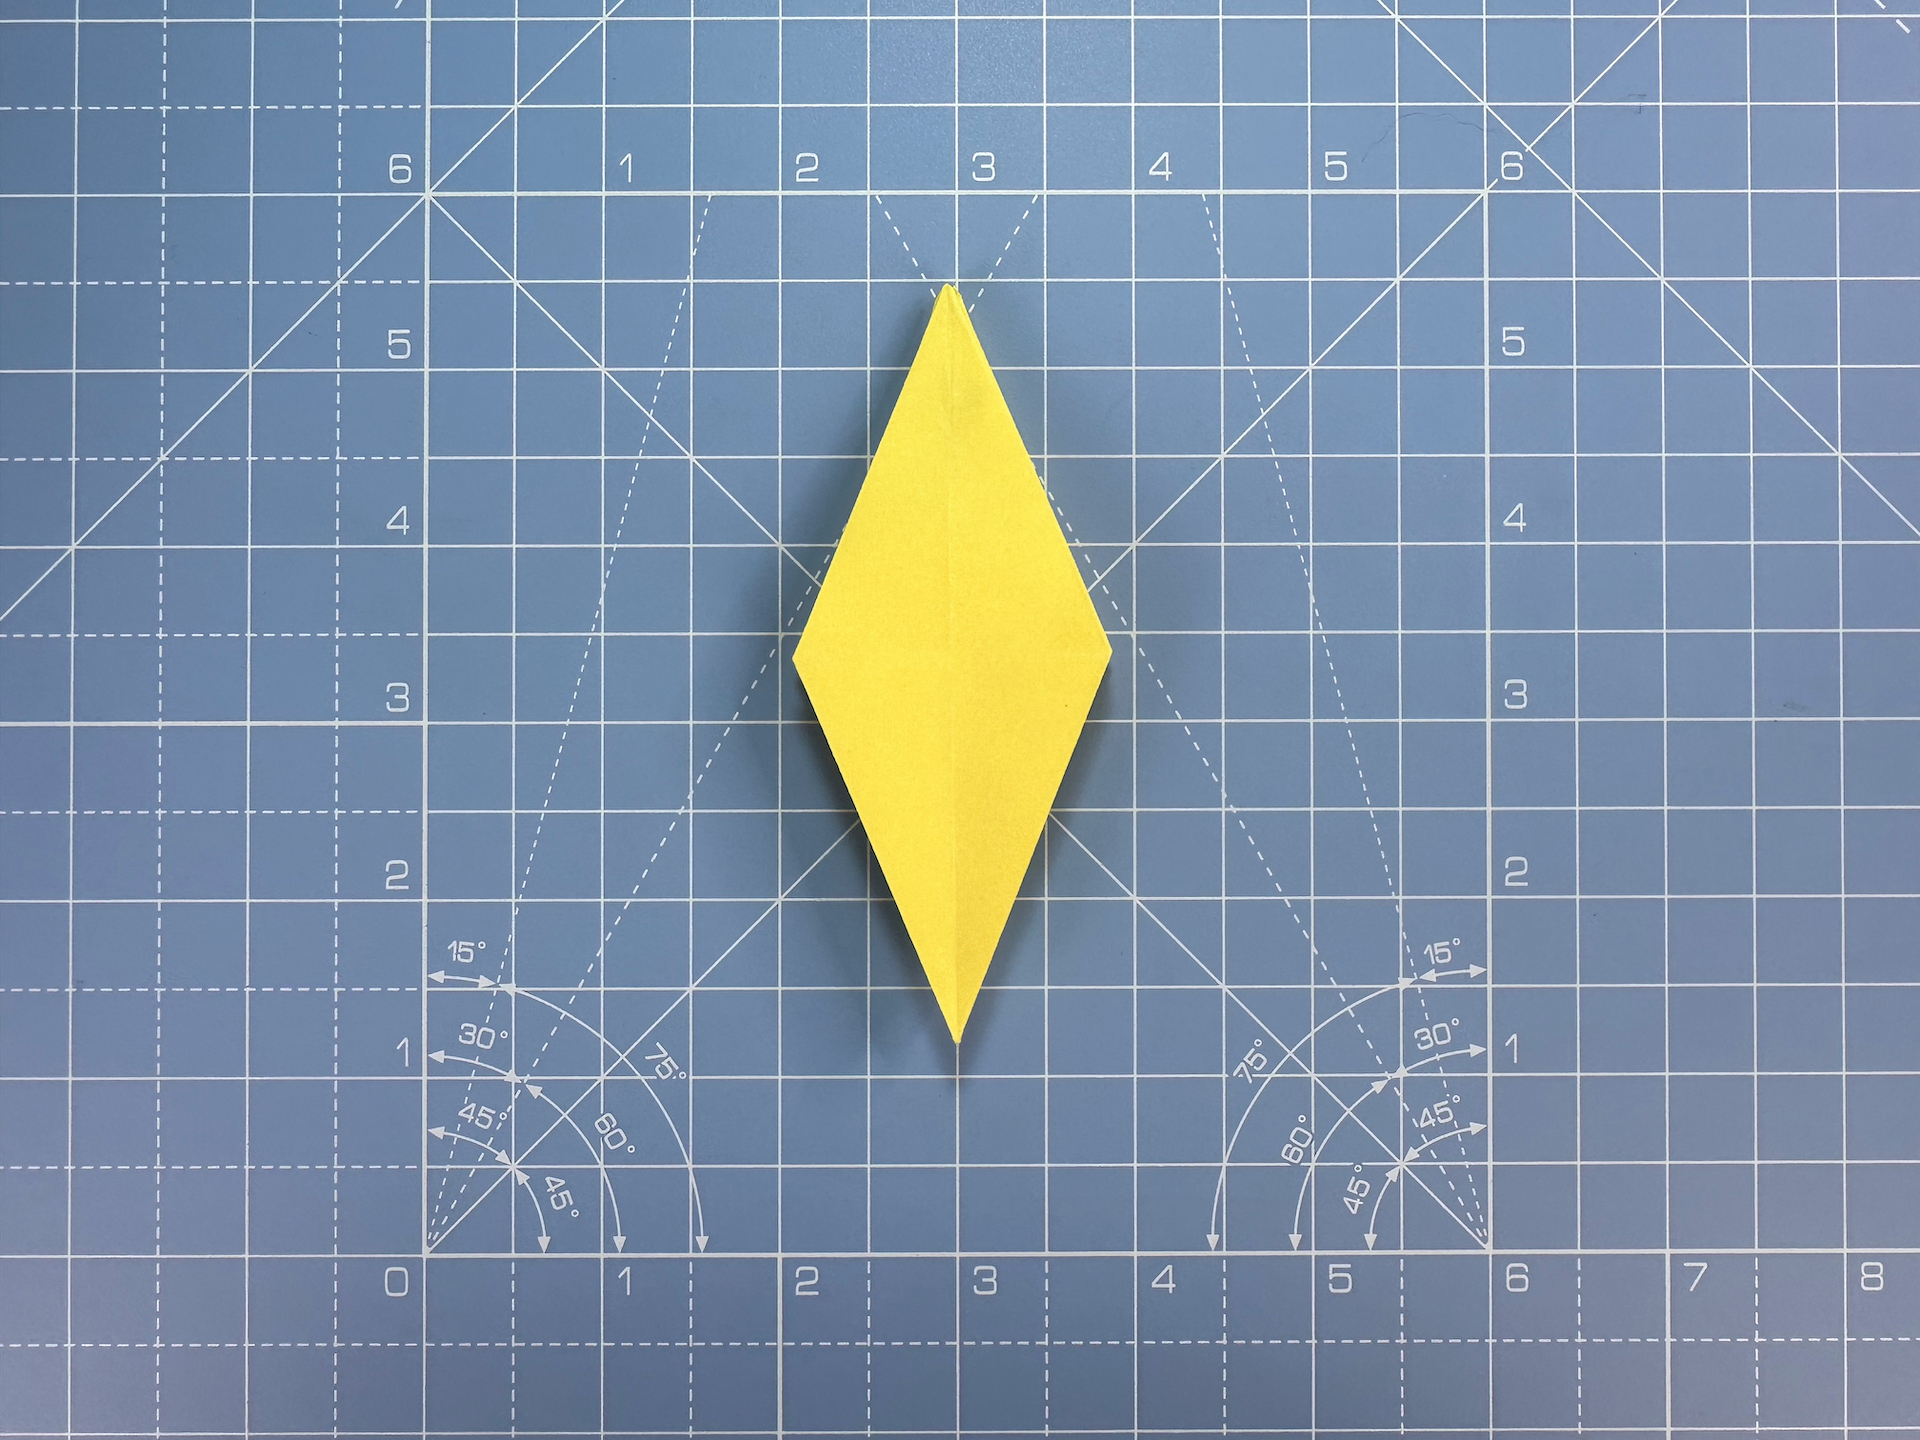
Step 16
Fold one layer in front and one behind.
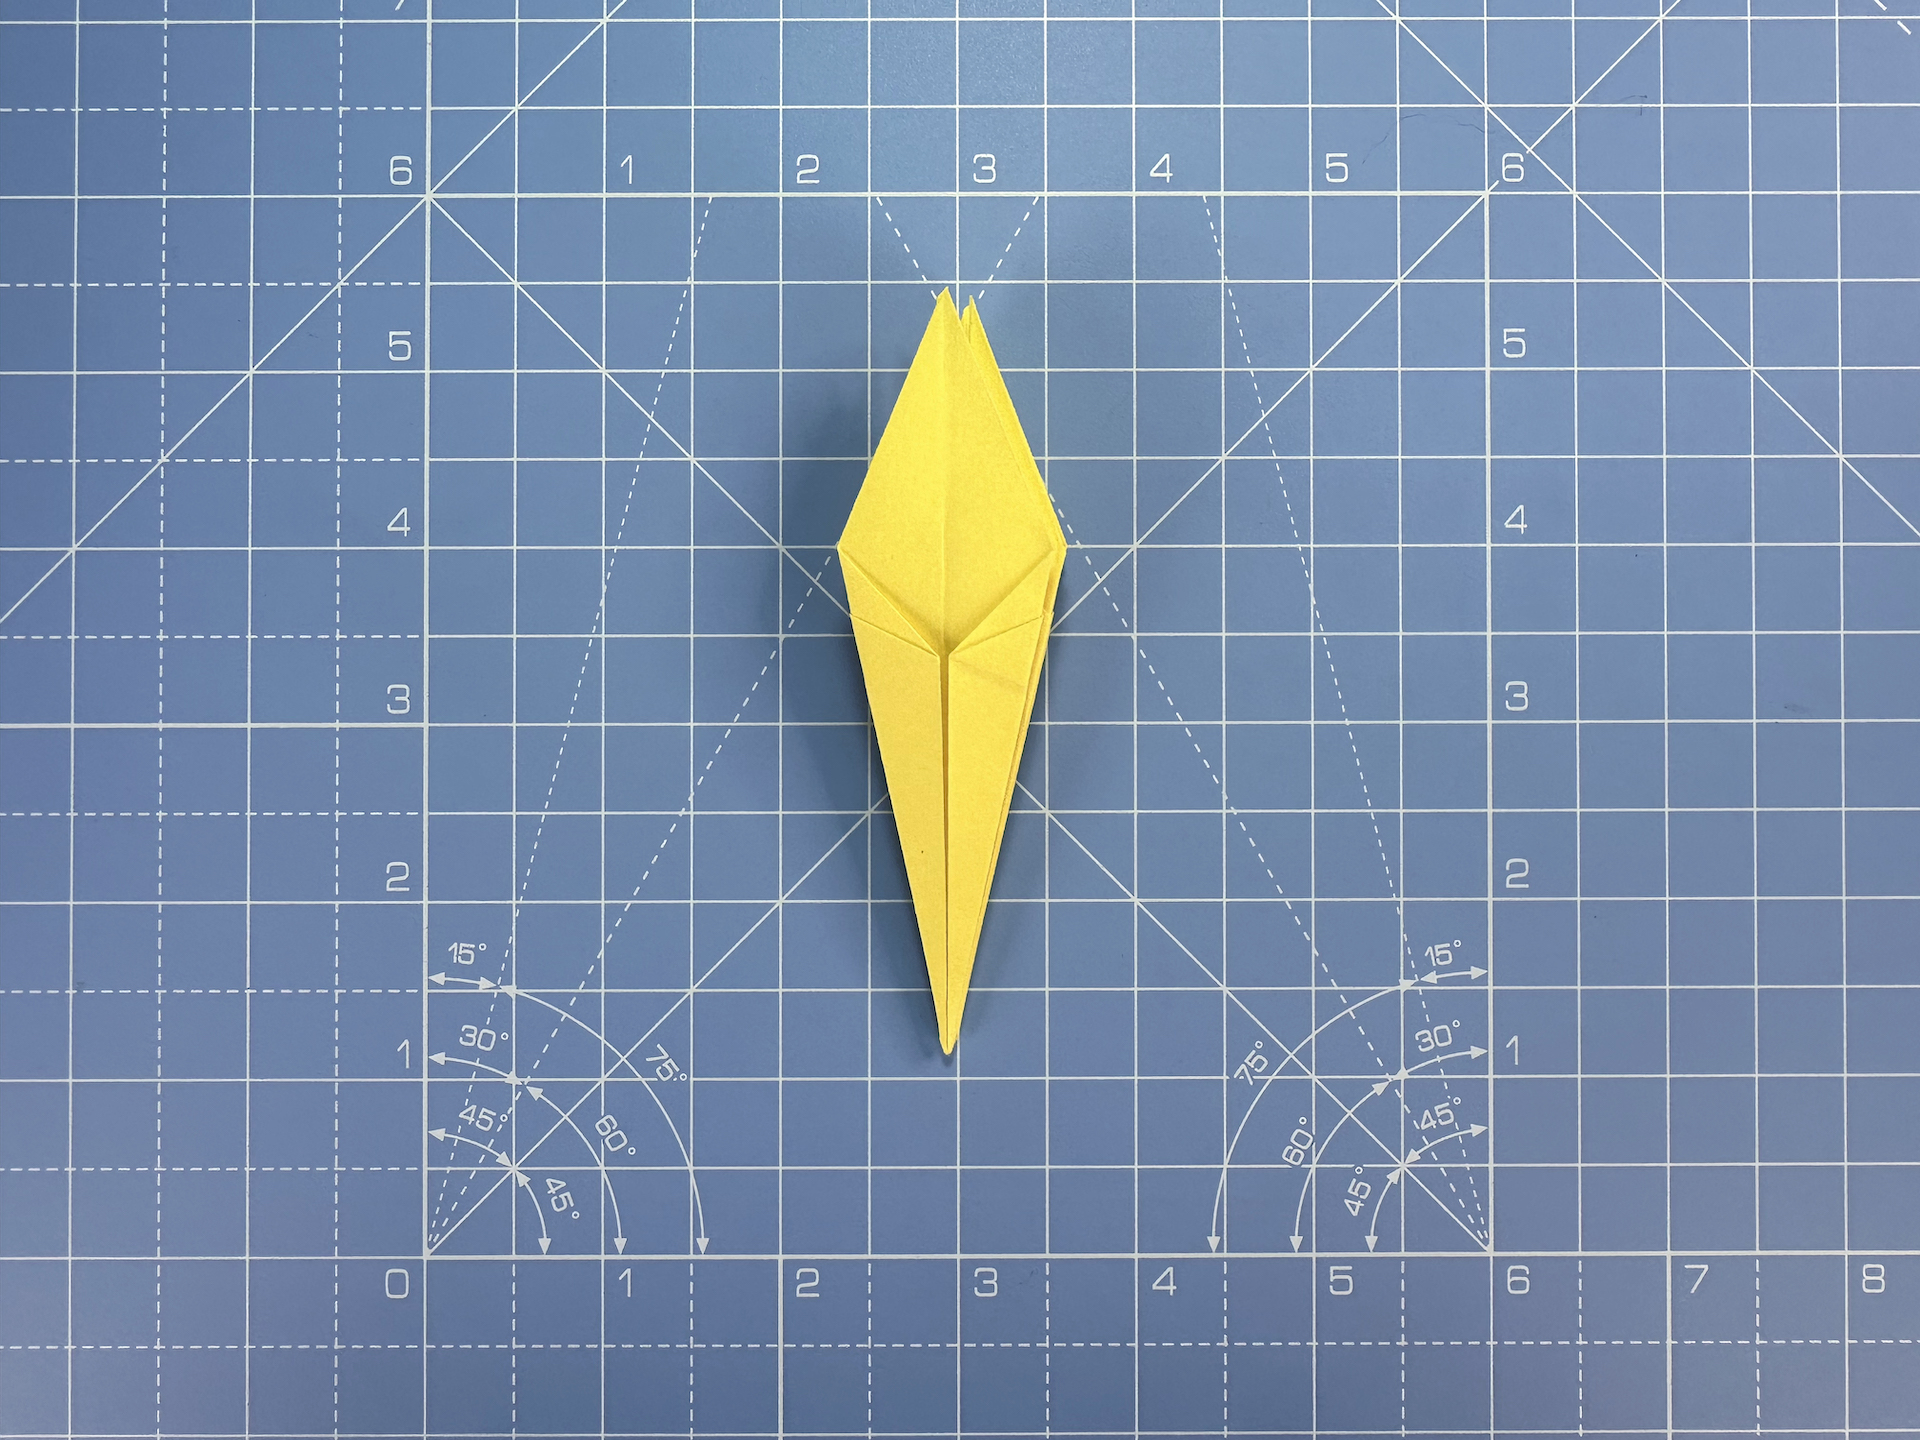
Step 17
Thin the base of the lily by folding both edges to meet the centre line.
Step 18
Repeat on the other three sides, so that you end up with a skinny kite shape.
Step 19
There are four flaps at the open end of your model; these will form the petals.
This next part is magic; although it doesn’t look like a flower at the moment, the origami lily will start to take shape before your eyes.
Working on the top flap first, curl it outwards and downwards. Curling it around a pen will help keep its shape. This is called a ‘curved valley fold’. 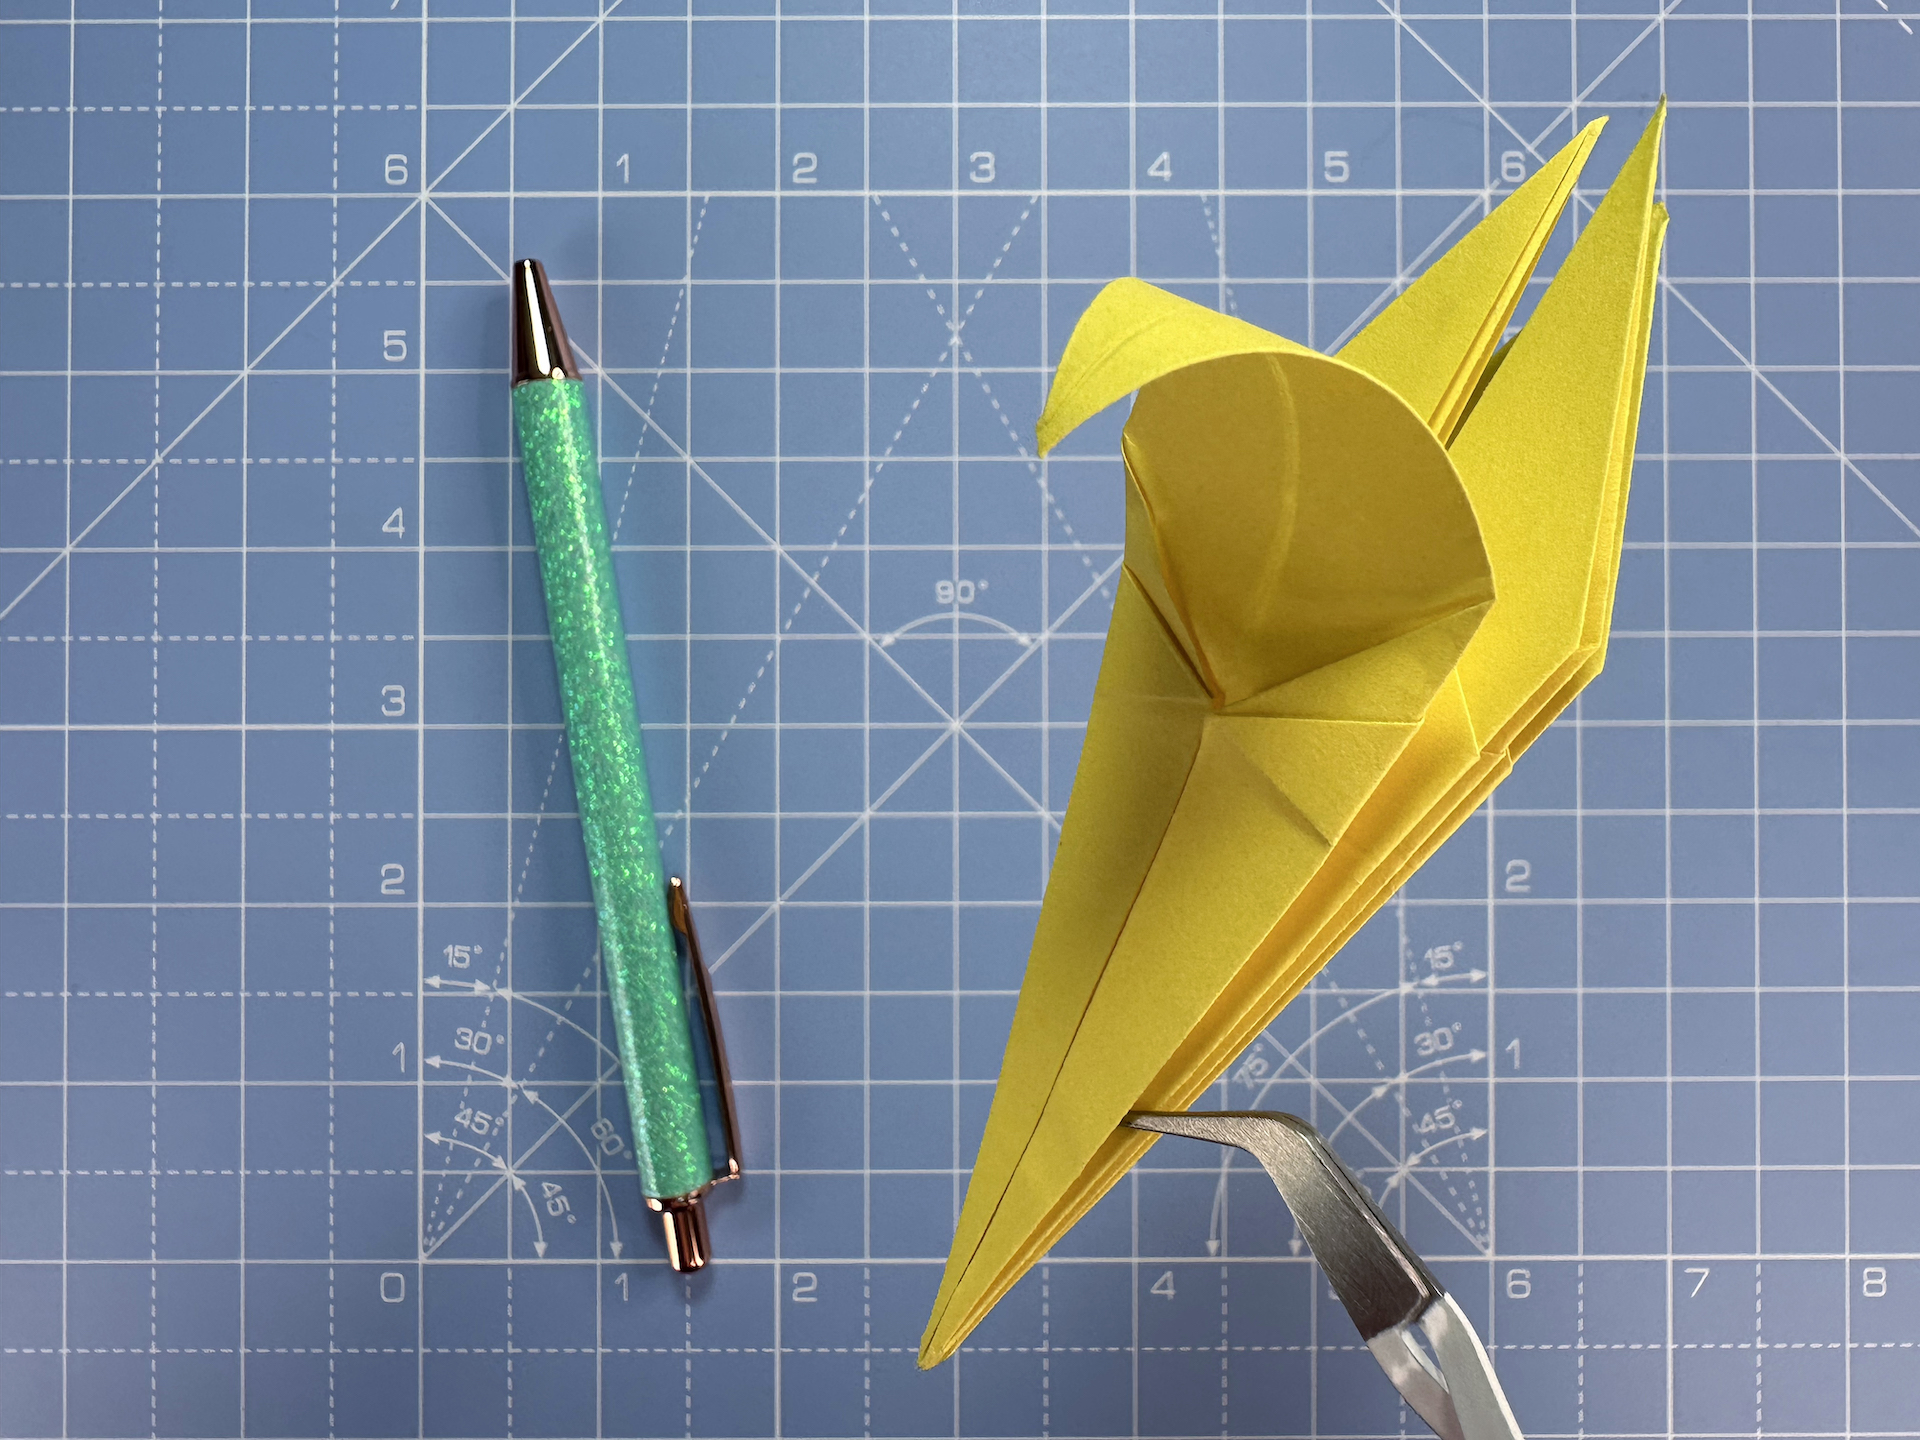
Step 20
Repeat the curved valley fold on the other three sides. The origami lily will naturally transform into a three-dimensional shape as you do so.
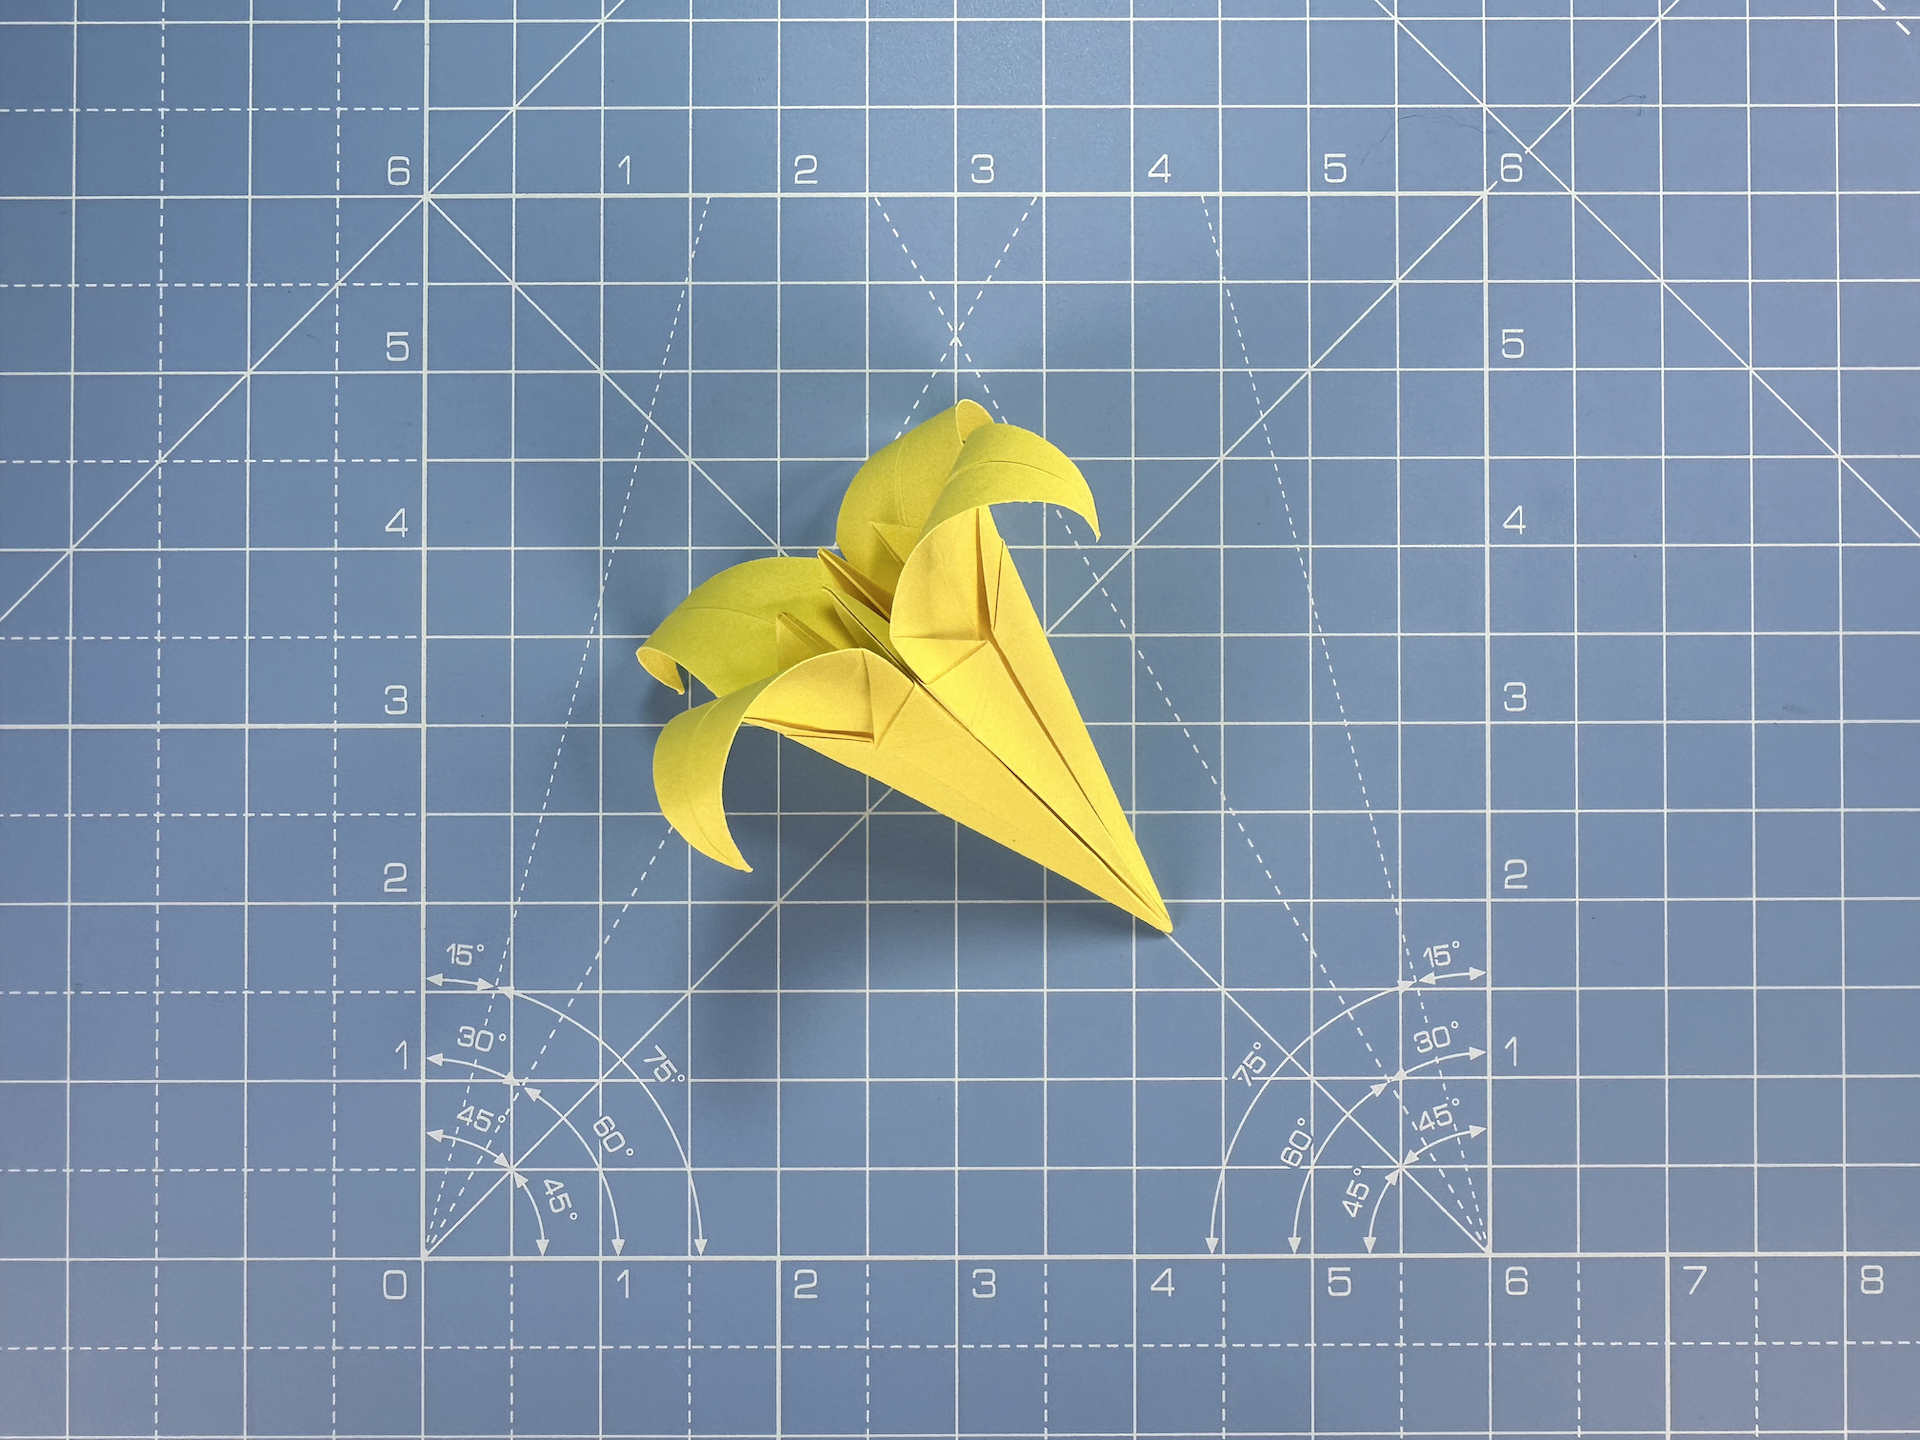
Congratulations, you have completed an origami lily!