All products were chosen independently by our editorial team. This review contains affiliate links and we may receive a commission for purchases made. Please read our affiliates FAQ page to find out more.
How to sew a DIY dog bed: how to make a dog bed out of fabric
Never mind the cat's pyjamas, Ali Burdon shows you how to make your very own DIY dog bed out of fabric scraps to make a cosy cushion that your pooch will be proud of!
Why buy a dog bed when you can make your own? We're here to show you how to sew a handmade cushion to create a cosy canine corner in your home. The beauty of this DIY project is it's made from patchwork squares so you can reuse fabrics you have around the house, or shop for fat quarters if you'd rather pick fabrics to match your home.
For an extra fun twist, we'll show you how to sew together simple triangles when you make your DIY dog bed cushion to create a cute bone motif. Use two contrasting fabrics to make sure the bone block stands out from the rest of the patchwork.
Seam allowances are ¼in throughout, unless otherwise noted.
Pre-wash and press all fabrics before cutting.
How to make a fabric dog bed
You will need:
Fabric (See materials list)
Wadding
Interfacing (Medium-weight)
Velcro (27in piece)
Cushion pad (30in)
Sewing machine
Basic sewing kit
Cutting out
Step 1
From bone block fabric A cut:
Eighteen (18) 2½in squares.
Three (3) 27⁄8in squares, subcut into six (6) half-square triangles.
Step 2
From bone block fabric B cut:
Twenty-four (24) 2½in squares.
Three (3) 27⁄8in squares, subcut into six (6) half-square triangles.
Step 3
From the edging and backing fabric cut:
Two (2) 2¾in x 24½in strips.
Two (2) 2¾in x 29in strips.
Two (2) 16½in x 29in pieces, for the cushion back.
See Fig 1 for reference.
Step 4
From the binding fabric cut:
One (1) 5in x 29in strip.
Step 5
From the lining fabric cut:
One (1) 31in square.
Two (2) 16½in x 29in pieces.
Sewing together the patchwork blocks
Step 1
Take one of the triangles of fabric A and one of fabric B and stitch them together, pressand trim to make a 2½in square (Fig a). Repeat with remaining triangles.
Figure A
Step 2
Stitch all the 16 bone block squares together into rows, as shown (Fig 2).
Stitch the four rows together to complete a bone block (Fig b). Repeat to create two more bone blocks.
Figure B
Step 3
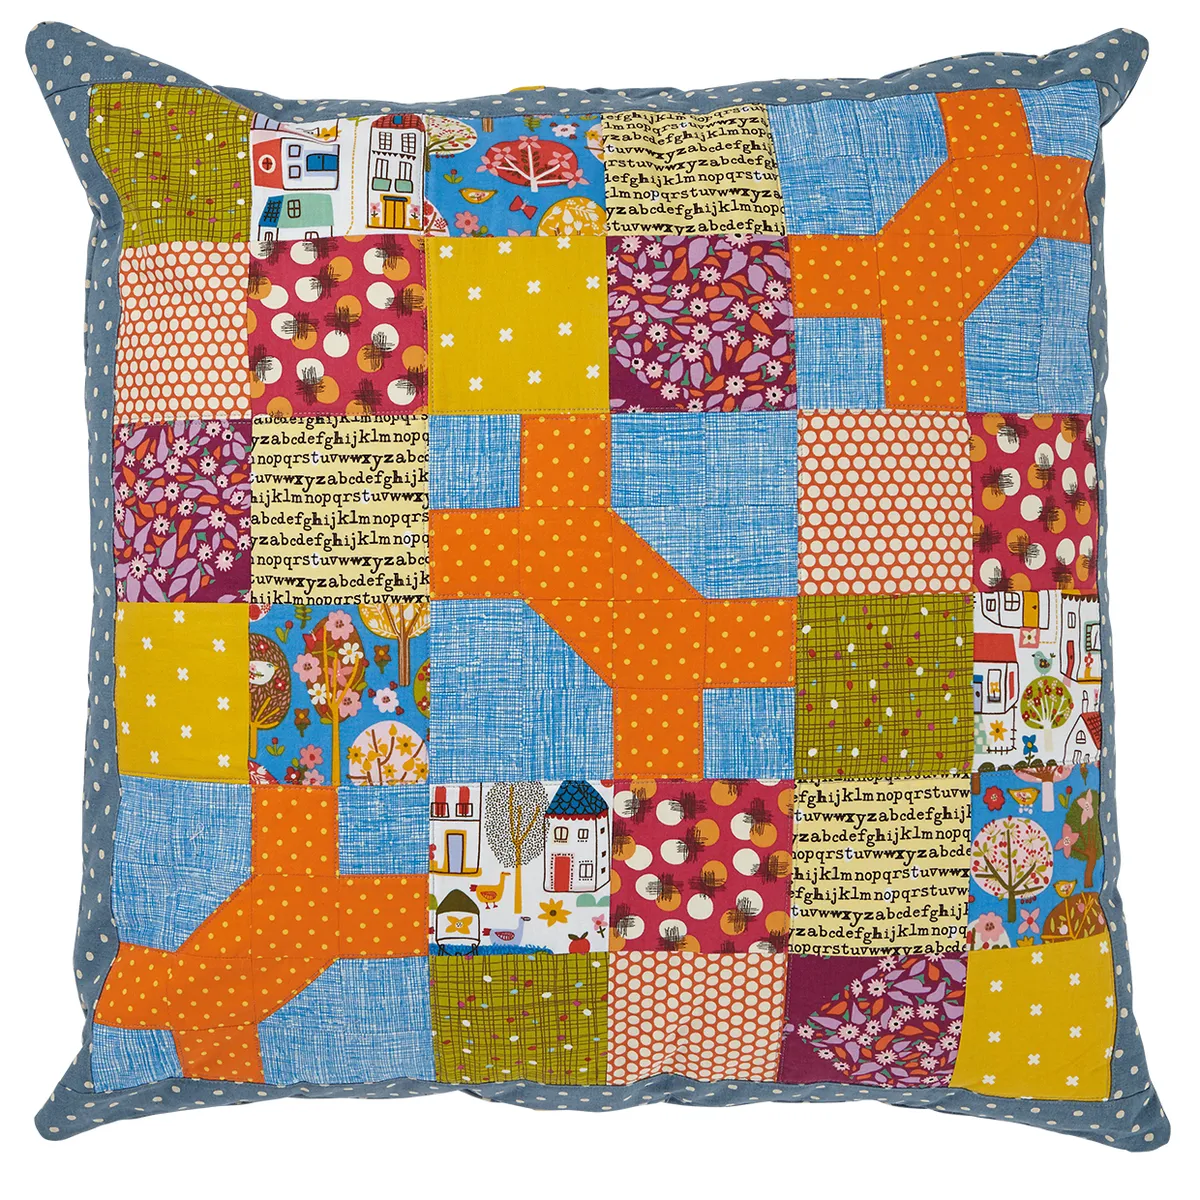
Lay the completed bone blocks onto your work surface and decide on the arrangement of the 4½in squares around them, using the photo of the finished cushion (above) as your guide. Make a note of your preferred arrangement on paper or take a quick photo of the layout, then stitch the 4½in squares into four-patch blocks (Fig c).
Figure C
Assemble the cushion top
Step 1
Stitch the nine completed blocks into three rows of three, according to your chosen arrangement, then stitch the three rows together.
Step 2
Take the two edging strips measuring 2¾in x 24½in and place right sides together with two opposite edges of the completed patchwork top. Stitch, then turn and press. Repeat with the 2¾in x 29in strips on the two remaining sides.
Quilt the cushion
Step 1
Place the 31in square of lining fabric wrong side up on a flat surface and smooth out. Put the batting on top, then position the completed cushion top, right side up, on top of the batting. Smooth out the layers and baste together using your preferred method.
Step 2
Quilt as desired. We outlined the bones, the edges of the four-patch blocks, and the edge of the edging strips.
Step 3
Trim the excess batting and lining fabric from the cushion top, which should measure around 29in square.
Preparing the cushion back
Step 1
Cut two pieces of medium-weight interfacing and iron onto the two remaining pieces of cushion backing fabric. Press the binding strip in half lengthways, wrong sides together.
Step 2
Take one of the pieces of backing fabric and place wrong sides together with one of the 16½in x 29in pieces of lining fabric. Line up the long raw edges of the binding with one of the 29in sides of the backing pieces. Pin in place, then stitch with a ¾in seam (Fig d).
Figure D
Fold the binding round to the back of the backing piece and press, then pin in place. Stitch the binding close to the binding edge to secure (Fig E).
Step 3
Pin and stitch the Velcro on this backing piece, right next to the completed binding, on the lining side (Fig F).
Figure F
Step 4
Place the two remaining backing pieces right sides together and stitch down one long edge. Turn right side out, press, then top stitch close to the seam edge.
Step 5
Place the other half of the Velcro 2in away from the stitched edge on this backing piece, this time on the backing side (Fig g).
Figure G
Pin and stitch in place (Fig h).
Figure H
Finishing your DIY dog bed
Step 1
Stick the two backing pieces together using the Velcro and place right sides together with the cushion top. Stitch all round the edge with a ½in seam. You will get a neater finish for the cushion if you curve the corners rather than stitching them with right angles.
Step 2
Turn the cushion through and check all is ok, then turn it back through and trim the seam to ¼in. Zigzag the raw edges of the seams and add an extra row or two of zigzag stitches where the two back sections overlap to give extra strength.
Turn through to the right side and then insert the cushion pad to finish.
Ali Burdon is a designer and sewing teacher who’s also known as Very Berry Handmade. She crochets too and has recently been experimenting with natural dyeing yarns using plants from her garden. You can keep up to date with her latest news over on her Instagram @msaliburdon. She lives in north Staffordshire with her husband, twin sons and their dog, Barney, where she does lots of sewing, crochet and baking, which became the main themes of her blogging and Instagram feed. Ali loves to use patchwork in her designs and has a seriously enviable fabric stash!
This website is owned and published by Our Media Ltd. www.ourmedia.co.uk


 Stitch the four rows together to complete a bone block (Fig b). Repeat to create two more bone blocks.