How to piece a Double Wedding Ring quilt
Step 1
Construction options
There are two main machine piecing methods. Both involve piecing arcs of fabric and, then sewing these to a background oval to make a melon-shaped piece.
You will need a set of templates, which will include the arc section, oval and centre. The centre template may be a curved diamond, or a quarter-curved diamond. The set should also include information on what size squares to cut for the ends of the arcs.
Step 2
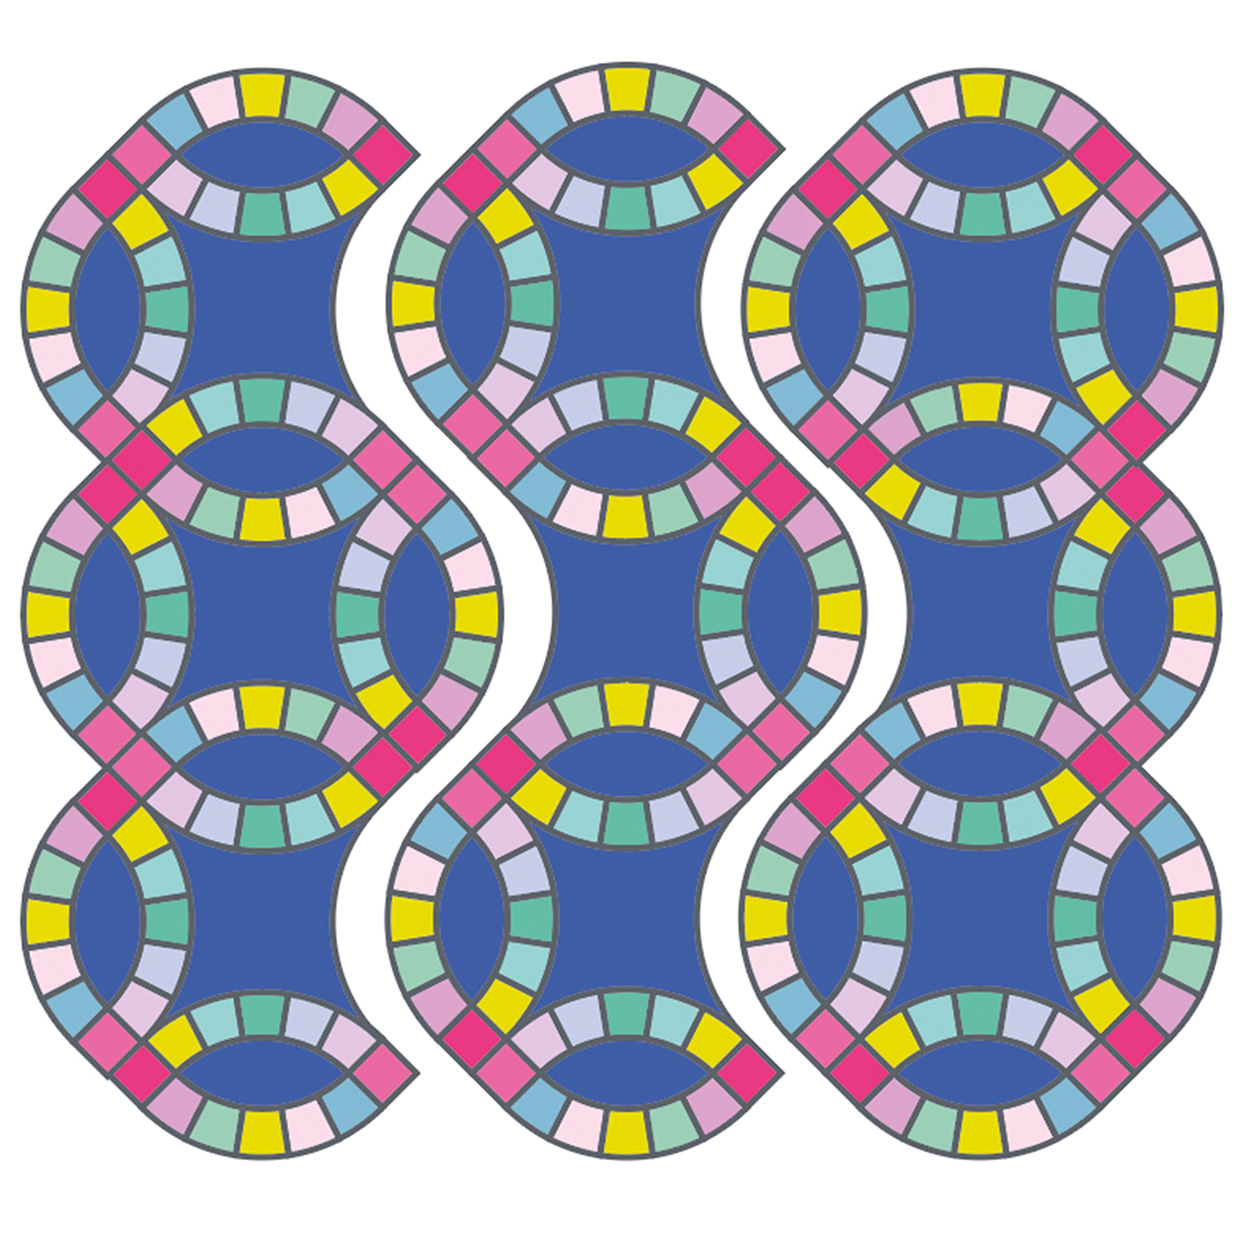
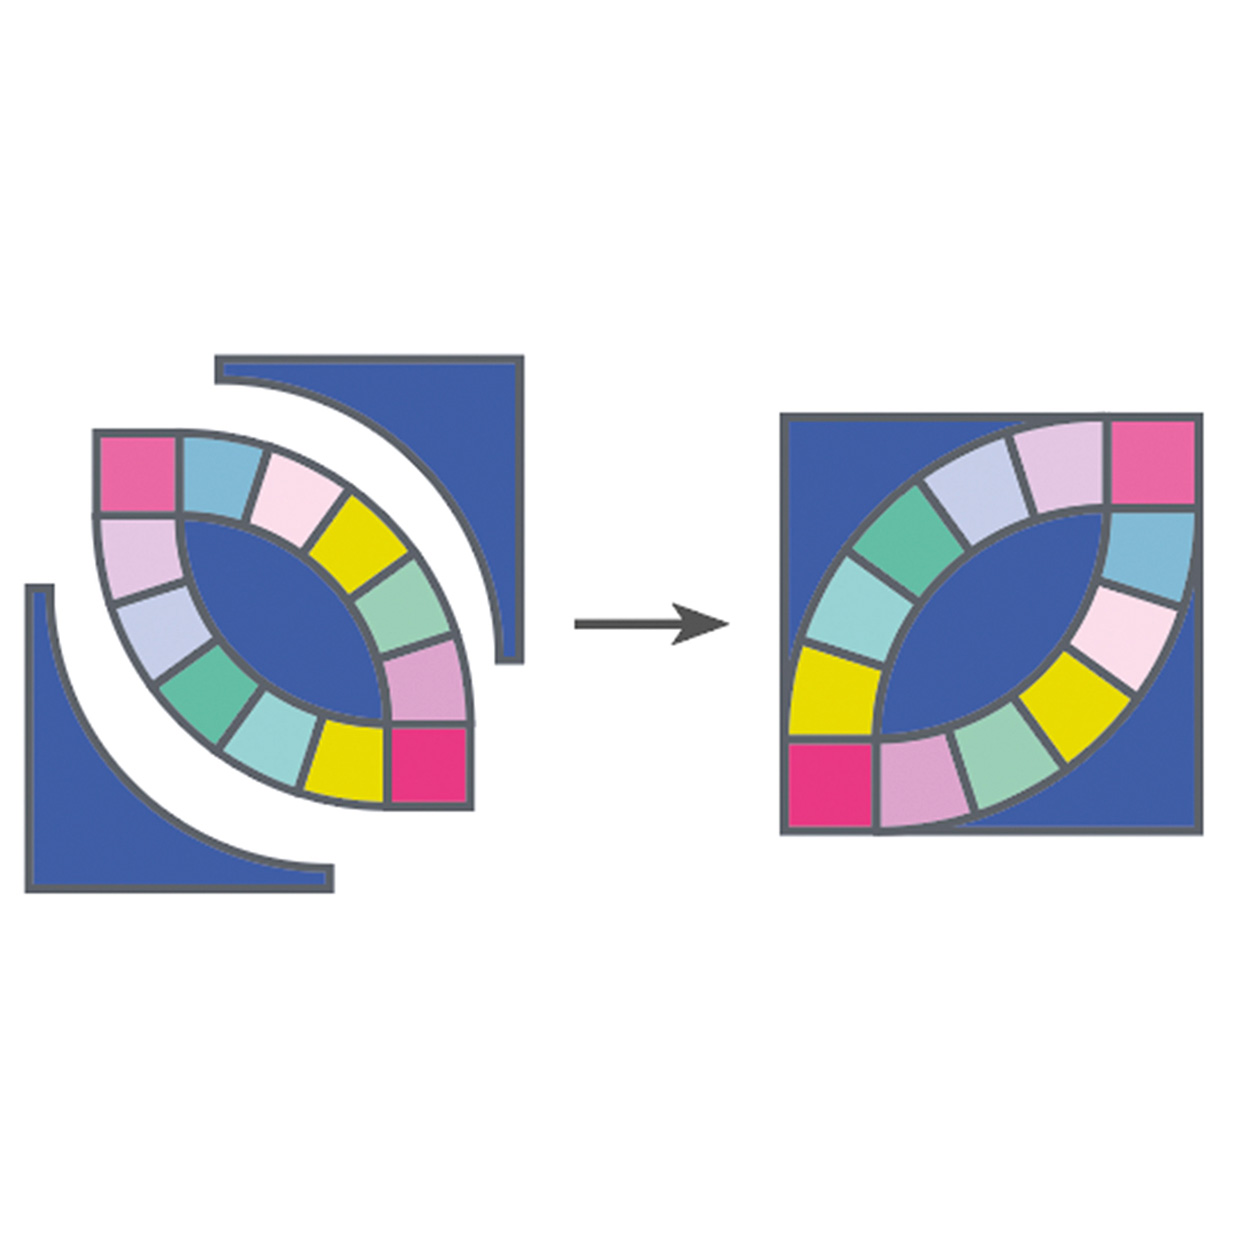
The first, more traditional machine piecing method involves building up the quilt by adding the melons to curved background diamonds. The second method involves sewing two background corners to each melon, similar to a Drunkard’s Path block, to make the blocks.
Use the first method to avoid seams across the large background diamonds or if you prefer a curved outer edge for your quilt. Use the second method for more straight seam piecing.
Step 3
As a third option, you can use English Paper Piecing (EPP) to hand stitch all the arcs and applique to the background fabric.
Step 4
Piecing the melons
Use a template to cut the required number of pieces for each of the two arcs, and sew together. Paula prefers to press her seams open to reduce bulk and improve accuracy.
Arrange the arcs with a background oval and two squares. Sew the bottom arc to the oval, as shown in Fig 1.
Step 5
Sew the squares to each end of the top arc, then sew to the top of the oval (Fig 2).
Take care to align the seams of the square with the points of the oval to complete one melon section.
Repeat this process as required until all the melon sections are sewn.
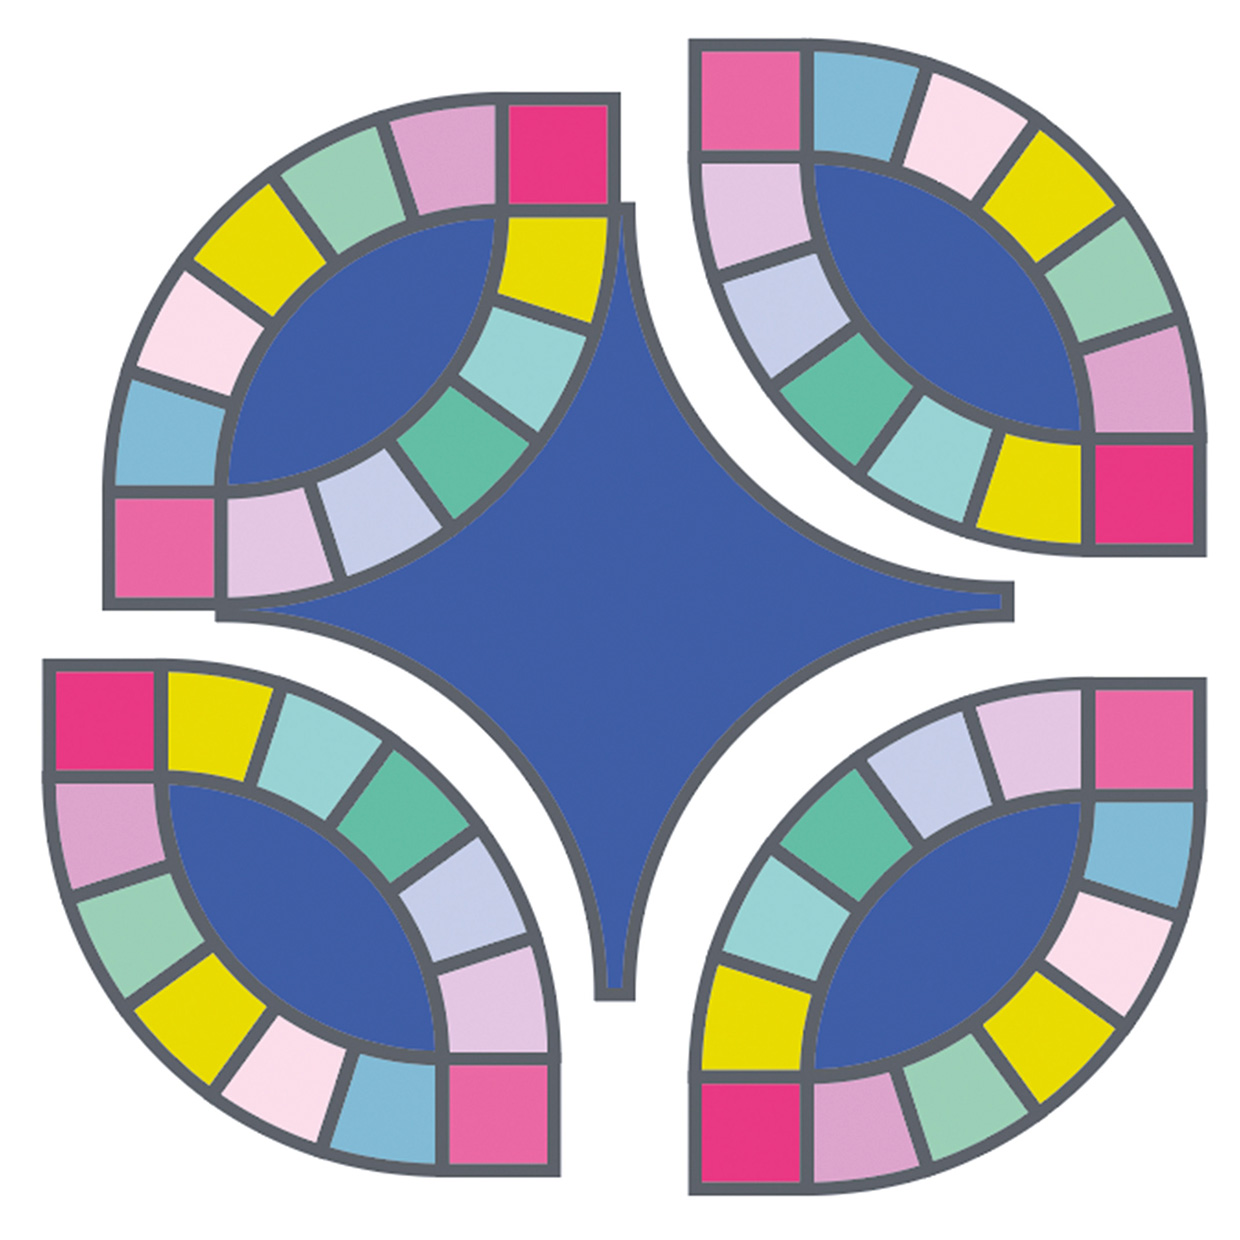
Step 6
Traditional machine piecing
Arrange four melon sections with one background diamond.
Sew the first melon in place along the curve, as shown in Fig 3.
Note that the seam will not extend into the squares of this melon. Sew the next section, aligning the squares at the top, as shown in Fig 4.
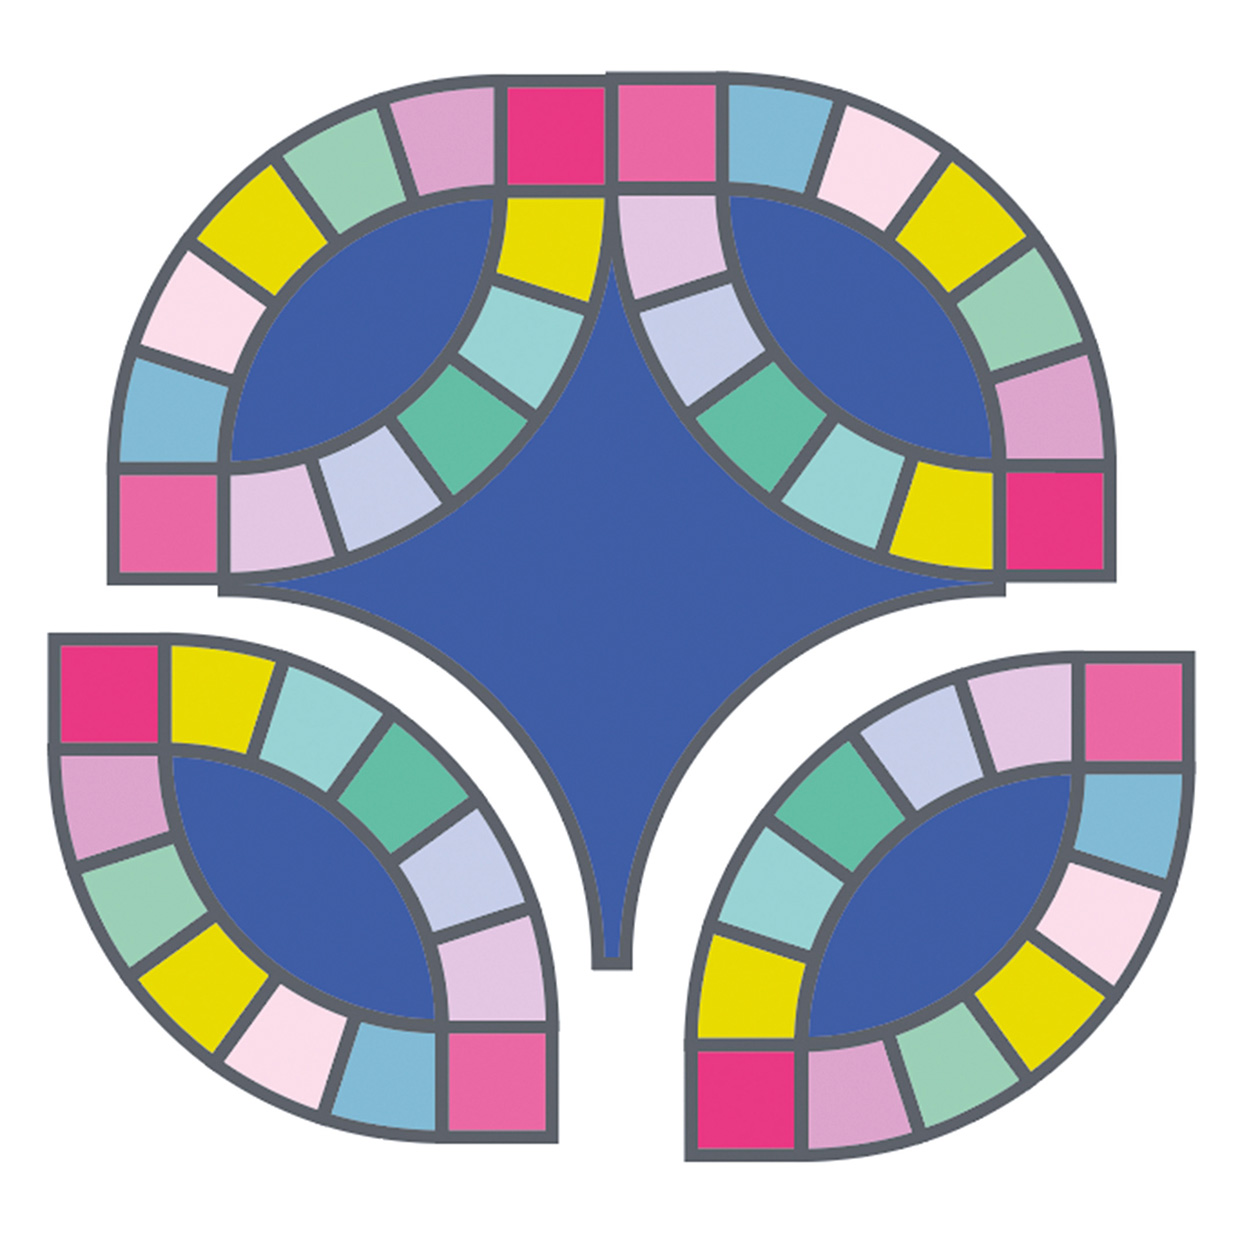
Step 7
Sew the third section, aligning the square at the side.
Then sew the last section, aligning the squares at both ends. This completes one ring section (Fig 5).
You can continue adding sections to this first one to make any size quilt, but remember that you will not add four melons to each background section, as they are shared between rings.
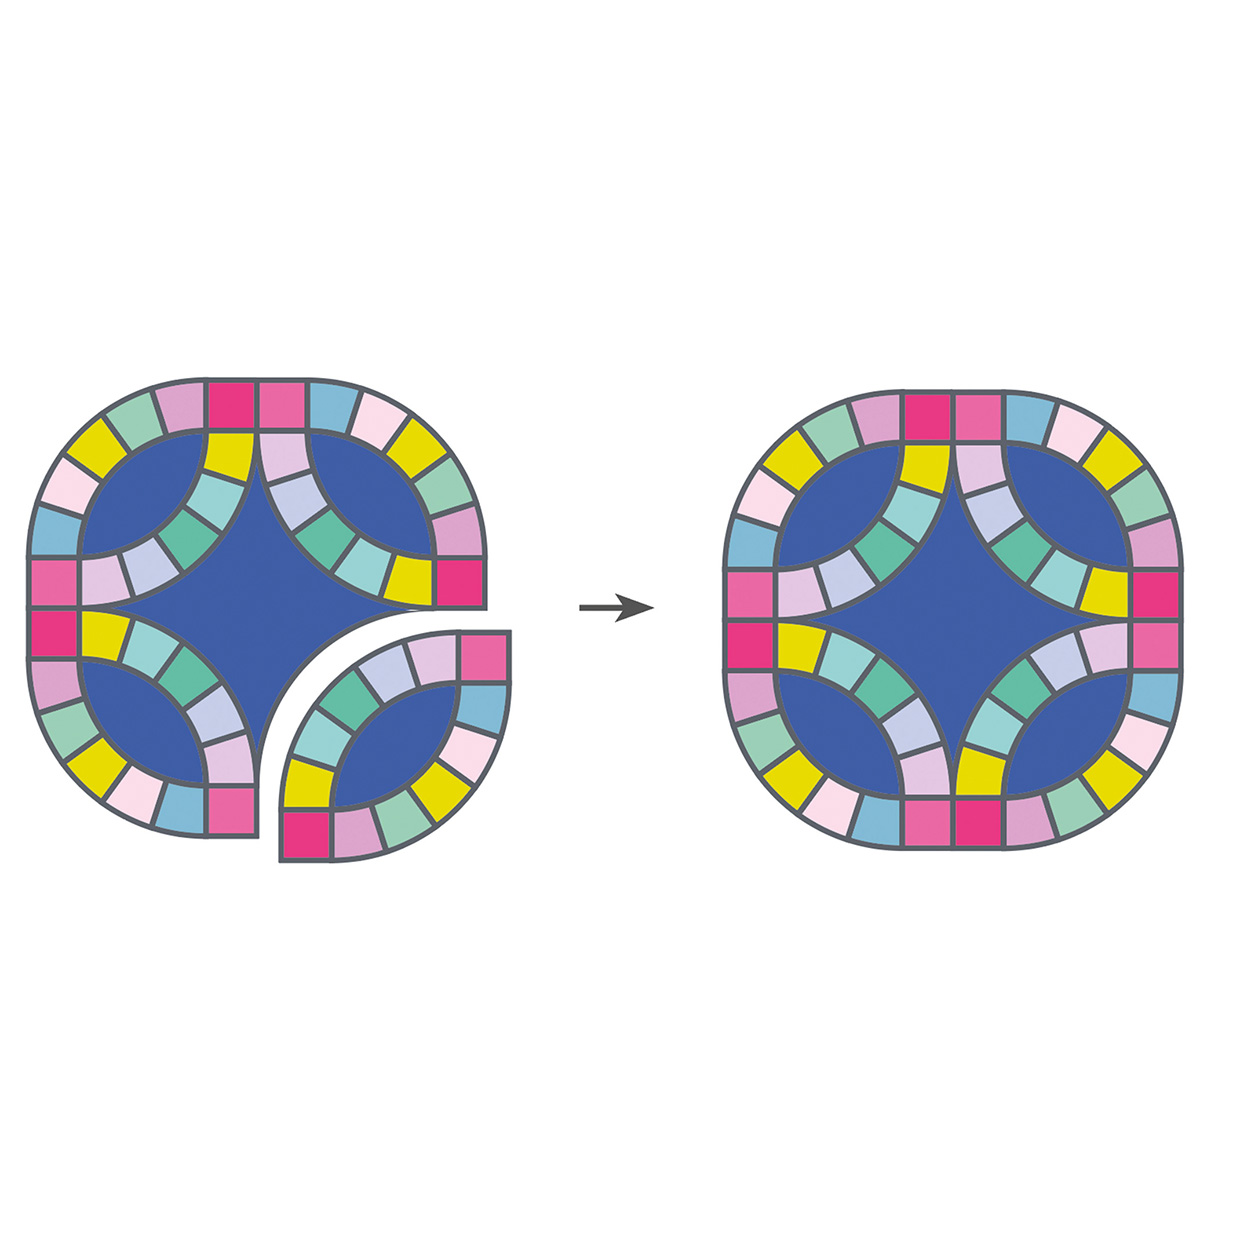
Step 8
To sew lots of sections together, the easiest way is to assemble columns.
Sew two melons to each remaining background diamond.
Arrange the columns as shown in Fig 6.
Fill in the side and bottom edges by sewing those melon sections in place, before sewing into columns.
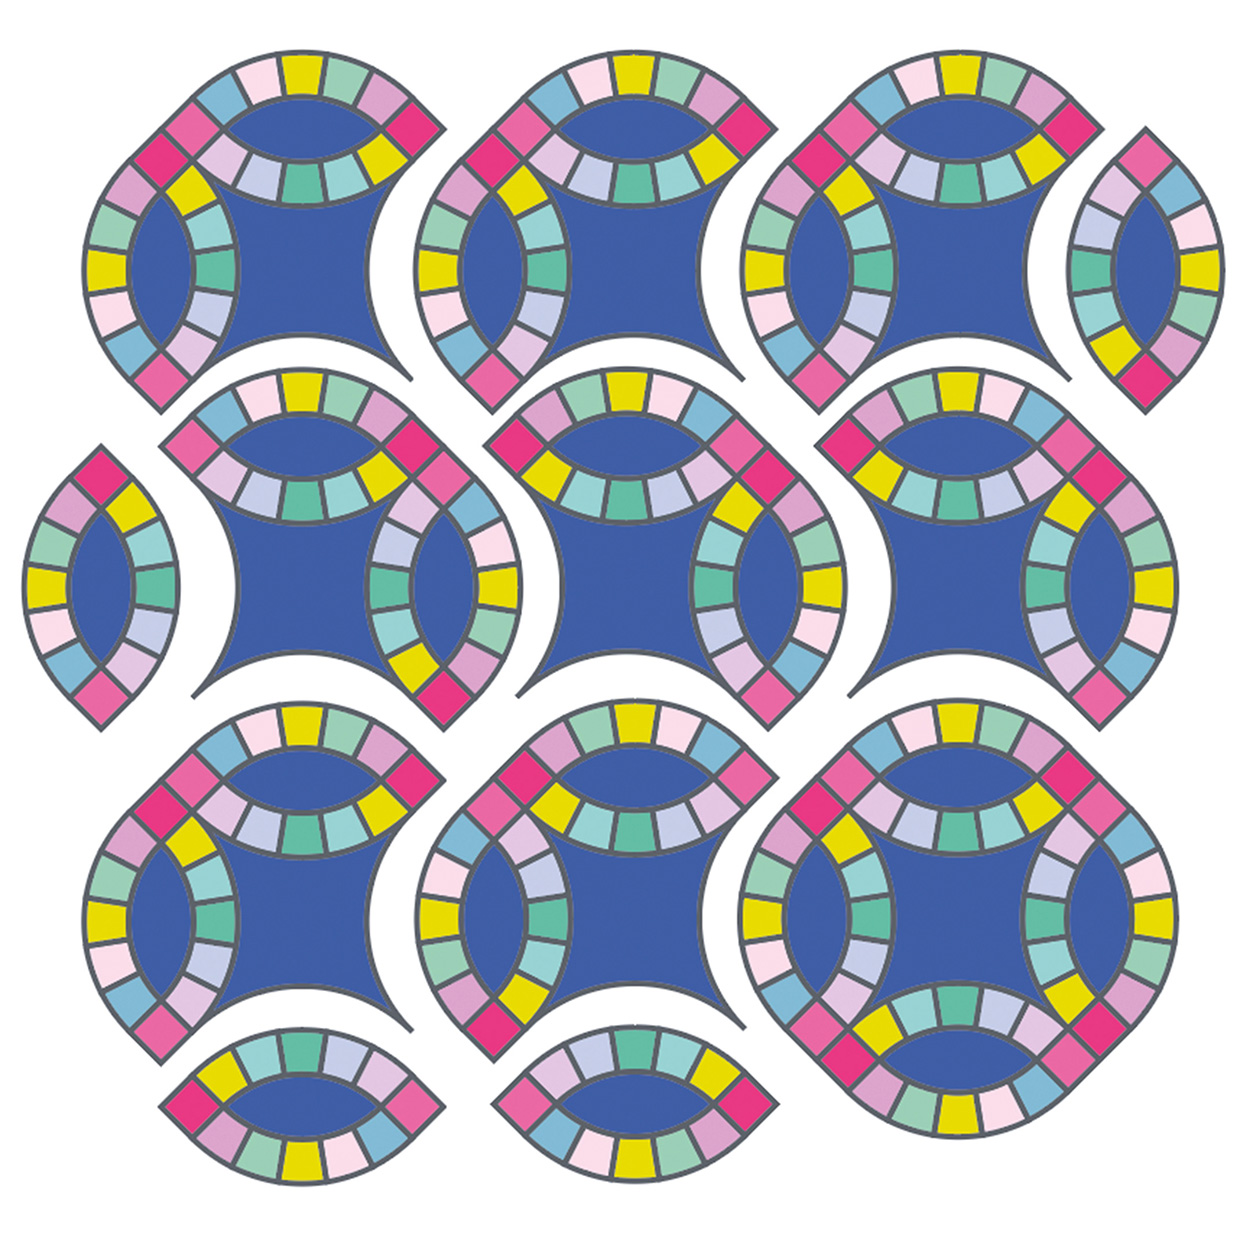
Step 9
Sew the long seams between the columns to finish (Fig 7).
Top tip: When sewing these long seams, make sure to stop often with your needle down, to adjust the fabric as necessary.
Step 10
Block based machine piecing
Prepare your melon sections as in steps 4–5.
Cut your background sections using a quarter diamond template. If your template is a larger curved diamond piece, use one curved edge to trim a square.
Step 11
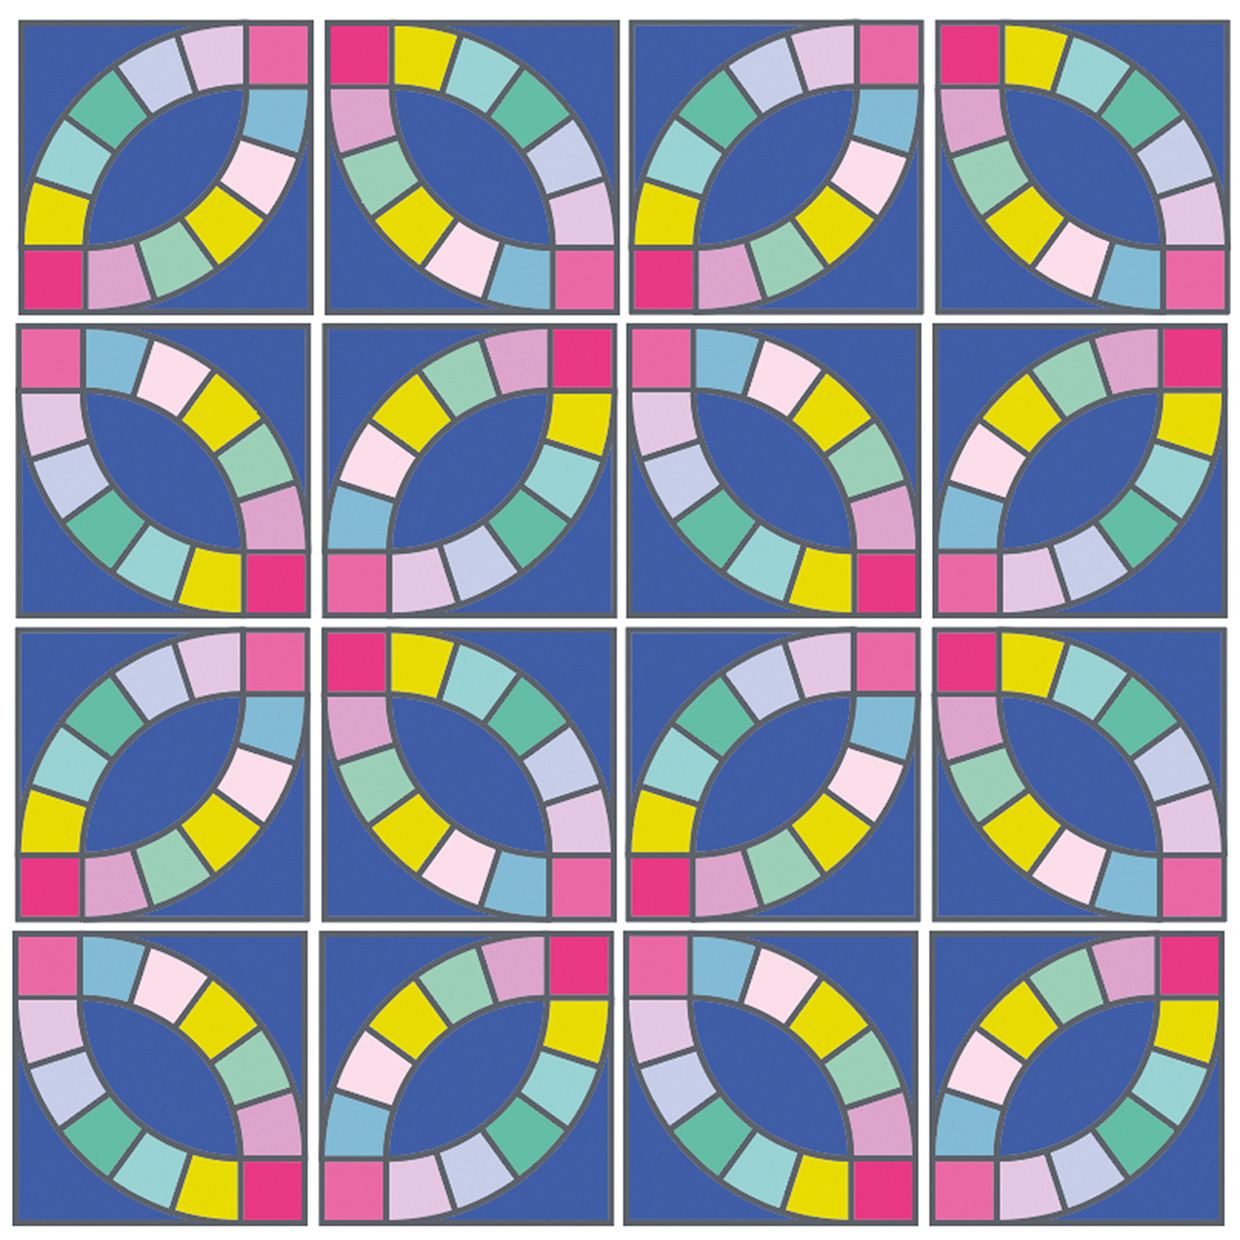
Sew a quarter diamond piece to each side of each melon section (Fig 8).
Arrange the completed squares in rows, making sure to turn the units to make the ring pattern (Fig 9).
Sew the units in rows, then sew the rows together.
Note: four blocks are used for each ring.
Double wedding ring quilt: Step-by-step tutorial
Step 1
Cutting out
From the white background fabric cut:
- Eight (8) Template A.
- Four (4) Template B.
Step 2
From each of the orange and pink fabrics cut:
Step 3
From each of the green and yellow fabrics cut:
- Eight (8) Template C.
- Four (4) 2½in squares.
Step 4
From the binding fabric cut:
Step 5
Piecing the quilt top
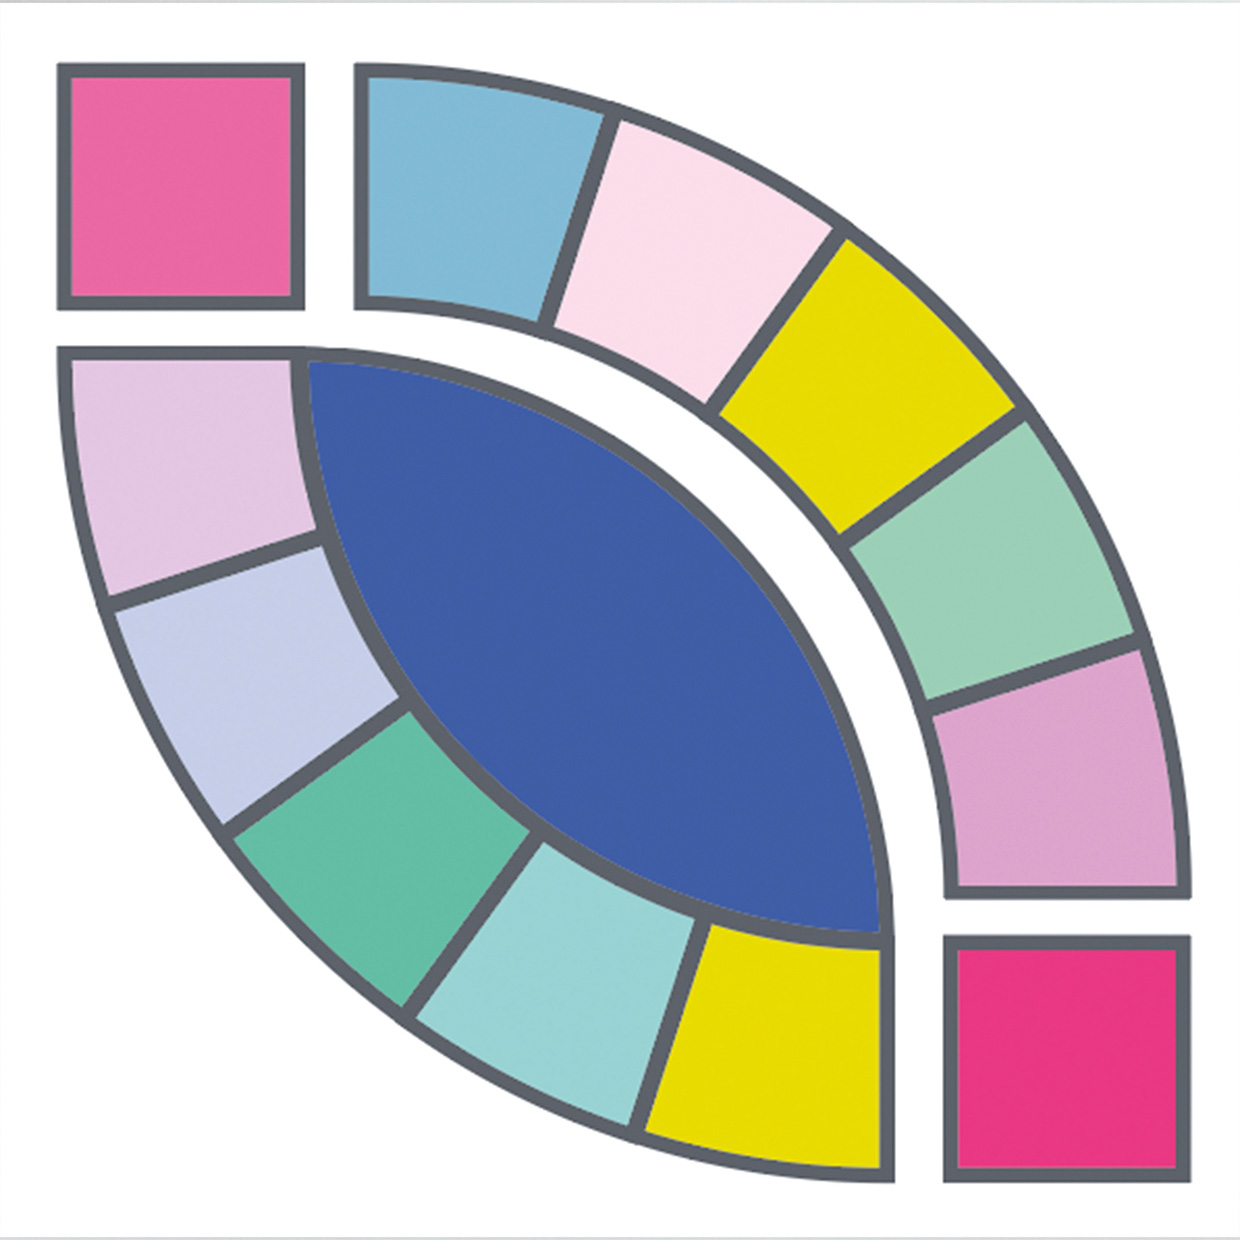
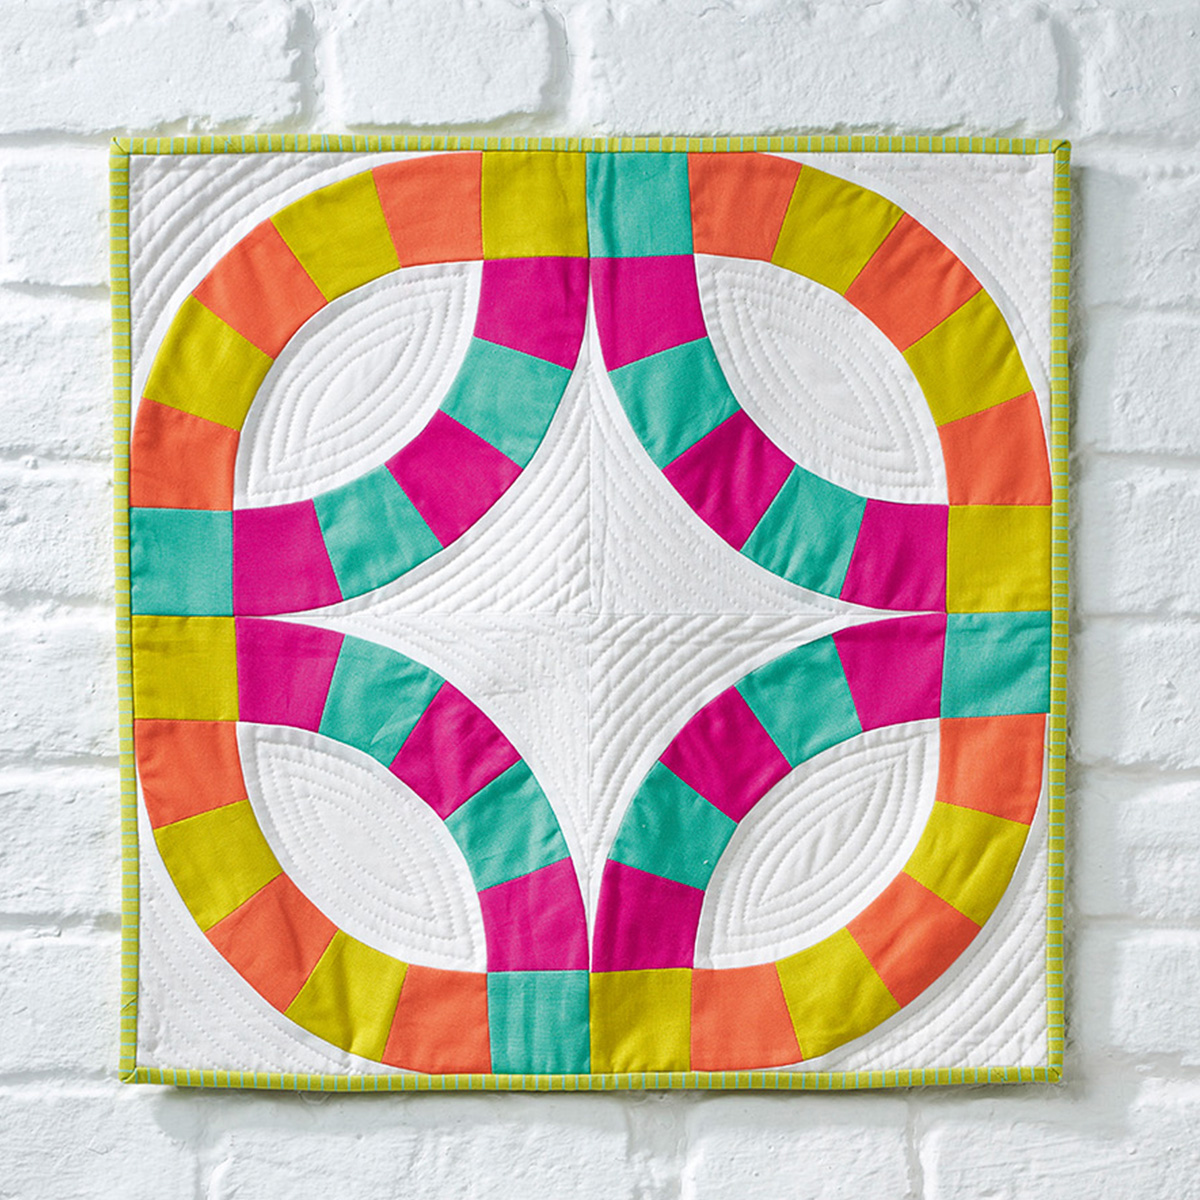
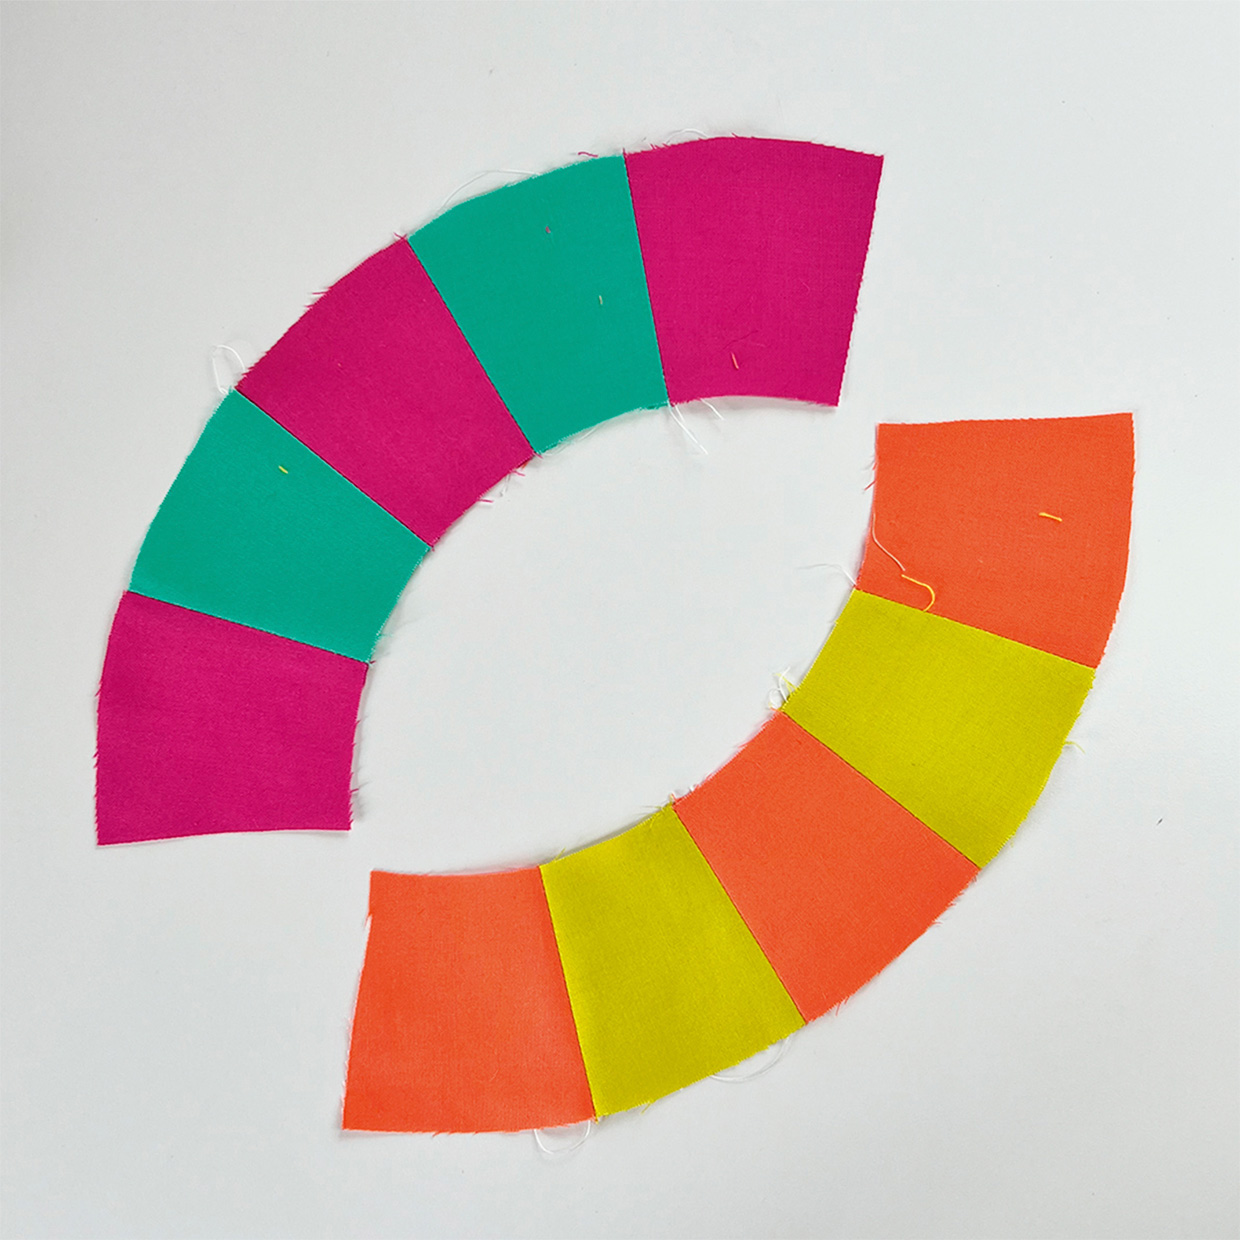
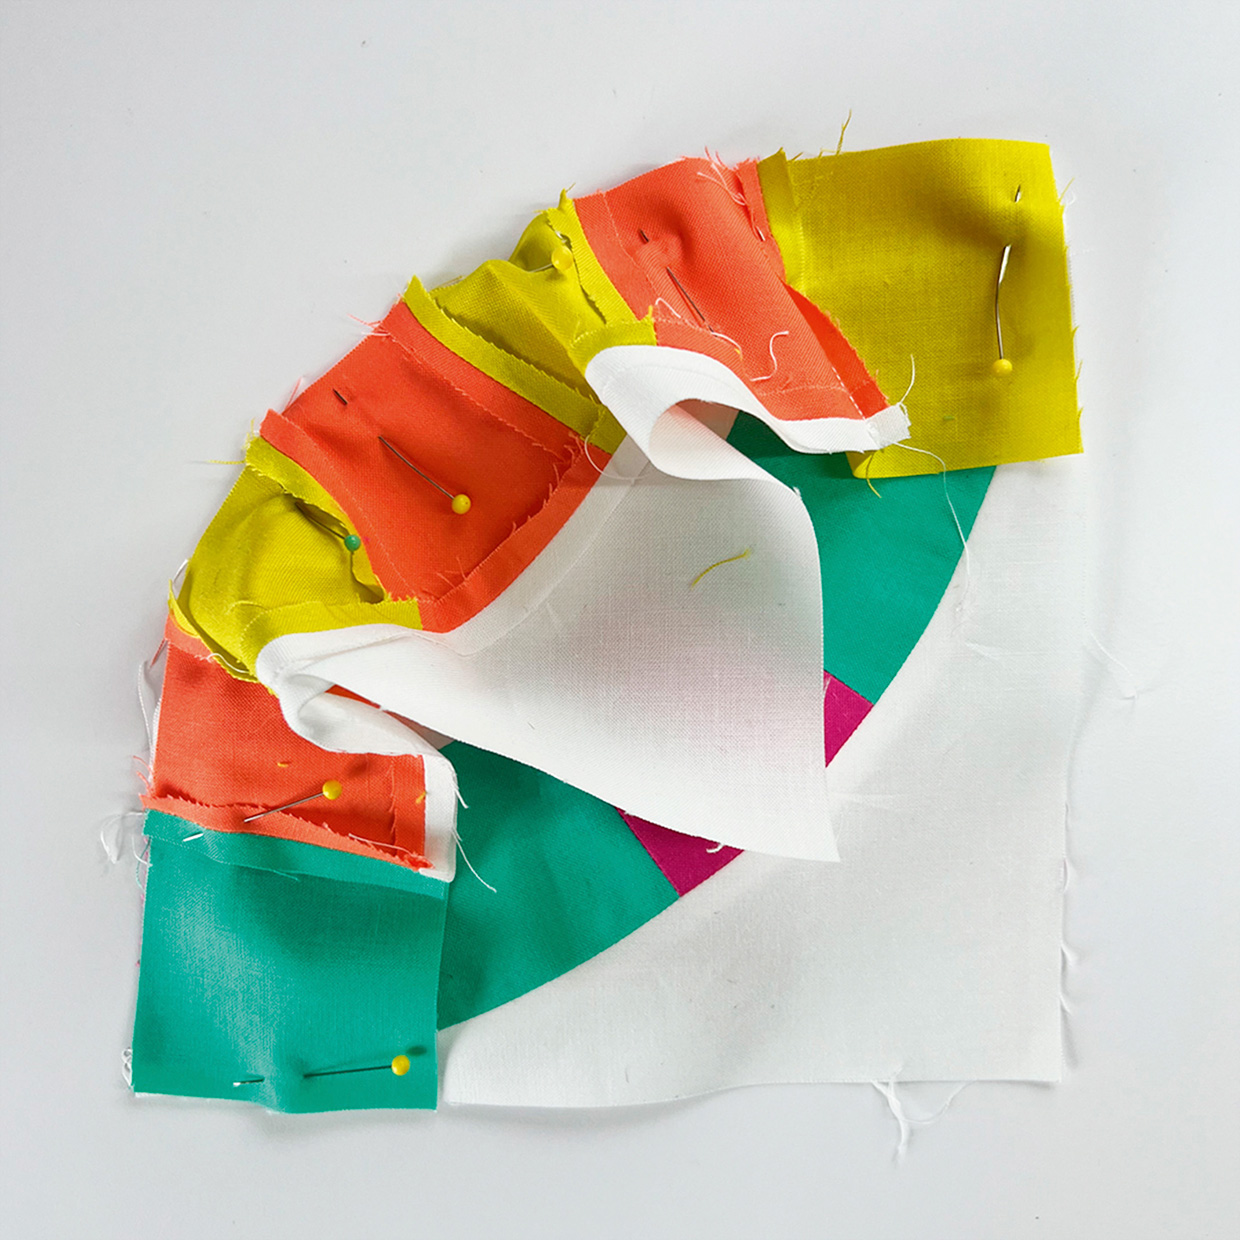
Sew one arc alternating three pink and two teal pieces, and one arc alternating three orange and two yellow pieces (Fig A).
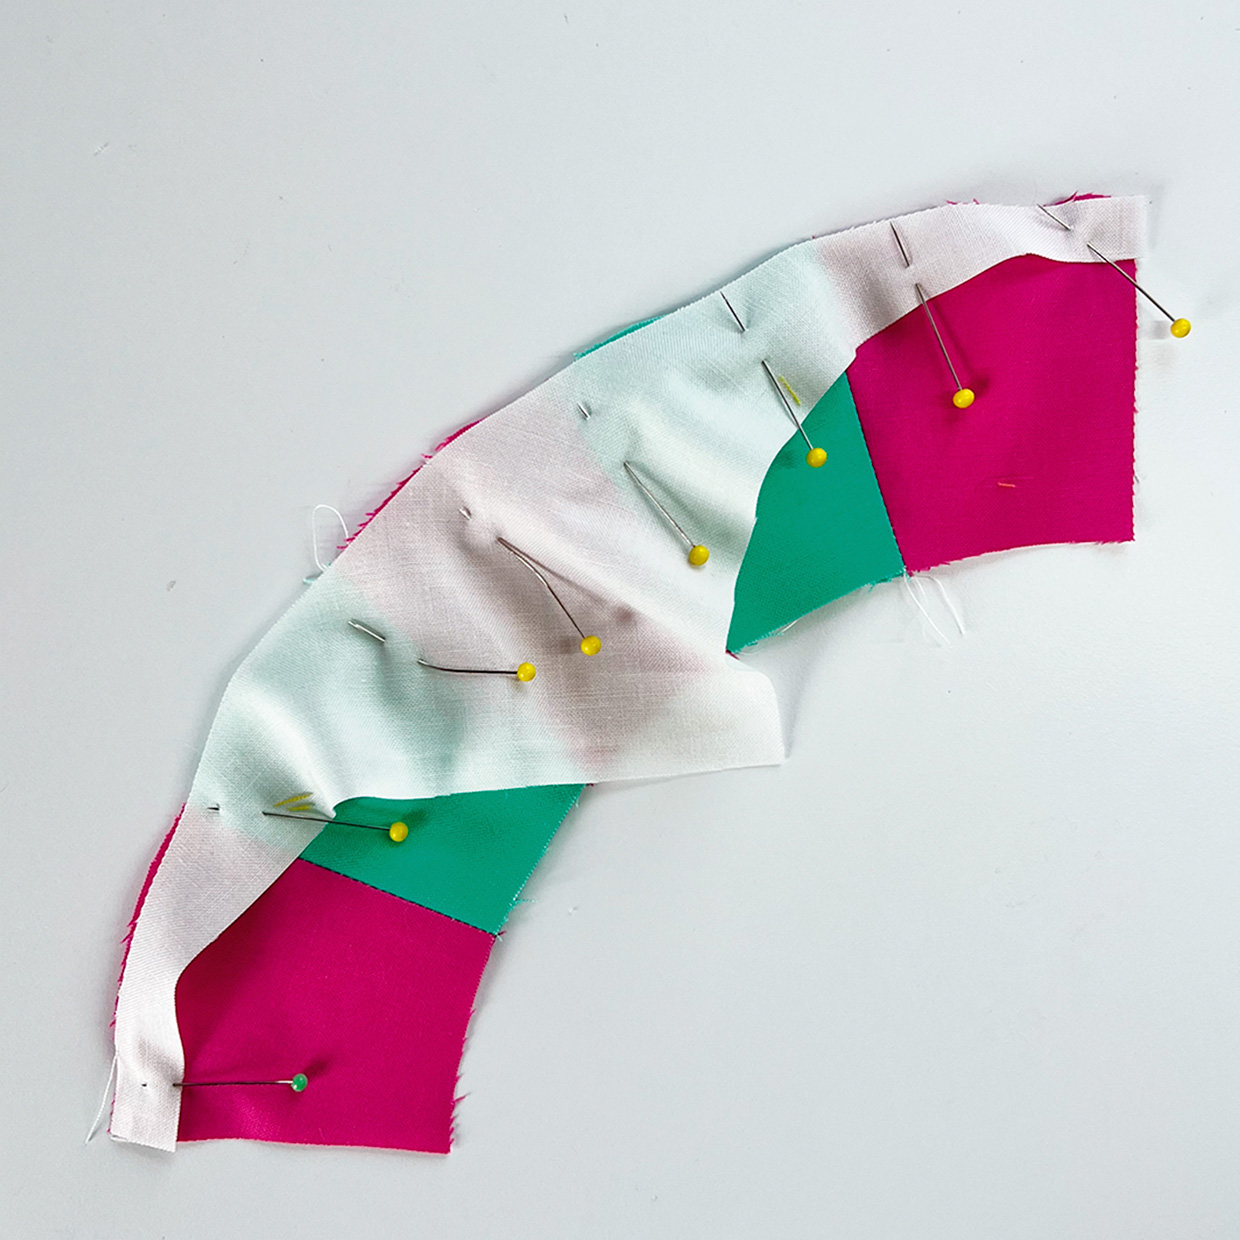
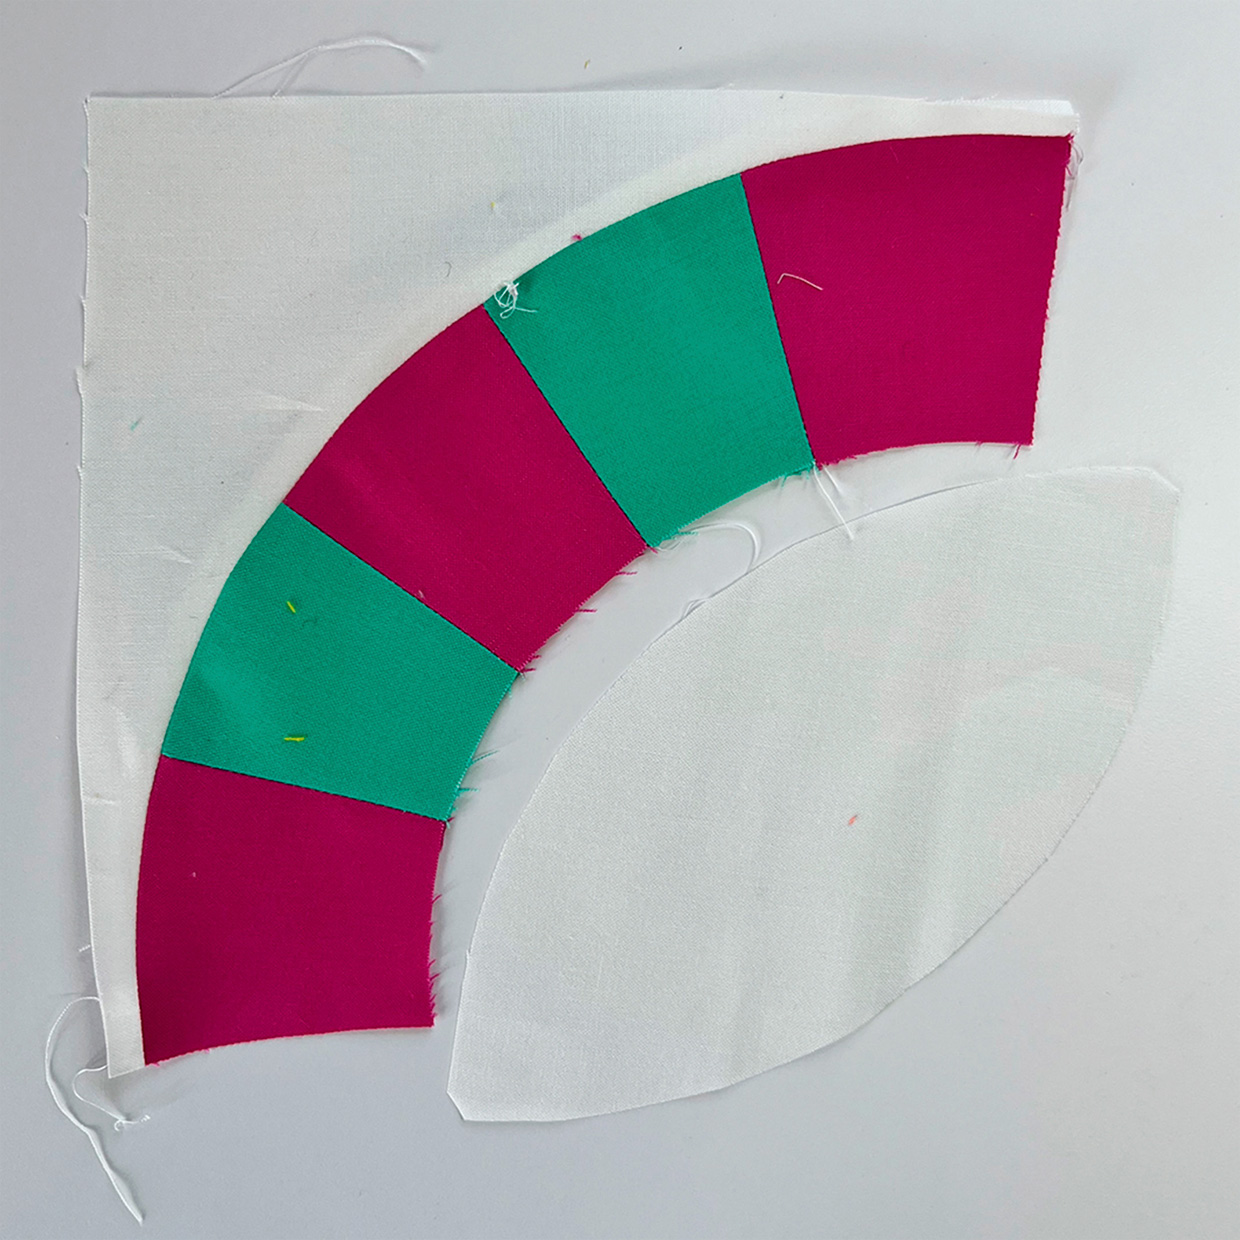
Place a white Template A piece RST with one arc and sew in place (Figs B–C).
Repeat with the other arc.
Step 6
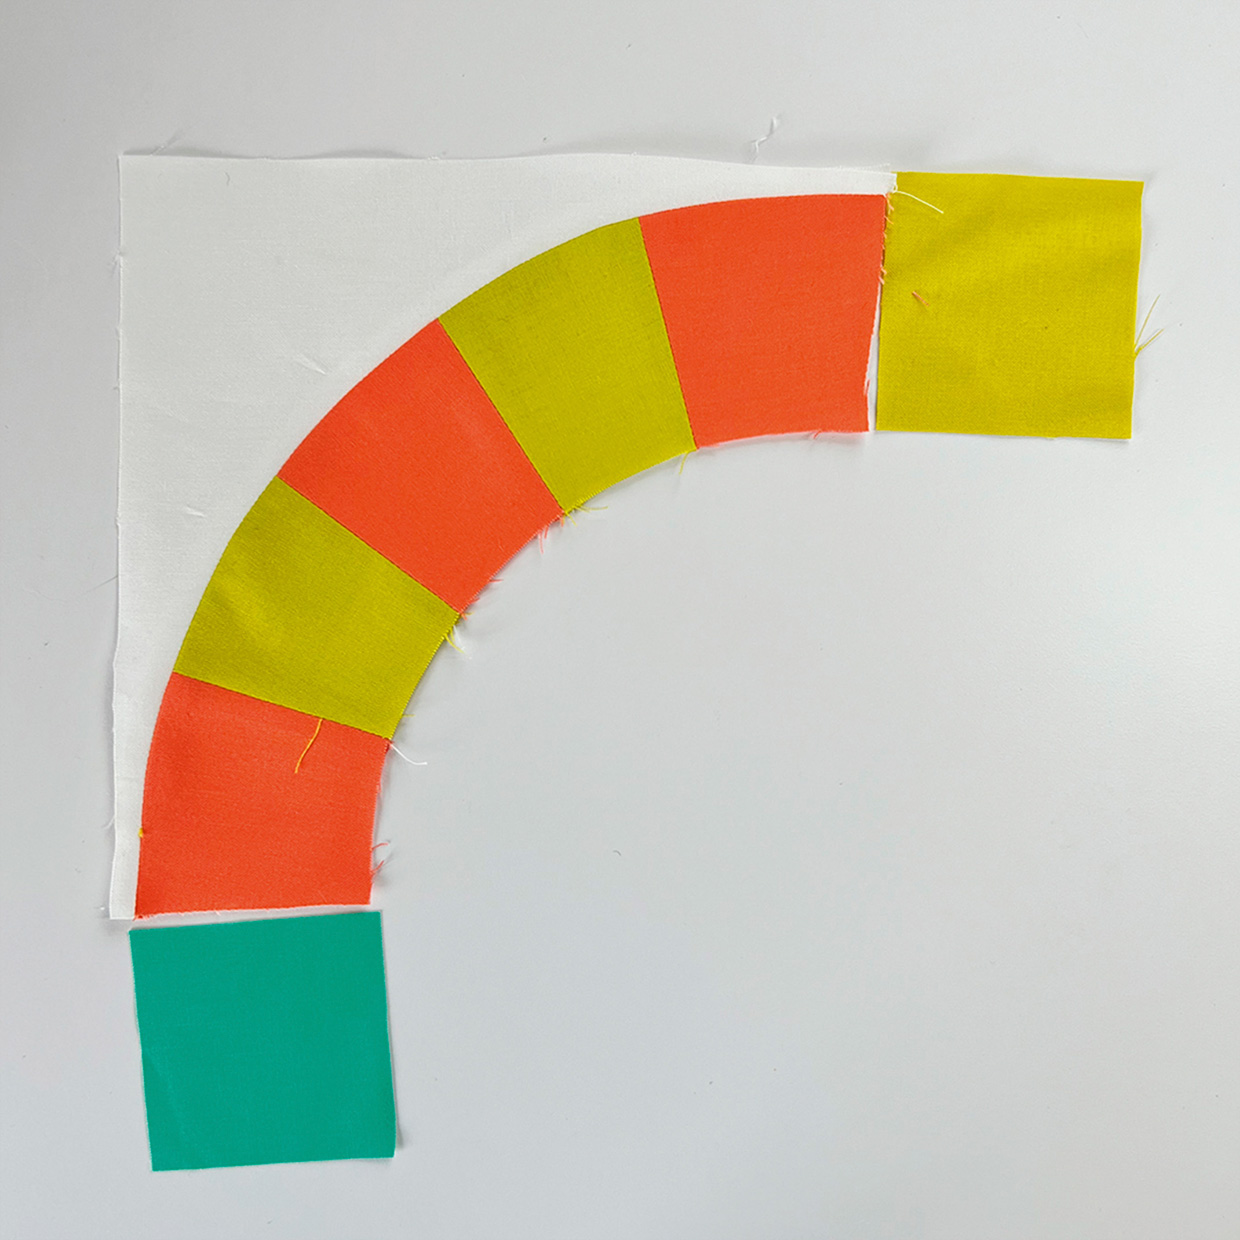
Sew one yellow and one green square to each end of the orange/yellow arc (Fig D).
Sew the Template B piece to the pink/teal arc.
Then sew the orange/yellow arc to the other side (Fig E).
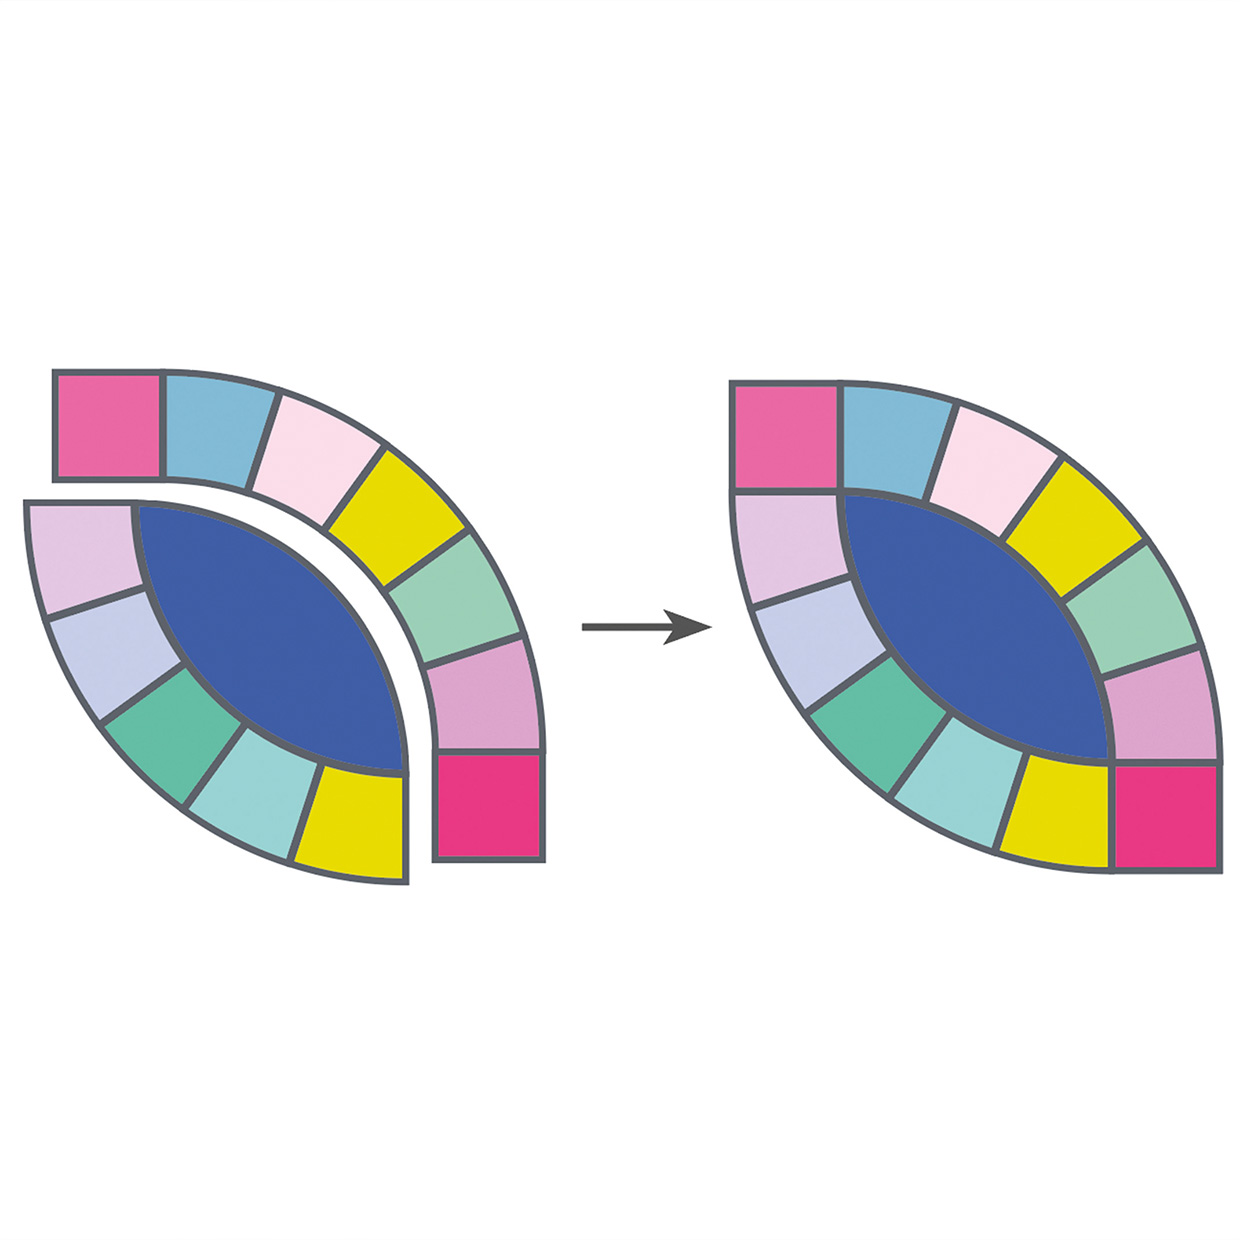
Step 7
Sew the blocks into a four-patch, following steps 10–11 of the above tutorial to complete the quilt top. Refer to the photograph for the placement of the blocks.
Top tip: You could also choose to turn the blocks for a pink/green outer ring and orange/yellow inner ring.
Step 8
Finishing the quilt
Give the quilt top a good press. Make a quilt sandwich by placing the backing fabric right side down, the batting on top, then the quilt top centrally and right side up.
Baste the layers together using pins, spray or your preferred method.
Step 9
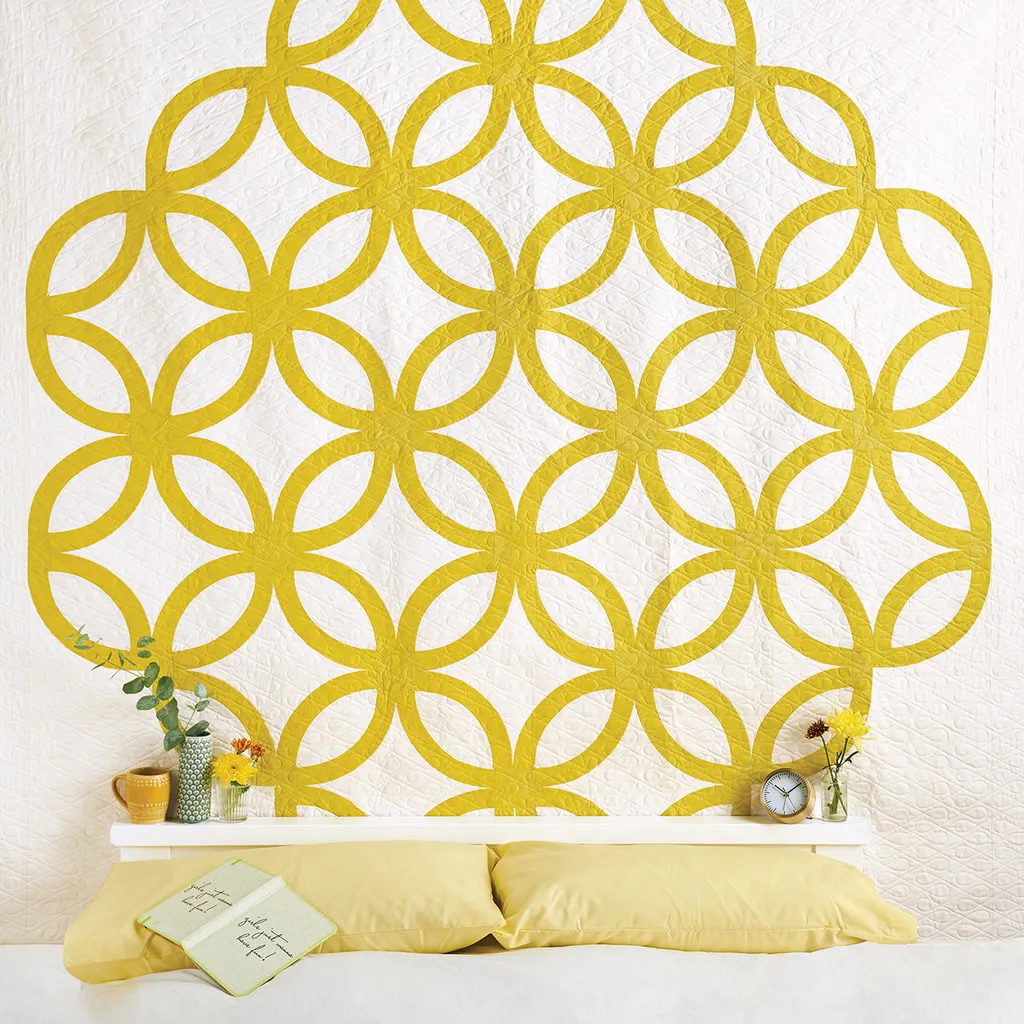
Quilt as desired. Paula chose echo quilting to complement the curves of the rings.
Step 10
Trim the quilt to 18.in square, cutting away the excess backing and batting in the process.
Step 11
Sew the five 2.in x 22in binding strips together end-to-end using diagonal seams.
Fold and press the binding in half lengthways, with wrong sides together, and press along the full length.
Step 12
Attach the joined binding strip to the front of the quilt using a ¼in seam and creating a neat mitre at each corner. Fold over the binding and hand stitch in place to finish.