Free quilted notebook pattern

Whip up a quick-to-stitch project with this sweet homemade notebook cover by Sarah Griffiths.

Try 6 issues of Love Patchwork & Quilting magazine for £9.99| SAVE 76%

Published: July 24, 2020 at 8:00 am

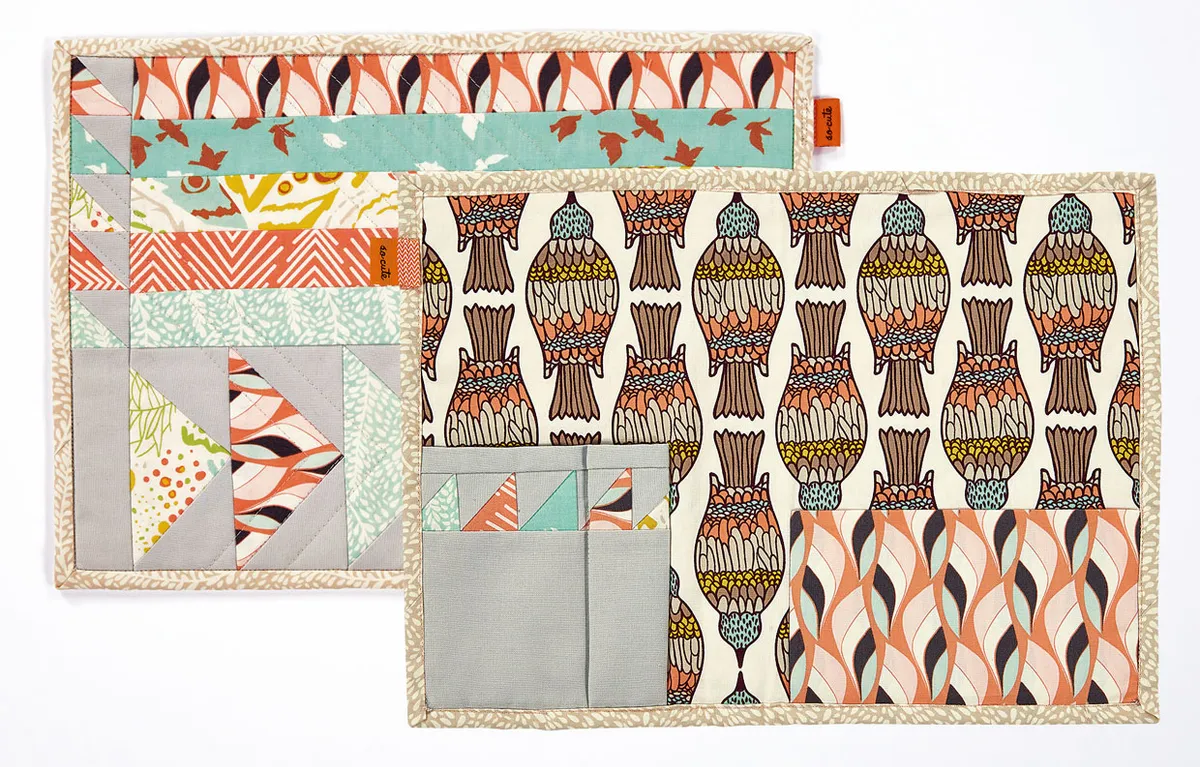
Make your notebook own quilted notebook cover work for you and your stationery. Perfect for a slim A5-size notebook and a set of pens, plus you can always try adding extra pockets and pouches for any other bits and bobs you might need.

You will need

  • Print fabrics six (6) fat quarters
  • Lining fabric 9½in x 13½in
  • Grey background fabric
  • one (1) fat quarter
  • Batting 11in x 15in

Finished size

9½in x 13½in unfolded, 9½in x 6¾in folded

Notes

Seams are ¼in throughout, unless otherwise specified.

HST = half square triangle.

Fabrics are from the Winged collection by Bonnie Christine for Art Gallery Fabrics

Free_quilted_notebook_cover_pattern_front_and_back

Free quilted notebook pattern

You will need:

  • fat quarters
  • Lining fabric
  • Cotton fabric
  • Batting
  • Basic sewing kit
  • Sewing machine

Step 1

Cutting out

From one print fabric cut three (3) 2½in x 22in strips for binding.

Step 2

From a second print fabric cut:

  • Two (2) 2½in x 4¼in rectangles.
  • One(1) 178insquares.
  • One 1½in x 12½in strip.

Step 3

From each of the four (4) remaining print fabrics cut:

  • One(1) 2½in x 4¼ in rectangles.
  • One(1) 178in squares.
  • One 1½in x 12½in strip.

Step 4

From one of the print fabrics, cut an additional 7in square piece to form the large pocket.

Step 5

From the grey background fabric cut:

  • Twelve (12) 2½in squares.
  • Five (5) 18in squares.
  • One(1)1½in x 4½in.
  • One (1) 3½in x 5½in.
  • One (1) 5½in square.

Step 6

Piece the outer square

Pair one print 178in square with a grey 18in square, right sides together. Draw a diagonal line across the grey square. Sew ¼in from each side of the line. Cut along your drawn line and press each HST open. Repeat with the remaining squares for a total of ten (10) 1½in HSTs.

Free_quilted_notebook_cover_pattern_fig_01

Step 7

Take one HST and sew to one end of the matching 1½ in x 12½in strip. Repeat with the remaining print strips. Sew the strips together to form a 5½in x 13½in panel.

Free_quilted_notebook_cover_pattern_fig_02

Save the five (5) remaining HSTs for later.

Step 8

Using the 2½in x 4½in print rectangles and 2½in grey squares, make six flying geese patchwork pieces, as follows. Draw a diagonal line onto the reverse of each square. Place one square at the edge of a rectangle, sew along the line and then trim the seam. Press away from the rectangle. Repeat with the second square on the opposite side of the rectangle.

Free_quilted_notebook_cover_pattern_fig_03

Step 9

Sew the flying geese pieces into one long strip, adding the 1½in x 4½in grey strip to the end.

Free_quilted_notebook_cover_pattern_fig_04

Step 10

Sew the flying geese panel to the bottom of the pieced panel to form the outside cover.

Free_quilted_notebook_cover_pattern_fig_05

Step 11

Baste your cover to the batting and quilt as desired. We quilted a set of angled lines, echoing the flying geese blocks. Trim away any excess batting

Step 12

Piece the small pocket

Sew the five remaining print HSTs into one strip.

Free_quilted_notebook_cover_pattern_fig_06

Step 13

Sew the grey 3½in x 5½in piece to the bottom of the strip, and the grey 5½in square piece to the top.

Free_quilted_notebook_cover_pattern_fig_07

Fold in half, wrong sides together and press.

Step 14

Make the lining

Place your small pocket face down on the lining, 5¼in from the left edge. Sew in place along the left edge, backstitching at the top and bottom to secure.

Free_quilted_notebook_cover_pattern_fig_08

Step 15

Fold the pocket over, so it meets the edge of the lining and press. Baste along the side and bottom edges to secure. Stitch a line about 1¼in from the folded edge for a divided pocket.

Free_quilted_notebook_cover_pattern_fig_09

Step 16

Fold your large pocket piece in half, wrong sides together. Place on top of the lining, aligning raw edges at the left and bottom (on top of the small pocket), with the fold at the top. This time, sew along the right edge, as you did with the small pocket.

Free_quilted_notebook_cover_pattern_fig_10

Then press toward the right edge of the lining and baste the raw edges in place.

Step 17

Finish the cover

Baste the lining to the back of the cover, wrong sides together. Zigzag stitch around the edges within the seam allowances to secure. Join your binding strips into one long length and use to finish the edges of your cover.