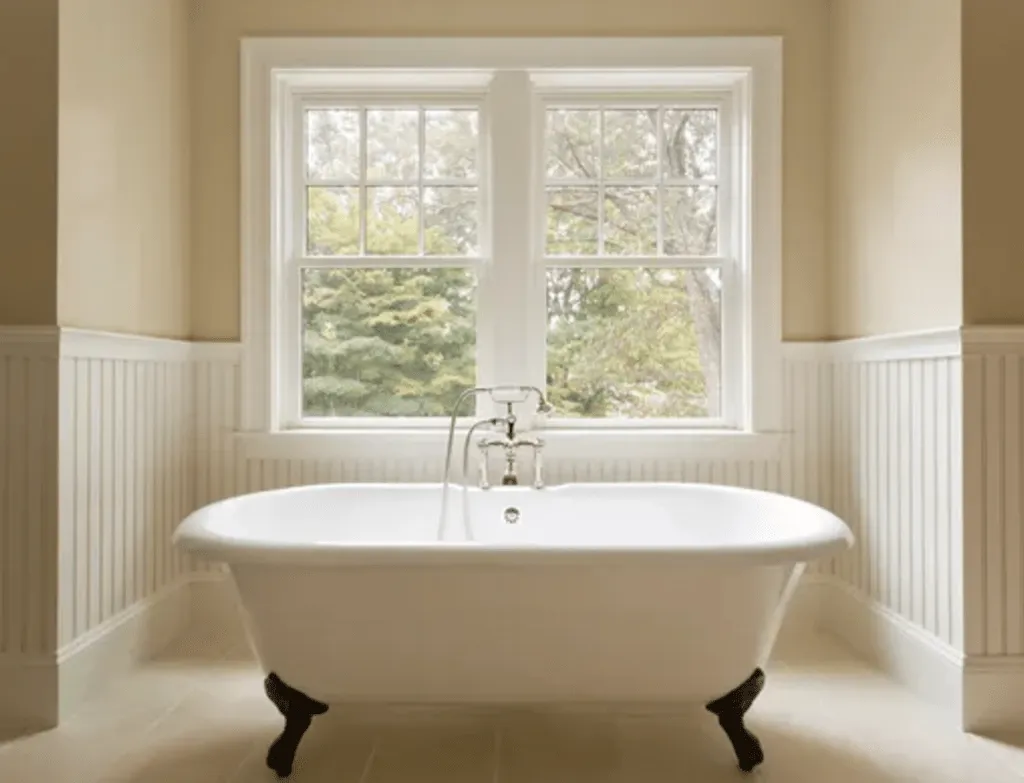
Gappy skirting boards, mouldy silicone around the bath, or loose panelling can make any room look less than inviting. But before you reach for any old one-size-fits-all product, take a look at this guide.
Do you know which is the best fit for the job? Read on to find out what is caulk, when to use sealant and when to plump for an adhesive.
Here’s our essential guide to the different uses of sealant, adhesive and caulk, as well as expert advice on applying them to make sure you get a professional finish.
What is caulk and what is it used for?
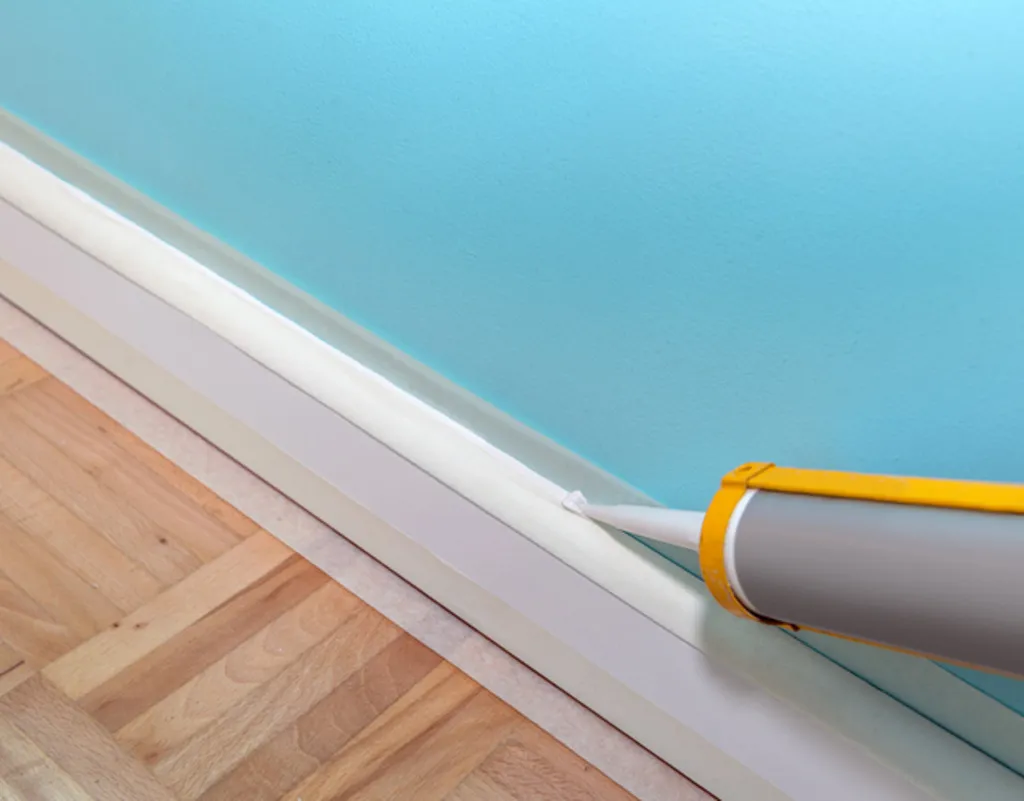
Used to fill gaps around the home, caulk not only produces a professional finish when decorating, but can also help to prevent draughts. Caulk is often used to fill any small gaps between skirting and walls – most brands can be painted over, so if you’re making a feature of your skirting it’s easy to get a seamless look.
Silicone caulk is used in wet areas such as around the bath, for example, whereas latex caulk is ideal for dry areas and can also be painted.
Caulk can be bought either in squeezable tubes or in cartridges, which are loaded into a caulking gun. Many people find the cartridges easier to use. It can also be bought in colours other than white, including magnolia and brown.
How to apply caulk
First, remove all of the old caulk using a utility knife, being careful not to damage the surrounding area. Specialist tools can also be bought to make this job easier.
Next, clean the surface and vacuum up any loose bits. Use painter’s tape to mark off a thin area, approximately 6mm, where the caulk is to be applied.
Cut the caulk nozzle at a 45 degree angle and puncture the tube or cartridge with a nail. Apply the caulk at a 45 degree angle by pressing firmly on the gun trigger, drawing the nozzle across the surface at a slow, steady pace.
Smooth the joint by running either a wet finger or a damp cloth along the surface. Wipe off the excess and remove the tape. Leave to dry thoroughly.
What is sealant and what is it used for?
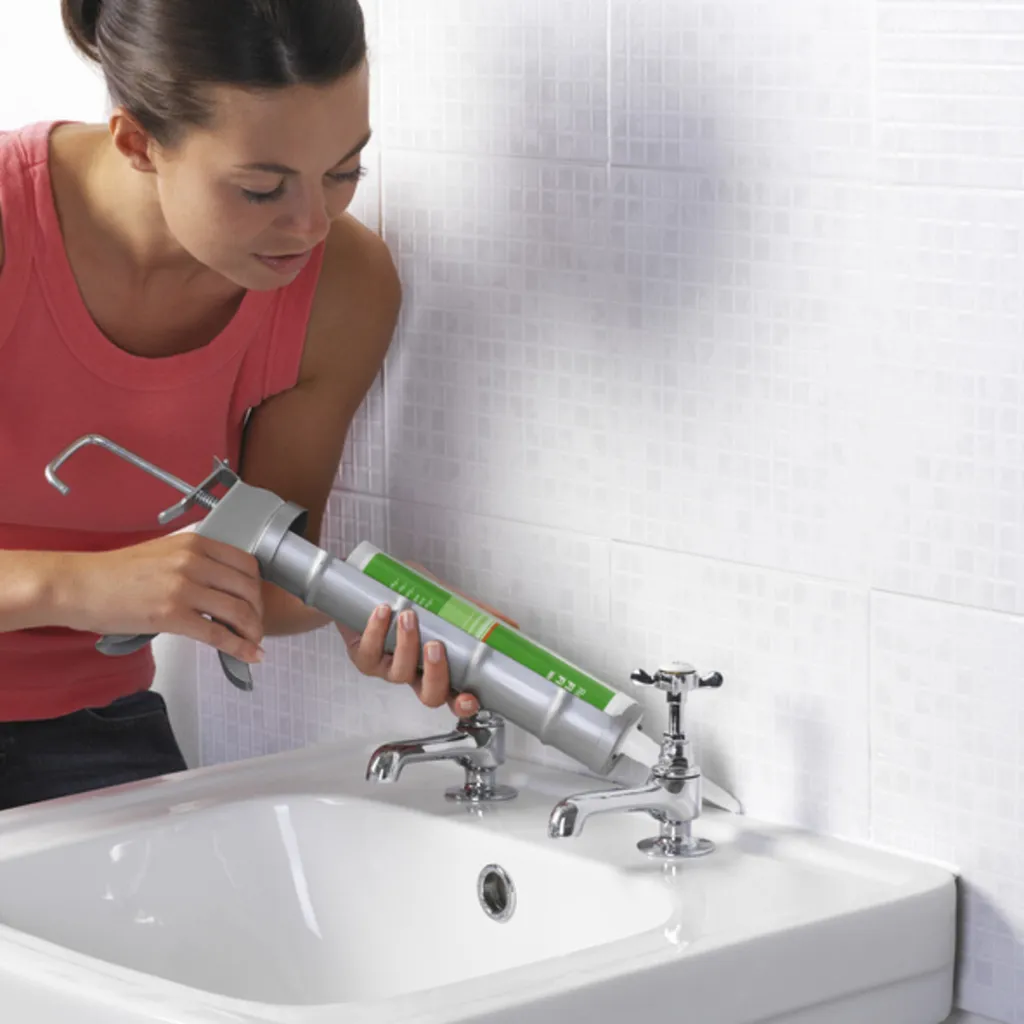
With waterproof, anti-mould and anti-mildew properties, silicone sealants are a great option for bathrooms to fill gaps around basins, baths and shower trays, and help to achieve a neat look around the edge of tiles. They’re usually available in white or clear finishes, and occasionally other colours.
There are two main types of silicone sealant.
Acetoxy Cure can be fully set in just 24 hours but cannot be used on porous surfaces like limestone or travertine.
Oxime Cure takes slightly longer to set but is suitable for use on delicate surfaces like marble and granite as well as metal and glass.
How to apply sealant
To apply, first ensure the surface is clean and dry. Insert the sealant cartridge into a caulking gun, making sure to cut the tip of the cartridge wider than the gap you’re filling. Holding the tip at a 45 degree angle, apply from one end to the other ensuring the sealant is evenly distributed.
To finish, use a sealant smoothing tool to remove any excess and ensure a smooth appearance.
How to remove old sealant
Removing old sealant can be a fiddly task, but luckily a specialised tool is available and super cheap. We’d recommend Unibond’s plastic remover and smoother tool.
This handy gadget will get the task done easily without the risk of scratches to your tiles. Simply scrape along the line of sealant and it should peel off in long strips, although it may need a bit more effort if it’s not coming away easily.
Another clever feature of the tool is that it can also be used to smooth new sealant later on, with two smoothing profiles to choose from to get the perfect finish.
If there are any bits of silicone that won’t budge, dab a little white spirit onto an old cloth and rub it over until they dissolve.
Once all of the old sealant is removed, wipe clean with methylated spirit and leave to dry before applying fresh sealant.
What are adhesives and what are they used for?
Grab adhesives, often simply called adhesives, are super-strong and can bond to almost any surface. They can be used in a multitude of tasks both inside and outside the home, including bonding skirting or architrave, installing wall panelling, and even to fill gaps.
When it comes to choosing a grab adhesive, strength, performance and setting time are all key factors.
Silane modified polymer adhesives (also known as SMP, SM Polymer or MS), such as EVO-STIK’s Strong Stuff waterproof adhesive offer resistance to extreme temperatures and movement, superior bond strength in both wet and dry conditions and fast setting times.
EVO-STIK's Strong Stuff is suitable for use with wood, MDF, plaster, brick, tiles, ceramics, plastics, PVC, concrete, stone, metal, and glass – it can even bond materials underwater. Plus, it's solvent-free and low odour.
Solvent-based grab adhesives are renowned for their superior final bond strength, with some, such as EVO-STIK’s GRIPFILL, also offering gap-filling properties. While compatible with most materials, it's important to check that surfaces will not be adversely affected by solvents before applying this type of adhesive.
Water-based adhesives, including EVO-STIK’s GRIPFILL Solvent Free offer a more environmentally friendly alternative to regular, solvent-based adhesives.
With no corrosive qualities, water-based grab adhesives are incredibly versatile and can be used on almost any interior surface without the risk of a chemical reaction. At least one of the surfaces to be bonded should be a porous material.
How to apply adhesives
Most grab adhesives are applied using a standard cartridge gun. All surfaces must be clean, dry and free from dust, grease and other loose material.
Any paint should be removed from surfaces where the adhesive will make contact and metal surfaces should be degreased with detergent and water or an appropriate degreaser.
Cut off the dome at the top of the cartridge, taking care not to damage the thread. Cut the nozzle to the desired width and angle and screw onto the cartridge.
Insert the cartridge into a cartridge gun and repeatedly squeeze the trigger until the adhesive appears. Apply parallel beads of adhesive to one of the surfaces, then align and bring the surfaces together, pressing firmly.
After carefully scraping off the excess, uncured adhesive can be removed using heavy-duty cleaning wipes or a cloth lightly moistened with white spirit.
Cured adhesive can only be mechanically removed, for example by cutting, sanding or scraping. Always refer to the product’s technical data sheet before use to ensure its suitability for your task.
This article first appeared in YourHomeStyle and HomeStyle magazine.
Get the job done by knowing the differences between caulk vs sealant!
From redoing the sealant around the sink to filling in the gaps in your skirting boards, it's important to get the right materials for the job in hand. With this easy-to-follow guide, which you can refer to whenever you have a DIY task, you'll feel like a proper pro!
Keep your DIY skills going and learn how to repair an enamel bathtub
If your bathtub is looking a little worse for wear, don't chuck it out! Check to see if it's made of enamel first then follow our step-by-steps for how to return your cast-iron tub to its former glory. After all, it's always better to see if you can repair a useful and well-loved item than send it to landfill.