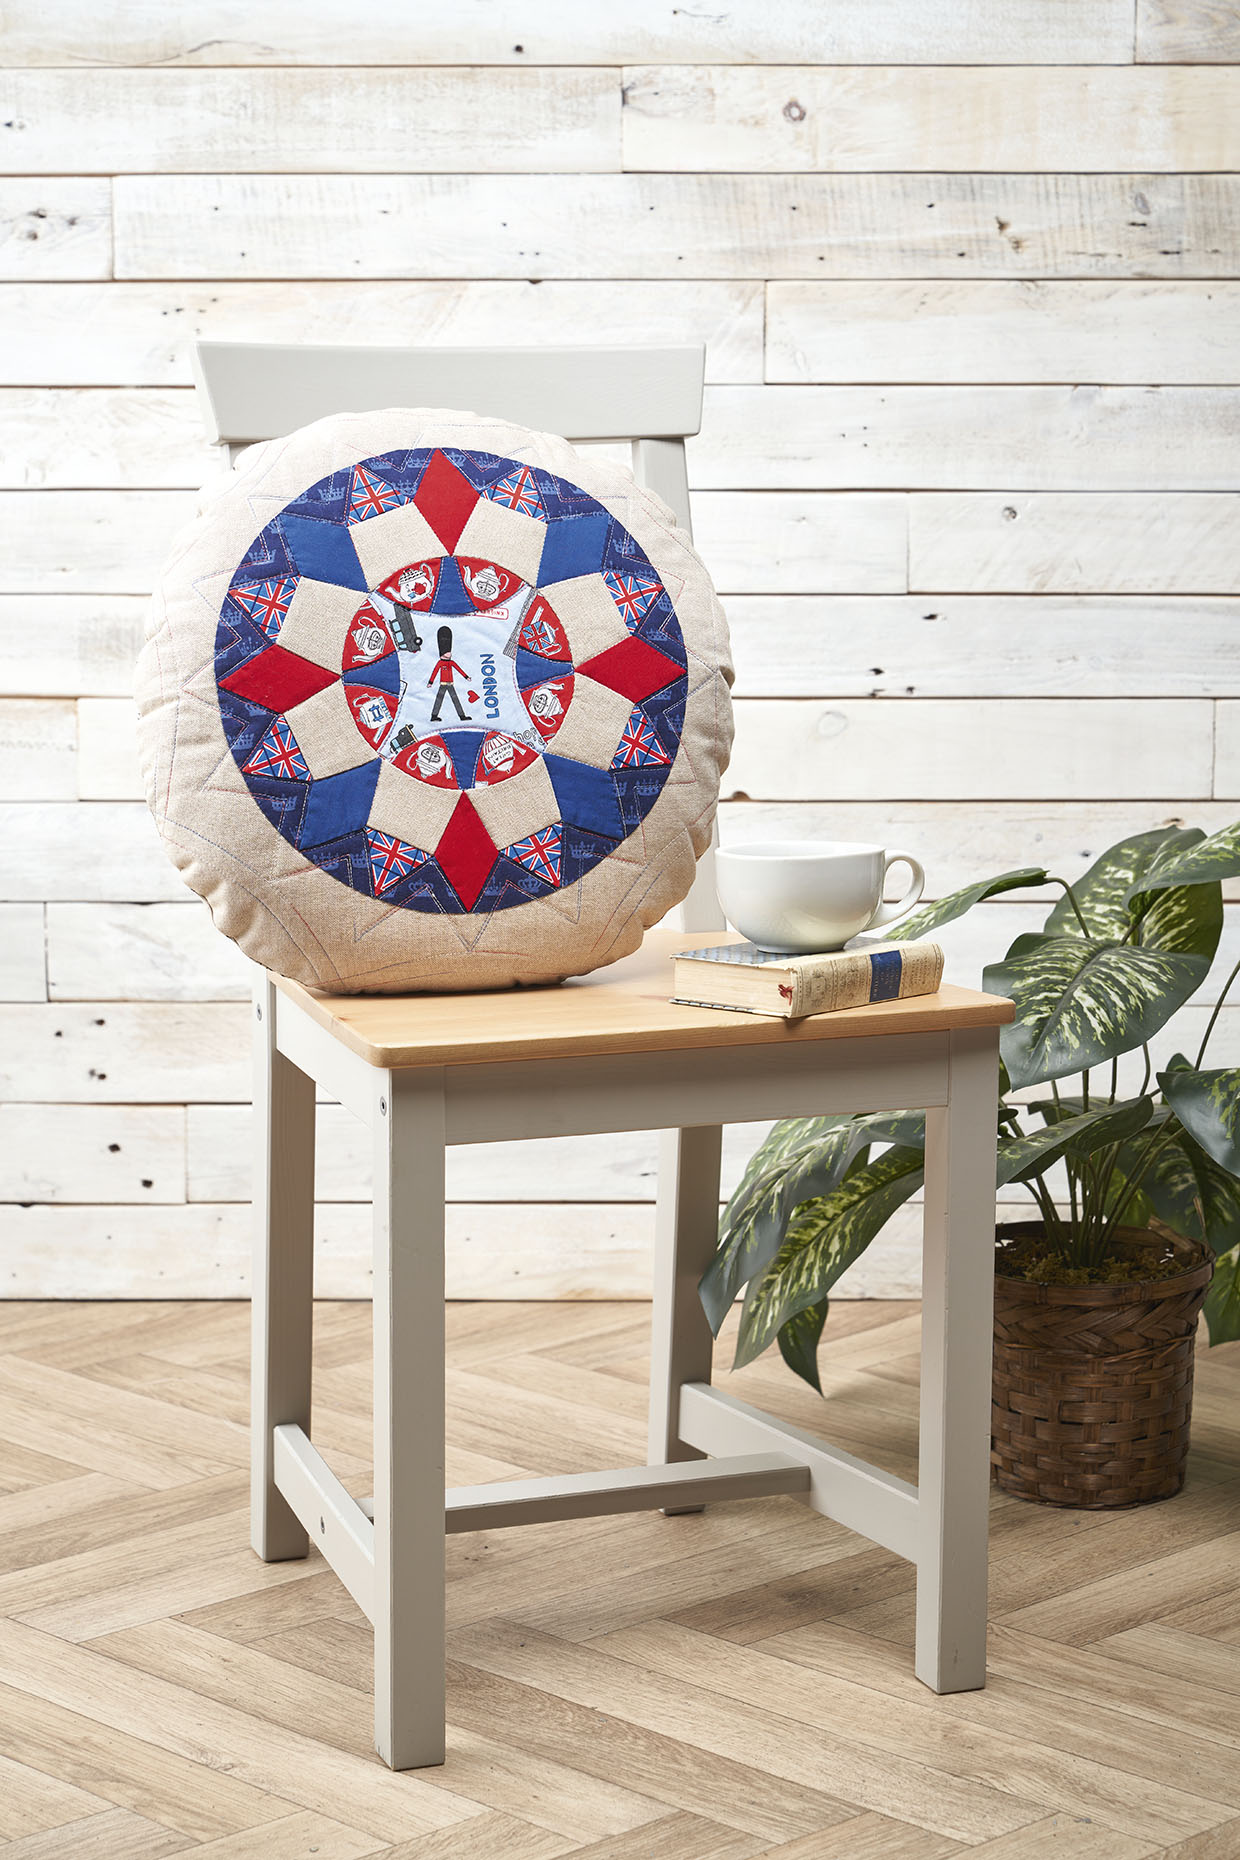
Making the block
Step 1
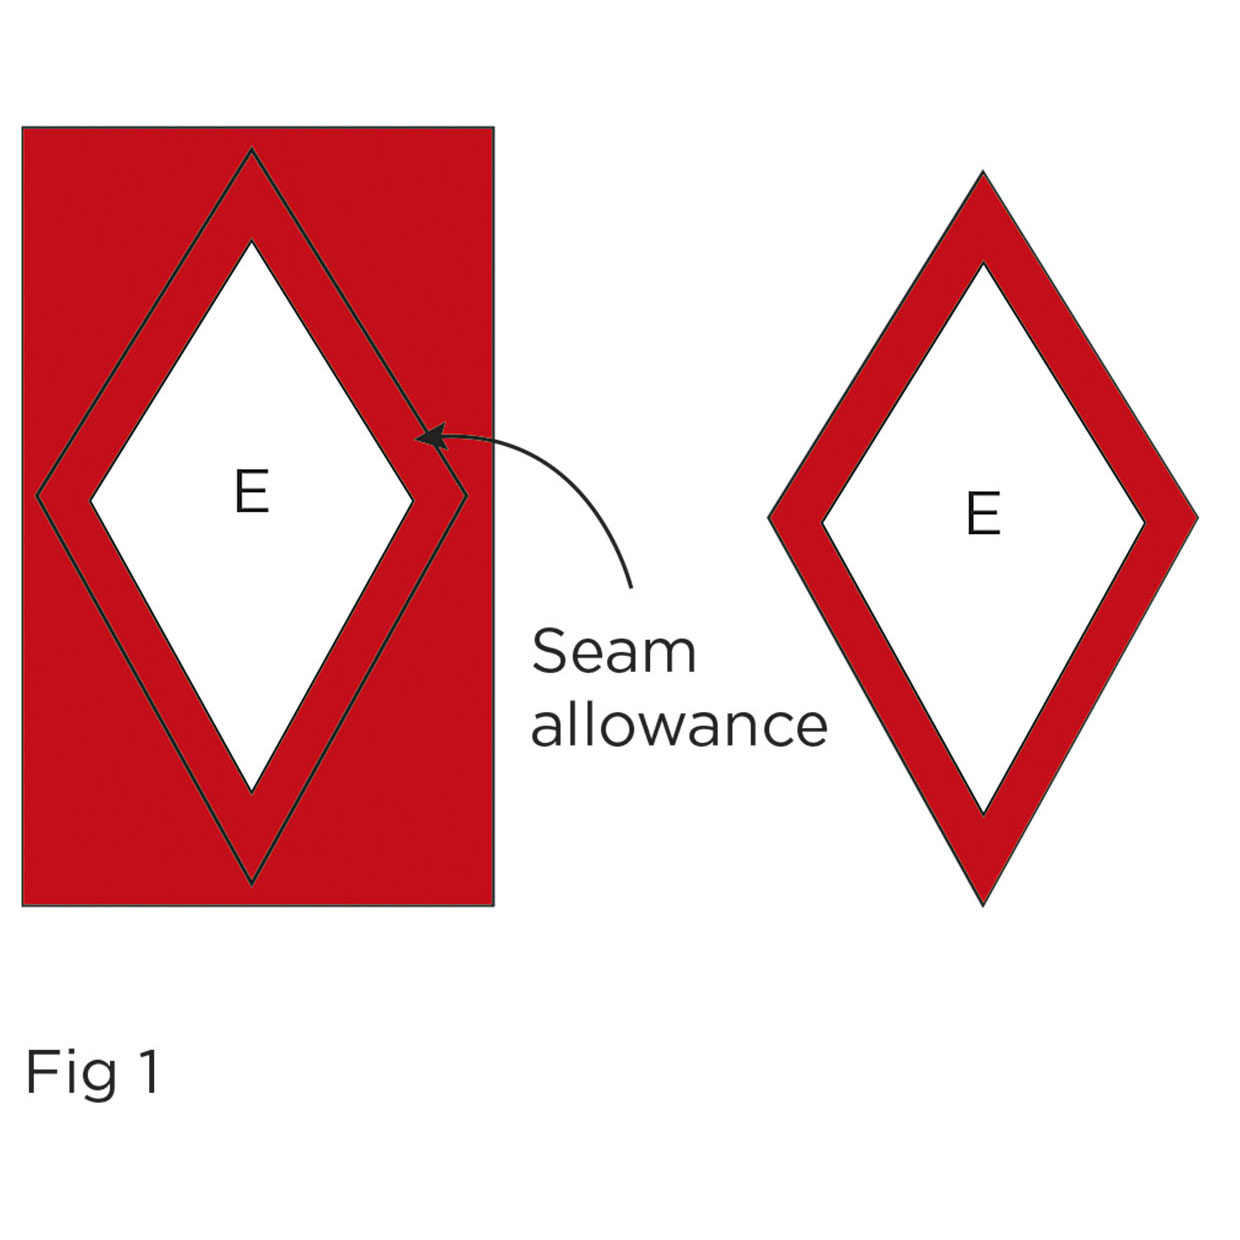
Firstly, choose which fabrics you want to use in each area. Place each template on the back of the fabric and draw around each shape. Add a ¼in seam allowance around every shape and cut out (Fig 1). If you want to fussy cut particular areas from a fabric several times, as I did with my teapots, then you will need to create a reference mark on the fabric.
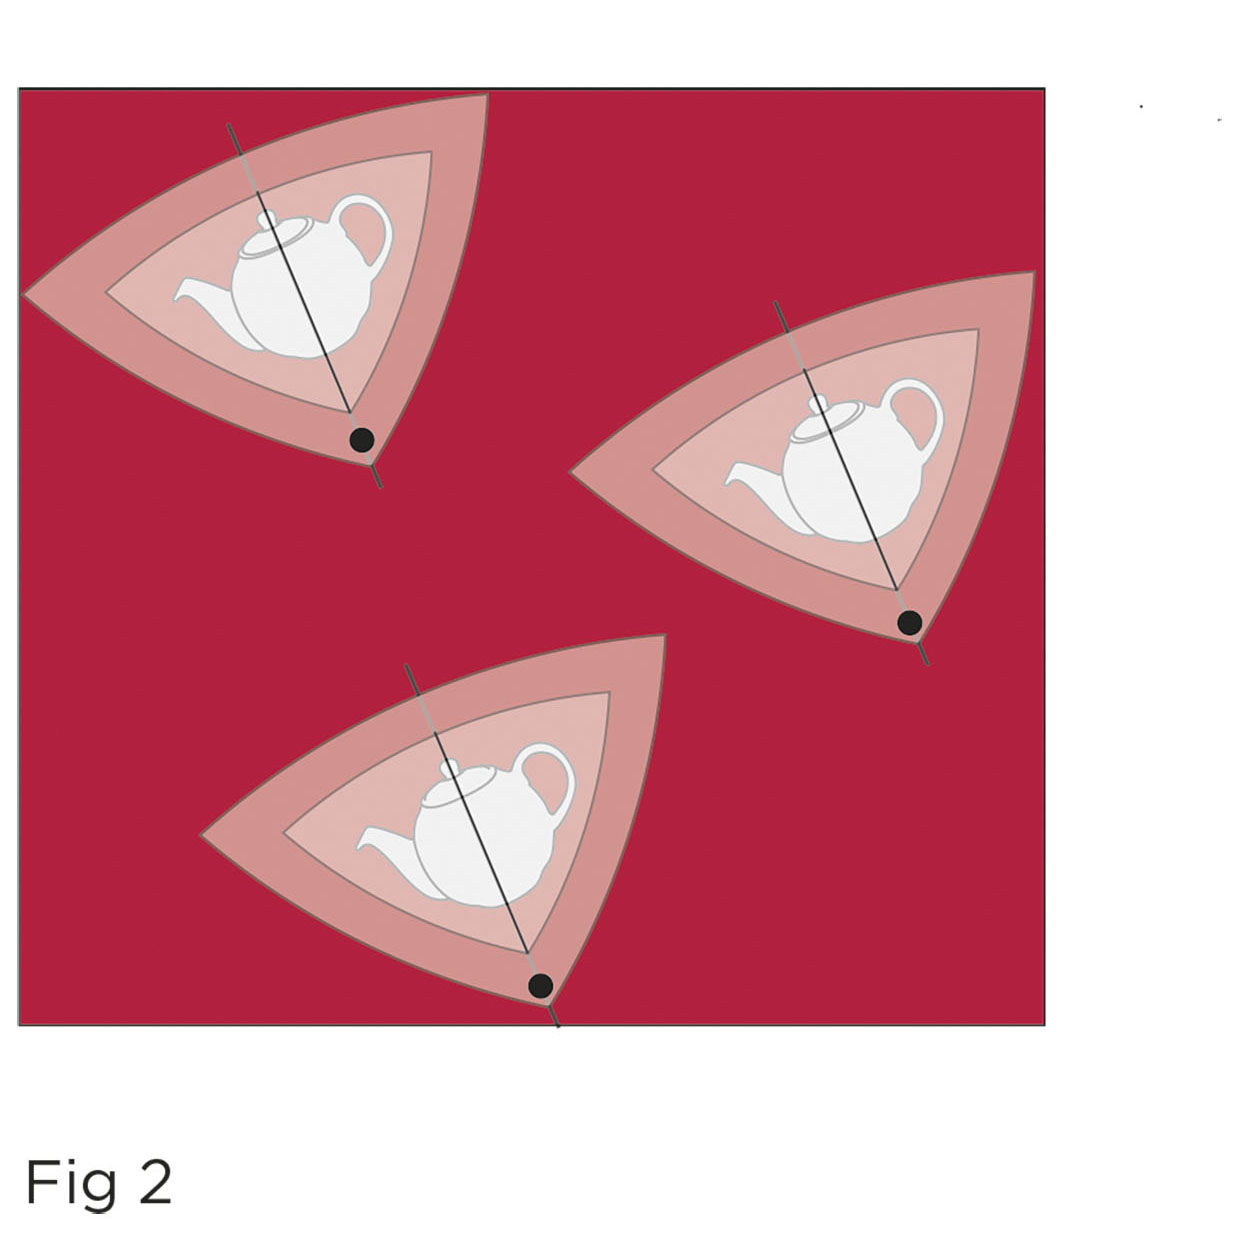
I drew a line lightly on my fabric to mark the centre of the chosen printed area e.g. A teapot. This was before drawing the template shape onto the fabric. I also marked the centre of the template, gently folding in half will suffice. All I had to do was line up my centre line of the template with the line on my fabric and each chosen area would then be the same (Fig 2). You will have to mark the front of the fabric using a pen or pencil that can easily be removed.
Step 2
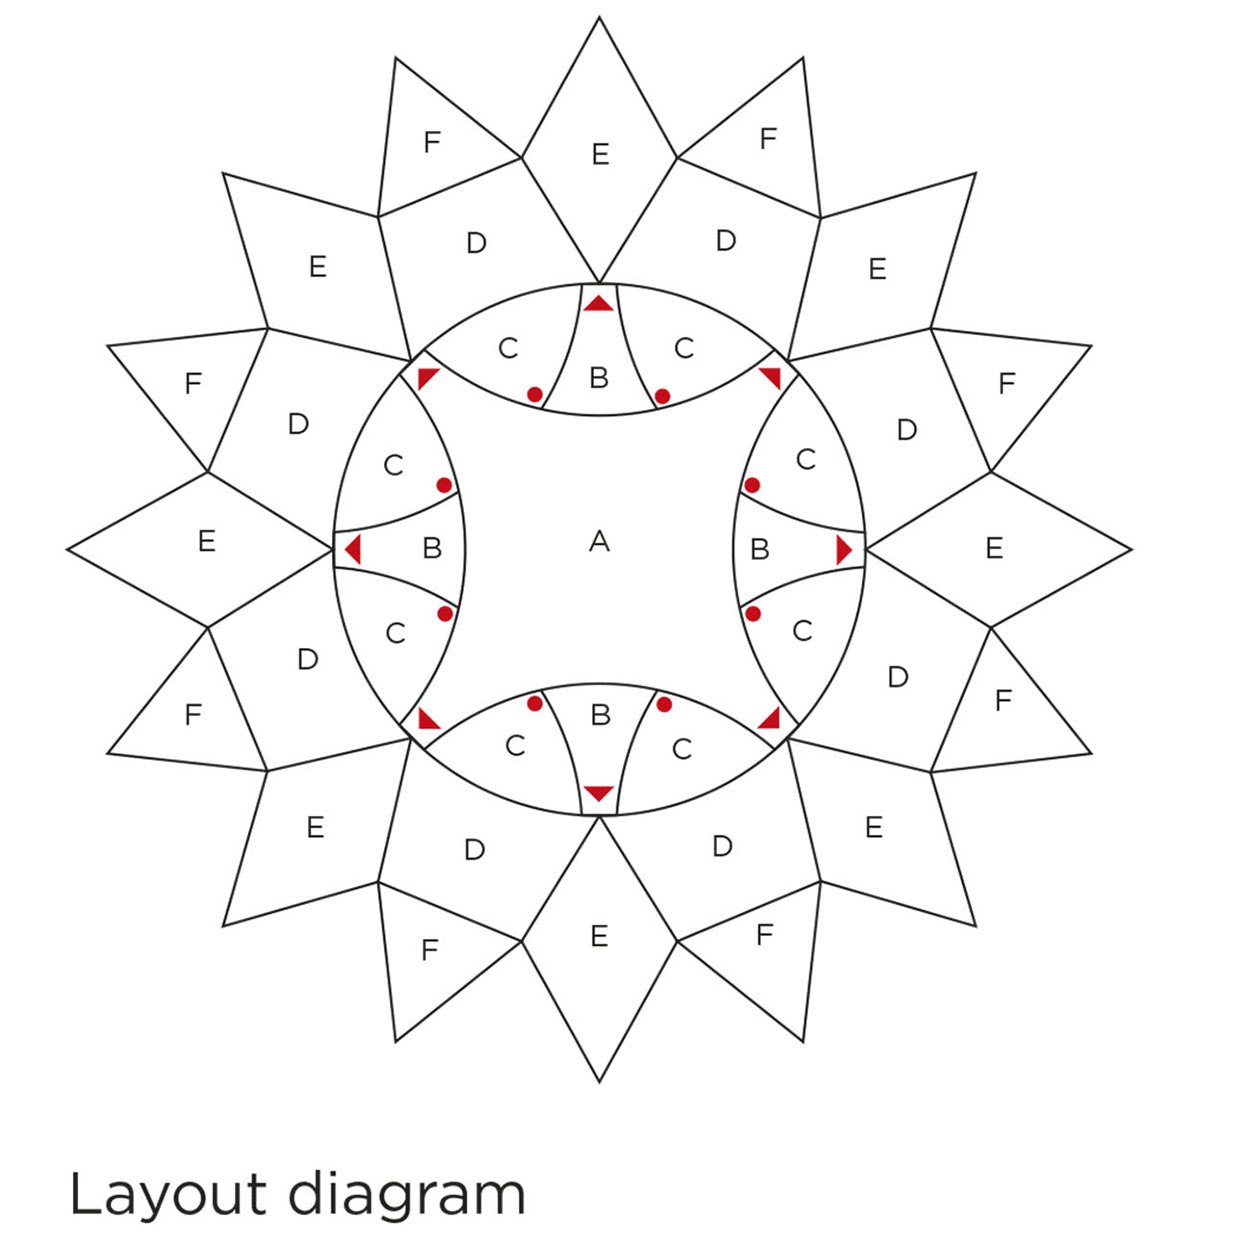
Follow the layout diagram to put the crown together. It will be done in sections. Some seams are curved and can be awkward to pin and then stitch.
Step 3
Begin with the four (4) sections that use Templates B and C.
Step 4
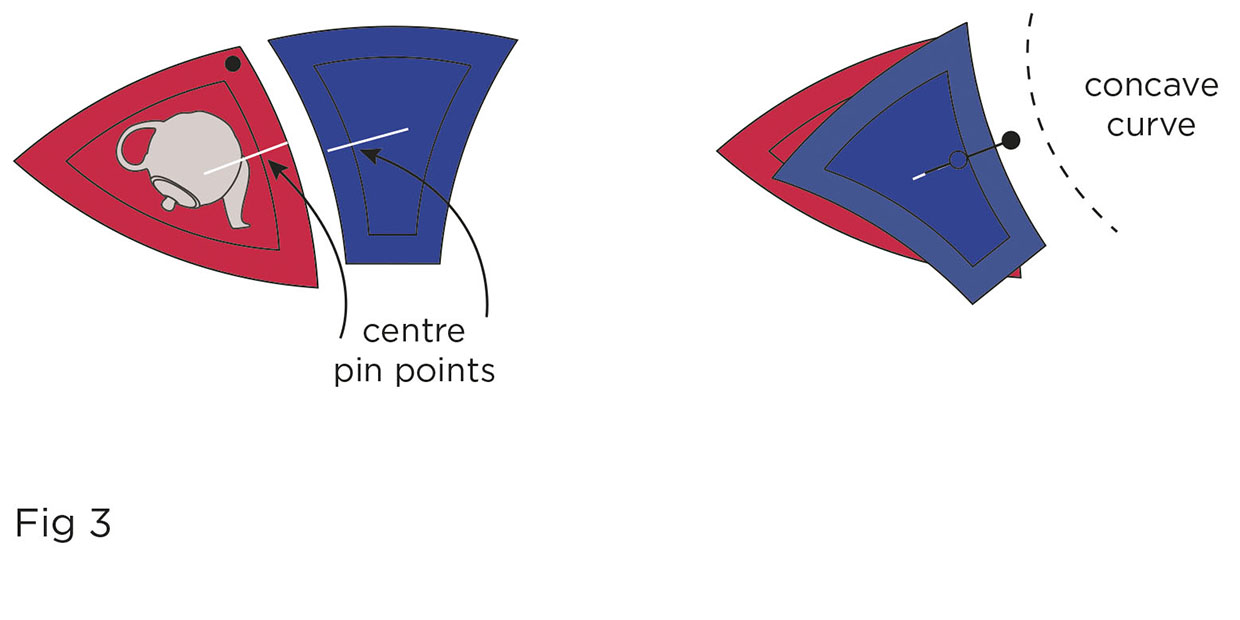
Take one (1) B piece and bring together the two end points of the curved line to be stitched with a pin and finger press the centre point of the seam. Do the same with the one (1) C piece, checking the rotation of the piece using the placement dots. (Fig 3).
Pin together these two pieces with B on top, using the centre points for the first pin, then pin the end points. It is easier to sew curves with the concave/inner curve on top (Fig 3). Repeat with a second C piece. Make four (4) units.
Step 5
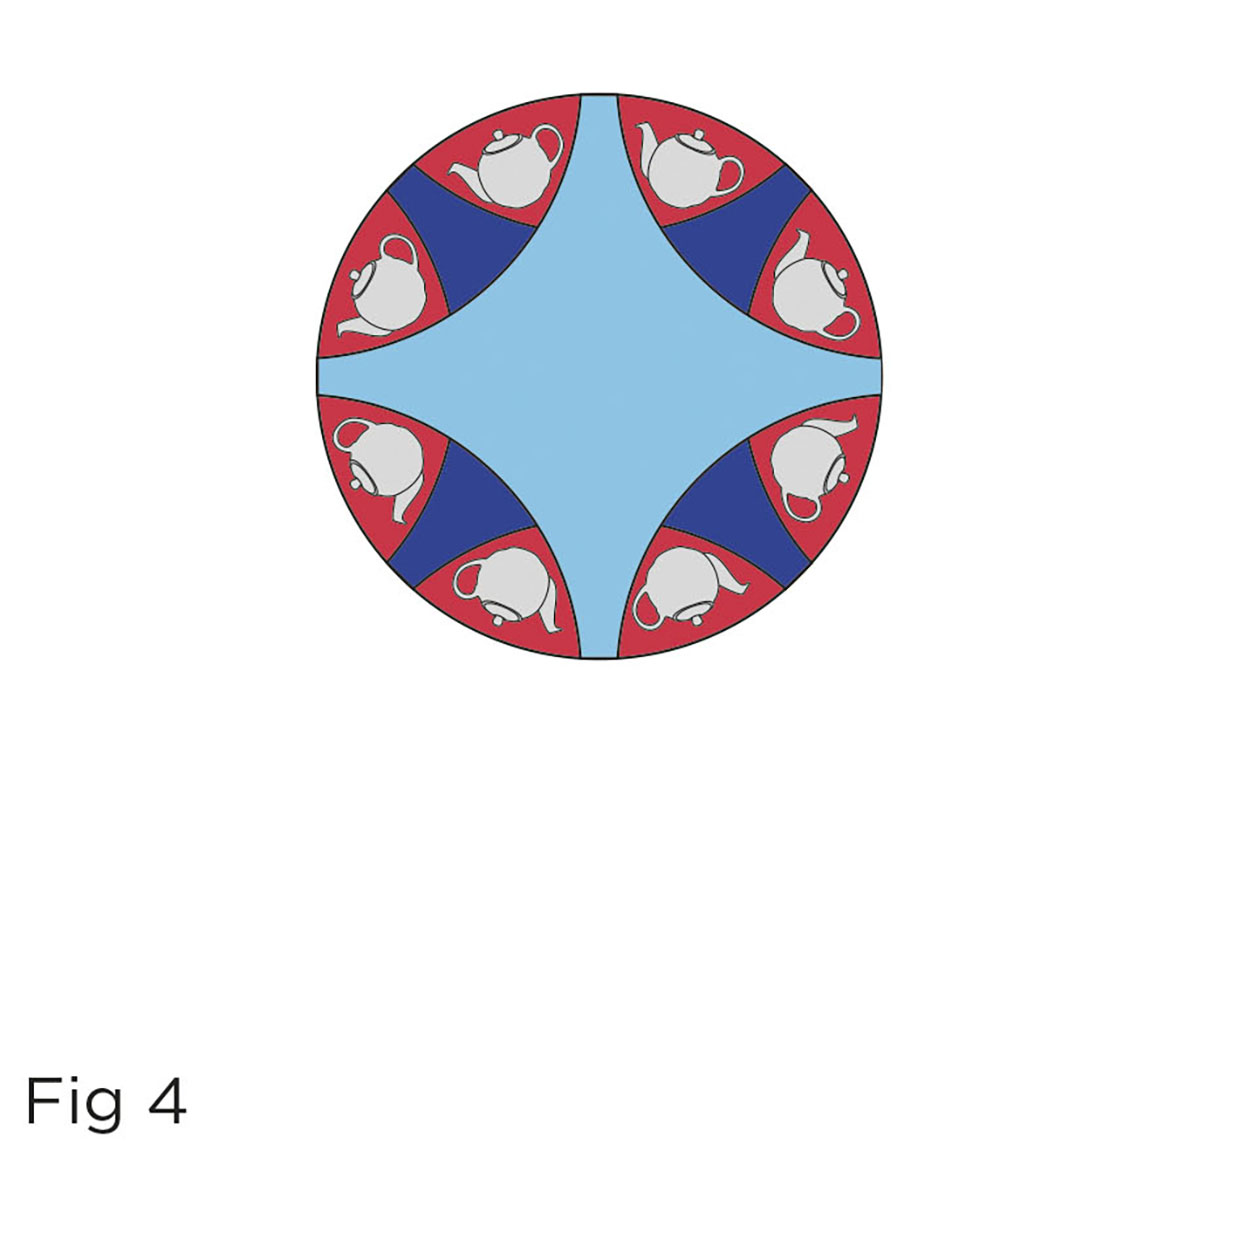
Attach the B/C units to Piece A, with A on top, using the method above to pin the curve (Fig 4).
Step 6
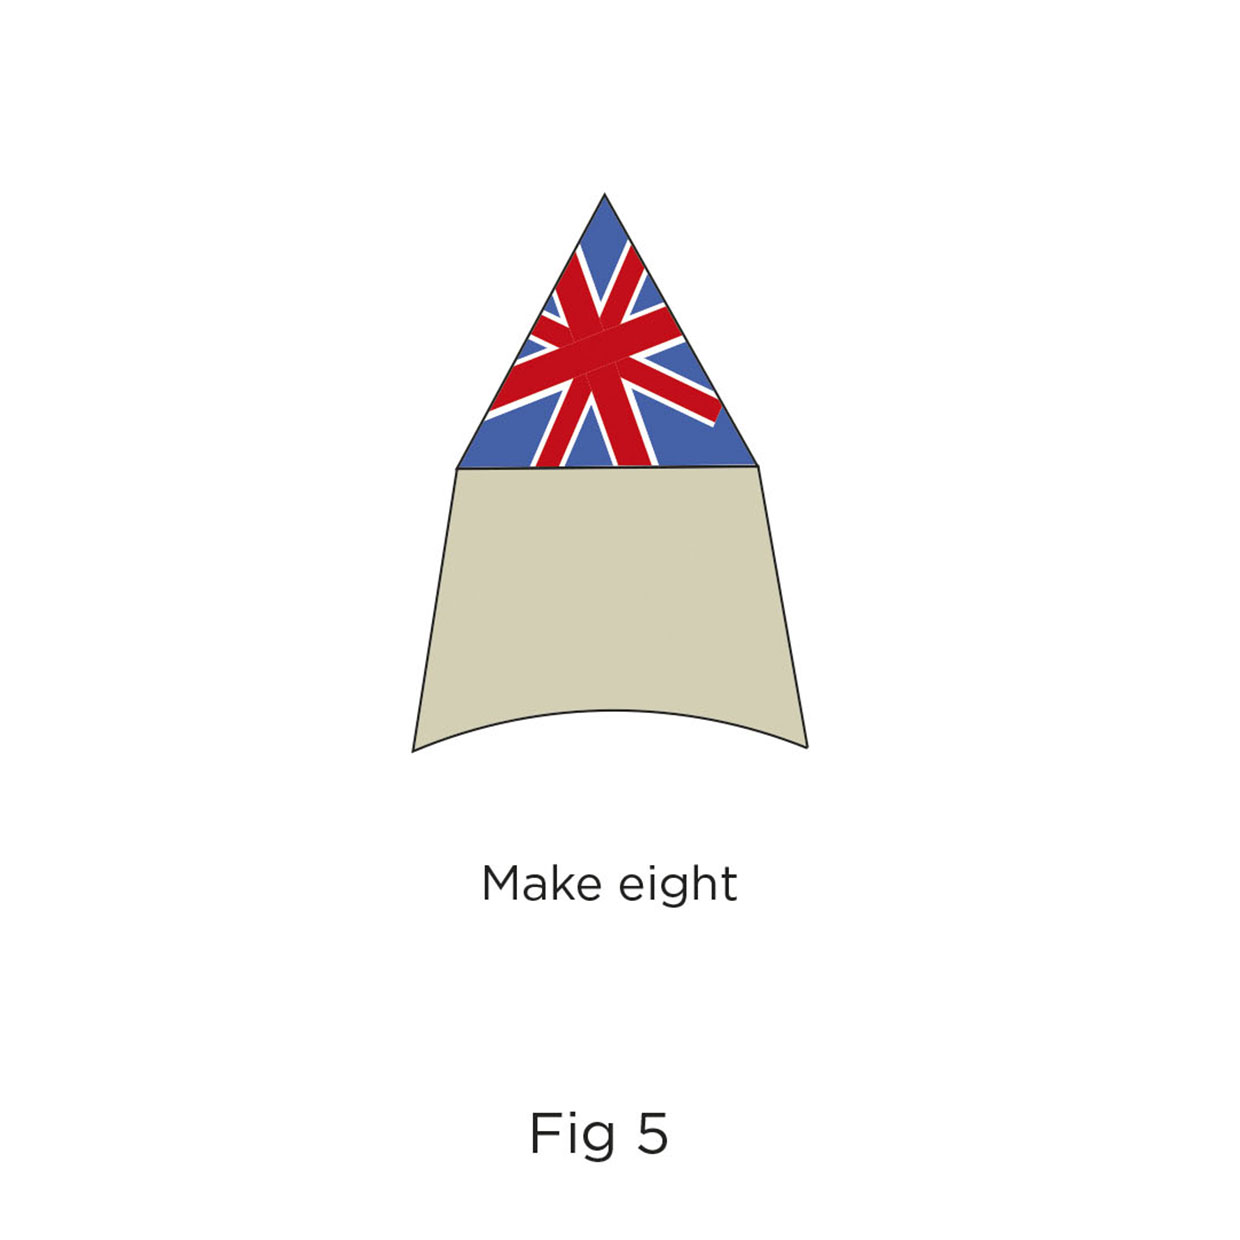
Sew together the Piece D and F shapes, pressing the seam towards D (Fig 5). Make eight (8).
Step 7
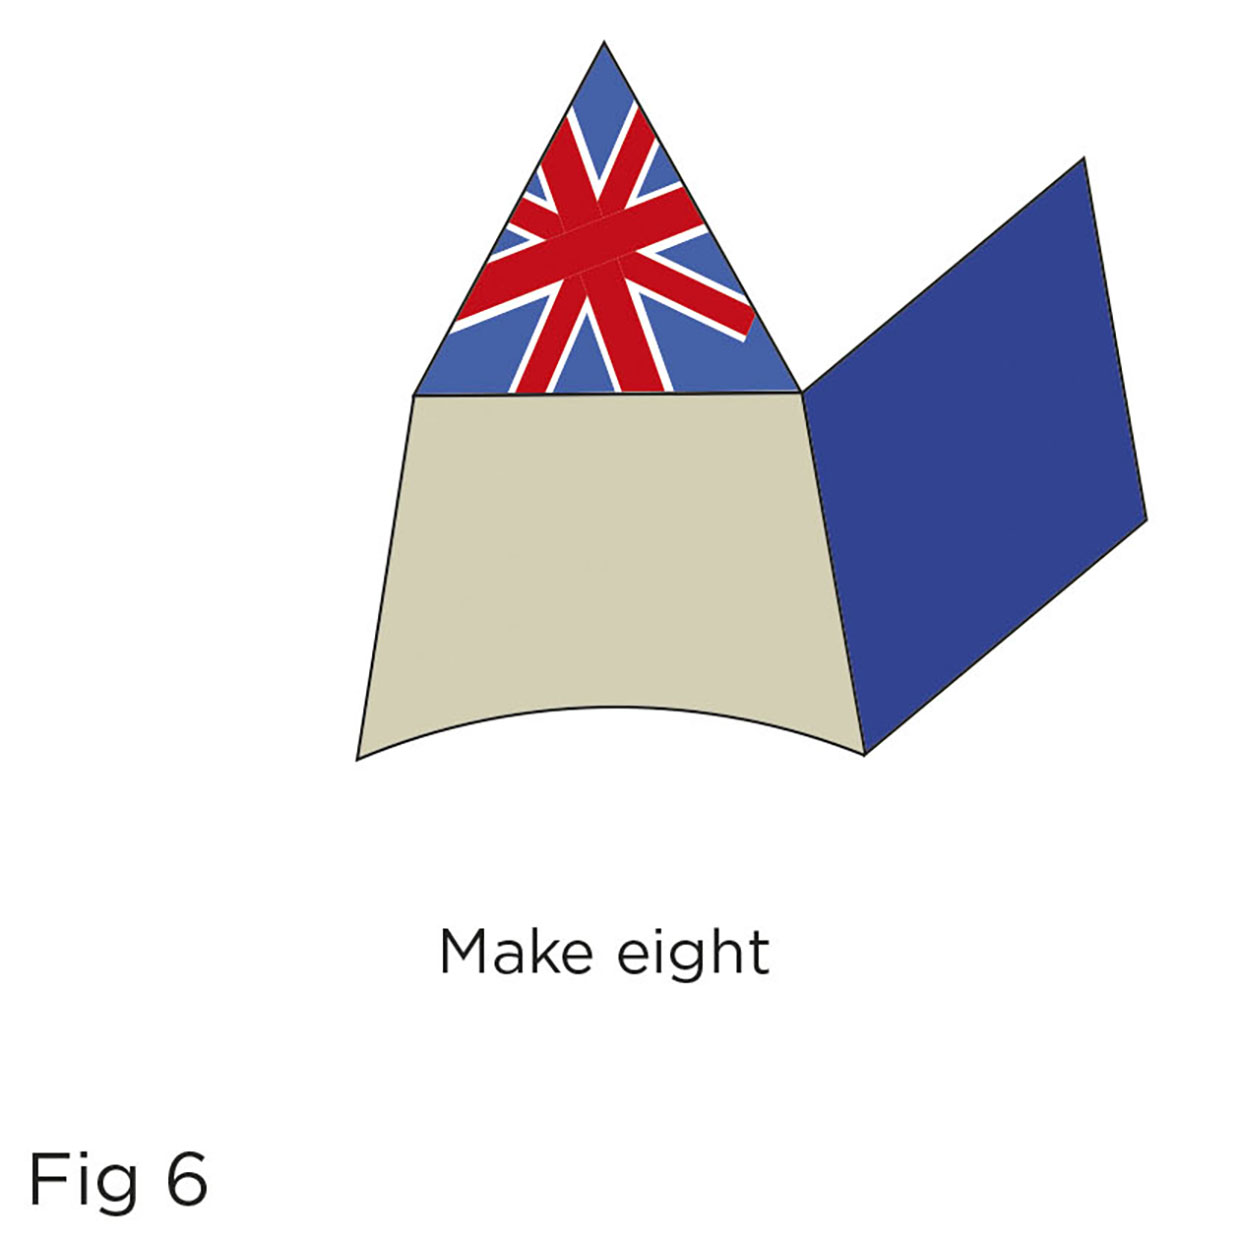
Sew one (1) Piece E to each D/F unit, pressing the seam towards D. Make eight (8) (Fig 6).
Step 8
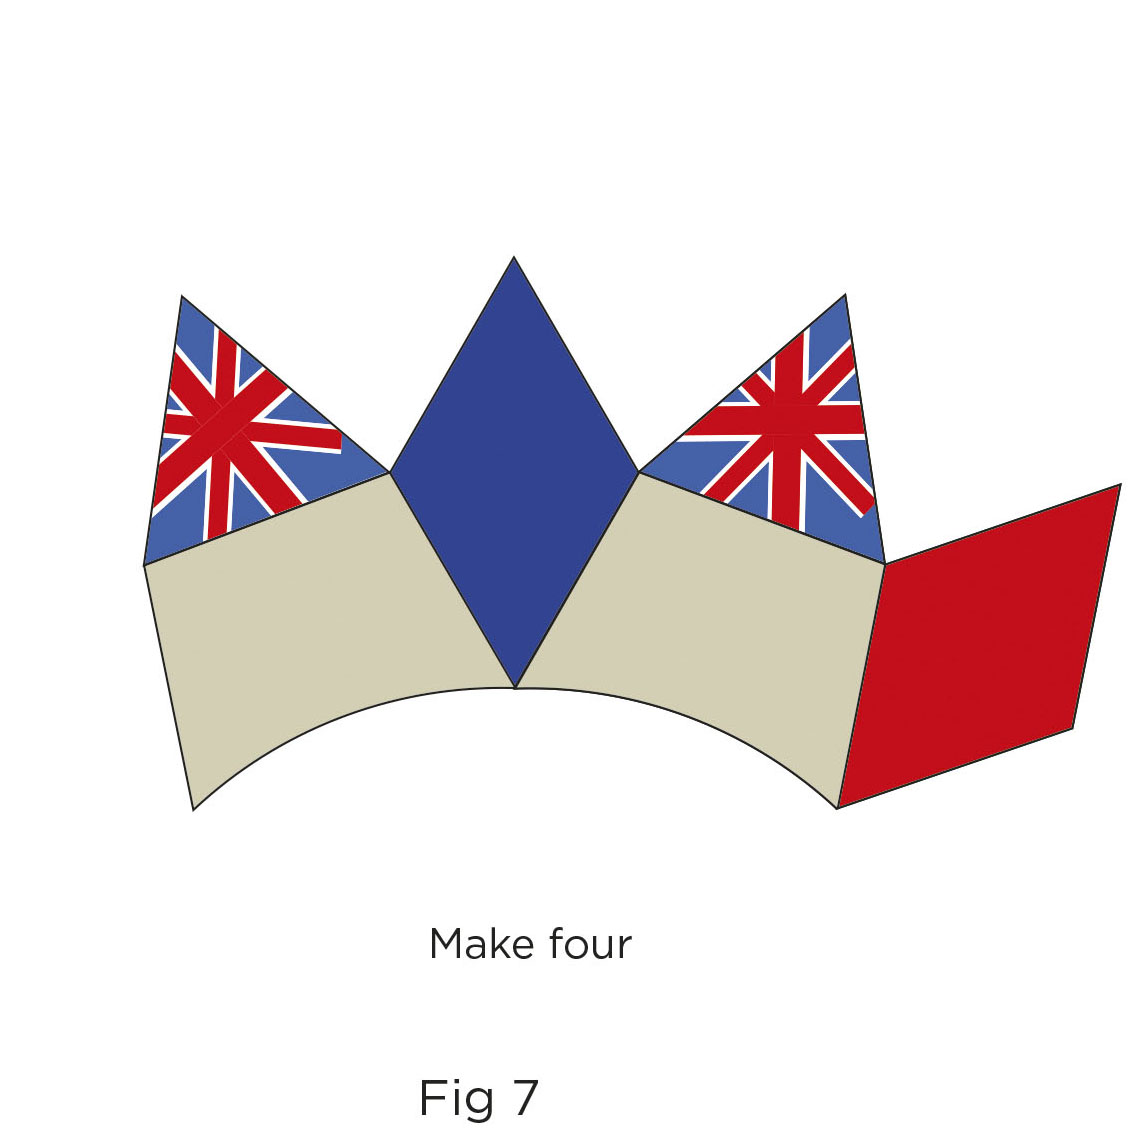
Sew together two (2) E/D/F units this time pressing the seam towards E. Repeat with the rest of the E/D/F units. Make four (4) (Fig 7).
Step 9
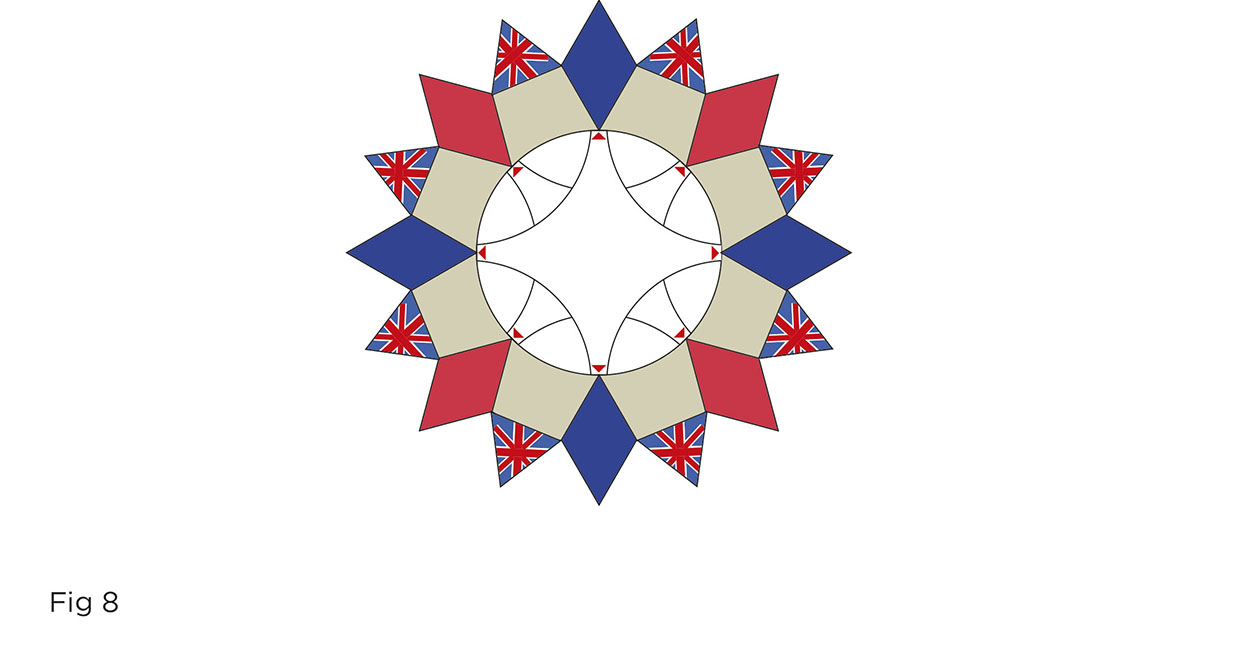
Join these four (4) units together to make one (1) circle of crown points. Notice the seams on the back, they should all be going in one direction, press.
Step 10
Using the red placement triangles, line up and pin the centre of the crown with the E Pieces of the outer section and stitch together (Fig 8).
Step 11
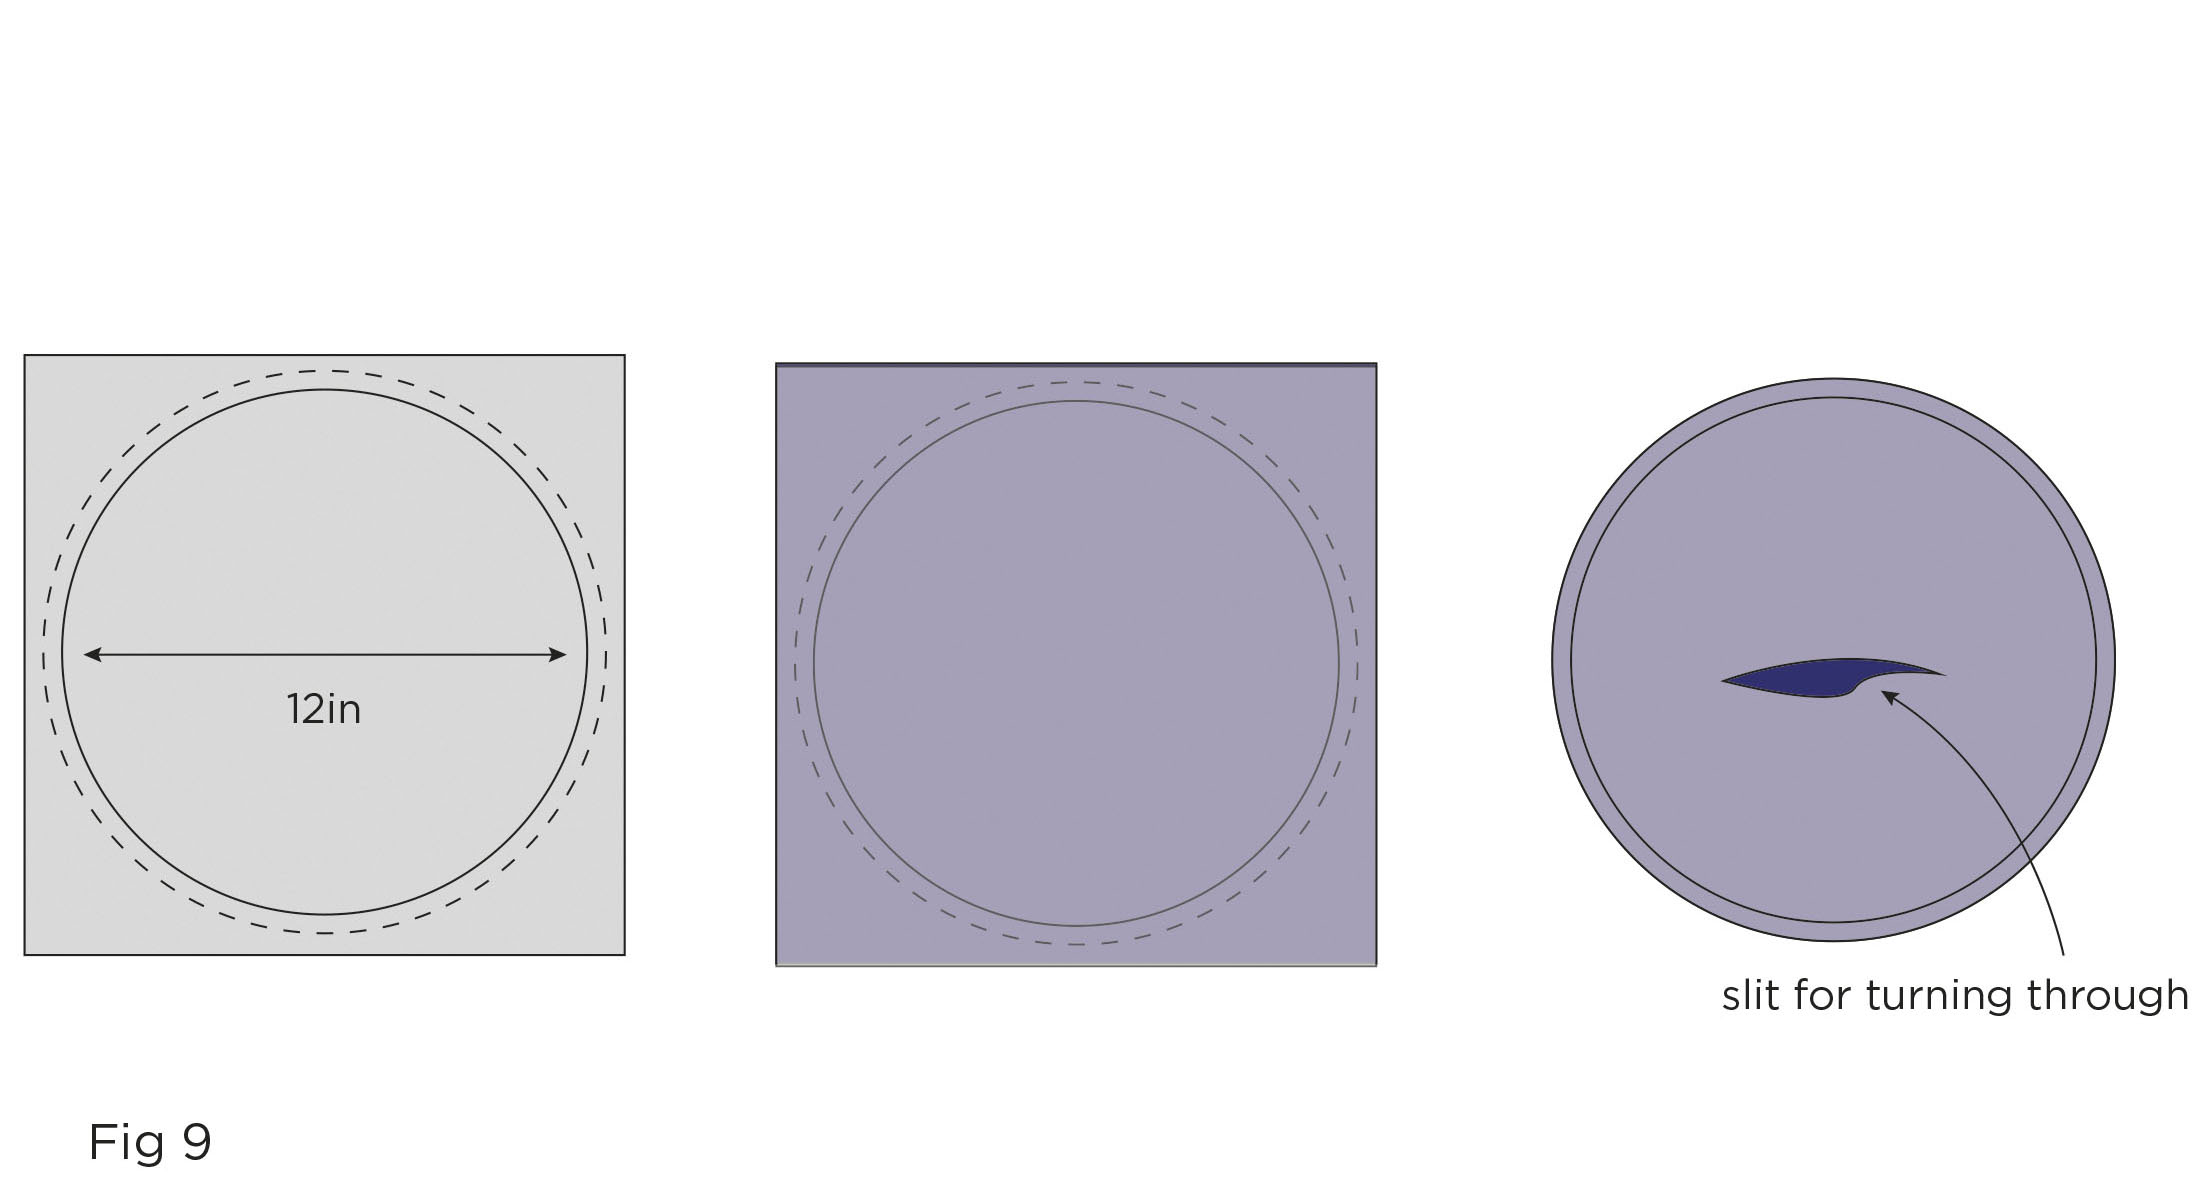
Draw a 12in circle on the interfacing. Place it onto the Right side of the circular frame fabric and pin in place. Stitch around the circle on the line. Finally cut around the circle ¼in away from the stitched line, pinking scissors are best for this. Cut a small slit in the interfacing and turn right sides out (Fig 9). Press into the circle shape.
Step 12
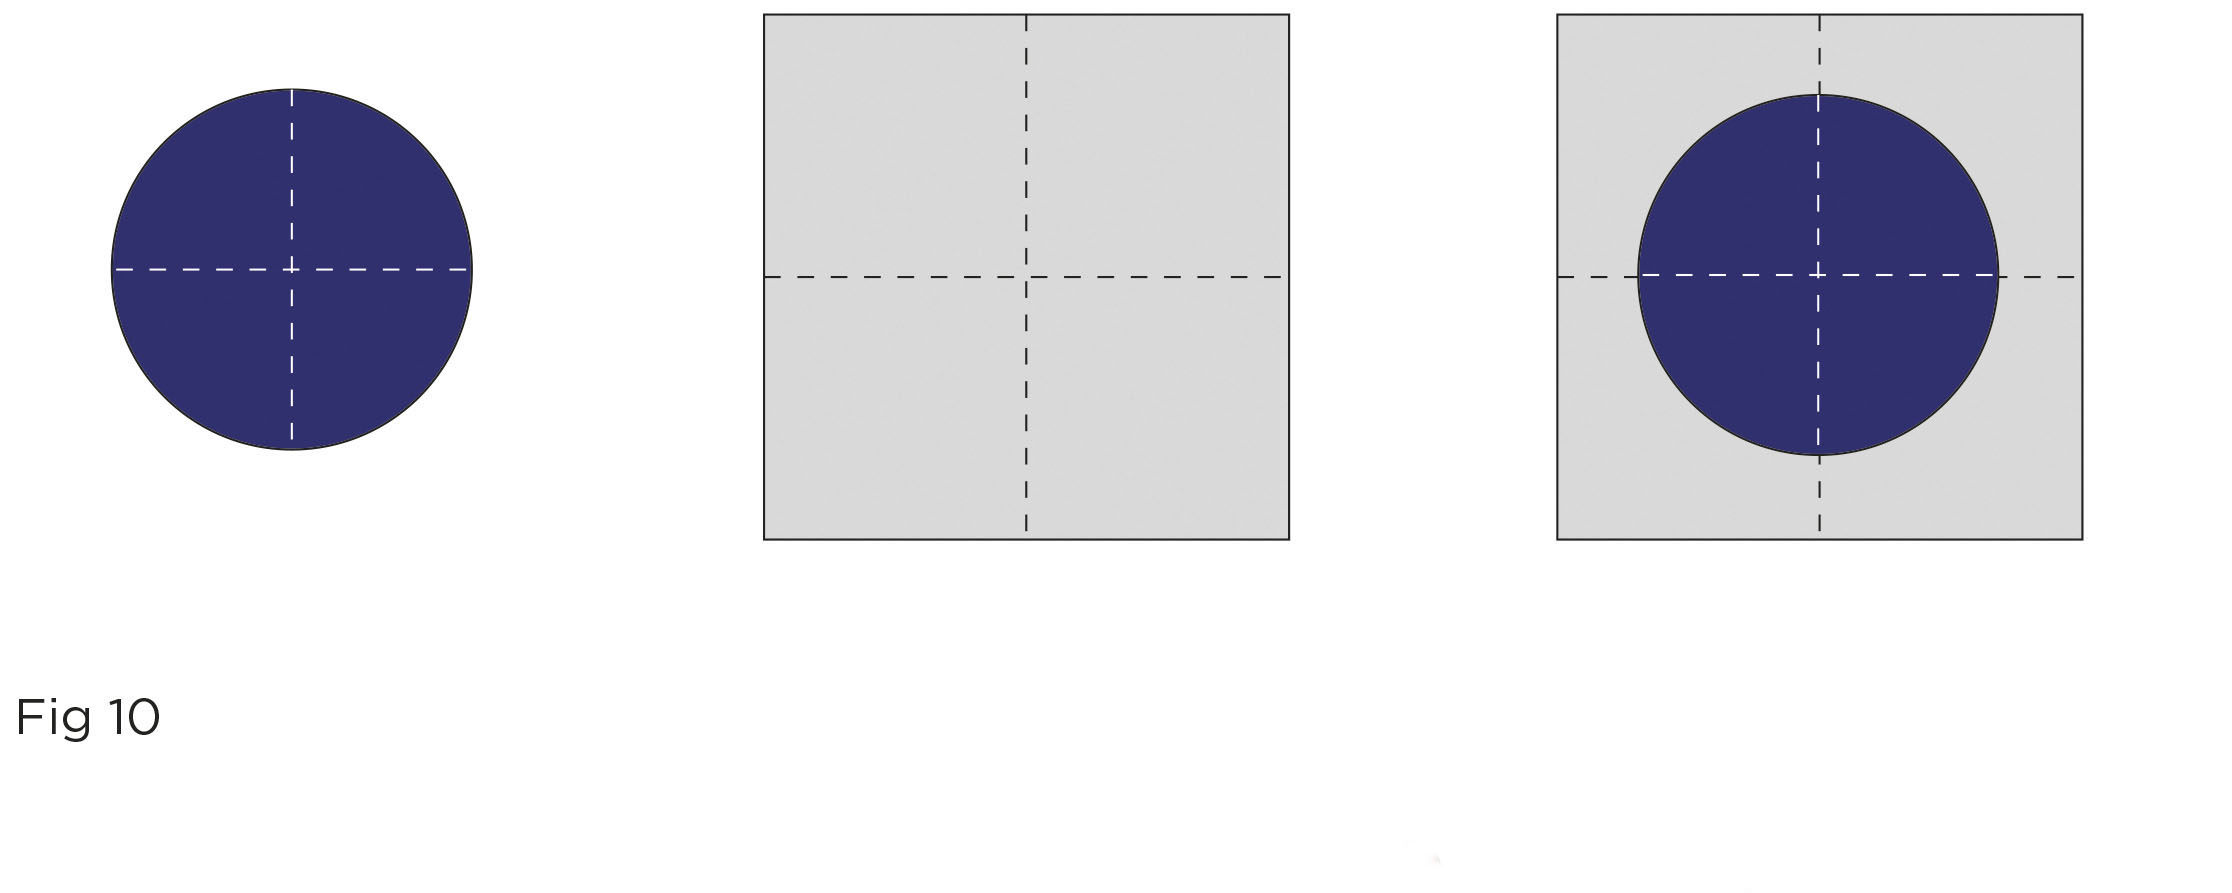
Fold the circle in half twice and lightly press to give quarter placement lines. Repeat with the background 21in x 21in square. Open the square out and place the circle in the centre of the background square, using the lines to centre it. Pin together and finally Slipstitch in place (Fig 10).
Step 13
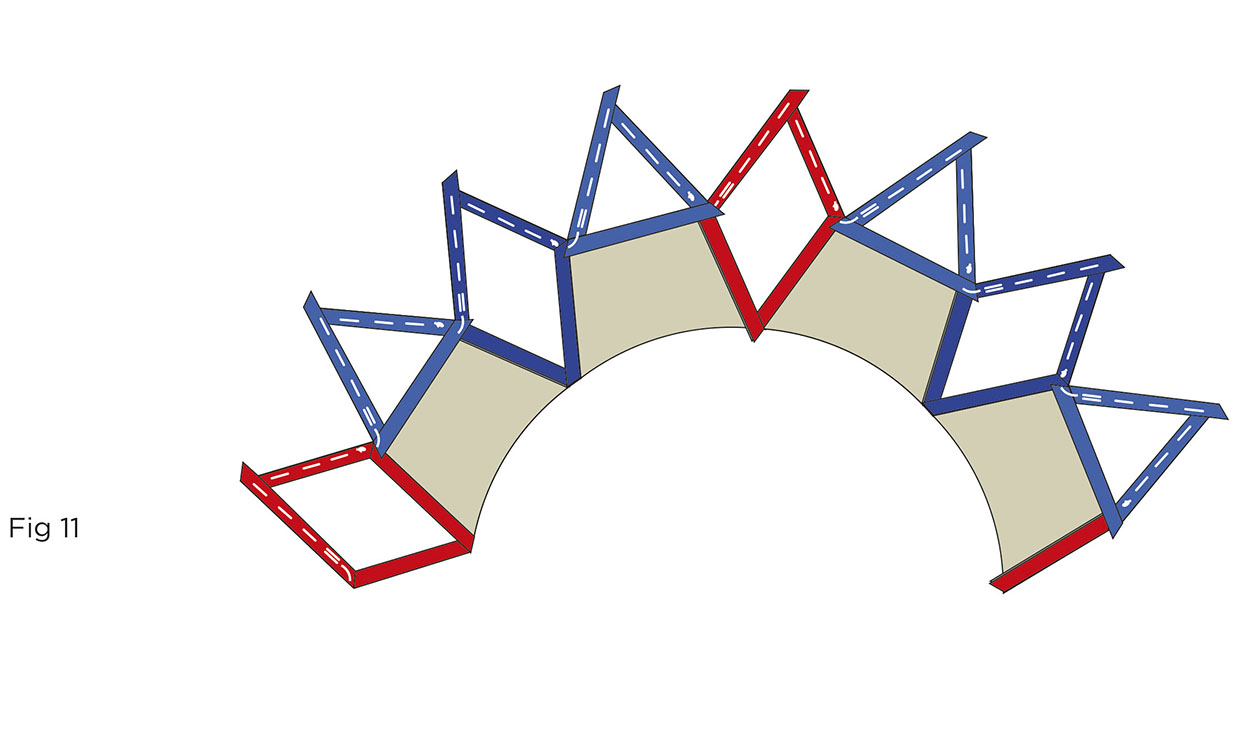
The crown should now be appliquéd onto the circular frame. I used a cheat’s method to make sure all the points were the same by part-inserting the paper templates as you would in EPP. Place a Template E on the back of a corresponding crown point. Line up the outer point and pin in place. Stitch or glue the paper in position around the top part of the template, as you would in EPP (Fig 11).
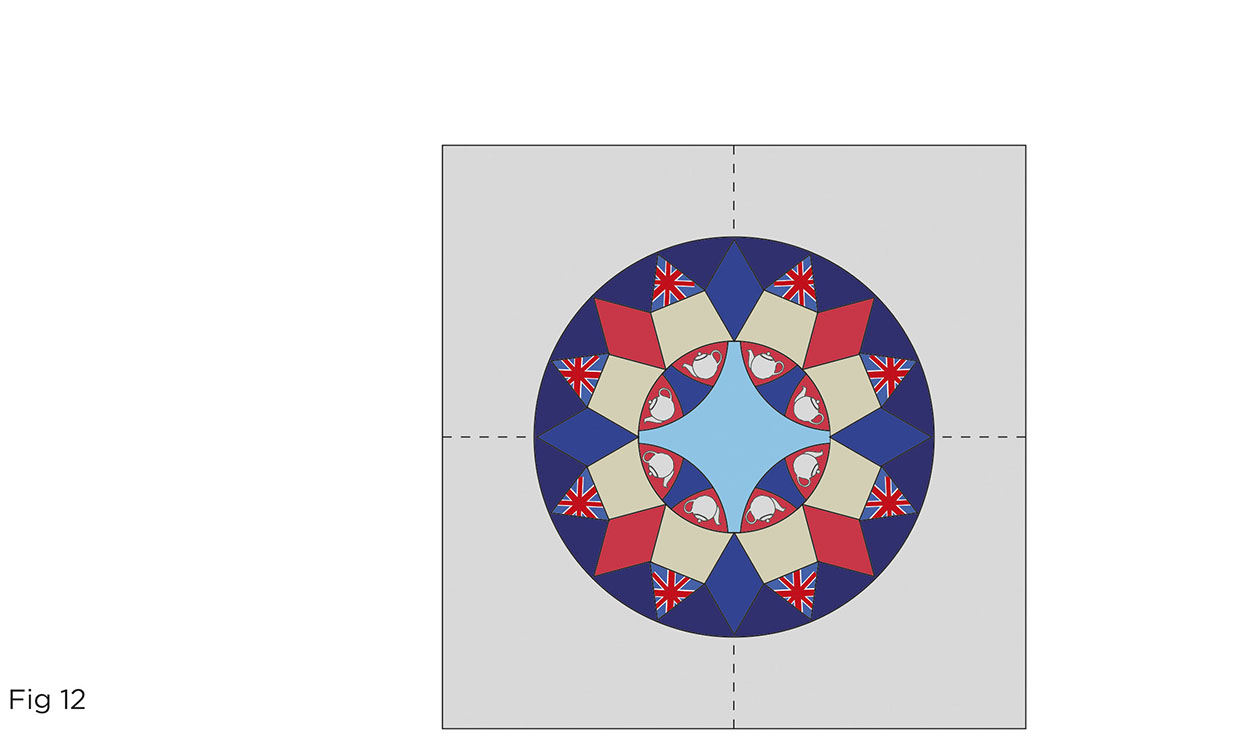
Repeat with the remaining E and F crown templates. Then Slipstitch the crown in place using the placement lines from the circle as reference (Fig 12).
Step 14
To remove the papers, turn the work WS up, and carefully cut the background fabric ¼in in from the seam allowance all around the shape. This background excess can be removed, and the papers can be popped out.
Step 15
Layer up the block with the batting and lining fabric and quilt. We echo quilted the shapes within the crown and then used overlapping circles to the background to frame the crown in the centre. Large dinner plates or a quilting hoop can be used as a circular template. We also cut the cushion front into a 18¾in circle at this point. You can keep the cushion as a square if you prefer by trimming to 18¾in x 18¾in.
For the envelope back
Step 1
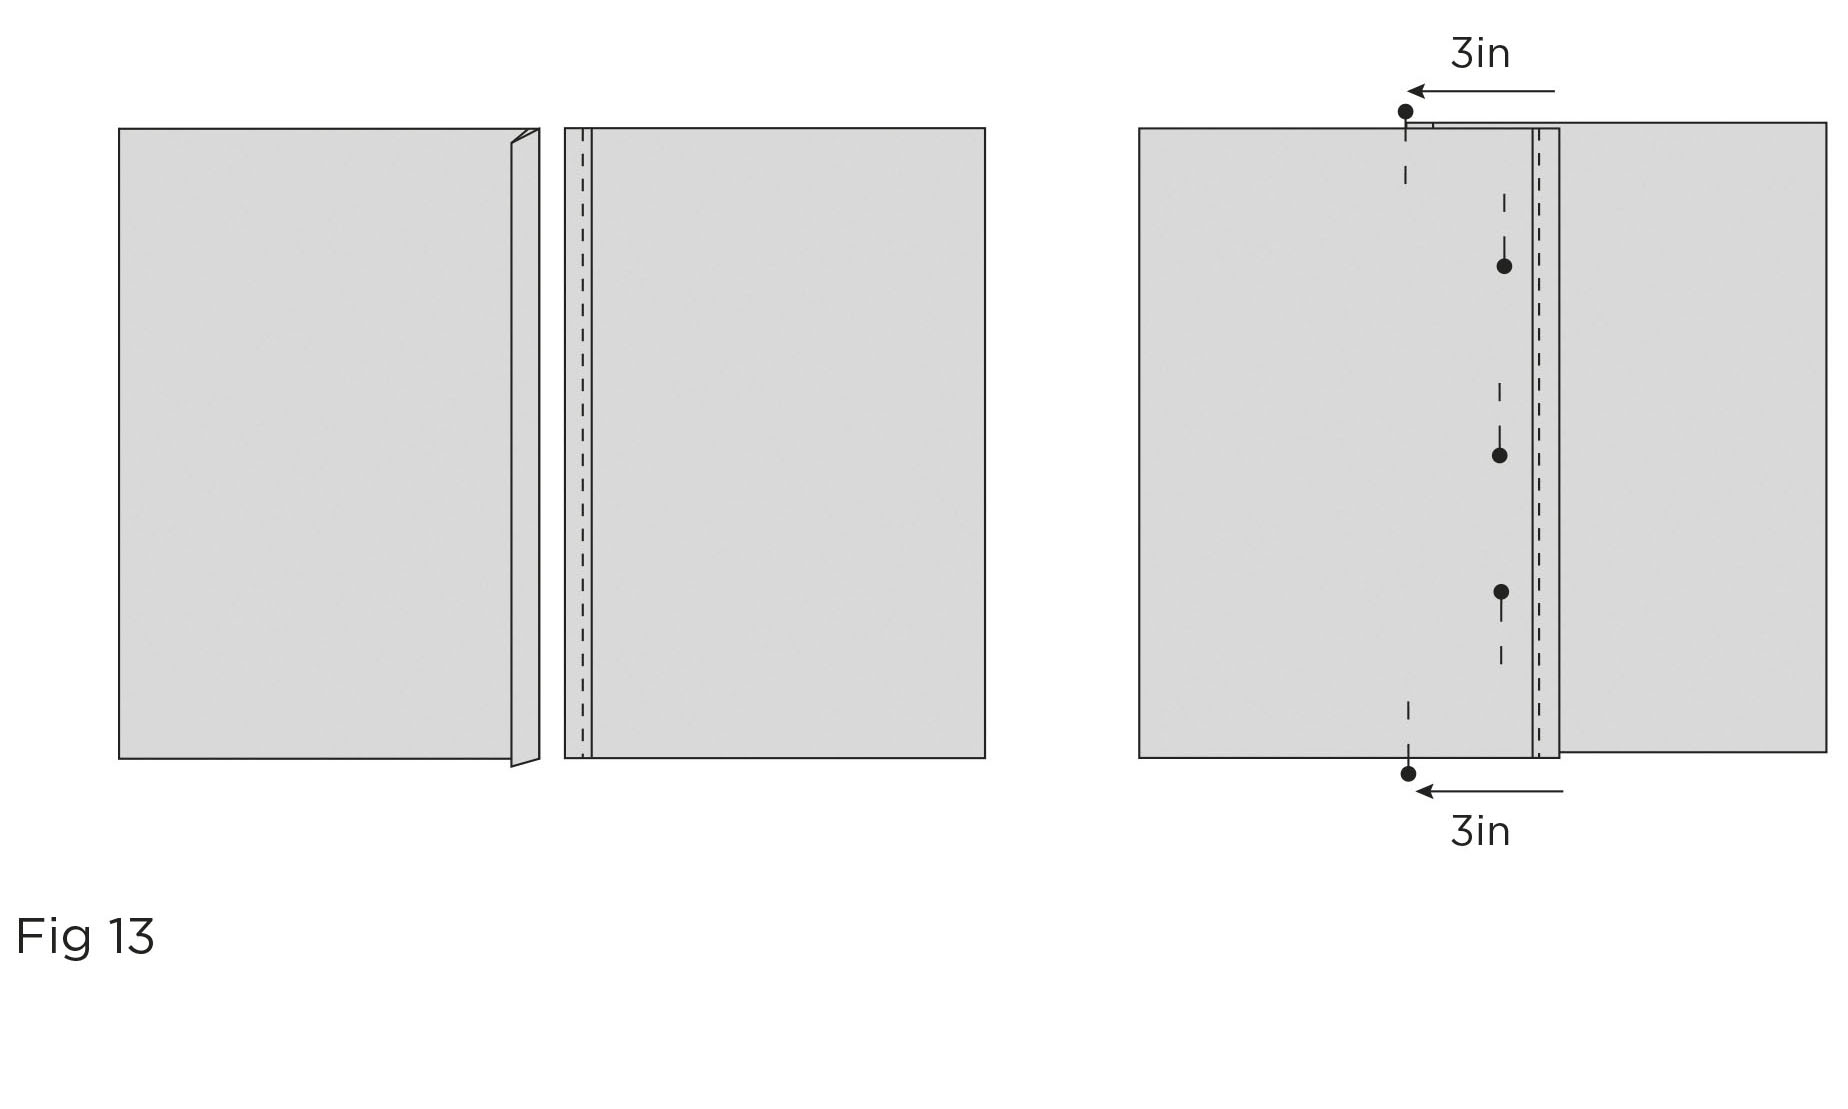
Cut the backing fabric into two 13in x 21in pieces. Fold a ½in seam allowance on one (1) 21in side twice, to the wrong side. Press and stitch in place (Fig 13). Make two (2) 12in x 21in pieces.
Step 2
Take one backing piece and lay it right sides up. Measure 4in in from the folded/stitched side, place a pin at either end. Take the second backing piece and place it wrong side down, lining up its folded/stitched side with the 4in marking pins creating an overlap. Pin the overlap to hold the pieces together (Fig 13). It’s at this point you can add the pieces of Velcro if you choose to.
Step 3
Lay the cushion front RST with the backing, centring the overlap (Fig 14).
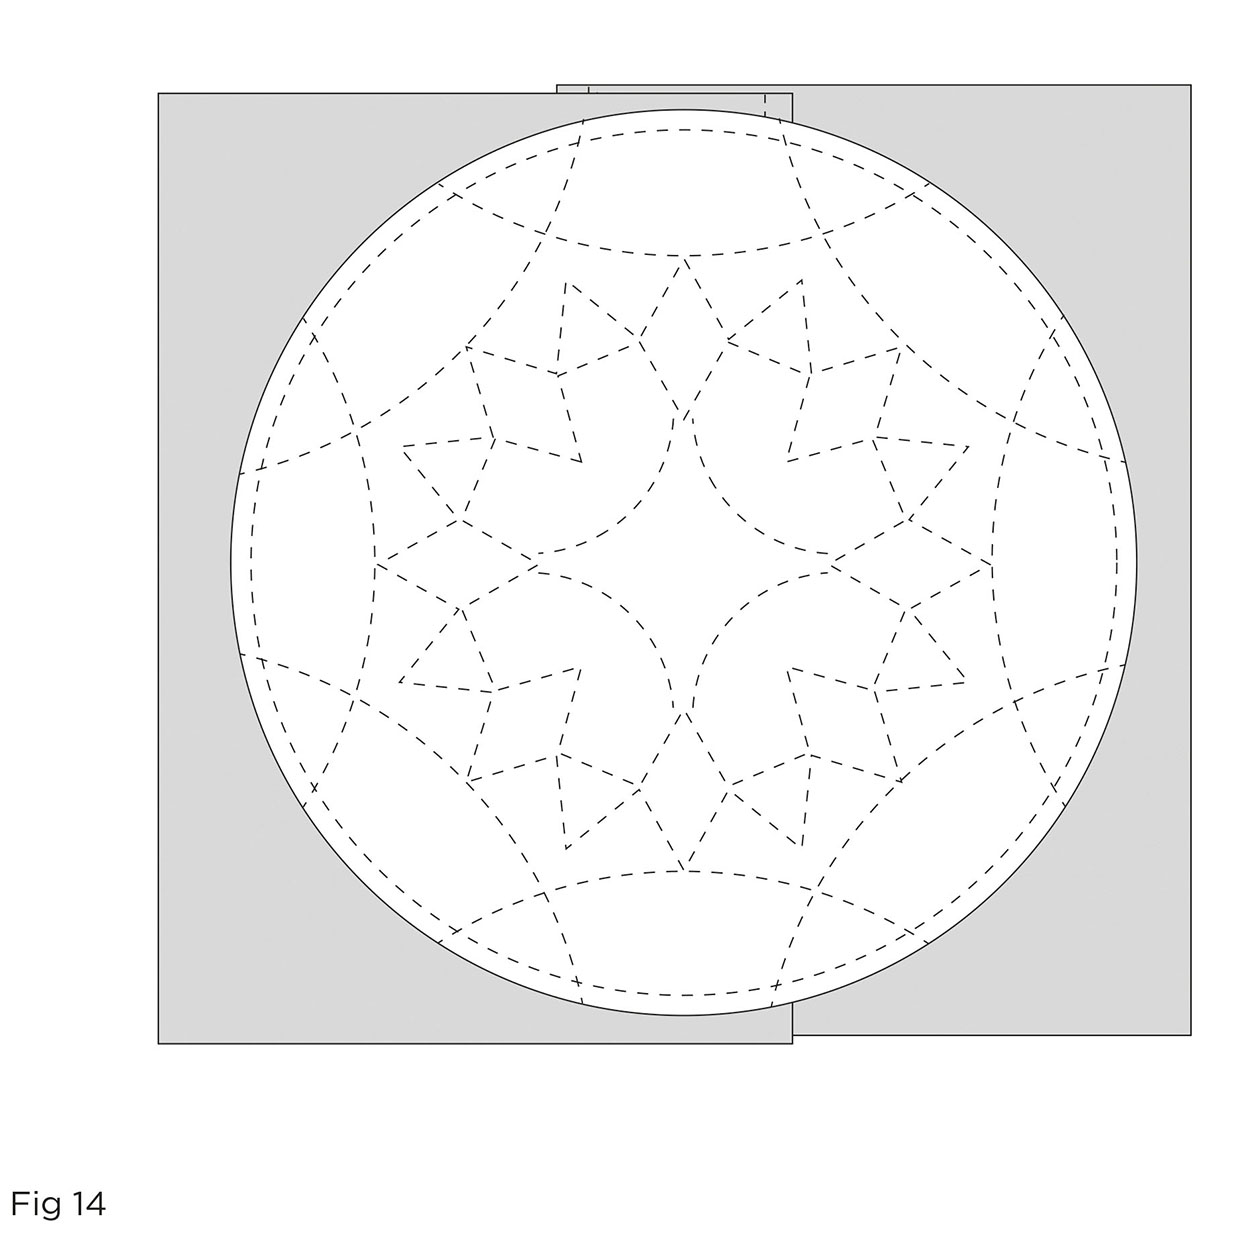
Pin together and using the cushion shape, whether round or square, stitch together with a 3/8in seam allowance. Trim off any excess backing. Reinforce the corners if you have them and turn right sides out. Press and fill with a cushion pad.


