Step 1
Cutting out the pieces for your quilted Christmas decorations

Place both fabric strips right sides together on a cutting mat.
Position the template/60-degree ruler on the fabric strips, with the top of the shape level with the top of the fabric and the bottom edge of the fabric lined up with the 5in marked line on the ruler for the small bell (Fig 1).
For the larger bell, use the 8in line on the ruler. Cut along both sides of the ruler/template with a rotary cutter.
Step 2
Turn the ruler/template through 180-degrees – do not flip it over.

Position the side of the ruler/template on the cut edge of the fabric and the top and bottom of the fabric strip as before (Fig 2).
Cut along the edge to make another fabric triangle.
Turn the ruler/template once more through 180-degrees and repeat the process to make three (3) pairs of triangles cut from the pair of strips.
Note: Left handers should work from right to left on the cut strips.
Step 3
Constructing the origami Christmas bell shape

Take each pair of triangles and stitch them together with a ¼ in seam, leaving a gap of about 2in in the seam opposite the cropped corner for the small bell or a longer gap of about 3½in for the larger bell (Fig 3).
This side of the triangle is cut on the straight grain of the fabric and will not stretch as much when the triangles are turned to the right side through the gap in the stitching.
Step 4

Trim the triangle corners to about ⅛in from the stitching to reduce the bulk of the fabrics at the corners and then turn the shape through to the right side. Pull out the corners to make them as sharp as possible (Fig 4).
Tuck the seam allowances at the gap under so that the edges are in line with the outer edge of the stitched triangle.
Stitch the gap closed. Lynne used ladder stitch to make the hand-stitched section as inconspicuous as possible. Press the finished triangle.
Step 5
Place a stitched triangle on the table. The fabric chosen for the folded corners on the final origami shape should be underneath, against the surface of the table.

Find the midpoint of the triangle by first folding it in half one way and finger-pressing to mark the mid-way crease (Fig 5).

Then, open the triangle out and fold it in half another way. Crease as before (Fig 6).

The centre of the triangle is at the intersection of the two crease lines (Fig 7).
Mark this centre point with a dot or a pin.
Step 6

Bring each corner in turn to the marked centre and sew it into position with two (2) or three (3) stitches from the corner of the triangle into the centre, stitching through all the layers at the centre each time (Fig 8).
Pull the thread tightly as you stitch to anchor the corners firmly to the centre of the block. You will find that the original triangle has now become a hexagon.
Step 7
Do not secure the thread and cut it off at this stage. Instead, leave the needle and thread on the back of the work and turn the hexagon over.
Three (3) of the hexagon’s sides have a thick fold on the edge.

The other three (3) sides are the seamed edges of the original stitched triangle (shown in Fig 9 as the sides marked with a star).

Find the midpoint of each of these starred sides by folding it in half and creasing it (Fig 10).
Step 8

Take the needle through the mid- point of one starred side, as in Fig 11.

Place the needle back down at the centre of the block so that it pulls the midpoint of the edge to the centre (Fig 12).
Stitch a couple of firm stitches through all layers at the centre to anchor it into place.

Repeat this with the mid-points of the other two starred sides (Fig 13).
Finish off on the back and run the thread into the layers before cutting it off.
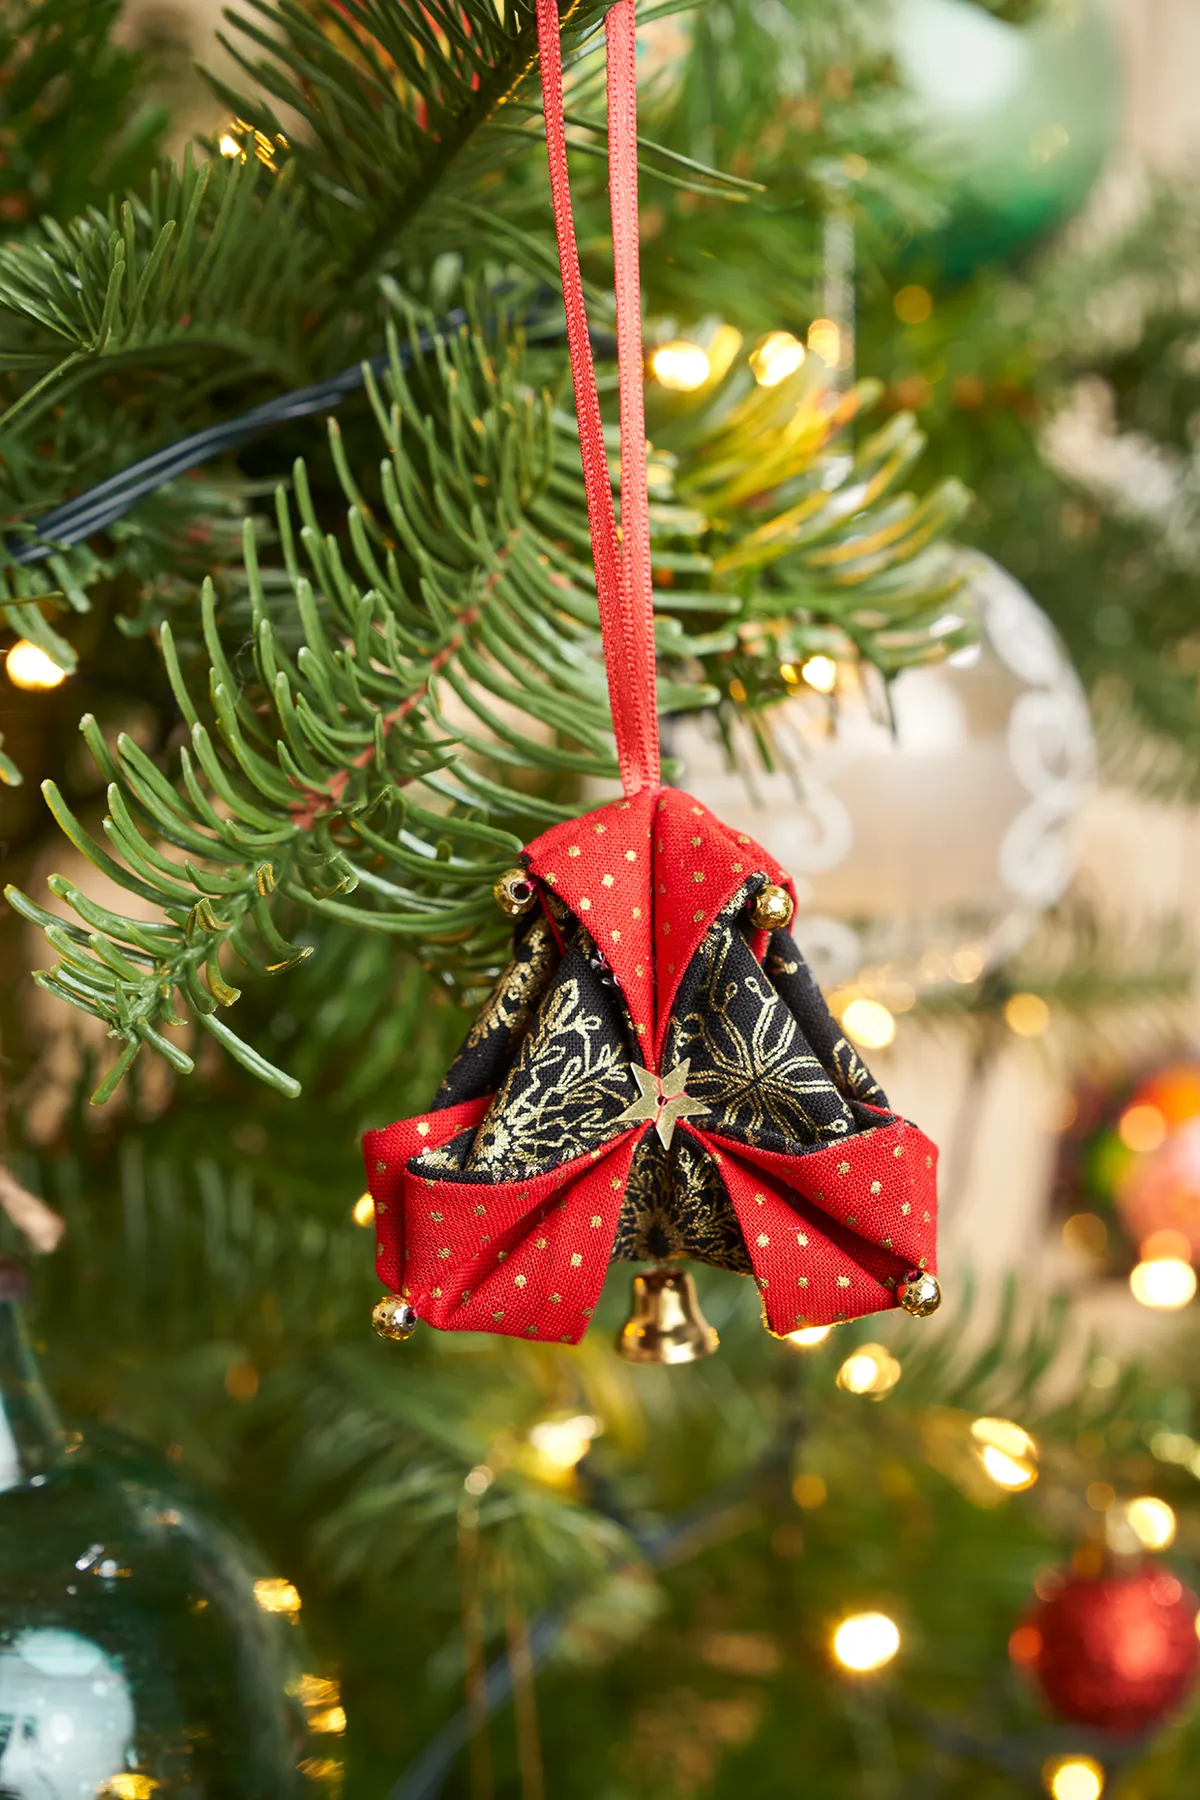
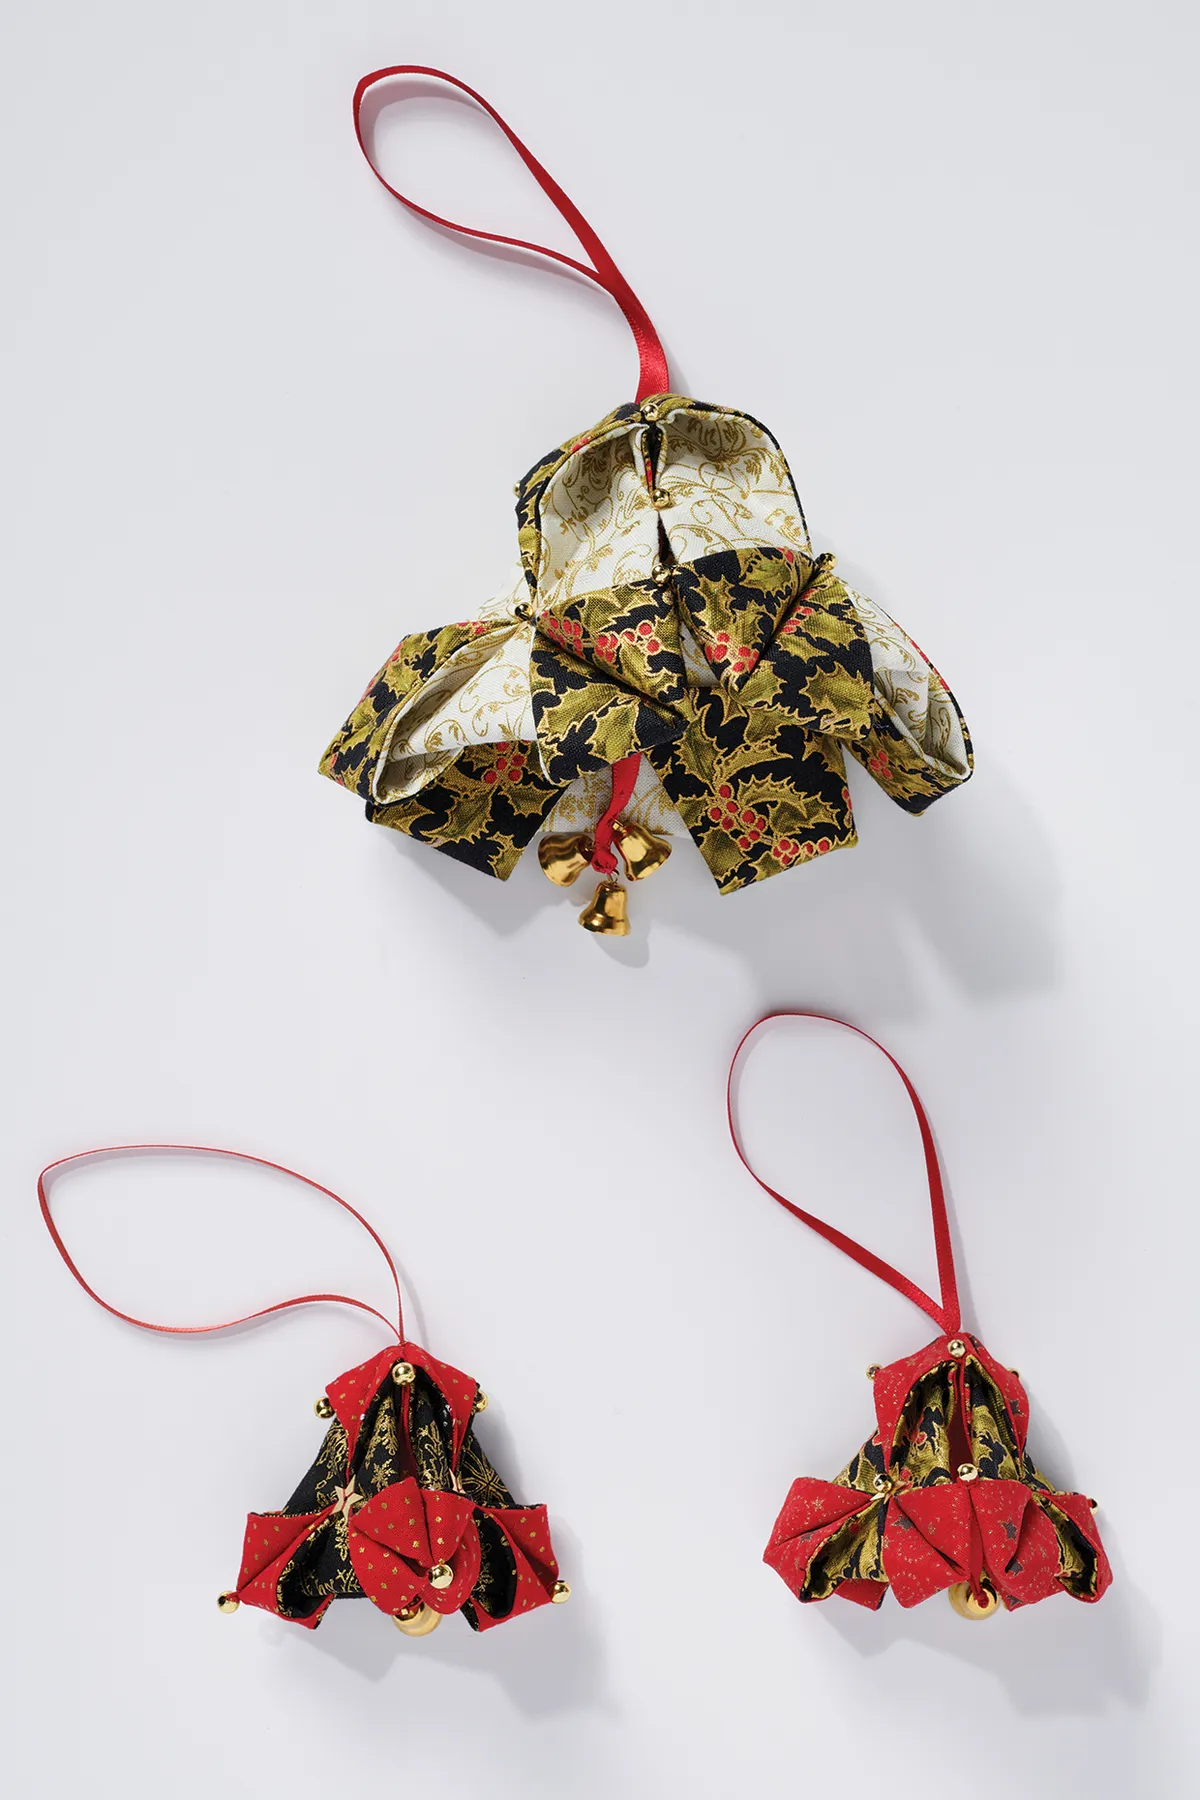
Technical Tip: Keeping your Christmas bell ornaments defined
On the larger bell, Lynne also stitched each of the long side edges together about ¼in from the top folded section to keep the bell shape well defined. She then added a bead at these points.
Step 9
Now you have a 3D flower shape.

Use the blades of a small pair of scissors pushed gently between the layers of the folded sections to smooth and flatten the folded areas Into regular kite shapes, as shown in Fig 14.
Step 10
Repeat to make all three (3) folded shapes for the Christmas bell design in this way.
Step 11
At this stage, stitch a bead or sequin at the centre of each folded shape, stitching through all the layers to keep the bead secure.
Finish off the stitching on the back of the folded shape.
Step 12
Assembling the origami Christmas bell
Cut an 8in length of ribbon for the hanging loop for the small bell (10in for the larger bell).

Fold this in half and stitch the two ends firmly to the back of one of the folded shapes as near to one of the outer corners as possible (Fig 15).
Step 13

Take all three (3) folded shapes and arrange them together, right side up, with points touching at the centre, as in Fig 16.
The point with the ribbon loop stitched on should be at the centre. To join the centre points together, leave the shape with the loop until last.
Join the two shapes without the ribbon loop together at the centre, stitching firmly at the exact centre from the back of the shapes with several small stitches through the matching corners.
Open the stitched shapes out flat and join the third shape with the ribbon loop to it at the centre of the unit in the same way.
Make sure the loop is pulled through to the right side of the folded shapes as you stitch them together.
Step 14

Place the unit flat, as in Fig 17. Stitch the three points marked ‘A’ together.
To do this, place one (1) shape onto the other with right sides facing and corners matching.
Sew several small stitches firmly through each set of corners to hold them together.
Add a bead at each of these joined places.
Step 15
Now, pull the units up by the loop into a bell shape. Join together the points marked ‘B’ in Fig 17 to keep the bell shape in position.
Add a bead at each of these joined places.
Step 16
To make the clapper for the bell, cut a 5in length of narrow ribbon for the small bell (9in for the larger Christmas bell ornament).
Thread this through the loop on the bell/bead and match the two (2) ends of the ribbon together.
Turn the ornament inside out (a test for the strength of your earlier stitching!) and stitch the two ends of ribbon firmly to the centre of the joined units of the Christmas bell ornament.
Finally turn the bell back right side out and it’s all done!