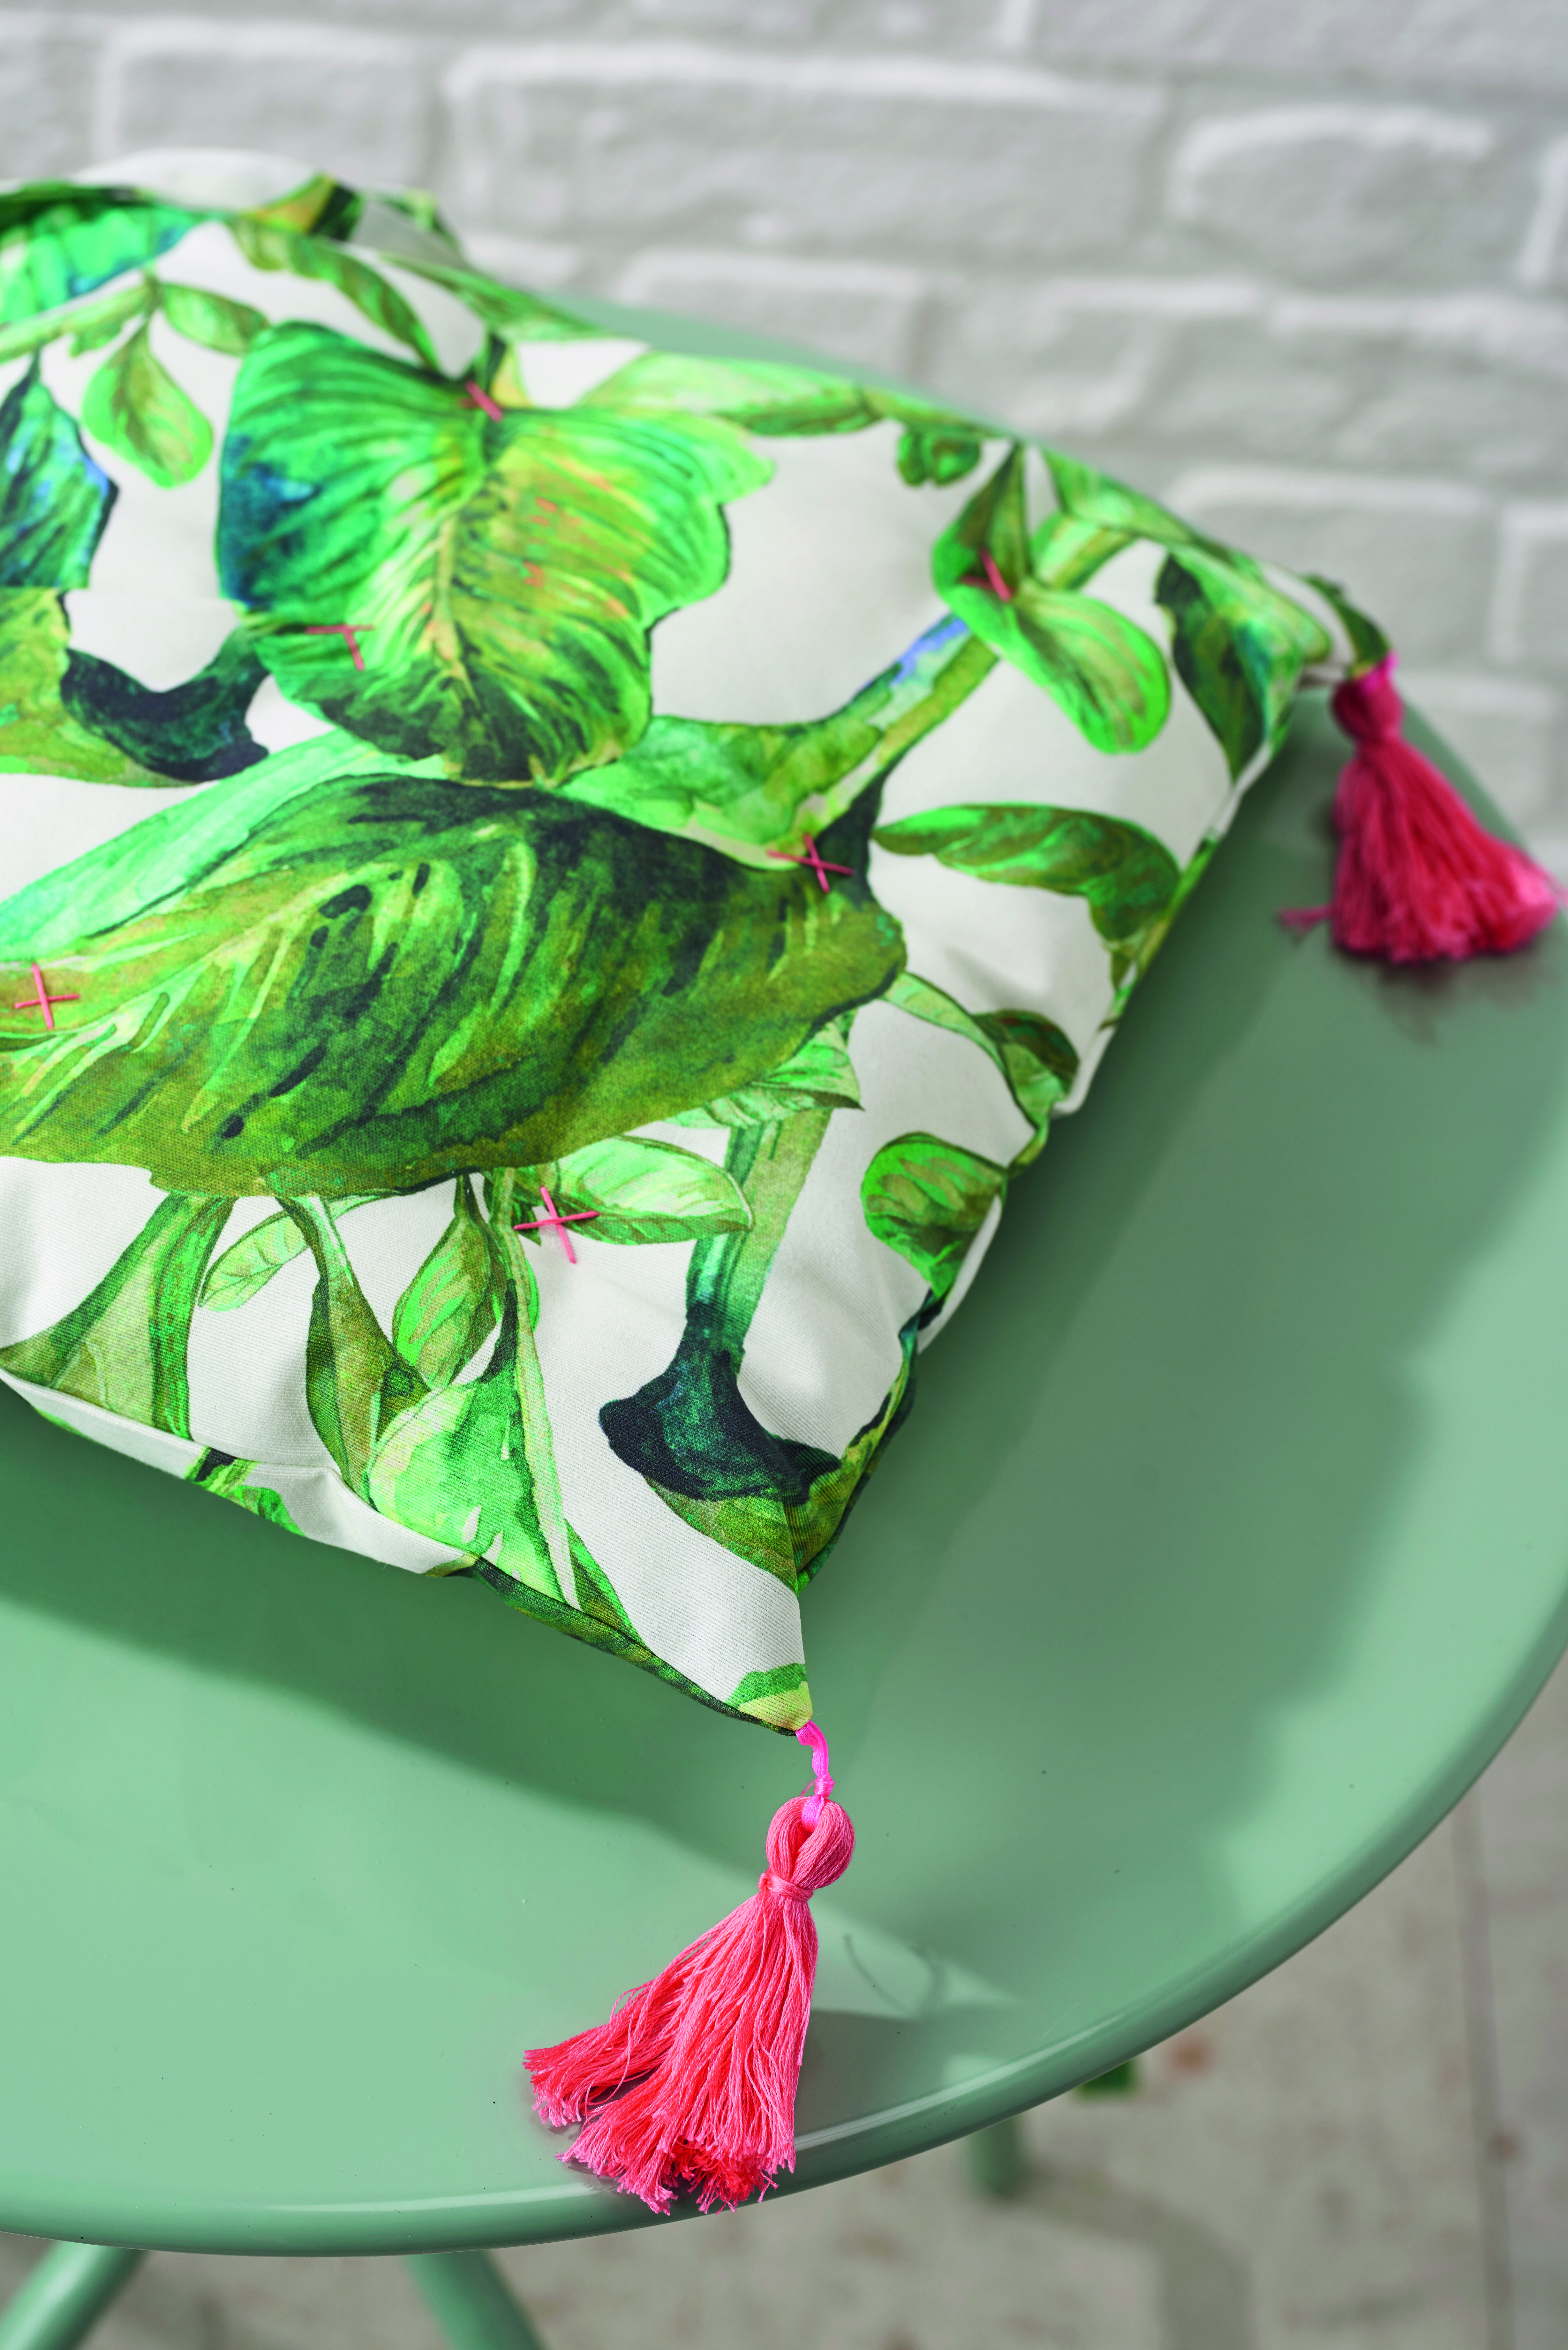
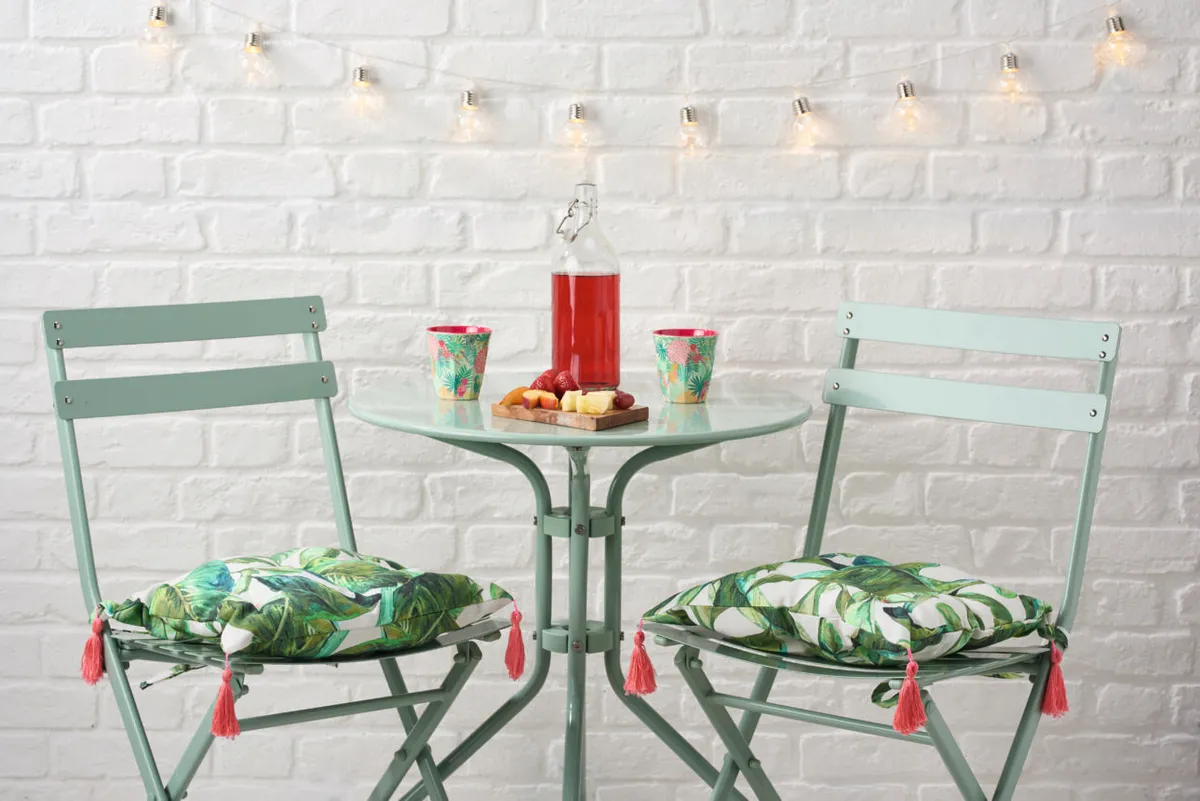
Transform even the smallest courtyard into a corner of paradise with these DIY outdoor cushions. Using statement fabric to spruce up patio furniture is such a clever idea, and an easy way to embrace the trend for all things tropical – after all, who doesn’t love a leaf motif? We found tons of plant-inspired fabrics, including this one, at www.stoffstil.co.uk.
Each cushion is finished with hot pink tassels for a pop of colour. And, you’ll use the same thread to embellish it with tufting. While you can use a standard sewing needle to do this, a millinery needle is preferable, as it makes stitching through the filling less fiddly. We've also got a painted plant pots tutorial that would go perfectly with your new DIY outdoor cushions.
This project was created by Laura for Mollie Makes magazine – for more easy-make craft projects and creative inspiration, subscribe to Mollie or click here to find out more.
Materials
- Cotton fabric, 100 x 135cm (393/8 x 531/8")
- 10 skeins of embroidery thread in pink (we used DMC Stranded Cotton in 3706)
- Pink ribbon, 1m (393/8"), 0.25cm (1/8") wide
- Two cushion pads, 40cm (153⁄4") square
- Long sewing needle
- Matching sewing thread
If you're new to sewing then make sure you head over to our sewing for beginners guide and our sewing kits for beginners. Oh and we have a round-up of the best sewing machines for beginners too if you're looking for a new machine. Looking for more summer sewing projects? Try our pick of the best swimsuit patterns.
If you don't have time to make your own outdoor cushions, check out YourHomeStyles pick of the best outdoor cushions to buy.
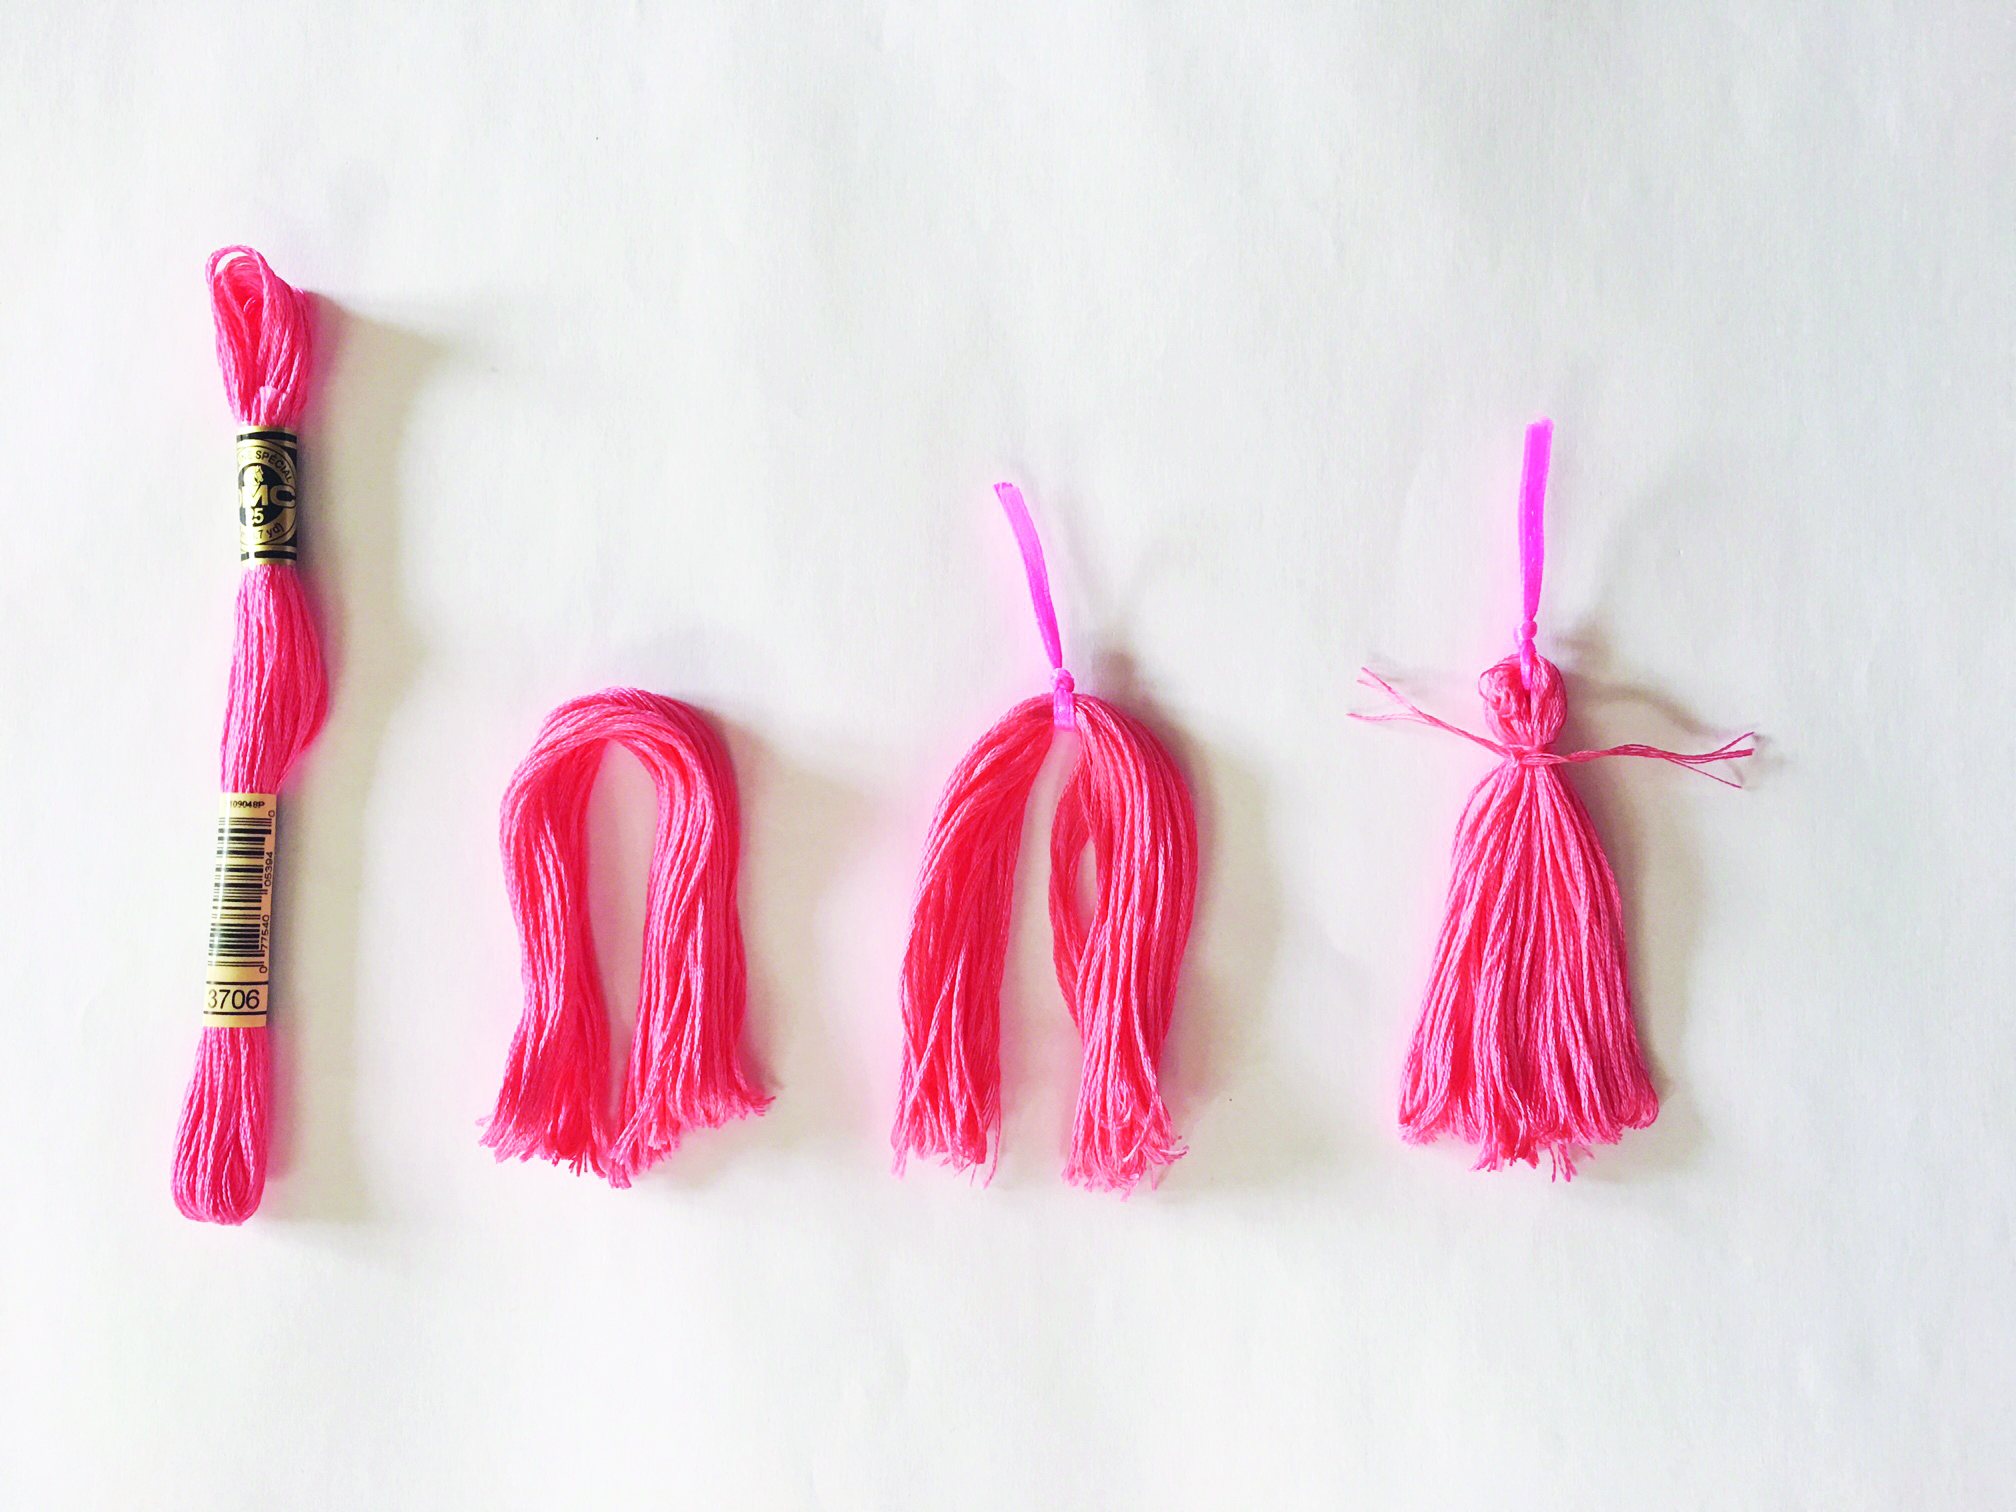 Trim the ribbon into eight 12cm (43⁄4") lengths. To make the tassels, fold a skein of embroidery thread in half and cut through the loops at either end. Knot a length of ribbon around the centre of the skein, then take a length of thread and wrap it around the top of the fold to secure. Neatly trim the cut edges of the tassel, then repeat to make four tassels in total.
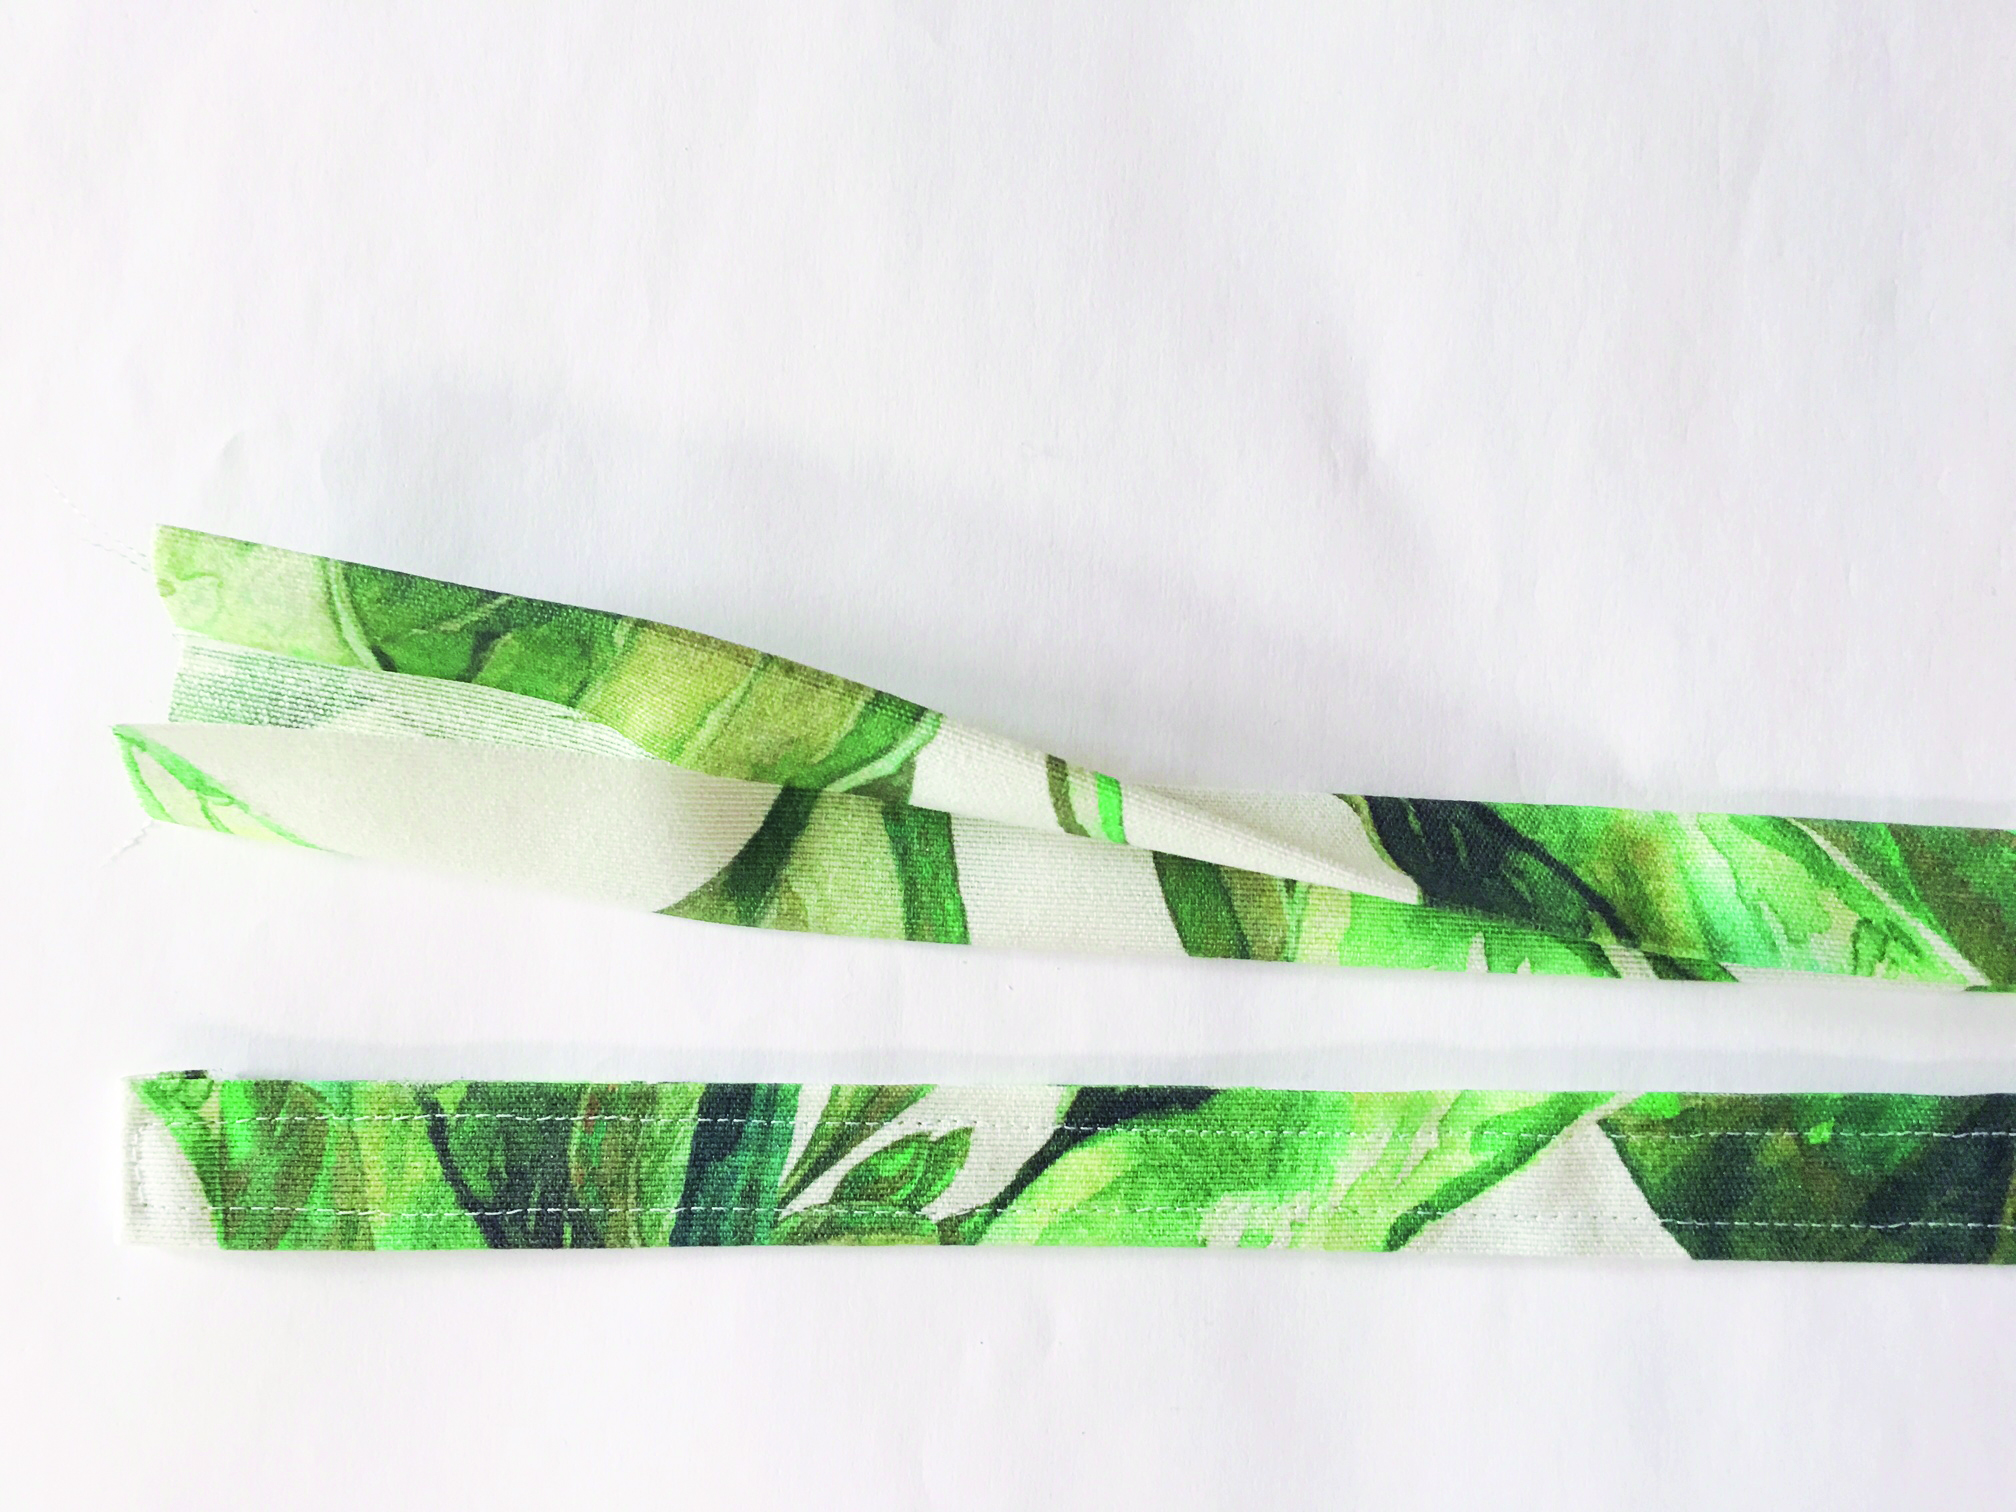 Cut two 8 x 35cm (31/8 x 133⁄4") strips from the fabric. Fold each strip in half along the length with wrong sides (WS) together and press. Open out each strip, then fold both long edges into the centre crease with WS together and press. Fold each strip in half along the length again, concealing the raw edges, and press. Fold one short end on each strip to the WS by 0.5cm (1⁄4") and pin. Sew along the two long edges and folded edge, 0.25cm (1/8") in from the edge, to create the ties.
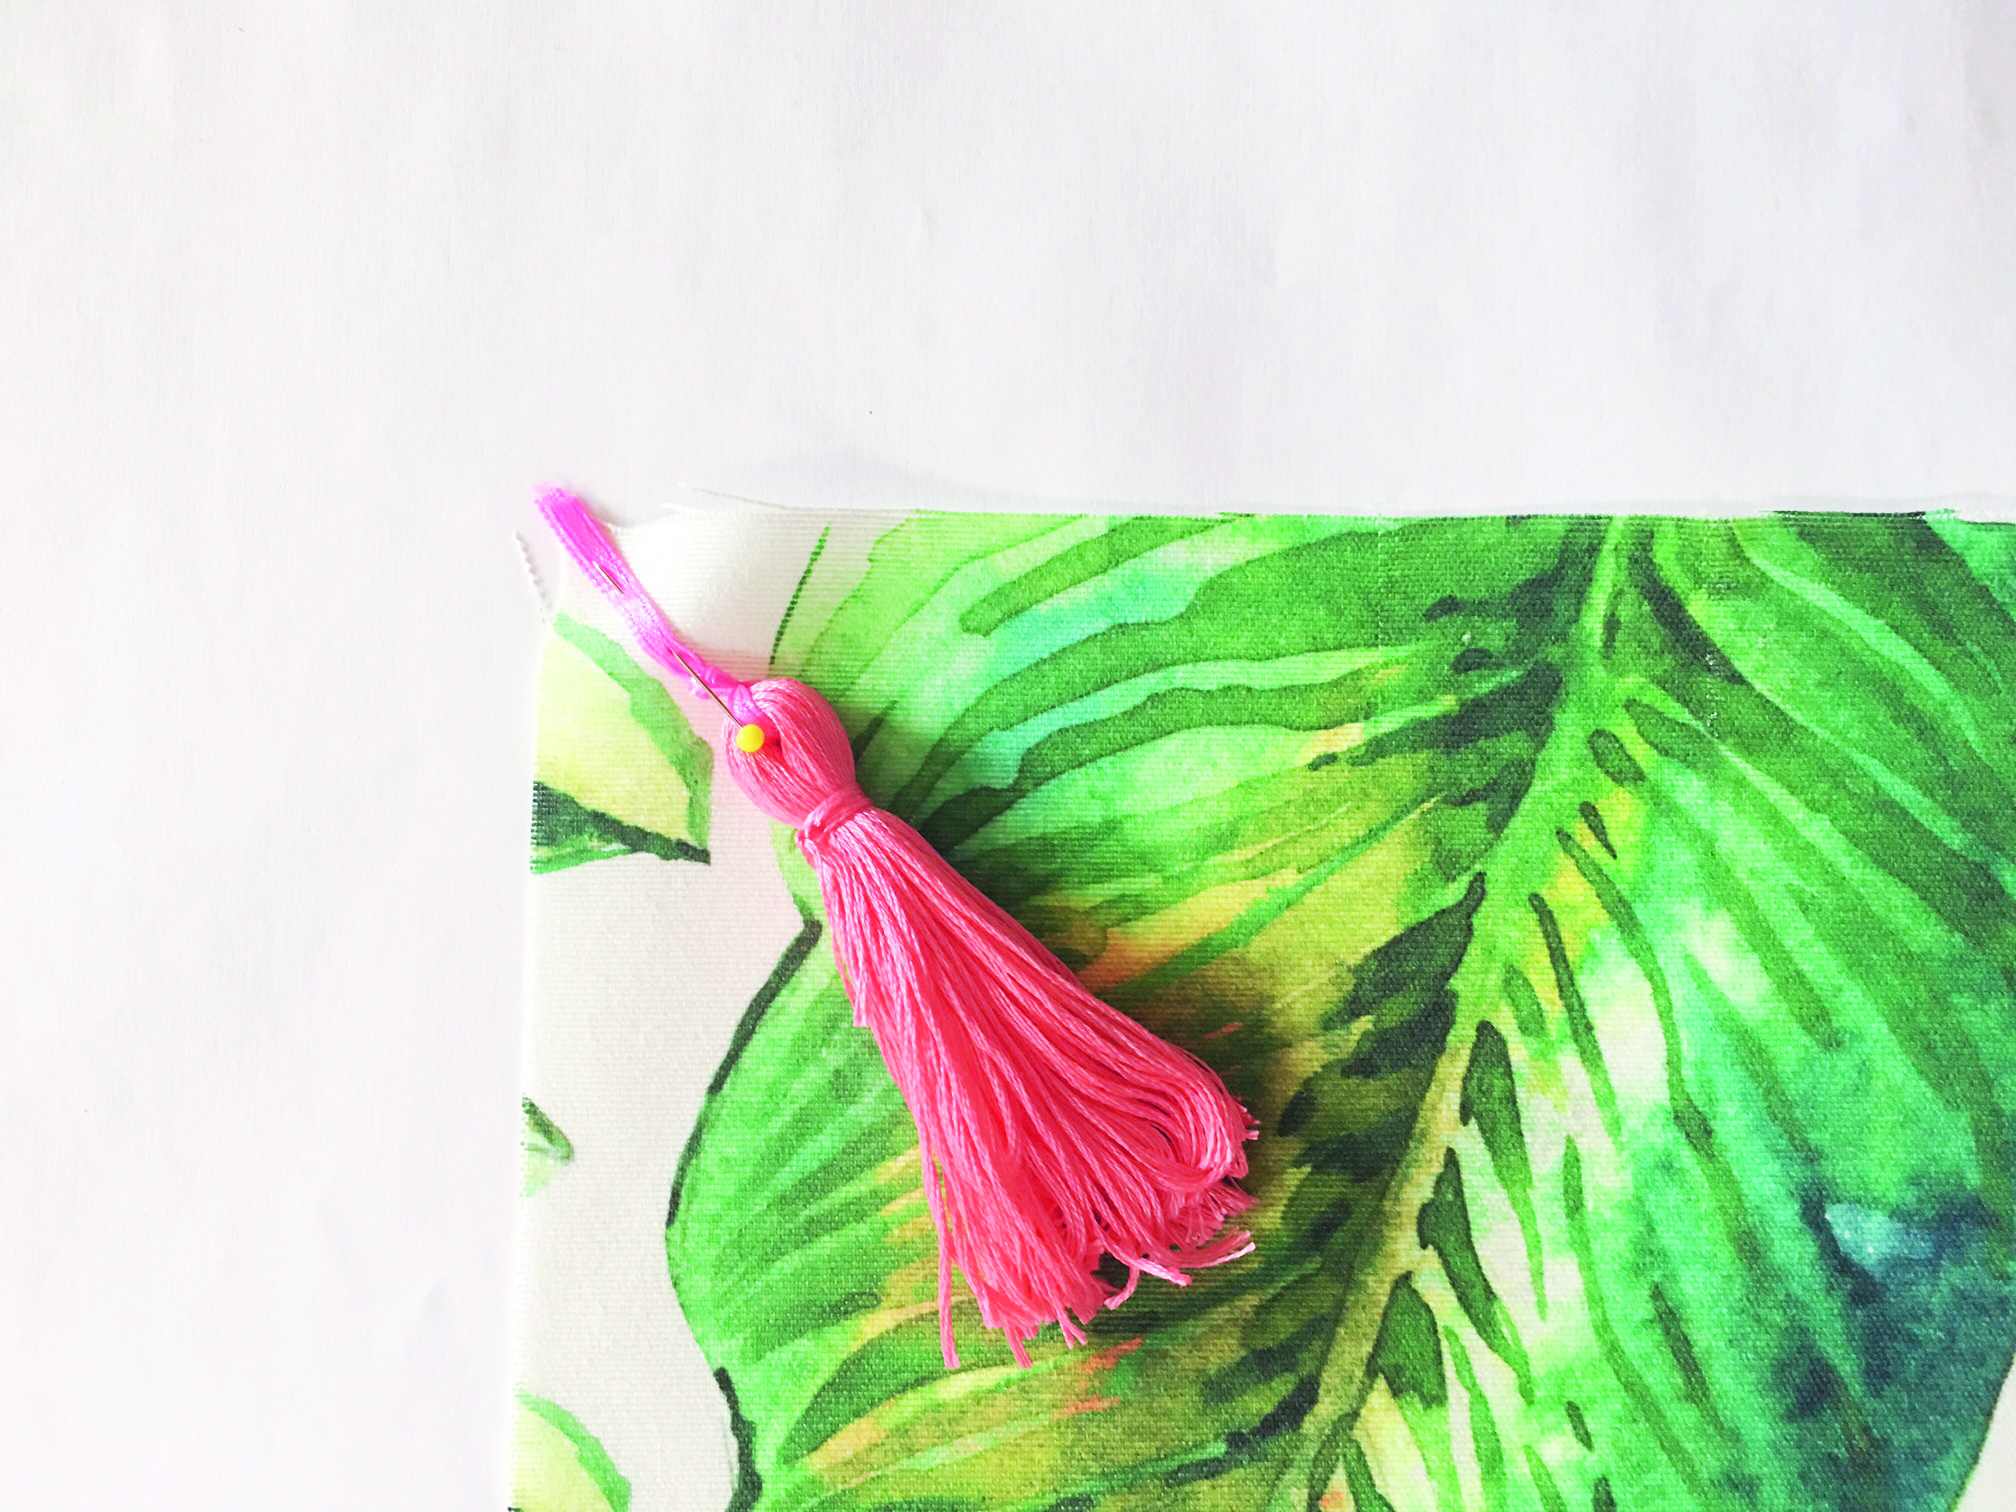 Cut two 43 x 43cm (17×17") pieces from the fabric, making sure the printed motif is positioned in the centre of each square. Place one square right side (RS) up and pin the ribbon on one tassel to the corner, with the tassel pointing in towards the centre. Sew to secure, then repeat for all four corners.
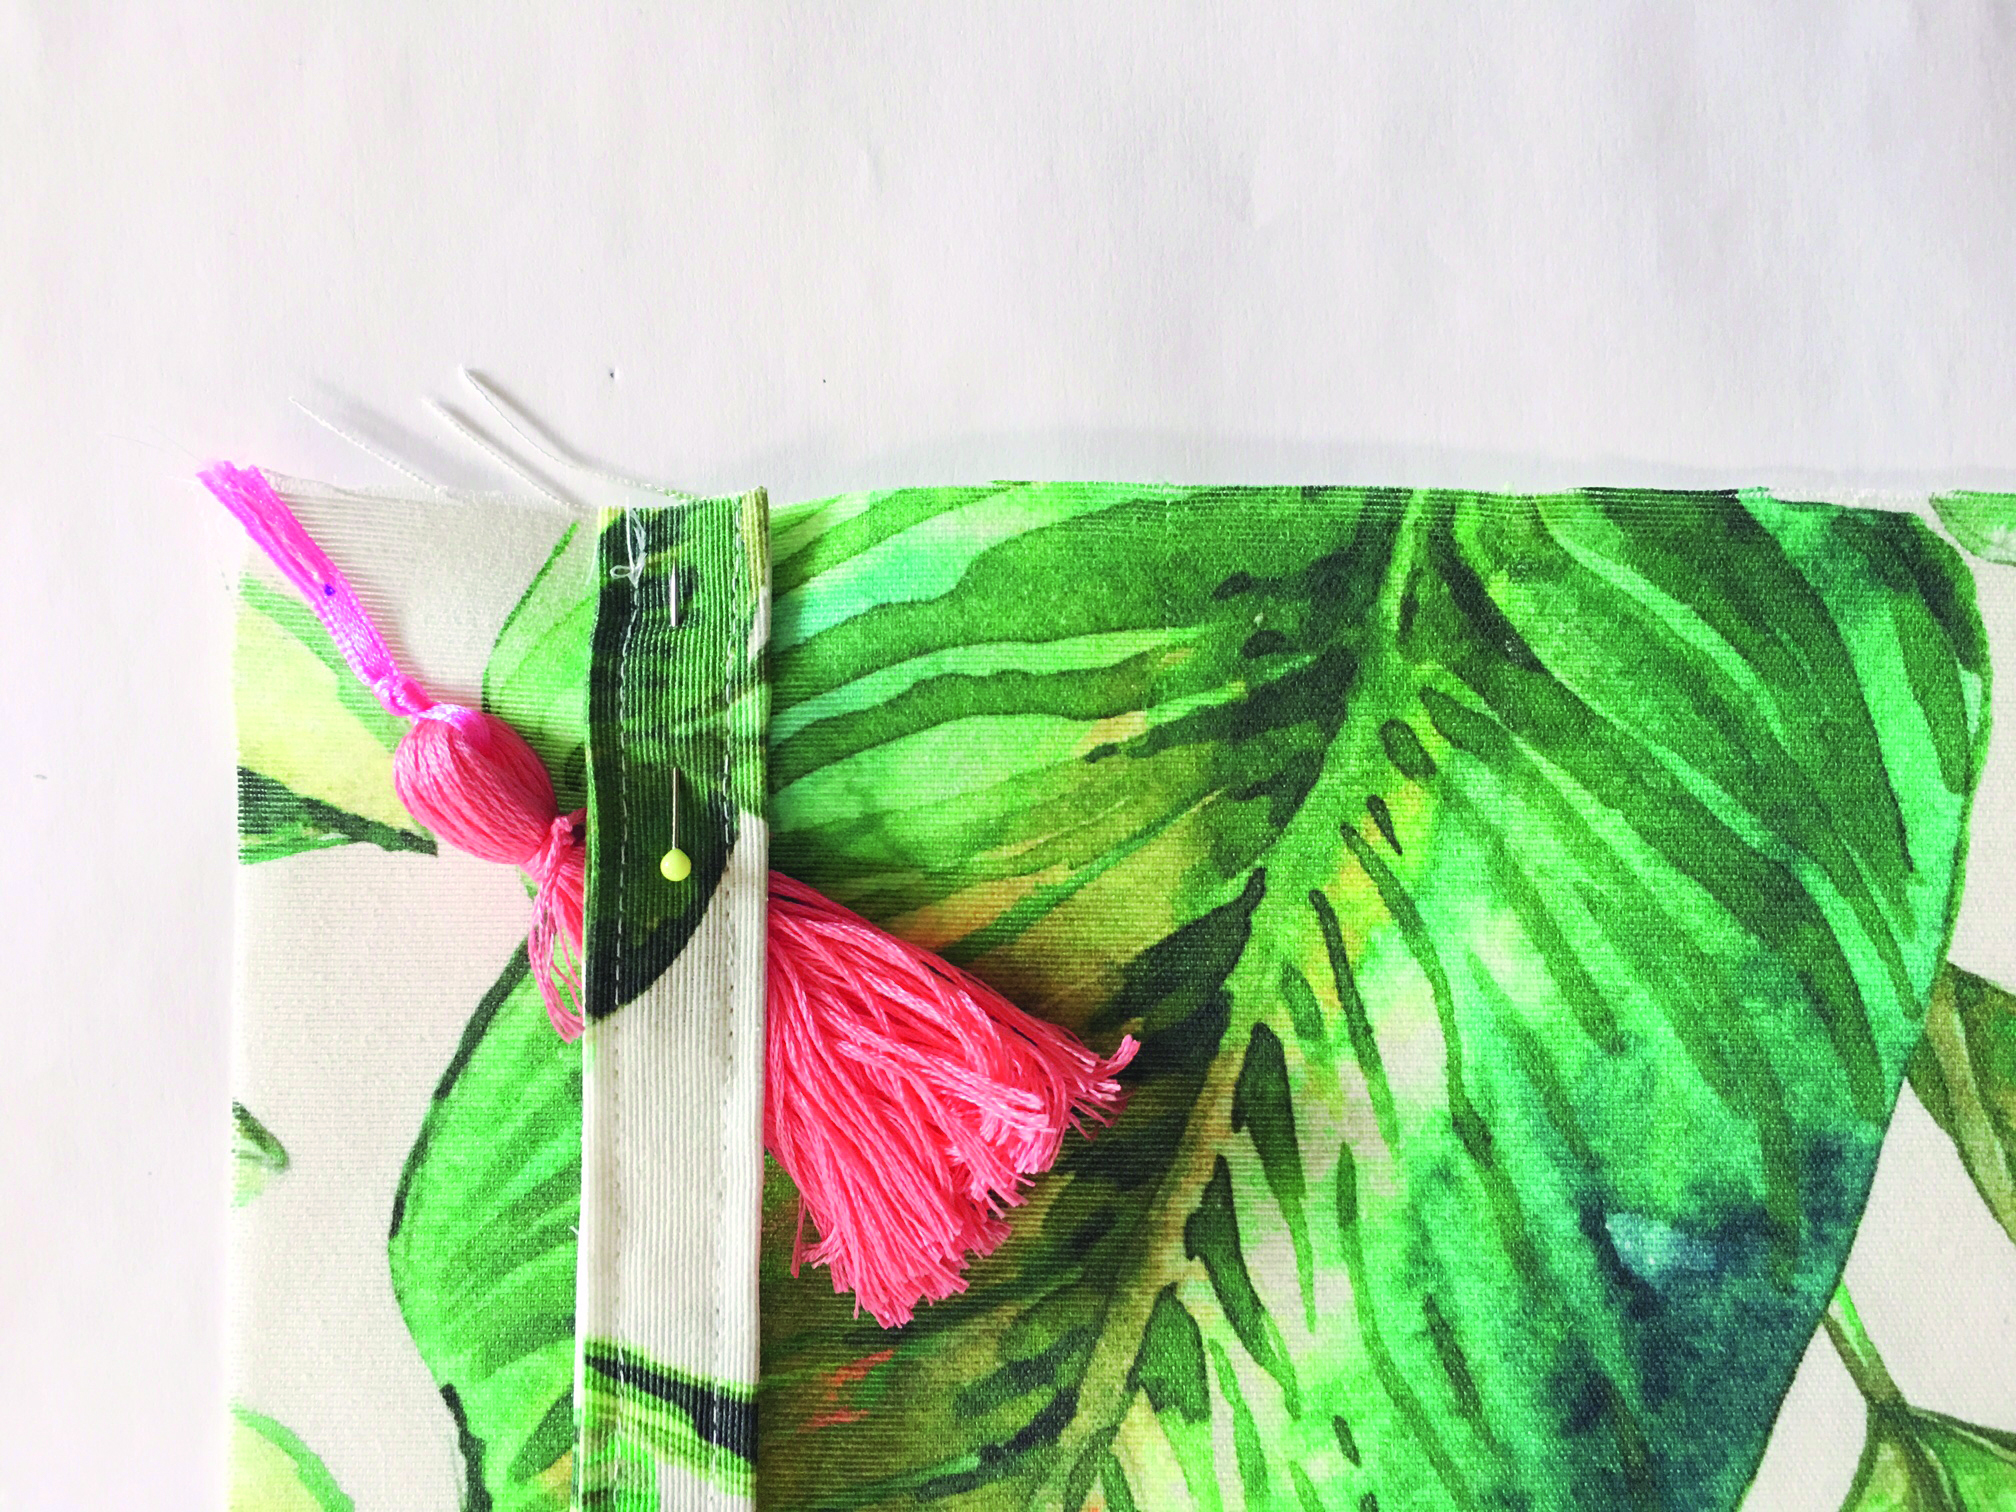 Position a tie 3cm (11⁄4") in from one edge, aligning the raw short edge with the top edge. Pin and sew in place, then repeat with the second tie on the opposite edge.
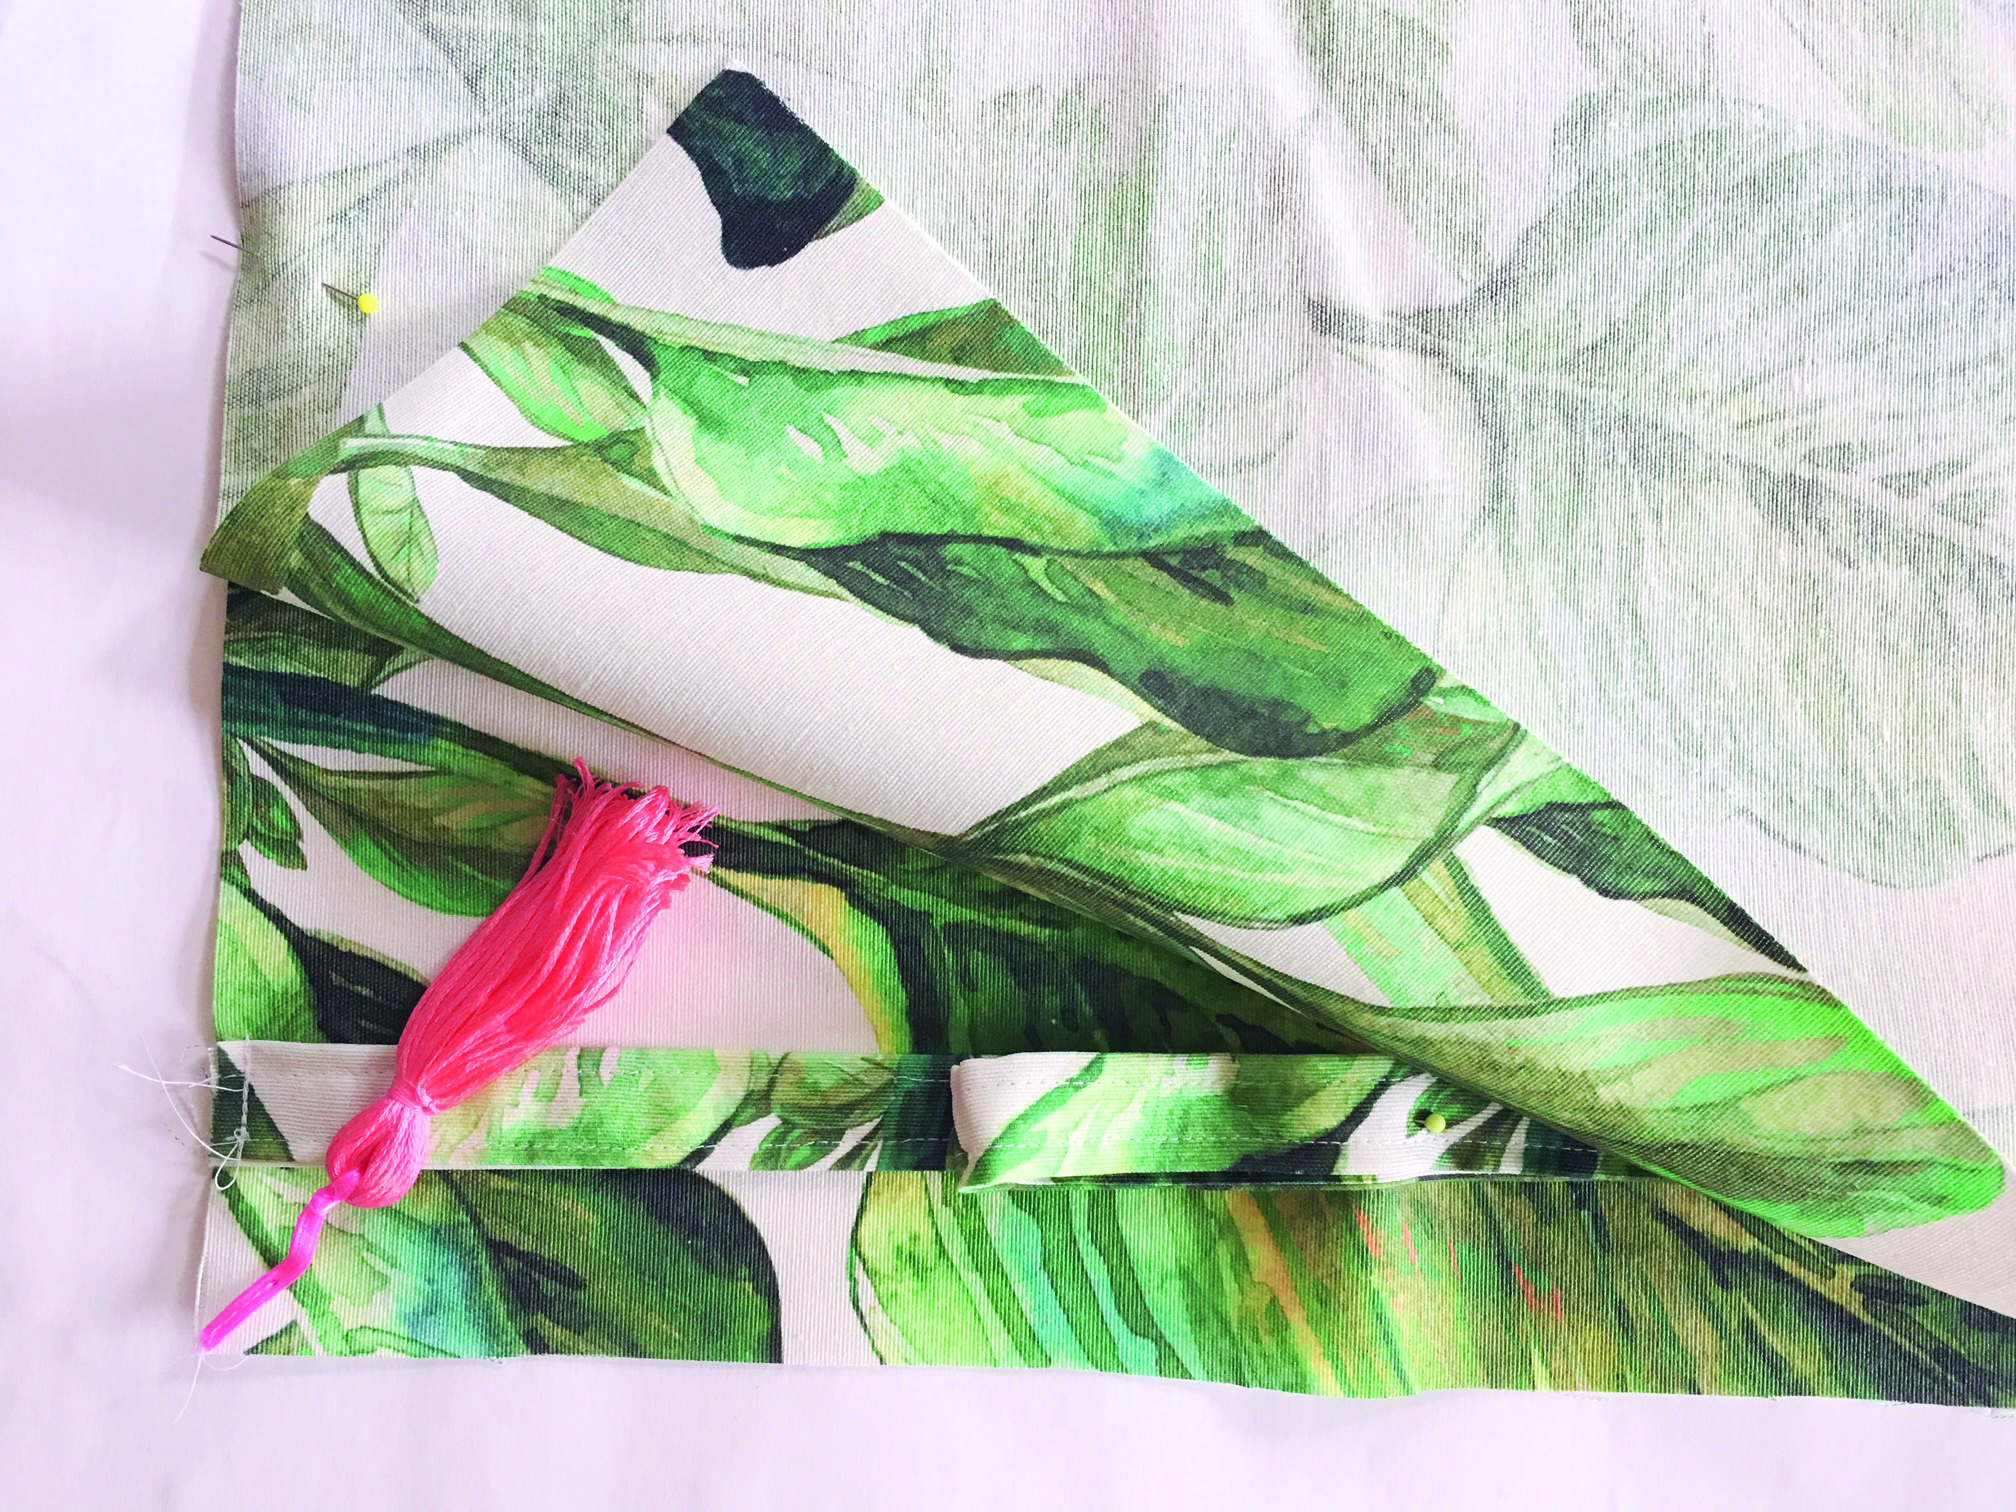 Pin the tassels and ties away from the raw edges of the fabric to prevent them getting caught when sewing. Place the remaining fabric square on top with RS facing, then pin and sew using a 1.5cm (5/8") seam allowance, leaving a 10cm (4") gap between the two ties.
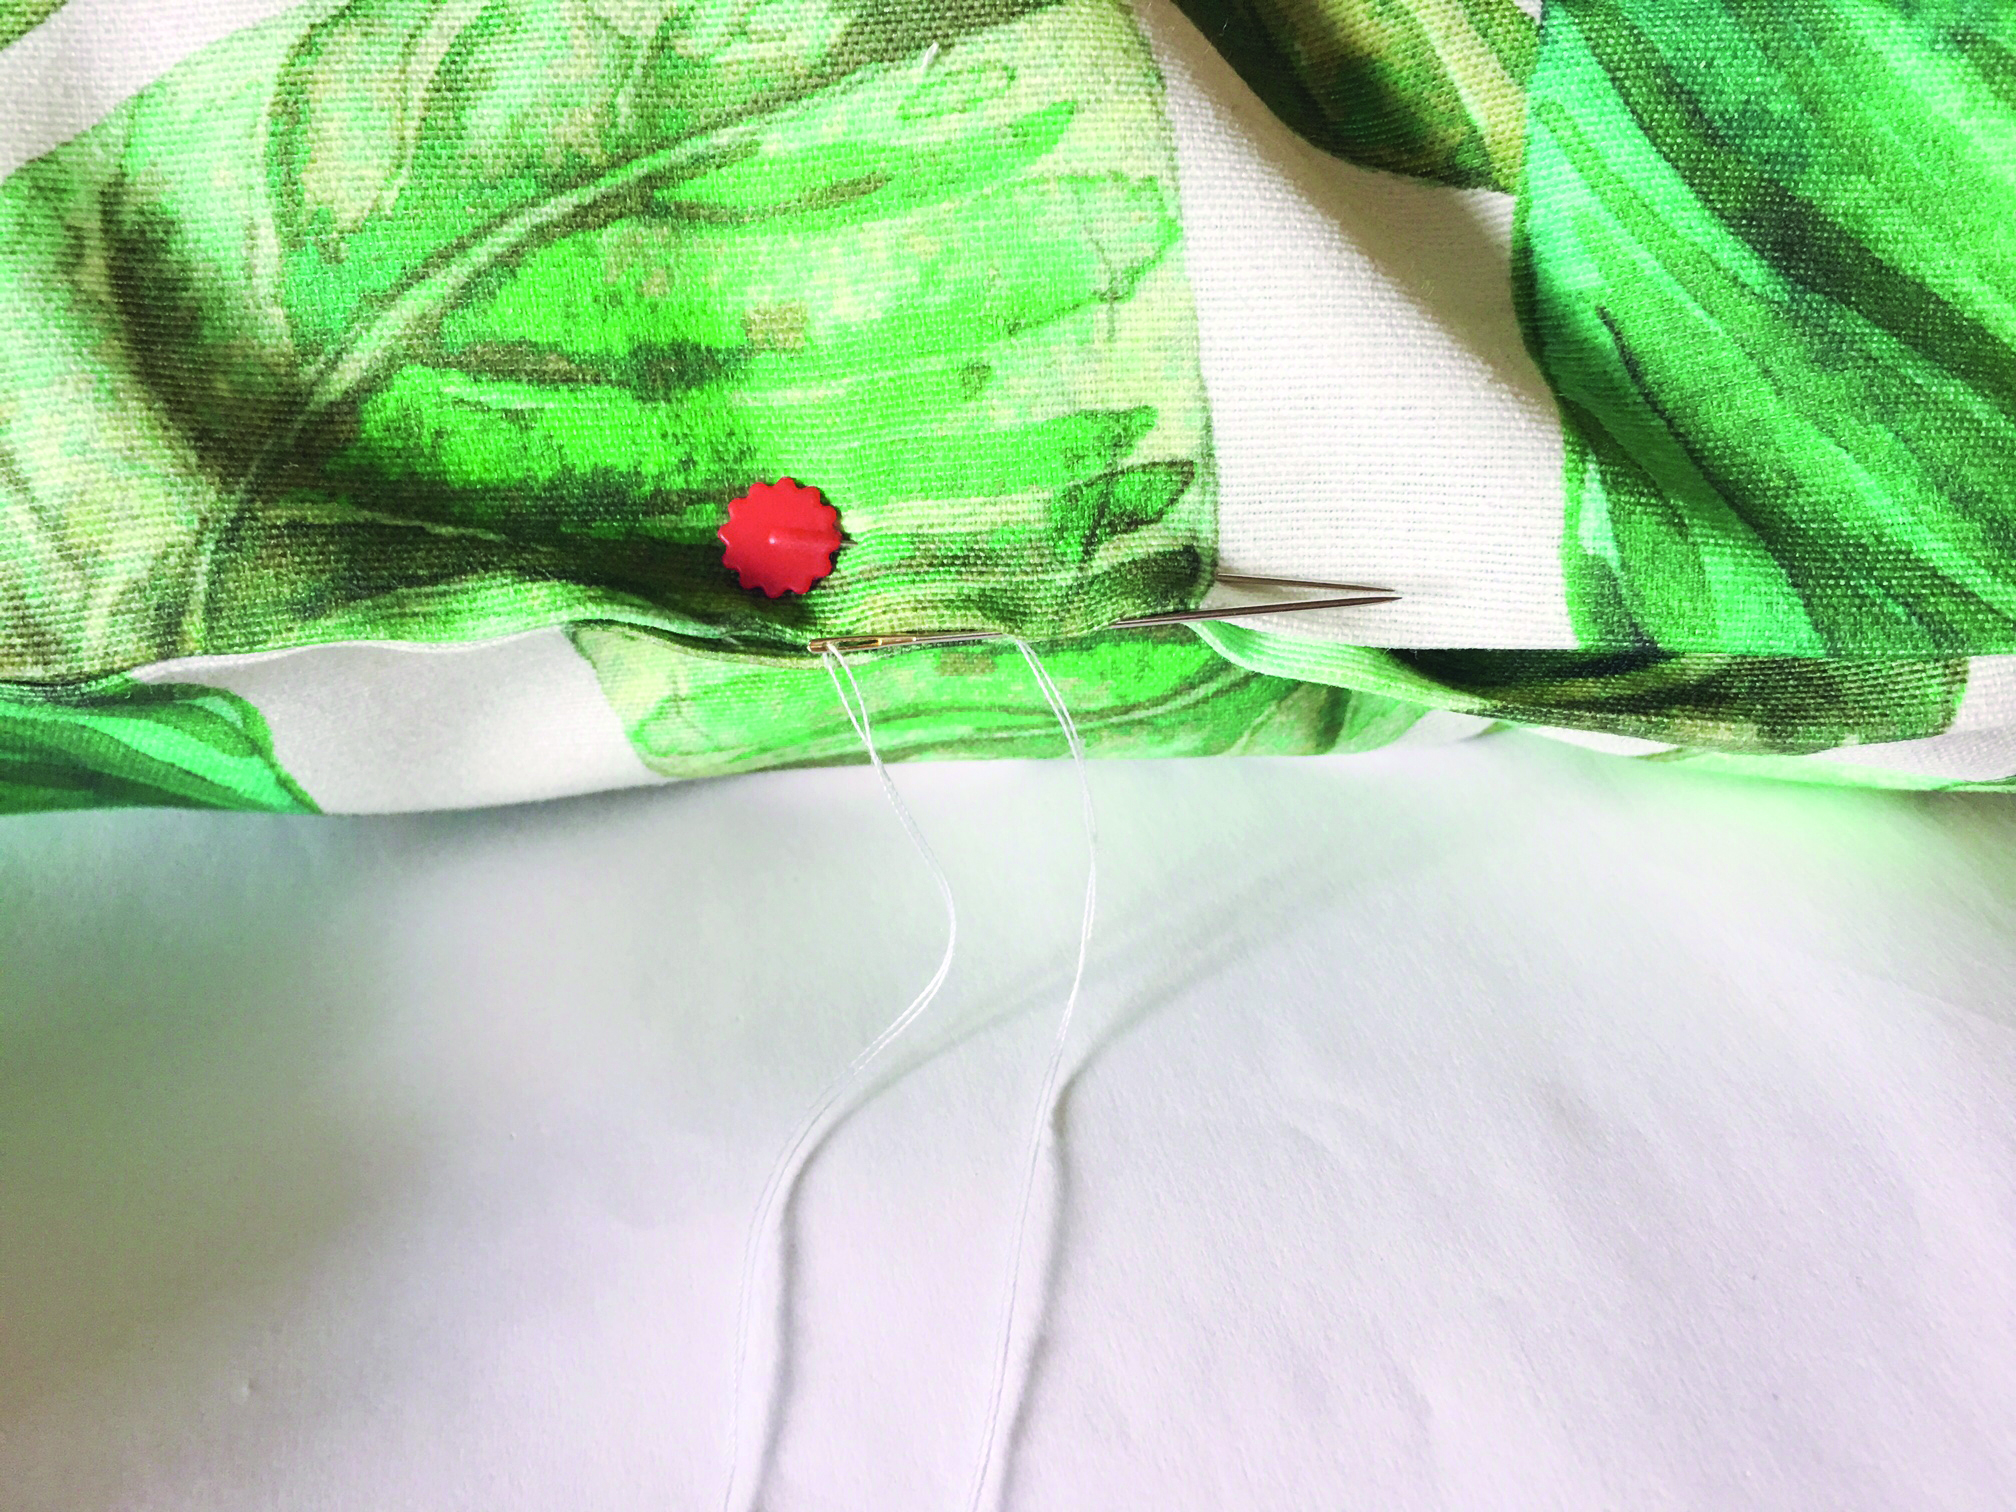 Trim the corners of the seam allowance, then turn the cushion RS out through the gap, using a knitting needle or similar to push out the corners. Press, position the cushion pad inside, then neatly slip stitch the gap closed.
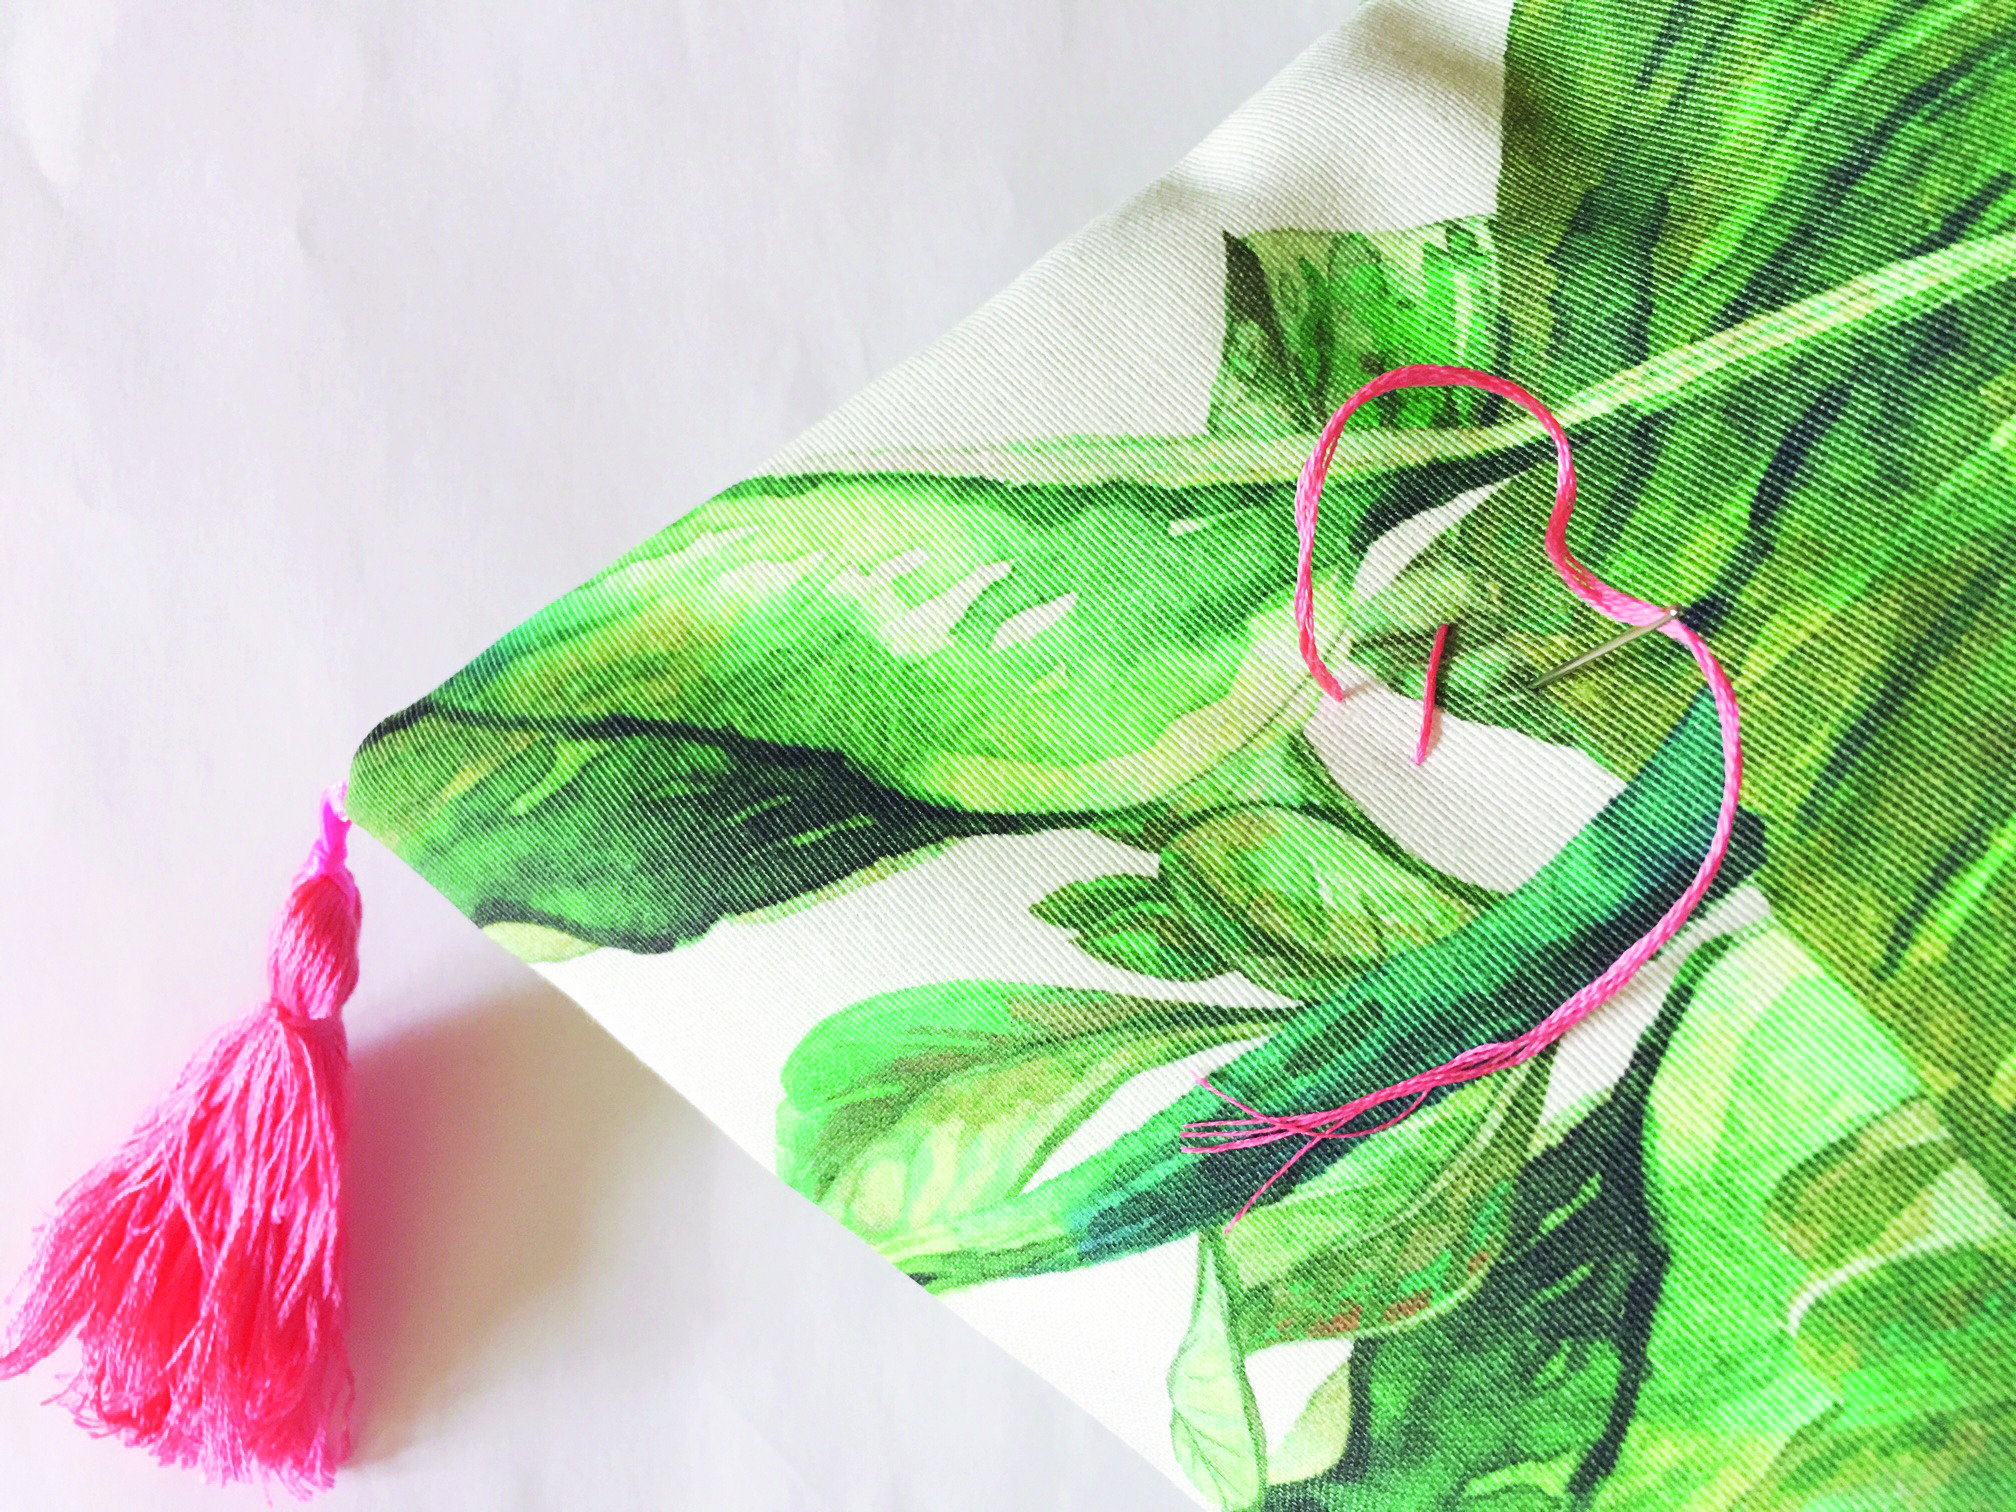 To create the tufting effect, stitch three rows of three crosses, spaced evenly apart across the cushion. To make a cross, use pink thread and a long needle to sew up from the base of the cushion, out through the top, then back down again, roughly 1cm (3/8") away from the first hole. Cut the thread, leaving the ends unknotted, then use a new length to make the second arm of the cross.
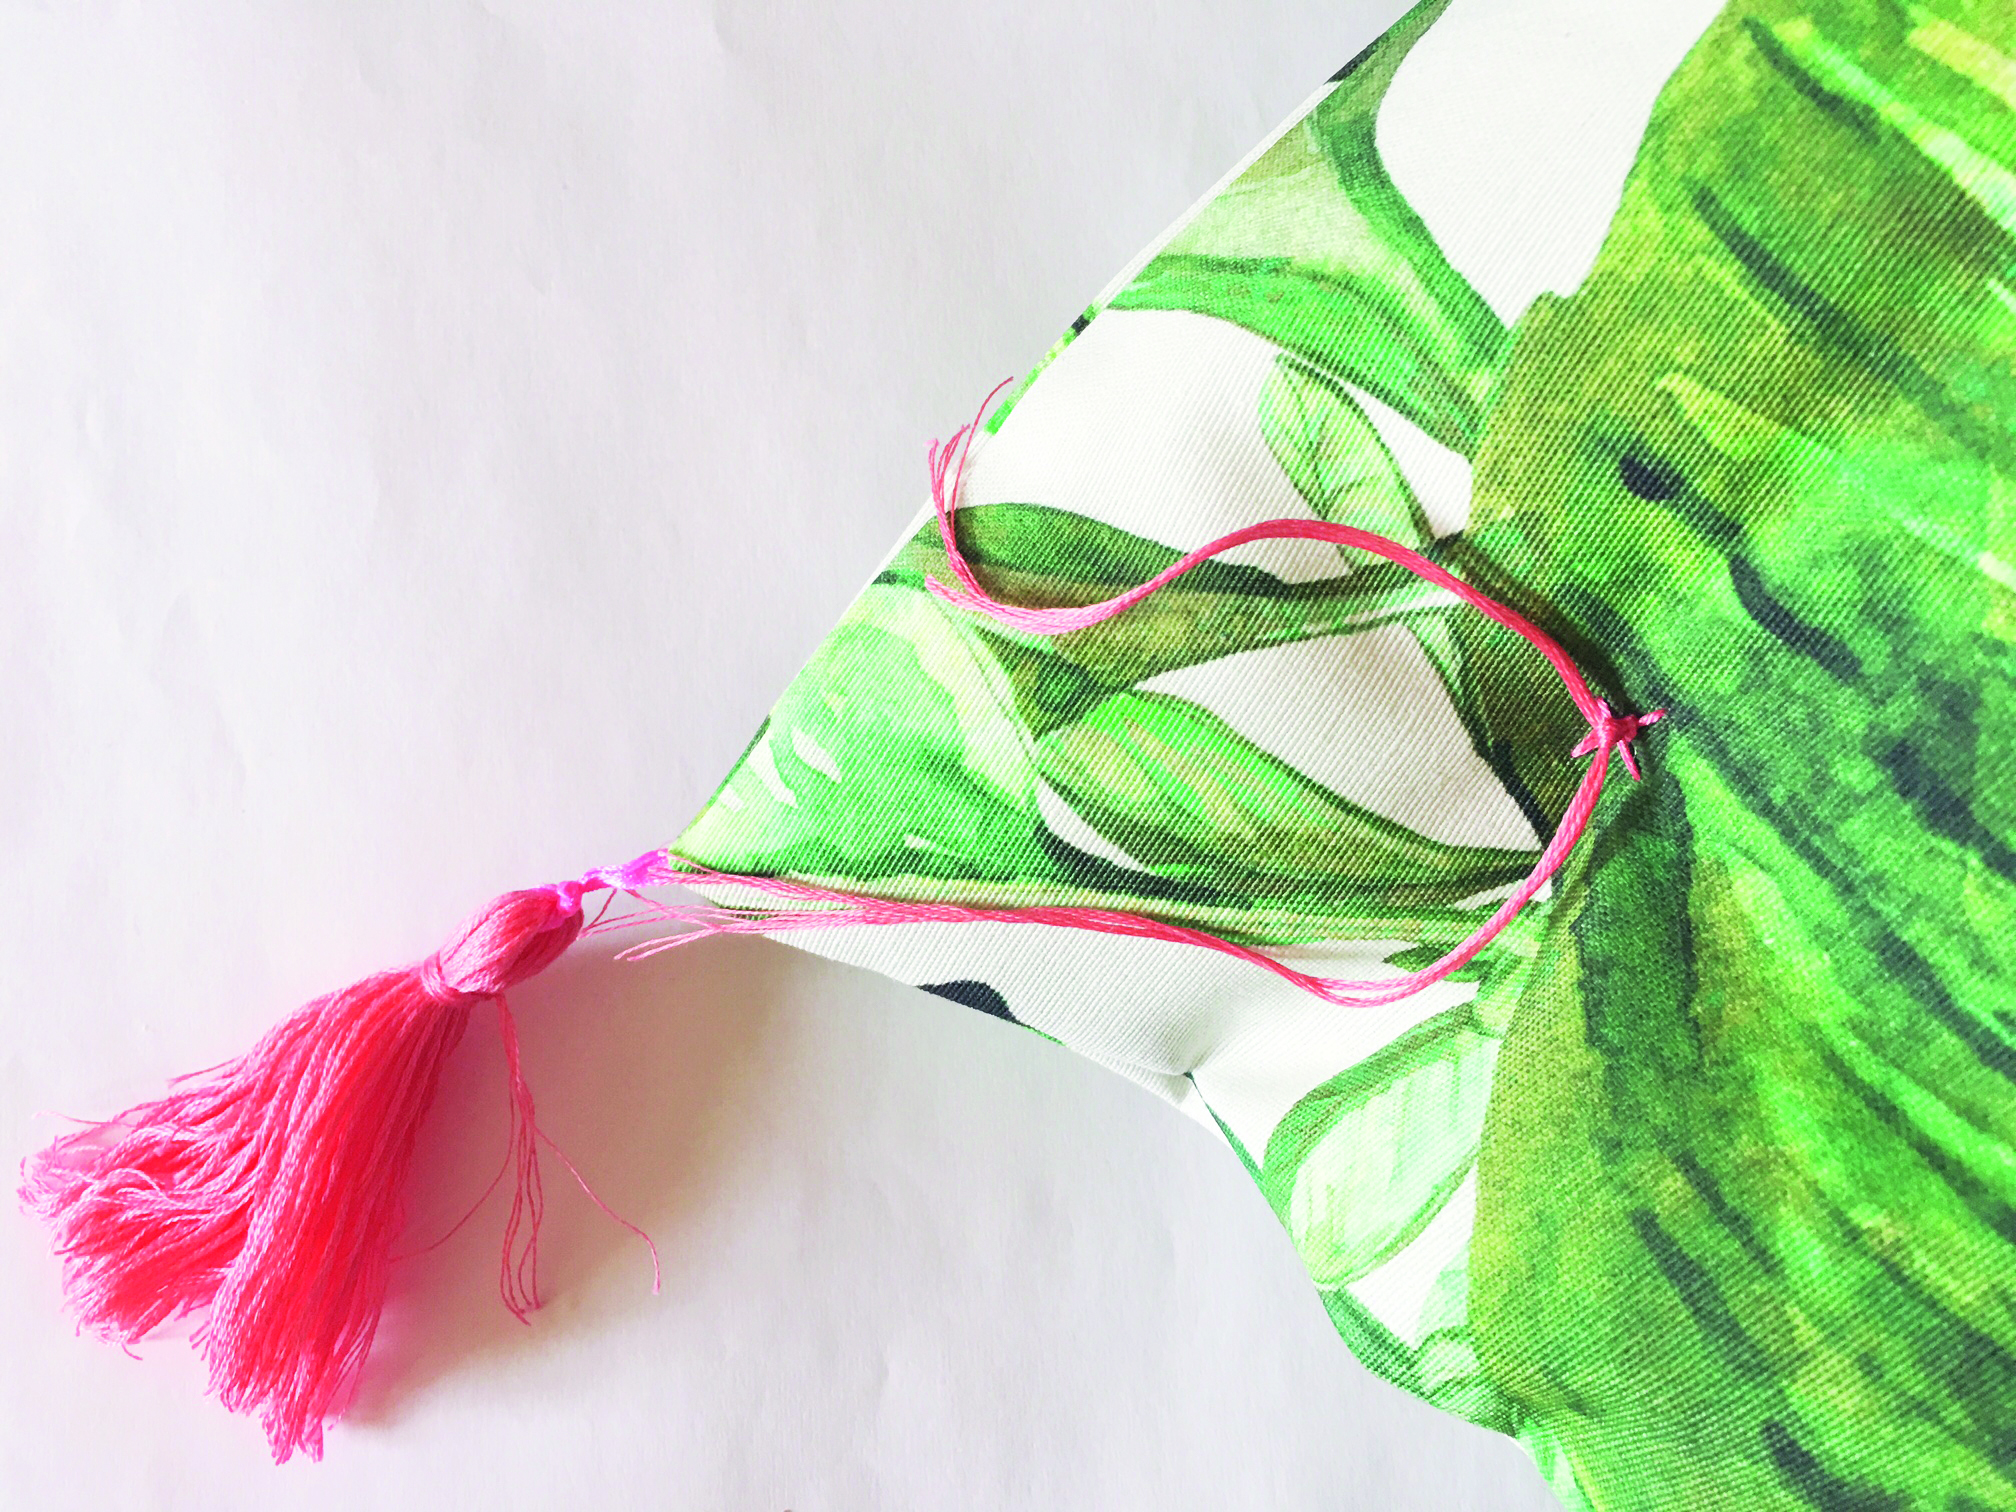 Turn the cushion over with unknotted threads facing. Working in pairs, pull the threads tightly on each cross to gather the filling and create the tufted effect. Knot to secure, then repeat, ensuring all nine crosses are tightened evenly. Trim the thread ends to neaten, then use the ties to attach the cushion to the chair.