Cable knitting tutorial: How to read cable charts & fix mistakes!
Cable knitting tutorial: How to read cable charts & fix mistakes!
Getting to grips with charts and learning how to fix mistakes can transform your cable knitting, as Belinda Boaden explains. This masterclass will help you understand the charts and knit with confidence, and share some expert tips for what to do when things go wrong!
Cable charts are a relatively new phenomenon in the UK, only becoming popular in the last 20 years or so. However, following a pictorial set of instructions for cables makes sense, in much the same way as charts for intarsia do. Rather than long, written instructions for each row, a good chart shows exactly how your cables should look. Once you’ve worked one full pattern repeat, your knitting itself can become your chart – making knitting easier as you’re not having to constantly refer to a book or photocopy of the pattern.
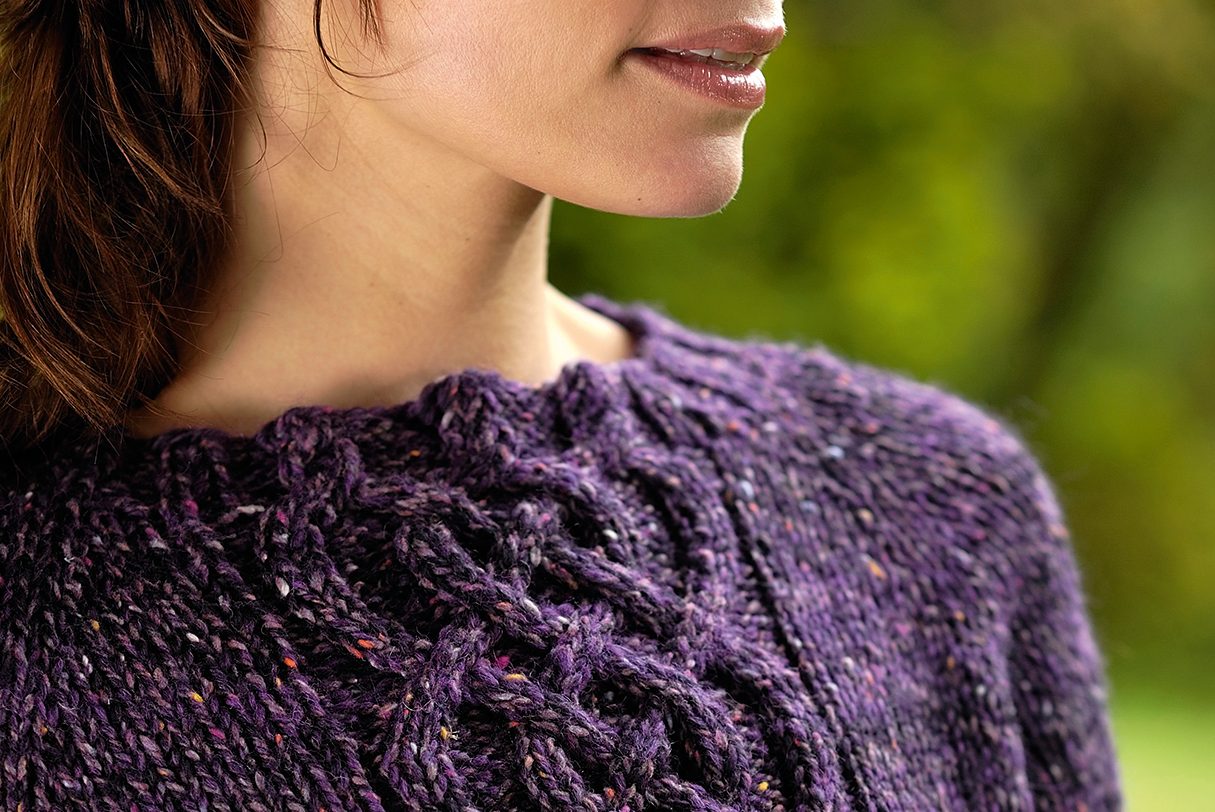
Main image (above): Collared jumper with cable details from Pat Menchini’s Cordelia knitting pattern, as featured in The Knitter issue 133.
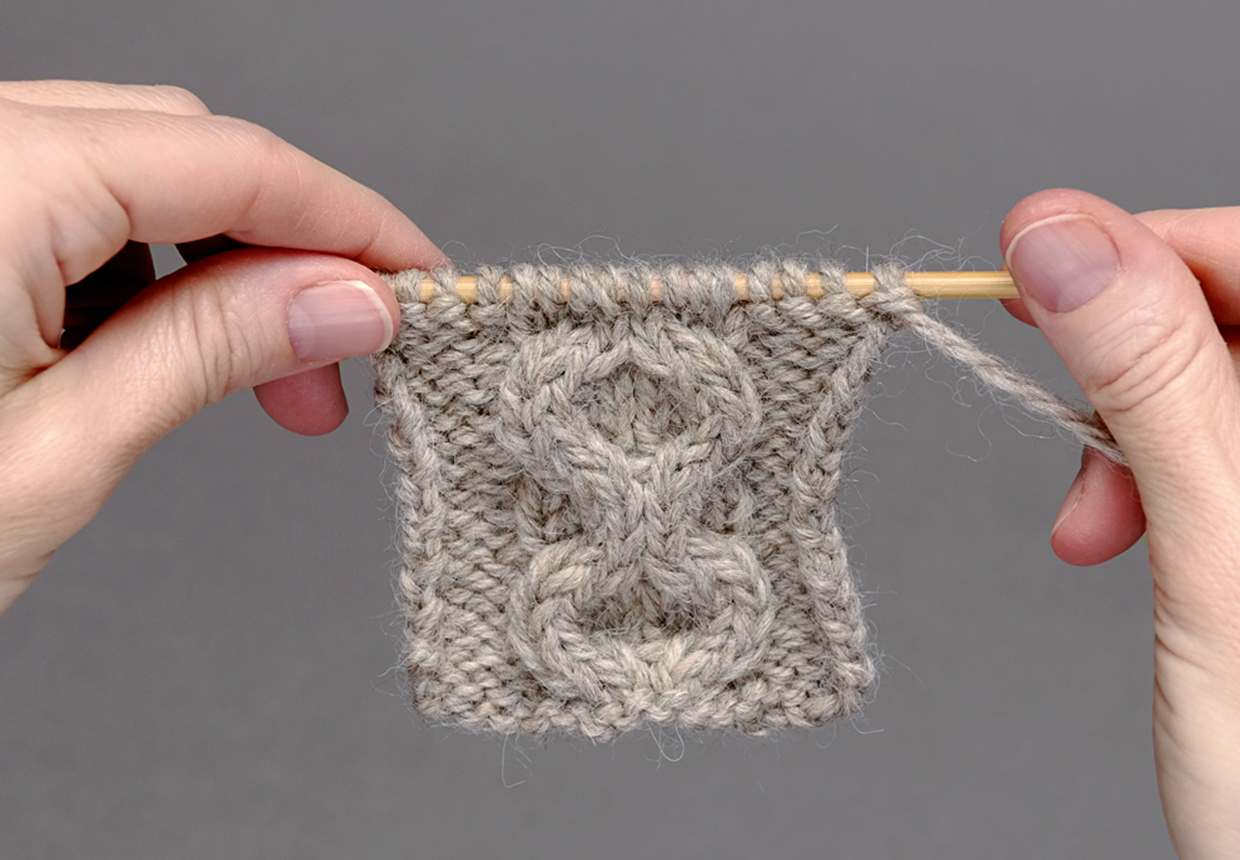
As with all charts, each square represents a stitch, so this is a cable panel of 8 stitches and 16 rows. While at first glance it might look complicated, it’s a compound cable made up of one of the most basic cables you will ever come across: a two-stitch over two-stitch cross either backwards or forwards.
Written out, row 3 (the first row where you need to work cables) would be:
Slip the next 2 stitches to cable needle and hold at the back, K2, K2 from cable needle, slip the next 2 stitches to cable needle and hold at the front, K2, K2 from cable needle.
This could then be abbreviated to ‘C4B, C4F’ if the written-out instructions are given at the beginning of the pattern.
Even then, if you’re not an experienced knitter it might be hard to visualise exactly what it is meant to look like once knitted, and also it can be daunting to see a whole row of 100-plus stitches written in this manner.
[pullquote quote="Tip: If you have trouble with the black-and-whiteness of the charts, it’s very simple to use highlighter pens and allocate each cable symbol a colour, giving you an even more visual cipher for your knitting." /]
Drawn out as a chart, it’s clear to see how for C4B, the first two stitches appear to be moved behind the second two, as the diagonal lines move from bottom left to upper right from the second set of stitches across the first set, showing you that the second set of two stitches need to move over the front of the first set of stitches.
With C4F, the diagonal lines showing the stitch movement draw the eye from bottom right to upper left, making it look like the first set of two stitches is moving across and in front of the second set.
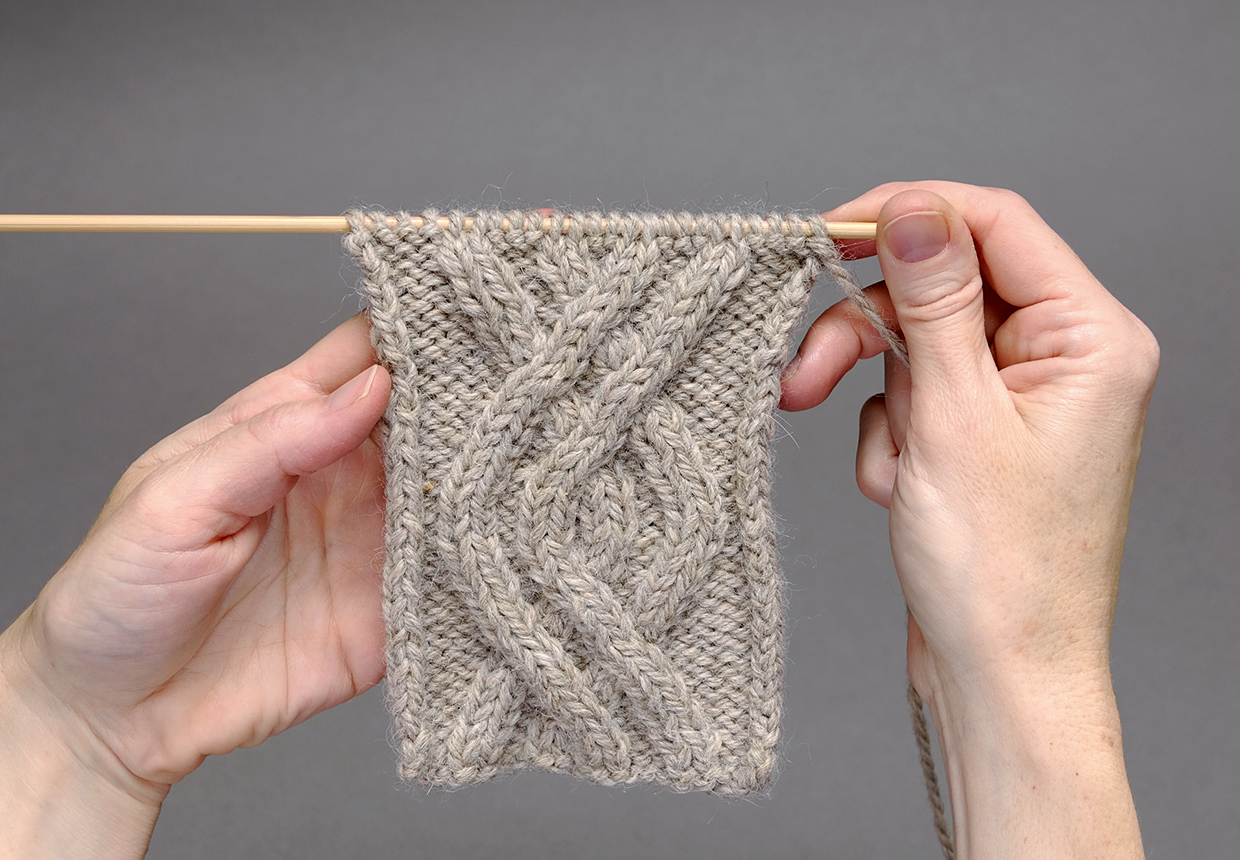
Knitted up, you can now see how this looks, and how the chart visualises the cable for you.
Step 2
How to read cable charts with purl stitches included
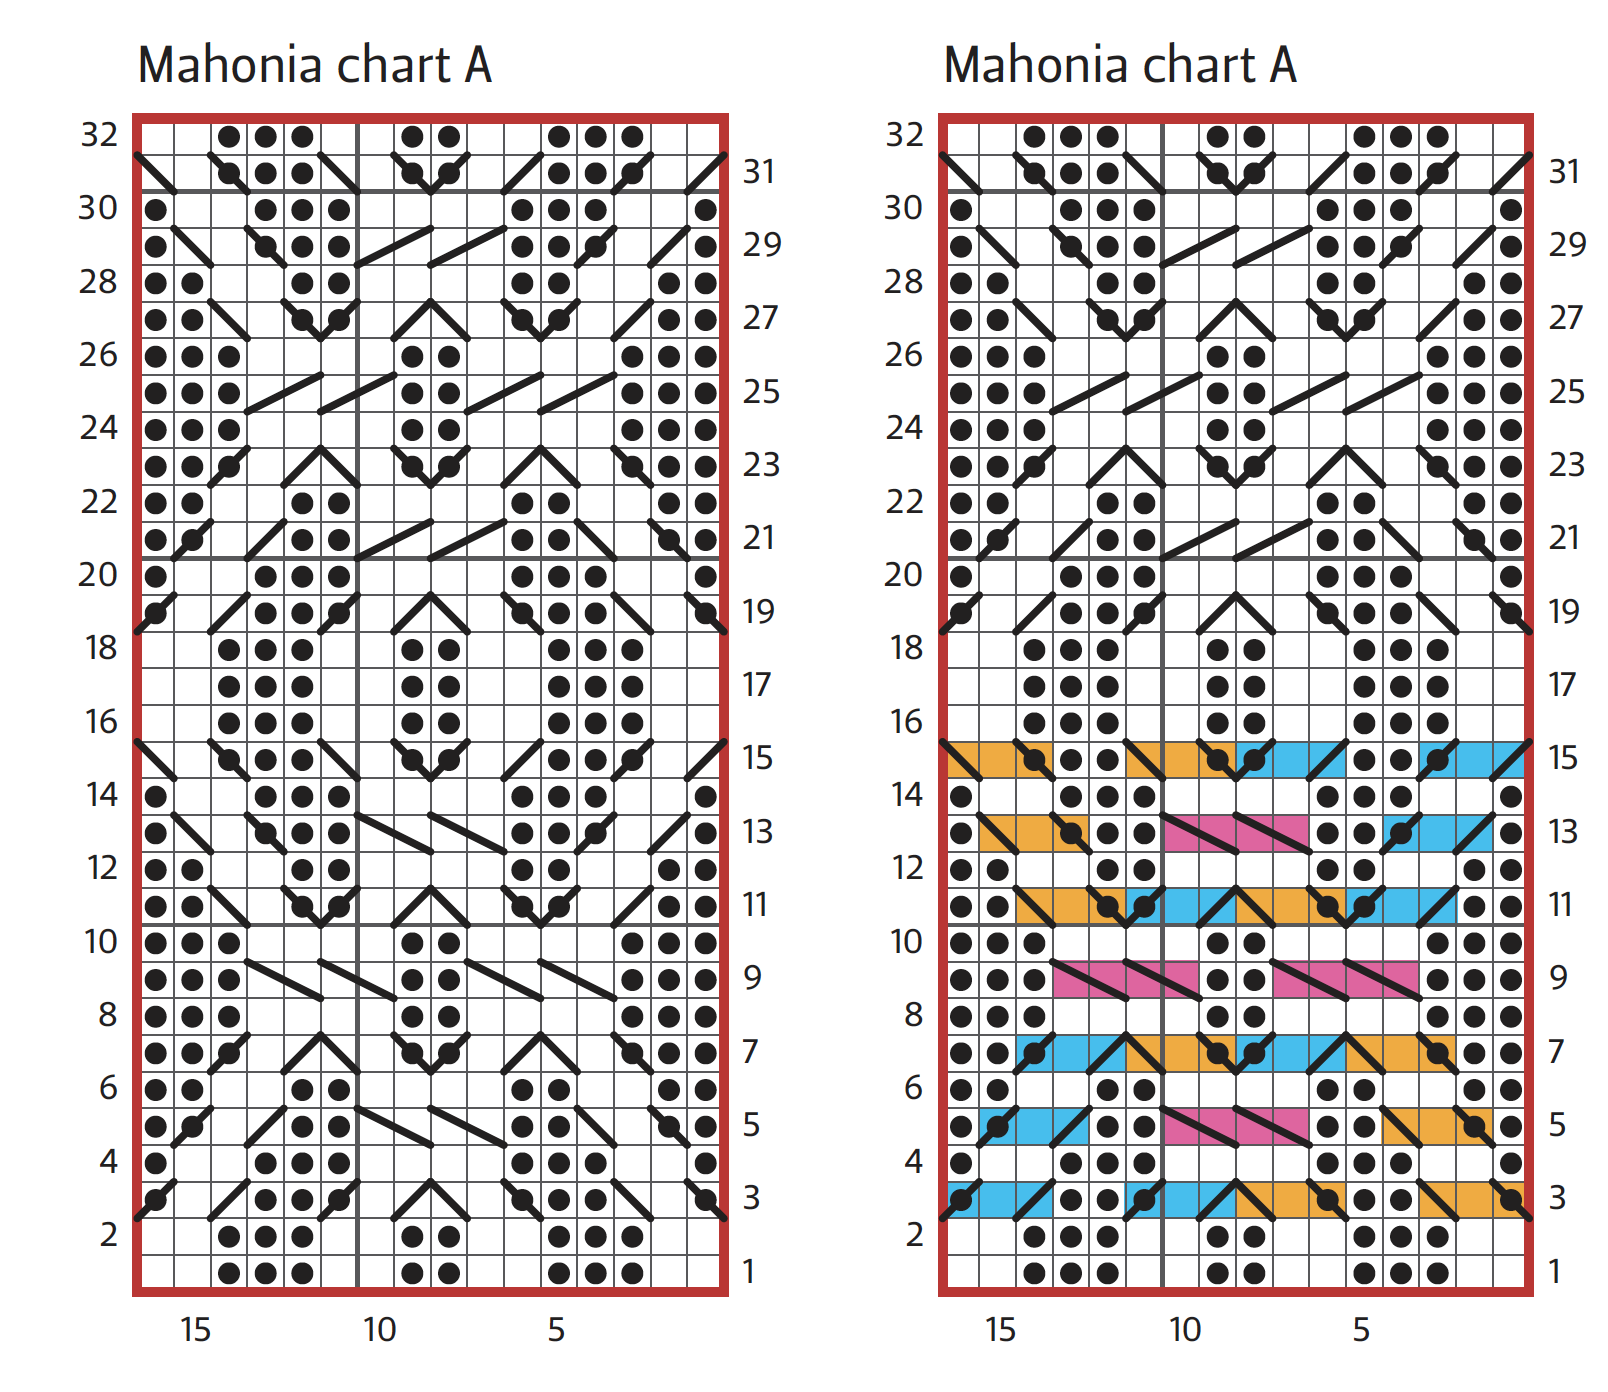
Let’s move on now to a chart with purl stitches included (cable panel A from Mahonia). Not only are we dealing with purl stitches, but also with non-symmetrical cables, where two stitches are moved over one stitch only, and that stitch needs to be a purl stitch to make the reverse stocking-stitch background within the panel.
Highlighted you can see where the C4F from chart A also comes into play on row 5.
Written out, row 3 would be:
(slip the next 2 stitches to cable needle and hold at front, P1, K2 from cable needle), P2, repeat (), [slip the next stitch to cable needle and hold at back, K2, P1 from cable needle], P2, repeat [ ].
This could be abbreviated to ‘T3F, P2, T3F, T3B, P2, T3B’, but perhaps with even fewer clues as to what your finished row would look like than the ‘C4B, C4F’.
The chart, however, clearly shows how the knit stitches set up in rows 1 and 2 move across the background purl stitches, shown by dots in the chart. It is the standard convention to use a ‘blank’ square in a chart to show that the stitch is knitted on the RS of the work, and purled on the WS, and a dot to show a purl on the RS and a knit on the WS.
Knitted up, chart A begins to look quite recognisable.
If cables are comprised only of ordinary knit and purl stitches, then the basics described above work on all charts.
Like many things in knitting, it’s often a lot easier to do than to explain, so any knitter stands to benefit from trying a cable chart at least once. All good charts should have a key with written instructions to get you going; even if they haven’t, though, a few minutes of study and a couple of highlighter pens should be enough to break down the most complicated chart into components that can be easily understood.
Step 3
Understanding Twisted Stitch Cable Charts
Some cables, of course, use twisted stitches or other non-standard stitches, and so for this we’ll look at the chart for the ‘Twisted Diamonds’ pattern from issue 17. Here there are no ‘blank’ knit stitches, but there is a loop symbol. This is to show that all stitches are knitted through the back of the loop, they are even twisted when working a cable. Although the chart looks complicated, there are really only two different cables here: one where two twisted stitches are passed over each other (1 st over 1 st) either backwards or forwards, and one where a twisted stitch is moved right or left over a background purl stitch as highlighted.
So, written out, row 4 would be:
P1, (slip the next stitch to cable needle and hold at front, P1, K1 tbl from cable needle, slip next stitch to cable needle and hold at back, K1 tbl, P1 from cable needle), P2, K1 tbl, P5, slipnext stitch to cable needle and hold at back, K1 tbl, P1 from cable needle, slip next stitch to cable needle and hold at front, P1, K1 tbl from cable needle, P5, K1 tbl, P2, repeat (), P1.
Rather lengthy, isn’t it? Especially if you imagine writing out all 24 rows of this chart – and again, it’s remarkably opaque as to what the knitting will actually look like. The chart, on the other hand, gives you an idea of the row you’re about to knit, and helps you to see the pattern developing as you go. You can also avoid mistakes before you’ve gone so far that they involve much unravelling and despair.
Step 4
Fixing mistakes in cables
Despair need not be a factor in cables, however, even if you do discover a mistake several rows or even patterns back. Here, on our original chart B, the first cable on row 7 has been worked as a C4B instead of a C4F, but it’s not been noticed until row 13. In a garment this could mean unravelling more than a thousand stitches, but there is an alternative. It helps here if you have a spare cable needle as well as the one you’re using, and an old machine knitting needle or latch-hook needle is very, very useful, although a crochet hook can be used.
Work your next row (row 13) until you reach the cable stitches, then drop the next four stitches of the cable off the LH needle and unravel them down to the offending cable.
Now put the first two stitches onto one cable needle and the second two stitches onto another, re-position the cable needles so that the cable is twisted the correct way, and slip them all onto one cable needle.
Now you need to ‘re-knit’ them using the bar of yarn unravelled from the row above, so with the (now spare again cable needle), knit these four stitches. This is a little bit fiddly, but do-able.
Now you can use your latch-hook needle or crochet hook to work the plain rows up to where you need to re-cable the cable on row 11, so work the first stitch on your cable needle up rows, hold it on your spare cable needle.
Repeat for the remaining three stitches.
Once again, split the stitches onto your two cable needles, position them so that the cable is twisting the correct way, slip them all onto one cable needle and re-knit that row. You are left with one ‘bar’ of yarn from the first row you unravelled, row 12, to knit these four stitches with and then you can carry on with row 13 as if nothing untoward had happened.
Your reworked cable might look a little wobbly, but it is easy to even the stitches out by teasing them with a needle. If they still look uneven after that, by the time the garment is blocked, steamed and being worn it is highly unlikely to be noticeable.
Step 5
How to avoid baggy stitches
Another problem some people have with cables is that the last stitch of the cable is often slightly looser than the first stitch of the reverse stocking stitch background,
and looks a little baggy. This does not seem to happen to everybody, and again in some cases is remedied when the stitches even themselves out with the first wash or when they’re wet blocked.
Another solution is to knit until you are ready to cast off your knitting, work to the purl stitch after the offending stitch and drop it down to a few rows above the beginning of your cable (best not to go right to the very bottom unless you are very brave). Turn your work over so that the WS is facing you and the purl stitch you just dropped now has its knit side facing you (it’s easier to pick up knit stitches than purl stitches), take your latch hook or crochet hook and re-knit up all the rows, giving each stitch a bit of a tug to take up some of the slack from that baggy knit stitch.
Or, for slightly less effort just try to knit that last stitch of your cable a bit tighter on each row, just give your yarn a bit of a tug as you bring it to the front of the work to work the next purl stitch.
Master cable knitting and you’ll unlock a new world of texture and pattern in your garments
Textured Cable Stitch detail from Emma Vining’s Holland Park cardigan, as featured in The Knitter issue 133.
Sarahis a craft writer with more than 15 years’ experience in the publishing industry, starting as author of The Good Nutrition Guide, and working on magazines including 3D World, The Simple Things and Simply Knitting. She’s also a knitting designer with a passion for making cosy accessories – you can check out her latest patterns on Ravelry.
This website is owned and published by Our Media Ltd. www.ourmedia.co.uk