
TEST COPY
Creative Publishing International have given you an extract from the book First Time Knitting by Carri Hammett completely free, with essential info on picking up stitches, and a free 'Directional Blocks' scarf pattern! Buy the book here.
Pick up and knit stitches
As your knitting progresses, you will often need to add a border or extra section to a piece of knitting that has already been finished. The stitches can be added on the bound-off edge or along the sides, such as a button band on a sweater. Borders and edges are normally worked in stitches that don’t curl, such as ribbing, seed stitch, or garter stitch.
For the directional block scarf, the technique is used to add the long bands to side of the center panel as well as the two short end bands. You will most often hear this technique referred to as “pick up and knit stitches,” but the words can be confusing.
The stitch isn’t actually knit as it’s being picked up; rather, it is picked up knitwise onto the right needle to be knit (or purled) on the next row. Stitches are picked up with the right side of the work facing and using a separate ball of yarn.
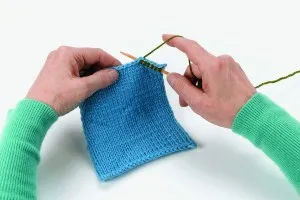
Step 1
When picking up stitches along a cast on or bound off edge, insert the right needle from the front to the back, going under two strands along the edge.

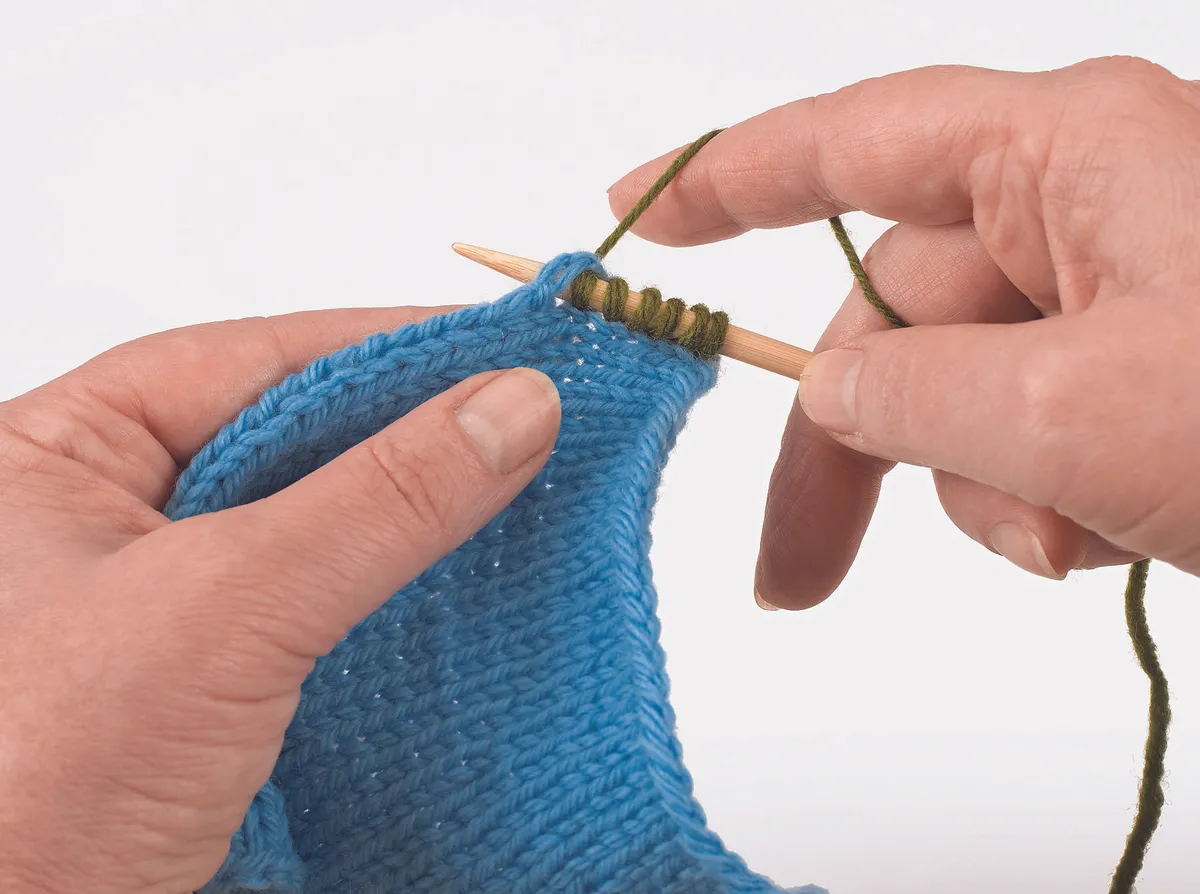
Step 2
Wrap the yarn around the needle as if you were knitting and pull a loop through and onto the right needle.
You have picked up one stitch.
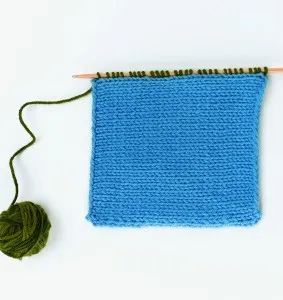
Continue in this manner until the required number of stitches has been added. The number of stitches to be picked up varies depending on the edge from which you will be working.
Typically, if stitches are being picked up from a cast-on or bound-off edge, then 1 stitch should be picked up for each stitch on the edge. After the desired number of stitches have been picked up, then turn the work to the wrong side and continue with the directions (knit, rib, etc.).
Step 3
When picking up stitches along a side edge (or selvedge edge) insert the needle into the space between the first and second stitch. Wrap the yarn around the needle as if you were knitting and pull a loop through onto the right needle.
Step 4
f you are working along a side edge (or selvedge edge) of a scarf or sweater front, then you should not pick up a stitch for every row. Knit stitches are wider than they are tall, so stitches should be picked up in a ratio of about 3 stitches for every 4 rows or 5 stitches for every 7 rows. Don’t worry about the space created by skipping a row; it won’t be visible after the first row of knit or purl stitches is made. After the desired number of stitches have been picked up, then turn the work to the wrong side and continue with the directions (knit, rib, etc.).
Working with self-striping yarn
Self-striping yarn is dyed with intervals of changing colors that make stripes when knit. Because the intervals are fixed, for instance, 20 yards of one color connected to 20 yards of the next color, then the height of the stripe remains fairly consistent as long as the width of the knit object remains the same.
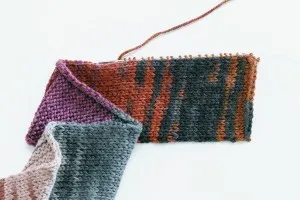
The scarf here has a narrow central panel with tall stripes composed of many rows of the same color. Attached to either side of the center panel are two strips that are knit the long way. Because this section is very wide (thirteen times more stitches than the center panel), it has very short stripes, sometimes 2 rows or less of a color.
This schematic (below) shows the different sections of the scarf. When working with self-striping yarn, it is important to remember that the number of stitches in the row will dictate the height of the stripe. If you make a cardigan sweater from self- striping yarn, then you can expect that the back, front, and sleeves will have stripes of differing heights because the width of each of those pieces is different. The scarf also combines stockinette stitch with garter stitch, and you’ll notice how different self-striping yarn can look depending on the choice of stitch.
Making seams — mattress stitch
Many knit garments require a seam of some sort; typically shoulders, sides, and sleeves are seamed. The quality of the seams and finishing on a garment are very important for its overall appeal. It’s worth the time to learn how to seam neatly and securely. This is a skill that really must be practiced on swatches before sewing the seams on the garment you spent such a long time knitting. Before seaming, the garment pieces should be blocked to make sure the size and shape match the pattern and also to make the sides smooth and even for easier seaming.
In general, the same yarn that was used to knit the pieces should be used to make the seam. Exceptions would be highly textured or very thick yarn, in which case use a thinner yarn of the same fiber type in a matching colour. The type of seam taught here is often referred to as the mattress stitch. It’s a method of invisibly seaming by weaving the yarn back and forth between the two sides. To aid in learning the technique use a contrasting yarn for making the practice seams, but remember that when you sew a garment together you want to use matching yarn. You should work on a flat table with adequate light and a comfortable chair.
Using a row counter
The easiest way to make sure the pieces have exactly the same number or rows for seaming is to use a row counter. Keep track of the number of rows used to make the back using a row counter. When you make the two fronts, be certain they have the same number of rows as the back.
You will have an area after the last decrease for the neck shaping to knit even (without increasing or decreasing) where you can adjust the row count to be equal to the back. Likewise, keep track of the number of rows completed to make the first sleeve and make certain the second sleeve matches.
How to knit a scarf with directional blocks
The unique characteristics of self-striping yarn are used to create a scarf with directional blocks. This scarf is made by knitting a narrow center panel and then adding long strips along the sides, and finishing with small strips at each narrow end.
The technique is somewhat like making a quilt, and can be used with self-striping yarn as shown, but would also be very effective with different colours.
You will need
- Yarn – medium weight self-striping yarn, approx. 310 yd (283.5 m)
- Needles and notions – US size 7 (4.5 mm) 9" (23 cm) single-pointed needles or size needed to achieve gauge
- US size 5 (3.75 mm) circular needle at least 32" (81 cm) long, or two sizes smaller than size needed to achieve gauge
- Yarn needle for weaving in ends
- Rustproof pins for blocking Gauge (tension) – 20 sts = 4" (10 cm) in stockinette stitch
Finished size
6in (15 cm) wide by 51in (130 cm) long
How to knit the scarf
Knitting the centre panel
Using larger needle, cast on 17 sts.
Row 1 (RS): knit.
Row 2: purl. repeat rows 1 and 2 (stockinette stitch) until length from cast-on edge is approximately 46" (117 cm).
Bind off stitches.
Pick up stitches for first side block using the smaller needle. position the centre panel with the right side facing you and the length running from side to side. Starting from the right corner and using the smaller needle, pick up and knit 3 stitches for every 4 rows of knitting.
Work across the entire long edge; you should have about 225 stitches. don’t worry if your stitch count varies by a few stitches. Your goal should be to pick up somewhere in the neighbourhood of 225 stitches.
Knit the side band
After picking up the stitches for the side band, work 16 rows in garter stitch (knit every row).
Bind off from the wrong side.
If you have a tendency to bind off tightly (your bound-off edges tend to curve), then use a needle one or two sizes larger for the bind-off needle.
Repeat steps 2 and 3 for other side of centre panel.

Pick up stitches for end bands
Position the scarf with the right side facing you and the short edge up.
Starting from the right corner of the short edge of the side band, pick up and knit 8 stitches 5 from the side band, 15 stitches from the centre panel, and 8 stitches from the other side band. there should be a total of 31 stitches.
When picking up stitches from the side bands, pick up 1 stitch from each garter ridge.
Knit end band
After picking up the stitches for the end band, work 16 rows in garter stitch (knit every row). Bind off from the wrong side.
Repeat steps 5 and 6 for other end. Finish scarf by weaving in all loose ends and steam blocking.

