Blocking can transform your finished knitting, smoothing out imperfections in the fabric and allowing you to shape the item as desired. In this guide I'll show you the special methods of blocking that you can use for hats, gloves, mittens and socks. Start by blocking your accessories as you would any other knitted garment (see my detailed instructions how to block knitted garments), then follow the steps below…
Hats
Depending on the shape that you wish to achieve, hats can be blocked in a number of ways. For a beret or tam–style of hat, stretch the damp hat over a dinner plate (or other suitable disc–shaped form) of the correct diameter. If you would like your hat to be particularly stretched, you can thread a strong cotton yarn through the ribbing or brim and pull it tight and tie. This can help prevent the brim overstretching, which could lead to a hat that doesn’t stay on!

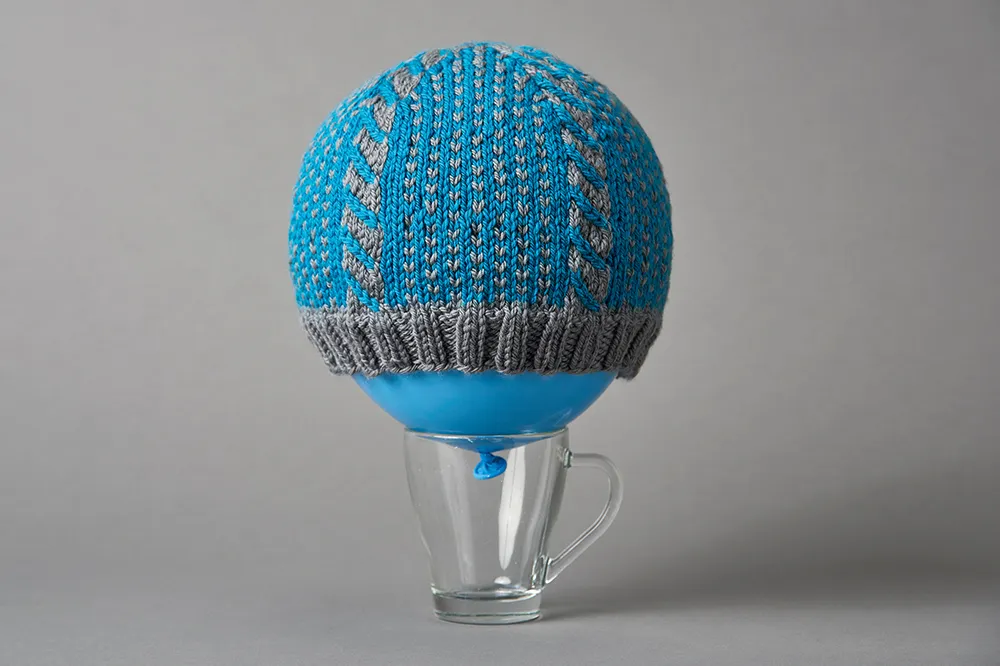
For a beanie–shaped hat, you can simply lay it flat to dry, but you’ll get a more pleasing finished shape if you dry the hat over a head–shaped form. You can purchase traditional wooden hat forms that are absolutely beautiful, but it’s just as easy to use a balloon. Inflate a round balloon to the desired head circumference and tie it shut. Then simply pull the hat on over the balloon and leave it to dry. If you aren’t keen on balloons, then you can stuff your hat to the required circumference using plastic bags – just be sure to avoid any unsightly lumps and bumps. As with sweaters, it’s well worth taking the time to smooth any colourwork and ensure that cables or other motifs are lying correctly and evenly.
Mittens and gloves
While mittens and gloves can easily be shaped as you wear them, it is nice to be able to present them looking their best if you are making them as a gift! This is where a blocker can come in handy.

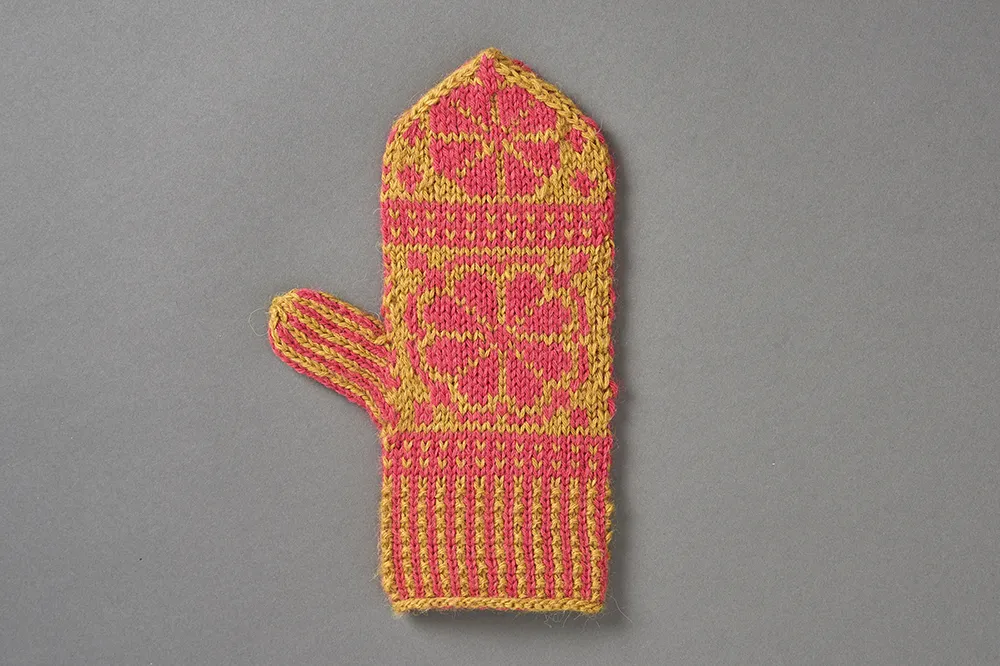
Mitten and glove blockers are simple to make from a thin sheet of plastic (such as the cheap table mats available from Ikea), or from cardboard covered in sticky tape or sticky–backed plastic. Measure your hand circumference above your thumb, and divide this length in two. This is your hand width. For mittens and the palm of gloves, cut two strips as wide as the hand width and longer than you’d want your mittens or gloves (approximately 9cm x 25cm would be a good starting point). Trim the top end of the strips to give a curve and avoid sharp corners to catch on your knitting.
Measure your thumb circumference, and divide it in half to give the thumb width. Again, cut two strips as wide as the thumb width, and longer than your thumb, trimming the tops to a curve. For mittens you now have all you need. For gloves, continue cutting strips for your fingers in the same way – it may be worth labelling your little fingers and your thumbs separately with a permanent marker. The index, middle and ring fingers are likely to be similar sizes and it’s not normally necessary to differentiate them. Each strip should be longer than required.
To use the blockers, carefully poke the thumb strip into the thumb of the mitten or glove. Shape the fabric around the blocker so that it’s lying correctly. For gloves, insert the finger strips into each finger. The benefit of the strips all being separate is that it makes it easier to manipulate them into the glove! Once all the fingers are neat, you simply pop the hand part into the glove or mitten and allow it to dry completely.
Socks
As with mittens and gloves, most of the time you can wash your socks and then just wear them to shape. They are usually designed with some negative ease so that they don’t fall down, and as such will stretch nicely on the foot as they are worn. Once again, though, if you want to take pretty photographs of your socks, or if they are intended as a gift, blocking them over a suitable sock form can transform the appearance of the sock leaving the needles.
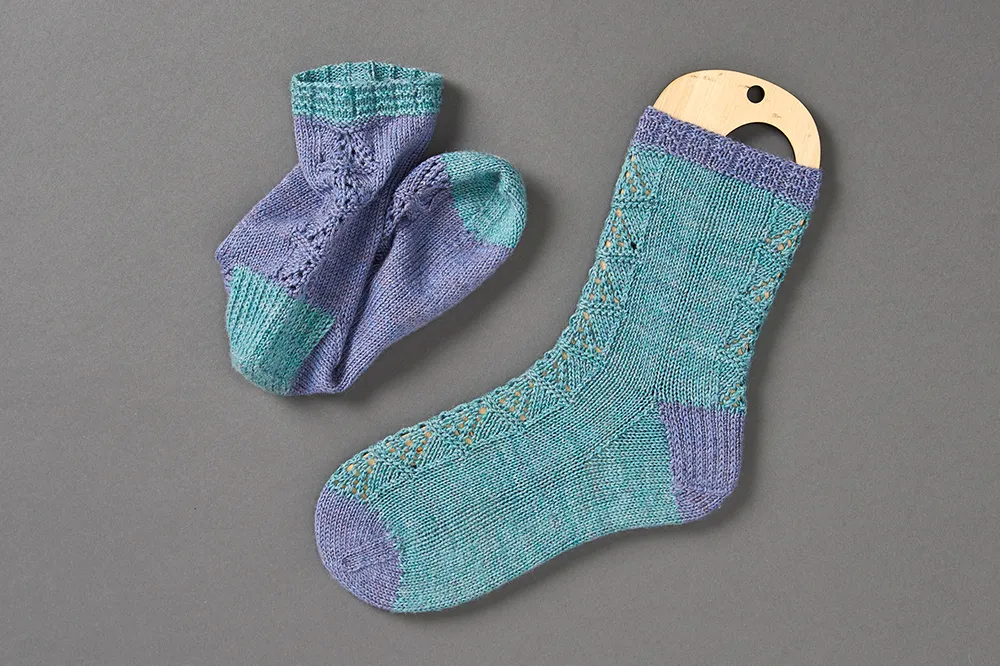
There are a number of styles of sock blockers available to purchase – bespoke wooden sock blockers, stainless steel hanger–like sock blockers, and plastic sock blockers being the most common. However, as with mitten blockers, it’s relatively easy to make your own from a thin sheet of plastic, and there are many online tutorials that will show you how to measure your feet to make exactly the correct size.
Careful blocking can help to even out many imperfections in your knitting, and is well worth taking time over.
For more finishing advice, see our guide to blocking garments such as jumpers and cardigans here.