Finding the right buttons for knitting to complement a handknit can sometimes be a challenge. You might discover the perfect colour, only to find the size is all wrong; or you may want a button that blends in with your garment, rather than standing out. It’s easy – and cheap – to make your own buttons to suit any project. Here, we bring you seven methods to try.
Make you own fabric-covered buttons
Most haberdasheries sell self-cover buttons, which come in a wide range of sizes. This lets you make your own buttons by covering them in a fabric of your choice. They are made of two parts: the face, which you cover with the fabric, and the back plate, which snaps on to hold the fabric tightly in place.
To cover your own, simply cut out a circle of fabric around 5mm larger than the face, fold it over the face and catch it on the row of ‘teeth’ around the inside edge of the face. Then simply snap on the back.
Wrap a self-cover button in fabric.
Make your own knitting buttons
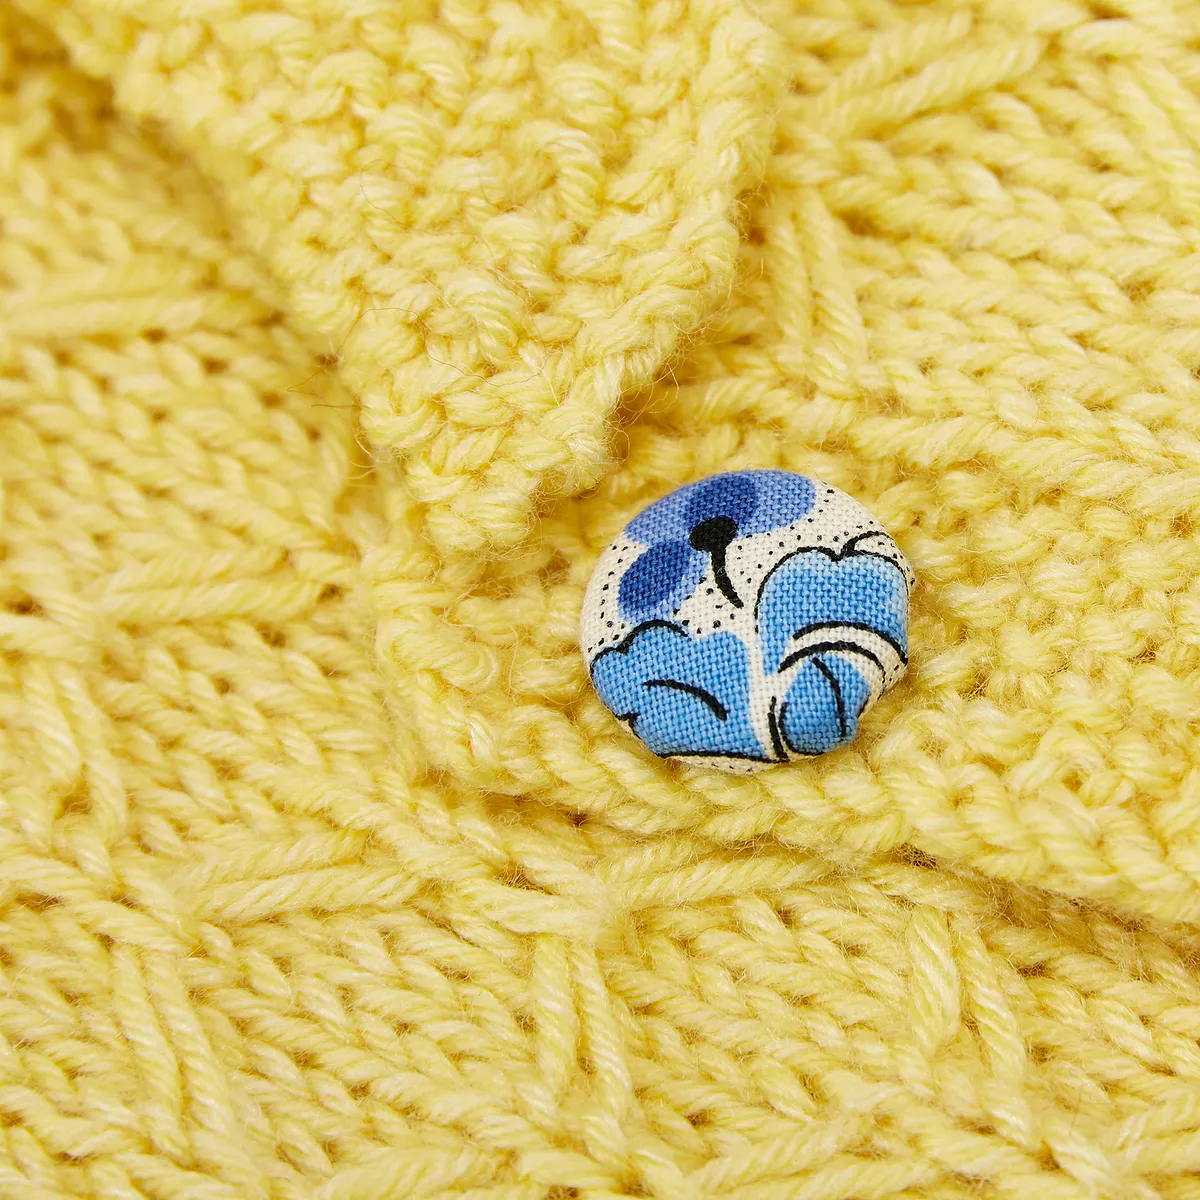
Self-cover buttons can also be covered with knitted fabric. It’s best to use needles slightly smaller than those recommended for your yarn, to make a tight fabric – our sample shows a 4ply yarn worked on 2.5mm needles.
You will need:
Self cover buttons
Wool
Knitting needles (a size smaller than recommend for your yarn)
Darning needle
Step 1
To make a simple hexagon, cast on four stitches then knit in the stitch pattern of your choice, increasing one stitch on each row until the piece is slightly larger than the button face.
Step 2
Work two rows straight, then decrease one stitch per row until you reach your original cast-on number.
Step 3
Cast off, leaving a long yarn tail.
Step 4
Place the fabric over your button face, catch the edges on the teeth, and use the cast-on tail to work a row of running stitches all around the edge. Draw it tight and secure with a few stitches.
Step 5
Fit on the backing plate – this can be tricky if your fabric is thick, so try using a pair of pliers to press it on. If necessary, you can leave the backing plate off, and simply sew the button onto your garment.
Here, we’ve used stocking stitch, but moss stitch, coloured stripes and mini cables are incredibly effective, too.
Knit a simple hexagon to cover a button.
Knitted bobbles
3) If your project would suit tiny buttons, you could consider using knitted bobbles.
Make a slip knot, leaving a long yarn tail.
Row 1: Knit into the loop, but keep it on your needle; now knit into the back, front, back and front again of the same stitch, and slide the stitch off the left needle. 5 sts.
Row 2: Purl.
Row 3: *K1 without dropping stitch off needle, yo, knit into the same stitch again. Rep from * to end. 15 sts.
Row 4: (P2tog) along row to last 3 sts, P3tog. 7 sts. Now lift the second st on the left needle over the first st and off the needle. Repeat for every stitch on the left needle until one stitch remains.
Cut yarn, leaving a long tail, and thread through the remaining stitch. Tie the two yarn tails together firmly, forming a bobble shape; shape it gently with your fingers until it is round.
You can use knitted bobbles as buttons.
Crochet buttons
If you’re comfortable with a few basic crochet stitches, you can make a variety of buttons. Here we give two examples (UK crochet abbreviations are used).
4) Lozenge button: Ch11, turn and dc in the second ch from hook and in each ch across (10 dc) – turn with a ch1. Work 5 rows more, working through the back loops only. Sew up one end, fill with wool, then sew bottom and other end.
This crochet lozenge is stuffed and seamed.
5) Round button: Ch4 and ss in first ch to make a ring. Ch3 (counts as a tr), work 15tr in ring. Break off yarn, leaving a long yarn tail; thread this through a yarn needle. Make a stitch into the top of each treble, pull threads tightly together to form a dome shape, then sew the yarn across the back.
Use basic crochet stitches to create this button.
Yarn-covered rings
6) You will need a ring shape to form the base of your button; this could be a small curtain ring, a plastic washer or even a circle of plastic cut from a yogurt pot, with a hole in the middle. Use a length of yarn at least one metre long, threaded onto a yarn needle. Sewing through the centre of the ring, wrap the ring base until it is completely covered, as if you were making a pompom. Once covered, sew around the edges of the ring using blanket stitch, looping through the top layers of yarn. Fasten off at the back.
Make a yarn ring as you would a pompom.
Dorset buttons
7) These traditional buttons made of yarn look wonderful on handknits and are fun to make. We covered their construction and history in detail in issue 36 of The Knitter. For expert guidance on Dorset buttons, take a look at Jennifer Best’s website.
To make a simple Cross Wheel button, stitch around a brass curtain ring in blanket stitch using your chosen yarn, until the ring is completely covered. Turn all the stitches so they face inwards.
Create ‘spokes’ around the ring by wrapping the yarn evenly around the ring, 12 times. Make a couple of stitches in the centre of the wheel to hold the spokes in place. Now the yarn must be wound around each spoke using back stitch. Bring the yarn up from the back between two of the spokes.
Take the thread to the back of the ring around the first spoke and bring it up between the next two spokes. Repeat until you reach the start of your round, and continue back-stitching rounds in this way until the entire button is filled. Secure the yarn at the back.
As Operations Editor of The Knitter, Helen makes sure that everyone works together to produce the best magazine they can – and that they hit their deadlines! As well as keeping the magazine running smoothly day-to-day, she sources all the latest stories for the news section, writes features, interviews top designers, and checks every word that makes it into print. When she gets a spare minute, Helen enjoys reading knitting books and blogs, and working on her own projects. Her first love is lace, but she’s also on a mission to improve her stranded colourwork so she can cast on more Fair Isle projects from her favourite designers, Kate Davies and Mary Henderson.
This website is owned and published by Our Media Ltd. www.ourmedia.co.uk