All products were chosen independently by our editorial team. This review contains affiliate links and we may receive a commission for purchases made. Please read our affiliates FAQ page to find out more.
How to cross stitch for beginners: your complete guide
Want to try counted cross stitch for the first time? Great idea! Here is our complete guide to cross stitching for beginners.
Cross stitch is a particular kind of embroidery worked on a gridded fabric where each stitch is a little x. As you work each stitch in different colours you'll build up amazingly detailed scenes, or create small motifs with the lovely texture and sheen of embroidery.
undefined
Because every cross stitch is composed of just two tiny stitches, it's quick and easy to master the basics. This beginners' guide will give you the skills and knowledge you need to start cross stitching straightaway.
How to cross stitch step-by-step
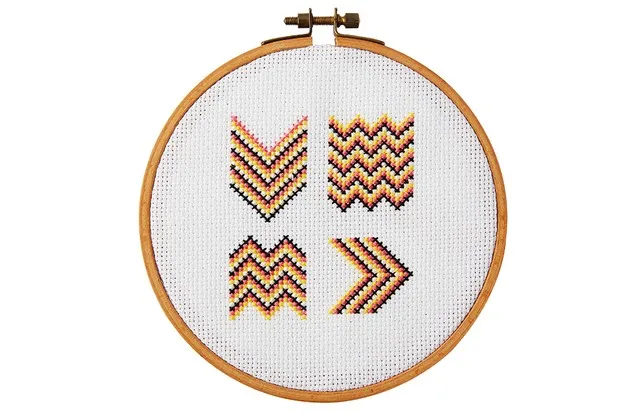
We'll be starting with the chevrons design shown above. The beauty of this design is that you can use any colours you want and you won't have to rethread your needle too often. To recreate the design above, download our Free chevrons pattern.
We are stitching on 14-count aida, which is the most common gridded fabric for cross stitch and a great choice for beginners. It is stiff and easy to handle, with clearly defined holes in the fabric. For other kinds of fabric, check out our fabrics guide.
You usually use two strands of cotton for stitching on 14-count aida. If you are using a different fabric count, found out how many strands you should use in our threads article. Embroidery cotton comes in six-stranded skeins – split it into individual strands and put two together before you thread the needle.
You will need:
DMC stranded cotton
14 count aida fabric
Tapestry needle
Step 1
Start by threading one of your cross stitch needles with two strands of cross stitch thread and knot the opposite end. Take your needle down through the aida, a short distance from where you want to start stitching then back up where you first stitch will start, leaving the knot on the surface. We’ll snip this off later once the thread is secure. Starting your cross stitch like this is called the waste knot method.
Step 2
You can now stitch towards your starting knot, following our free chevrons cross stitch pattern chart as a guide for your stitches. Each symbol on the chart represents one cross stitch on the fabric. Work the first part of the stitch by making a diagonal stitch. This should sit from the bottom left to top right over a single aida block.
Step 3
To complete this cross stitch, make a second diagonal stitch, this time working it from bottom right to top left, crossing over your previous stitch. The different coloured chart symbols represent different colours of stranded cotton – you can choose whichever colours you prefer for this simple design.
Step 4
Continue working towards your starting knot – your stitches will secure your starting thread on the reverse of your work. Once you reach the knot, snip it off. To finish your thread, simply pass it through the reverse of your stitches a few times so it’s secure then cut off the end.
How to separate cross stitch strands
Often for various cross stitch and embroidery projects, you will need to separate out your threads as certain stitches require a certain number of threads. As you might know, each thread contains six strands, and can sometimes become a bit of a chore if you don’t use the right technique (hello knots!). So to avoid those tangles and knots we’ve made a quick video to help you separate your threads in a quick and easy way.
Step 1 – Take a cutting of thread
Step 2 – Hold it gently between your index finger and thumb
Step 3 – Pull and single thread away from the other 5
Step 4 – Pull the thread forwards gently away from you
Top tip: keep your hand relaxed and don’t pull the thread hard!
Cross stitch chevrons onto white linen fabric using your new skills for a graphic look and a cross stitch for beginners project that does not need any specialist fabric! Cross stitch may be thought of as quitea traditional technique, but that doesn’t mean it can’t be used in a modern way – just look at these contemporary chevrons and a great project for cross stitch for beginners! Bring this classic embroidery technique up to date by using it in unexpected ways, like we’ve done here with this stitched panel on crisp white linen – backed and framed with white cotton fabric. It’s a creative way to incorporate graphic prints into a modern home. See our colourful chevrons in a hoop above for how to perfect this versatile stitch. If you like a more contemporary look, take a look at our best modern cross stitch kits post.
What is counted cross stitch?
Counted cross stitch designs are stitched from charts onto a clearly gridded cross stitch fabric, such as aida or evenweave. For each symbol you see on the chart, you need to make a cross stitch on the fabric. Counted cross stitch is different from printed or stamped cross stitch, where the pattern is printed onto the fabric and you work your cross stitch on top of it without needing to refer to a chart. In counted cross stitch you need a chart with an accompanying key to recreate your chosen cross stitch design.
The key tells you what symbols on the chart correspond with which colours of cross stitch thread. Gathered’s cross stitch charts and keys are also colour tinted to help you pick out different areas of the design much more easily. The key tells you how many strands of thread to use for the cross stitch and backstitch, and whether there are any French knots or other stitches used in the design. The key also often tells you what the stitch count of the design is and gives you its finished size if it’s stitched on the recommended fabric.
The centre of most cross stitch charts is specially marked. This is the best place to start stitching, so you end up with the design stitched in the middle of the fabric. The centre of our charts on Gathered is where the heavy vertical and horizontal lines intersect – these lines are marked by triangular black arrows. To find the centre of your fabric, fold it in half horizontally, open it up and fold it vertically. When you open the fabric again, you’ll find the creases mark the centre. Start stitching with the colour that’s nearest to the centre of the chart. The charts are divided up every 10 squares, to make counting easy.
Essentials on how to cross stitch
Step 1 – Choose your project
Make sure you choose the right level for you – if you’ve never tried cross stitch before, it’s a good idea to start with kits or charts that are marked for beginners. Absolute beginners should choose a design without fractional stitches – look for a pattern that’s made up of whole stitches, with a bit of backstitch detail, and that isn’t too large, so you can try it out and see results quickly. For any terms you are not sure about, check out our cross stitch glossary
Step 2 – Gather your materials
Cross stitch kits come with all the fabric, needles and thread you’ll need to sew the design inside. If you have a cross stitch pattern only as opposed to a cross stitch kit, you’ll need to buy the materials you need. As a beginner, you should buy the recommended cross stitch fabric and the cross stitch thread listed in the key, but click these links to find out more about these and gain the confidence to adapt designs to different sizes and colours! Before you start to stitch, sort out the threads into different shades and mark which symbol they match on the chart. Many cross stitchers use a thread sorter for this.
If you’re stitching from a cross stitch chart then you’ll also need to buy cross stitch fabric, cross stitch thread and cross stitch needles. The chart should say which fabrics the design is intended for. We recommend starting with Aida fabric – it’s more beginner-friendly than evenweave or linen fabric. You can try those later! You’ll also see a list of the threads you need in the chart key.
We recommend always starting from the middle of the design. This is usually marked in some form (for example with arrows, a ‘0’ or triangles) around the edges of a chart. Look for this symbol on the key for the colour of thread you need, plus the number of strands. Thread your needle with this colour.
Step 4 – Find the centre of your fabric
Fold your fabric in half horizontally and vertically to find the centre of that as well. The folds will make a cross, which corresponds to the cross at the centre of your chart.
Step 5 – Get stitching!
You’ve now got all of the essentials on how to cross stitch and it’s time to make your first project! Bring the needle up at the bottom left corner of a square and down at the top right corner. Then repeat in the opposite corners to complete the stitch, with one arm ‘crossing’ over the top of the other. You should leave a long tail of thread before this first stitch, so you can catch the thread under the stitches as you work, securing it in place.
You can also use the loop method to secure your thread to the fabric before starting – this only works when using a single strand of thread doubled over in the needle, creating a loop at one end. Make the first arm of your cross stitch as above, but leaving the looped end of thread hanging loose at the back of the fabric. Then pass the needle through the loop before completing the top arm.
To finish a thread, leave a thread tail of a minimum of 4cm (2in) on the back of the fabric, and catch it under a few nearby stitches to secure it, then trim all loose ends with embroidery scissors. We recommend finishing all the cross stitch in your design before you work the backstitch or add any French knots – see our video guide on How to do French knots.
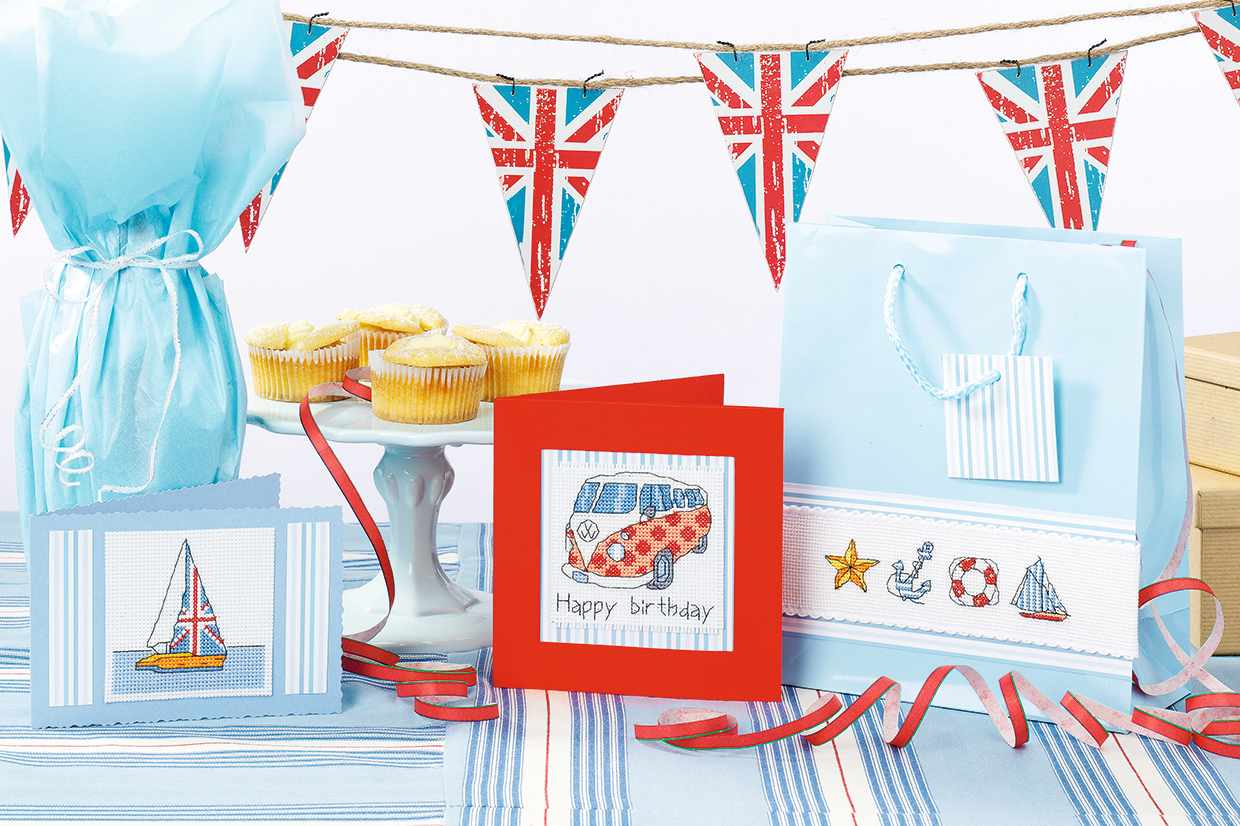
Cross Stitch patterns for beginners
When you are just starting out with cross stitch for beginners, it’s best to choose cross stitch patterns for beginners that use whole cross stitch and some backstitch for detail and definition. Try not to tackle cross stitch design with lots of fractional cross stitches or French knots. Below are some free cross stitch patterns for beginners you will find on the gathered website.
These heart designs are stitched entirely in whole cross stitches. Work them on 14-count aida rather than the wooden necklace mount for a fabulous beginner cross stitch pattern.
Worked in whole cross stitch and backstitch. these simple summery motifs are great for beginners.
Learning to cross stitch – the ideal craft for beginners
Cross stitch is such a fun and therapeutic craft to learn. You can pick it up in just a few hours, and the creative possibilities are endless! Cross stitch makes for fabulous greetings cards, gifts and decor.
Challenge yourself to new cross stitch projects
We’ve got plenty of exciting cross stitch patterns right here on Gathered. Try these modern cross stitch kits to give yourself a boost in your skills.
Hannah has worked on Gathered for 3 years, since our launch in 2019. At school Hannah learned to knit collaborating on dorcas blankets – now she edits our knitting section. She inherited her love of stitching and embroidery from her talented grandmother, and her passion for thread led her to be Editor of The World of Cross Stitching for six years, where she famously made all team members dress up as Paddington Bear to be hidden in the magazine pages. Card making is a more recent passion, developing from her position as editor of Cross Stitch Card Shop. She loves using kinetic techniques to make cards that move – she was editor of Papercraft inspirations magazine for over four years, creating loads of card making video tutorials at www.youtube.com/PapercraftTV. Her ever-expanding craft stash stretches to sock yarns and circular knitting needles, too. She has an allotment and loves harvesting and preserving her own produce – her office jambola is an annual event.
This website is owned and published by Our Media Ltd. www.ourmedia.co.uk