Embroidered banner tutorial – crafting is good for the soul

Make your own embroidery banner to give you motivation and remind you of what's important!

Try 6 issues of your choice of craft magazine from just £9.99

Published: December 27, 2019 at 10:09 am

Happy 2020 makers! To kick off the new year we’re giving you a free little embroidered banner tutorial to get you inspired. The banners designer, Jessie Doughty, told us:

“When I think about how crafting makes me feel, I always come back to the word ‘meraki’, which means to ‘do something with soul, creativity, or love; to put something of yourself into your work. Seeing your idea become a piece of art you can hold in your hands is another level of happiness and achievement. I take a lot of inspiration from mindfulness – my workspace is full of postcards and pieces of art that have positive mantras on them. Creativity is contagious. That’s why I chose the quote that I did for the design.”

We completely agree. Give Jessie a follow on Instagram and start stitching your first project of 2020.

Materials

  • Two 15 x 15cm (6 x 6″) pieces of white cotton fabric
  • Dowel, 14cm (5 1/2″) long, 2mm (1/8″) wide
  • DK yarn in green, 3m (118 1/8″)
  • Embroidery thread in pink, green and yellow
  • 10cm (4″) embroidery hoop
  • Template

If you’re not familiar with the embroidery techniques used in this project, head to our library of embroidery stitches blog post to help you.
Embroidered banner instructions

You will need:

  • Embroidery Thread
  • Fabric
  • Dowel

Step 1

banner crafting step 1

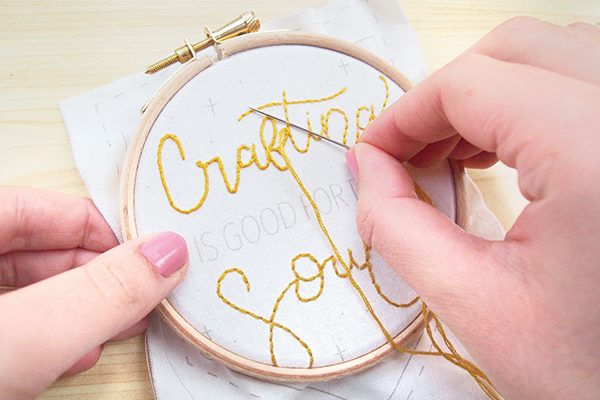
Place the front pennant fabric piece in an embroidery hoop. Using three strands of yellow thread and whipped backstitch, stitch the words ‘crafting’ and ‘soul’.

Step 2

banner crafting step 2

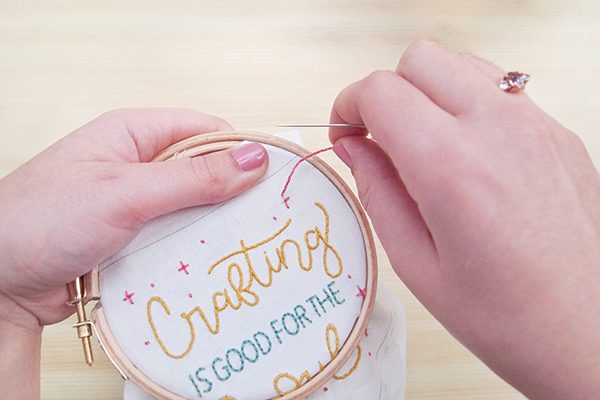
Embroider the rest of the text with backstitch and three strands of green thread. Use backstitch and six strands of coral thread for the stars. Use backstitch and three strands of coral thread to stitch the dots.


Step 3

banner crafting step 3

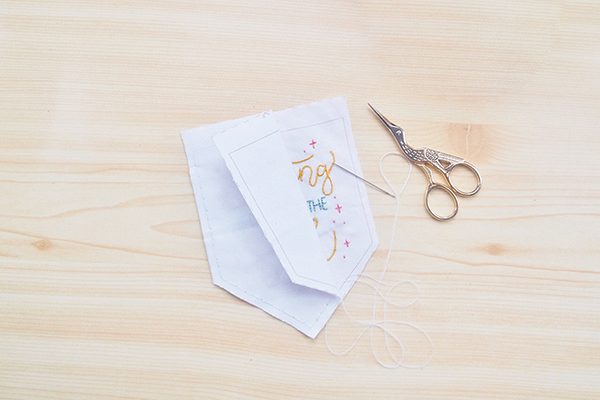
Remove the embroidered piece from the hoop. Cut out the front and back fabric pieces for the pennant following the outer dotted lines. Place the front and back pieces with right sides (RS) together, making sure the solid grey lines are matching. Sew using the white sewing thread and a 0.5cm (¼”) seam allowance (along the grey line), leaving the top open. Turn RS out.


Step 4

banner crafting step 4

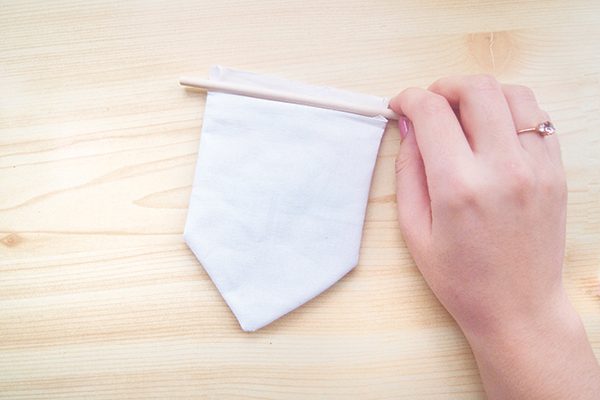
Fold the top raw edges to the wrong side by 0.5cm (¼”), then fold the top of the pennant over the wooden dowel. Sew along the top edge, just underneath the wooden dowel, using the white sewing thread.

Step 5

banner crafting step 5

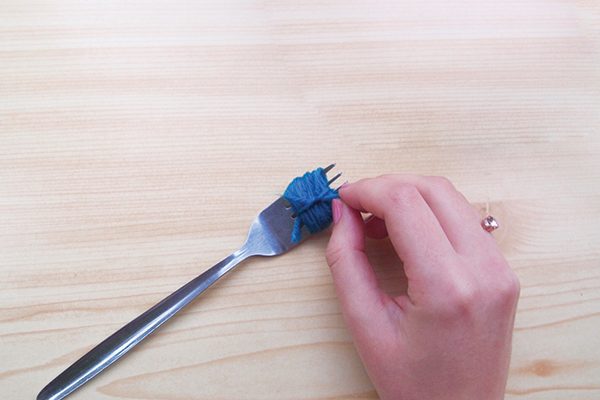
Make a mini pom pom using the teal yarn and either a fork or a small pom pom maker.

Step 6

banner crafting step 7

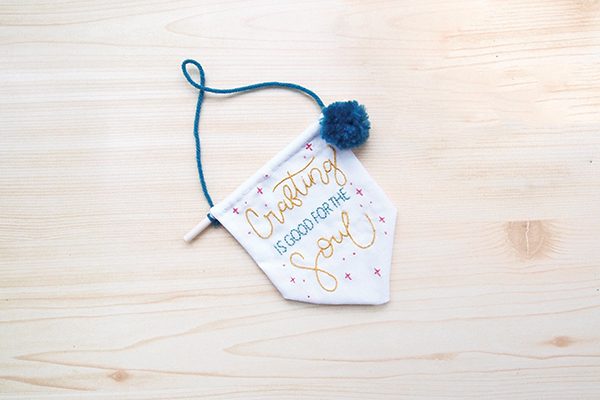
To finish off the pennant, tie the pom pom to one end of the dowel, using the image as a guide. Finally, cut a 22cm (8¾”) length of yarn and tie onto both ends of the dowel for hanging.

We hope you love your little embroidered banner. Tag us in a pic on Instagram and Twitter or post it on our Facebook wall. Plus, make sure you subscribe to Mollie for more creative inspiration and projects.