How to work braid stitch
Step 1
Work from right to left along two drawn parallel lines. Bring the needle up through the fabric on the bottom line.
Step 2
Make a loop with the working thread, so the thread that just came through the fabric is on top.
Step 3
Insert the needle through the loop then in through the top line, and back out on the bottom line.

Step 4
Pull the working thread taut on the needle and slide it under the point of the needle. Gently pull the needle through to complete the stitch. Work subsequent stitches in the same way. To end a thread, tack the lower loop down and start a new one coming up through the last stitch.

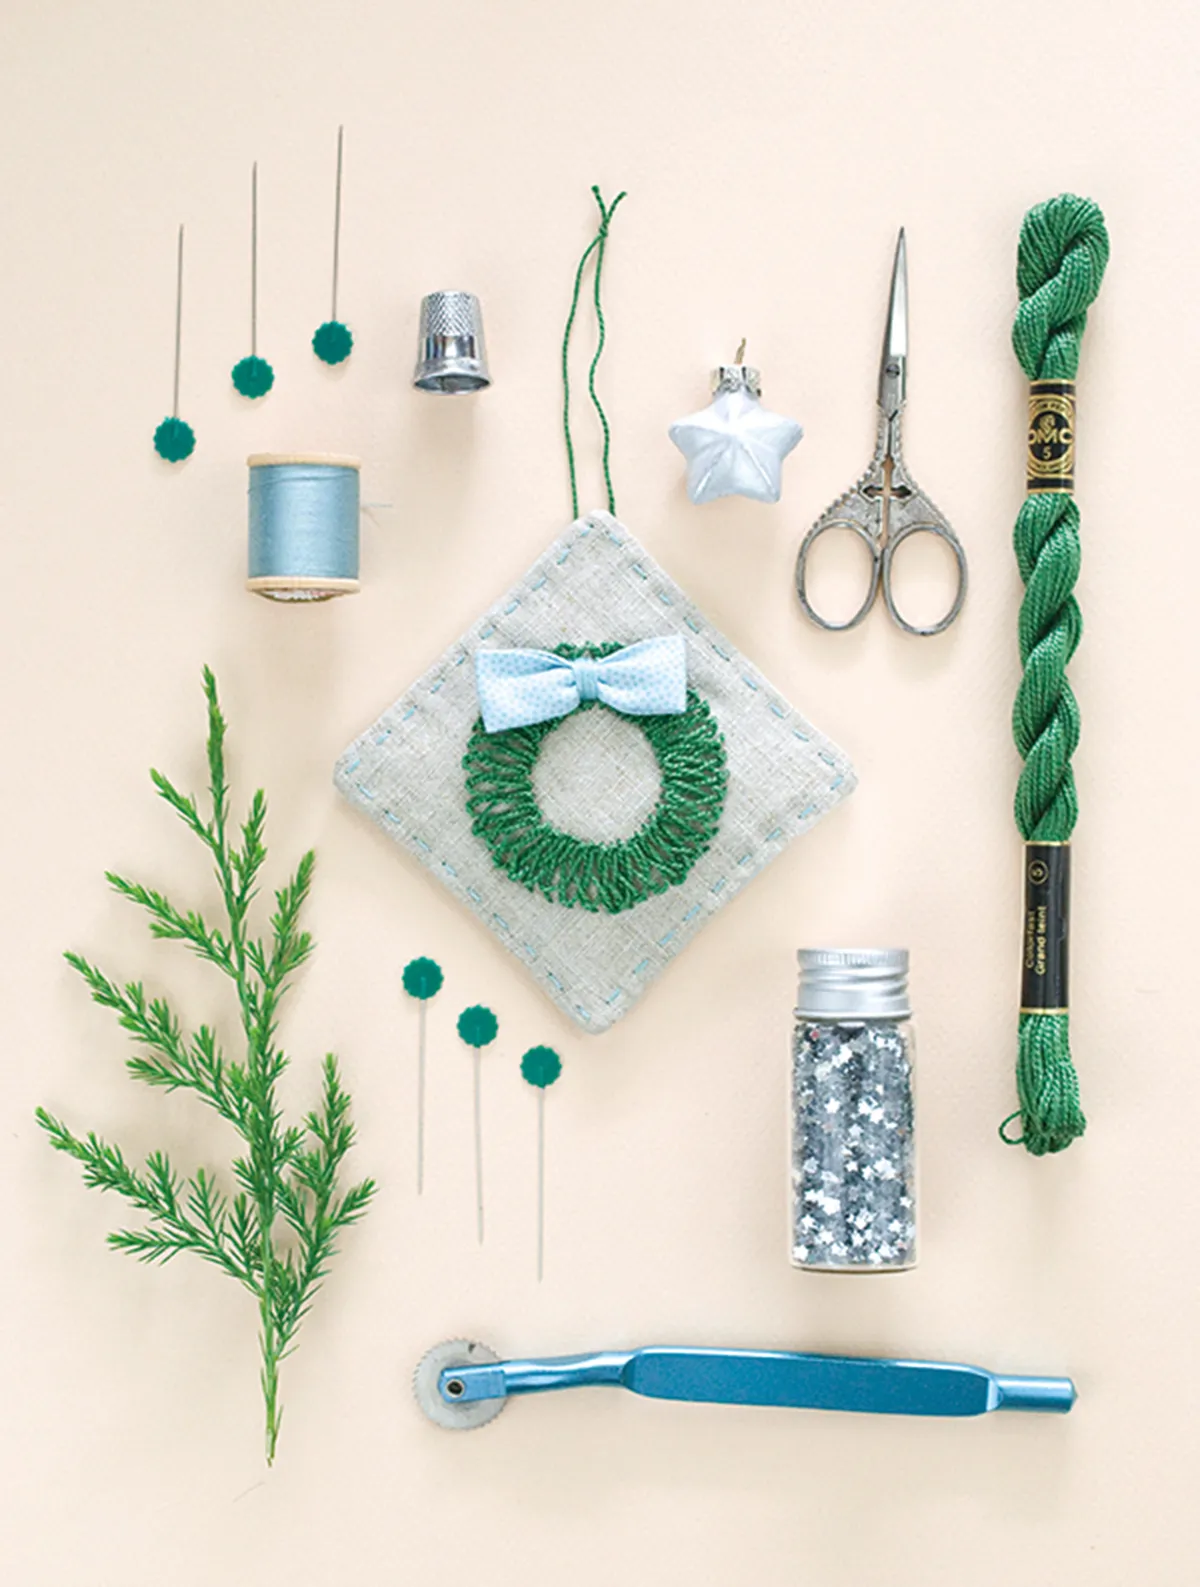
How to embroider the wreath
Step 1
Place the linen fabric right side (RS) up centrally over our downloadable Christmas wreath template and trace over the inner and outer circle.
Step 2
Using perle cotton, work braid stitch around the wreath. The outer circle is the bottom line and the inner circle is the top line so you are stitching from the outside in.
Step 3
Work the braid stitch so it is slightly fanned with tighter spacing on the inside and looser on the outside.
Making the ornament
Step 1
Trim the linen to 12x12cm (4¾x4¾in) with the wreath placed centrally.

Step 2
Cut the contrast fabric as follows:
- Backing: 12x12cm (4¾x4¾in).
- Bow: 4x10cm (15/8x4in).
Step 3
Fold and press the two long edges of the bow over to the wrong side (WS) so they overlap by 5mm (1/4in). Fold the short ends to the WS so they overlap by 1cm (3/8in).

Step 4
Hold the folded cotton bow in place at the top of the wreath and satin stitch it into place using stranded cotton. Make the stitches narrower than the bow to pull in the middle.

Step 5
Place the embroidered fabric and backing fabric RS together with the wadding beneath and pin together.
Step 6
Stitch together around the sides using a 1cm (3/8in) seam allowance, leaving a 7cm (23/4in) turning gap in the centre of one side.
Step 7
Trim the corners and turn the ornament RS out carefully as the stitches are quite delicate.
Finishing off
Step 1
Slip stitch the opening closed.
Step 2
Work a running stitch around the edge using stranded cotton and add a loop of perle cotton to the back for hanging.