This spectacular sleigh – from Cardmaking & Papercraft – is so easy to make, and is perfect fo filling with a gift or sweet treats! To create this festive sleigh decoration, simply download the PDF template below, print it out and cut your shapes from your chosen coloured card.
For this make, our designer chose red and gold card to construct the sleigh for a traditional look, but you could easily swap the colours for different patterns for a more modern look.
Don't forget to share your projects on Facebook or post them on Instagram!
Download your free papercraft Santa's sleigh template:
To download the template, click on the link below the image and it will open in a new window. You can then save/download the template. There is one PDF to download, which contains all the elements you'll need for the sleigh.
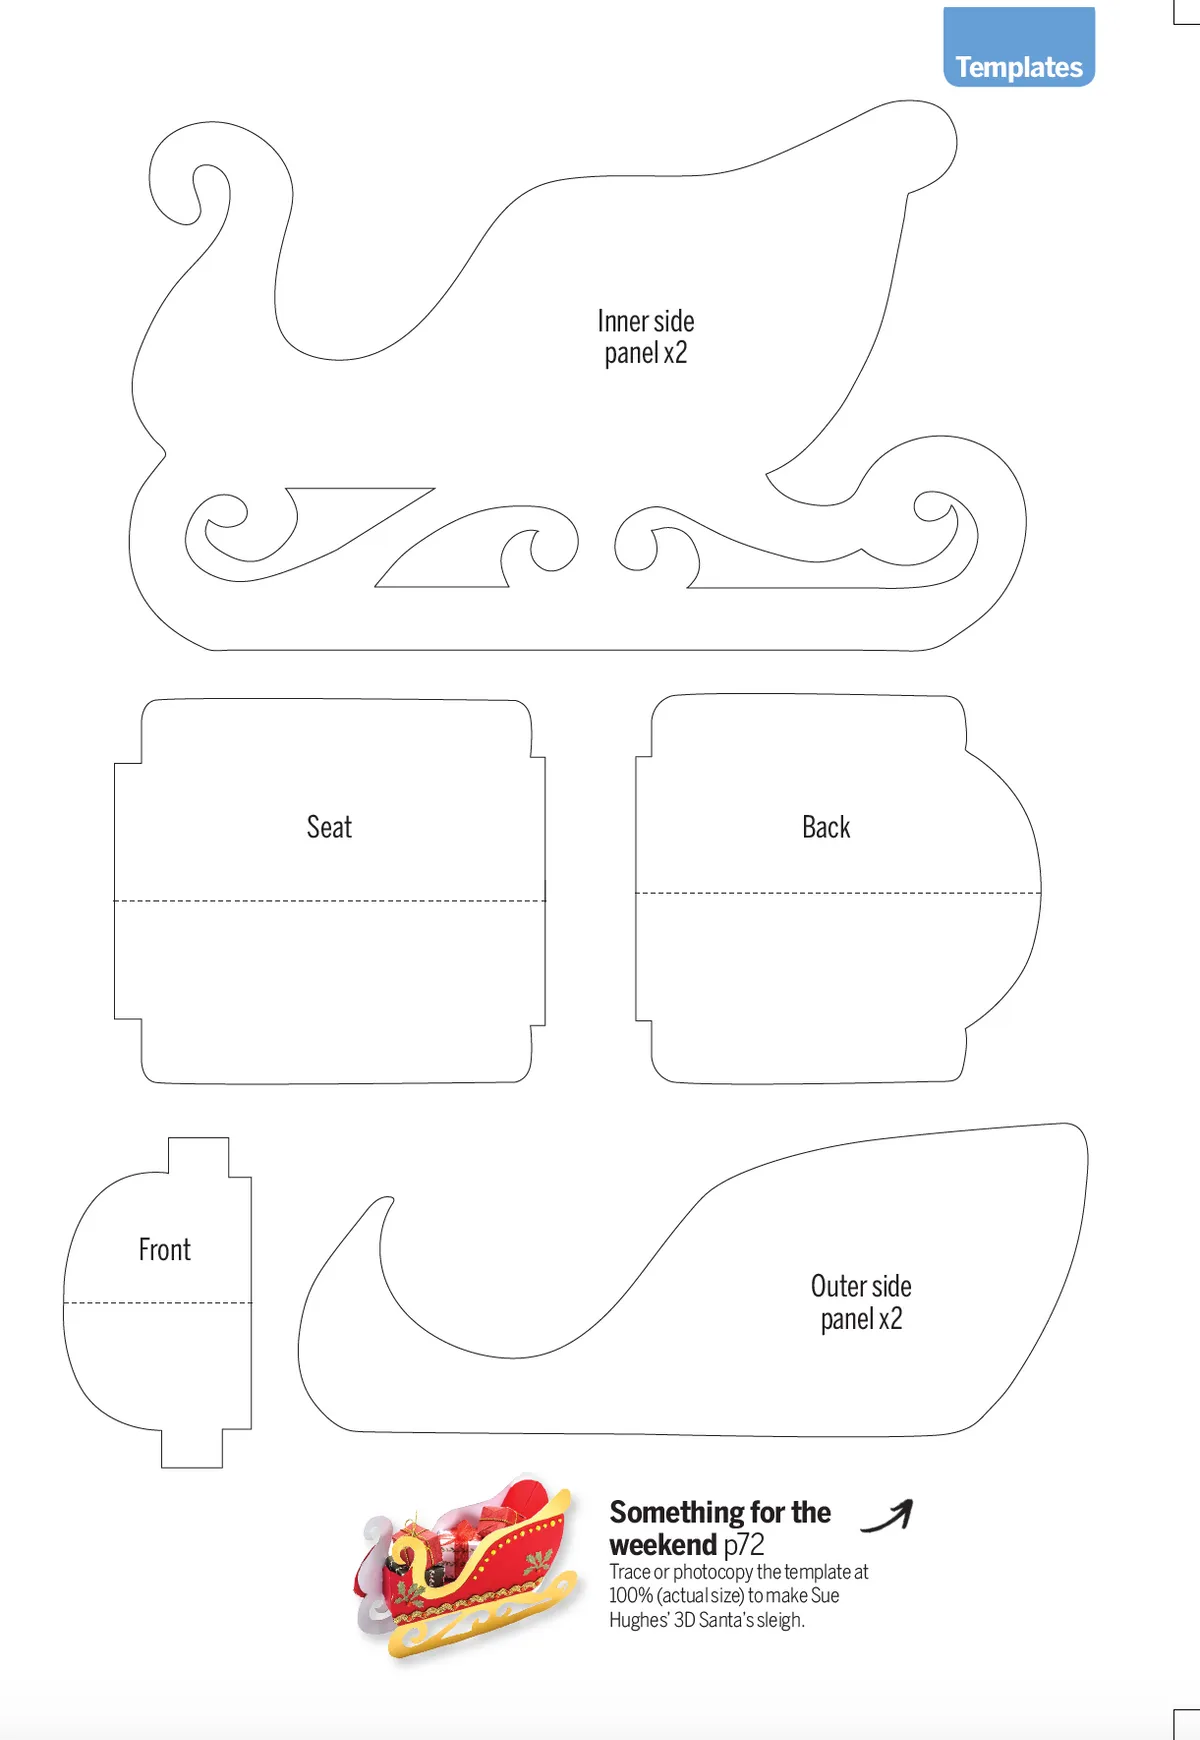
Template for papercraft Santa's Sleigh
Shopping List:
- Template (see above)
- Coloured card
- Holly punch
- Festive patterned papers
- Gold twine
- Red organza ribbon
- Red and gold gems
- Gold ricrac