
How to make paper pine cone decorations
Bring the beauty of the outside indoors this Christmas, with two different ways to make paper pine cone decorations.
Will you make the deliciously tactile and glittery paper pine cone decorations or the upcycled corrugated card pine cone decoration? Or why not both!
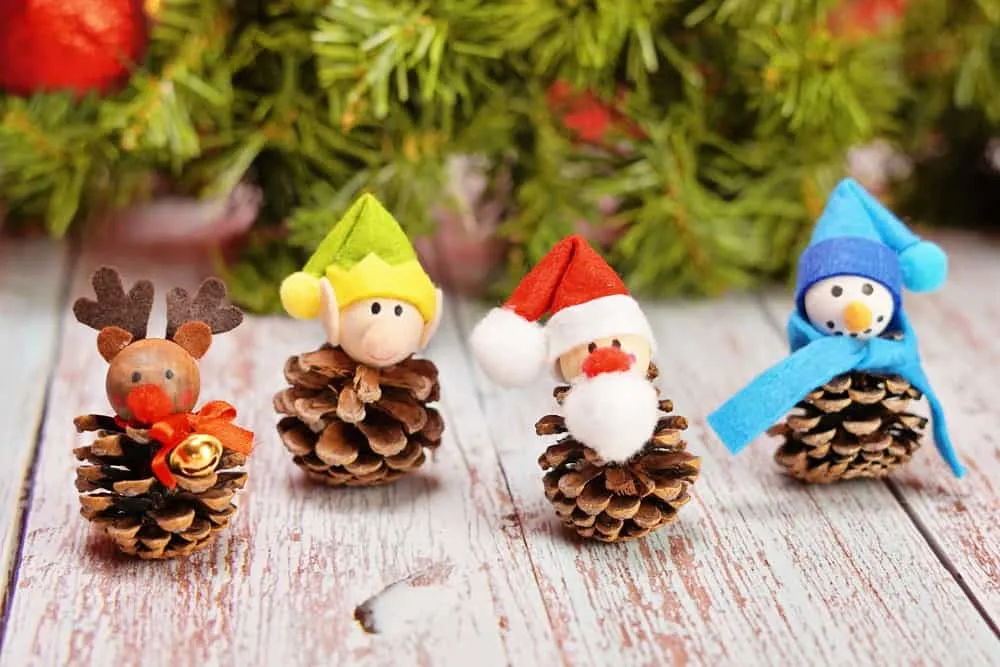
Pine cones are a festive favourite when it comes to decorating your house for the holidays, and these paper versions will look great grouped together on a mantelpiece, hanging from a door handle or placed individually on the tree. Alternatively, a collection of these paper pine cone decorations would look fantastic arranged in a fruit bowl as a table decoration.
Pine cone projects
If you're looking for ways to get creative with real pine cones, check out our list of pine cone crafts for Christmas.
Both designs are quick to make, and are easily made by securing folded paper or card scales onto a plain polystyrene egg using pins, plus a sprinkling of glitter and a few berries to finish.
If you're looking for paper to make your paper pine cone decorations have a browse through our free patterned paper collection, we love these pine cone and poinsettia patterned papers!
How to make a paper pine cone decoration:

You will need:
- Patterned paper
- 10cm and 7cm polystyrene eggs
- Artificial red wired berries
- Glitter
- Dressmaker’s pins (250-300 per pine cone)
- Adhesive (tacky craft glue works well)
- Ribbon
Step 1

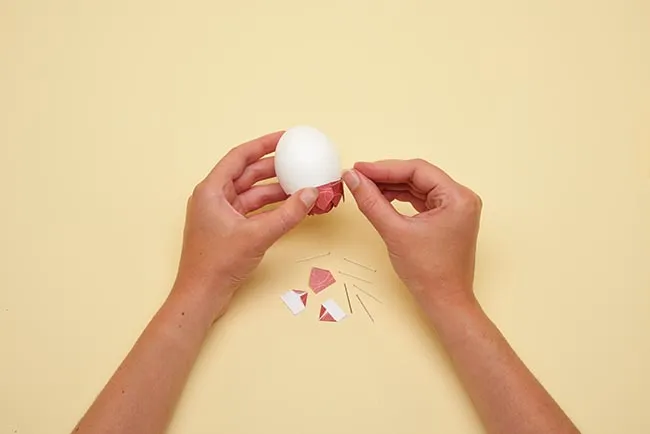
Cut your paper into 2x2cm squares.
Fold two corners to the reverse, to create a triangular shape along one side. Working from the narrow end of the egg (this will become the top of the pine cone), position the point of the folded edge at the egg centre and pin. Secure the wide end with two pins.
Repeat this for three more pieces, arranging them so that they point into the centre, or top of the soon-to-be pine cone.
Step 2

Once the base layer is pinned, work along the next row, this time lining up the pointed end to follow the join where two folded pieces meet on your first layer.
Secure with two pins at the base, keeping the pointed end free. Work around the egg with three more folded paper pieces.
With each layer that you add, you'll cover up the pins from the layer before!
Step 3
Continue to work in rows around the egg as you build up your paper pine cone decoration. As the egg increases in size, the more folded pieces you’ll have to use to go around the circumference. Try to create a 'bricking effect', taking care to cover any gaps and pins from the previous layers.
Keep working your way down the egg, until all the polystyrene is covered.
Once the entire egg is covered with 'scales', cut three leaf shapes from green paper (patterned or plain). Using a strong glue, attach a loop of ribbon onto the paper pine cone and leave to dry. Disguise the stuck-down end of the ribbon by sticking on your leaves over the end of the ribbon.
Finally, poke in the artificial wired berries around the ribbon. If you down have any wired berries, how about using red beads instead?

A classic Christmas project
Create an iconic paper decoration by learning how to make paper snowflakes.
How to make a corrugated card pine cone decoration:
You will need:
- Corrugated card
- 70mm polystyrene egg
- 25mm circle punch, or draw around a 10 pence piece (or a round pound coin if you still have one!)
- Green card
- Large red adhesive pearls
- Ribbon
- Pins
- Glue
Step 1
Use a 25mm circle punch to cut approximately 70 circles from corrugated card. You may need to remove the backing layer from the card to ensure it fits inside the punch. Alternatively, draw around a 10 pence piece or an old round pound.
Step 2
At the narrow end of a 70mm polystyrene egg, pin two circles opposite each other so they touch at the bottom. Pin two more circles so they overlap the first two and they all meet at the bottom. Pin another row of circles so they overlap slightly and continue adding rows of circles until you reach the top.
Step 3
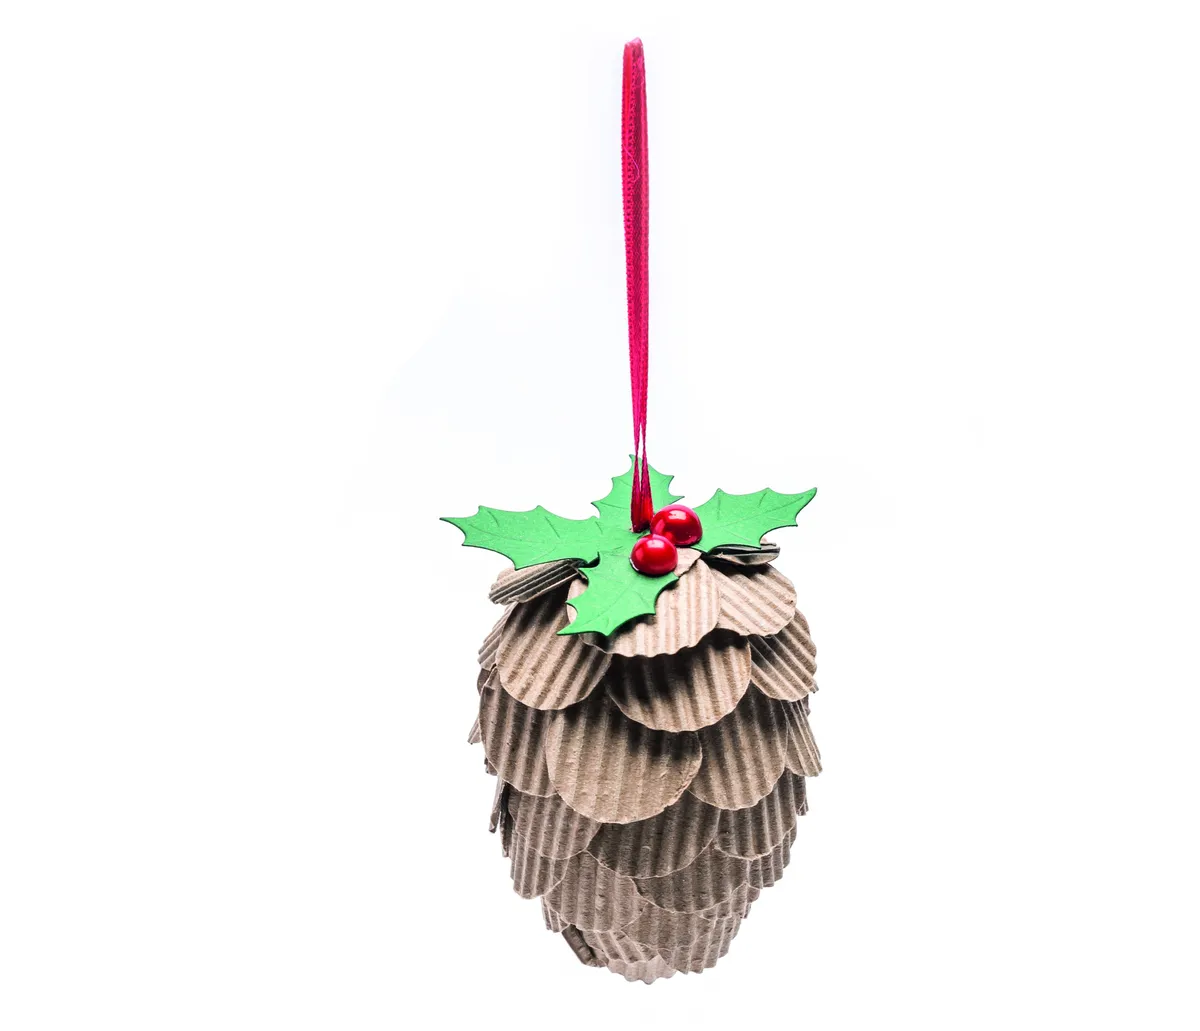
Loop a length of narrow red ribbon and secure the ends to the top of the egg with two pins. Cut a slit into one of the circles up to the middle, then place it around the ribbon at the top of the egg to cover the pins. Secure with glue.
Step 4
To finish, decorate the top of your paper pine cone decoration with die-cut holly leaves and red pearls.

Stunning silhouettes
Looking for more fun papercraft projects? Get inspired with these lovely paper cutting templates.
Customise your paper pine cones
Of course the best part of getting crafty is adding in your own style! Try experimenting with different papers and materials, and you can choose to either mix up your paper pine cones in a wide range of colours and patterns, or keep it simple and go for realistic shades – the choice is yours!
Get crafty this Christmas with paper decorations
You don't need to spend loads on new decorations this year! All you need is a bit of time and paper with our list of festive DIY paper Christmas decorations to make at home!


