How to make a rocking card

Rock the house and learn how to make a rocker card this season, sure to delight any recipient!

Try 6 issues of any craft magazine from just £9.99

Published: February 5, 2021 at 9:09 am

Take your cardmaking to the next level with our rocker cards – they’re so much fun to make and your friends and family will love watching them rock. The rounded edges of the base card allow the card to rock back and forth, so when you create your rocker, make sure you keep the sentiments even on either side. This way your cards will be perfectly balanced!

The various panels on the rocker base are great for using up your paper scraps, which you can die-cut into circles or rectangles to then decorate with your chosen toppers, stamped elements and die-cut sentiments.

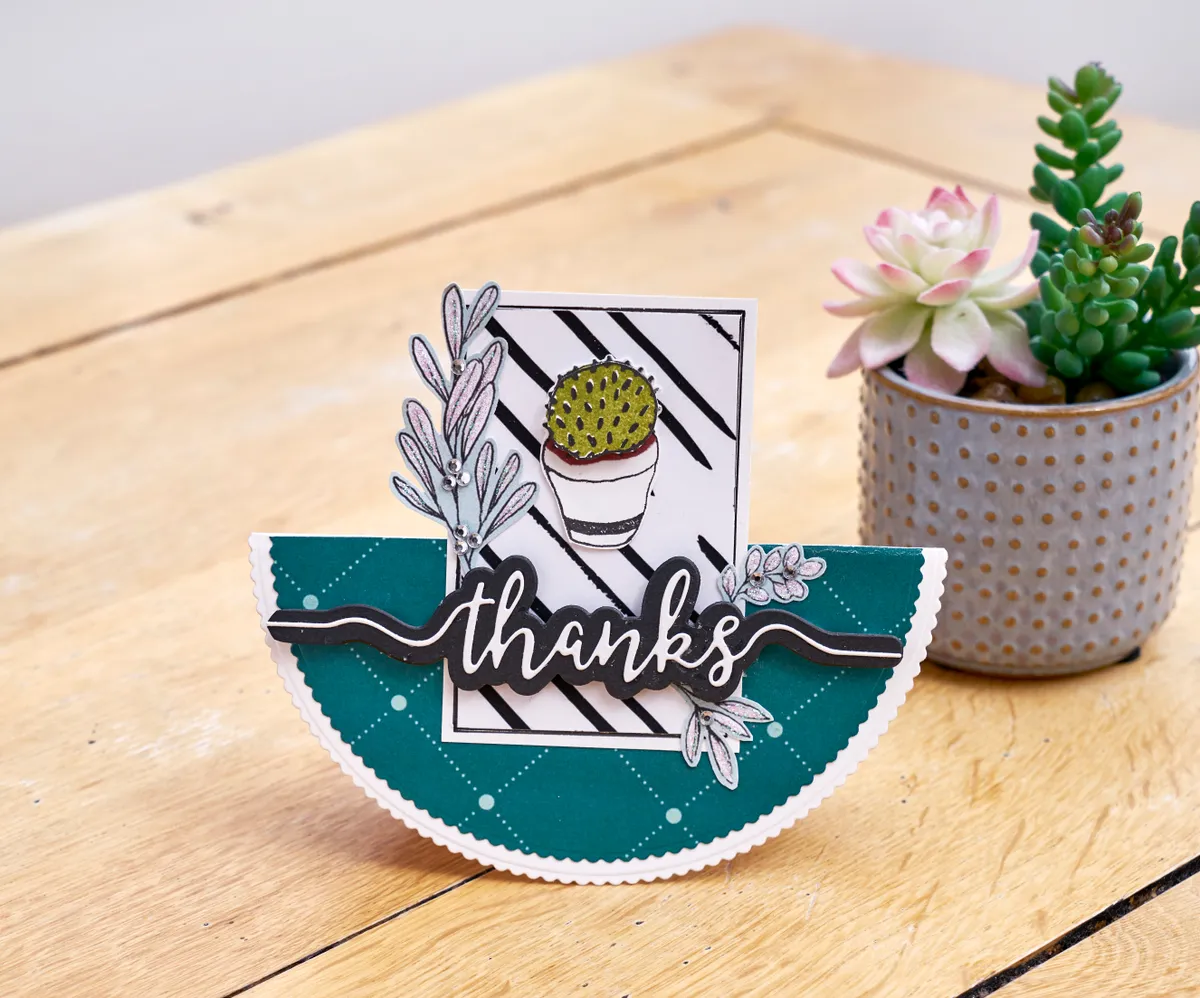
Here, our designer Ruth Hamilton has paired the Verdant Walk paper pack from Altenew with the Indoor Garden stamp set to create these botanical makes. From a trendy succulent birthday make to a thoughtful thank you card, Ruth’s three rocker cards are so versatile and fun – we especially love the scalloped details she added to the designs. They're easy to create, too, so the only limit is your imagination!

Here are some top tips:

  • Balance the toppers and embellishments on either side of your rocker to ensure it moves smoothly and does not fall over.
  • Choose some sturdy card for the base, which won’t crease as the card rocks back and forth.
  • Attach your embellishments with foam pads to add even more dimension to your designs.
  • Decorate the panels of the rocker with your crafty scraps.

Short on patterned paper? Take a look at our ever-growing collection of free patterned papers, there are lots to choose from and there are lots of different themes. We love these stylish cactus papers! For more general card making, let us show you how to make cards.

We love seeing what you make with our free printable papers, so don’t forget to share your cards and papercraft projects with us on Facebook and Twitter, too!

Make this Thanks rocking card

Step 1

Die-cut a 140mm white scalloped circle, score in half and fold to create a rocker. Add a 130mm semicircle of green patterned paper onto the base. Layer a 55 x 85mm piece of striped paper onto some card. Draw on a border.

How to make a rocking card, card 1 – step 1

Step 2

Stamp the cactus pot twice using black ink. Apply green ink to the plants, then fussy cut both stamped images. Fussy cut one of the cacti and layer onto the other stamped image with foam pads, as shown.

If you don’t have a cactus stamp, how about cutting out some pictures from a magazine or print one off the internet? Or – why not use any stamp you have to hand?

How to make a rocking card, card 1 – step 2

Step 3

Die-cut ‘Thanks’ from white card and the frame die from black card. Layer the ‘Thanks’ die-cut onto the black frame. Attach the topper to the centre of the base using foam pads, as shown.

Again – if you don’t have a ‘Thank’s die – why not dust off your calligraphy skills and write a handwritten thanks instead? Take time to practise – but remember, it doesn’t have to be perfect!

How to make a rocking card, card 1 – step 3

Step 4

Let’s add some foliage. If you like, fussy cut some leaf sprigs from the paper pad and add glitter glue. Attach the sprigs to the stamped topper, then layer the sentiment on top with foam pads. Add a few gems to the sprigs, to finish.

How to make a rocking card, card 1 – step 4

Make this Happy Birthday rocking card

How to make a rocking card – card 2

Step 1

Die-cut a 140mm circle of white card. Score in half and fold. Die-cut a 130mm semicircle from floral paper and attach to the front of the card, as shown.

How to make a rocking card, card 2 – step 1

Step 2

Die-cut a 75mm circle of patterned paper and layer onto an 85mm circle of card. Attach the bottom half to the folded edge of the rocker. Add two banners to the base. Add a semicircle of white card to the reverse.

How to make a rocking card, card 2 – step 2

Step 3

Stamp green leaves onto the peach circle. Fussy cut two flowers from the patterned paper and attach them to the peach circle with foam pads. Tie some baker’s twine into a bow and attach below the flowers.

How to make a rocking card, card 2 – step 3

Step 4

Stamp the sentiment onto card using black ink and trim. Add a stitched border with a black fine liner pen. Attach the sentiment to the peach circle, as shown. To finish, add a few gems to the leaves.

How to make a rocking card, card 2 – step 4

How to make a rocking card