How to make a side stepper card

With just a few simple cuts and folds, follow our step-by-step guide to discover how to make side stepper cards.

Try 6 issues of any craft magazine from just £9.99

Published: September 18, 2019 at 4:29 pm

We love creating different styles of card bases – it’s a great way to add extra interest to a design and will often provide you with extra space to add lovely papers and embellishments. Here, we show you how to create a side stepper card, which is perfect for birthday, Christmas, wedding cards and more!

To make this side stepper card, you can follow our simple four-step guide below. When you've made the base from step 1, create another base from sturdy card and keep as a template for your future side steppers - this will save you lots of time spent measuring!

What you need to make this side stepper card:

  • Festive-patterned papers
  • White and coloured card
  • Craft knife
  • Craft mat
  • Metal ruler
  • Red gems
  • Glitter glue

Step 1

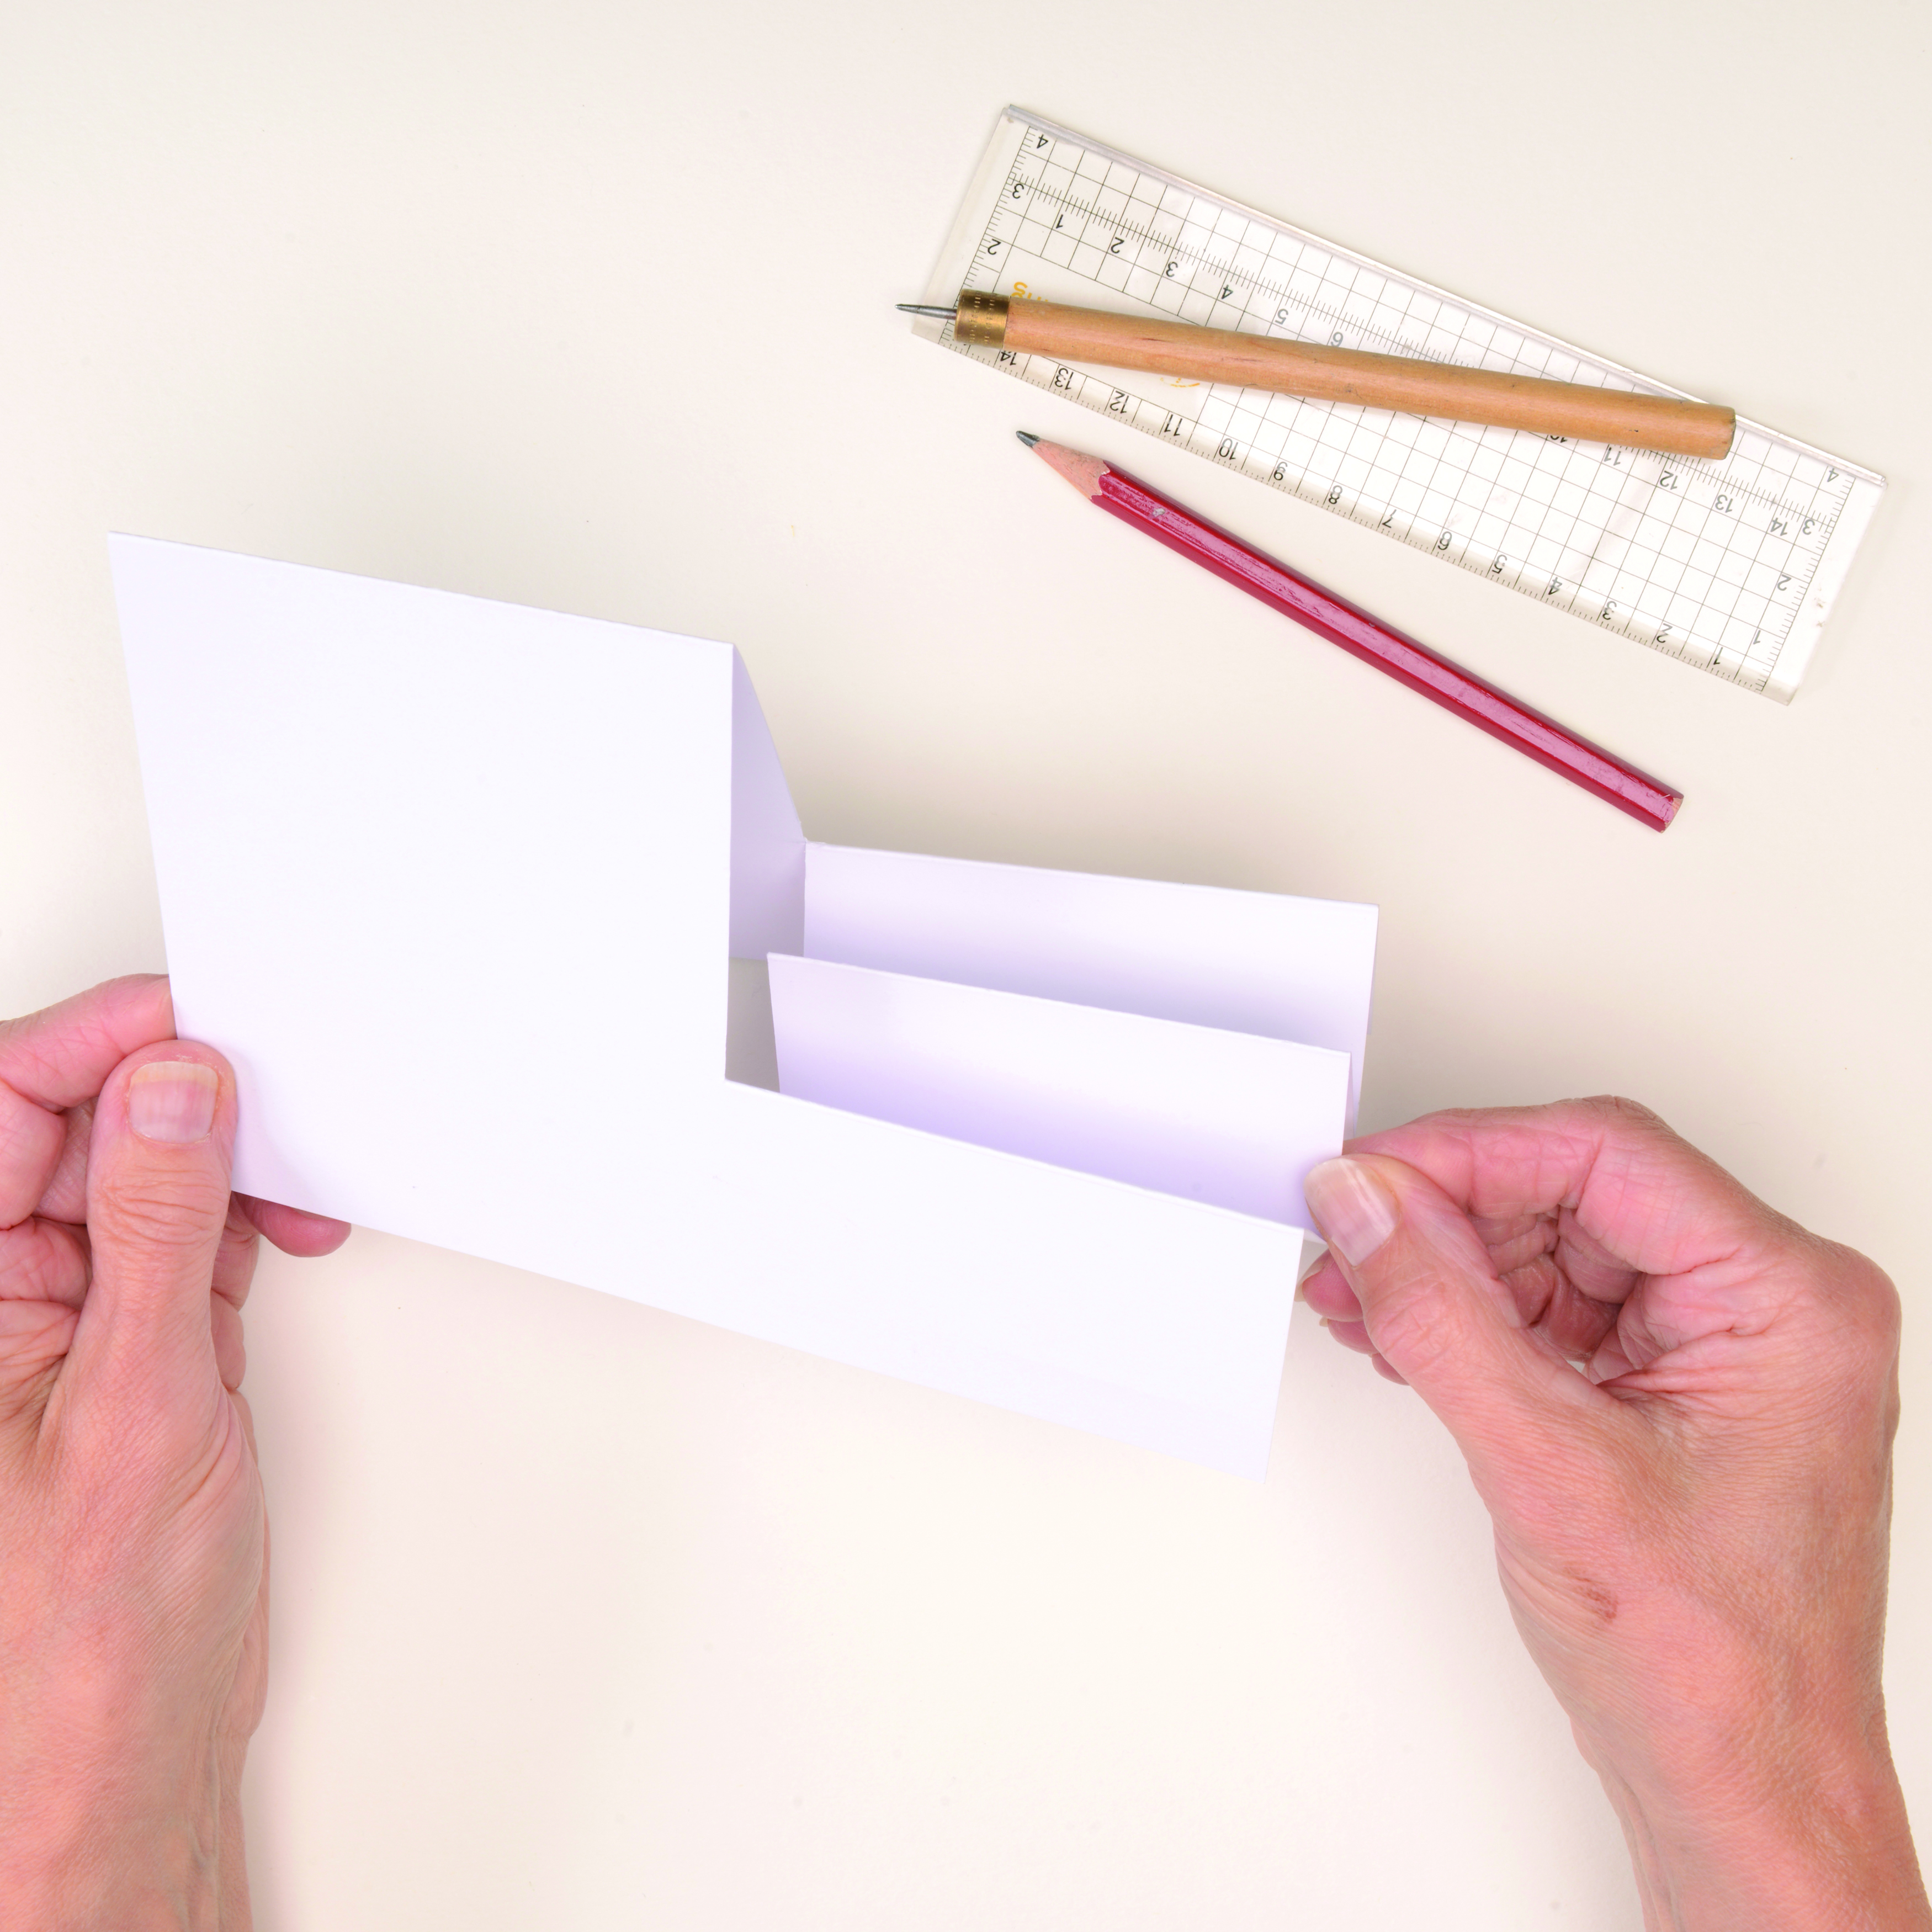
How to make a side stepper card 1

Score a 28x14cm piece of card along the long edge at 3cm, 6cm, 10cm and 21cm, only as far as 6cm across. Score all the way across at 14cm. Use a craft knife to cut from the 3cm fold to the 21cm fold then concertina fold at the score lines.

Step 2

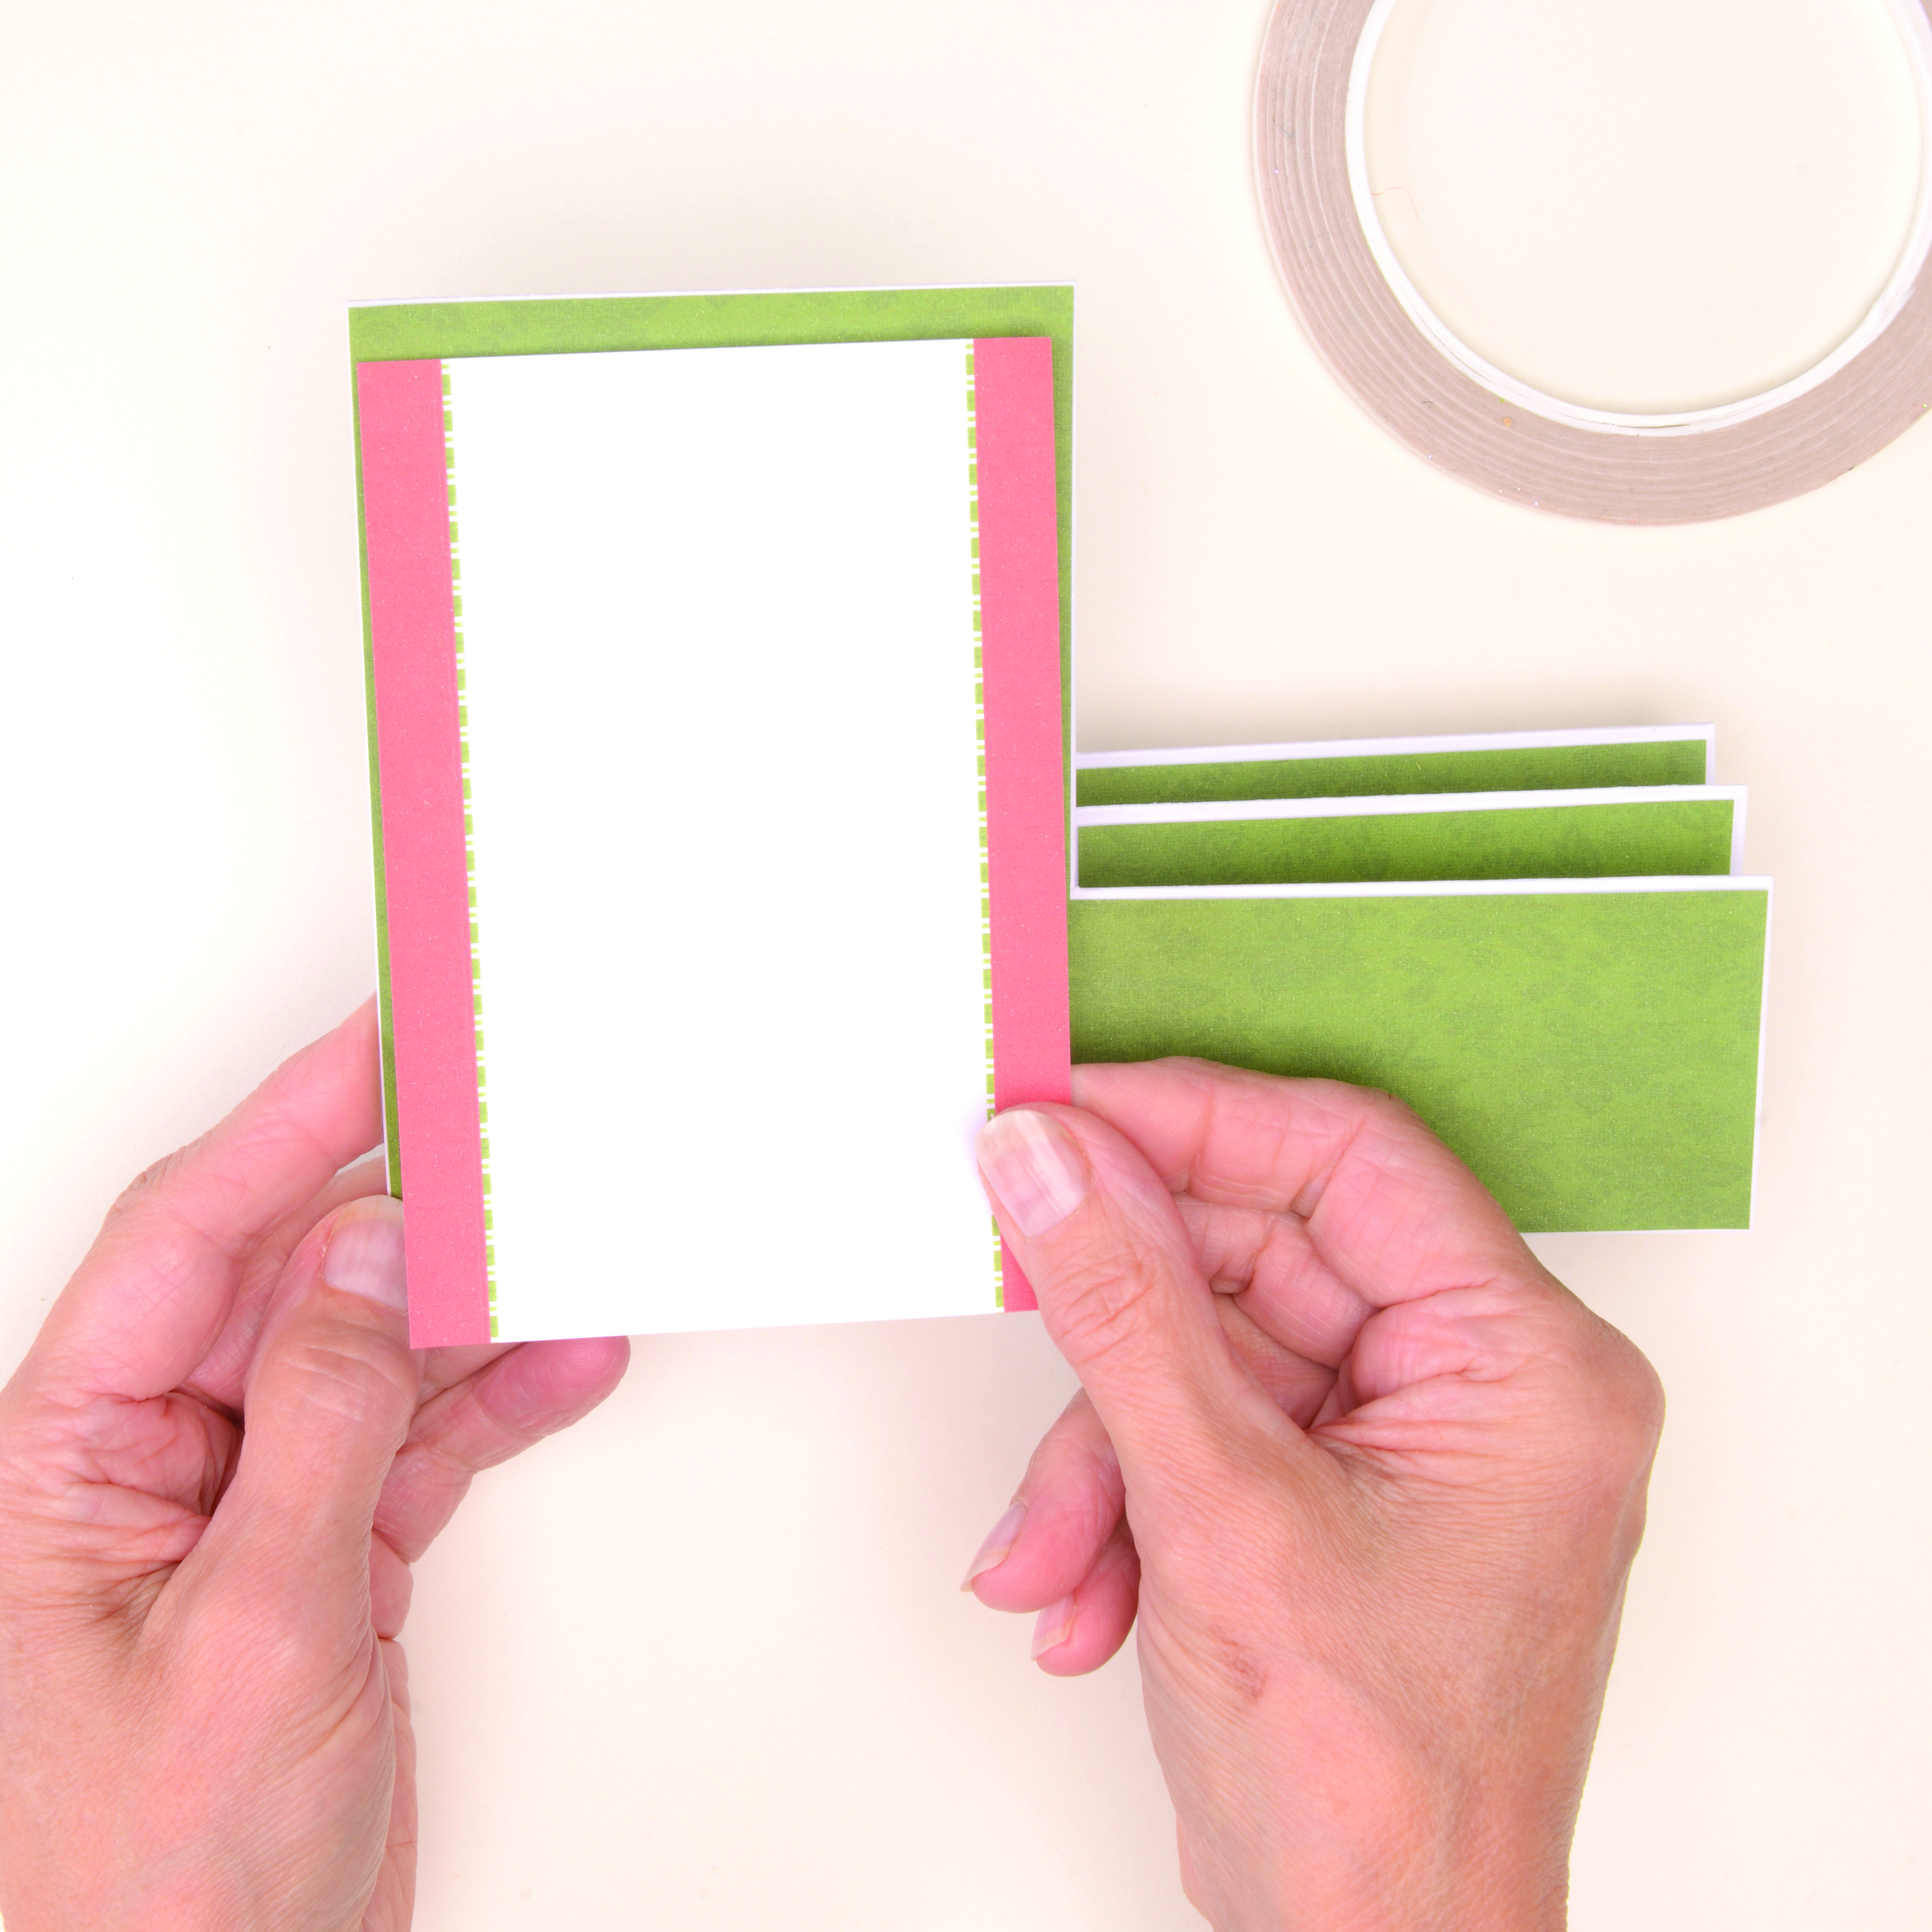
How to make a side stepper card 2

Trim green damask-pattenred paper into an ‘L’ shape to fit the front of the base and attach as shown. Cover the two side panels with green damask paper. Attach an 8.5x12cm strip of patterned paper to the left-hand side of base, as shown.


Step 3

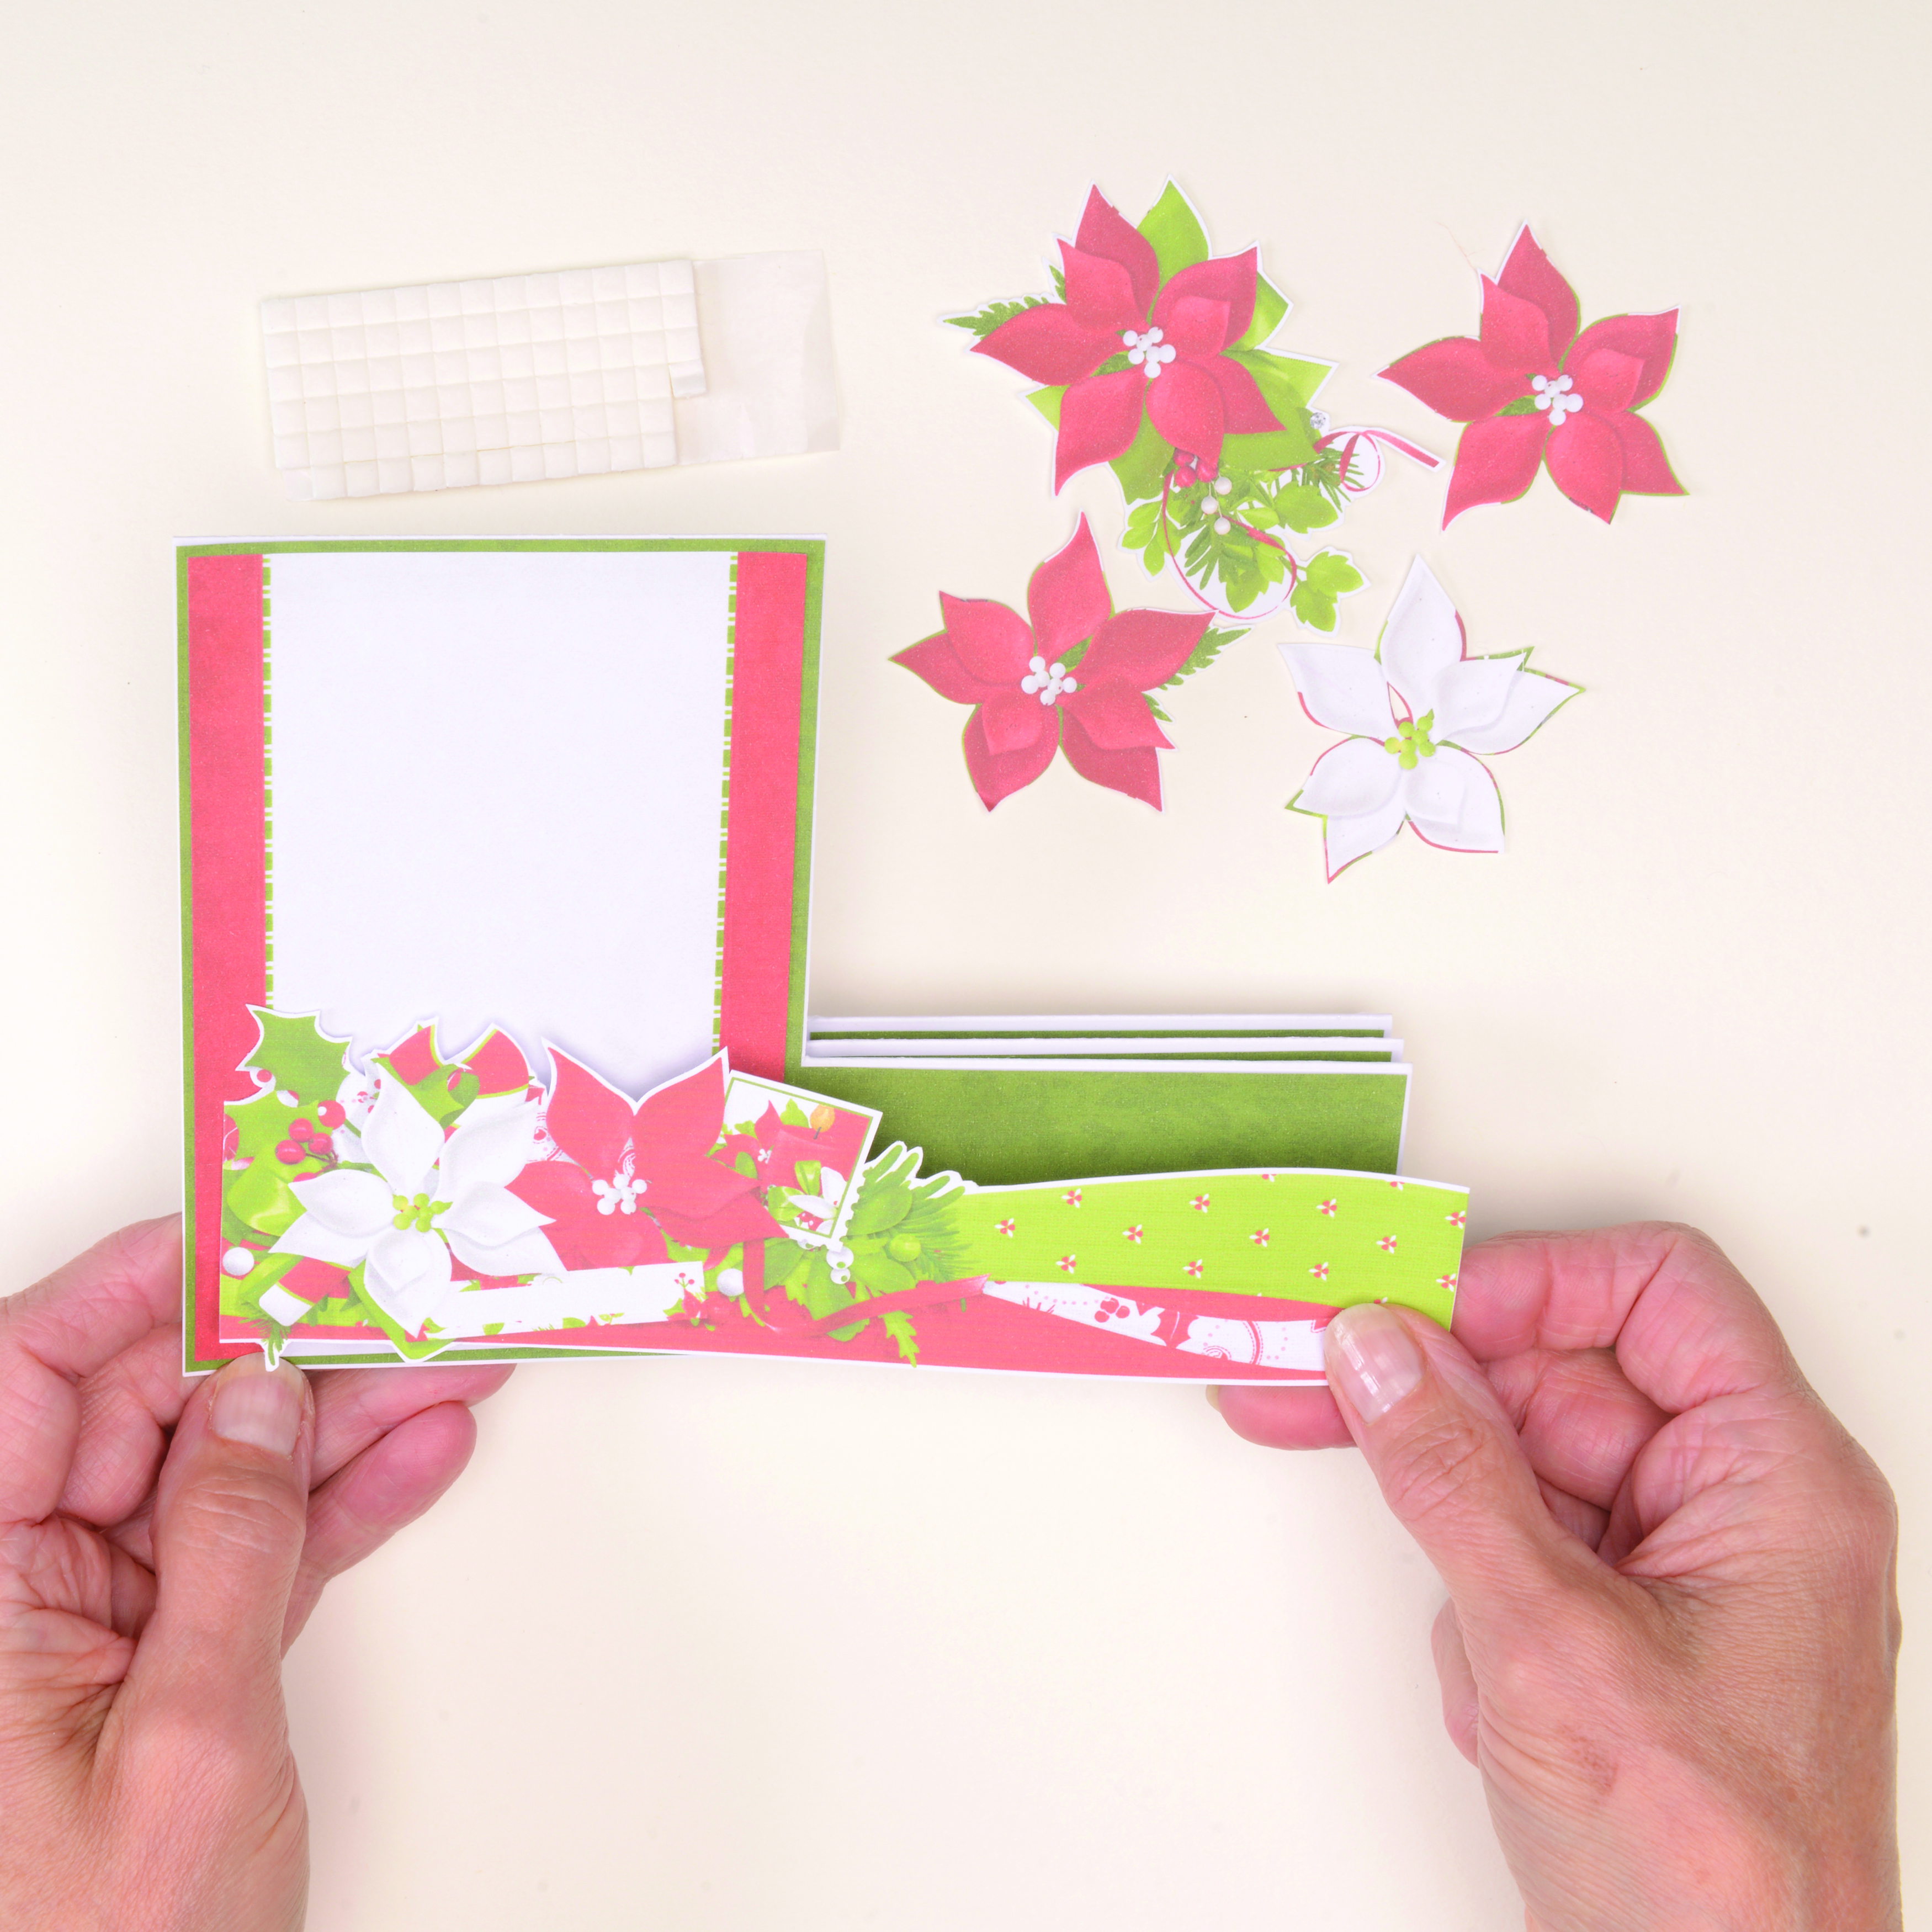
How to make a side stepper card 3

Trim a poinsettia border. Attach to the bottom of the base with foam pads, as shown. Trim and attach poinsettia toppers and some extra flowers to the front and middle panels, using foam pads on some of the elements.

Step 4

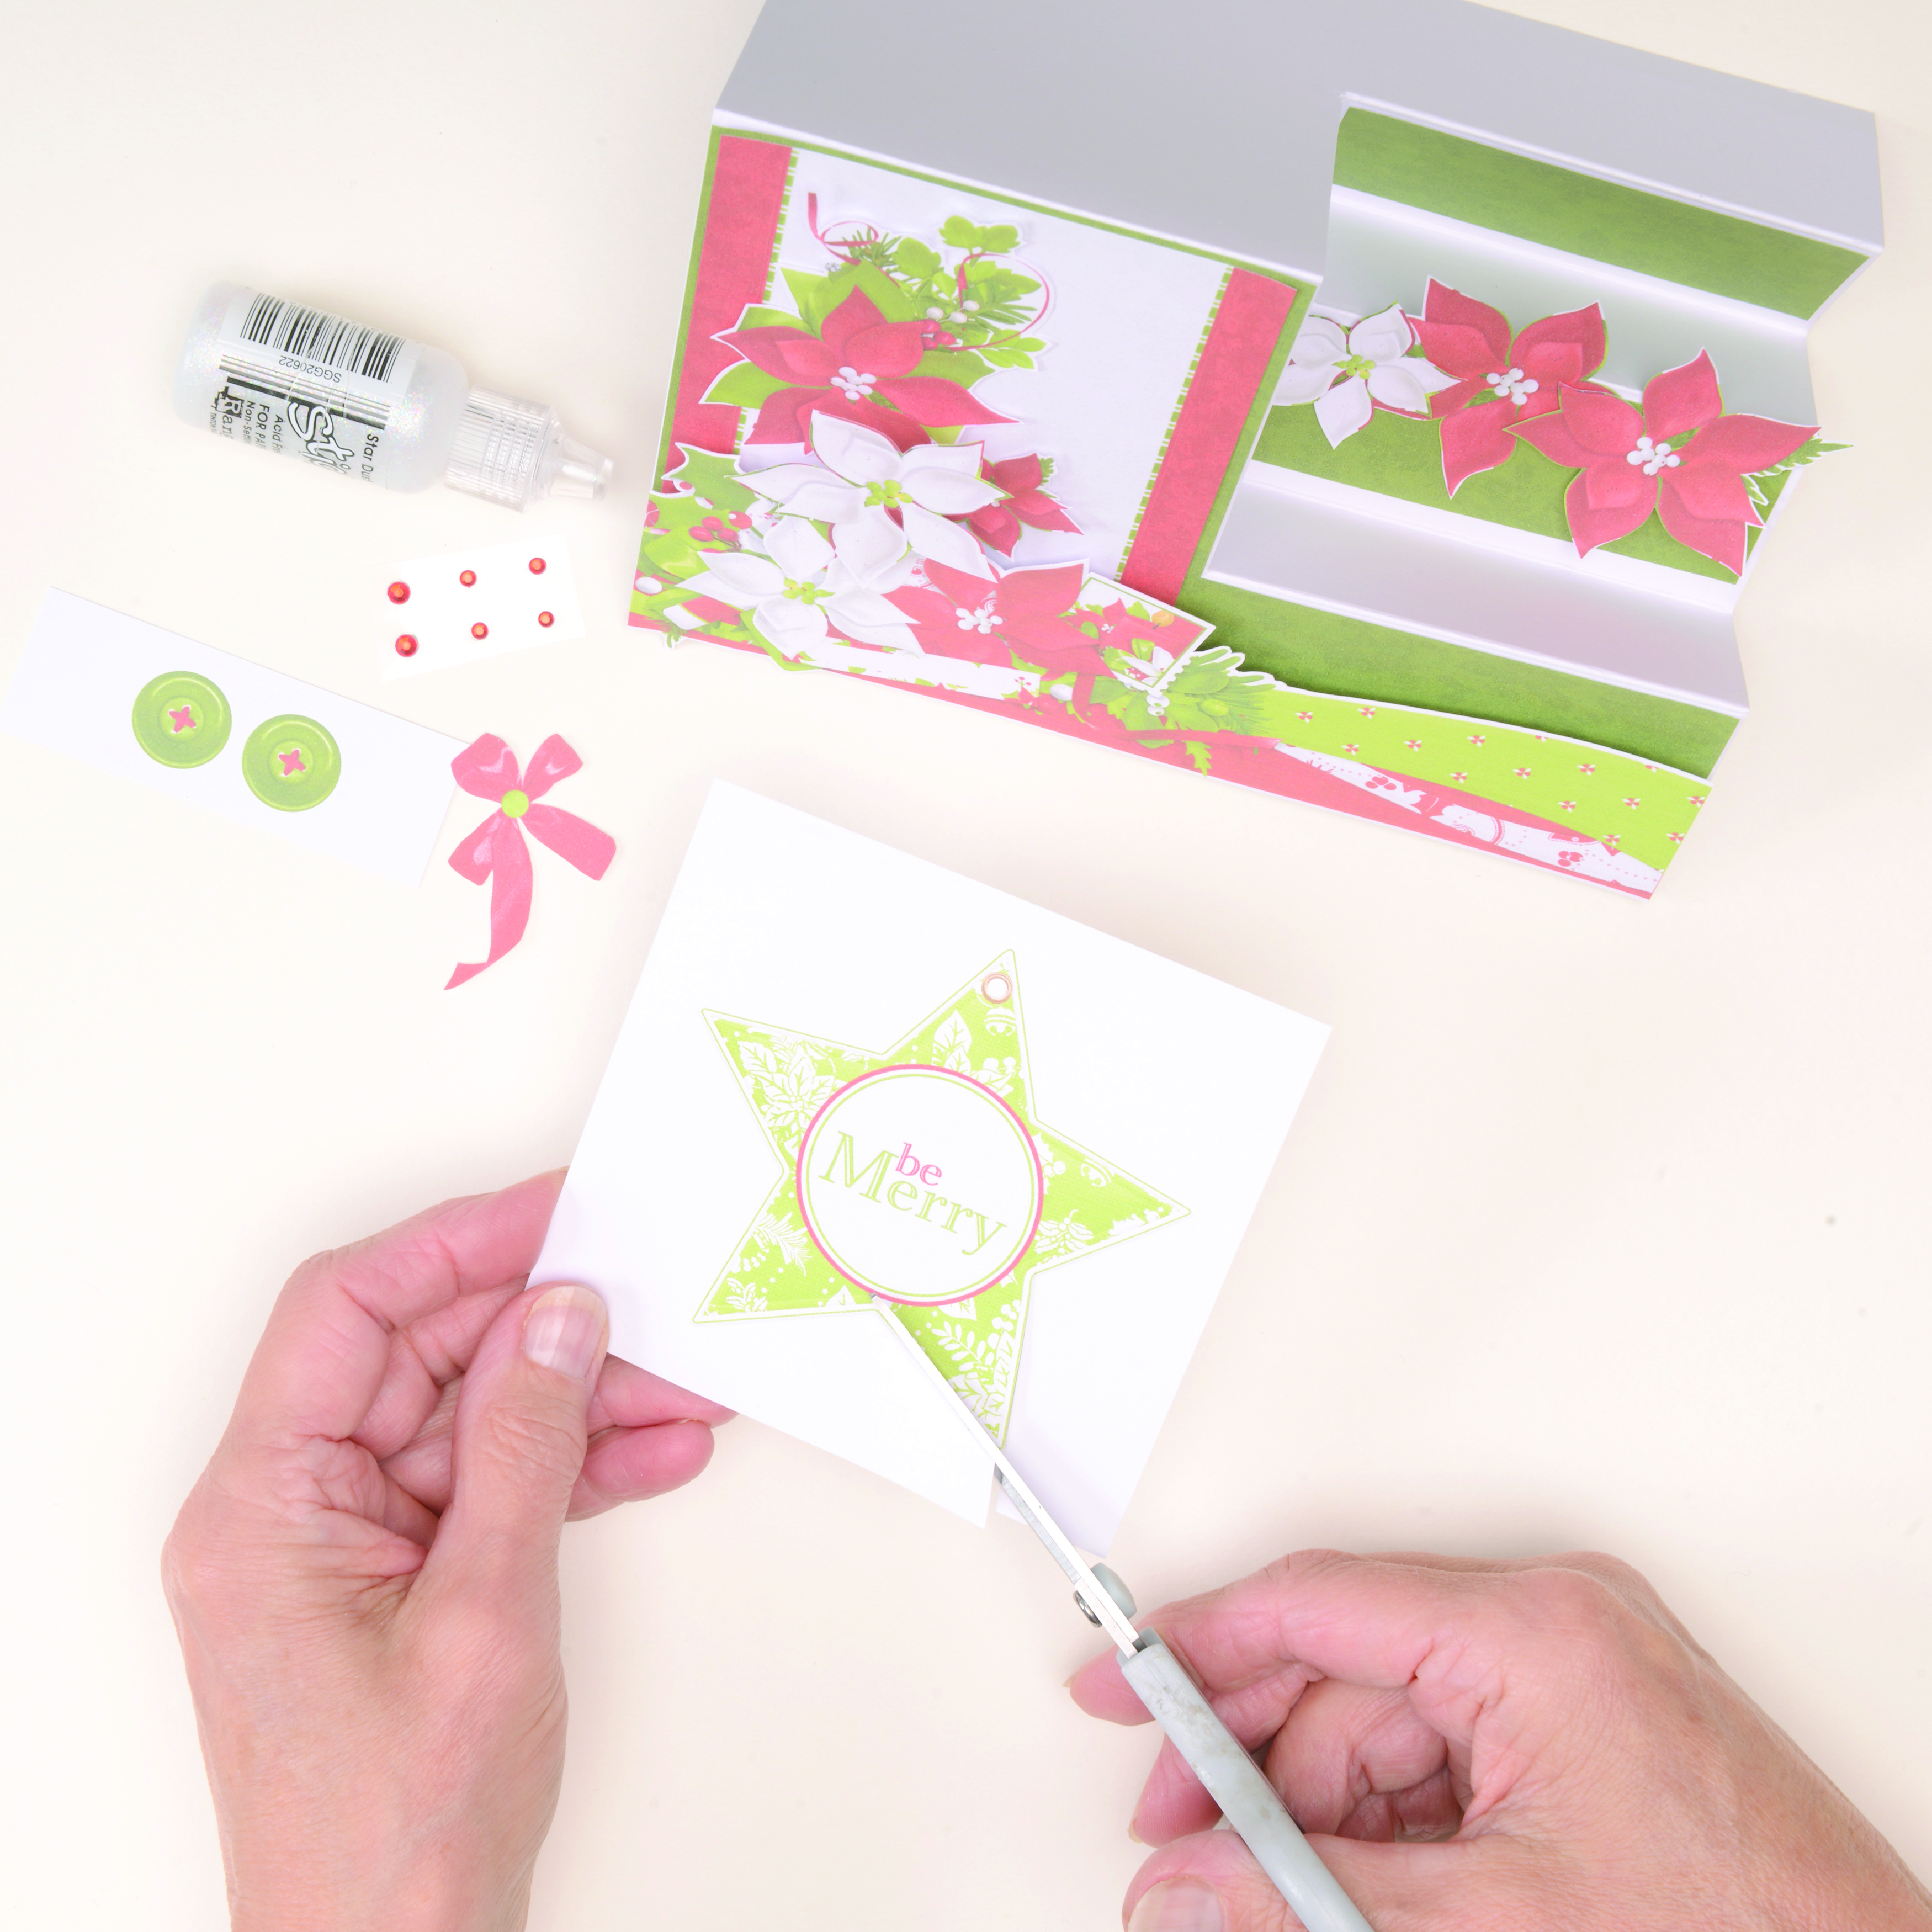
How to make a side stepper card 4

Trim star topper and attach to the back panel, as shown. Top with a printed red bow and a red gem. Attach two printed green buttons to the front of the base with foam pads. Finish with touches of glitter glue, as shown.