How to make a bow fold card
Wrap up a real gift for a loved one with these impressive bow fold card. They can be created with just a few oval and circle dies, which do all the hard work for you!

Published:
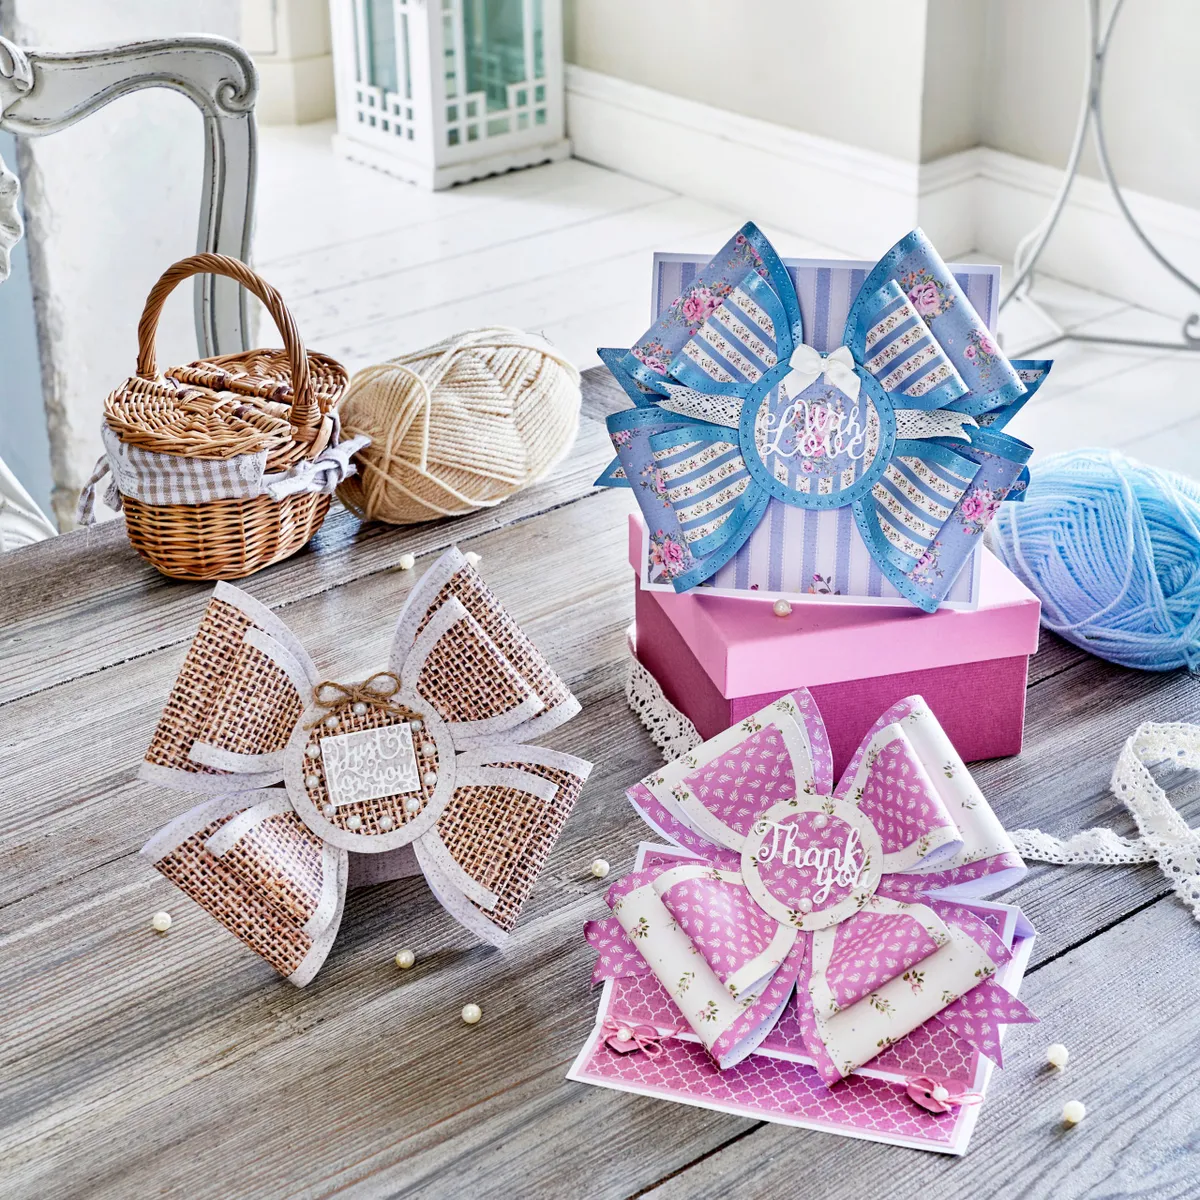
Take inspiration from your haberdashery drawers with these beautiful bow cards – they’re easier to make than you might think. Use your nesting oval and circle dies to cut different-sized ovals from contrasting patterned papers. Layer an oval onto a slightly larger oval, gently fold in half to create the bow loop shape, then secure with a staple or adhesive.
Create seven more bow loops, then assemble together to create the bow, before adding to your base. The various ovals of the bow are great for using up your paper scraps. You can even use your scallop-edged or stitched dies to add extra interest to the layers.

Shopping List:
- Die-cutting machine
- Stitched oval and circle nesting dies
- White and coloured card
- Patterned papers
- Tube (such as a glue stick, to wrap and shape the ovals)
- Adhesive pearls
- Baker’s twine
- Glue gun
- Ribbon
You Will Need
- Die-cutting machine
- Patterned papers
- Coloured card
- Dies
Step 1
Layer four small ovals of striped paper and four large ovals of floral paper onto larger die-cut ovals of blue pearl card. Roll each layered oval around a tube to form a loop shape, as shown.

Step 2
Fold the ends of the ovals together and secure with a glue gun. Attach the smaller ovals onto the larger ovals to create four double loops. Attach the loops to the reverse of a 7cm layered circle, as shown.

Step 3
Snip the ends of a 21×6.5cm strip of pearl card and a 19×5.5cm strip of striped paper to create two banners. Layer together and attach to the reverse of the layered bow using a glue gun.

Step 4
Attach a sentiment to the bow. Attach ribbon to the bow. Layer a square of striped paper onto a 15cm square top-fold base. Add the bow to the base using foam pads. Add a ribbon bow, to finish.
