How to create a water bleached effect with ink

Learn how to create the popular water-bleached effect using your Distress inks!

Try 6 issues of any craft magazine from just £9.99

Published: February 19, 2021 at 7:38 am

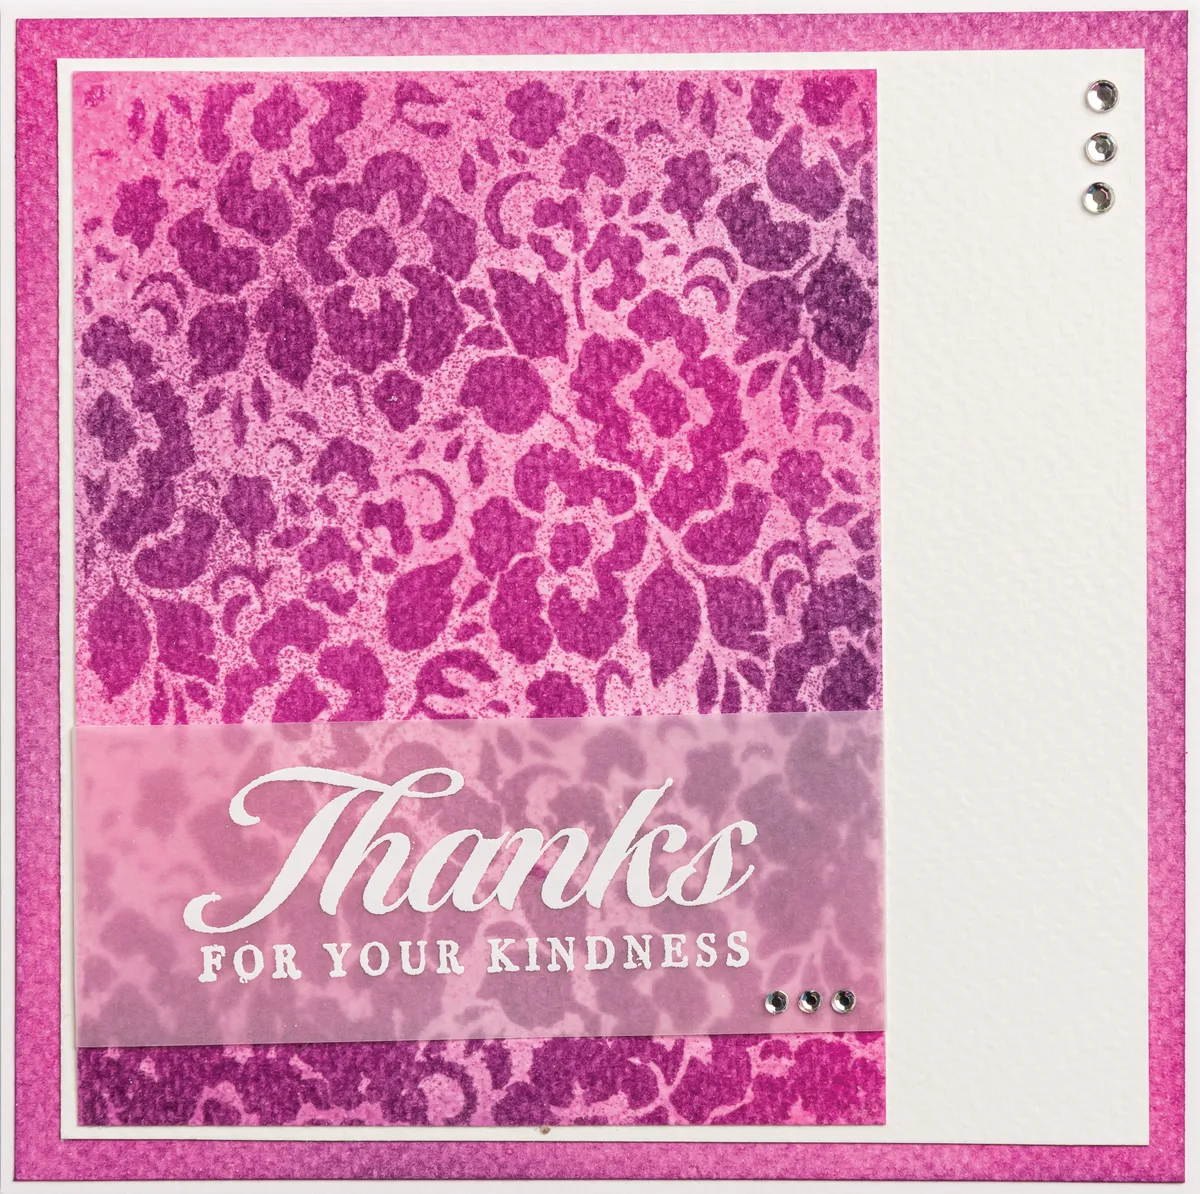
The water-bleaching technique uses a simple combination of watercolour card, water-based inks, stencils, water and paper towels to create a faux bleached look for your cards that will always be unique. The non-permanent properties of water-based inks can be used to transform background stencils into designs that will become the central focus of your cards.

How to create a water bleached effect

Water-based ink is applied to a piece of watercolour card. The stencil is placed over the card and the pattern is heat embossed. The panel is then spritzed with water, and some of the colours are lifted using a paper towel to create a two-tone effect. For these cards, our designer Carolyne Knott blended Distress Inks together to create the base colour, which provides even more interest when the ink is lifted.

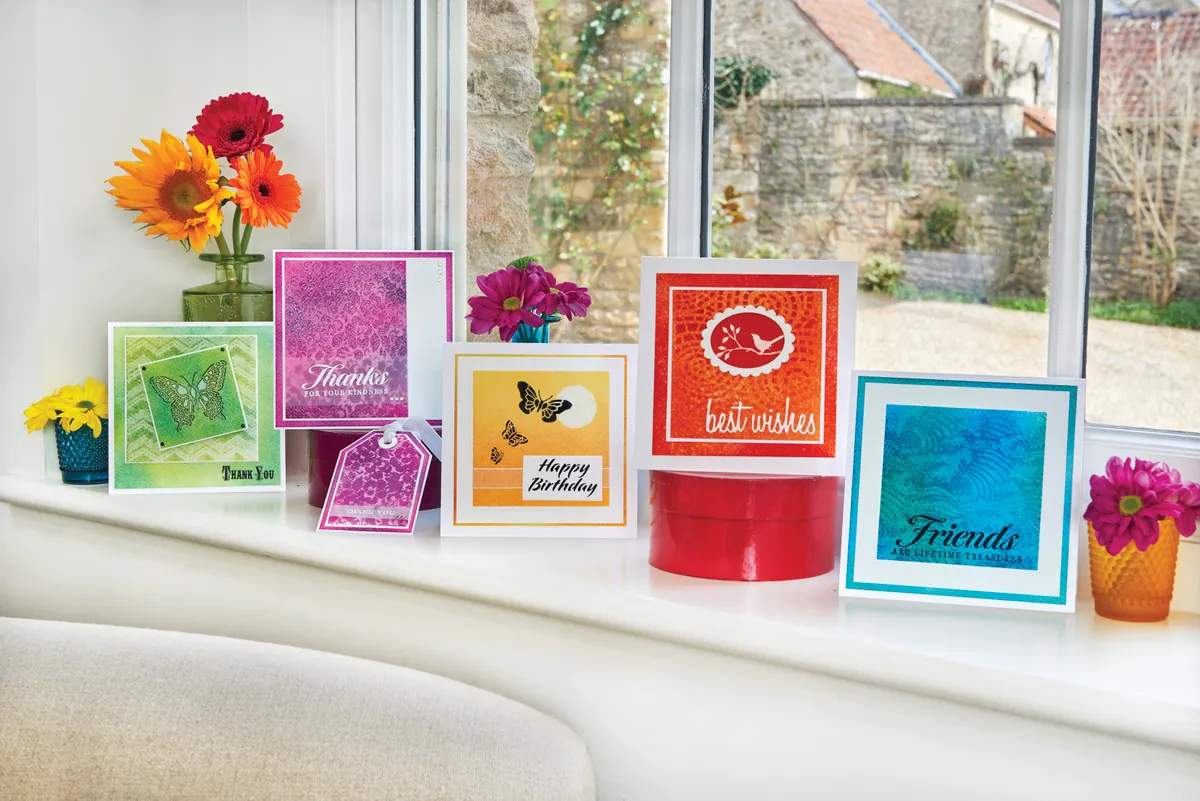
Carolyne has used a lovely selection of new Dreamweaver stencils to create these colourful and stylish cards, but the same technique could also be used with stamps. Very little equipment is needed, so why not give it a try?

If you’re looking for some nice papers to decorate your cards with, check out our selection of free patterned papers – just print them out and you’re good to go!

If you’ve tried this technique, don’t forget to share your makes with us on Facebook and Twitter, we love to see what you’ve made!

Make this water bleached card

Water bleached thank you card

You will need:

  • Distress inks
  • stencils
  • Water
  • Card (white)

Step 1

Use a blending tool to ink a 150mm square of watercolour card with Dusty Concord and Picked Raspberry Distress Inks. Start from the edges and use circular motions to blend the two colours together evenly until you have covered the card.

How to create a water bleached effect – step 1

Step 2

When the ink is dry, place a stencil over the top and press a VersaMark ink pad through onto the card. Ensure that the whole design has been covered. Remove the stencil, cover with clear embossing powder and set with a heat tool.

How to create a water bleached effect – step 2

Step 3

To create the water bleached effect, spritz water onto the Distress inks and lay a paper towel across the image to remove some of the ink from the unembossed areas. Continue dabbing the card with the paper towel until you have removed enough ink. Trim the panel to 100 x 130mm.

How to create a water bleached effect – step 3

Step 4

Use VersaMark ink to stamp a sentiment onto a 40 x 160mm strip of vellum and heat emboss in white. Wrap around the bottom of the panel and secure. Attach to the left-hand side of a 135mm square of white card.

How to create a water bleached effect – step 4

Step 5

Ink the edges of a 145mm square of watercolour card with Dusty Concord and Picked Raspberry Distress Inks; attach to a 148mm square white base. Add the stencilled panel to base, and add gems to finish.

How to create a water bleached effect – step 5

Step 6

Repeat the technique on a 60 x 100mm tag of watercolour card. Add an embossed vellum sentiment and layer onto some white and inked card. Punch a hole, add a ring reinforcer and thread with white ribbon. Finish with gems.

How to create a water bleached effect – step 6

Water bleached gift tag