Step 1
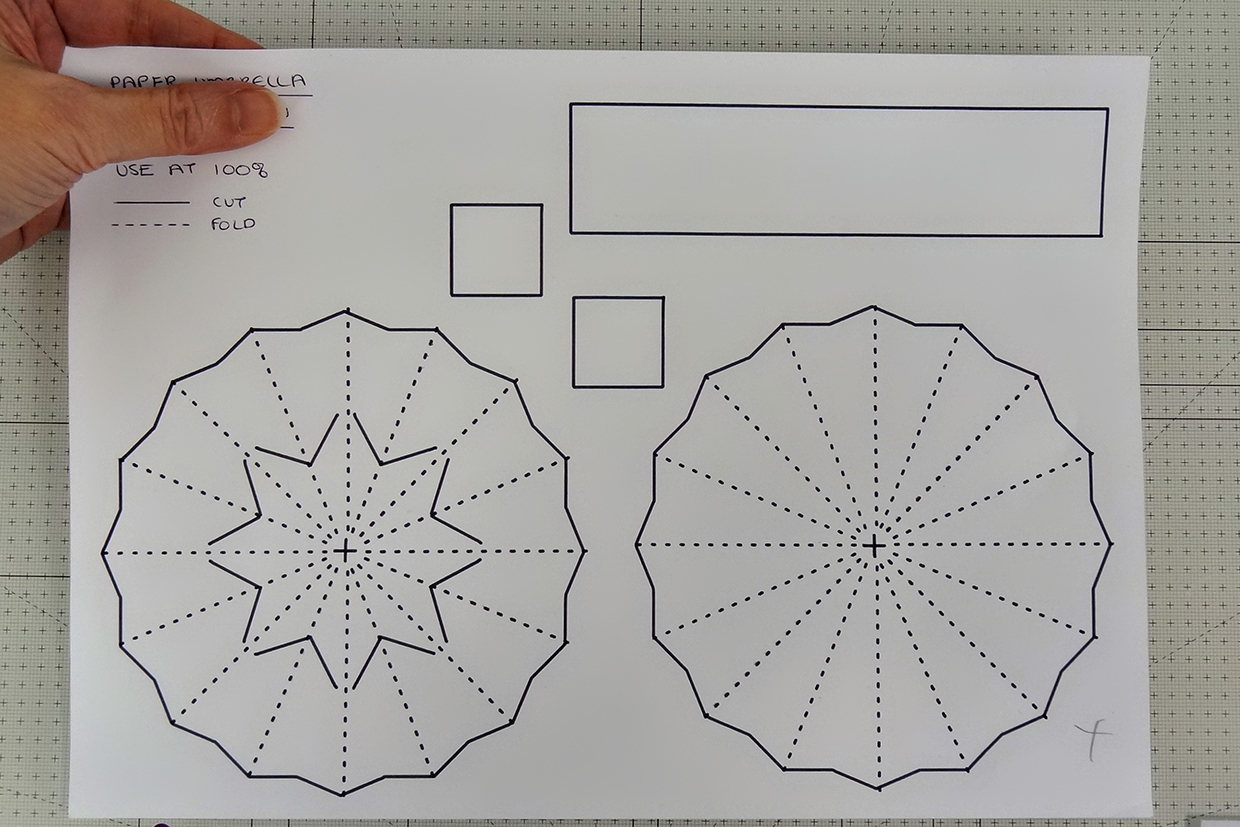
Print off your small paper umbrella templates on to patterned paper and cut out using scissors. Alternatively download the cutting files or scan the templates into your Scan N Cut machine onto your machine.
Step 2
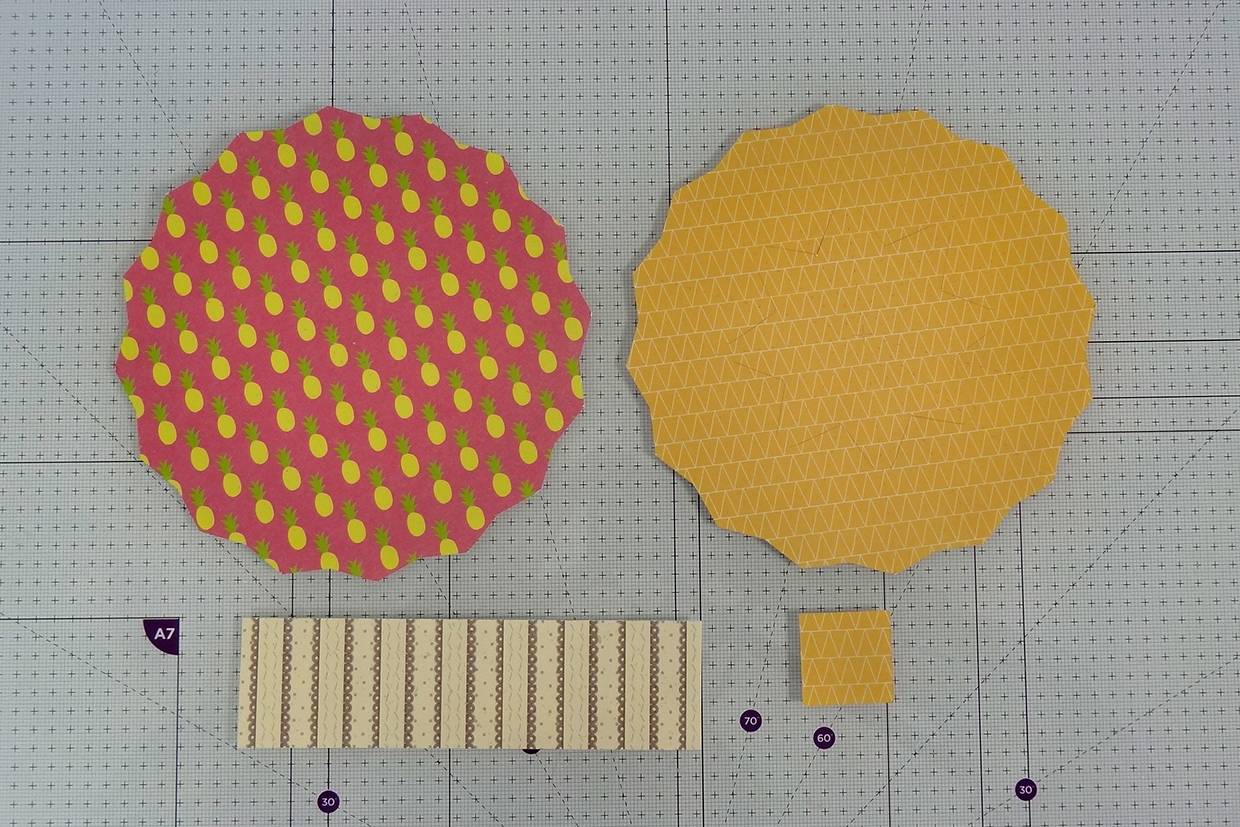
Cut out the following pieces from your choice of coloured patterned papers with an ideal weight of 120gsm to 150gsm:
1 x upper canopy piece
1 x lower mechanism piece
1 x stem piece
1 x slider piece
Step 3
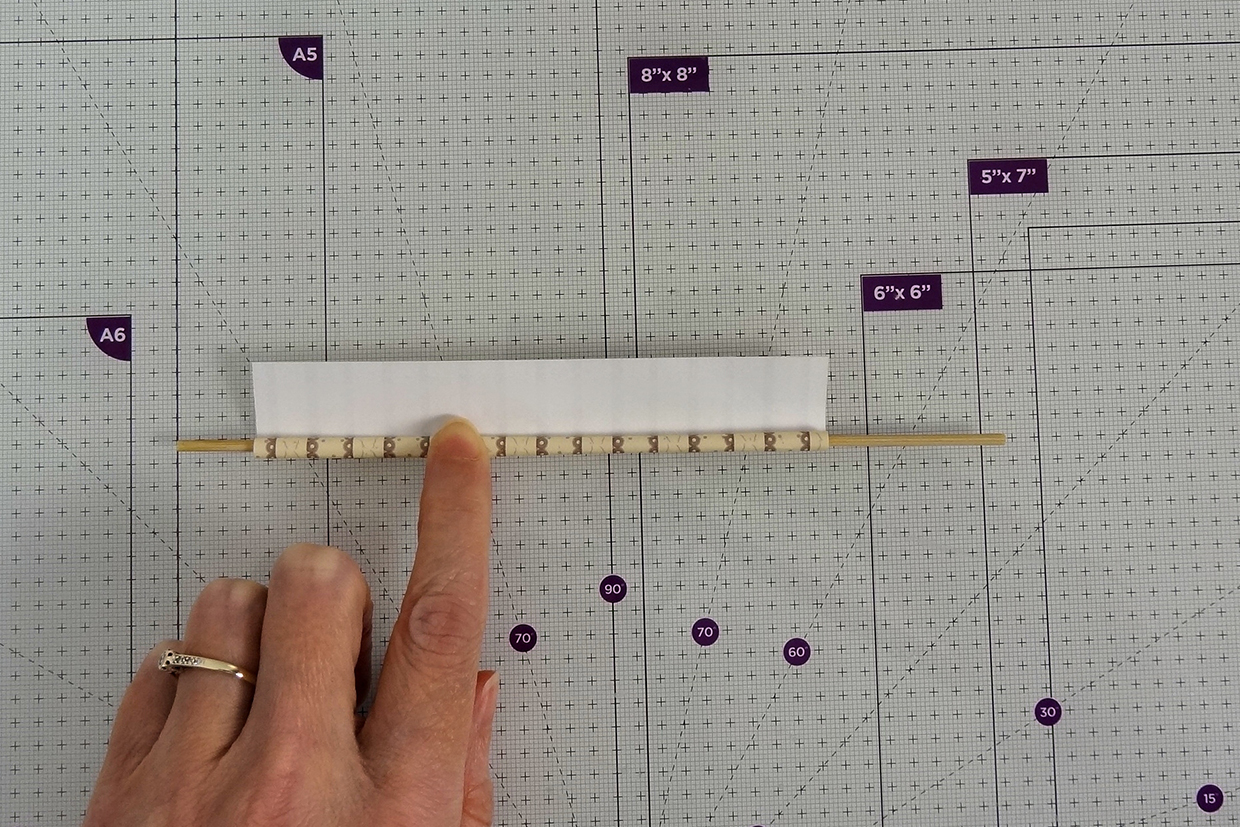
Take the rectangle stem piece and roll it to form the umbrella stem. It is easier to roll if you use a wooden barbecue skewer stick or cocktail stick. Roll tightly and add double sided tape or glue to seal the roll before sipping it off the forming stick.
Step 4
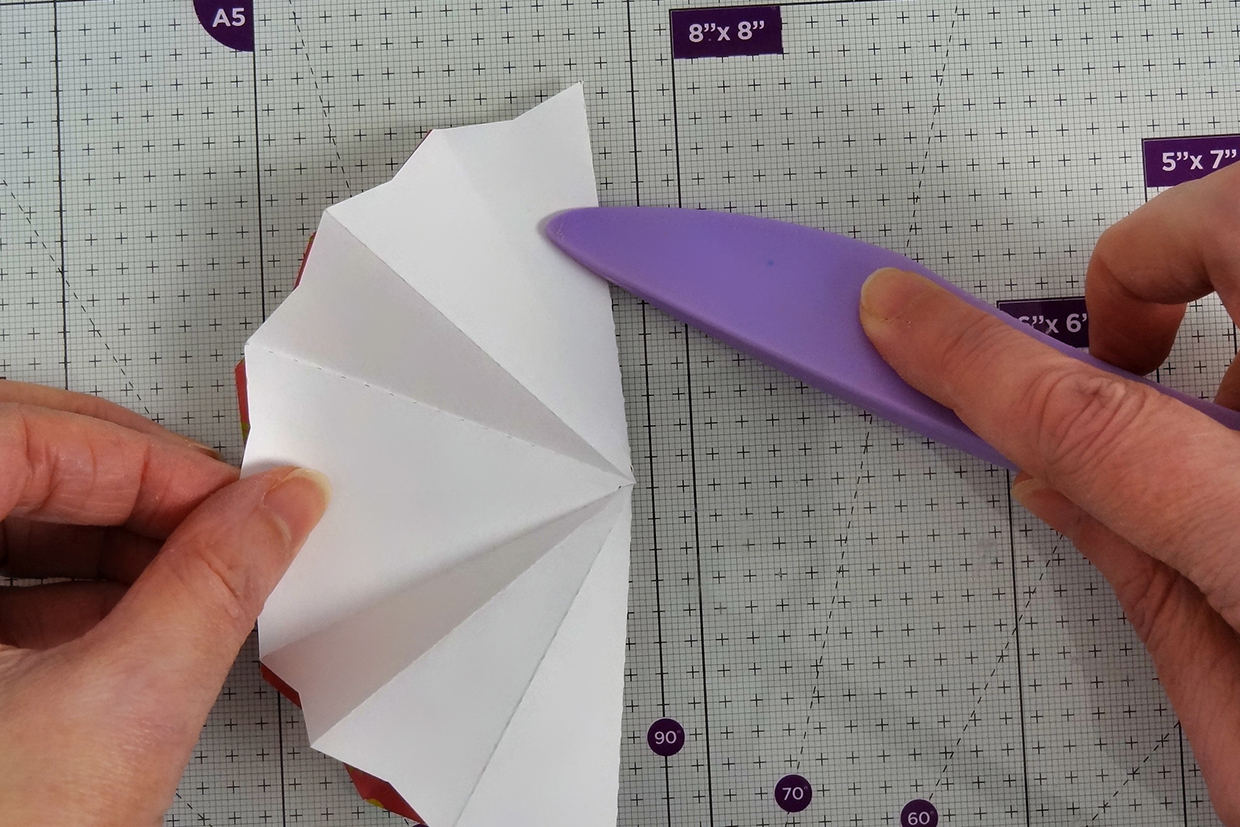
Take the top canopy piece and begin folding at the score lines. Fold by alternating mountain and valley folds, burnishing to reinforce the folds.
Step 5
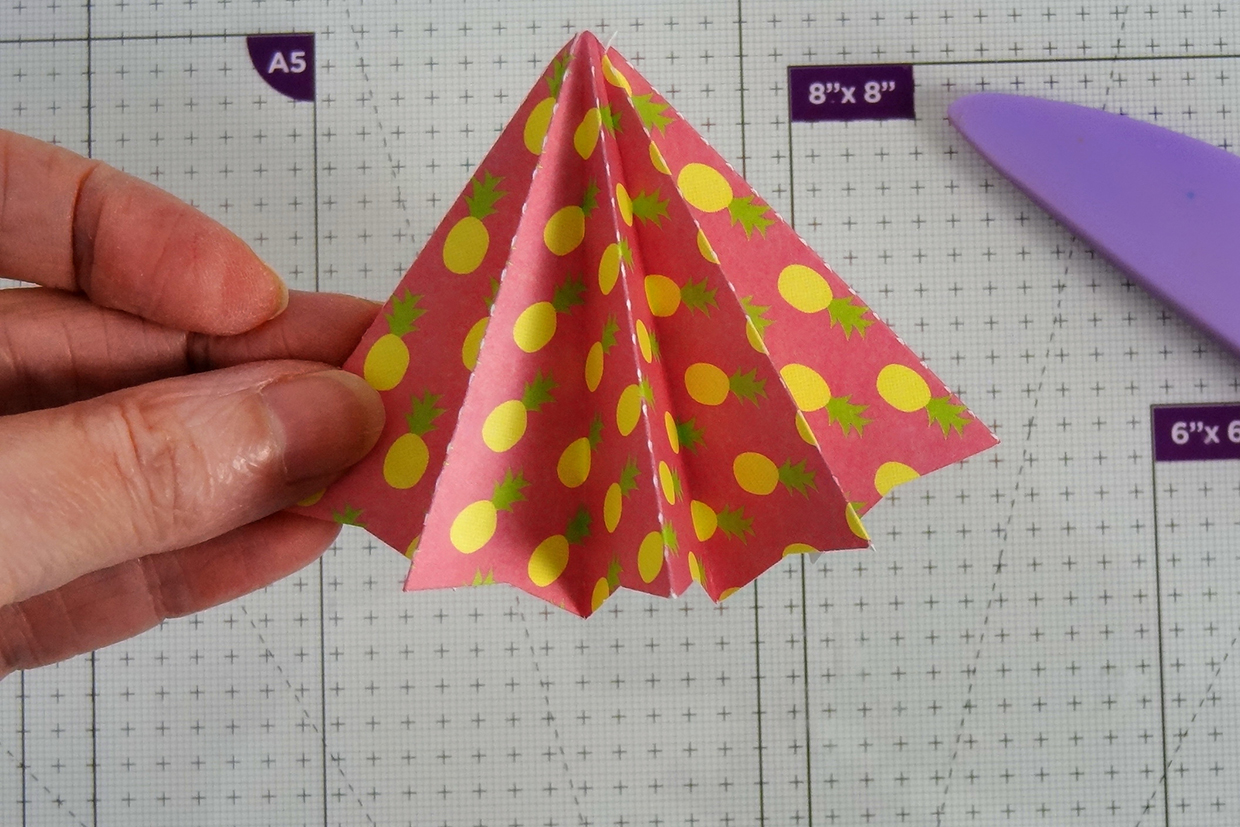
Squeeze the folds together and your top canopy piece will now look like this. Set aside.
Step 6
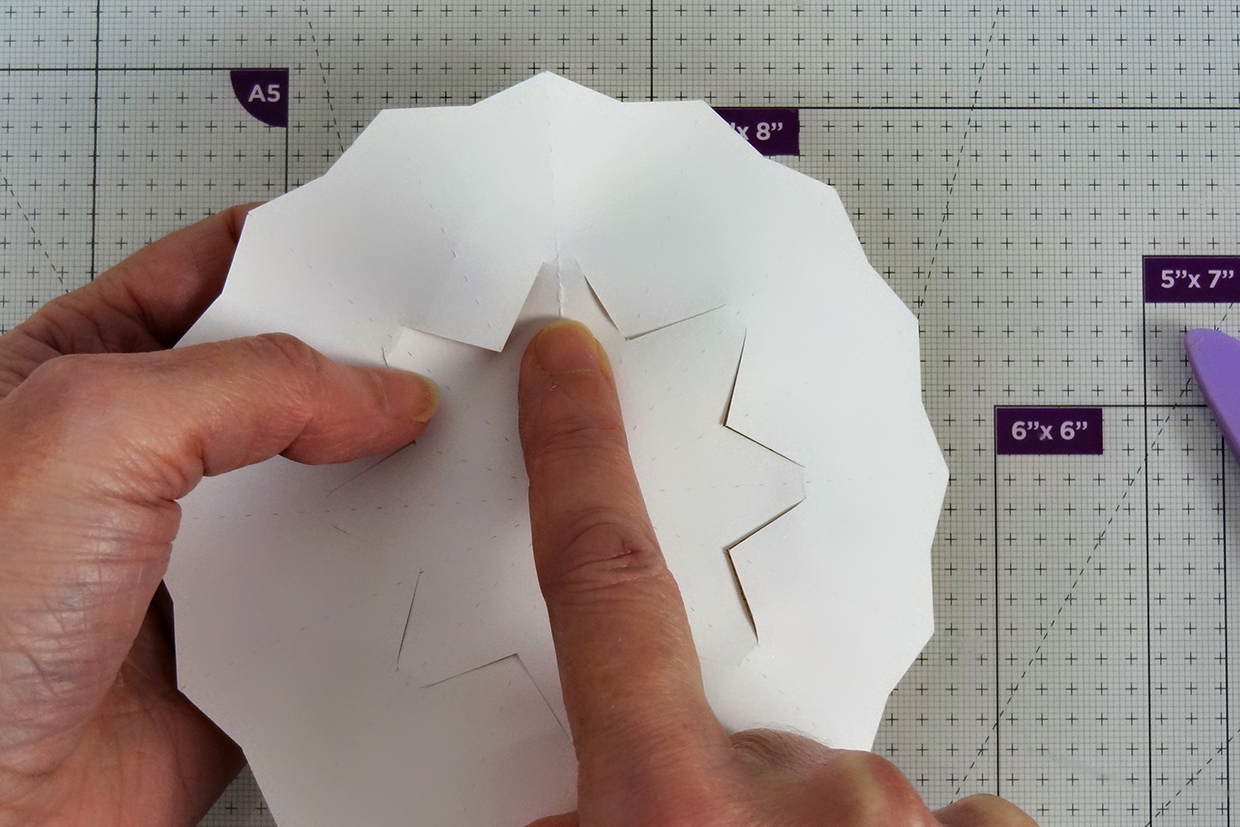
Take the lower mechanism piece and begin to ease the folds at the tips of the inner petals.
Step 7
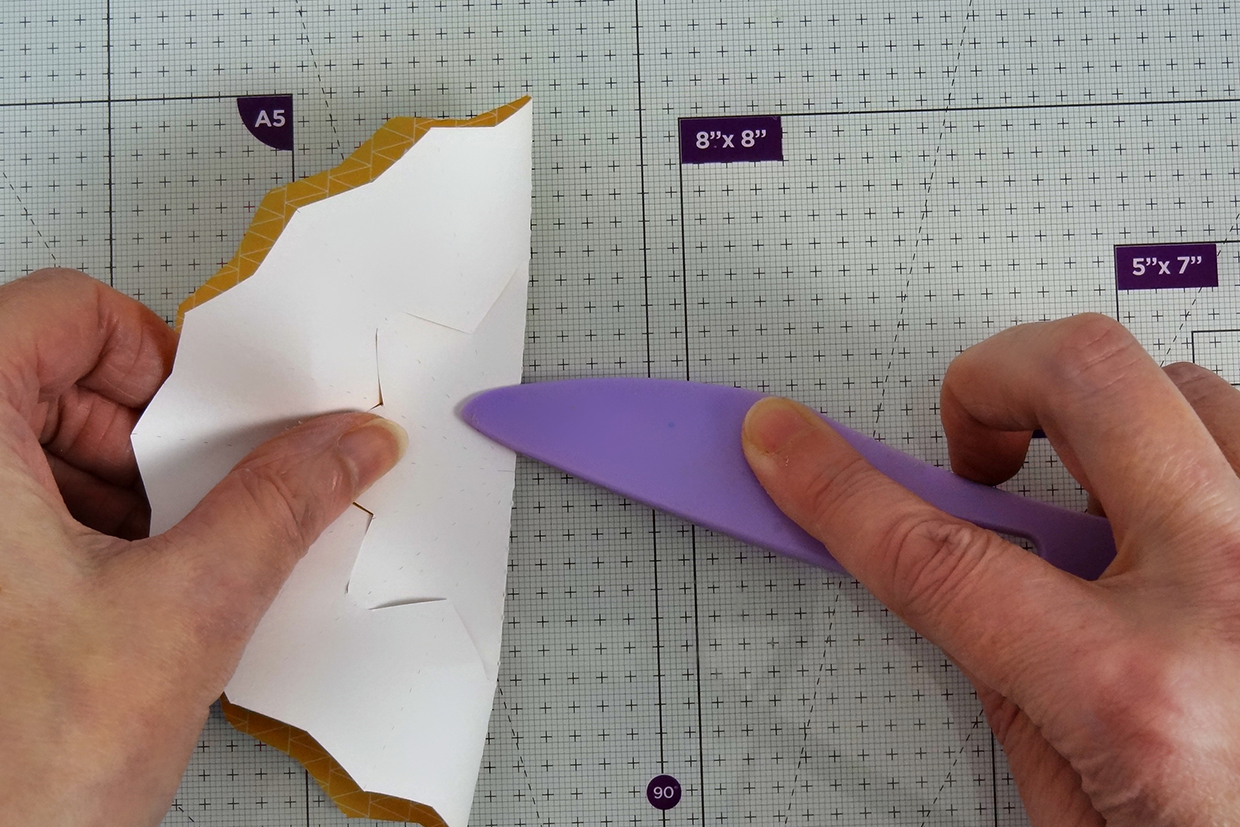
Turn over and find the score lines that go down the points, gently ease the folds on the inner petals alternating the valley and mountain folds. Fold paper in half to help with folding inner section only for now.
Step 8
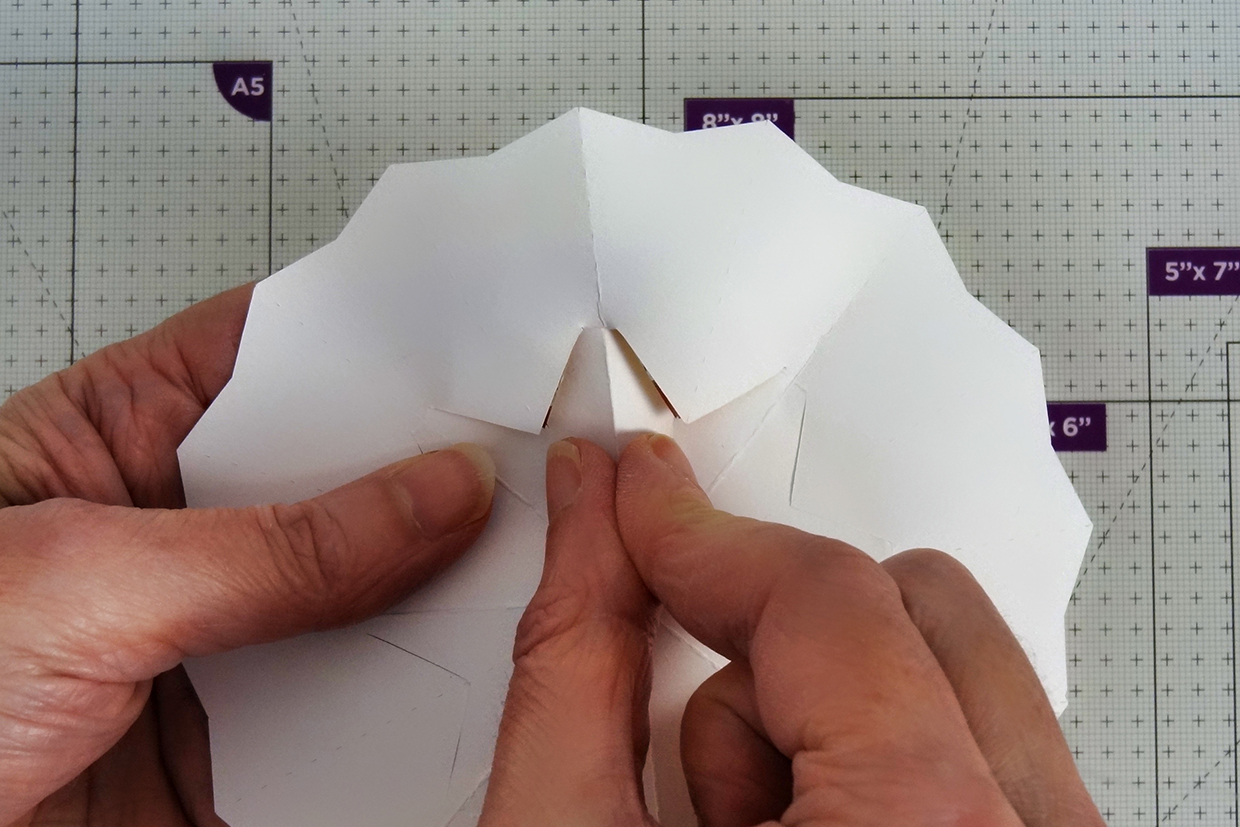
Pinch the centre score line down the back of each of the 8 petals to help, viewed from the back it will be a mountain fold and creating a mountain fold either side.
Step 9
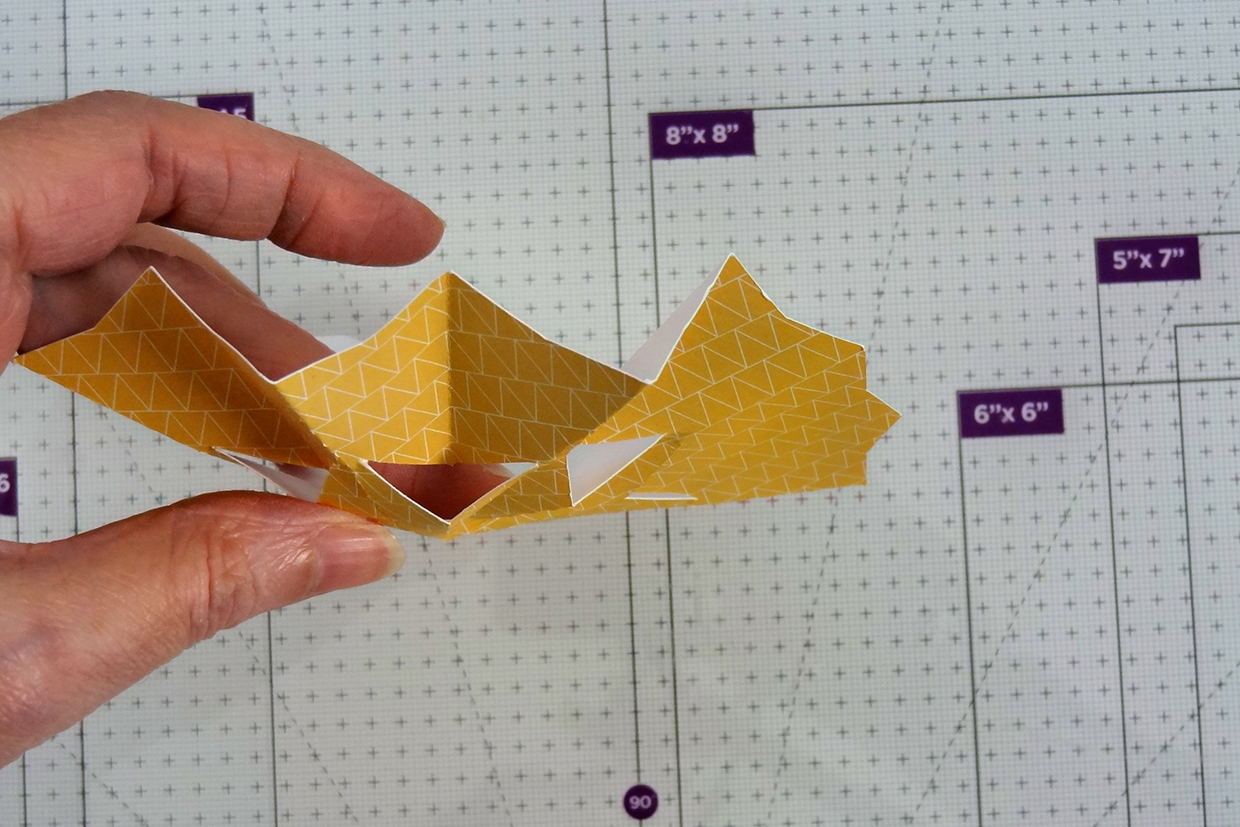
Turn over and begin folding the outer section on the mechanism, this will fold in the opposite way to the inner fold, but still alternate mountain & valley folds (as we did for the top canopy). Viewed from the side it will look like this.
Step 10
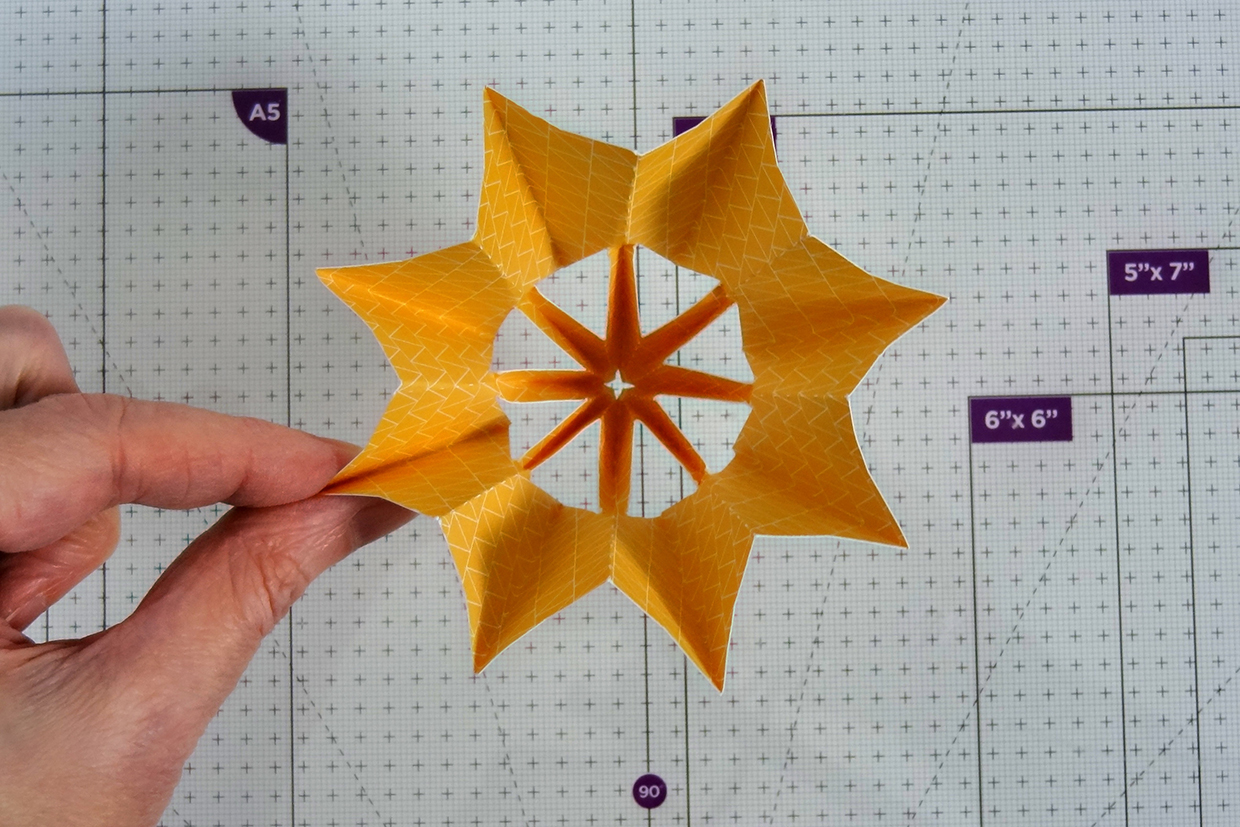
Squeeze the folds together more firmly to reinforce them. It will look like this on the right side.
Step 11
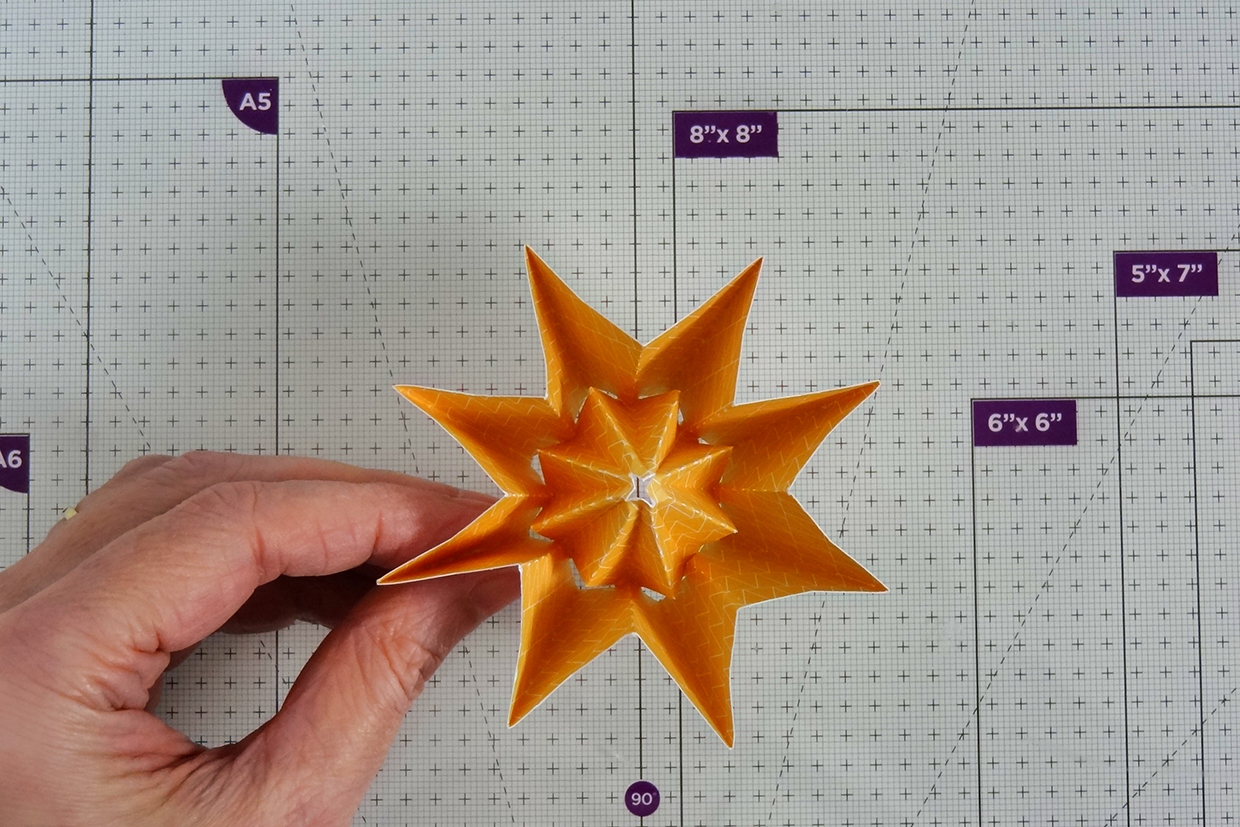
Gently push in the outer folds towards the centre and allow the centre petals to pop up, you may need to tease them into place, and then it should look like this. Now you can squeeze the folds together more firmly to reinforce them into place.
Step 12
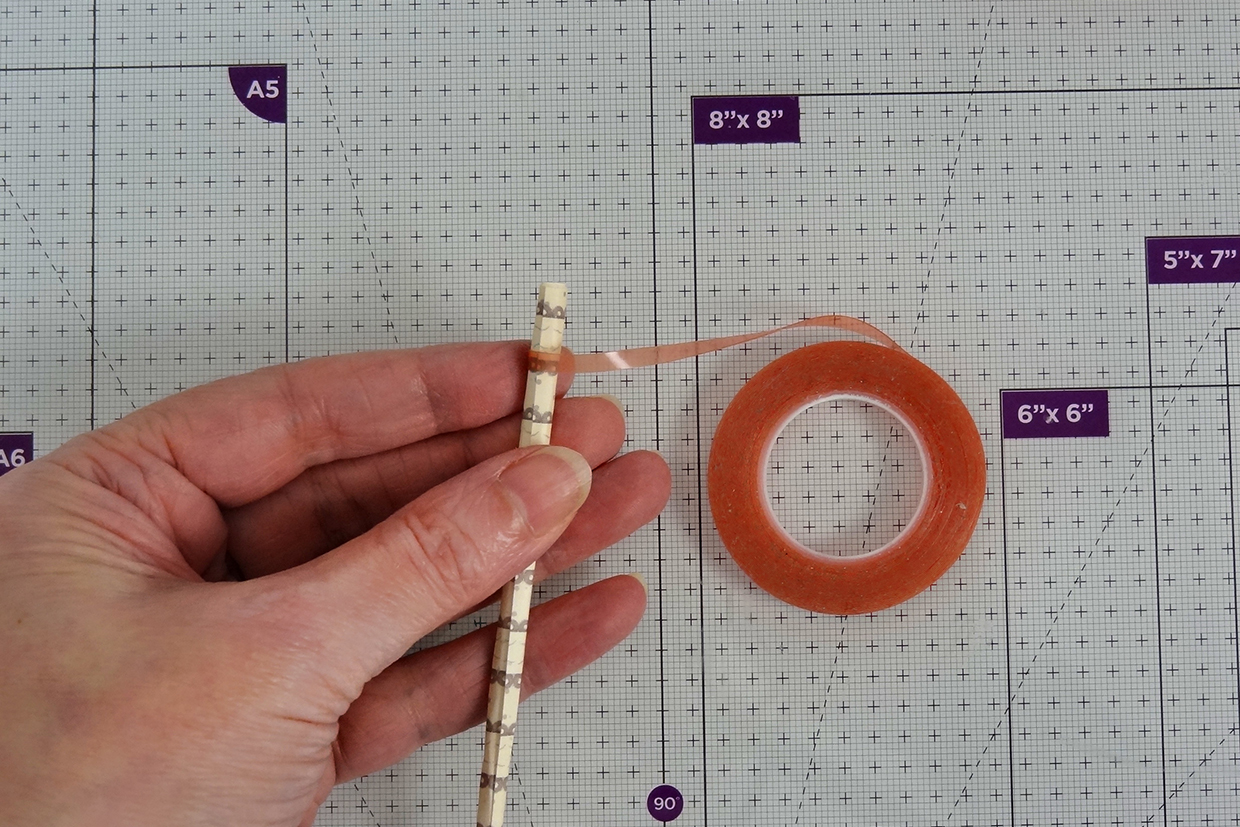
Take the stem piece and wrap thin adhesive tape around the top section, leaving some space at the top, as shown.
Step 13
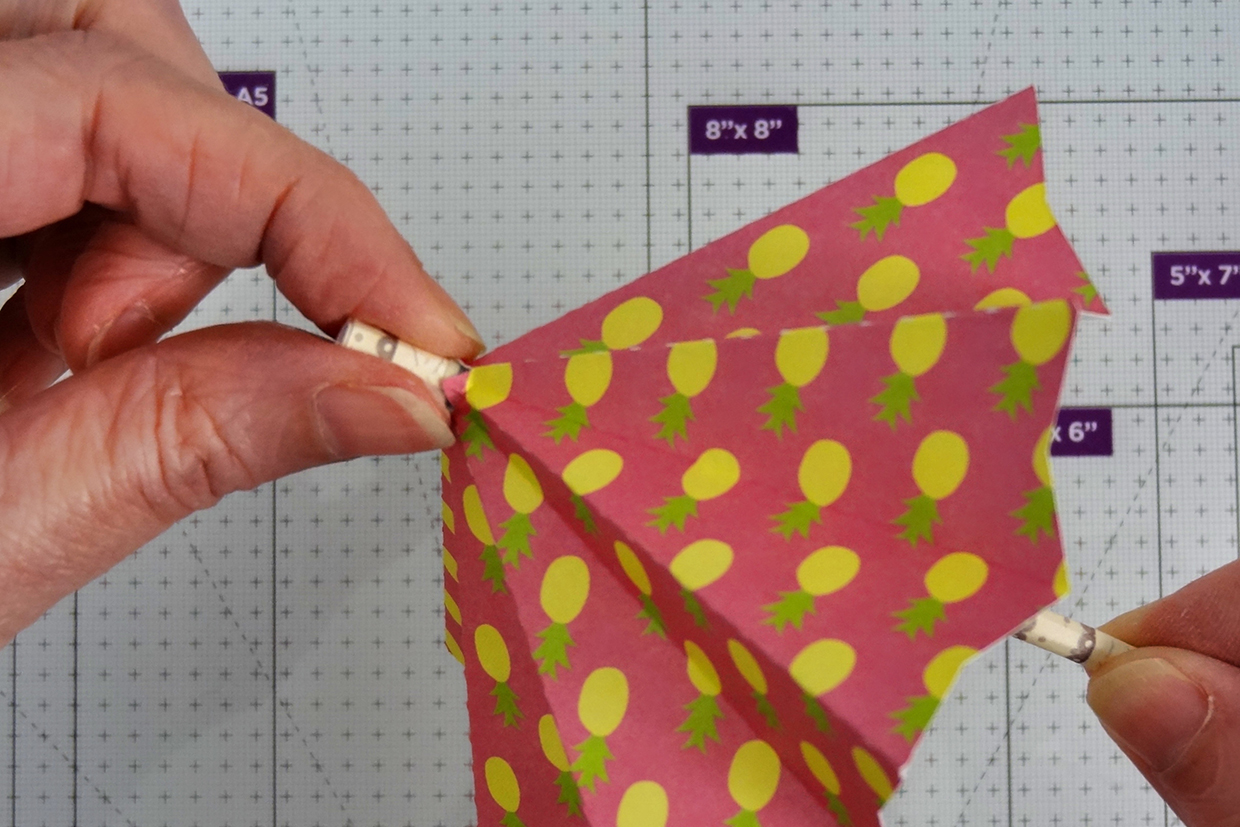
Push the tip of the stem through the centre hole in the canopy piece, ease it down until the centre tabs are on the adhesive, press them firmly to adhere, this will hold it in place for now.
Step 14
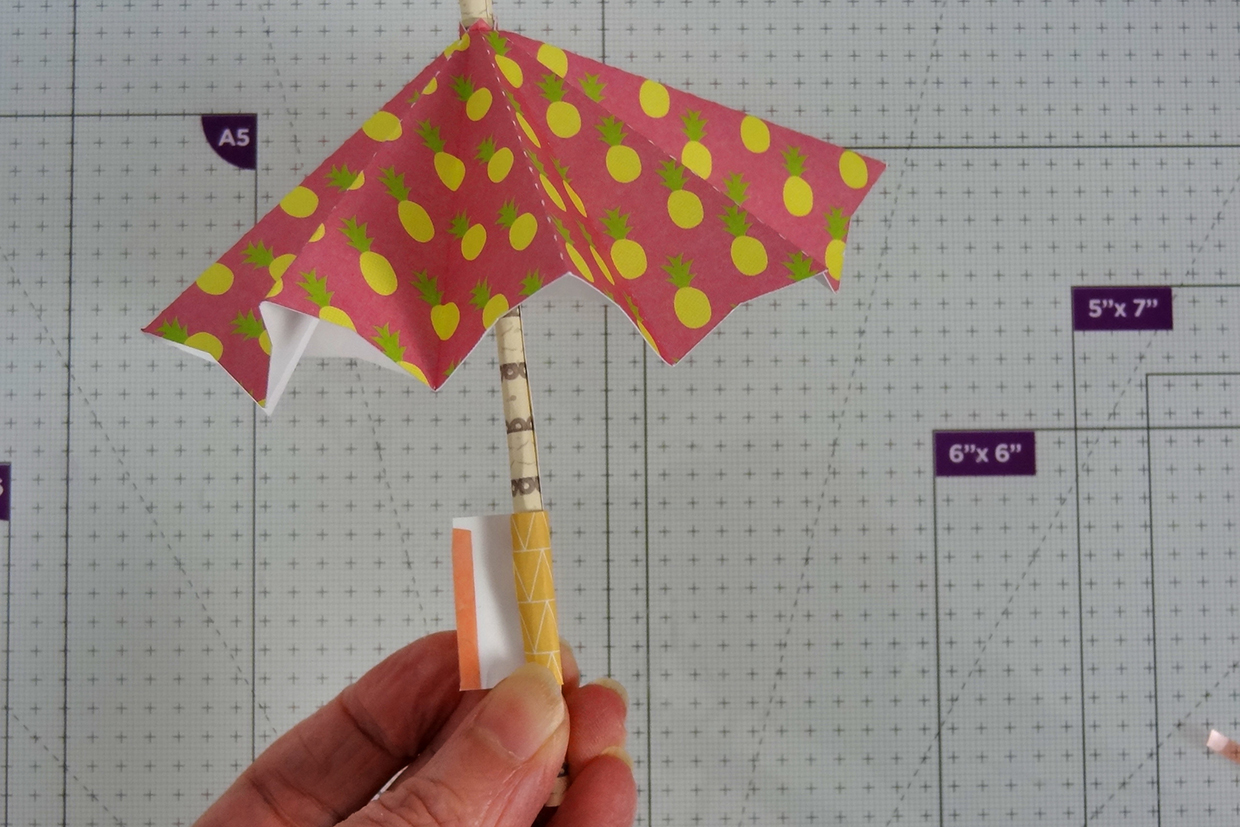
Take the square slider piece of paper and wrap it tightly around the stem, secure with tape at the end, tightly but ensuring the piece can still move freely up and down the stem.
Step 15
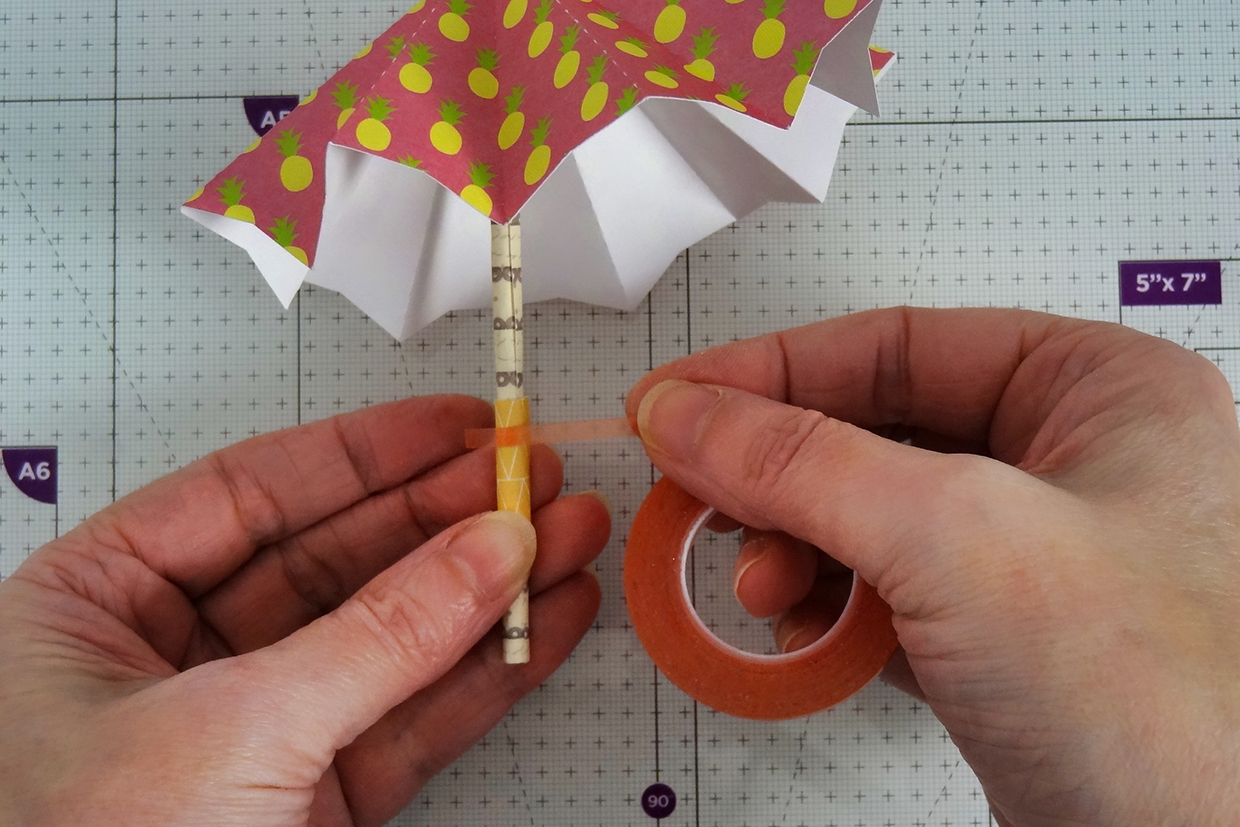
Next wrap thin adhesive tape around the top of the slider piece as shown.
Step 16
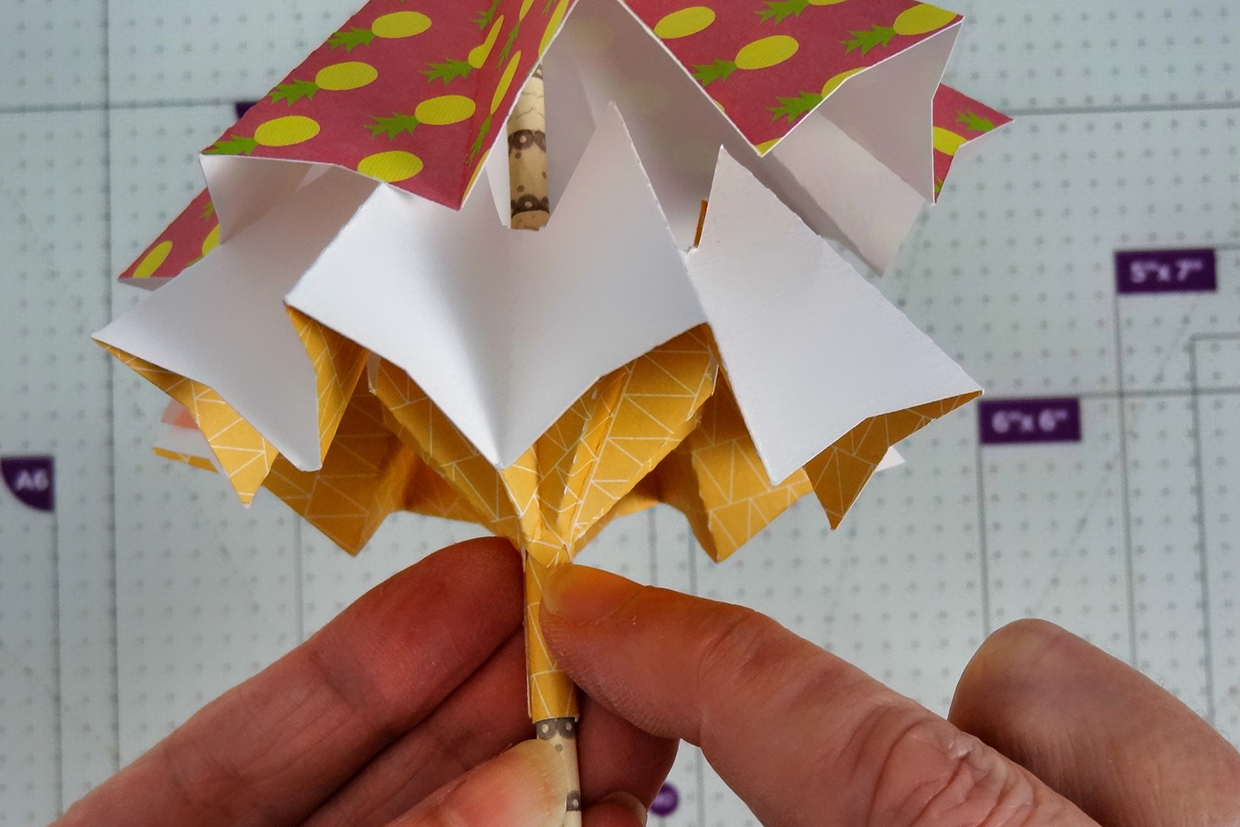 Push the lower stem though the centre hole in the mechanism piece. Gently ease it up onto the slider piece, you might need to push the slider down a little, until the centre tabs are on the adhesive tape, press them firmly to adhere.
Step 17
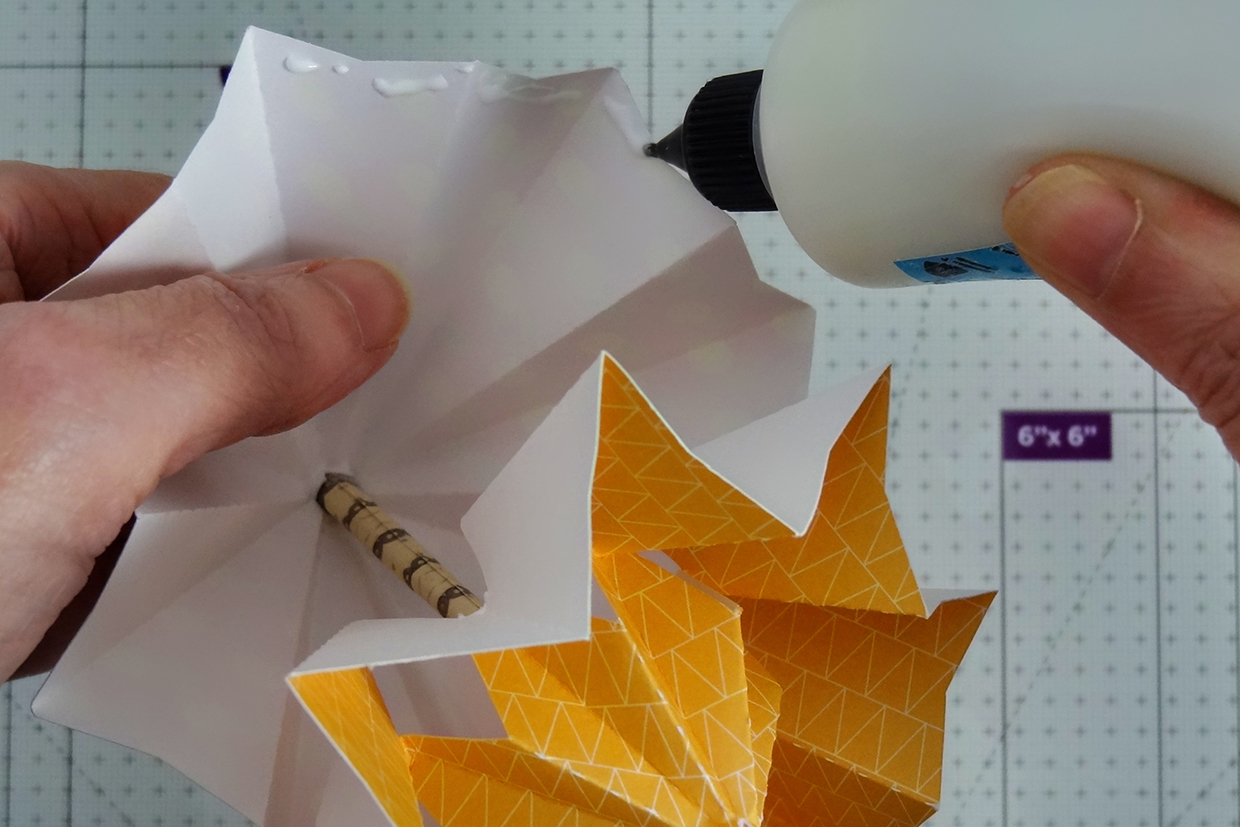
Apply glue around inside top edge of upper canopy as shown. Raise lower mechanism to meet the canopy, line up and press to adhere the folds together
Step 18
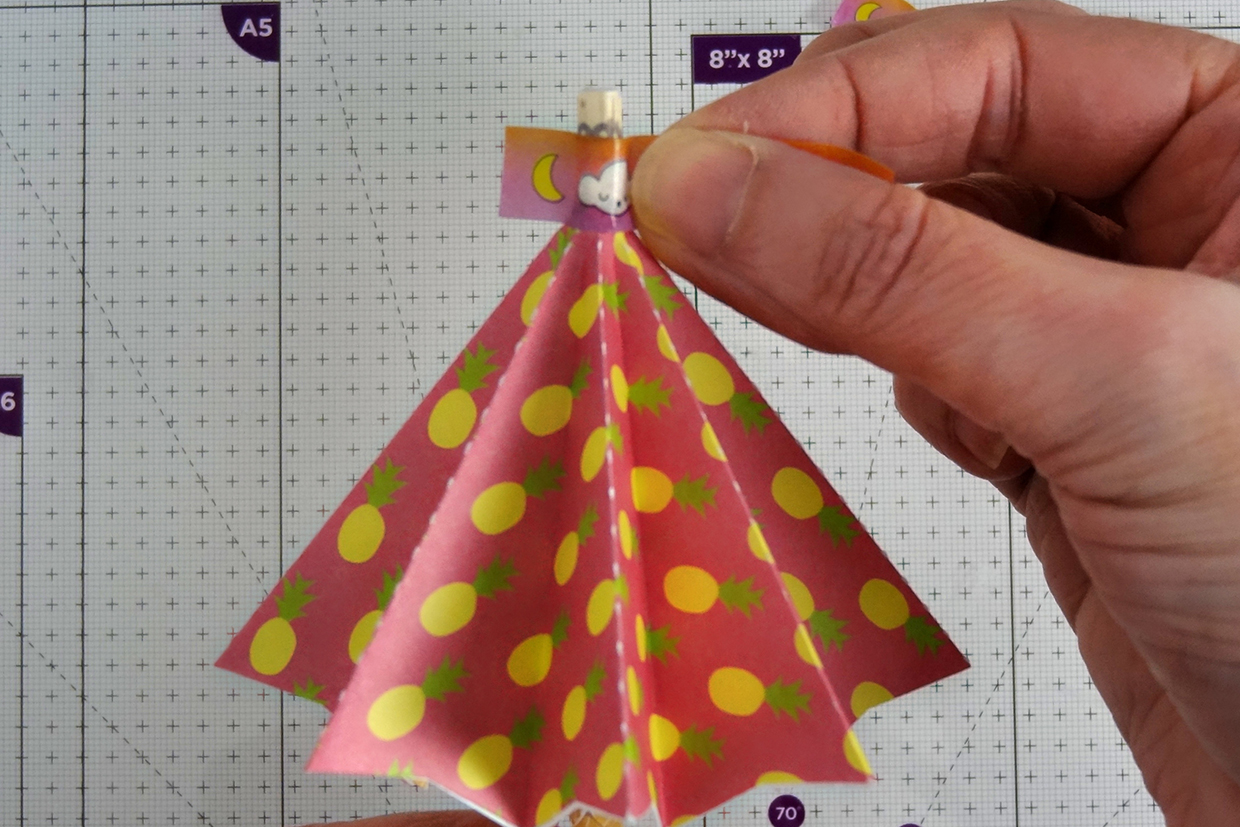
Wrap washi tape tightly around the top of the stem, over the tabs to secure them in place. If the tabs had come away from the adhesive tape, simply add tape over the top of the tabs and then continue with the washi tape. You can easily trim off the top of the stem with scissors to the desired size. Add a little metallic adhesive gem to top of stem if desired – use glue to ensure a good bond.
Step 19
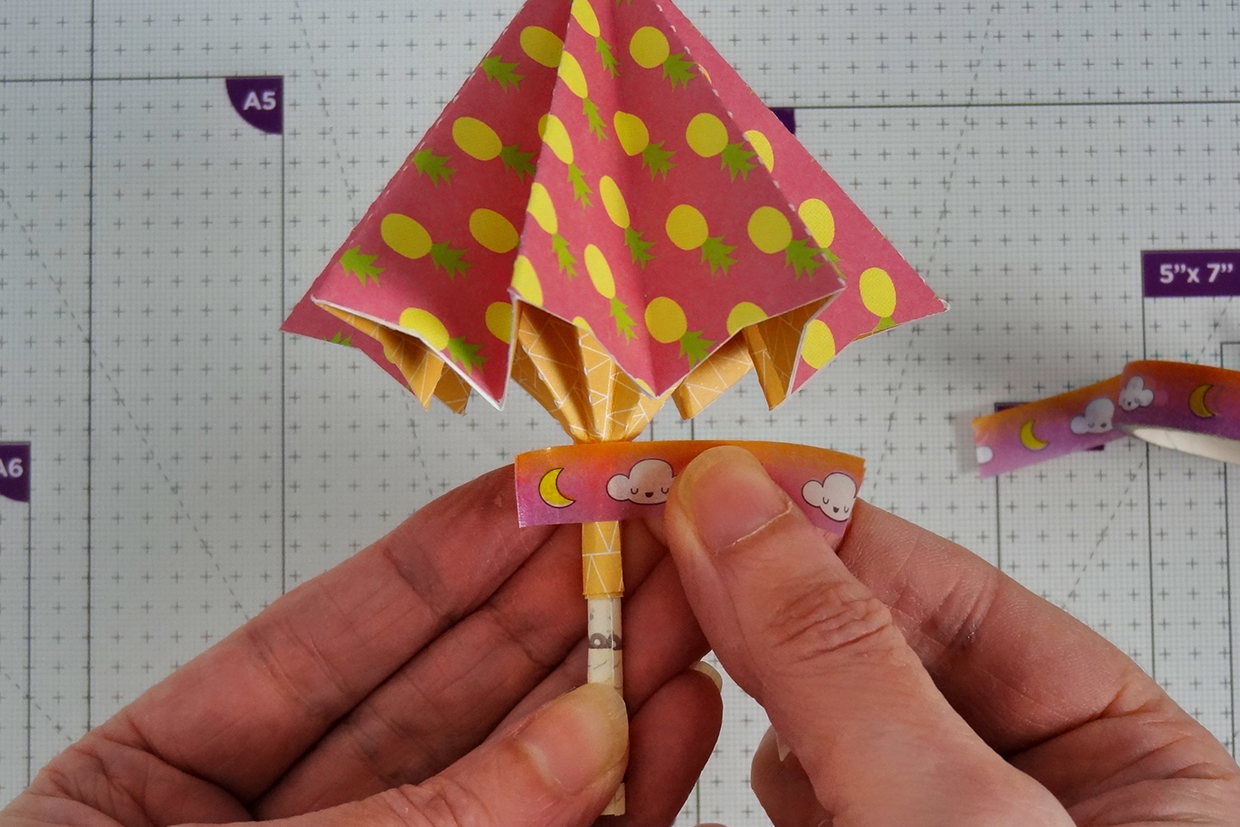 Wrap washi tightly around the slider piece, over the tabs to secure them in place, all as previous.
Step 20
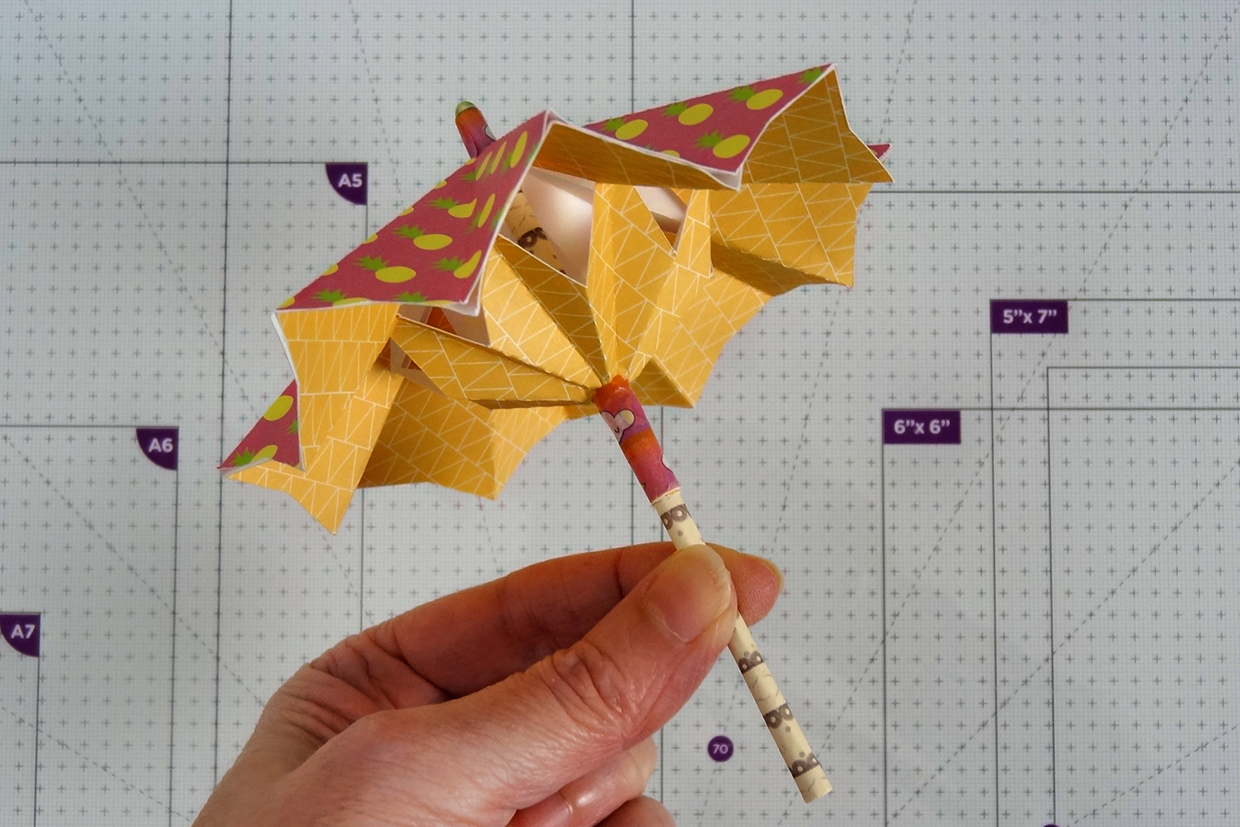 When glue is dry, test your umbrella by sliding the slider on the stem to open and close, you may need to press the folds a few times to ensure they are nice and firmly in position.
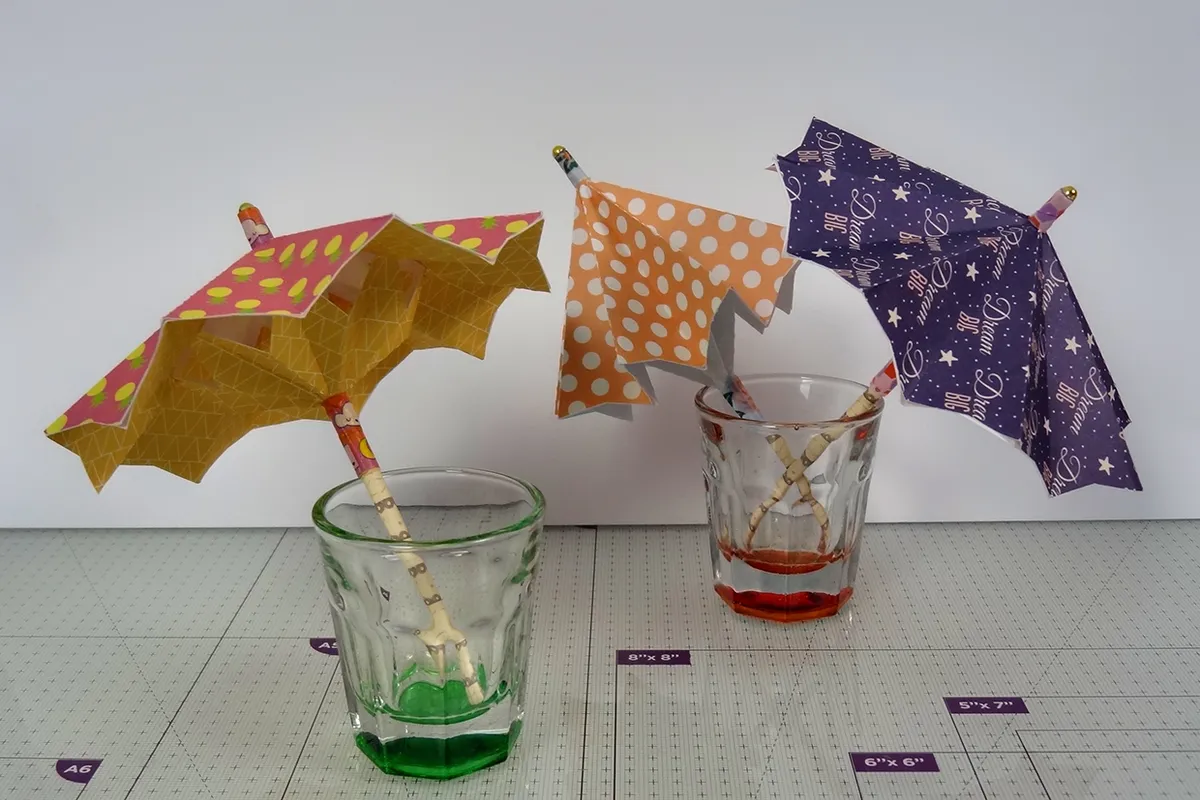


 Push the lower stem though the centre hole in the mechanism piece. Gently ease it up onto the slider piece, you might need to push the slider down a little, until the centre tabs are on the adhesive tape, press them firmly to adhere.


 Wrap washi tightly around the slider piece, over the tabs to secure them in place, all as previous.
 When glue is dry, test your umbrella by sliding the slider on the stem to open and close, you may need to press the folds a few times to ensure they are nice and firmly in position.
