How to make chocolate gift boxes

Open up this fold-out box card to find a tier of tasty treats! Our free template makes this an easy papercraft project for beginners.

Try 6 issues of any craft magazine for just £9.99

Published: December 4, 2020 at 9:53 am

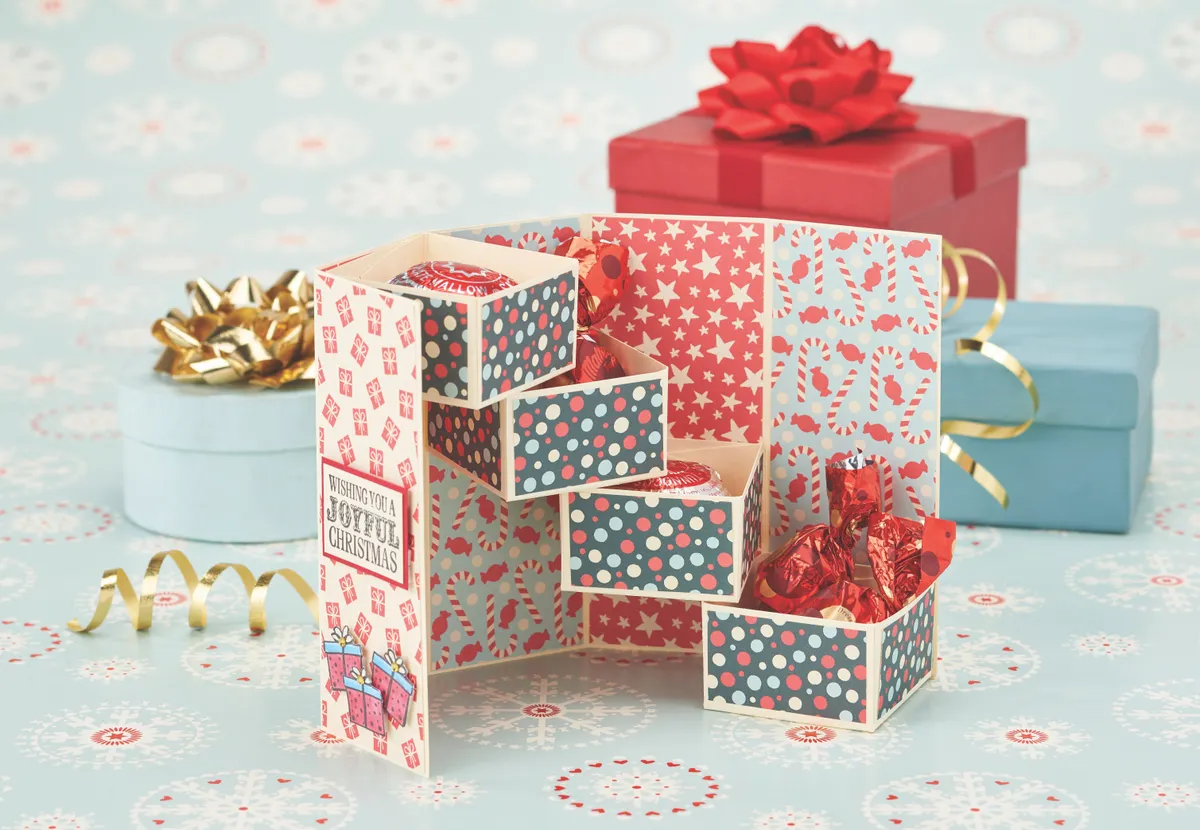
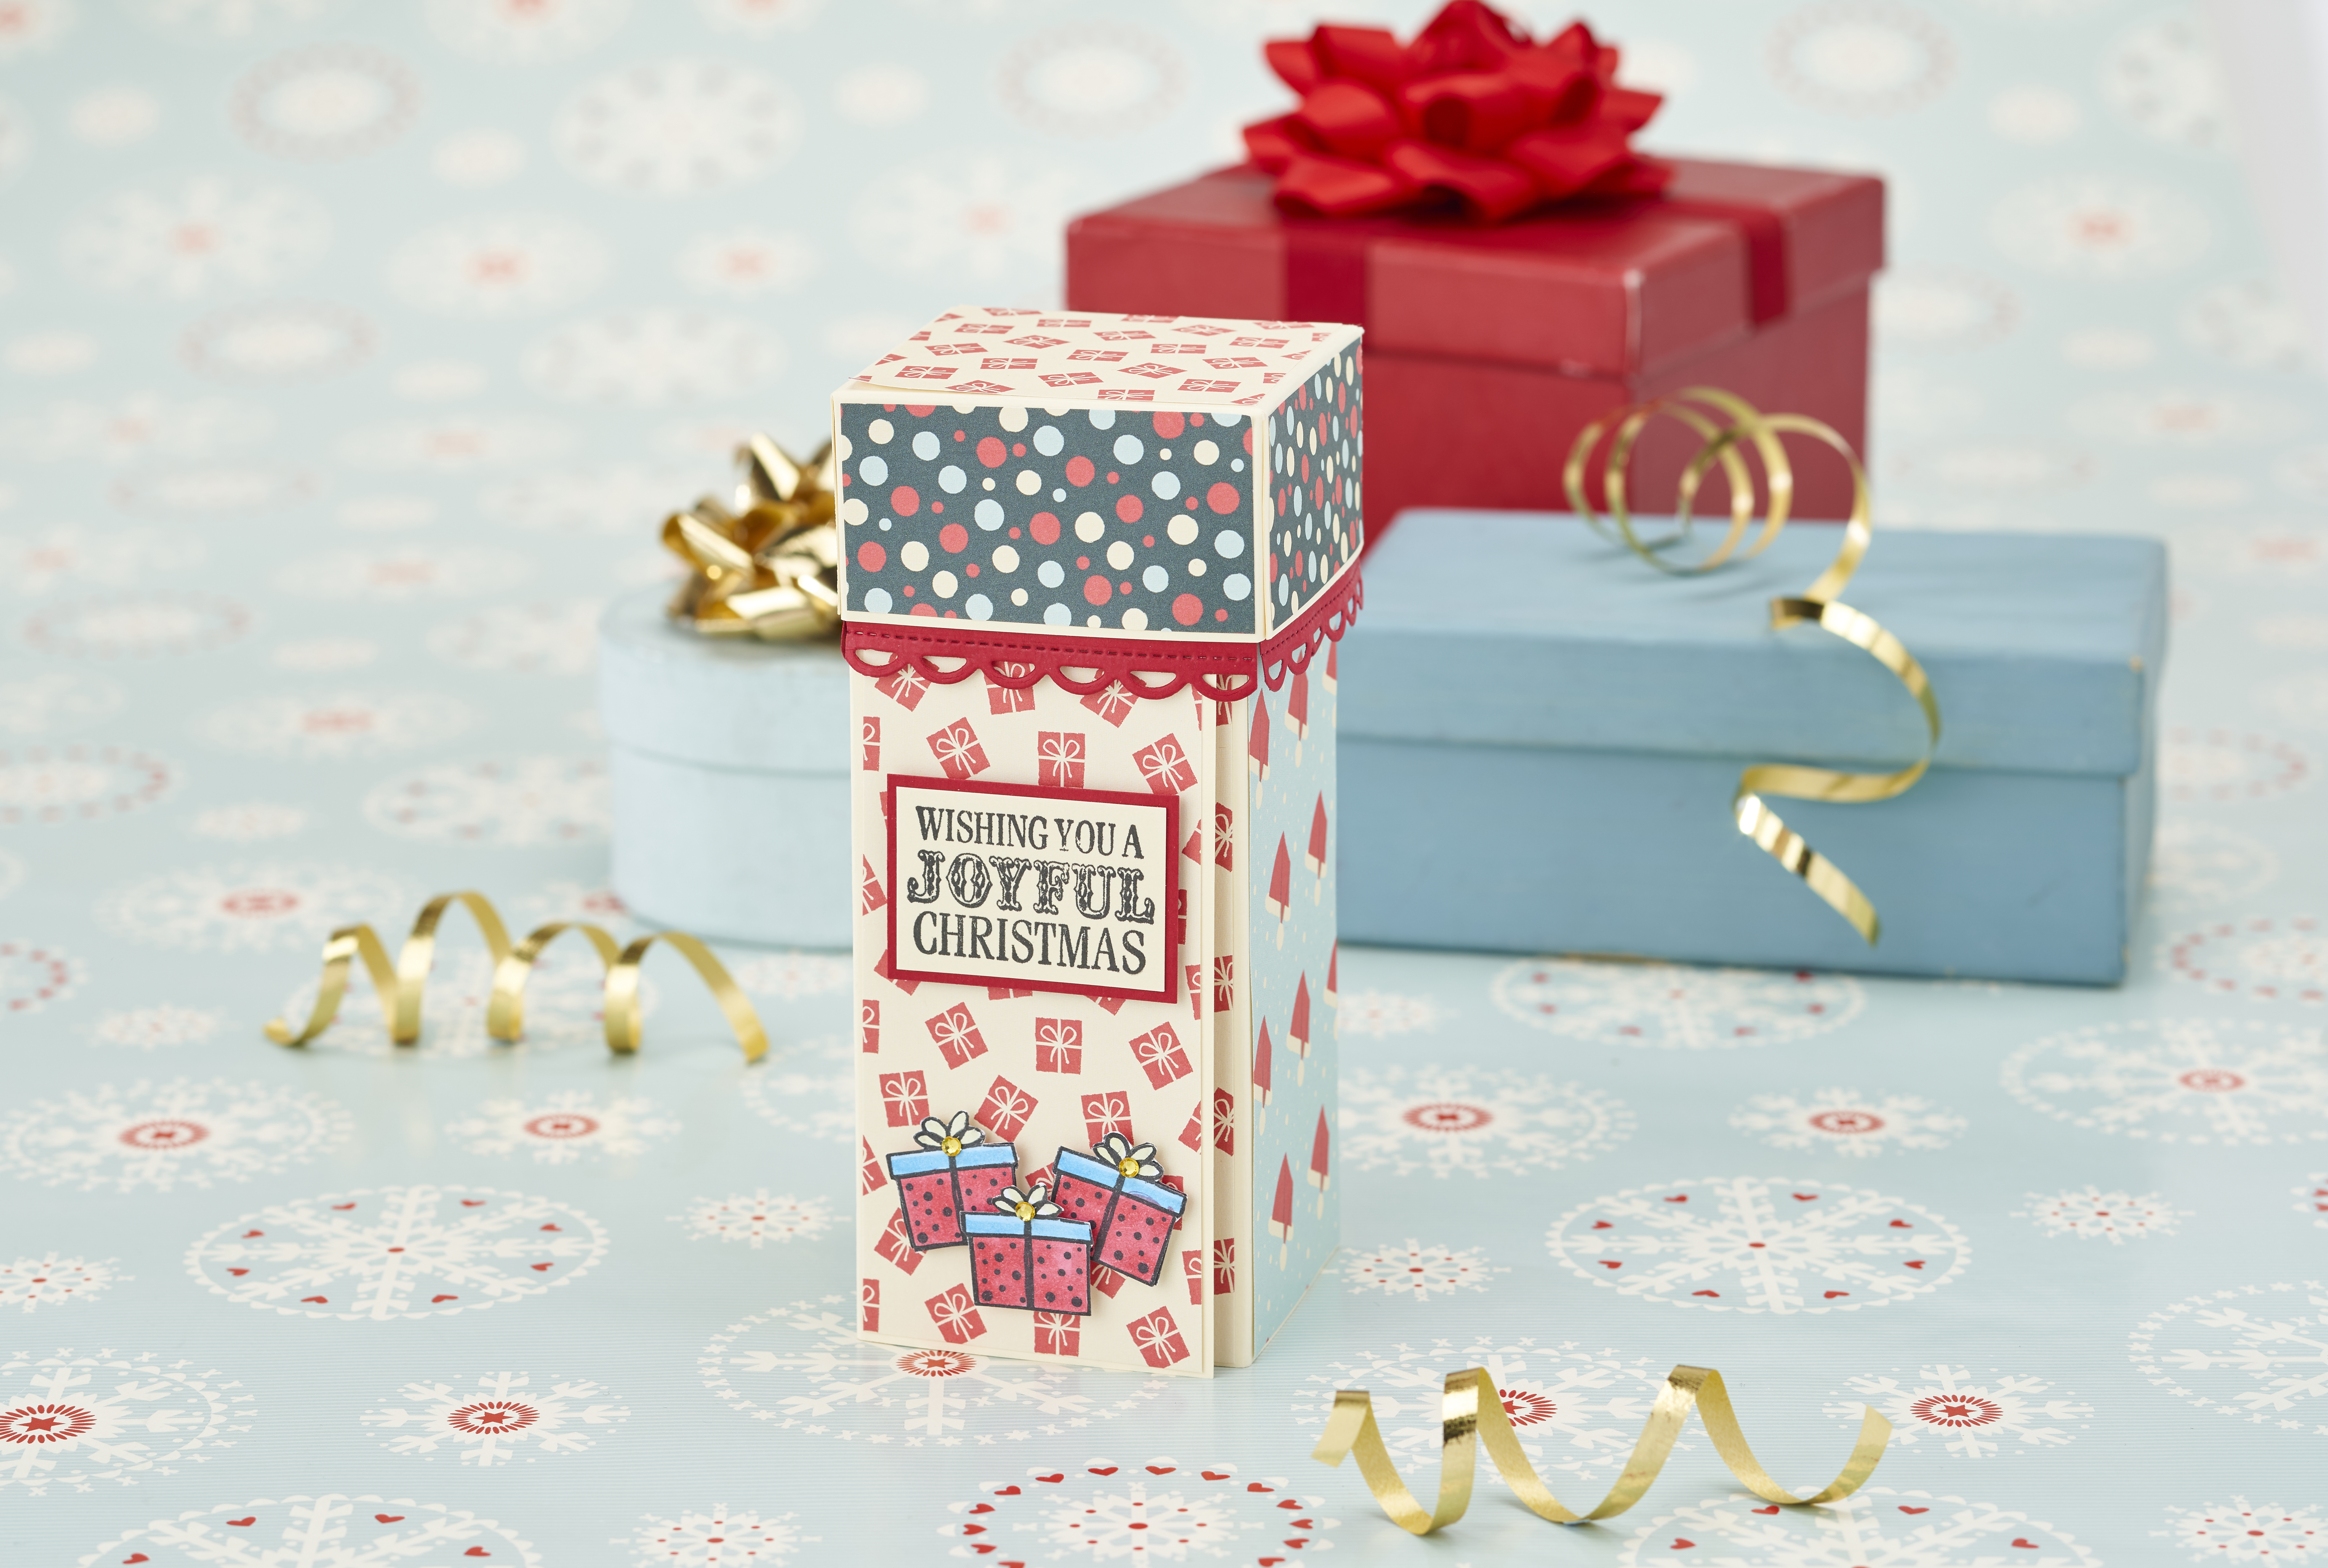
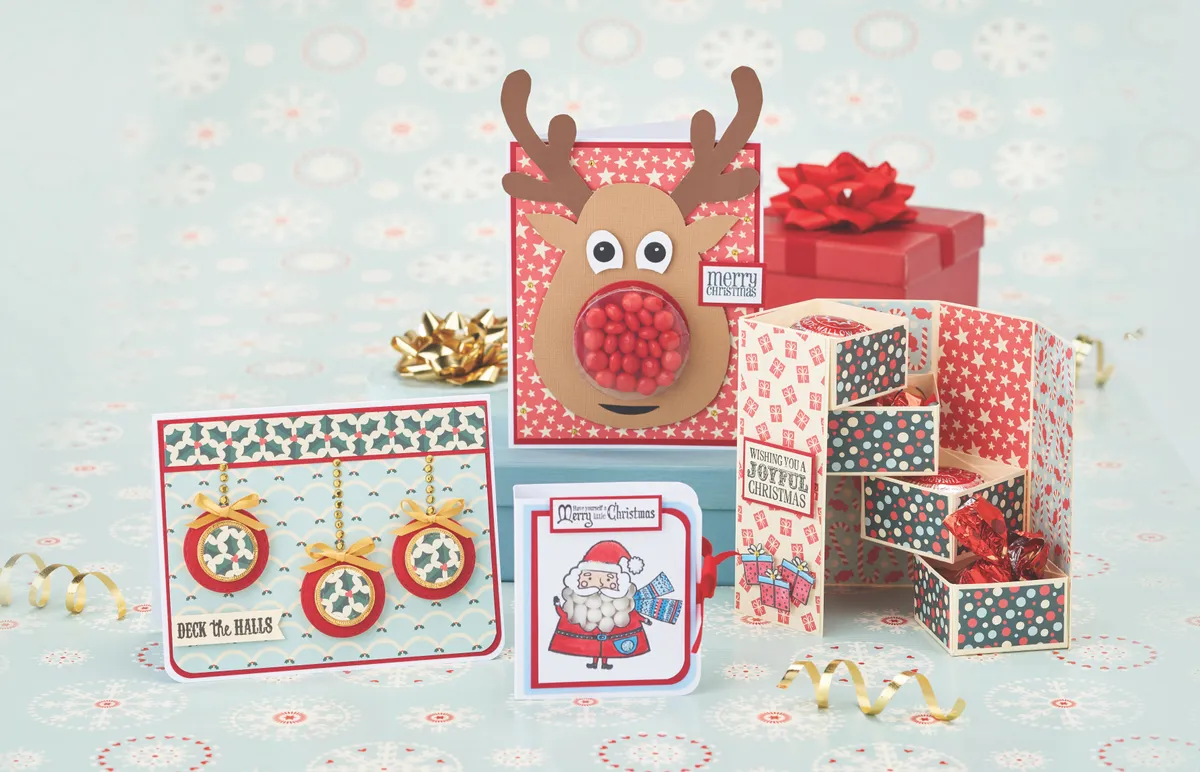
There are so many things to think about at Christmas, which is why this fab treat tower comes in very handy indeed. Not only will the recipient get a special Christmas gift box that they’ll want to display right away, but they’ll also get a sweet treat nestled inside, ideal if you want to tick off the card and gift from your to-do list in one go!

This would be great to send to someone who lives further away, or who you're unable to see because of social distancing or self-isolation. It's a sweet way to tell someone you're thinking about them, and you decorate the box to suit the recipient. Download your free chocolate gift box templates to get started (the ones you want are labelled 'edible card project'.

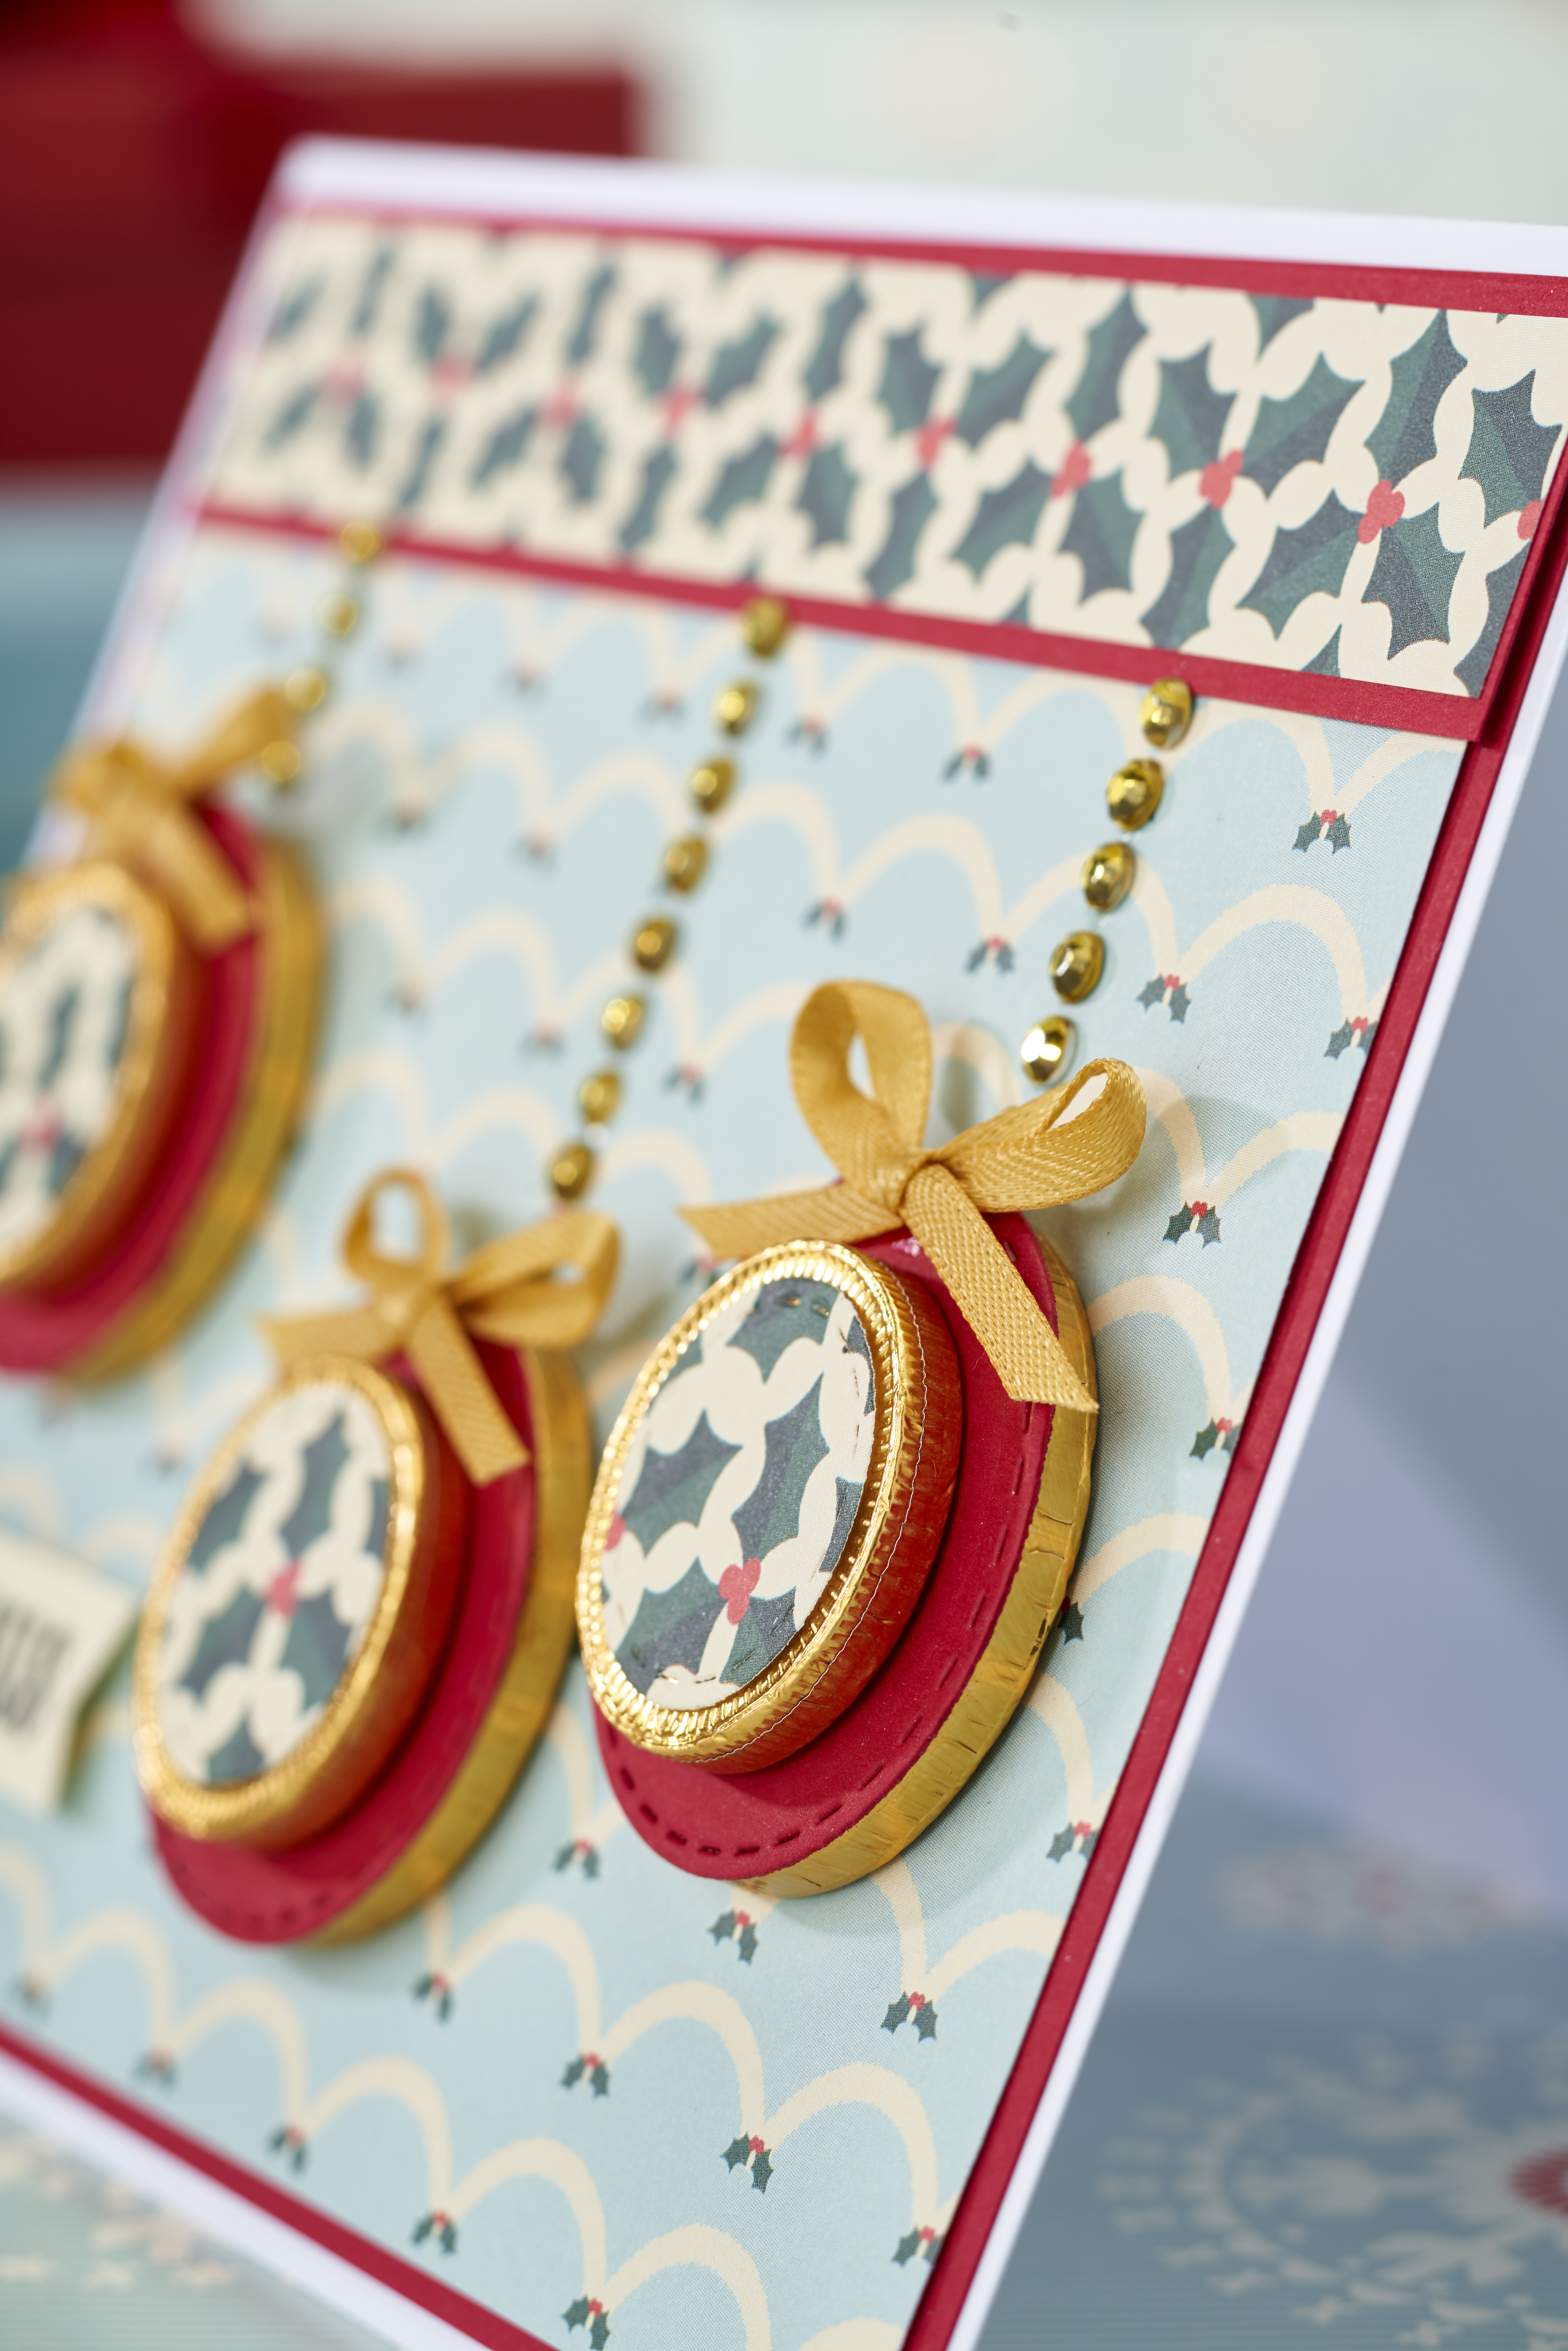
There are lots of possibilities for adding extra embellishments to personalise your treat tower to make them even more special. Check out our collection of free patterned papers if you need an easy way to boost your stash, we love these free colourful Christmas patterned papers.

Try these chocolate gift boxes

If you’ve made this project, don’t forget to share it on Facebook or post it on Instagram, we love to see what you make!

DIY Treat Tower

You will need:

  • Card
  • Pattern paper
  • Sweets

Step 1

Vertically score a 14.5 x 29.5cm piece of card at 6cm, 12cm, 18cm and 24cm. Cover inside the scored lines with panels of patterned paper, then turn over and repeat on the reverse.

DIY papercraft treat tower – step 1

Step 2

Using the template as a guide, cut four boxes from card. We’re using cream coloured card, but you can use whatever you have to hand! Score and fold as shown by the template. Cut 12 pieces of 3 x 5.3cm patterned paper and attach to three sides of each box.

DIY papercraft treat tower – step 2

Step 3

Open out the tower box base and position so the smallest panel is on the left side. Secure one box to the very top edge of the second panel. Glue another box to the very bottom edge of the last panel.

DIY papercraft treat tower – step 3

Step 4

Position another box on the third panel, just below the one above. Secure the remaining box to the fourth panel, again attaching it just below the box that sits above it.

DIY papercraft treat tower – step 4

Step 5

Cut the box lid template from card. Score and fold as directed and secure with glue. Secure four 3 x 6cm pieces of patterned paper to the sides and a 6cm square to the lid’s top.

DIY papercraft treat tower – step 5

Step 6

Cut two 3.5 x 13cm pieces of red card. Shape the lower edges with the lacy border die and cut each piece in half. Attach so they overlap the lower edges of the lid, securing on the inside.

DIY papercraft treat tower – step 6

Step 7

Stamp a sentiment onto cream card, layer onto red card and attach. Colour stamped presents with markers. Attach to the front of the card and apply a gold gem to the centre of each. But remember, these are only suggestions – you can decorate your box however you like!

DIY papercraft treat tower – step 7

Red-nosed Rudolf

Make Rudolph the Reindeer’s nose shine bright by filling it full of crimson-coloured sweets

  1. Layer 12 x 15.5cm of patterned paper onto a slightly larger piece of red card. Attach to a 16.5 x 13cm white card base.
  2. Using the template as a guide, cut the reindeer’s head and antlers from brown card. Attach the antlers to the back of the head and secure to the card base. Cut a piece of black card for the mouth and attach.
  3. Cut an 8.5cm circle from acetate. Cut slits around the edge of the acetate circle to form a ring of tabs. Fold the tabs towards the centre, but don’t glue them just yet.
  4. Place sweets onto the acetate and tuck in a circle of red card on top of the sweets. Stick the acetate flaps to the back of this circle. Attach another red circle onto the card and secure the acetate treat pouch on top.
  5. Finish by attaching the reindeer’s eyes and securing the Christmas sentiment.

Chocolate coin bauble card

For a fun festive treat, cover foiled chocolate coins with circles of patterned paper. Layer them together to create the look of Christmas baubles, finishing with gold gems.

Layer different- sized chocolate coins to create festive baubles!

paper craft card making projects

Santa’s beard card

Here, Santa’s beard has been cut out and a box of mints has been stuck behind the aperture. Simply make folds at the side and secure the card with a length of red velvet ribbon. Sweet!