How to make quilled flowers

Learn how to make quilled flowers with our easy tutorial! Choose from daffodils, bluebells or tulips - or why not make all three?

Try 6 issues of any craft magazine from just £9.99

Published: February 26, 2021 at 6:31 am

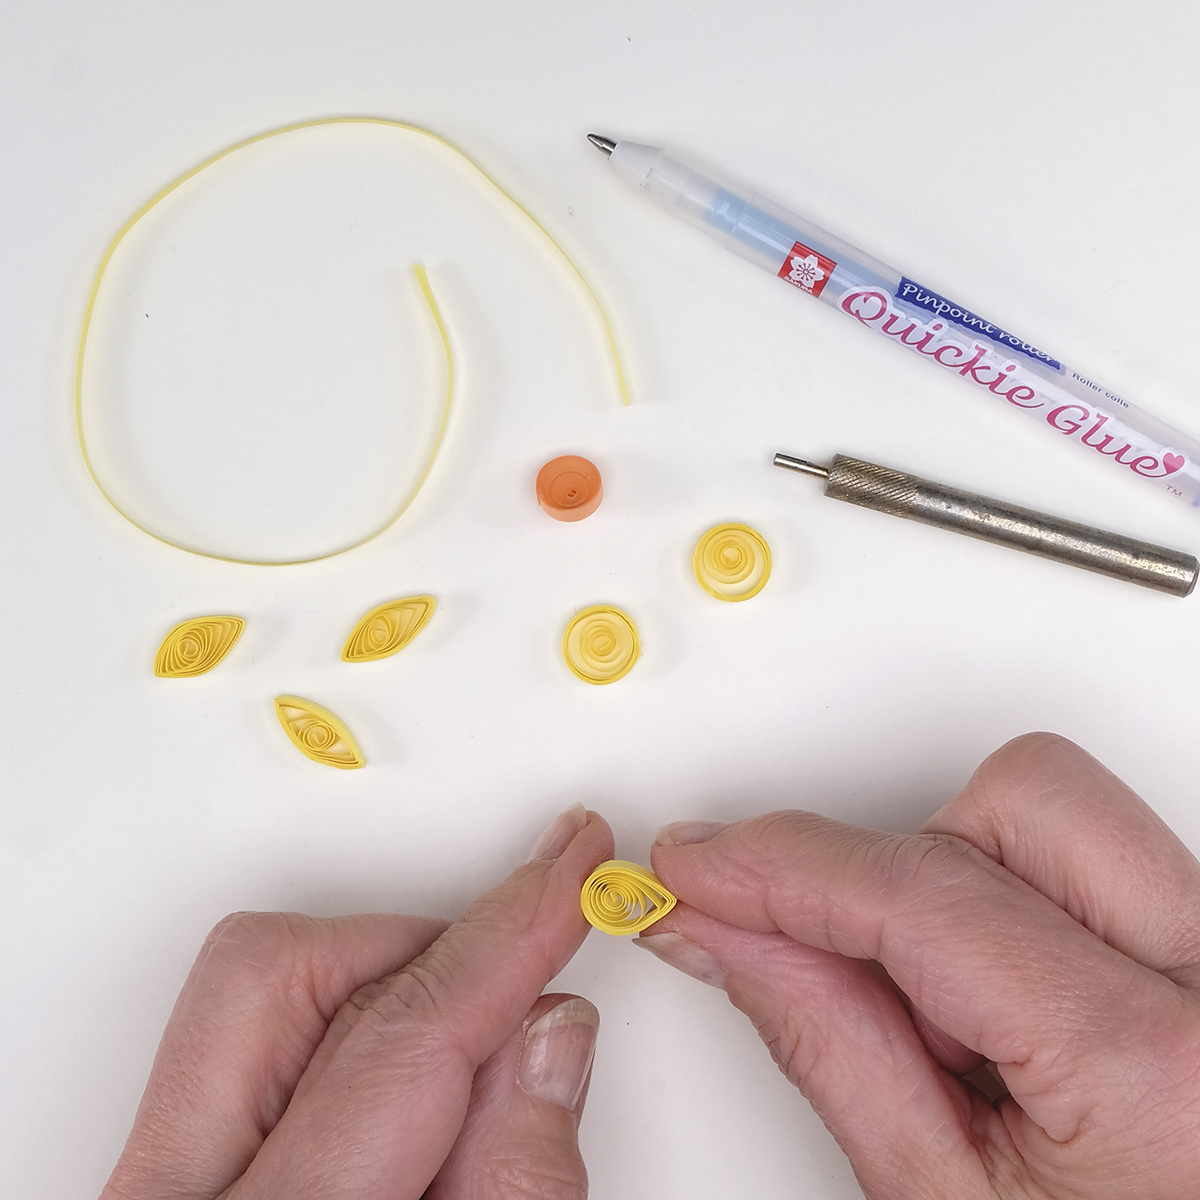
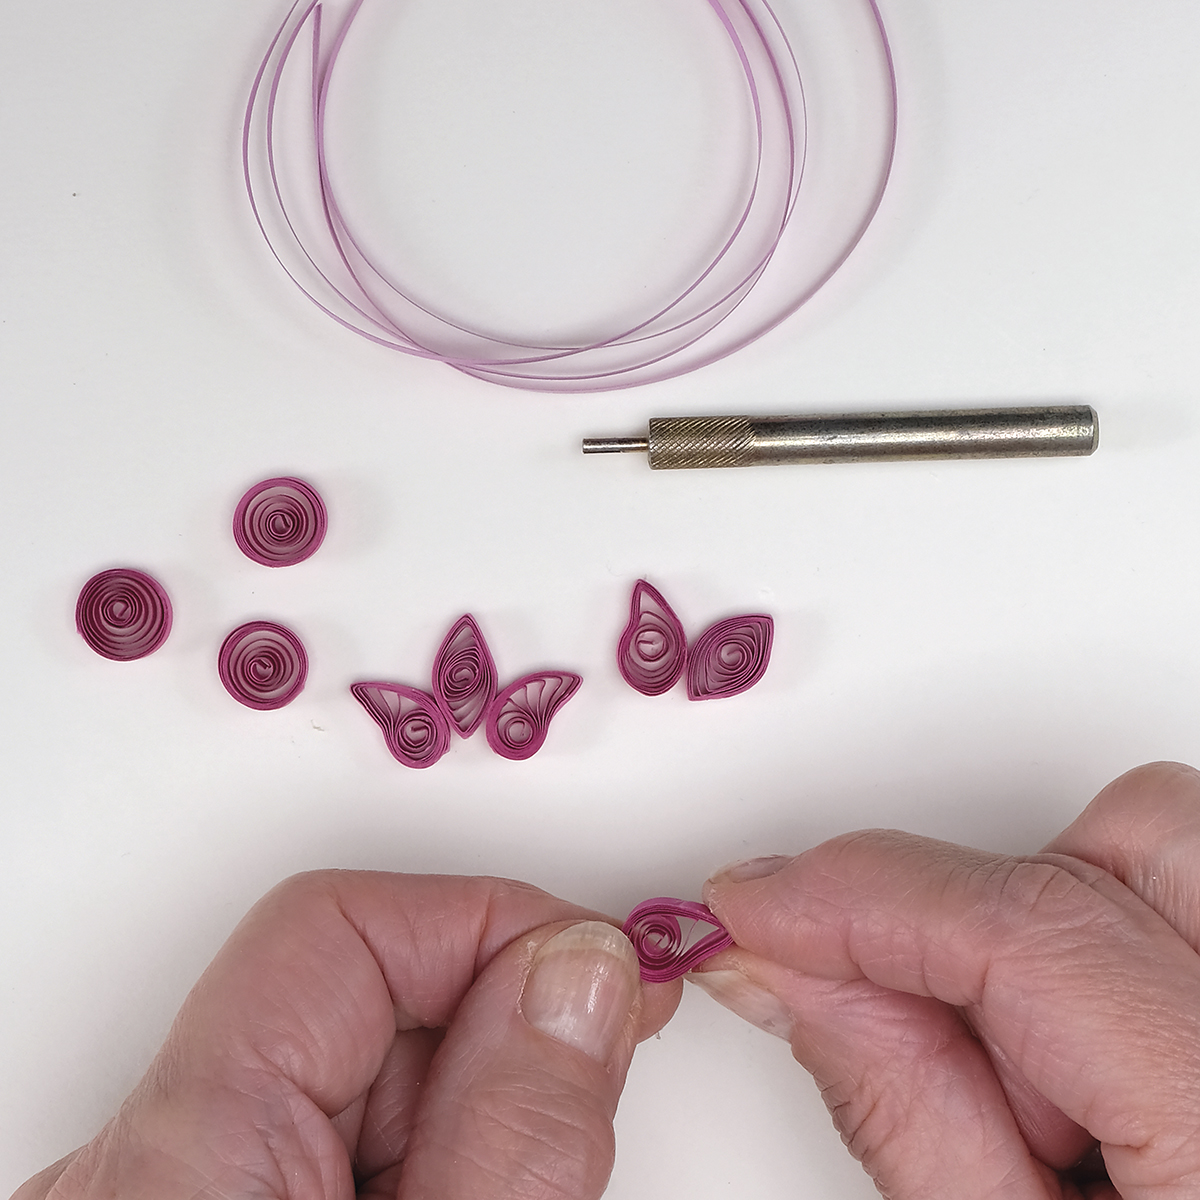
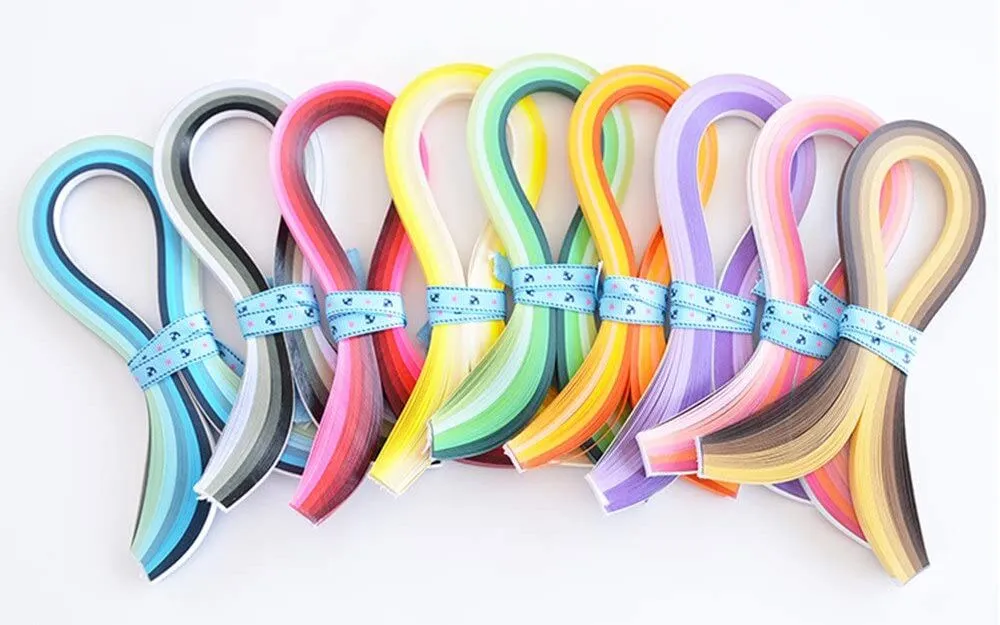
Quilling is one of the most creative and ancient papercraft techniques around. It uses thin strips of paper rolled into coils, shapes and scrolls, and you use a quilling tool to create different designs.

If you’ve already tried some 2D quilling and learned to make some of the basic shapes, why not venture into the world of 3D quilling? 
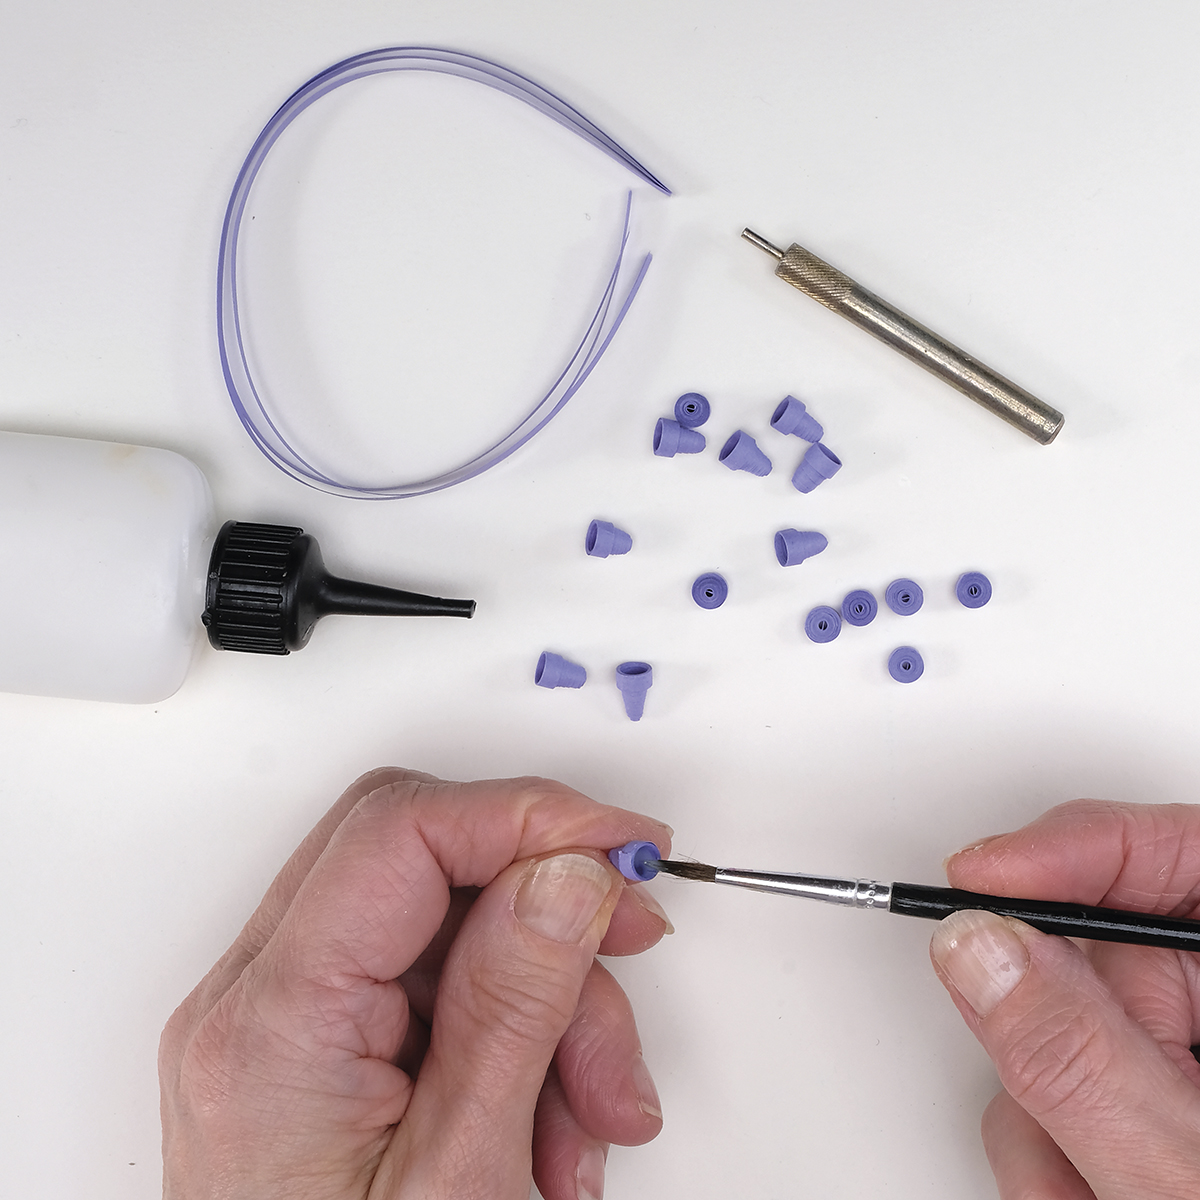
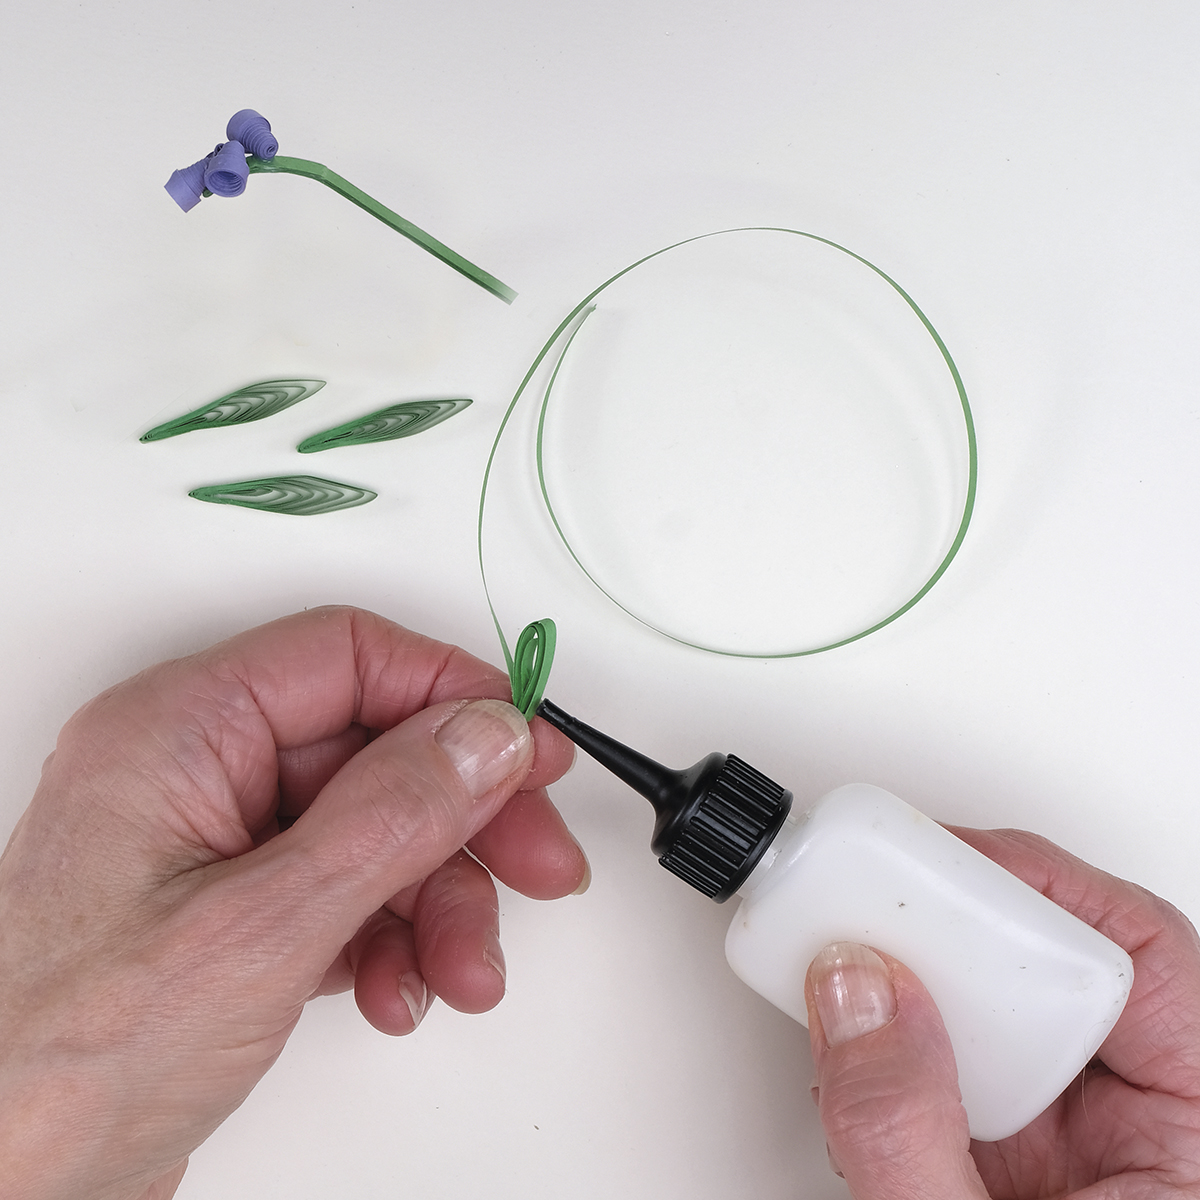
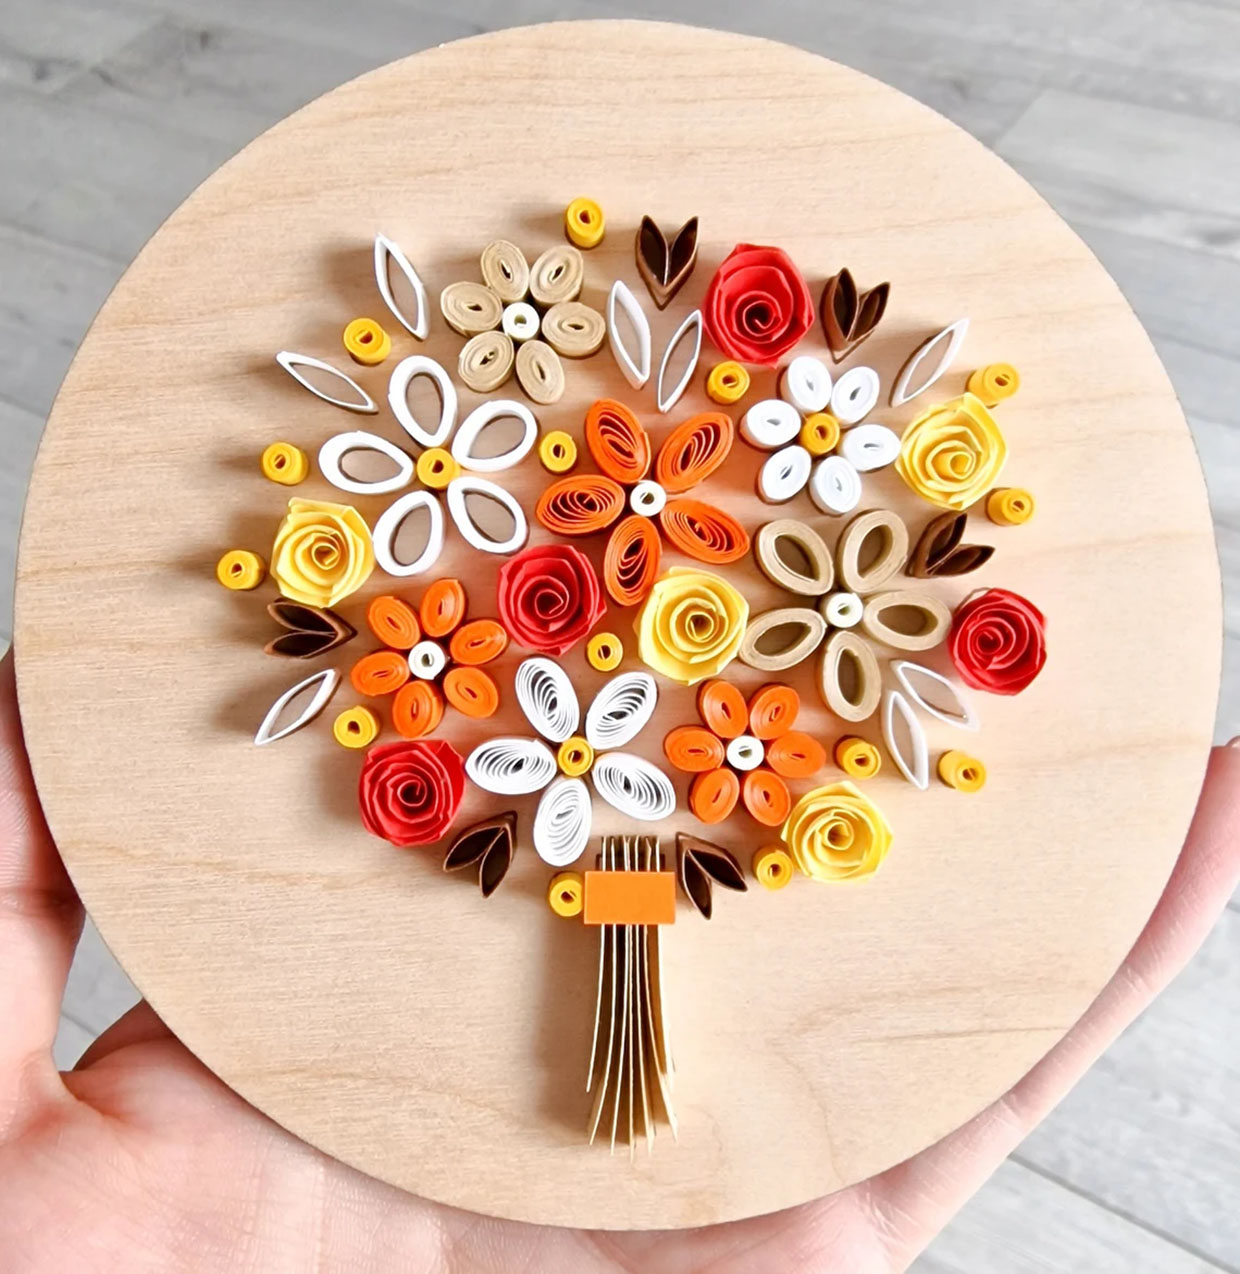
One of the most common shapes used in 3D quilling is the cup coil – a solid coil made up of several strips of paper where the centre is gently pushed inwards to create a dome effect. These shapes must be supported with a coating of PVA glue on the inside to prevent collapse. 
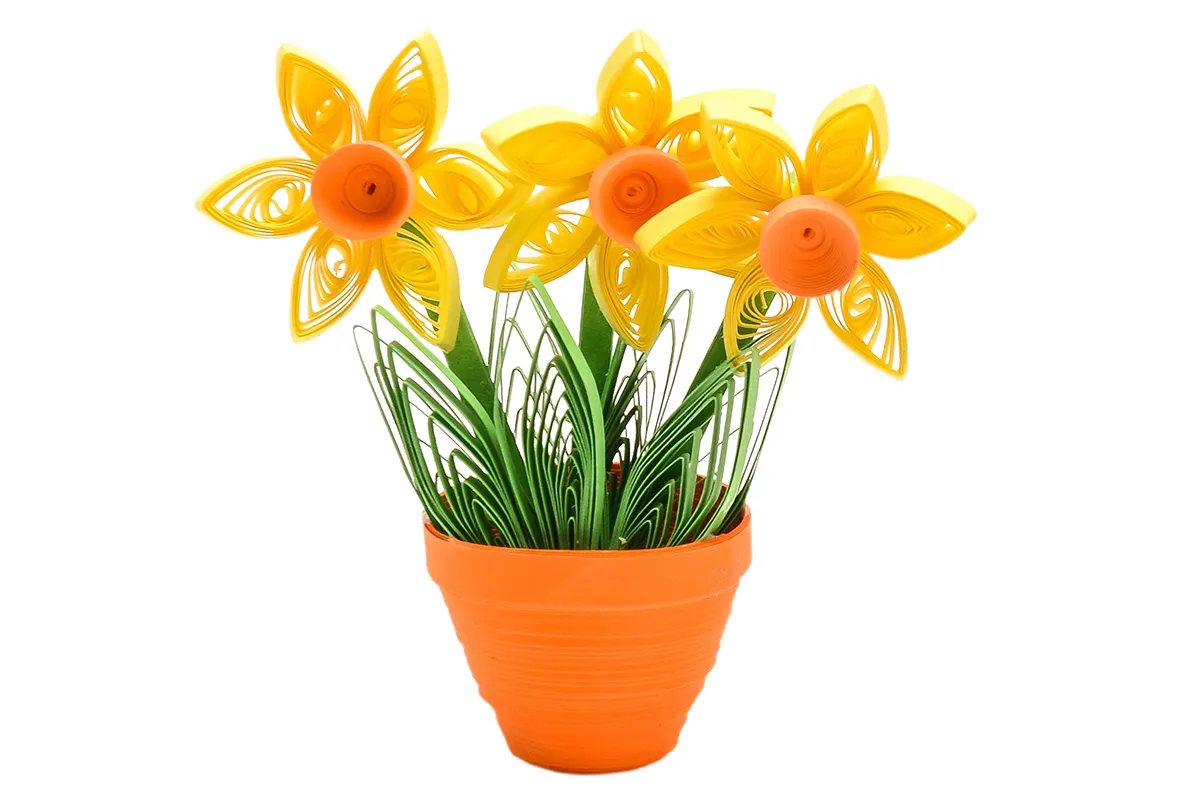
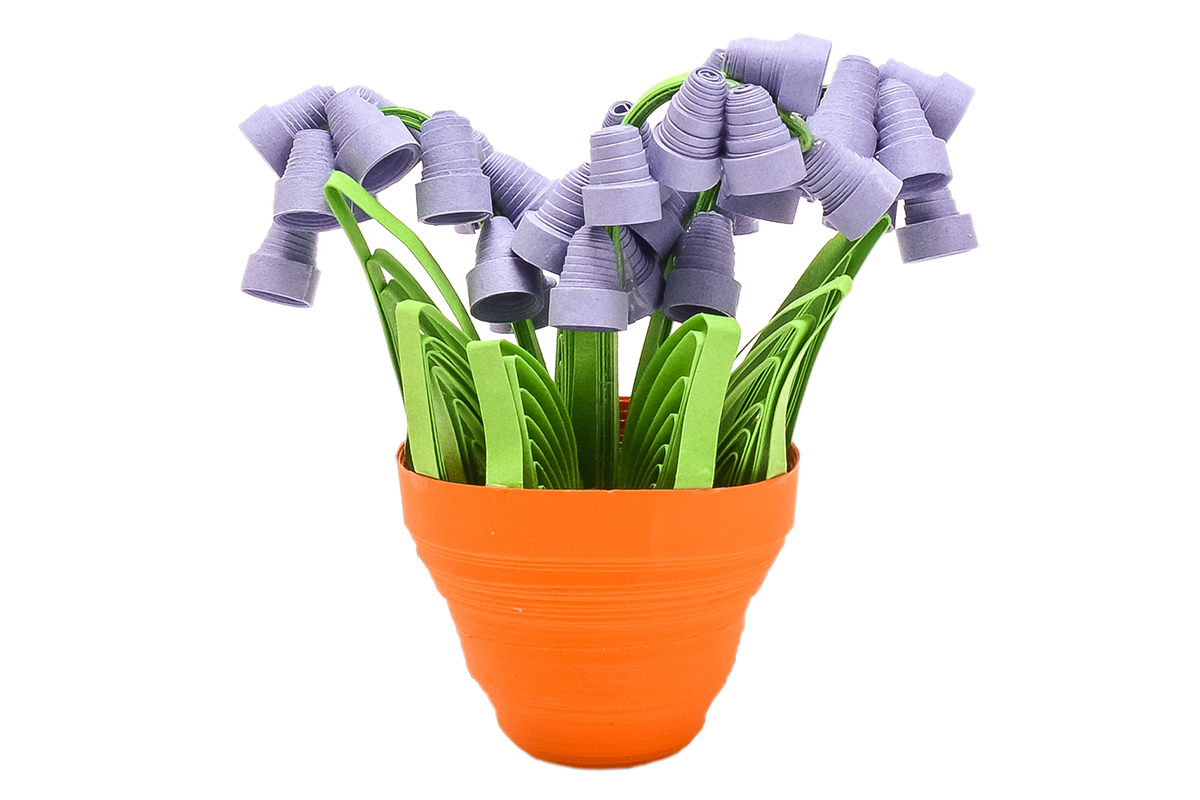
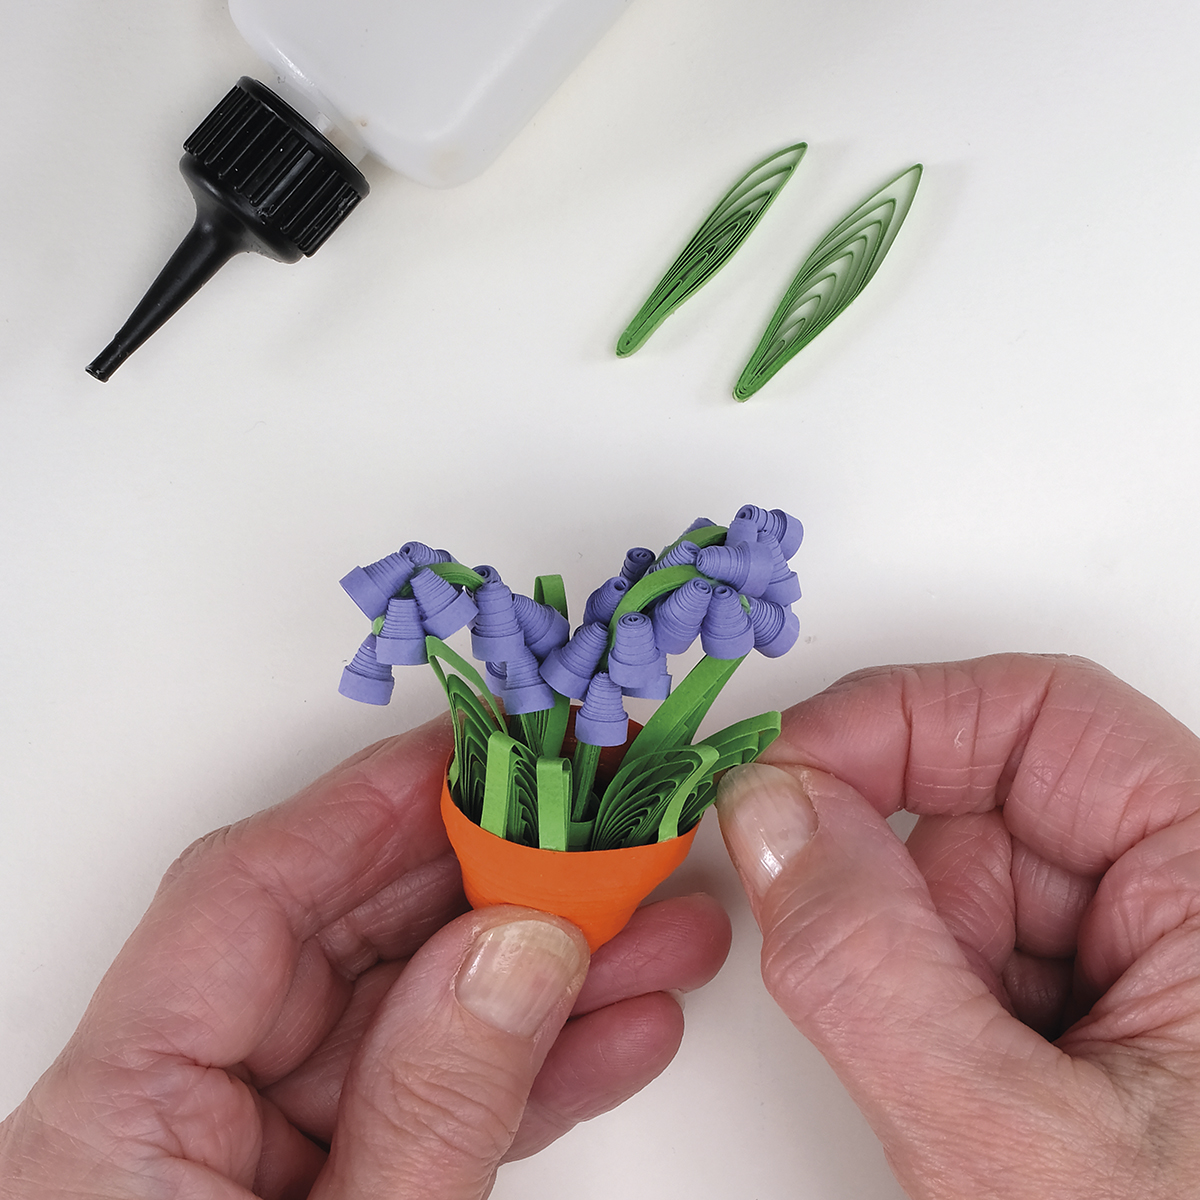
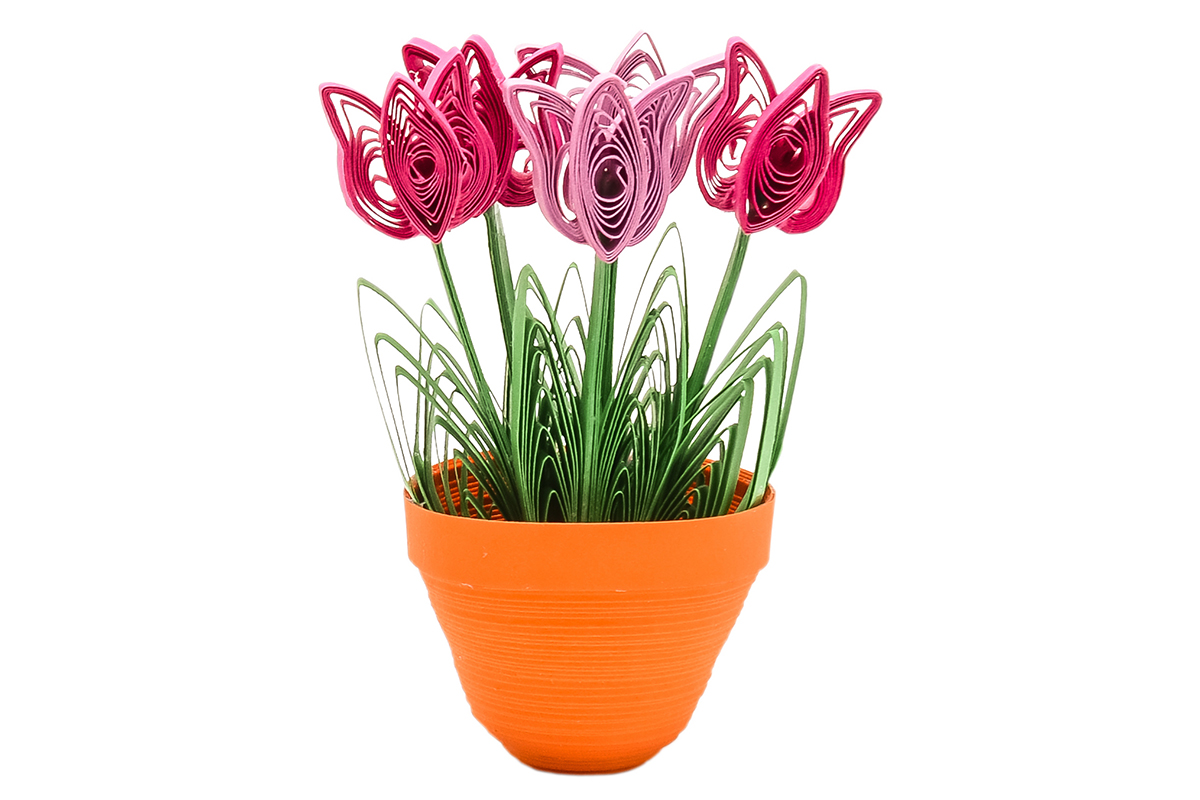
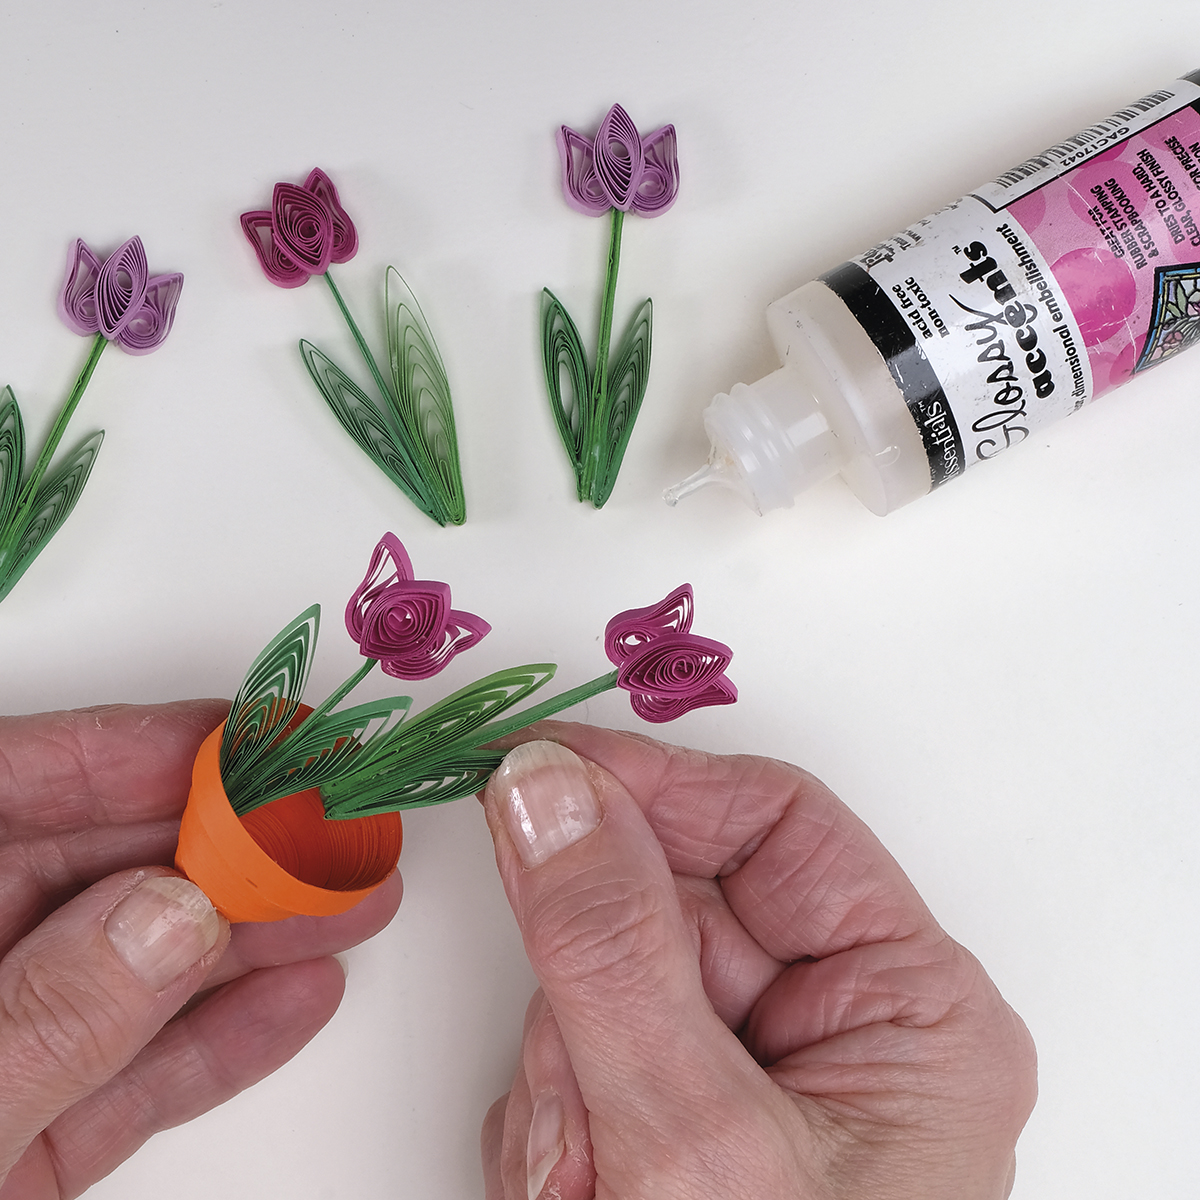
The cup coil was used here on a larger scale to make the flowerpots and on a smaller scale to make the bell shape of the bluebells.

Most 3D quilling projects tend to be miniature and while these flowers are small they will sit neatly on a desk or shelf and last much longer than real flowers. They’ll make the perfect mini gift for someone who is starting a new job or moving to a new house!

Quilling paper - Amazon

Here's a bunch of top tips from designer Clare Buswell:

  • Making the flowerpot can be tricky. Don’t use strips narrower than 5mm wide or the pot will collapse. Roll the solid coil tightly and, once glued, remove very carefully from the quilling tool. Make sure the base of your pot is fairly flat so it will stand. Use a small old artist’s paintbrush to apply the PVA glue to the inside of the flower pot. Leave the flowerpot to dry completely.
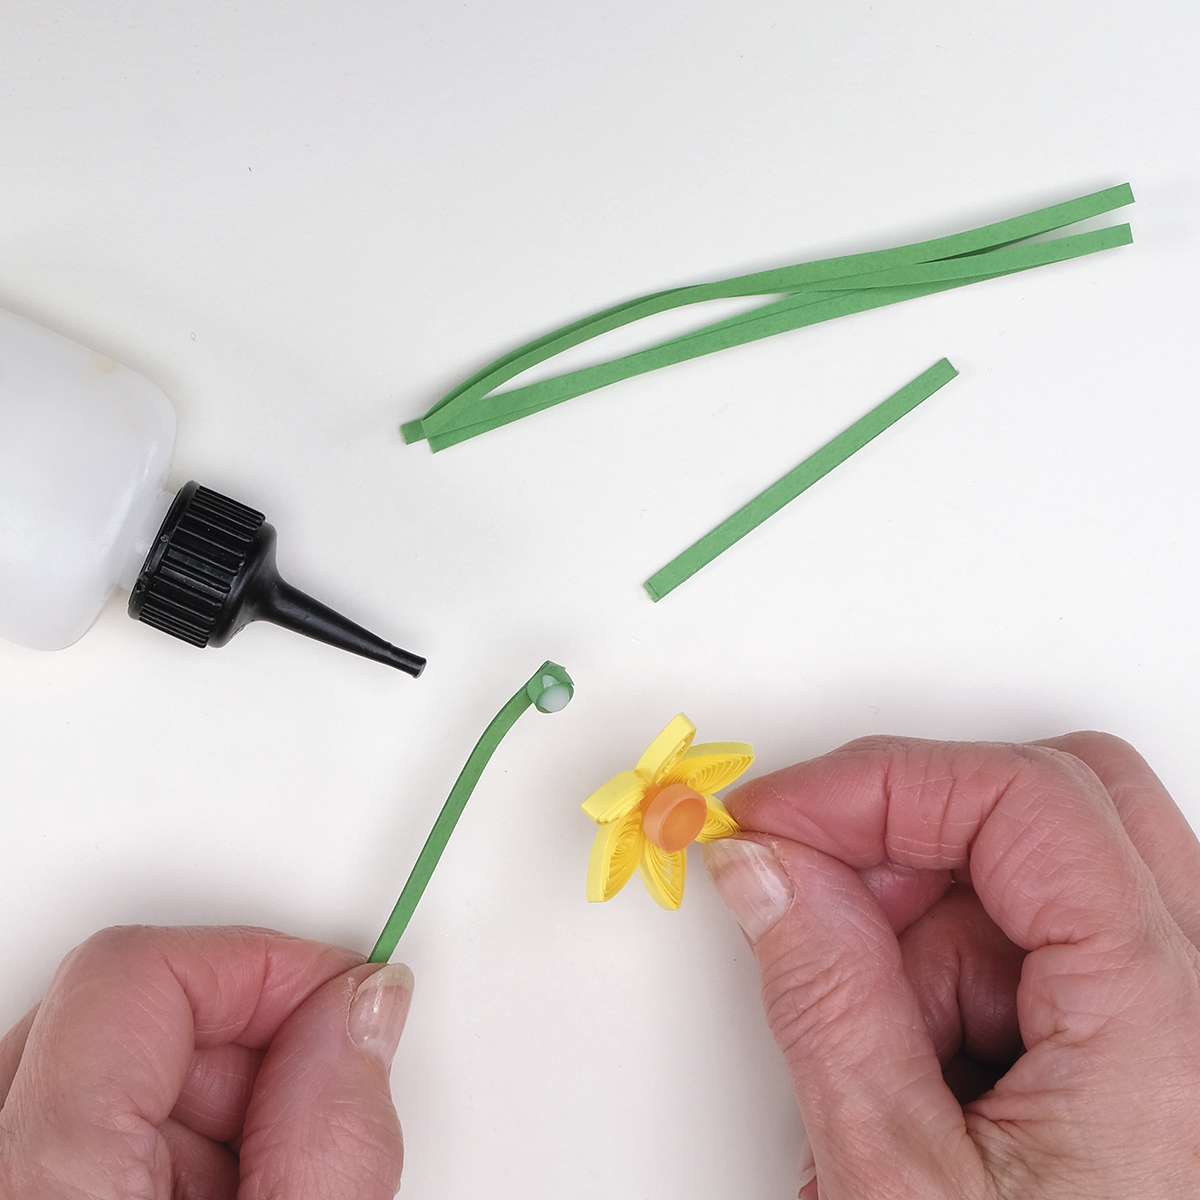
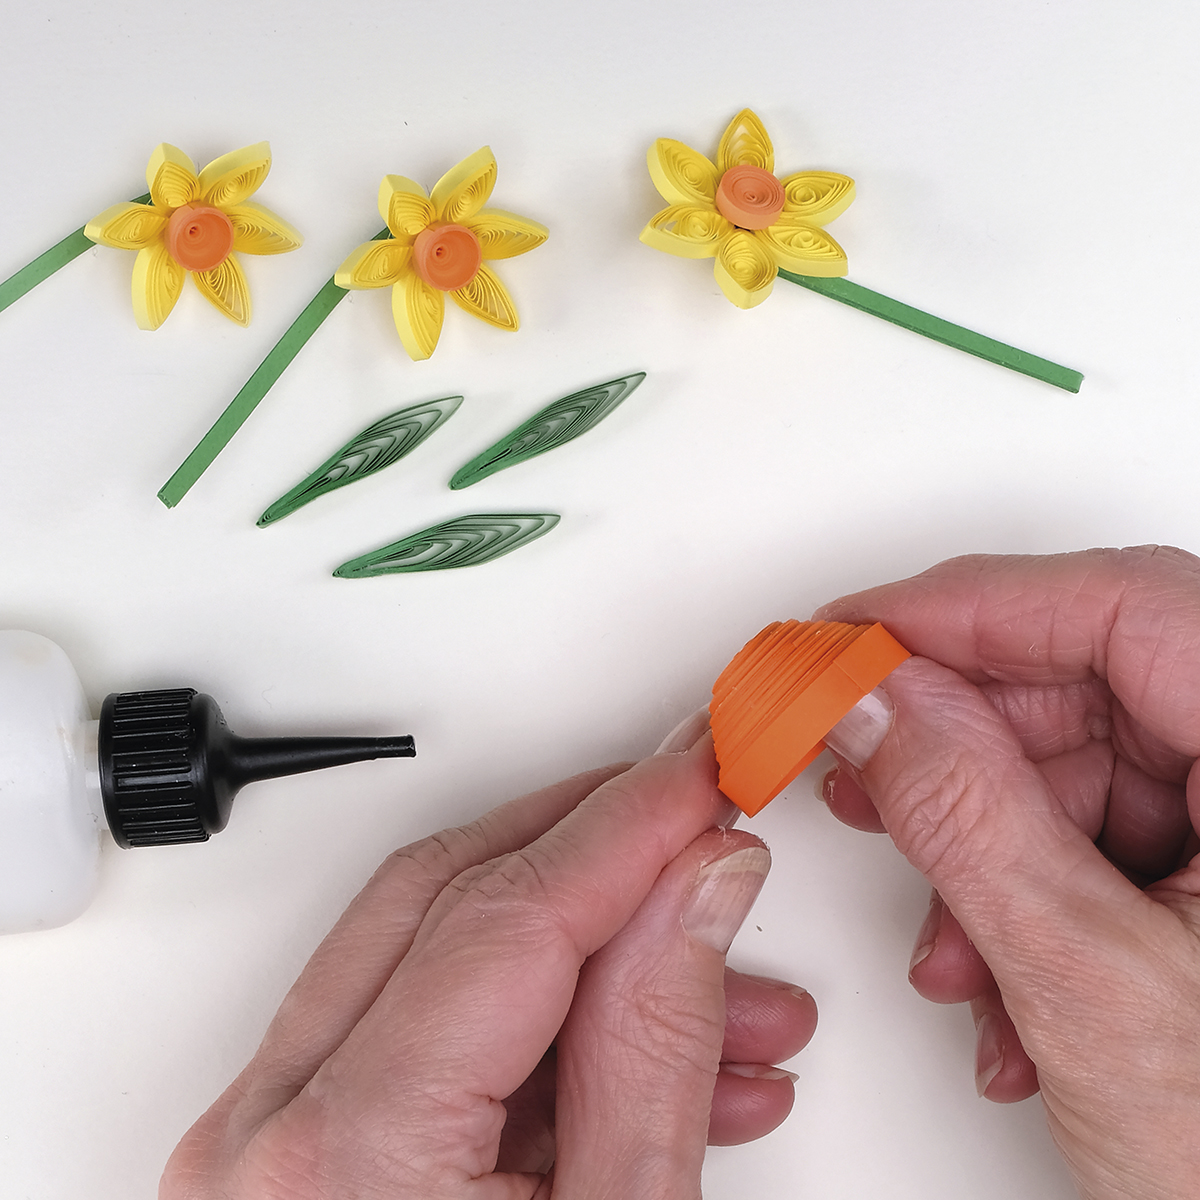
  • Rather than leaving it flat, give your daffodil a more natural curved shape by placing it in the bottom of an egg cup when gluing it together, this will create a domed or curved effect. Leave to dry.
  • Instead of cutting your own 5mm strips for the pots you can purchase ready-cut 5mm strips, which will speed up the process.
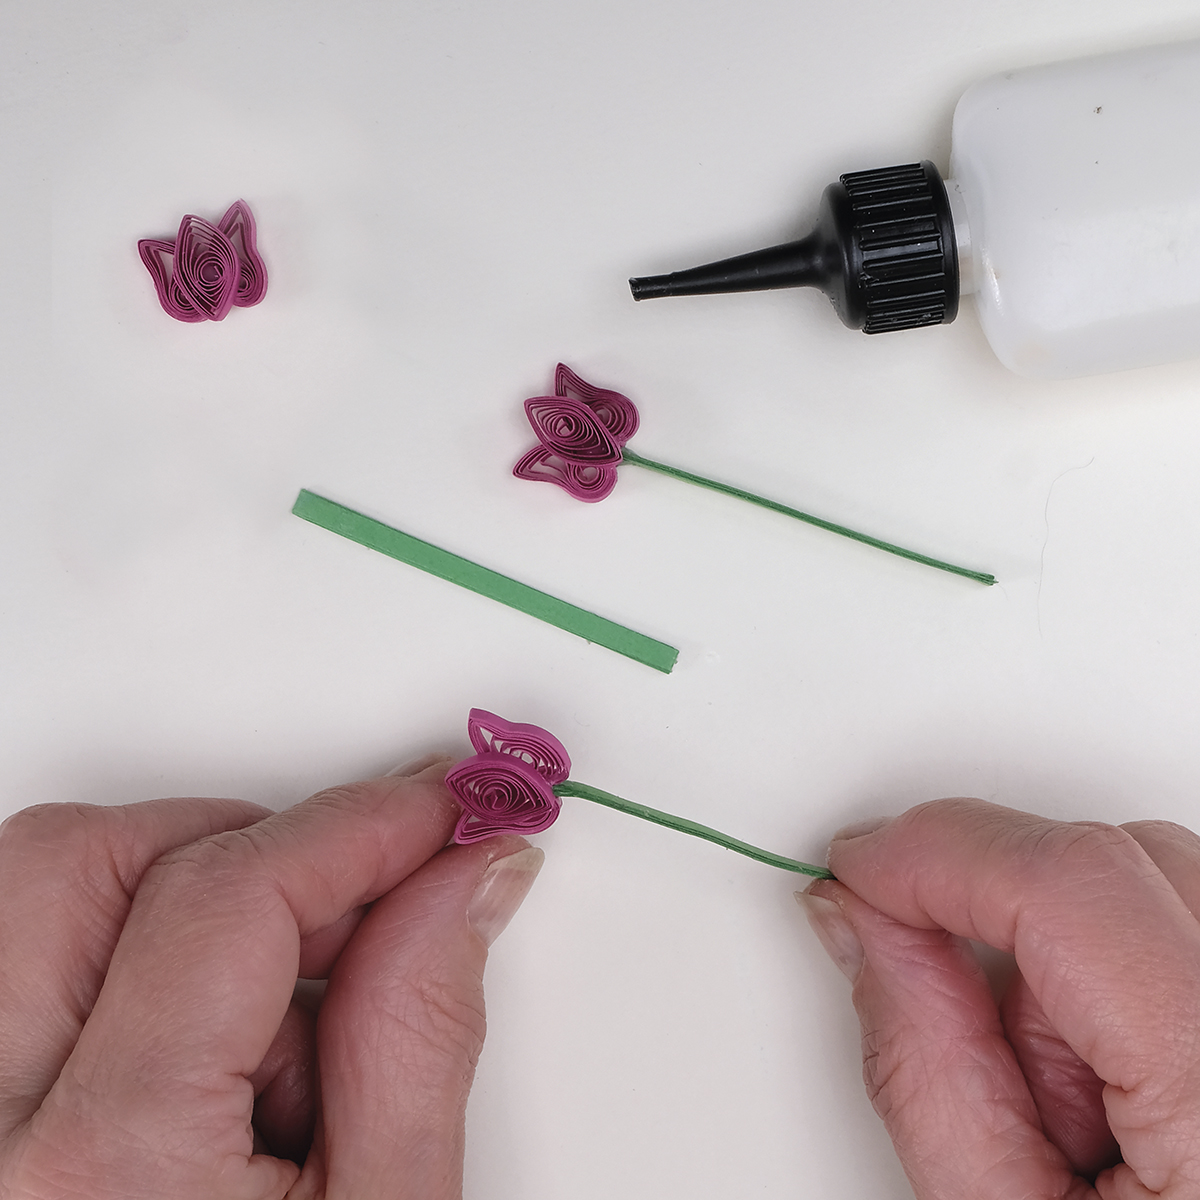
  • If you are new to 3D quilling, start with the easiest of the flowers, the tulips. They will also work just as nicely on a card, if you’d like to make a matching set. The daffodils are also fairly easy to make whereas the bluebells are more difficult and will require more patience.
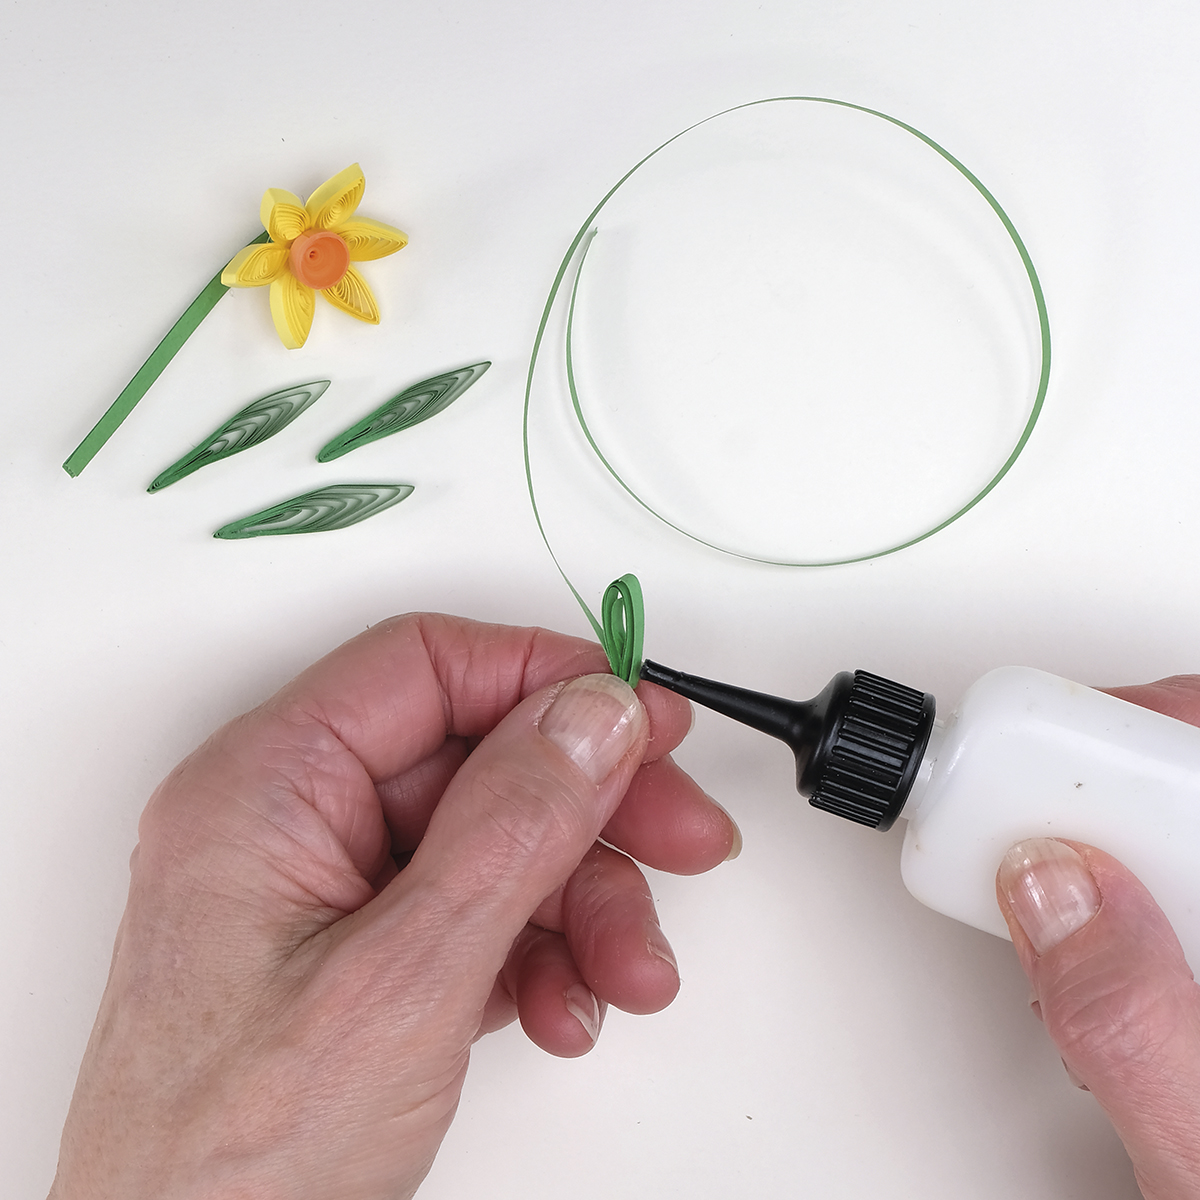
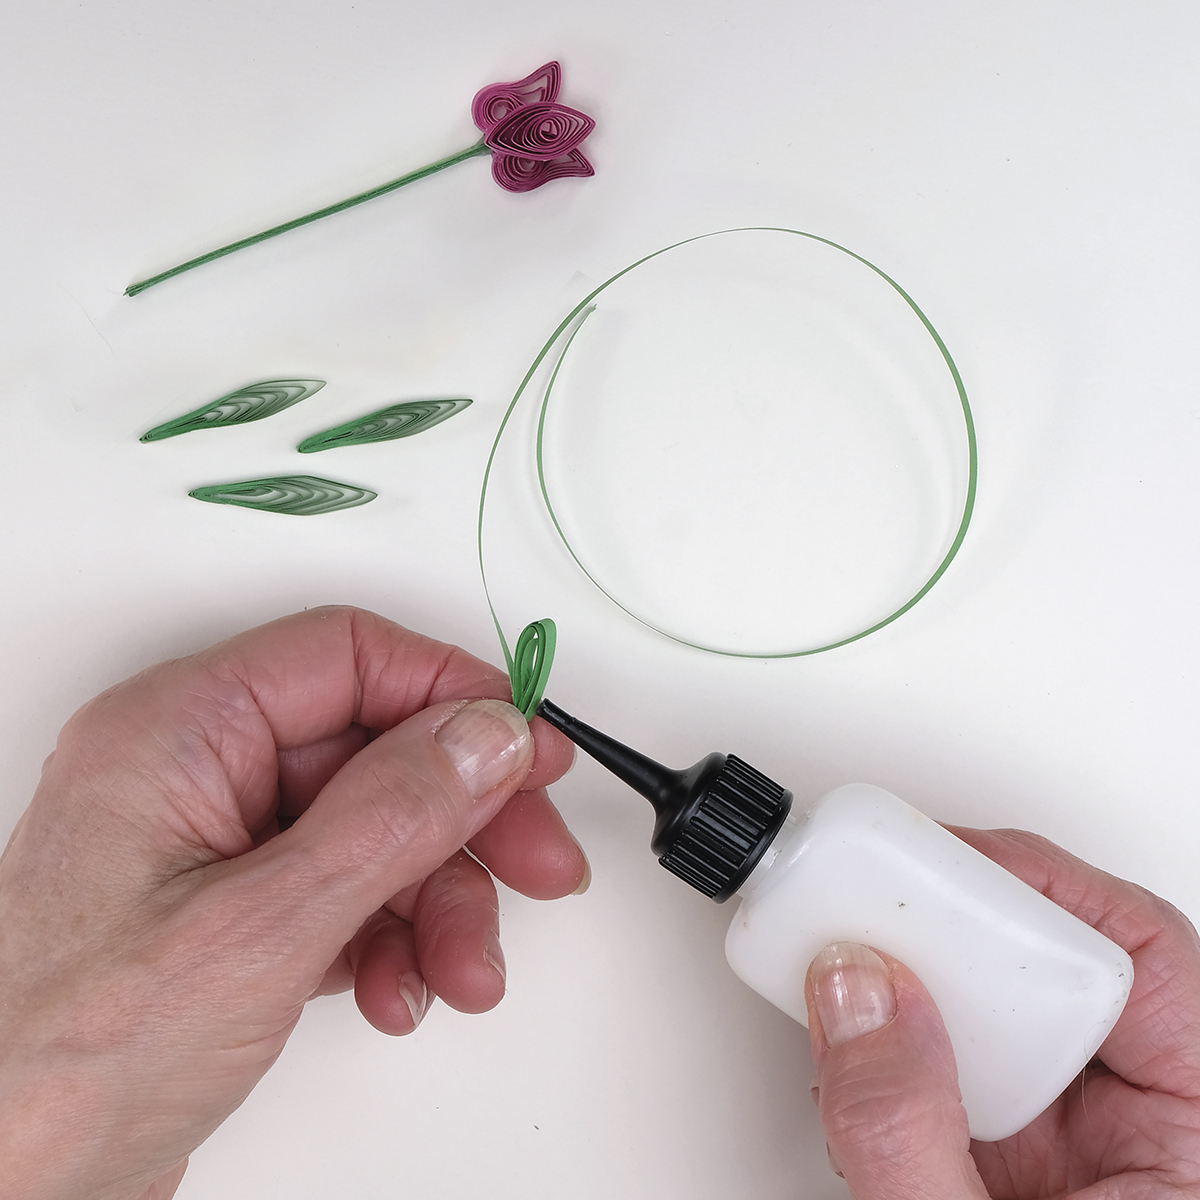
  • Drying time is necessary for each section. The pots will collapse if they are not coated with PVA. Leave flowers to dry before adding the foliage. Even adding the flowers to the pots will require gluing a section at a time. With the bluebells in particular, it’s necessary to glue just a couple of bells at a time to the stem. Use a good quality tacky glue when it comes to gluing the quilled segments together.
  • If your flower stems aren’t long enough for your pot or you’d like to add more height, simply add a solid coil inside the pot first which will add height to the flowers.

How to make quilled flowers: Daffodils

Qulled flowers - daffodil

You will need:

  • Quilling paper (or thin strips of paper)
  • Tweezers
  • Glue
  • Paintbrush

Step 1

Roll a 225mm yellow strip into a 12mm coil; pinch into an eye shape. Make six. Roll a 450mm orange strip into a tight coil. Press centre to create a cup shape; coat inside with glue. Attach petals in groups of three and glue sections together. Glue orange cup to daffodil centre. Make three.

How to make quilled flowers – daffodils, step 1

Step 2

For the stem, take a 450mm green strip, glue along the length and fold it back on itself. Fold and glue in half again and one final time to make a strong stem. Roll a 225mm green strip into a small coil. Glue the coil to the top of the stem; glue the coil to the back of the daffodil.

How to make quilled flowers – daffodils, step 2

Step 3

Make a loop at the end of a 450mm green strip and glue in place. Bring strip around to make a larger loop, add a dot of glue, and repeat the loops until you’ve used the full strip. Glue the end; pinch to create a point. Repeat to make two more. Glue to either side of the stem.

How to make quilled flowers – daffodils, step 3

Step 4

For pot, cut ten 5x430mm strips from orange paper. Join strips by overlapping slightly; secure in place to make one long strip. Roll into a 30mm wide tight coil. Remove from quilling tool; press gently to form pot shape. Coat inside with glue. Arrange flowers in pot and glue in place.

How to make quilled flowers – daffodils, step 4

How to make quilled flowers: Bluebells

Quilled flowers – bluebell

Step 1

For the flowers, roll a 225mm lilac strip into a tight coil. Use the end tip of a paintbrush to push the coil centre inwards to form a bell shape. Coat inside using PVA. Repeat to make 10 shapes for each bluebell flower. Make three flowers in total.

How to make quilled flowers – bluebells, step 1

Step 2

For the stem, take a 450mm green strip, glue along the length and fold back on itself. Fold and glue in half, again and again, one final time, to make a strong stem. Gently bend one end of the stem to create a curve. Glue bells to stem two at a time using tacky glue. Leave to dry.

How to make quilled flowers – bluebells, step 2

Step 3

For the foliage, make a 450mm green strip. Make a loop at the end of the strip and glue it in place, then bring the strip around to make a slightly larger loop. Add a dot of glue to the base, repeat the loops using the full strip and glue end. Pinch to create a pointed finish. Make seven.

How to make quilled flowers – bluebells, step 3

Step 4

For the pot, cut ten 5 x 430mm strips from orange paper. Join strips by overlapping slightly and secure in place to make one long strip. Roll into a 30mm wide solid coil. Remove from tool and press gently to form pot shape. Coat inside with PVA. Glue stems to the pot and surround with foliage.

How to make quilled flowers – bluebells, step 4

How to make quilled flowers: Tulips

Quilled flowers – tulip

Step 1

For the flower, use a quilling tool to roll a 225mm pink strip into a 12mm coil and pinch into an eye shape. Make three for each flower. For the two side petals, slightly pinch one tip to one side. Glue two side petals together, leaving a small gap at the base for stem; glue remaining petal on top. Make three dark pink and two paler pink.

How to make quilled flowers – tulips, step 1

Step 2

For the tulip stem, take a 450mm green strip of paper and glue all the way along the length, then fold the paper back on itself. Fold and glue in half, again and again, one final time, to make a really strong stem. Apply a little dab of glue to the top of the stem and insert into the base of the flower, as shown.

How to make quilled flowers – tulips, step 2

Step 3

Use a 450mm green strip to make the foliage. Make a loop at the end of the strip and glue it in place. Bring the strip around to make a slightly larger loop, again add a dot of glue to the base. Repeat the loops using the full strip, glue end. Pinch to create a pointed finish then repeat to make two for each flower.

How to make quilled flowers – tulips, step 3

Step 4

To make the flower pot, cut ten 5 x 430mm strips from orange paper. Join each strip to the next by overlapping slightly and secure in place to make one long strip. Roll into a 30mm wide solid coil. Remove from tool, press gently inwards to form pot shape. Coat the inside with PVA. Glue flowers into the pot to finish.

How to make quilled flowers – tulips, step 4