How to make kite shaped cards

These fun kite-shaped cards are the perfect way to showcase your favourite summer papers - Kitty Frampton shows us how!

Try our magazines – get 6 issues from just £9.99!

Published: July 5, 2021 at 6:03 am

If you have lots of gorgeous summer papers in your stash and want to make the most of them before autumn comes around again, have a go at these pretty kite cards! They’re easy to make, but look so effective when they’re decorated with pretty ribbons, papers and embellishments. Designer Kitty Frampton has used the Anything Goes collection kit from Echo Park to create these colourful designs, but have fun and be creative with your patterns!

You can either make your kite cards so they open up to write a message inside, or you can add front folding panels that you can then decorate. We’ve shown you both techniques so you can have fun experimenting with the different looks – enjoy!

Want some free patterned paper for this project? Take a look at our ever-growing collection of free patterned papers, there are lots to choose from and there are lots of different themes – we love these summer picnic papers or these beautiful summer meadow papers!

We love seeing what you make, so don’t forget to share your card making projects with us on Instagram, Facebook or Twitter, too!

To make kite cards you will need

  • Patterned paper
  • Card
  • Kraft card
  • Twine
  • Ribbon
  • Buttons
  • Eyelets & eyelet setter

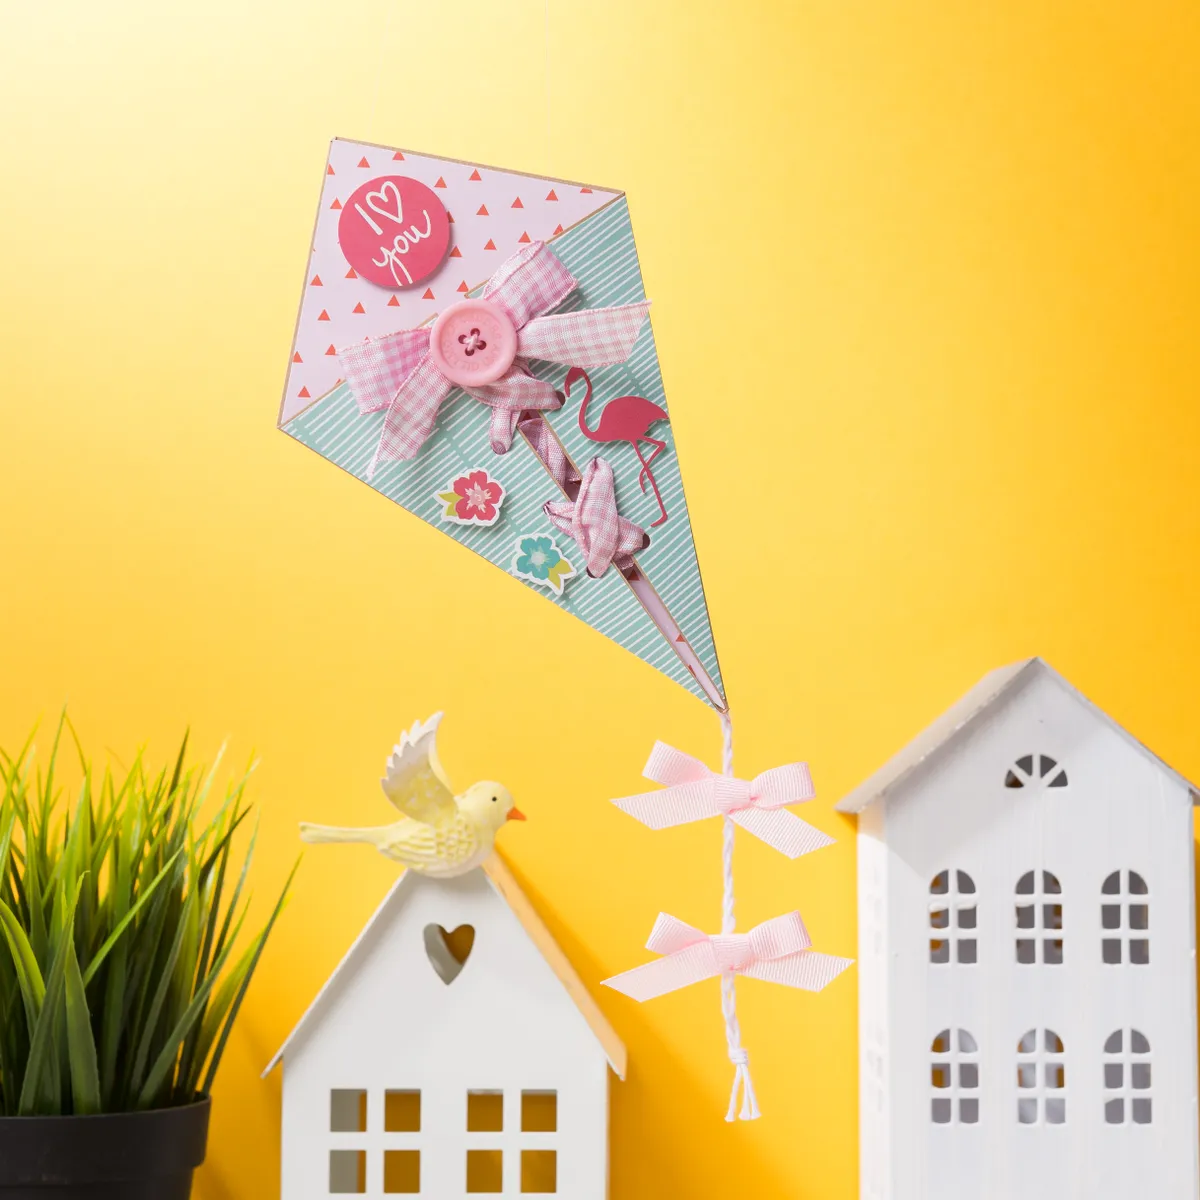
I Love You kite-shaped card

Step 1

Cut a 13.5 x 13.5cm piece of kraft card. Measure 5cm in from the top left corner and make a little pencil mark.

Kite-shaped card, card 1 – step 1

Step 2

Make a second mark 5cm up from the bottom right corner. Score diagonal lines from each point to the bottom left corner.

Kite-shaped card, card 1 – step 2

Step 3

Fold in the two scored sides of your card to make your kite shape. Cover the inside panel with a piece of patterned paper.

Kite-shaped card, card 1 – step 3

Step 4

Cut two triangles of blue paper to cover the front flaps of the card. Use a single hole punch to add three holes to each side.

Kite-shaped card, card 1 – step 4

Step 5

Thread ribbon through the holes and tie in a bow. Thread a button with twine and stick on top of the ribbon bow.

Kite-shaped card, card 1 – step 5

Step 6

Decorate with stickers and add a sentiment. Plait baker’s twine and attach as a tail. Add ribbon bows.

Kite-shaped card, card 1 – step 6


More kite-shaped card ideas

Let’s go fly a kite!

Kite-shaped card, card 2

Step 1

Mount a 13.5 x 13.5cm piece of patterned paper onto kraft card, leaving a narrow border. Add to a 14.5 x 14.5cm card base.

Kite-shaped card, card 2 – step 1

Step 2

Emboss an 11.5 x 11.5cm piece of blue card – we’ve chosen a clouds folder. Cut some grass and attach (if you have a grass die – this is ideal, otherwise snip into a strip of green paper to create grass). Mount onto kraft card.

Kite-shaped card, card 2 – step 2

Step 3

Cut a 7 x 7cm piece of card. Mark 2.5cm in from the top right and 2.5cm up from the bottom left. Score to the bottom right corner.

Kite-shaped card, card 2 – step 3

Step 4

Fold in your scorelines to make your kite shape. Cover the inside panel and outer front panels with patterned paper, as shown.

Kite-shaped card, card 2 – step 4

Step 5

Use an eyelet setter to add two blue eyelets to each of the front panels. Thread these with a length of ribbon.

Kite-shaped card, card 2 – step 5

Step 6

Tie the ribbon into a bow and attach a plaited piece of baker’s twine to the back of the kite. Add to your base. Add a sentiment.

Kite-shaped card, card 2 – step 6


Best friends card

Kite-shaped card, card 3

  1. Cut a 12.5 x 12.5cm piece of kraft card. Measure 5cm up from the bottom left corner and make a mark. Make a second mark 5cm in from the top right corner.
  2. Draw diagonal lines from each point to the bottom right corner of your card and score them. Fold them inwards to make your kite-shaped base card.
  3. Cover the inside of your card with blue striped paper. Cover the outside panels with triangles of yellow patterned paper.
  4. Use an eyelet setter to place three eyelets on either side of the front panels. Lace these with some blue ribbon from the bottom and tie in a bow at the top. Top the ribbon with two small flower stickers attached with some strong glue so they don’t fall off.
  5. Attach a sentiment – we’ve gone for a ‘Best Friends’ die cut – to your card with foam pads. Plait a length of baker’s twine and stick behind your card. Attach three stickers along them, backing 11cm them with little squares of paper to keep them in place.

Stay Cool (left card)

Kite-shaped card, cards 4 and 5


  1. Cut and fold white card to create a 12.5 x 12.5cm card blank with the fold at the side. Measure 5cm up from the bottom left corner and make a little mark. Make a second mark 5cm in from the top right corner.
  2. Draw diagonal lines from each point to the bottom right corner of your card and cut along them. This will give you your basic kite card base.
  3. Cover the front of your card with a piece of kraft card. Cut another slightly smaller kite shape from lime patterned paper. Cut the triangle off the top, then cut the rest of the shape in half. Stick these three pieces of paper to your base card. Top with a blue ribbon bow.
  4. Cut an oval from blue patterned paper, then mount onto a scalloped oval, cut from kraft card (using dies are an easy way to cut ovals and scalloped ovals). Add a sticker on top – we’ve chosen an ice cream sticker, then add to your card base. Stick a sentiment panel underneath it.
  5. Cut three pieces of twine and plait together. Stick to the back of your card to give your kite a tail.

Just for You (right card)

Kite-shaped card, cards 4 and 5


  1. Cut and fold white card to create a 12.5 x 12.5cm card blank with the fold at the side. Measure 5cm up from the bottom left corner and make a little mark. Make a second mark 5cm in from the top right corner.
  2. Draw diagonal lines from each point to the bottom right corner of your card and cut along them. This will give you your basic kite card base.
  3. Cover the front of your card with a piece of kraft card. Cut another slightly smaller kite shape from lime patterned paper. Cut the triangle off the top, then cut the rest of the shape in half. Stick to your base card.
  4. Cut a 7cm-wide circle of white card and emboss with the clouds embossing folder. Mount onto a slightly larger circle of kraft card. Stick a flower sticker in the centre and add adhesive gems to the flower centres. Add a sentiment sticker below.
  5. Tie a bow from pink gingham ribbon and stick to your card. Top with a button. Stick a piece of baker’s twine behind your card to finish.