
You may already be counting down to Christmas, but once December arrives you can reward yourself or a loved one every day with your very own DIY advent calendar. So let the countdown begin!
There are two styles to choose from to make your own advent calendar, but you might like to consider space - do you have room to display the book-style advent calendar? If not, you may like to go for the wall hanging Christmas advent calendar. The book-style Christmas advent calendar has more room for small gifts, whereas the hanging wall advent calendar is based on small envelopes and is better suited to jokes, poems or photographs.
If you're looking for papers to make your own advent calendar, check out our free patterned papers! We’re always updating the collection, so be sure to bookmark the page and keep checking back for more freebies.
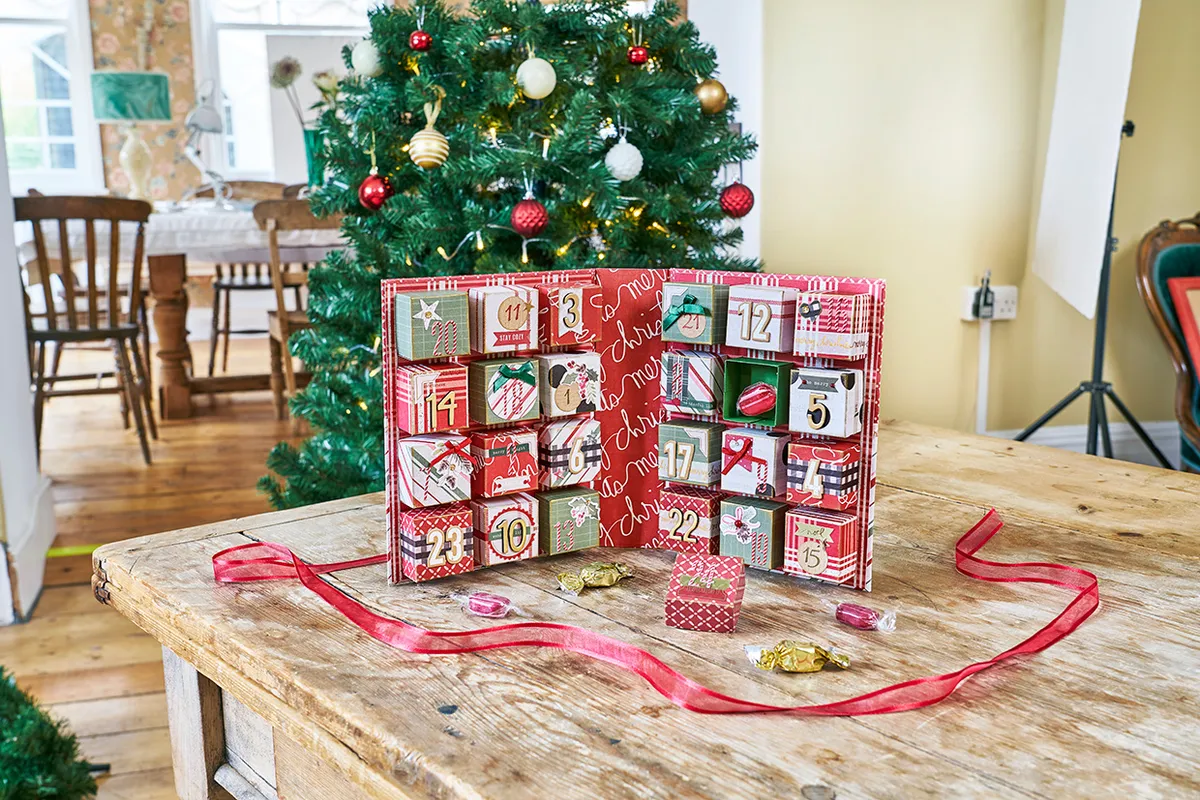
Make a book-style DIY advent calendar
Let the Christmas countdown begin with this DIY paper advent calendar book, ready to be filled with treats, designed by Vicky Sheridan.
You Will Need
- Book-style DIY advent calendar templates
- Patterned papers
- Coloured card
- Mountboard (thick card)
- Ribbon
- Adhesive gems
- Puffy stickers
- Wash tape
Step 1

For the box bases, trace the box base template onto coloured card. Cut along the cut lines and score along the dashed lines. Attach the box using the tabs. Repeat 23 times.
Step 2

For the box lids, trace the box lid template onto coloured card. Cut along the cut lines and score along the dashed lines. Build the lid using the tabs. Repeat to create 24 lids.
Step 3

Decorate each lid with washi tape, ephemera, ribbon bows and gems. Add a number sticker or topper to each of the lids, ranging from 1 to 24 for each day of advent.
Step 4

Cut two 180 x 230mm pieces of mountboard (also called greyboard, this is essentially just thick card). Cover the mountboard with patterned papers. If you decide to use two different patterned papers, cover the join with festive washi tape.
Add a 172 x 225mm piece of checked paper to the reverse of the card.
Step 5

Cut a 120 x 230mm strip of paper for the hinge. Score down the panel at 30mm from each long edge. Attach each tab to the layered cover. Cover the spine with script-patterned paper.
Step 6

Attach six red and six green boxes to the right-hand side of the inside of the advent book, spacing the boxes evenly. Repeat to cover the left-hand side of the book.
Step 7

Arrange the box lids so that the numbers are in a random order. Fill the boxes with sweet treats or other presents and place a lid onto each of the box bases, as shown.
Step 8

Attach die-cut ephemera to the front of the advent book using foam pads, as shown. Add gems to the ephemera. For extra security, tie ribbon around the book once closed.

Make a wall hanging DIY advent calendar
This hanging wall DIY advent calendar by Vicky Bailey uses a mini envelope template to create the pouches. You can embellish each little envelope pocket with whatever you have in your stash, then simply cut out tags to slip inside the envelopes. You could write little messages in them, decorate with images or even “treat” your family to 25 groan-worthy cracker jokes!
Once you’ve made all the envelopes, use lengths of string to attach them to a coat hanger, then simply hang your DIY advent calendar in pride of place.
It’s great fun being able to give each envelope its own bespoke design and with 25 to embellish, it’s the perfect excuse to get family or friends crafting together to complete this paper advent calendar.
You will need
- Wall hanging DIY advent calendar templates
- Patterned papers
- Kraft card
- Ribbon
- String
- Mini pegs
Step 1

Download the mini envelope template, and trace around onto festive patterned paper of your choice. Score and fold the paper, as indicated by the template to create your mini envelope shape.
Step 2

Once the envelope is made, create a tag to go inside. You can use the one on the template, or you can make your own if you would prefer. Once cut, punch a hole in the top of the tag and tie a length of ribbon through the hole. Now slide the tag into the envelope.
Step 3

Finally, add numbers 1 to 25 and finish by adding embellishments. You could use die-cut shapes, adhesive gems and sequins, ribbon, hessian or whatever you have to hand. Adhesive numbers are sold in most craft shops fairly cheaply, but you could always write the numbers on instead.
Attach your mini envelopes to lengths of string hung from a coat hanger and find somewhere to hang up your paper advent calendar!
Make your own advent calendar with Gathered
Get ready for the Christmas countdown with our pair of advent calendars. Make your favourite and treat a friend or family member to 24 little gifts this December!
Improve your paper folding skills
If you’ve enjoyed folding the envelopes in the hanging DIY advent calendar, you might also like easy origami for beginners, and what better time to learn a new skill?


