Do you know these 5 expert top tips for cleaning your sewing machine?
Cleaning your sewing machine may not sound all that glamorous or exciting, but if you want to have your sewing machine happily humming for years to come, it’s a must.
Whether you've got a new sewing machine or have been using the same one for years, quilting expert Suzy Williams has put together five easy steps to help you help your machine.
- Best sewing machines for beginners
- How to clean a sewing machine - our complete guide
- Sewing machine tips and tricks
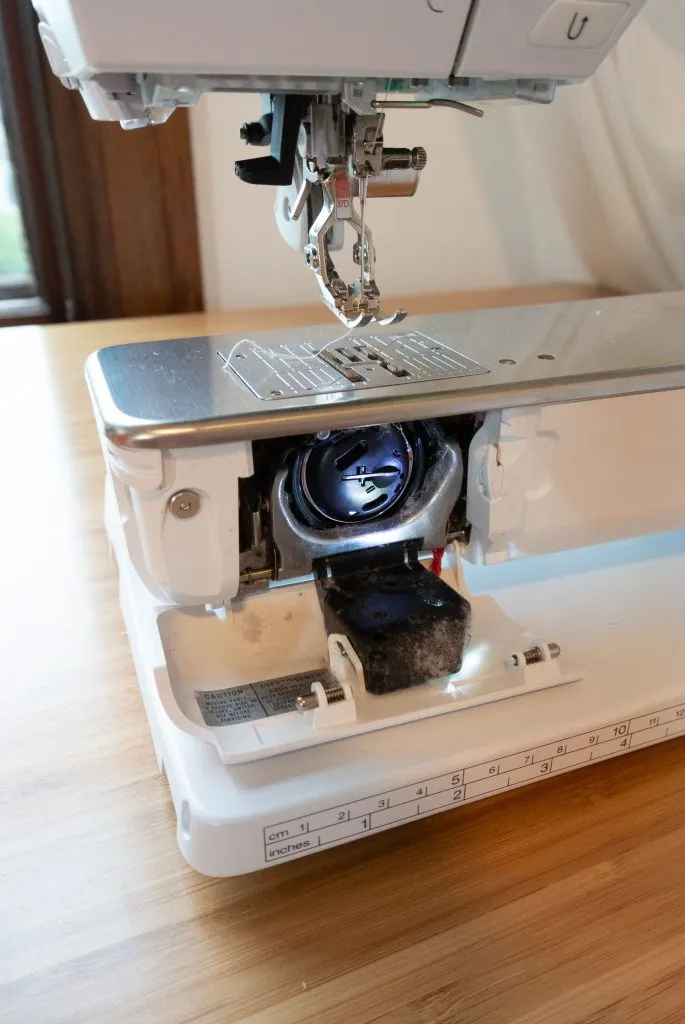
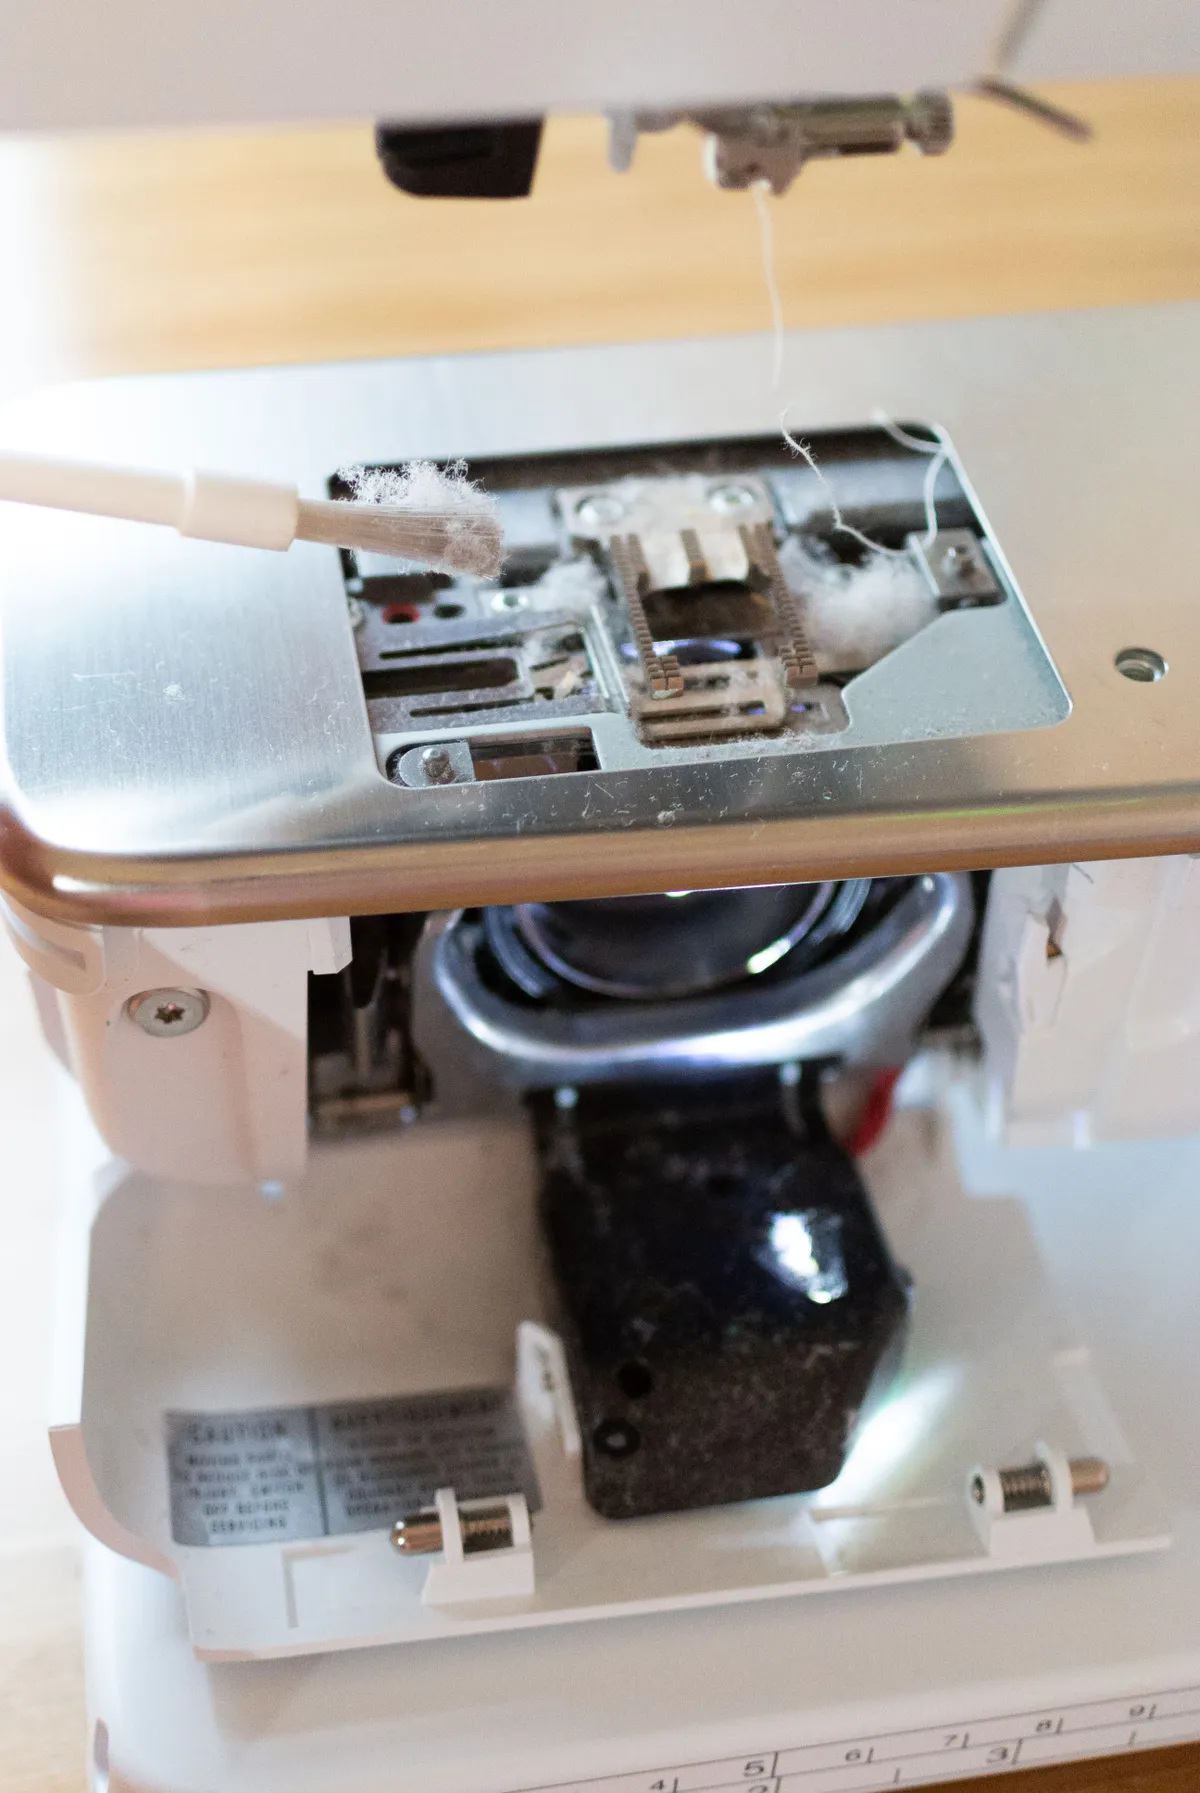
De-lintify
It’s tempting to take two mighty aerosol cans of air and go at your sewing machine with one in each fist, yelling “WELCOME TO THE REVOLUTION, LINT!” but that may not be the best idea… though it’s probably the most entertaining.
Actually, using air cans on your machine can do more harm than good by forcing lint and dust even further into the depths of your beloved sewing machine.
If you do use canned air at all, make sure you spray the air at an angle so you are always blowing lint OUT of your machine, rather than into it.
More effective tools include:
- A lint brush (Even though one usually comes with your machine, eventually, they get gunky. Think about getting a new brush once a year.)
- A muslin cloth (I like muslin because it’s super soft.)
- A gentle lambs wool duster (attracts dust without the use of chemical sprays)
Before cleaning out your machine, unplug it. I know, I know, you’re not stupid, but I had to say it. Remove your needle (maybe it’s time to replace it, anyway? Keep reading for more about that), and follow your instruction manual to remove the presser foot, the bobbin, the needle plate, and the bobbin case. Now, you’re ready for some cleaning action.
Use your lint brush to GO AT these separate components like a cleaning fiend, making sure you get all of the lint and gunk out before carefully placing them back where they belong.
One more thing NOT to use: your breath. It’s tempting to blow dust and lint out of your machine with your handy, built-in lungs, but your breath actually contains moisture that can cause corrosion in your machine! Who knew you were so dangerous!
Change the needle!
This is a biggie. You guys, when you sew, your sewing needle passes through fabric A THOUSAND TIMES PER MINUTE. (possible exaggeration, but I'm sure it's close) That’s why it’s so easy for sewing machine needles to get really dull, really fast. I recommend changing your needle every time you clean.
And what will happen if I don’t heed this advice?
I’m glad you asked. Sewing nightmares like skipped stitches, broken threads, runs and pulls and even (gasp!) machine damage can follow! These are the things that haunt my dreams! Change your needles. A lot. They're cheap! Treat yourself to a few packs so that you always have them on hand.
Go undercover
When you’re using a machine to sew fabric, things are going to get linty. But if you leave your sewing machine out in the open, it can get a lot of other stuff stuck in it as well, like dust and dirt, and even animal hair. (Or, if you have this habit of snacking at your sewing space, all sorts of exotic and delicious materials can find their way onto your machine!)
The best thing you can do for your sewing machine is get it a cozy little cover. You can get a plastic cover from most machine dealers, or you can make one yourself!
Book it in for a service
All brands are different, but no matter what make or style you’re rocking over there at your sewing station, it’s smart to get your sewing machine serviced regularly, about every 12 - 18 months. This is like the annual physical you get (er… forget to get) from your physician. It means carting your machine over to a professional for a good once-over, and some TLC if it needs it.
Oil your machine regularly (if it needs it)
Keep in mind: This point doesn't apply to all sewing machines. While it's true for some front loading bobbin machines, you should avoid oiling Brother and other top loading bobbin machines to prevent damage to the machine. If you're unsure about your sewing machine, always consult your manual or speak to the shop you brought if from.
If you’re someone who doesn’t pour through the instruction manuals first thing when bringing home a gadget (like… everyone?) you may not know that some sewing machines need to be oiled regularly. What do I mean by regularly? A good rule of thumb is every three bobbins.
And where does this oil go? Is it a massage sort of situation? Good question. This is where you probably do need to get out that manual you pitched into the back of the closet. Each brand of sewing machine does things a bit differently. Common places to oil are the bobbin case area, on the needle bar, and also where the handwheel meets the side of the machine. A drop or two is all you need.
Read more from Suzy at suzyquilts.com or check out her Instagram @suzyquilts
Time for troubleshooting
Even if you take good care of your sewing machine, things can still go wrong from time to time. You can find advice on the most common faults in our guide on how to fix a sewing machine.