Cuddle up! Free baby quilt pattern

Sew this sweetest of baby quilt patterns in an afternoon, perfect for last-minute gifting! Our step-by-step guide shows you how to make a baby quilt for beginners

Try 6 issues of Love Patchwork & Quilting magazine for £9.99| SAVE 76%

Published: April 26, 2020 at 7:47 am

Is there any greater gift you can give new parents than a handmade quilt? We don't think so, but then we're probably a bit biased! Luckily, you don't need any experience of quilting to make this easy baby quilt pattern. We've used a jelly roll of fabric to pick a set of pretty, coordinating fabrics, and some linen fabric to give a stylish backing to the pastel prints.

Here's how to make a baby quilt

You will need

  • Linen fabric 1yd
  • Assorted print fabrics, one hundred and sixty (160) 2½in squares
  • Binding fabric 3/8yd
  • Batting 34in x 46in
  • Backing fabric 34in x 46in
  • Embroidery thread (for quilting)

Finished Size

30in x 42in approx

Notes

  • Seams are ¼in throughout, unless otherwise stated.
  • We used a Jelly Roll to cut all of the print fabric squares, and bind the quilt (with several lengths of fabric left over!)
  • Finish the raw edges of the linen fabric with a zigzag stitch, to prevent fraying.

When you're mixing different fabrics (linen, cotton and fleece) It's really important to pre-wash!
Baby quilt pattern free
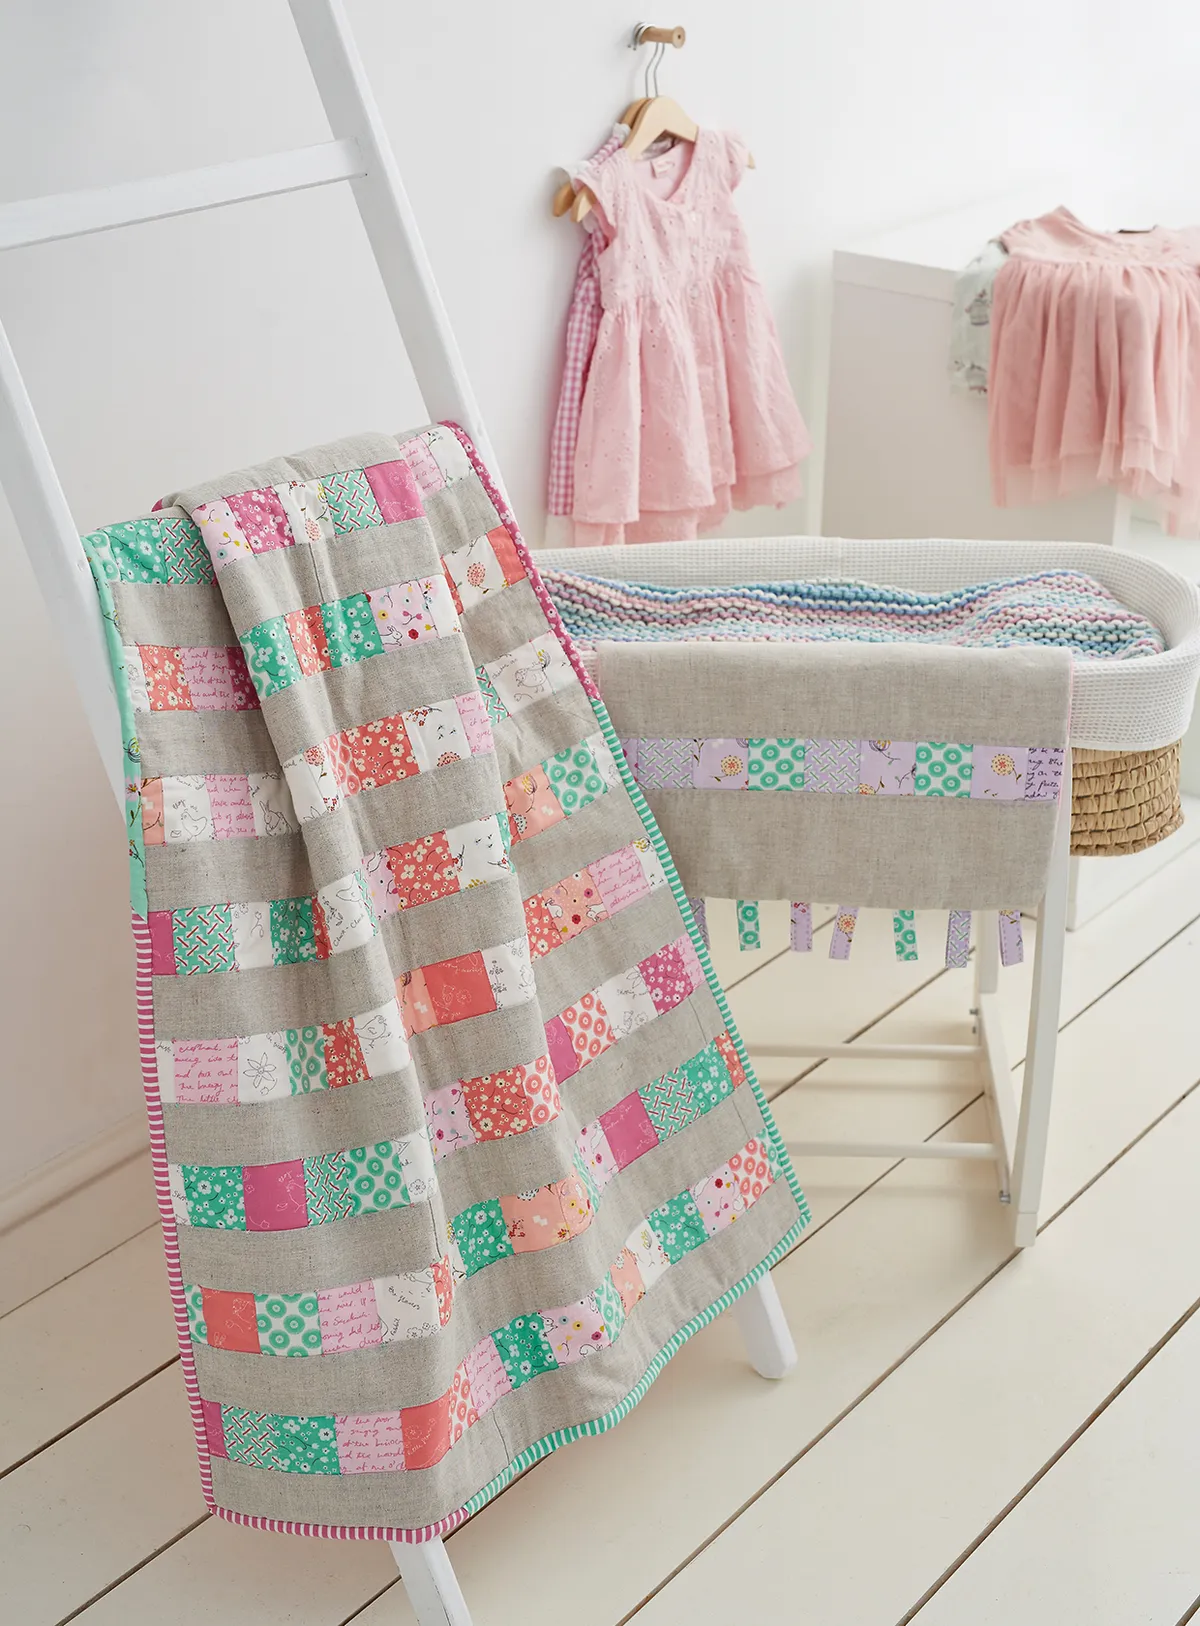
This little baby quilt pattern started life as a Jelly Roll of fabric. It's full of pretty prints and fresh colours that are just right for brightening up a baby's room.

You will need:

  • Linen fabric (1 yard)
  • Cotton fabric (See notes for how much fabric you need for the quilt, backing and binding)
  • Batting (34 x 46 in)
  • Embroidery Thread

Cutting out

Step 1

From the linen cut eleven (11) 2½in x 30½in pieces.

Step 2

From the binding fabric cut four (4) 2½in x WOF strips.

Step 3

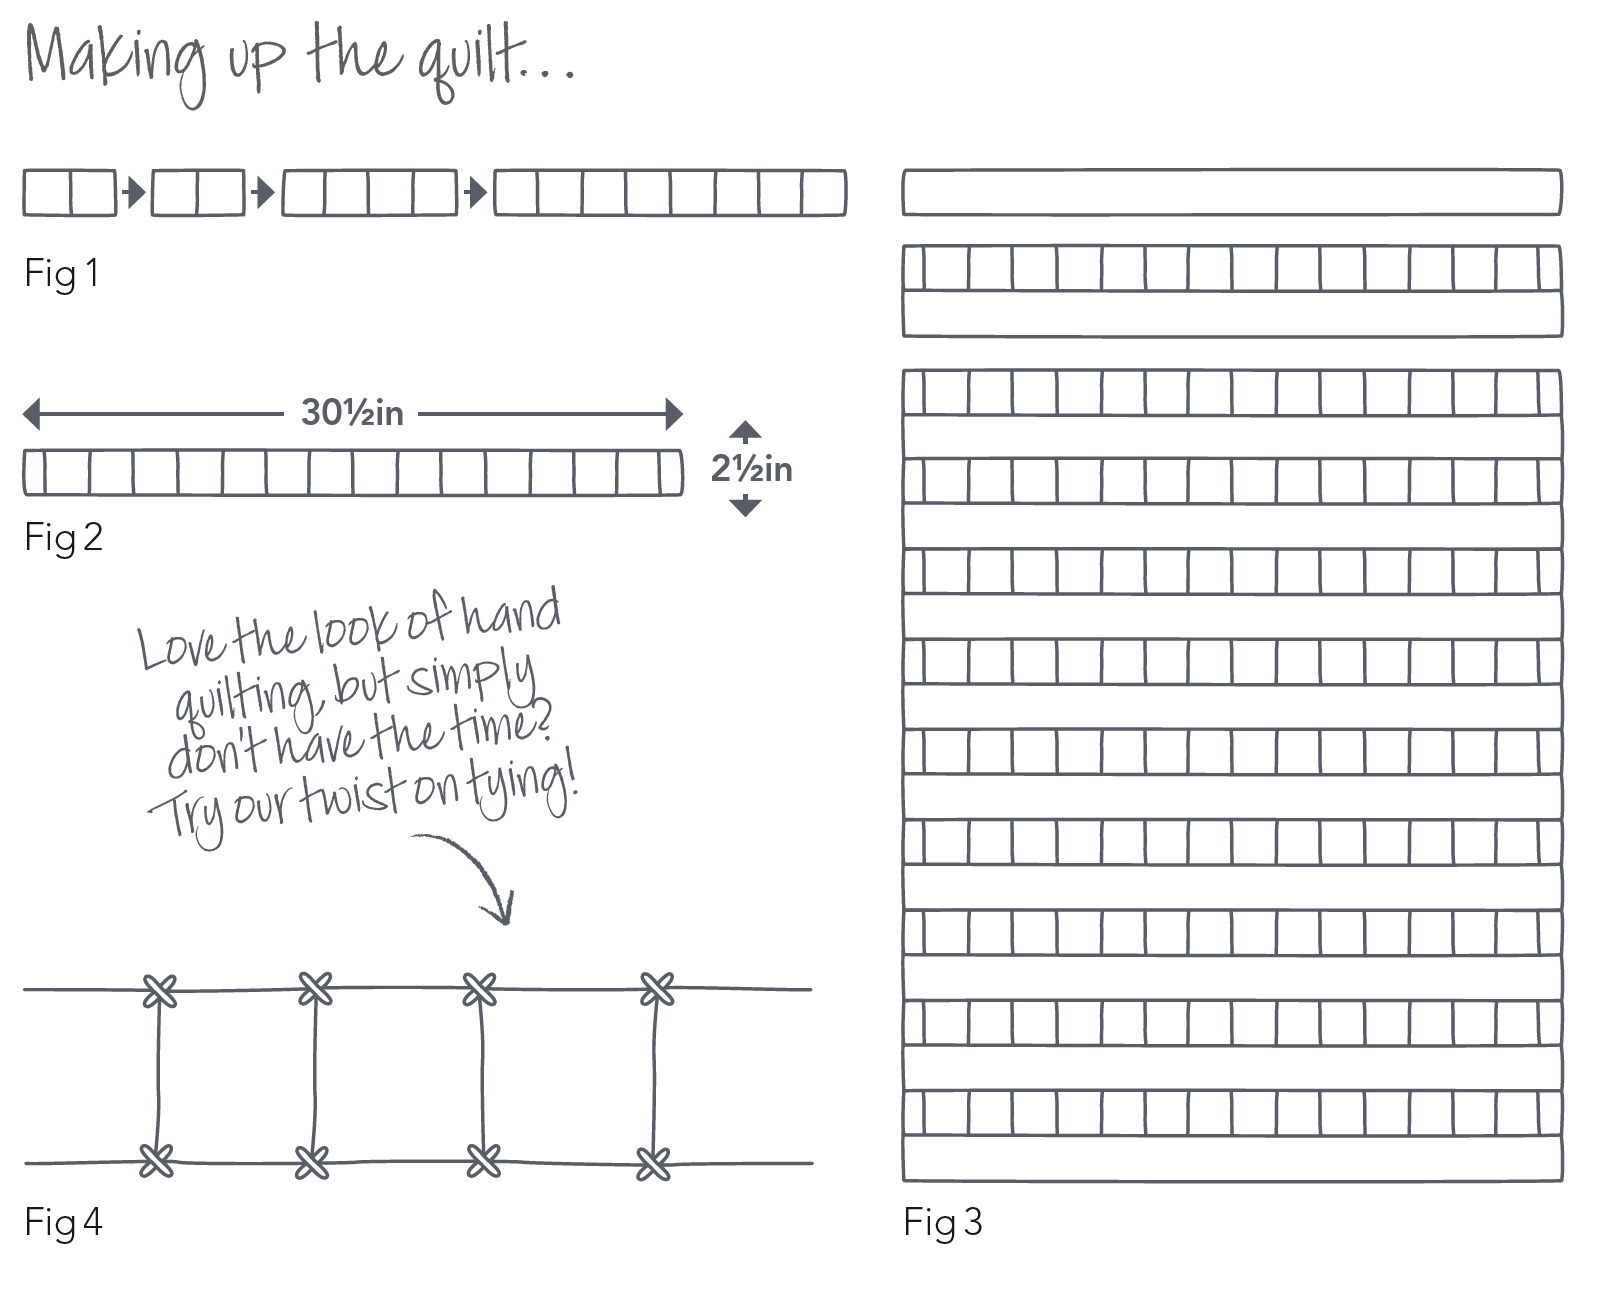
Arrange your fabric squares in ten rows, with sixteen squares in each. If your fabrics feature directional prints, take care to position them all the correct way up. Sew the squares together in pairs, then sew the pairs together, repeating until you have pieced each row (Fig 1).

How to make a baby quilt

Step 4

Trim 1in from each end block – each row should measure 2½in x 30½in (Fig 2).

Step 5

Lay out your quilt top, placing a linen strip at the top and bottom of the quilt, and alternating a print row with a linen row, as shown (Fig 3). Sew the rows together.

Finishing the quilt

Step 1

Place your quilt top on your batting and baste in place. Quilt as desired. We used three stands of embroidery floss to stitch an ‘X’ in the corner of each pieced row, tying at the back of the wadding to secure (Fig 4). Remove your basting stitches or pins.

[pullquote quote="Love the look of hand quilting, but simply don’t have the time? Try our twist on tying!" /]

Step 2

Place your quilt on top of your backing fabric, wrong sides together. Baste using your preferred method – we pinned and then ran a line of basting stitches around the outer edges of the quilt (these stitches were hidden by the binding). Square up the quilt top and trim away excess batting and backing fabric.

Step 3

Join the binding strips end-to-end to make one long length. Use to bind the quilt, taking care the mitre the corners. We used four different Jelly Roll strips to give our quilt a fun patterned binding.

Quilt labels

A label is the perfect way to personalise a special gift, or mark a special occasion. Make sure to include the name of the recipient as well as your own name. 

To make a label like ours, add your embroidery to a large square of linen. Give your label a good press on the reverse. Centering your stitching, trim the label into a rectangle, leaving a ¼in seam allowance on all four sides. Layer over a piece of batting, cut to the same size and bind the edges as you would a quilt. Add the label to your quilt using invisible stitches.

When the piecing’s simple, you can spend more time on fabric and finishing touches, like adding a quilt label to add a personal touch.