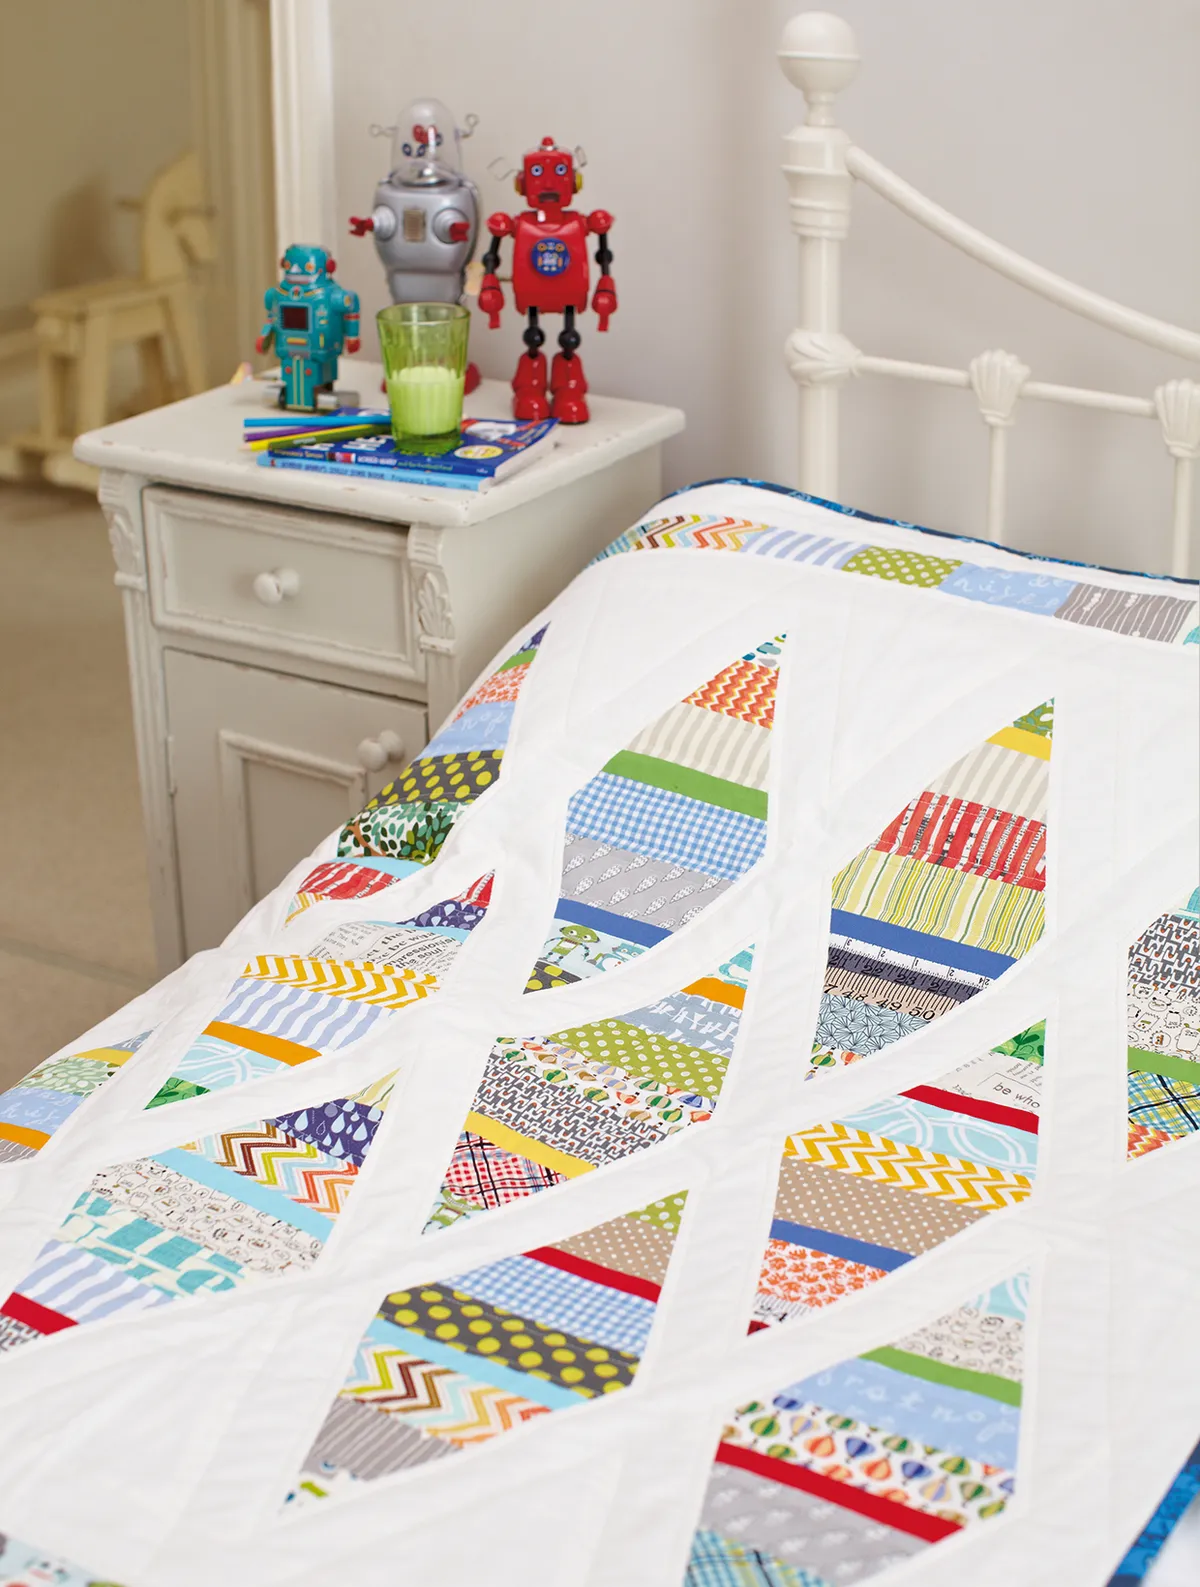
Make the most of your stash with Laura Pritchard's simple and fun diamond quilt pattern. For a unique look ensure each strip of fabric stands out by mixing a variety of bold, colourful prints with a selection of neutral choices. That way the fun factor is there in every single block!
For the diamond quilt pattern you will need
- Patterned fabrics for diamonds, 77 scraps each 2½in x 7in
- Solid-colour fabrics for diamonds, 22 scraps each 1¼in x 7in
- Patterned fabrics for print border, 2½in wide x various lengths (about 73in in total)
- White fabric for sashing, half diamonds and borders 1¾yd
- Backing fabric 40in x 52in
- Batting 40in x 52in
- Binding fabric ½yd
- Basic quilting kit for beginners
Finished size
36in x 48in approx
Notes
- Seam allowances are ¼in
- Press all fabrics well before cutting.
- Download our Diamond Quilt Triangle Template (PDF) (Not a paper aeroplane, we promise! Simply double up to create the quilt's diamond blocks).
Stashbuster project: free diamond quilt pattern
Cutting out
Step 1
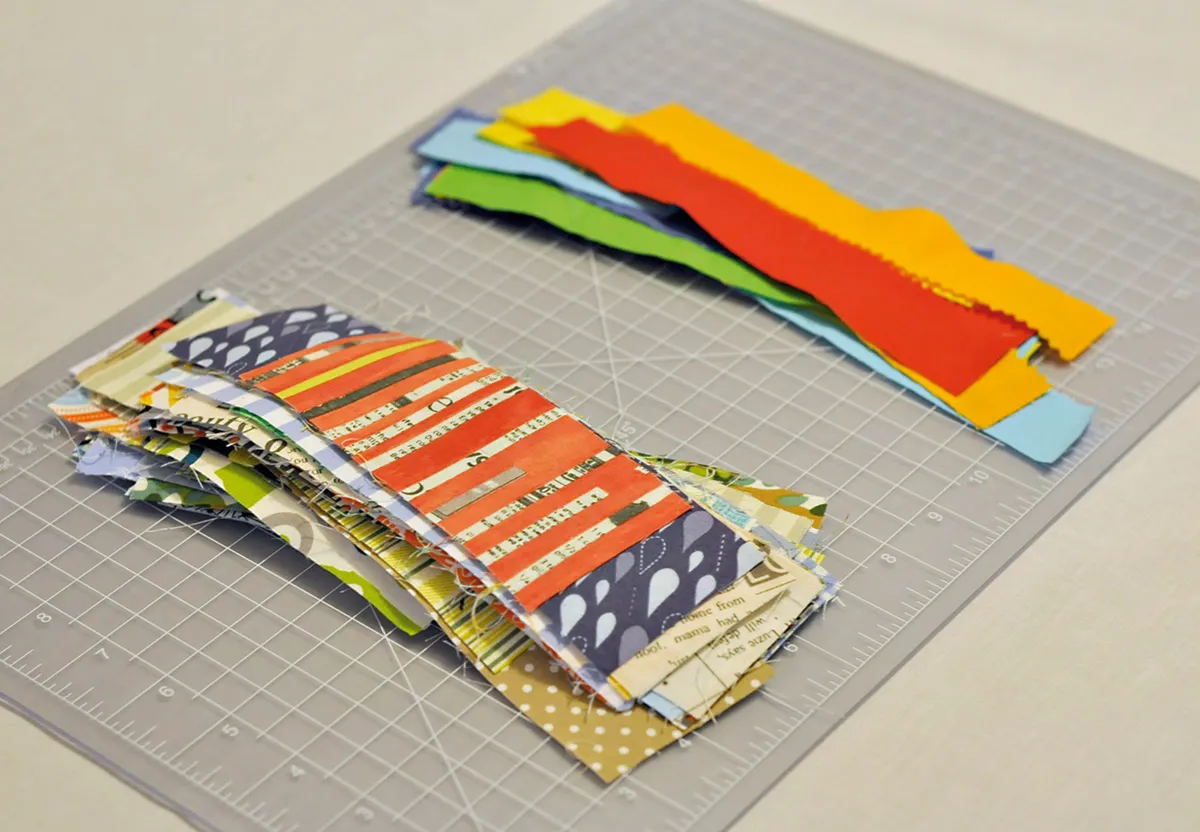
Cut the patterned scraps into 77 strips, each 2½in x 7in. Don’t worry too much about the accuracy of the length as smaller pieces can be used towards the tapered ends of the diamond block. Keep any 2½in wide offcuts for the coloured border.
Step 2
Cut the solid fabrics into 22 strips each 1¼in x 7in.
Step 3
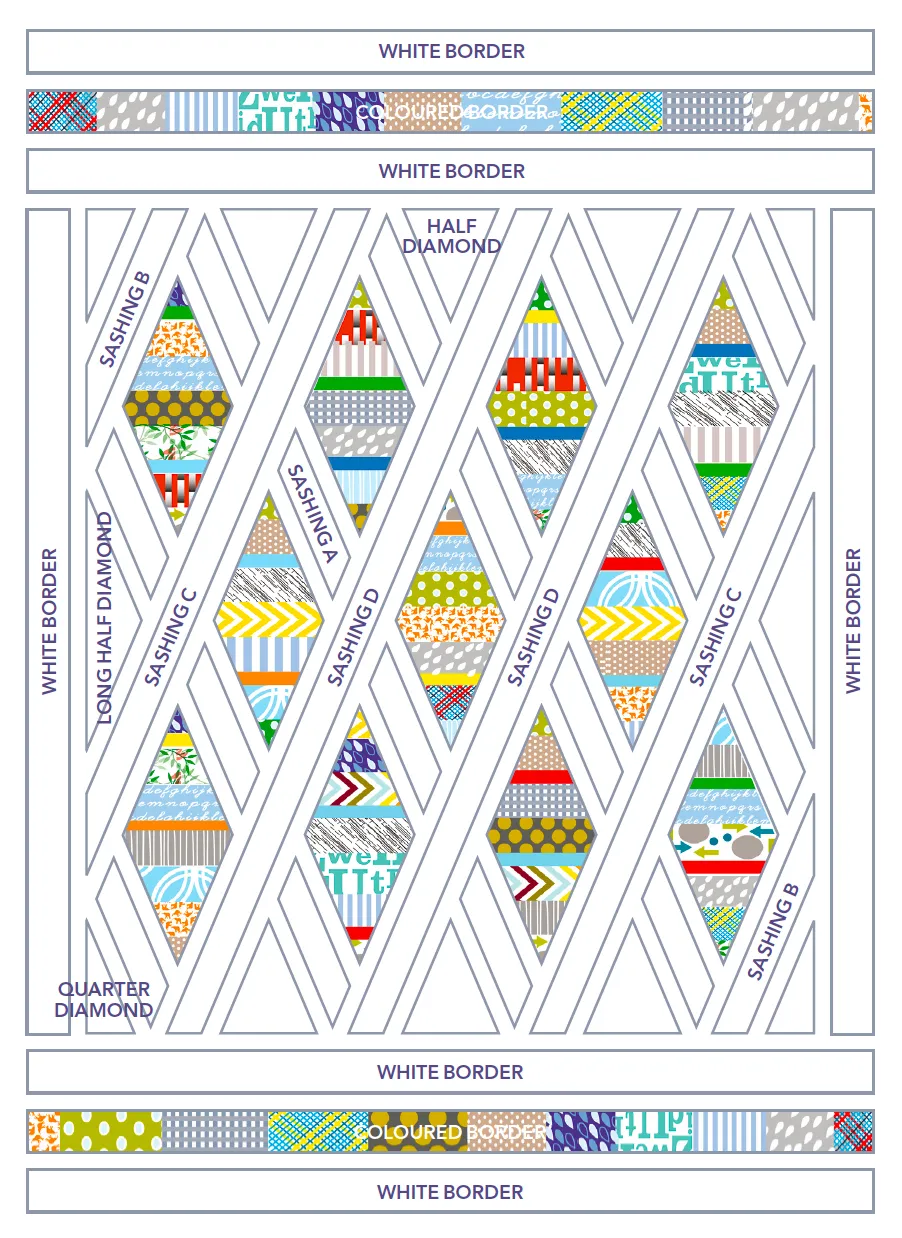
From the white fabric, cut the following for sashing (refer also to the quilt assembly diagram below):
- Sixteen strips 2½in x 11in (Sashing A on assembly diagram)
- Two strips 2½in x 14in (Sashing B)
- Two strips 2½in x 36in (Sashing C)
- Two strips 2½in x 44in (Sashing D)
Step 4
From the white fabric, cut six strips 2½in x 36½in for borders (see White Border on assembly diagram).
Top tip: To reduce wastage, you can use shorter scrap pieces that taper towards the ends of the diamond shape, but measure against the template to ensure the pieces will be wide enough.
Step 5
Copy the triangle template three times and cut out the triangles. Use adhesive tape to join two triangles together into a diamond shape. Set the other triangle template aside for the moment. Use the diamond template to cut five diamonds from white fabric and then sub-cut as follows:
- Cut three of the diamonds in half horizontally (you need six in total).
- Cut two diamonds in half vertically (you need two in total).
- Cut the remaining two long half diamonds in half to make quarter diamonds (you need four in total).
Step 6
From the binding fabric cut five strips 2½in wide x width of fabric.
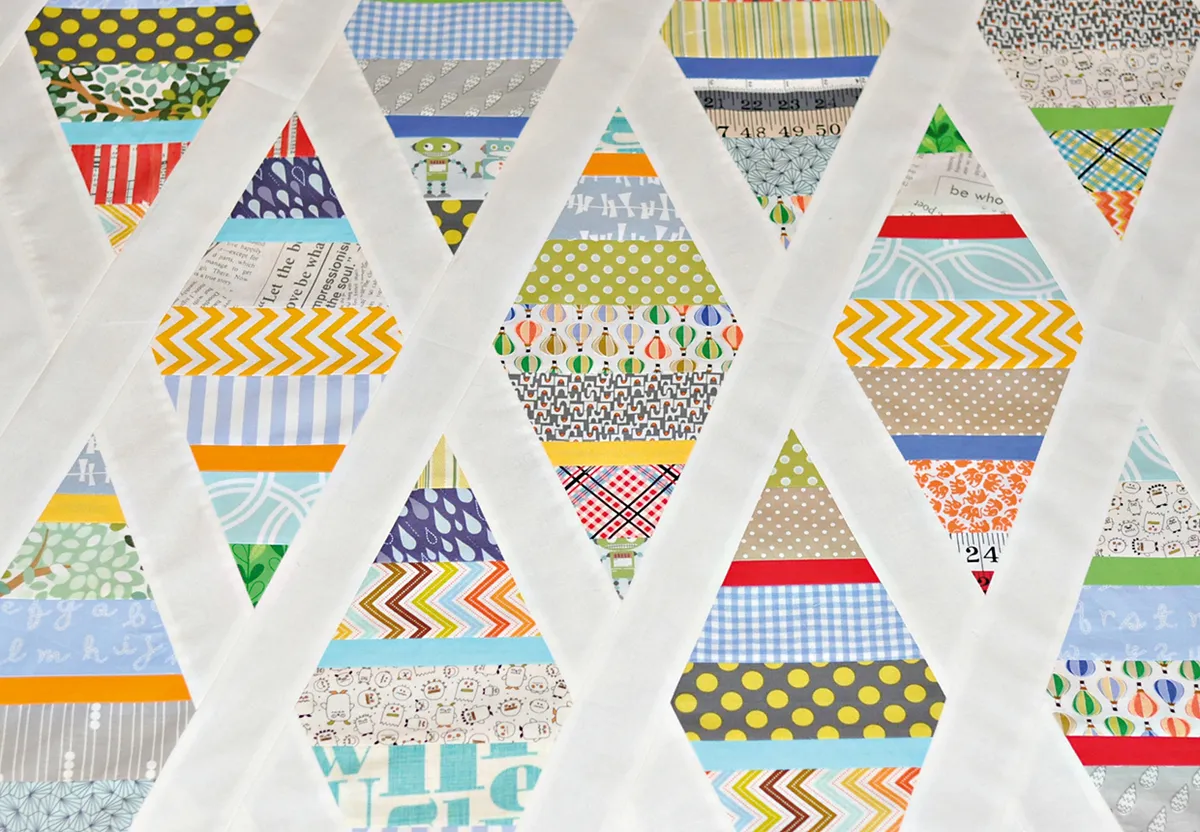
Making the scrappy diamonds
Step 7
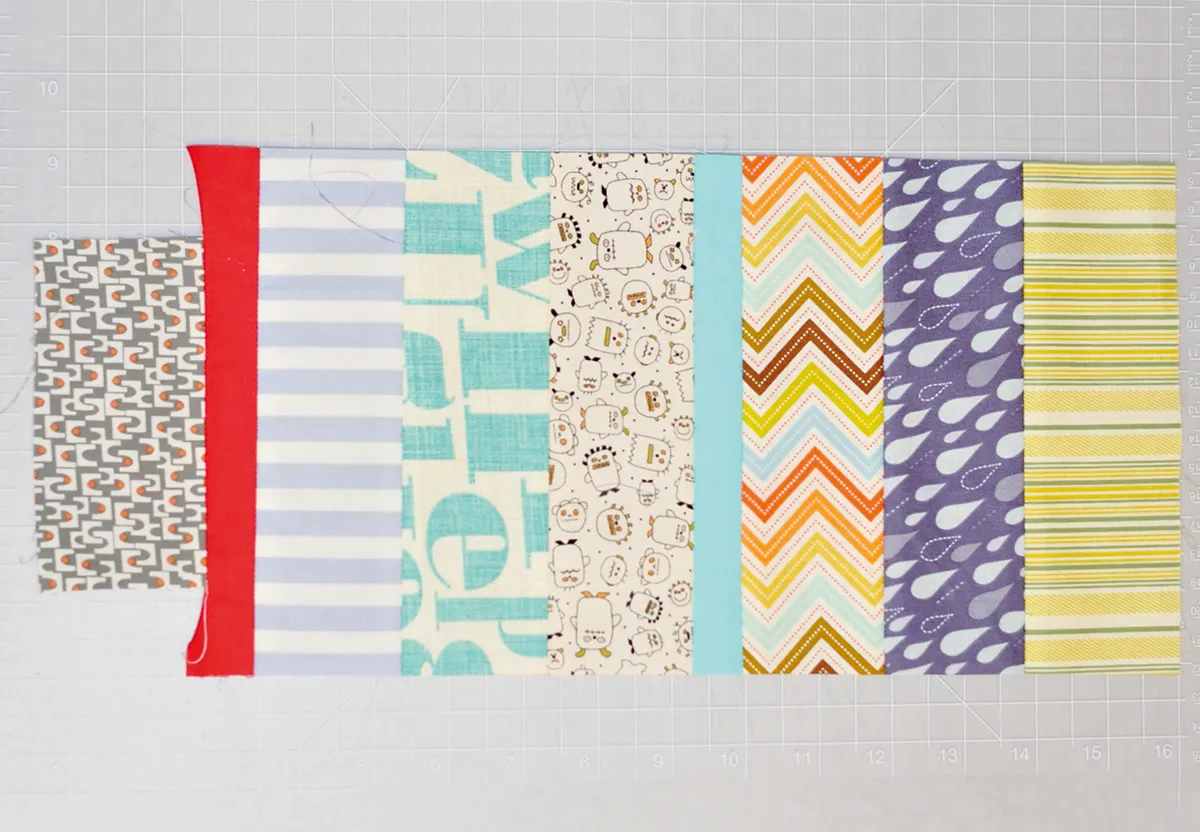
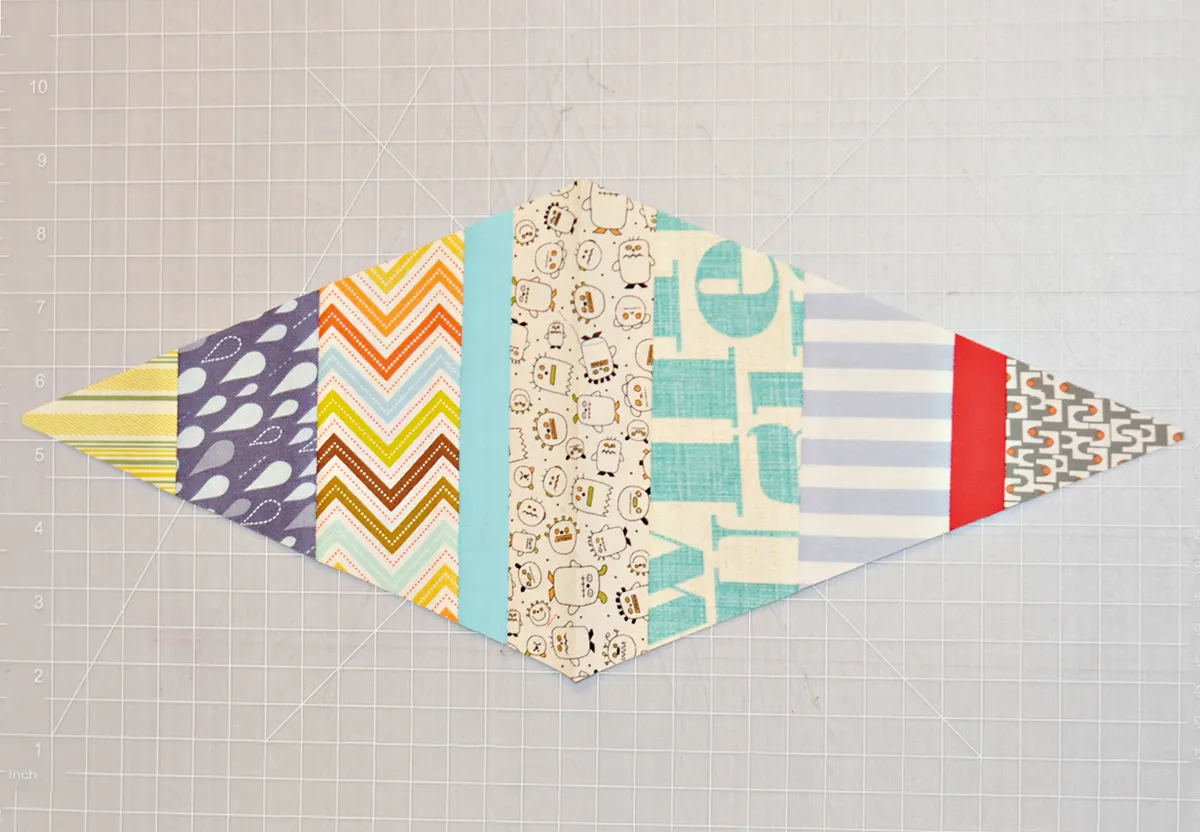
To make a scrappy diamond you need seven 2½in wide patterned strips and two 1¼in wide solid strips. Lay out the strips in your preferred order and then sew them together using ¼in seams.
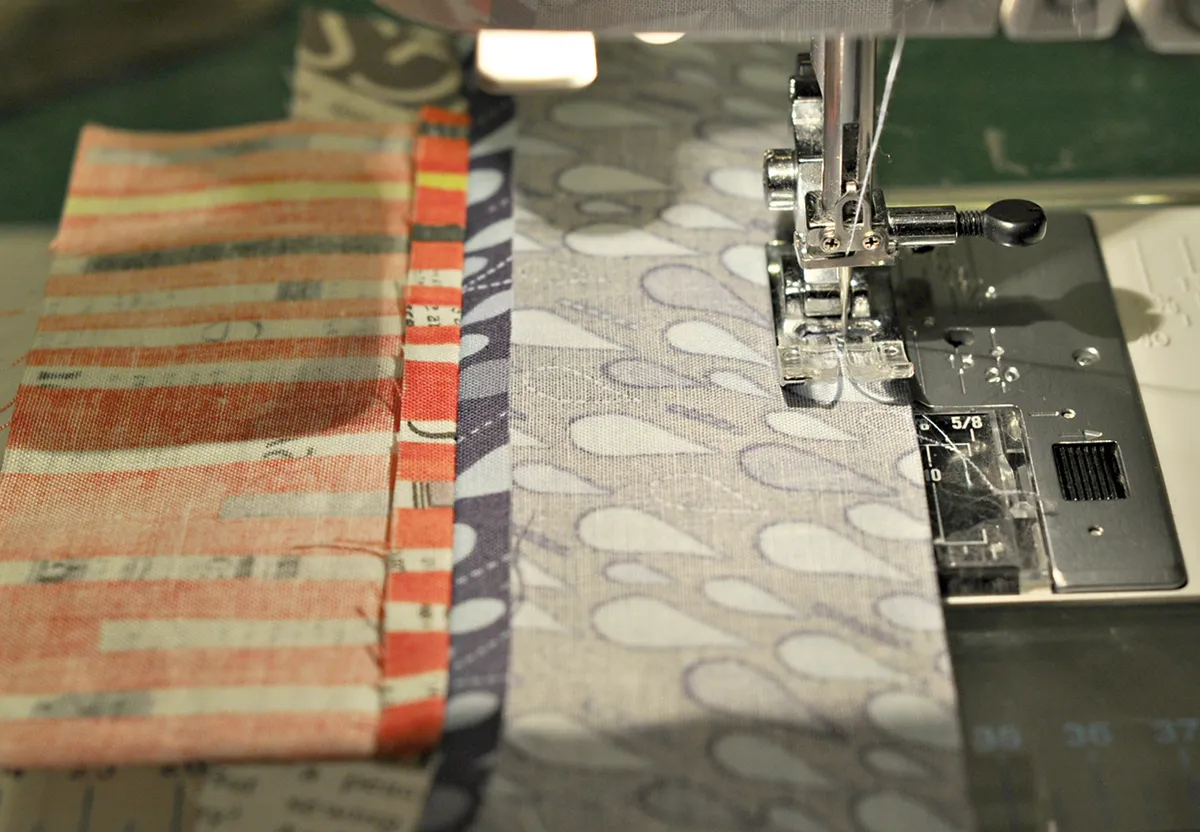
Press the seams open as you go.
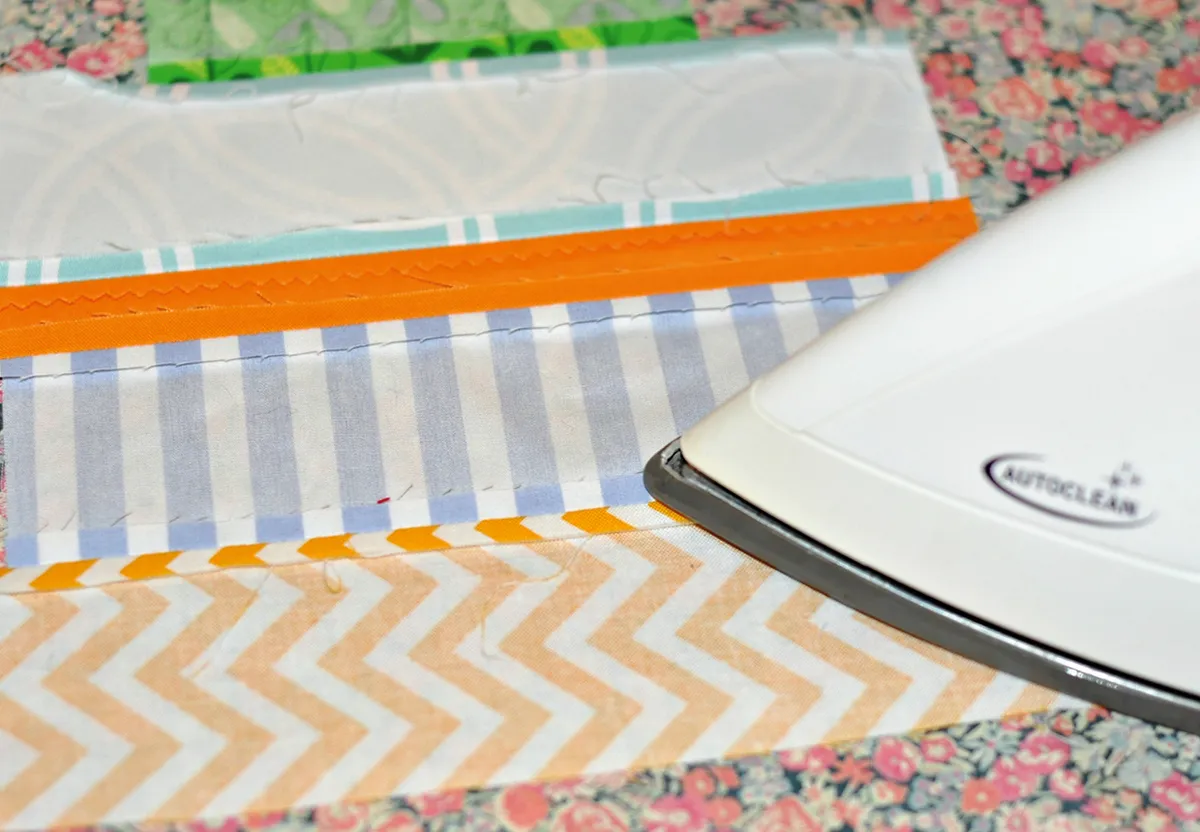
You should now have a rectangle that's about 7in x 16in.
Step 8
Fold the pieced rectangle in half horizontally and place the triangle template on top, aligning the short edge of the triangle with the fold.
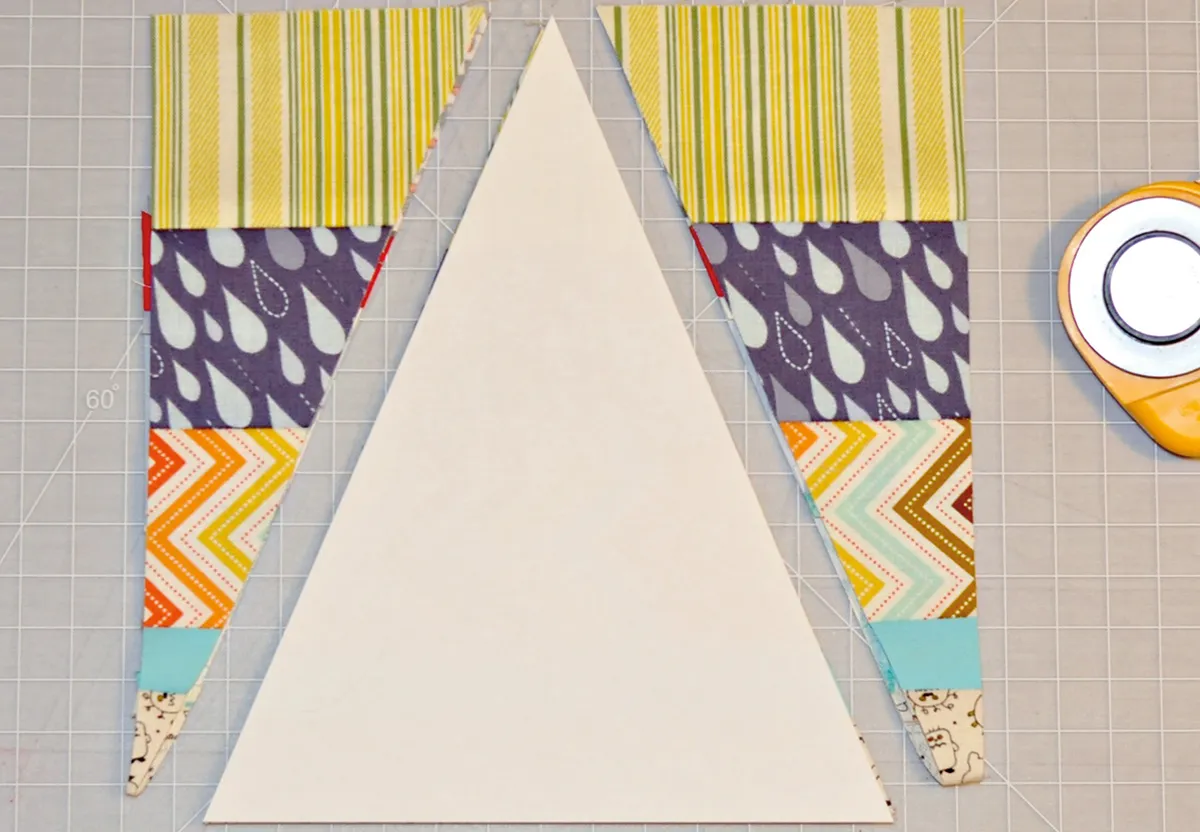
Trim the overhang down to size. Open up and you’ll have your first scrappy diamond.
Repeat to make eleven pieced diamonds in total.
Top tip: The diamonds have bias edges that can stretch and lose shape easily, so be sure to handle and press with care to avoid risk of distortion.
Sewing the quilt rows together
Step 9
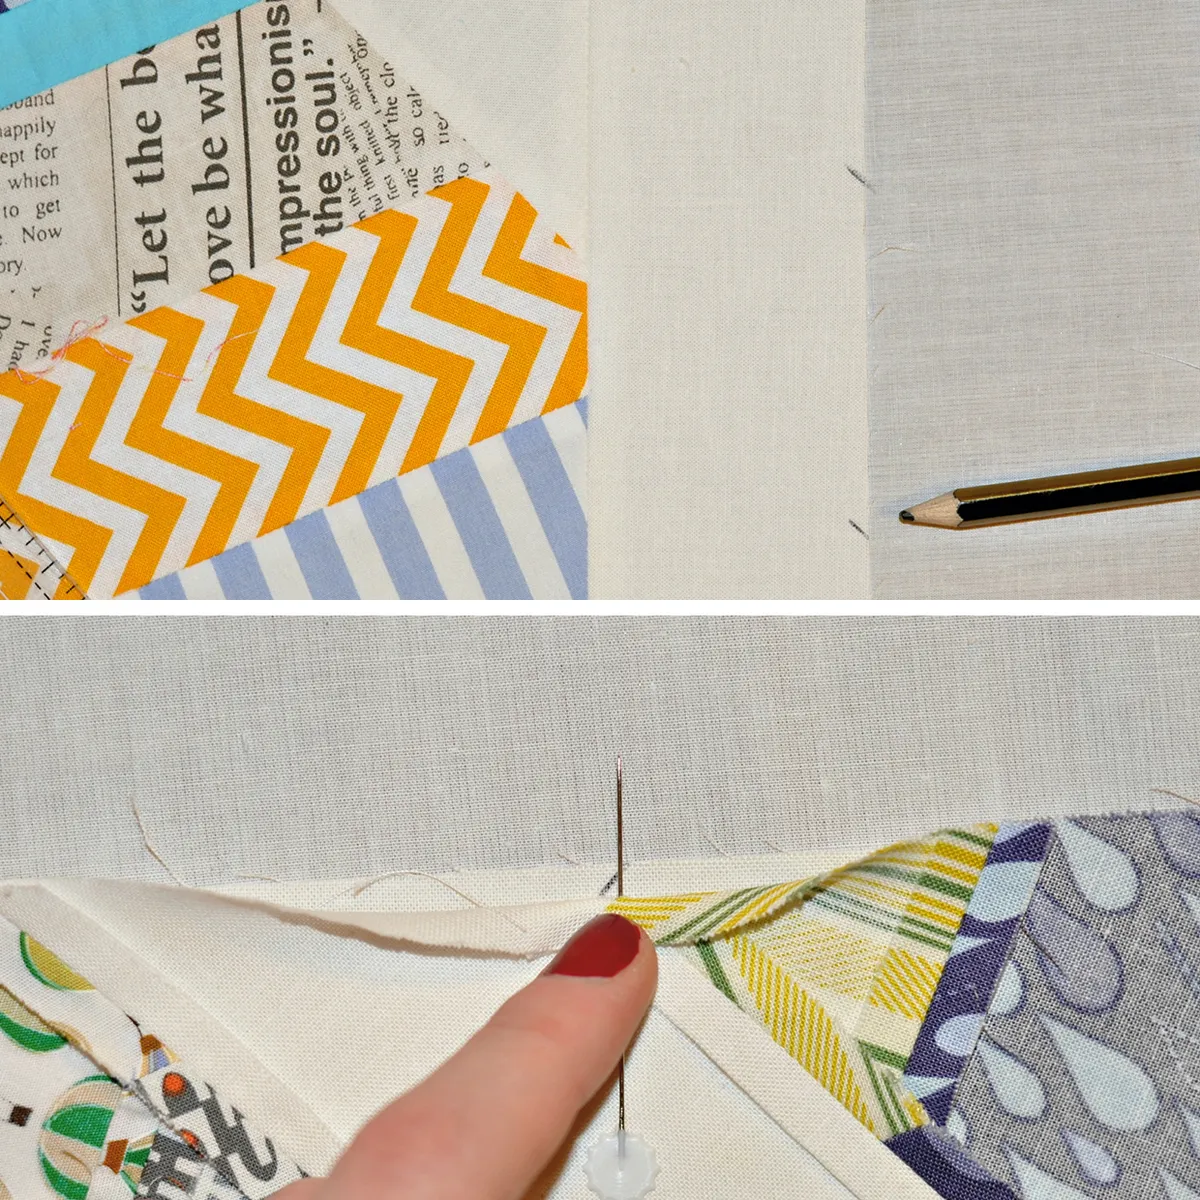
The diamonds are sewn together into diagonal rows, as follows. For the first row, arrange one diamond, two Sashing A strips, one white half diamond and one long half diamond as shown in the diagram (Fig 1).

Pin them well and then sew these pieces together.
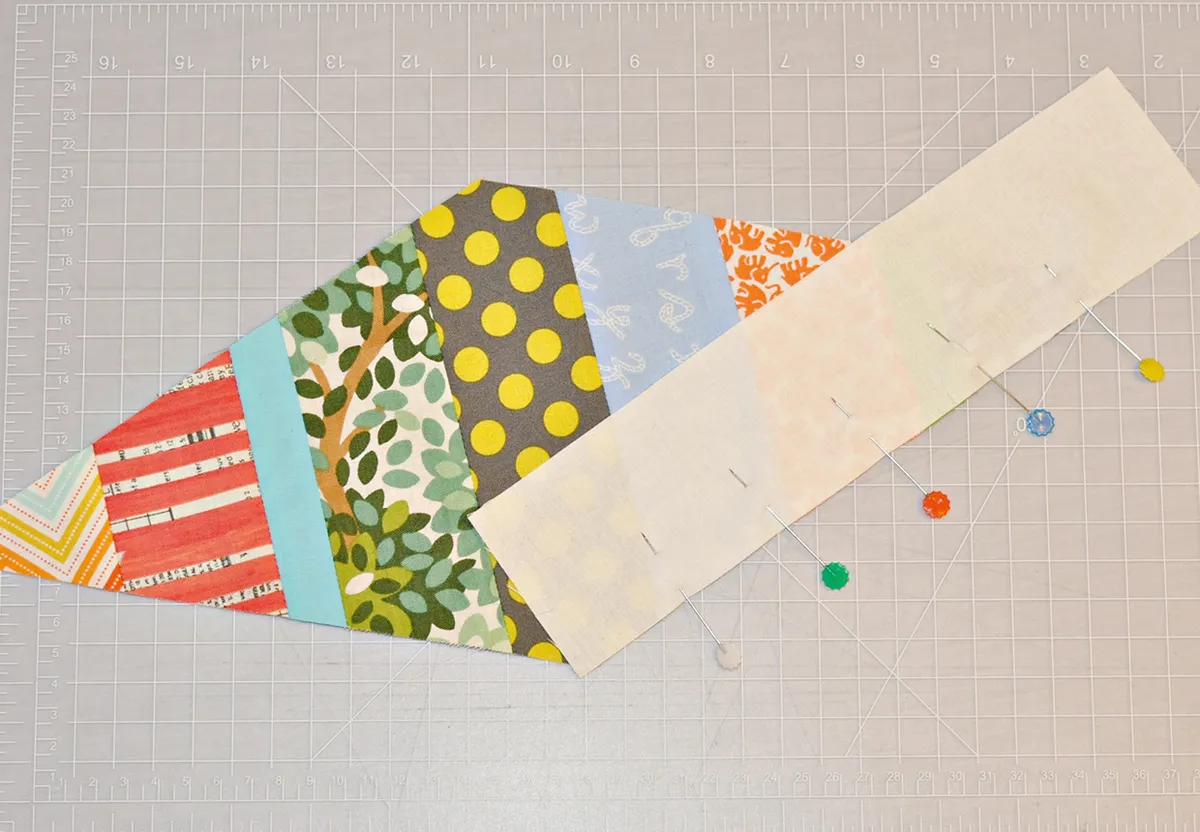
The end of the sashing will extend just past the ends of the diamond. When lining up the next piece of the row, offset the ends by ¼in so that the line of stitching meets precisely at the edge of the previous piece.
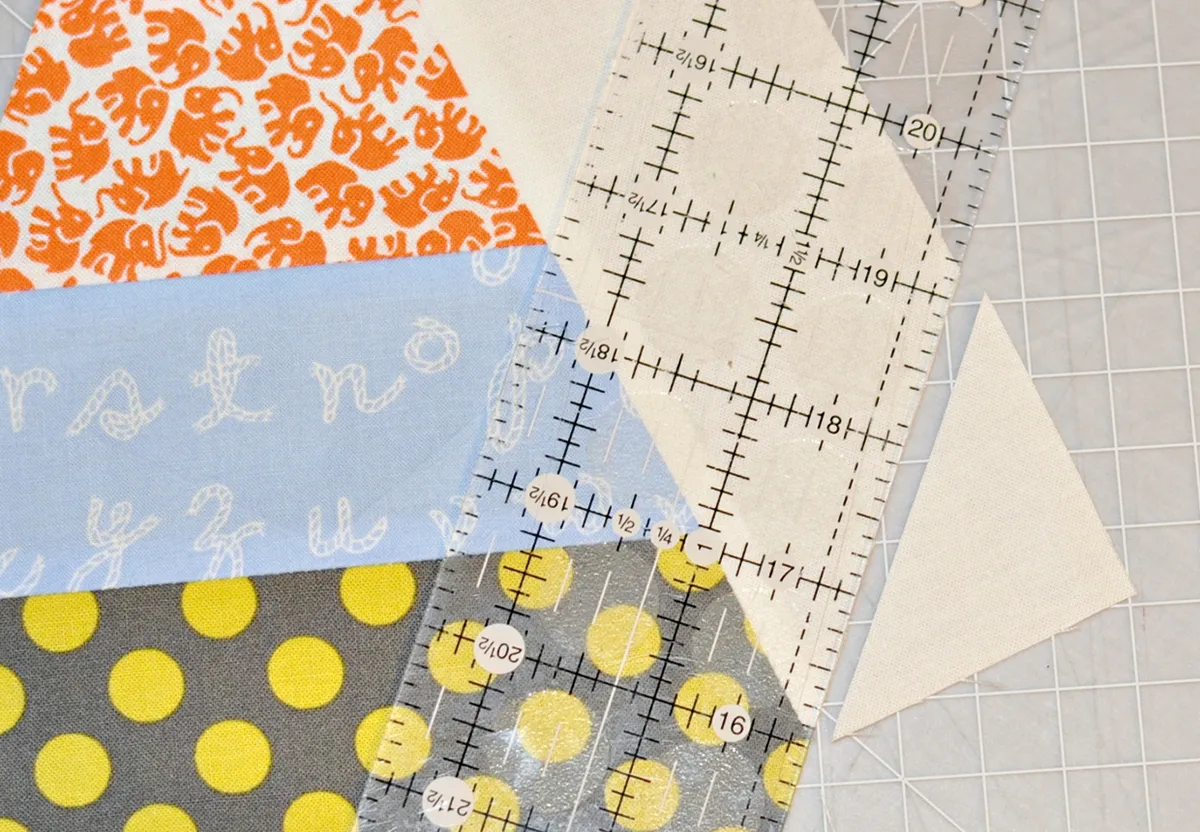
Step 10
Make the other rows using the same process, following the layout shown in the quilt assembly diagram. Where rows have more than one diamond, use a ruler to trim the overhang down flush with the diamond edge before attaching the next diamond.
Assembling the quilt top
Step 11
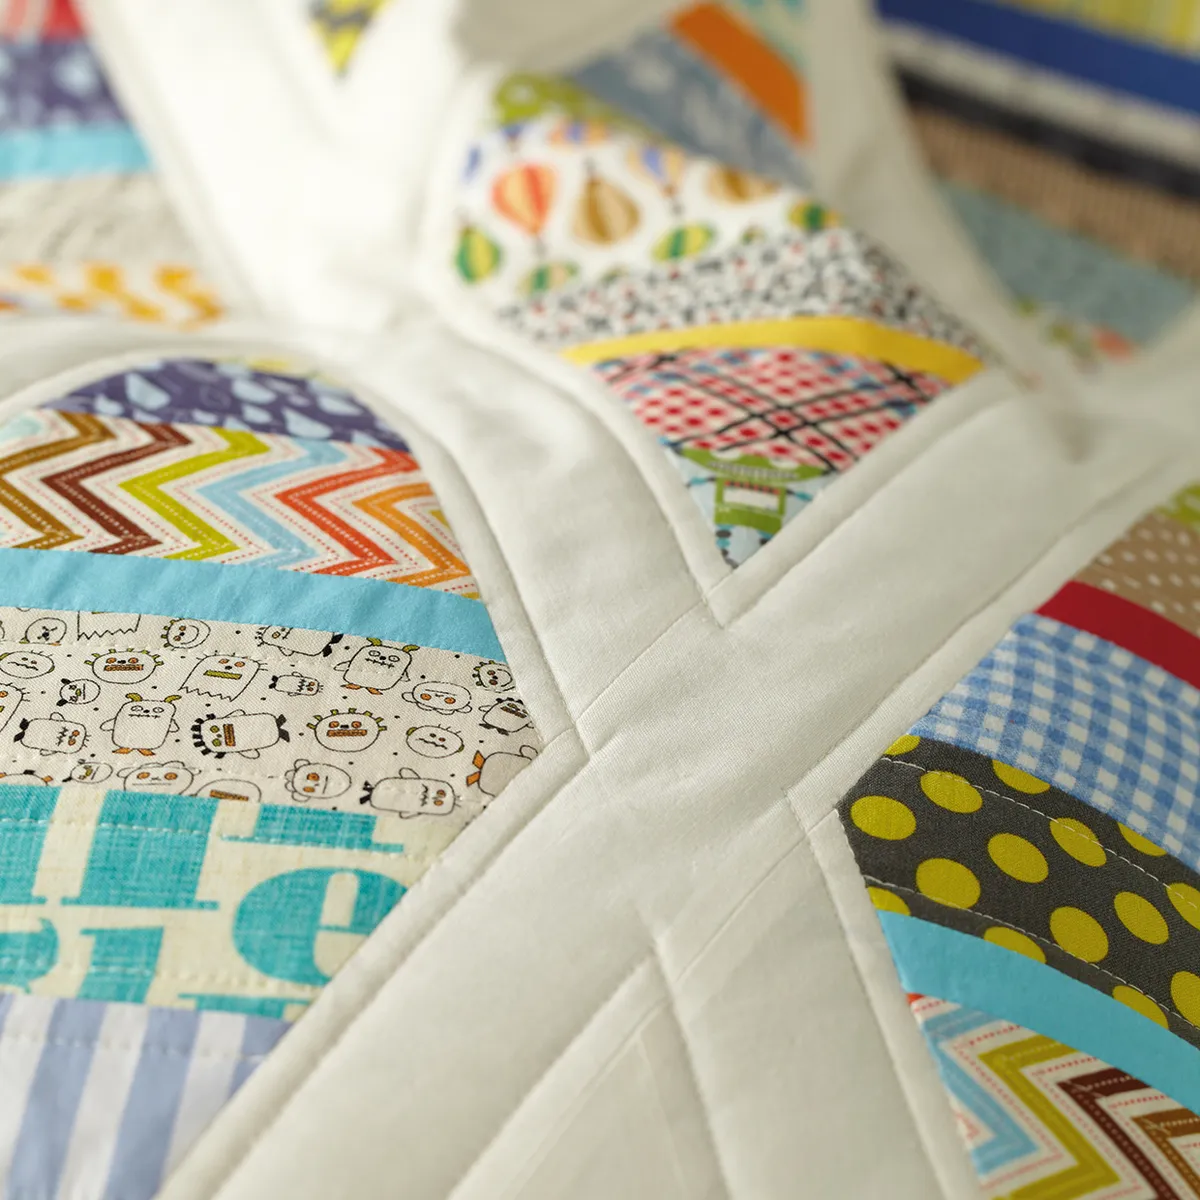
When the five diagonal rows are completed, sew them together with strips of white sashing in between each one.
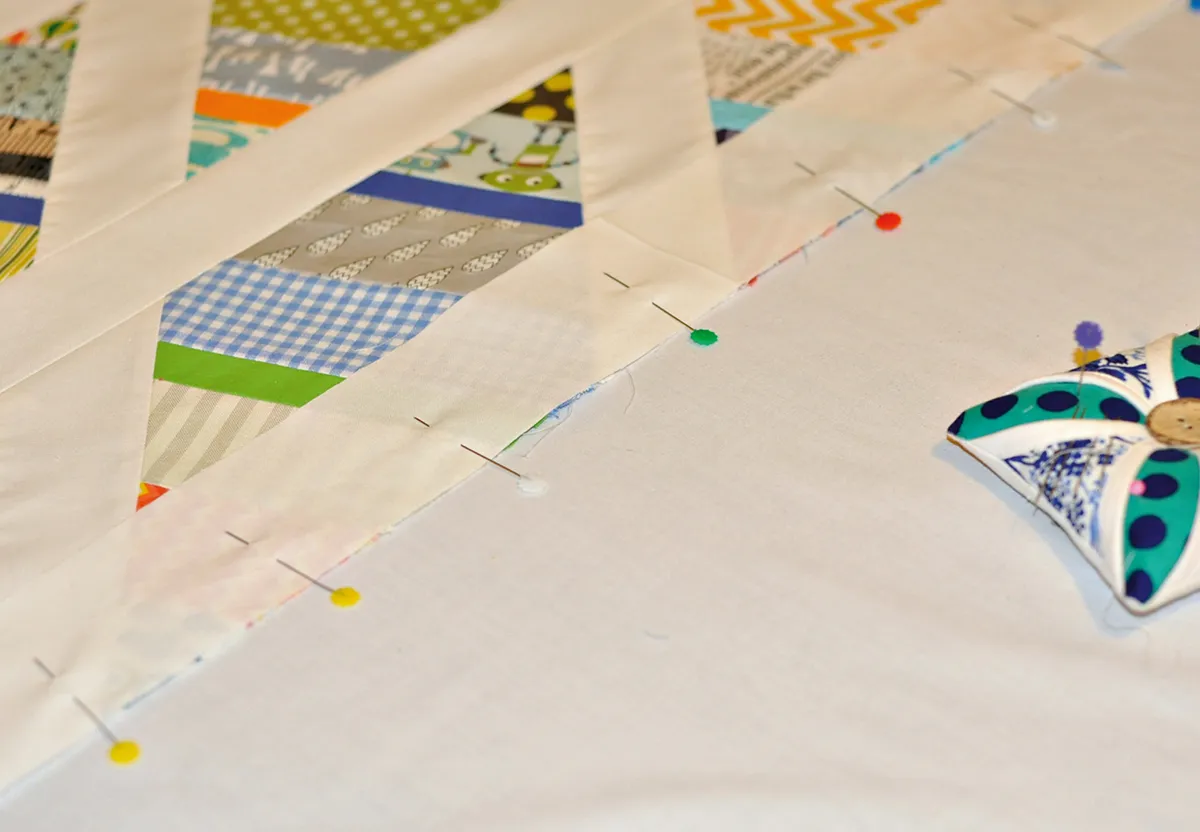
The lengths of the sashing will vary (Sashing B, C and D) – refer to the quilt assembly diagram and the images in this post. See also the Perfect Positioning tip, below.
Perfect Positioning
To line up the points of the diamonds on each row, draw little dots or crosses as markers on the back and offset the row by ¼in. It is worth taking your time lining this up and pinning well to avoid shifting.
Step 12
When all of the sashing has been added, press the quilt top and square this up – it should be 36½in high x 32in wide.
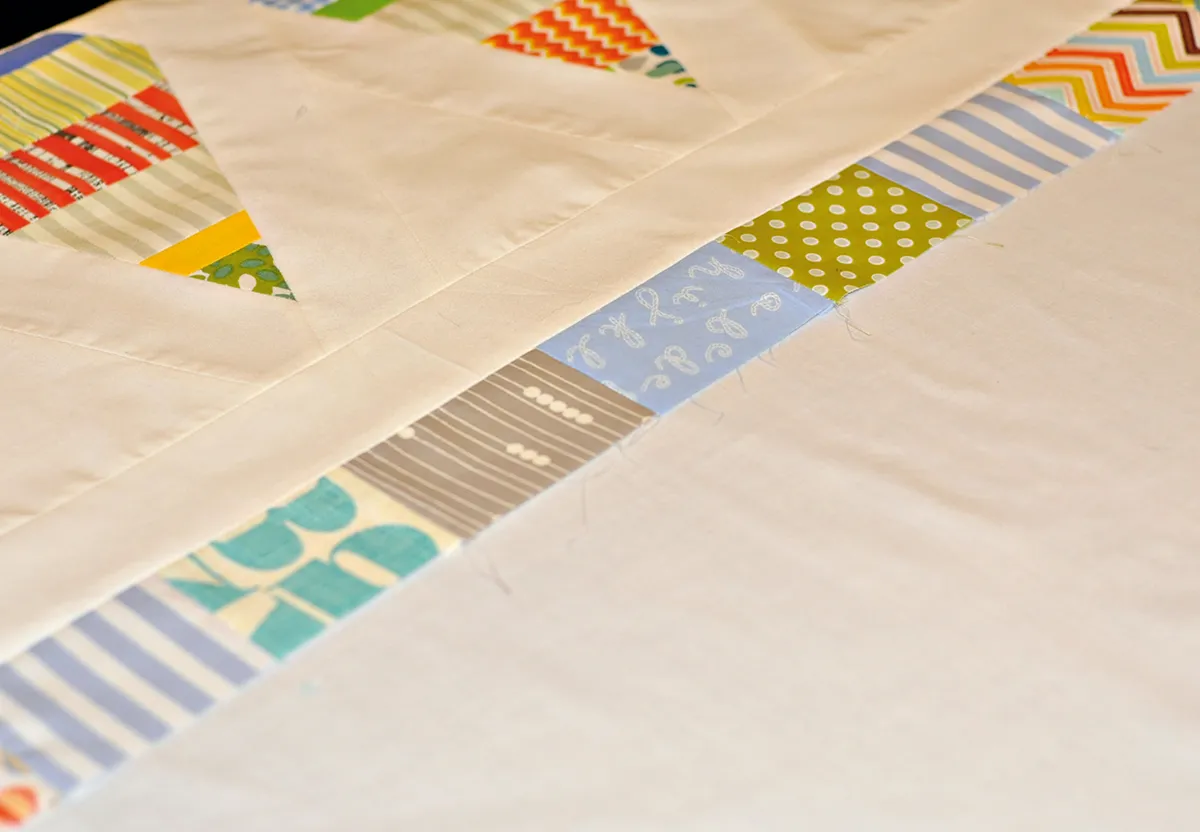
Adding the borders
Step 13
For the inner white border, sew a 2½in x 36½in white border strip to each side of the quilt and press seams open. Sew two more 2½in x 36½in white strips to the top and bottom of the quilt. Press seams open.
Step 14
For the outer coloured border, sew the 2½in wide patterned fabric pieces together until you have two strips that are 2½in x 36½in (Step k). Sew these to the top and bottom of the quilt and press seams open. If need be, trim the sides of the strips flush with the quilt.
Step 15
Sew the two remaining 2½in x 36½in white strips to the top and bottom of the quilt to complete.
Top tip: To reduce wastage, you can use shorter scrap pieces that taper towards the ends of the diamond shape, but measure against the template to ensure the pieces will be wide enough.
Quilting and finishing
Step 16
Assemble the quilt backing from one piece of fabric, or by piecing together left-overs for a scrappy look. Make a quilt sandwich of the backing fabric, right side down, the batting and then the quilt top, right side up. Baste or pin the layers together using your favourite method.
Step 17
Quilt as desired. Trim off excess batting and backing fabric and square up the edges of the quilt.
Step 18
Sew the binding strips together using diagonal seams, placing the ends of each strip right sides together at a right angle and sewing corner to corner. Trim
to leave ¼in seams. You will need at least 180in of binding. Press seams open, and then press the full length of the binding in half lengthways. Use this double-fold binding to bind the quilt.
Upcycled style for your diamond quilt pattern
As an alternative to using scraps from your stash, you could use small bits of old baby clothes, hankies or bed linen to make a special heirloom quilt.
Any randomly sized small bits of fabric will be ideal for making this project. If using baby clothes, be sure to iron lightweight fusible interfacing to the back of anything stretchy like jersey, prior to cutting, to make it easier to handle.
Cut pieces an extra ½in larger and use a ½in seam allowance instead of the usual ¼in, as this will help the seams lie flatter. Always press the seams open to reduce bulk.
More ways to make the most of your stash
Transform scraps into a beautiful clamshell quilt with this brilliant tutorial from Sarah Sheen.