Patchwork pincushion DIY
Love English Paper Piecing? Then you'll love this easy, not to mention quick, diamond pyramid pincushion project by Carolyn Forster.

Published:
We’ve been brushing up on our English Paper Piecing skills after reading the tips and techniques by Carolyn Forster in the English Paper Piecing project booklet that came free with issue 7 of Today’s Quilter magazine. Once you get hooked you won’t be able to stop!
If you’re new to English Paper Piecing
Or you’d like a refresher on how it’s done, read our guide to English Paper Piecing post before you get started on this project.
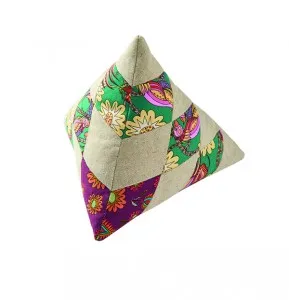
You will need
- Fabric A (green) 2½in x WOF strip
- Fabric B (purple) 2½in x WOF strip
- Fabric C (linen) 12in x WOF
- Paper pieces – Eighteen (18) 2in
- 6-point diamonds, twelve (12) triangles – six (6) diamonds cut in half), and one (1) large triangle
- Polyester toy stuffing
- Thread to tone with fabric
Free patchwork templates
- Free patchwork pincushion templates
- Need more paper diamond templates? Download our Free Diamond English Paper Piecing Quilting Templates!
Finished size
- 7in high x 8in base

Total time:
Cutting out
Step 1
From fabric A cut nine (9) diamonds ¼in larger than the paper pieces.
Step 2
From fabric B cut three (3) diamonds.
Step 3
From fabric C cut as follows: six (6) diamonds, twelve (12) triangles (diamonds cut in half) and one (1) large triangle (see template).
Making the patchwork
Step 1
Baste fabrics to your paper pieces using thread or glue. For further instructions, see our Beginners Guide to English Paper Piecing post.
Step 2
Join together six (6) diamonds and four (4) triangles to make one pyramid side (Fig 1). Make three (3) of these in total.

Step 3
Join together the three pyramid sides, right sides together as shown in Fig 2.

Step 4
Add the large fabric C triangle as shown in Fig 3, this is the base of the pyramid.

Step 5
Now join the long straight edges of the two pieced sides, right sides together to form the pyramid, with the large triangle for the base still flapping (Fig 4).

Step 6
Stitch the remaining two sides of the base piece to the side piece, leaving a 3in hole in the middle of one side to turn though and stuff.
Step 7
Remove all of the paper pieces and turn right-sides out.
Step 8
Stuff until you are happy with the firmness. Stitch the hole closed with ladderstitch (Fig 5)
