Learn the basic stitch
Step 1
Hold the work with the edge to be appliquéd facing away from you. Right-handed sewers will be stitching from right to left.
Step 2
With a knot at the end of the thread, work a small stitch under the shape to get started.
Step 3
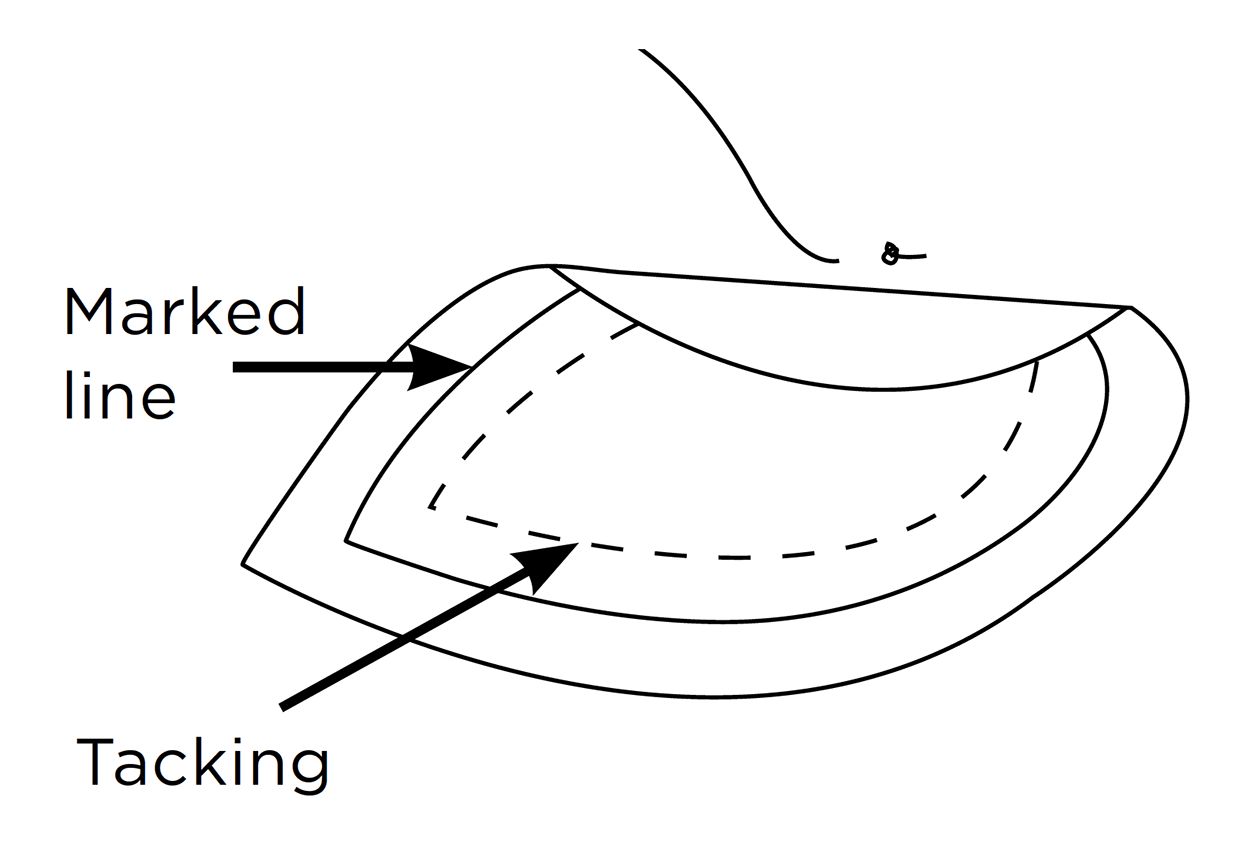
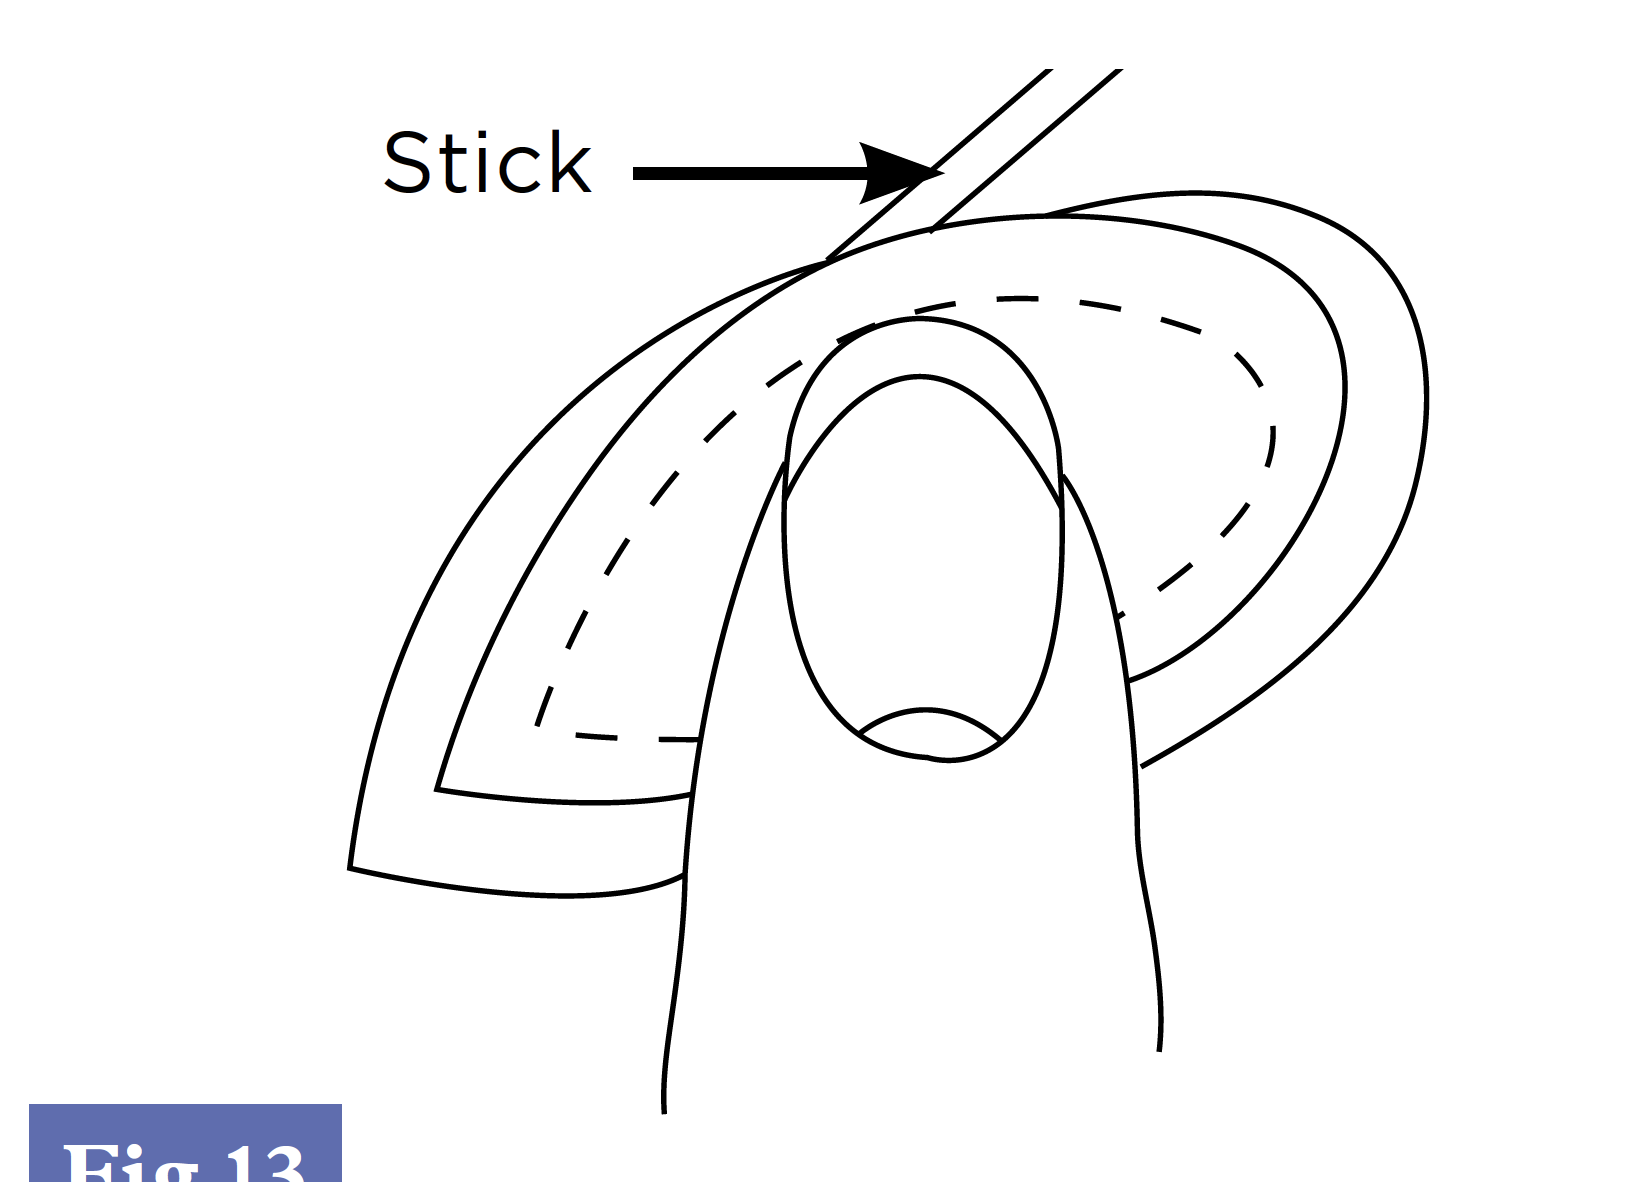
Use the side of the needle or the turning stick to stroke under about ¾in of the seam allowance so that the marked line is just under the shape. Twist the stick to help roll the edge under and make a curving arc action in an anti-clockwise direction so that any fullness in the seam allowance is pulled back behind where you are stitching. Finger press and hold the turned under edge.
Step 4
Bring needle up through the folded edge.
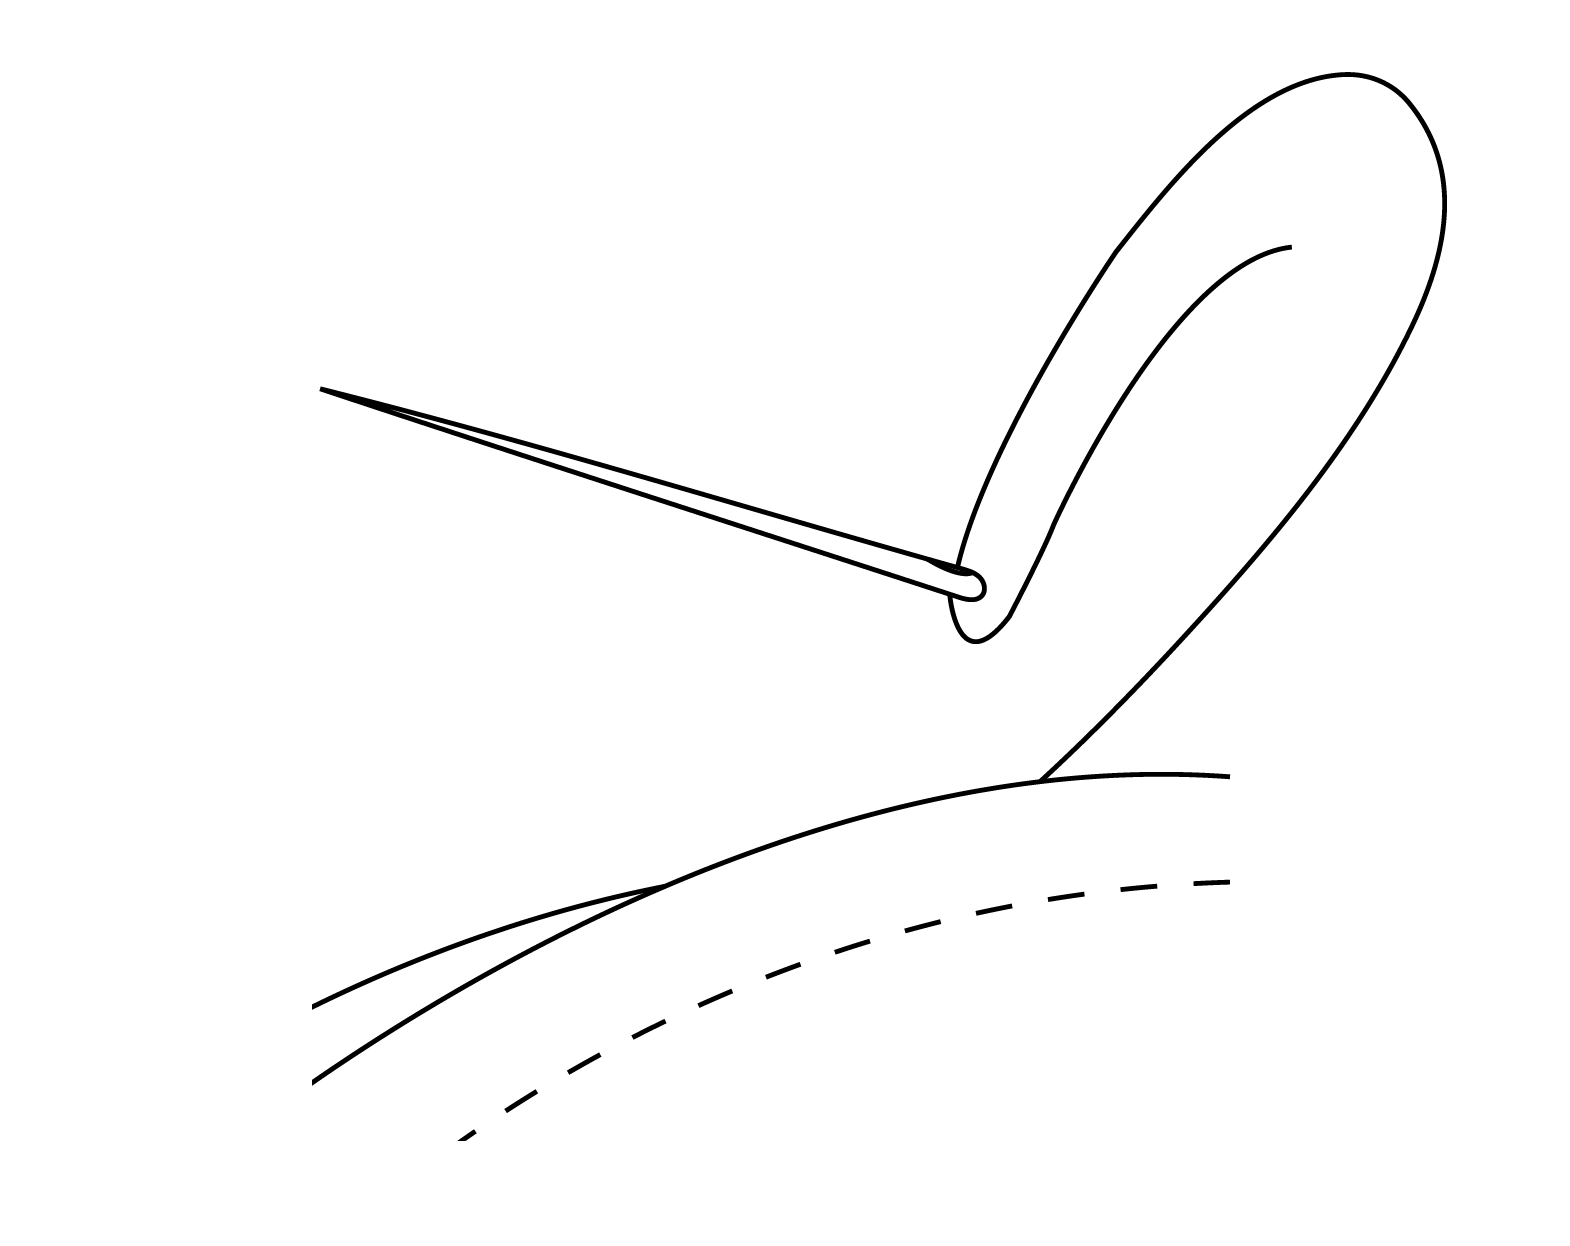
Step 5
Keeping the needle perpendicular, insert it into the background against the folded edge, opposite where the thread comes out of the folded edge.
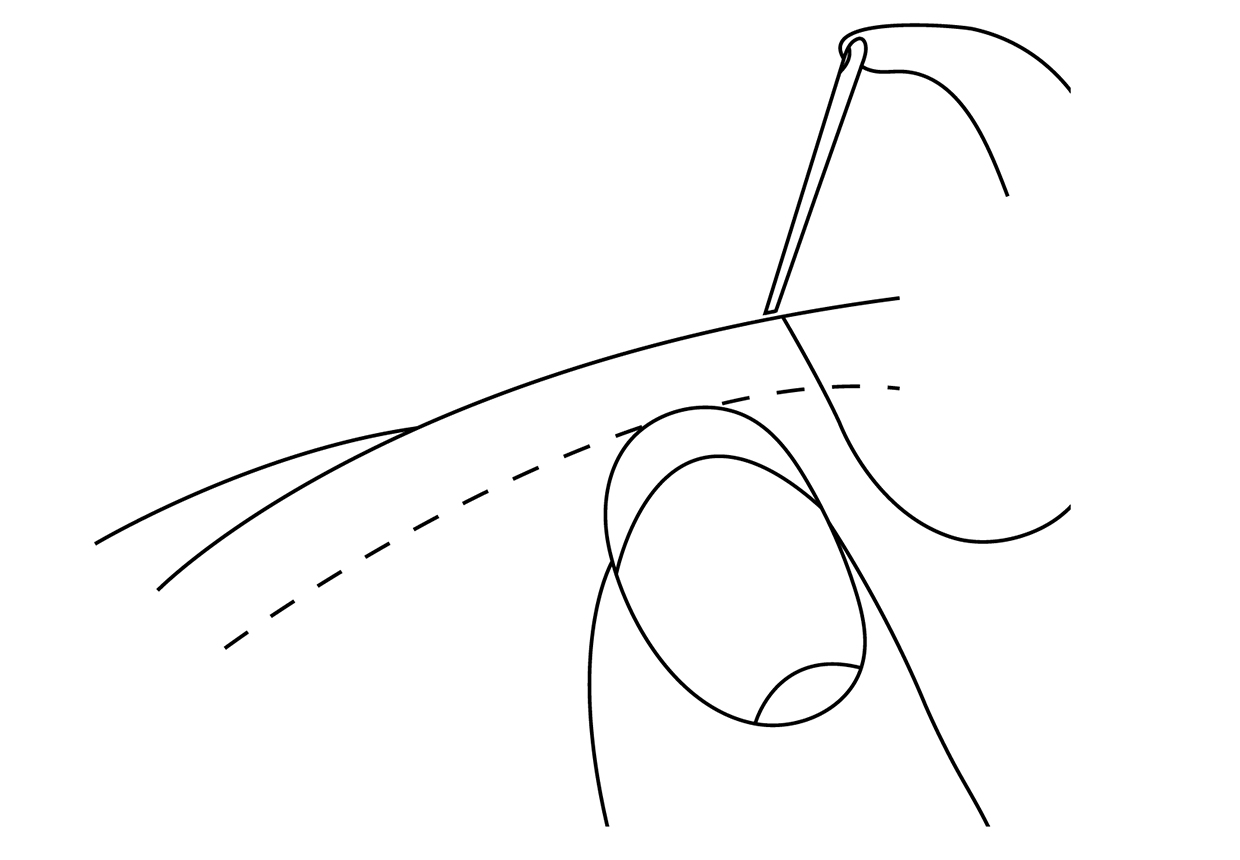
Step 6
Swing the needle up so that it travels a short distance in the background and comes up through the background to just catch the opposite fold in the appliqué.
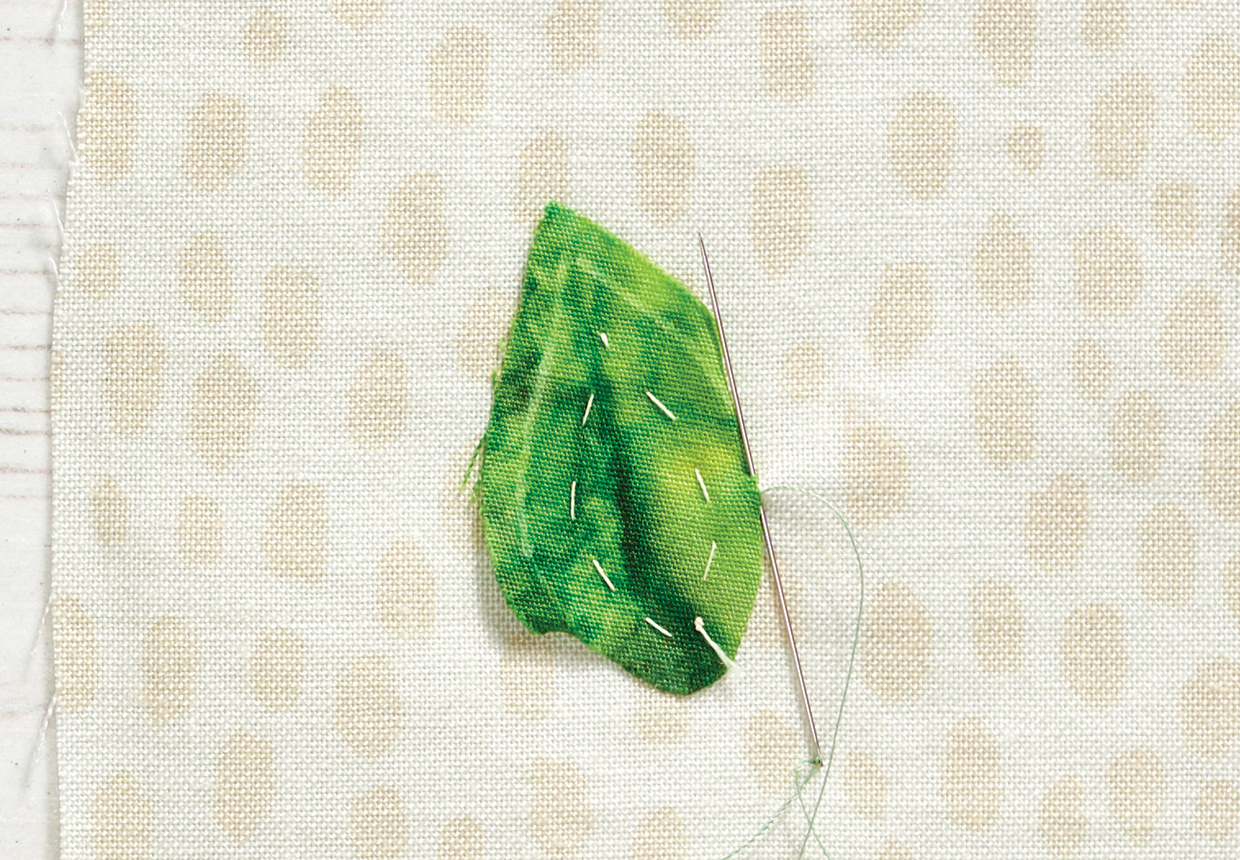
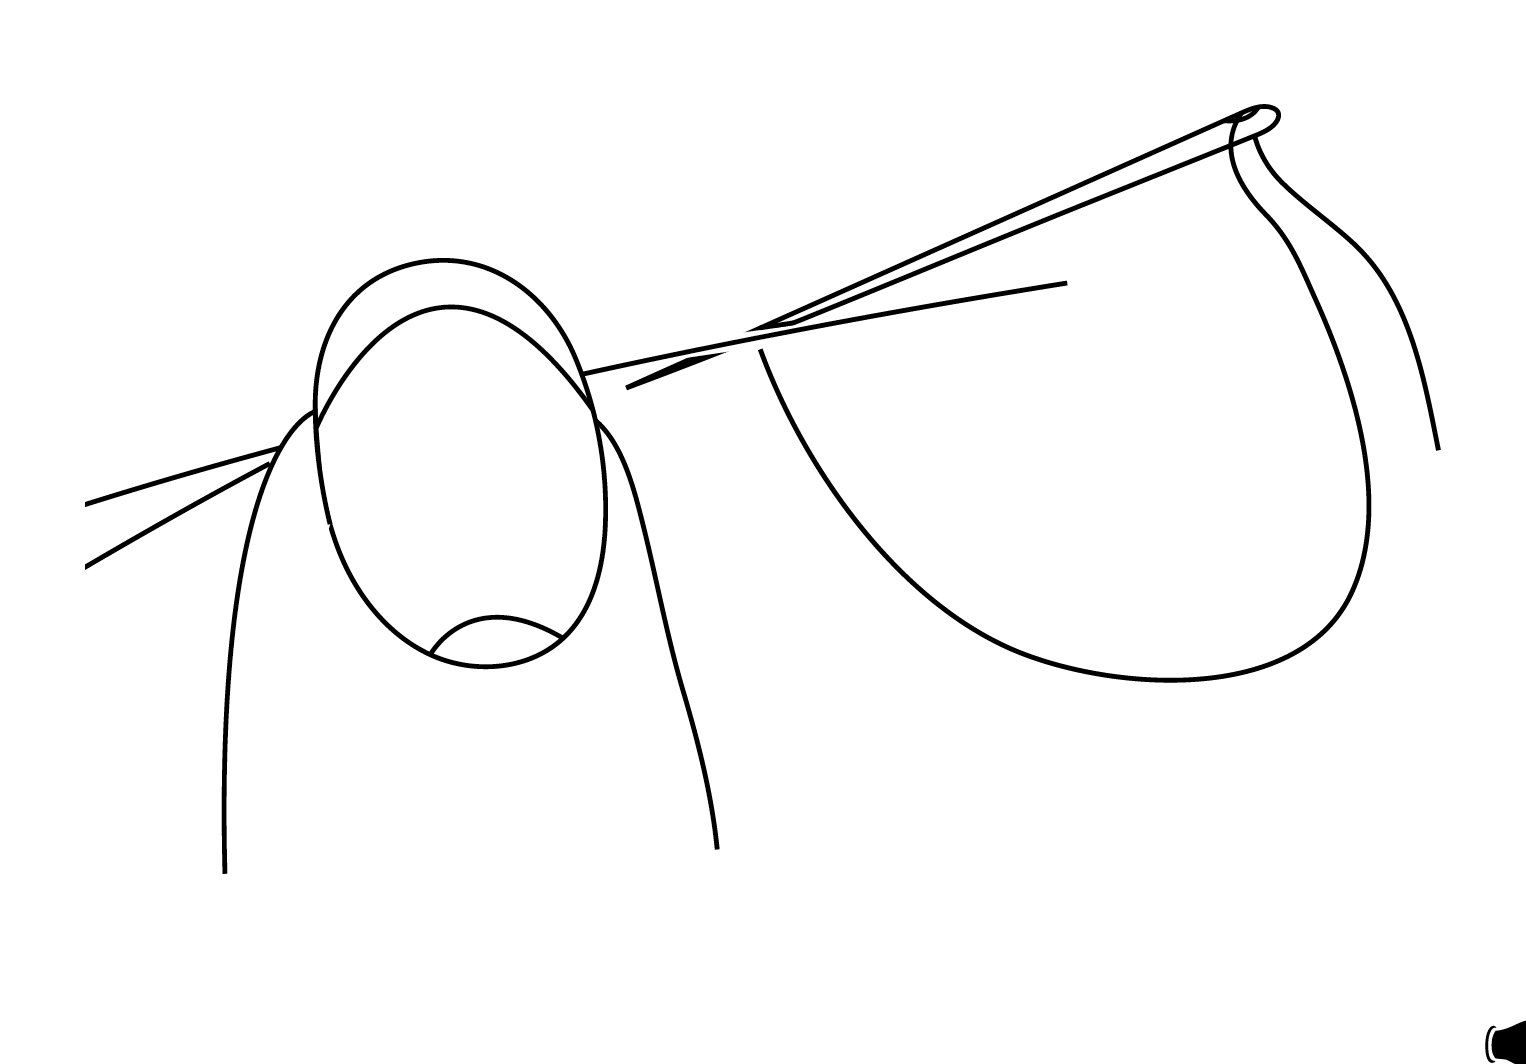
It helps to keep your left thumb just ahead of the needle to hold the edge down. Pull the thread away from the edge, not back as in hemming. This helps prevent puckering and completes the first stitch. After each couple of stitches finger press the edge, rolling the edge outwards to keep it flat and smooth.
Step 7
You will need to keep sweeping under the edge as necessary as you work your way round the shape. On fairly straight edges you will be able to turn about an inch. On curved shapes you will need to make more frequent adjustments to keep a smooth edge. However, stop stitching a few stitches from the end of a folded section so you can marry the next turned section into the previous one. This will give you a much smoother finished edge without points forming. The seam allowance can be trimmed a little as you stitch if there seems too much to tuck under smoothly.
Step 8
Check the back of the work. The stitches should look like small, straight, close-together running stitches – an average size would be about 12 stitches to the inch.
Step 9
To fasten off the thread, take the needle through to the back and work a couple of tiny backstitches in the background fabric under the appliqué shape.
Inner curves
Step 1
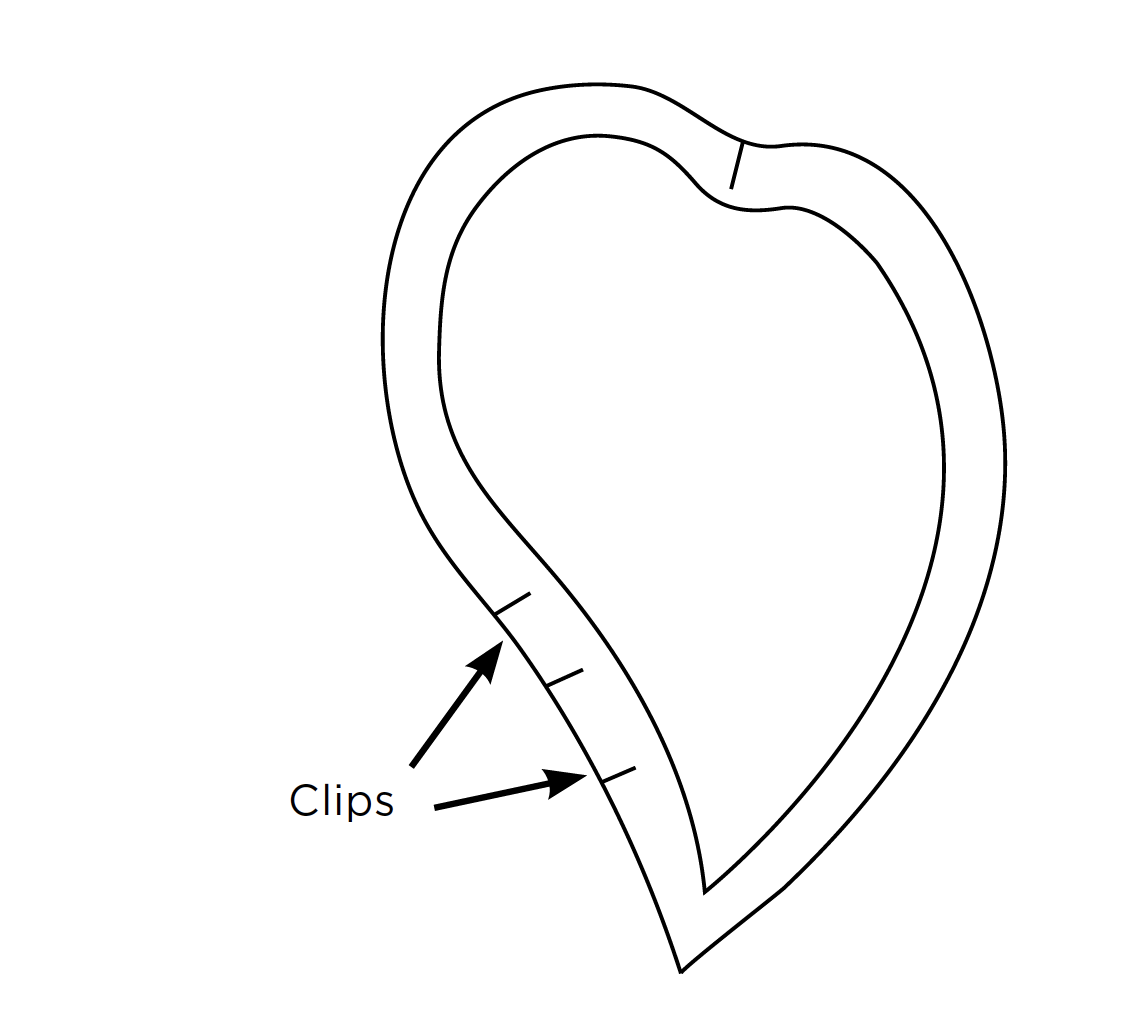
Using small sharp scissors clip the seam allowance nearly to the marked line. You may need to make several clips. Swing the edge under with the turning stick. The stick works very well on inner curves and enables you to achieve a smooth edge.
Step 2
Keep the stitches close together on a clipped edge to prevent fraying and to ensure a smooth curve.
Outer curves
Step 1
There is no need to make any clips in the seam allowance. If necessary, reduce the seam allowance slightly if you find the edge will not turn under smoothly.
Step 2
Note the position of the left thumb just below the drawn line.
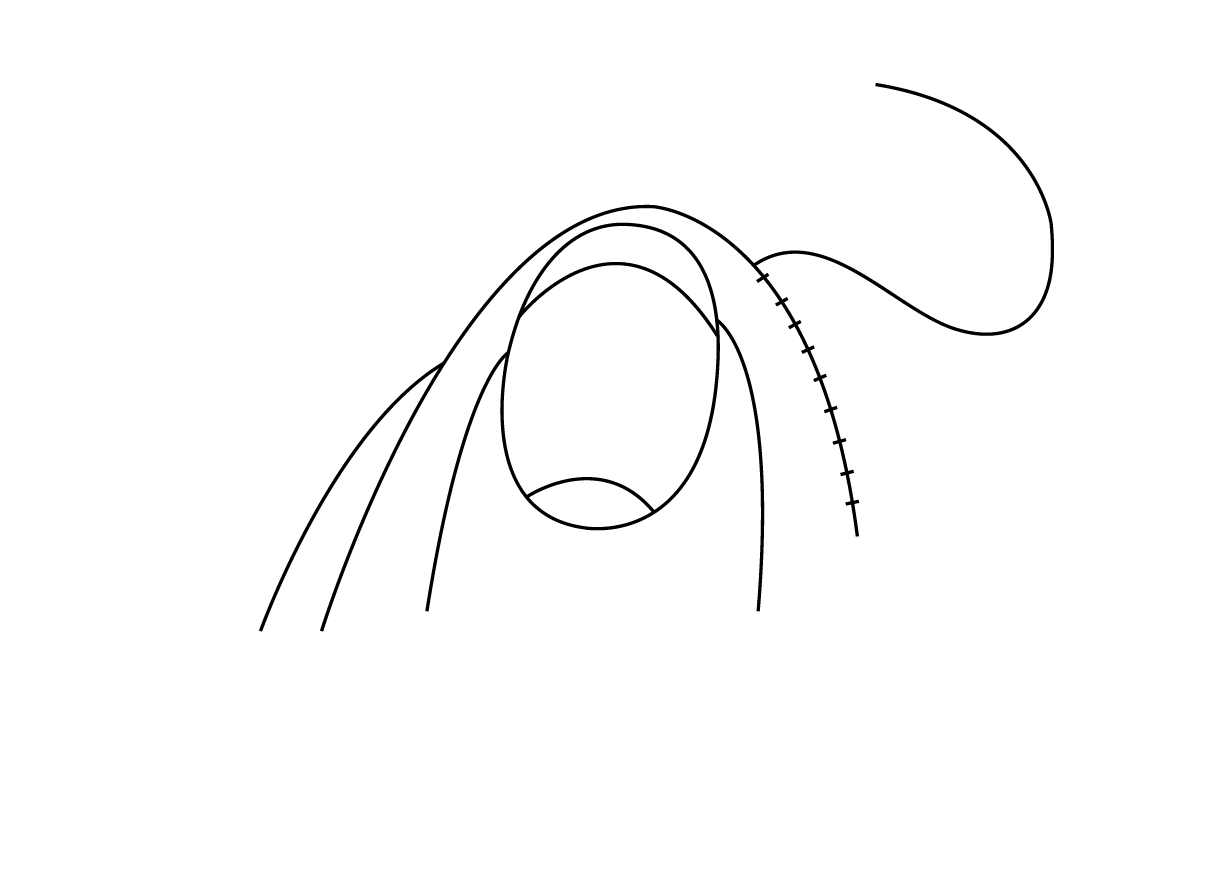
Use the needle rather than the stick to ease the edge under a small amount at a time. You may need to adjust the edge every stitch or so on a very tight curve. As usual, keep your thumb on the folded edge when making the stitch.
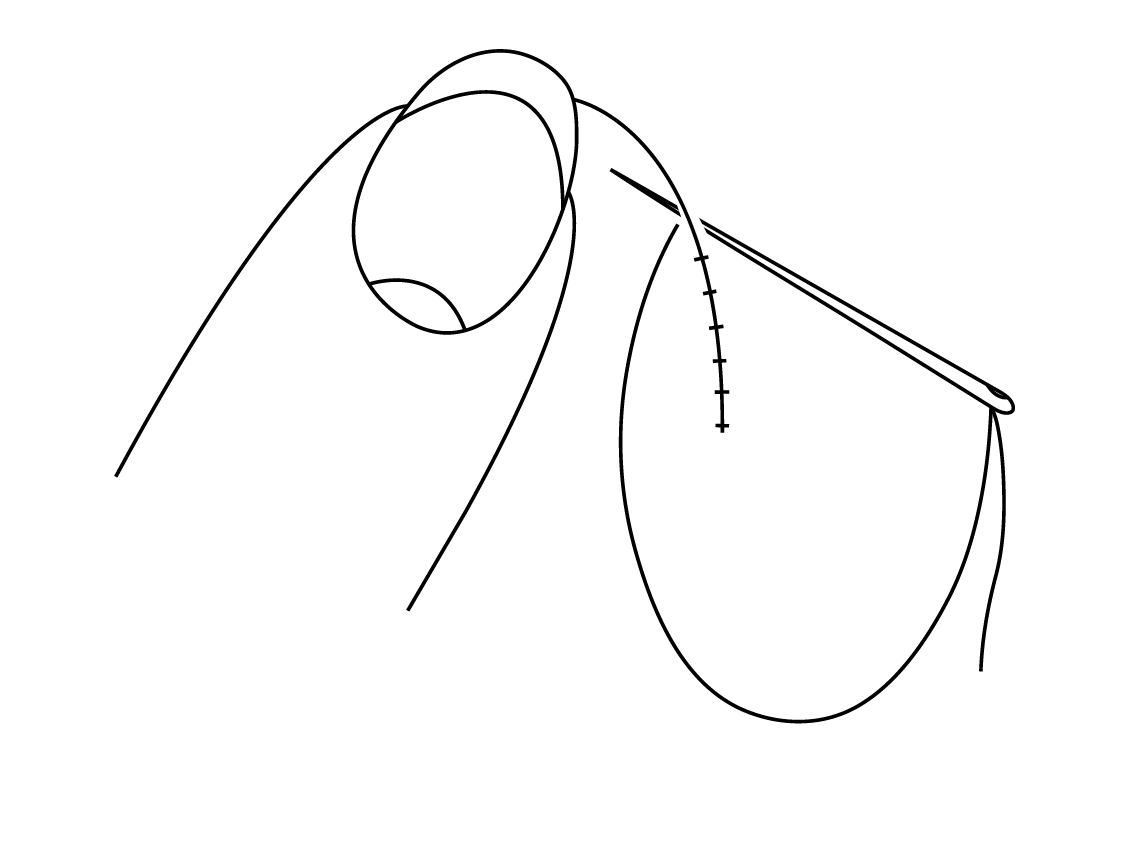
Finger press firmly to maintain a smooth edge.
Inner points
Step 1
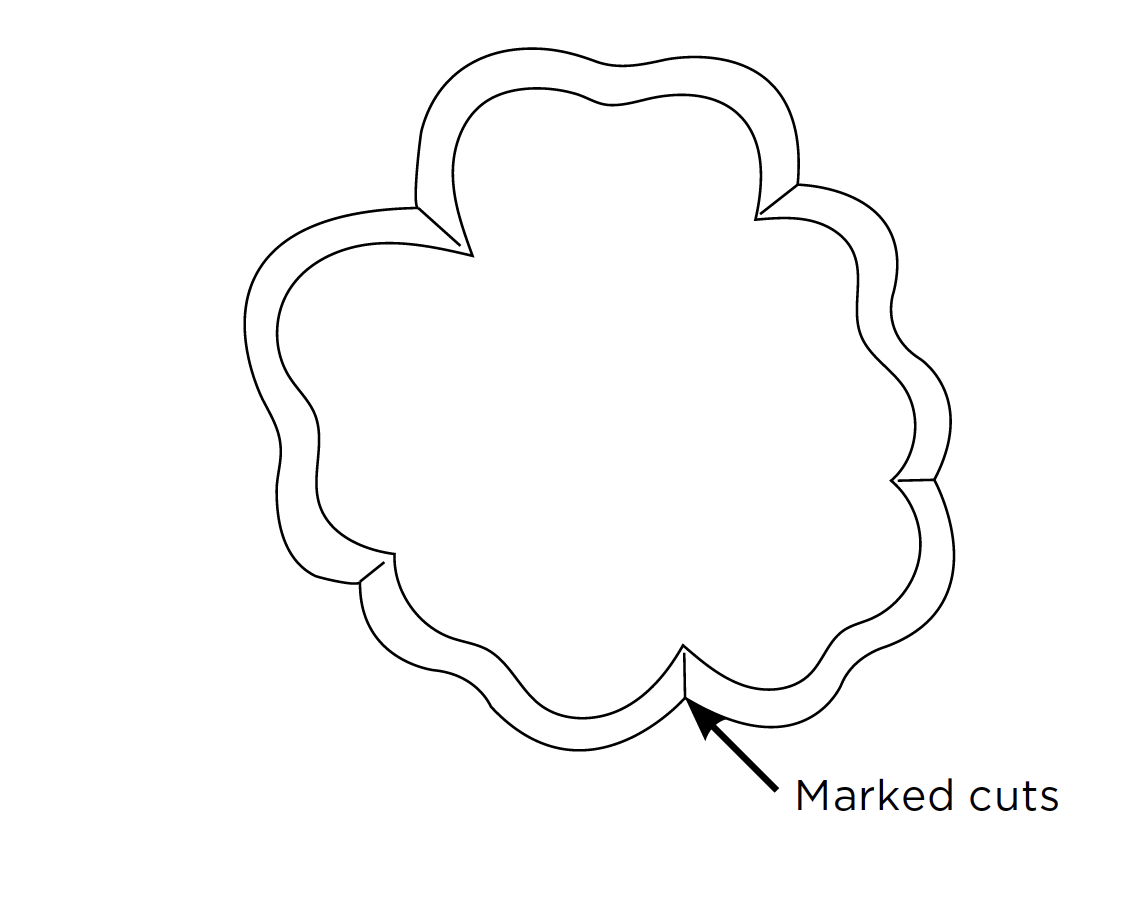
You will need to clip the seam allowance at an inner point, but do not make the cut until you are ready to stitch. If it is a very deep cut, mark the position of the cut with the white Clover marking pen or a little clear nail varnish – this helps to prevent fraying. It’s convenient to do this when you are preparing the shapes before tacking them in position.
Step 2
Stitch to about ½in from inner point and then clip the seam allowance almost to the drawn line
at the base of the point.
Step 3
Use the stick to turn the seam under and continue stitching towards the base. Keep stitches small and close as there is little seam allowance left. Use the stick to turn under the adjacent side of the point, pulling the stick down at the base to give a sharp inner point.
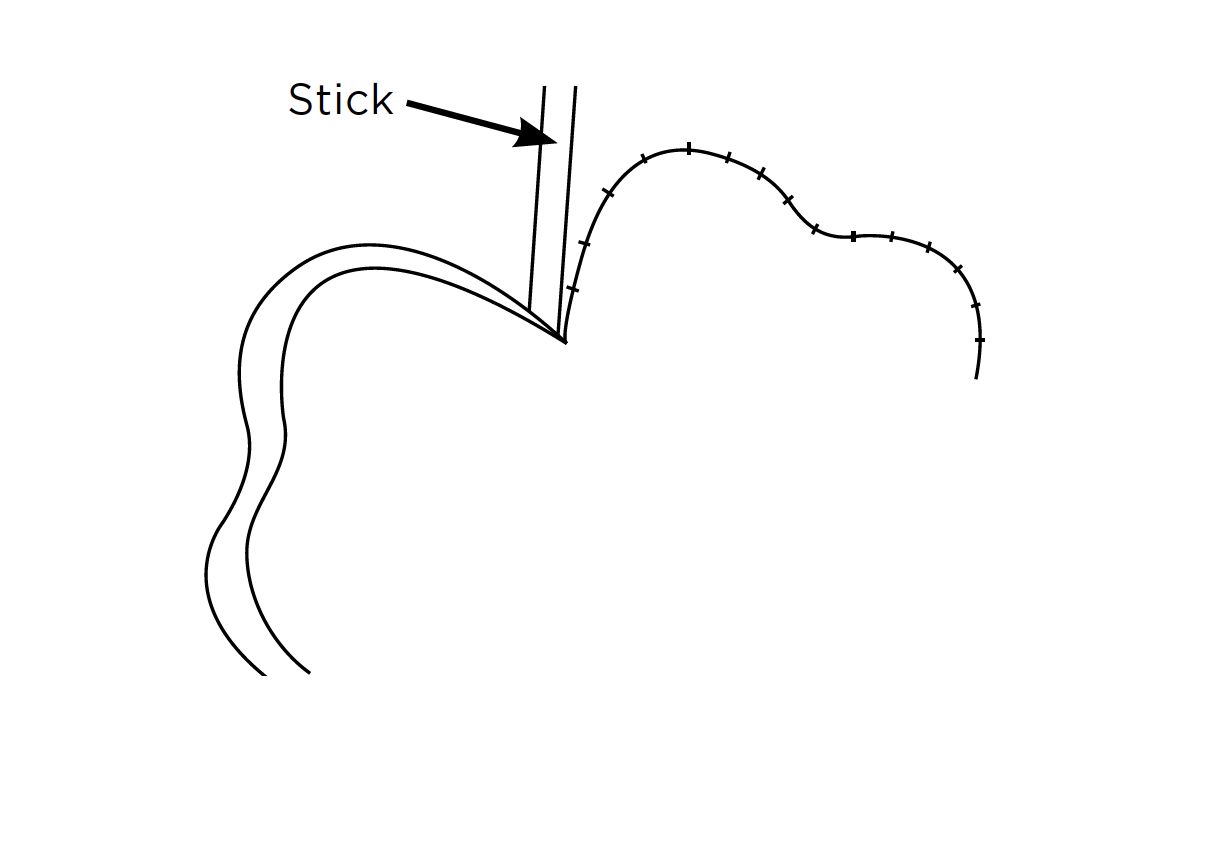
You may at this stage have to clip another thread or two at the base if the edge will not turn sufficiently.
Step 4
At the very base of the point take a slightly deeper stitch. Work this stitch in two stages. Bring the needle up through the appliqué fabric taking a slightly bigger “bite” than usual.
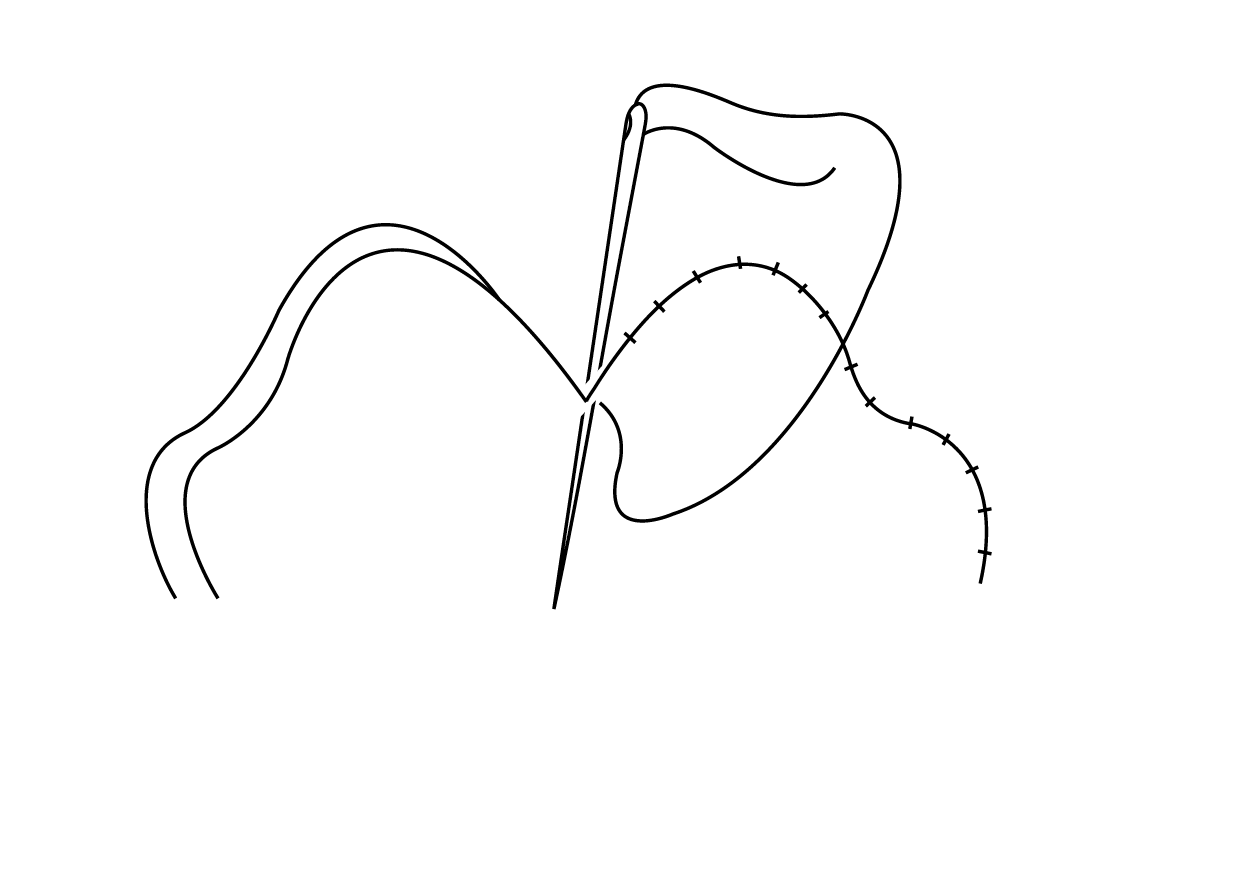
Return the needle into the background, slanting the needle well under the edge. Put your left thumb over the stitch to prevent puckering as you pull the thread through tightly. This slightly bigger stitch will disappear into the fabric and firmly secure the base of the point.
Step 5
Start stitching up the second side of the point. Work the first 2 or 3 stitches in two stages so you do not pluck out the miniscule seam allowance and then you will be safe to continue stitching as normal.
Outer points
Step 1
These can make appliqué stitchers anxious – here are a few tips to reduce stress levels!
Method 1
Needle-turn along to the point, stopping just before the marked line. Make sure the stitching as you approach the corner is small for extra security.
Step 2
Hold the work firmly in your left hand over your first two fingers and then between your third and fourth fingers to give a bit of tension on the background fabric in the area of the point.
Step 3
Pick up the seam allowance on the point of the needle... 
and swing the seam allowance under through 180-degrees.
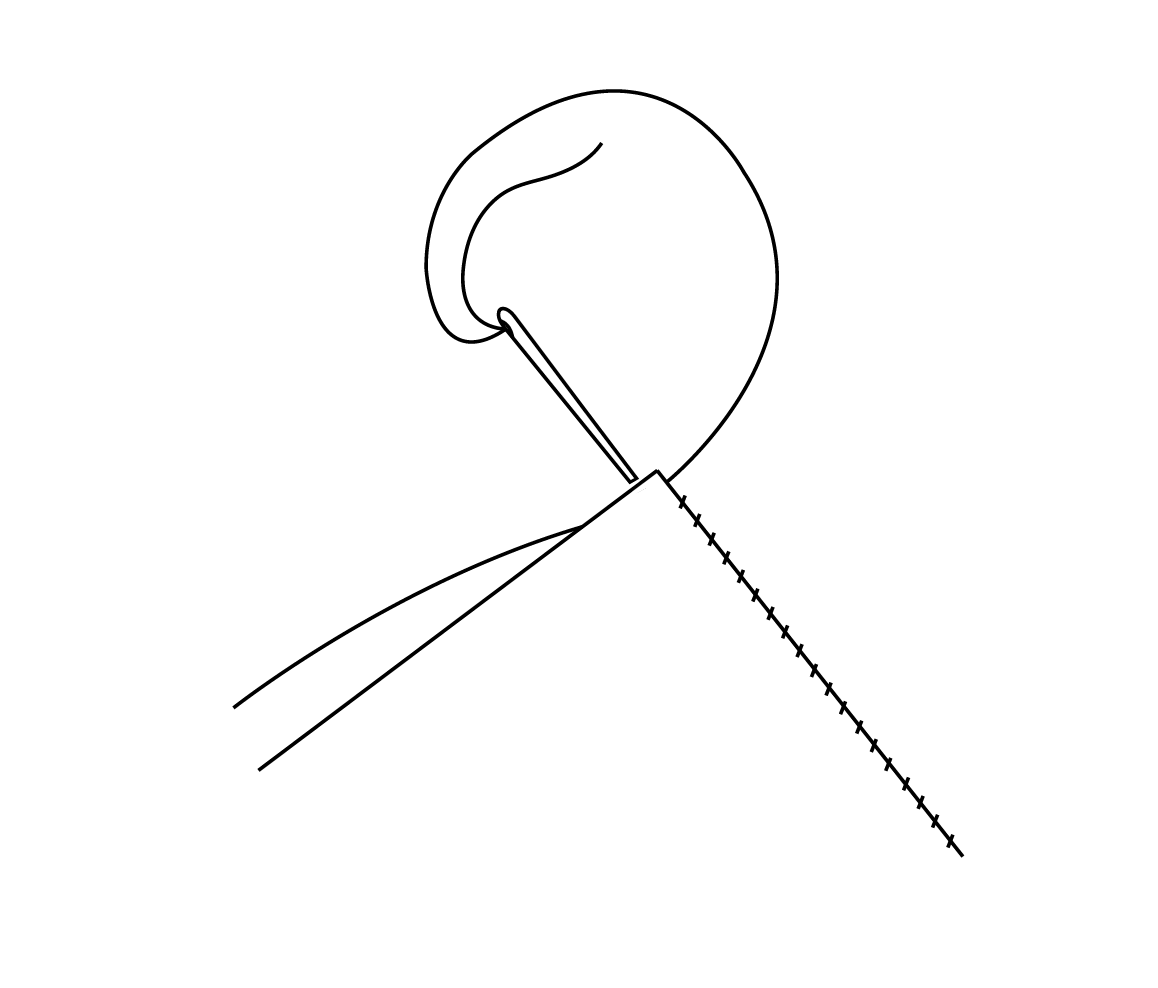
The needle will now be pushed firmly against the first line of stitching. Carefully remove the needle and pull gently on the thread to re-align the point which may have loosened in the turning process. Work a small stitch at the point.
Step 4
Turn the seam allowance under on the second side of the point and continue stitching as usual.
Method 2
Step 1
An alternative method for turning points is to use the flat end of the turning stick. Using such a stick makes it much easier to turn a corner.
Follow the first two steps of Method 1 above.
Step 2
Hold the stick with the flat edge at right angles to the background,
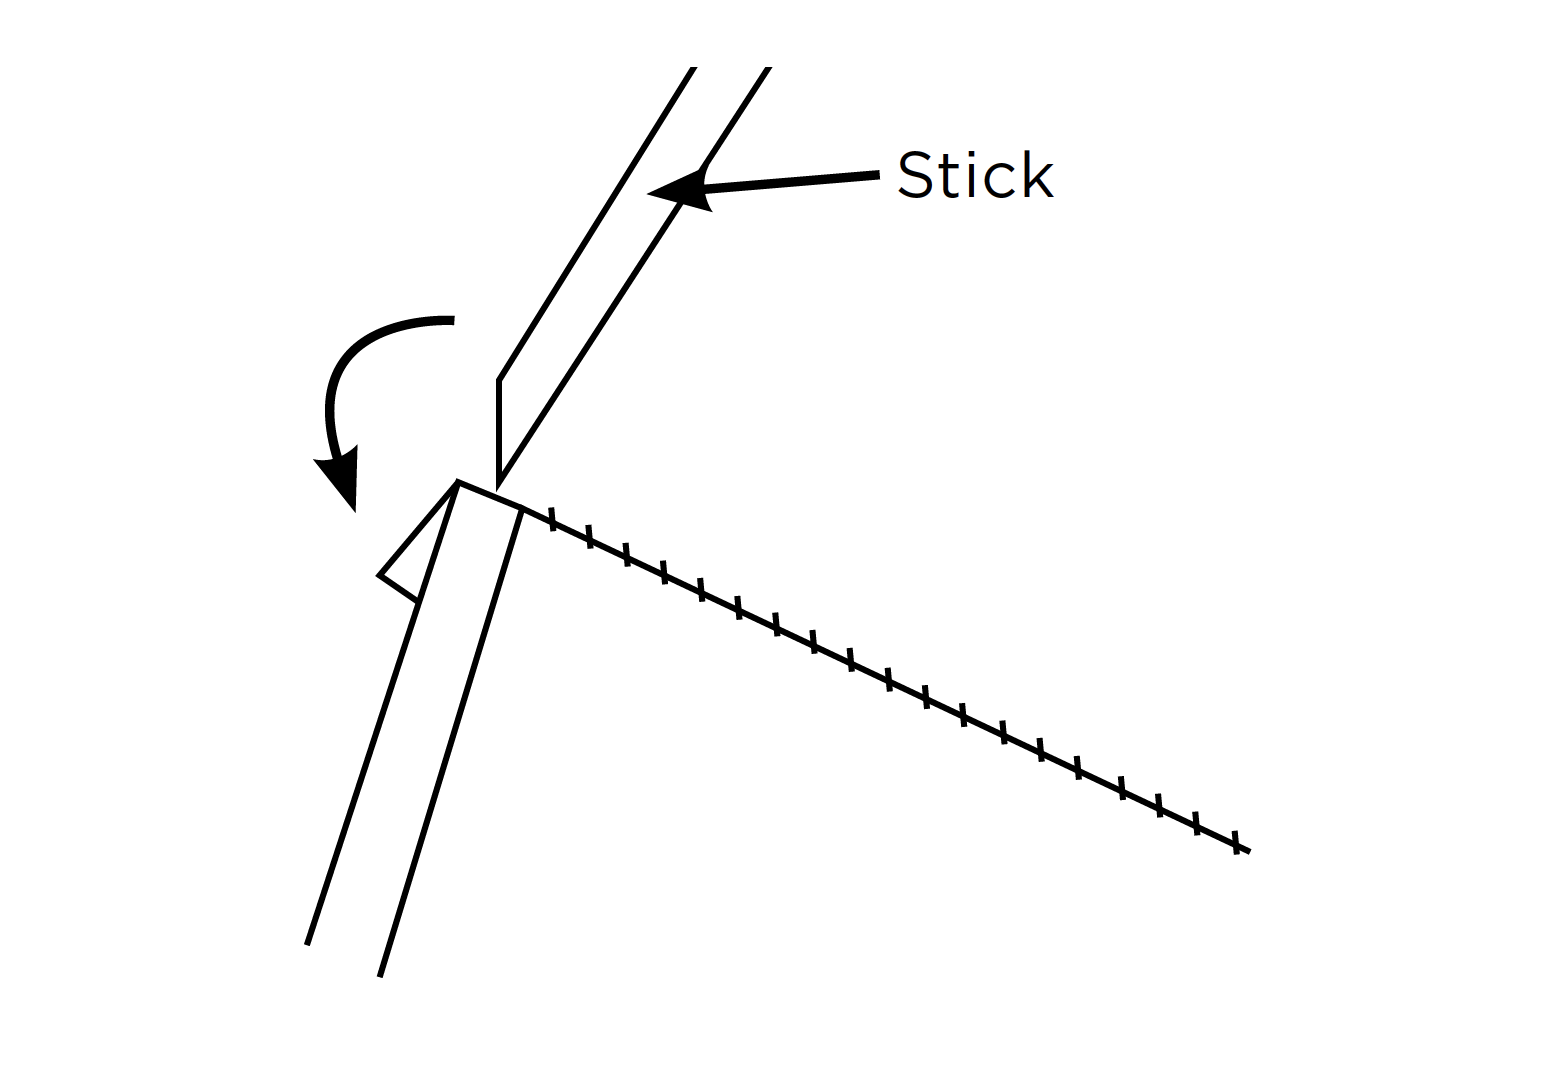
push the seam allowance under, flattening the stick against the background as you turn.
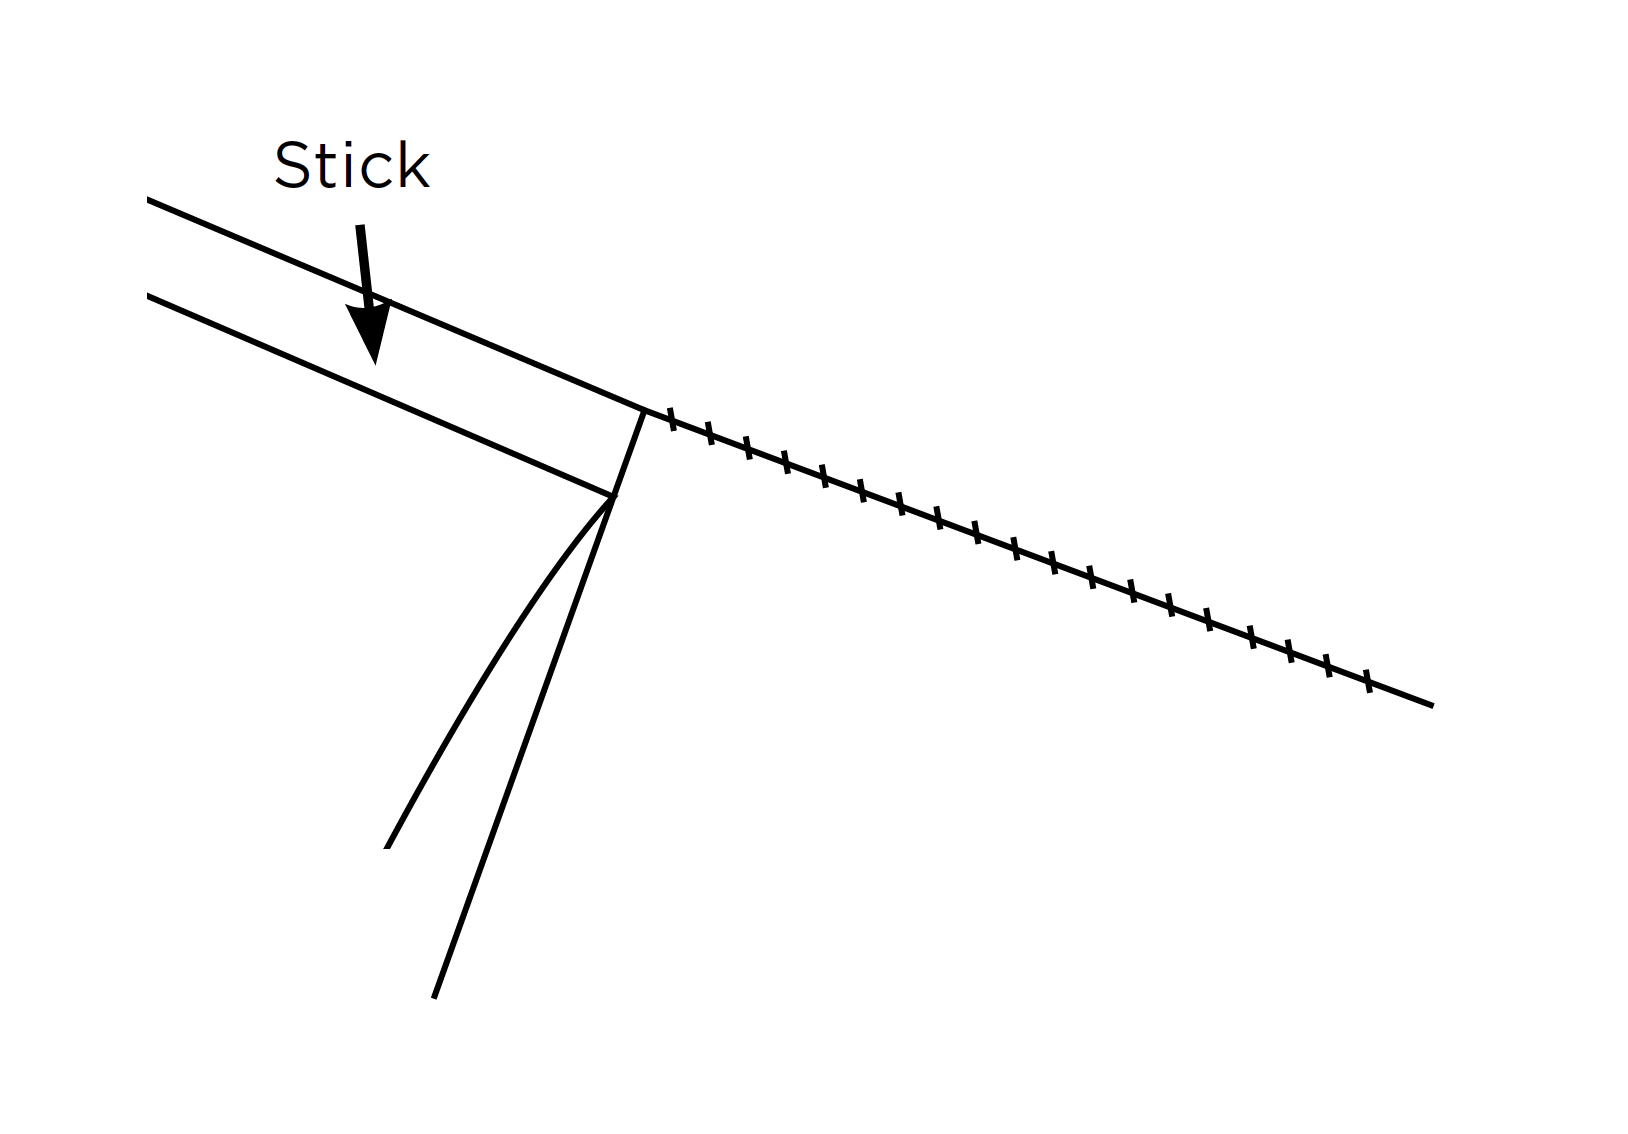
Push the stick down inside the point a few times to smooth out any turnings, which may have got bunched up. Re-align the point and work a small stitch at the point. You can turn under some of the seam allowance along the second side of the point too with the flat end of the stick before continuing the appliqué.
Acute outer point
For more acute outer points it is necessary to turn the point in 2 stages. Turn once to give a straight top (Fig 28)
and then turn the seam allowance again to complete a sharp point.
Acute outer point
Step 1
For more acute outer points it is necessary to turn the point in 2 stages. Turn once to give a straight top...
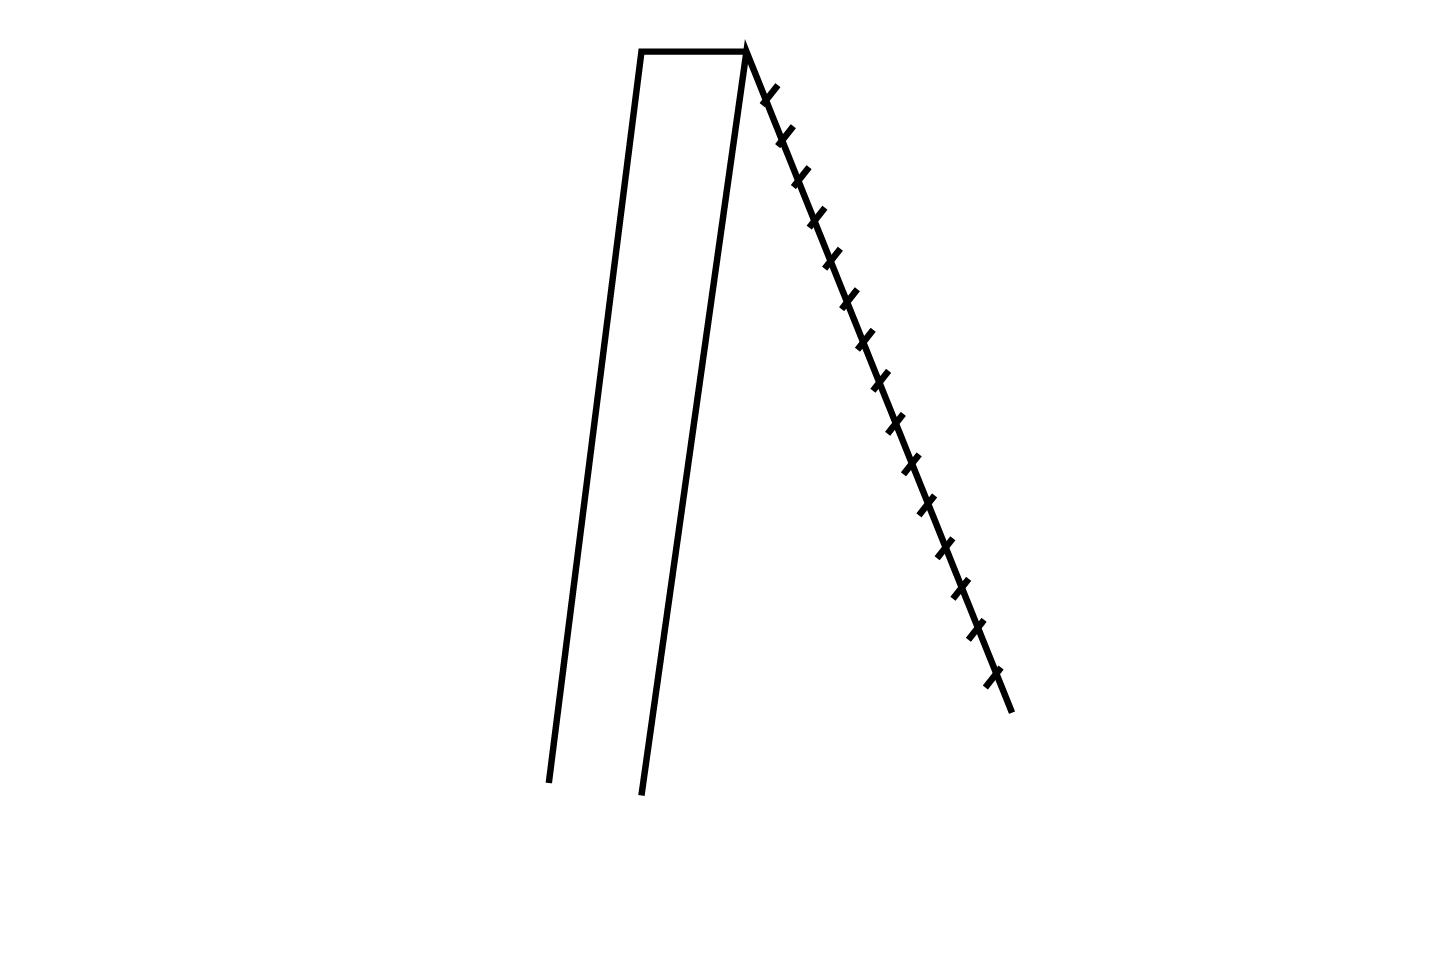
... and then turn the seam allowance again to complete a sharp point.


