Upcycle vibrant textiles and fill your home with colour with our Kantha quilt

Our Kantha Quilt is simple yet striking – it's perfect to breath new life into old textiles in gorgeous jewel-tone prints and simple Kantha embroidery

Try 6 issues of Love Patchwork & Quilting magazine for £9.99| SAVE 76%

Published: June 2, 2023 at 7:00 am

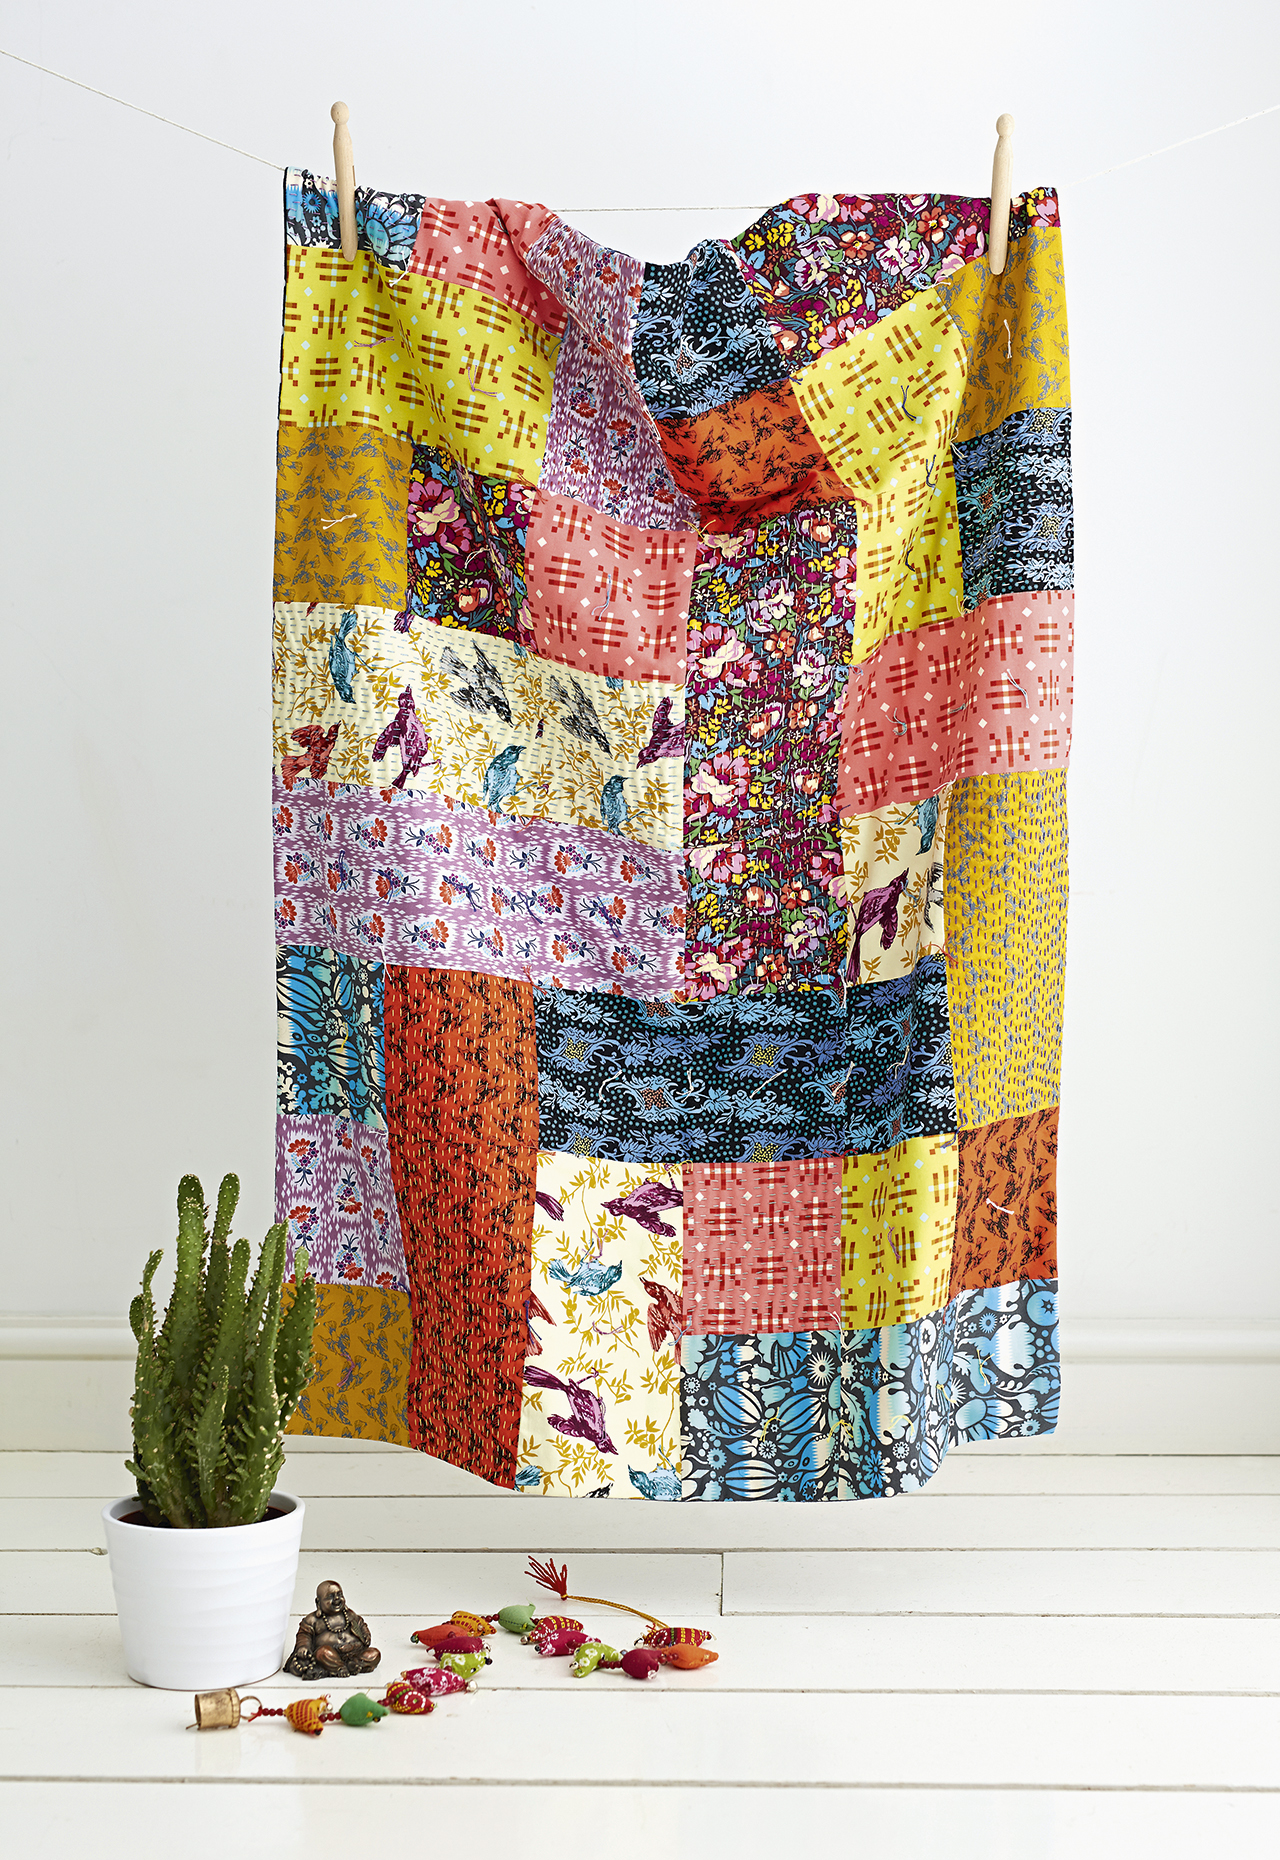
Whether you use it as a throw or a quilt, a homemade Kantha quilt has a luxurious feel with lots of colour, patterns.

Traditional Kantha quilts feature Kantha-style embroidered running stitches and layers all tied together.

As it's inspired by traditional Kantha quilting, the Kantha quilts here are a little different from a traditional quilt.

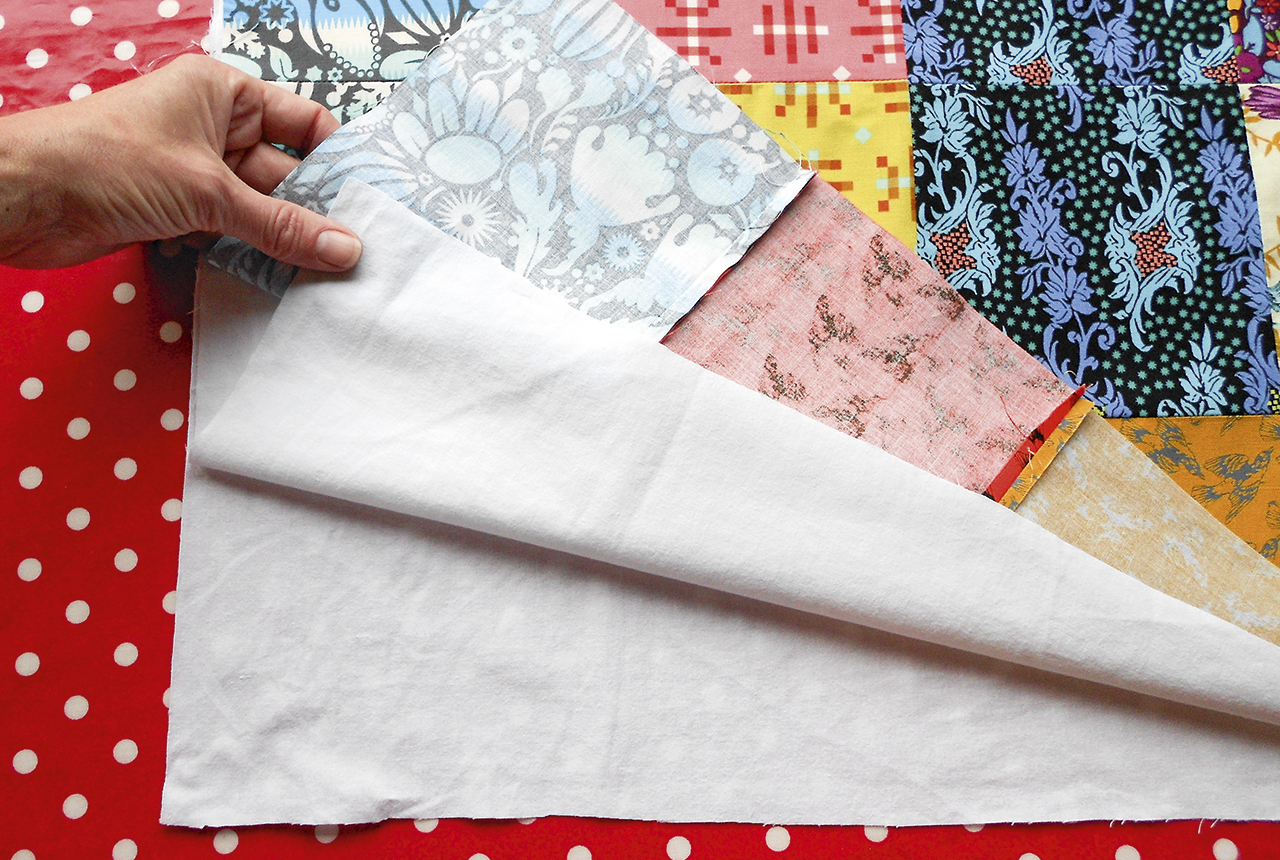
Instead of a central layer of batting or wadding, we've added layers of old sheet, which you secure with Kantha embroidery. You then sew backing to the front panel, right sides together, turn inside out and finish with knots of beautiful thread.

Give it a go and let us know how you get on!

What is a Kantha quilt?

Kantha is a traditional Indian embroidery technique, mainly from Bangladesh and Bengal. As with Western quilting, it is a way to use up old textiles: layers of old saris are stitched together to form bedspreads or used for cushions.

We have used old sheets rather than batting in this project to evoke the traditional ‘drapey’ feel of these pieces. We asked the amazing Manjari Singh to explain more about what Katha quilts are so it's over to you Manjari!

More about Kantha quilts

Winters in India are all about munching on roasted peanuts, drinking chai and snuggling up in a Kantha quilt.

Originating from the West Bengal region of India, Kantha is the oldest form of quilting. Kantha literally means ‘rags’ and that is what was used to make these quilts. The technique was born out of need to repurpose old saris, as women in that region wear handwoven cotton saris every day.

Women would come together as a community in small villages and sew quilts from their old clothes. Slowly this became a community project, especially during wedding seasons, and the quilts became more ornate: a scene or story from the year would be embroidered on plain white muslin to mark the occasion or commemorate an event.

The beauty of this embroidery lies in its simple technique using running stitch. Plus, the raw and often unplanned quilting makes each quilt unique. - Manjari Singh

How to make a Kantha quilt video

Use our Kantha quilt video tutorial to see the quilting process in action. It includes how to layer the bedsheet fillings, Kantha embroidery and the securing knots.

Daylight Lamp – Slimline floor lamp

We’re using a Slimline floor lamp from the Daylight Company.

This helps us see the small Kantha stitches on the colourful and busy patterns of the quilt blocks as we stitch the layers together.

The 4-step dimmer lets you choose the best illumination for your project. Because the LEDs don’t give off heat, it keeps things comfortable working on larger projects like quilts.

There are 2 flexible joints in the neck of the lamp which make it easy to adjust to the exact position you need. The wide field of illumination is great for bigger projects like the Kantha quilt where you want good accurate light over a large working area.

How to make a Kantha quilt step-by-step guide

This quilt was designed by Jo Avery for Love Patchwork & Quilting magazine and is just one of our series of quilt patterns and upcycling projects

Things you'll need to know for the Kantha quilt

  • Seam allowances are ¼in throughout, unless otherwise stated.
  • We used fat quarter halves for our prints.

Fabrics used in the Kantha quilt

All of the print fabrics shown are from Honor Roll by Anna Maria Horner for Free Spirit Fabrics.

It's quite hard to come by here in the UK now but you can still shop some Anna Maria Horner fabrics over on Etsy.
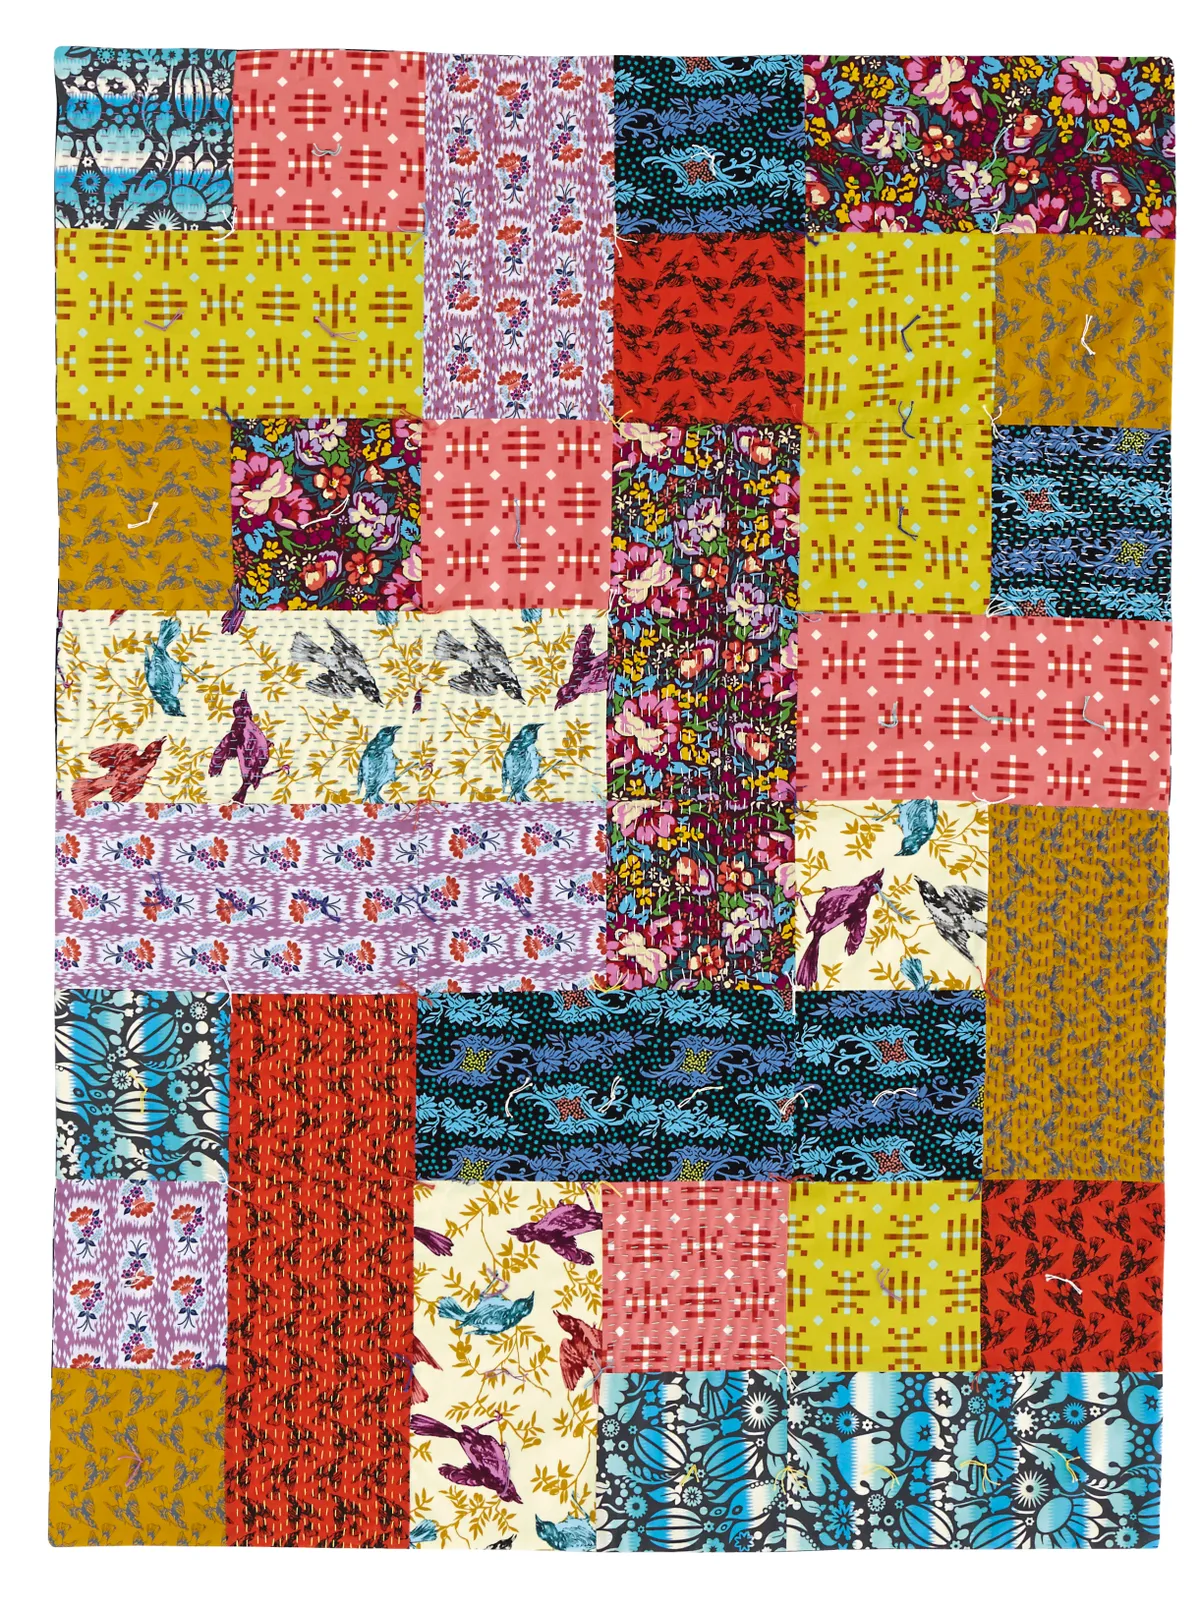
How to make a kantha quilt
Combine your favourite fabrics from pre-loved garments or homewares or shop for favourite clashing prints to make our Kantha quilt pattern

You will need:

  • Fabric (Nine (9) different cotton prints, 11in x 18in eac)
  • Thread (Perlé cotton No.8 in a variety of colours to contrast with fabrics, for the Kantha stitching)
  • Fabric (Two (2) pieces of solid fabric, each 31in x 41in)
  • Sewing machine
  • Basic sewing kit
  • Fabric (Backing fabric (we used a flannel sheet) 31in x 41in)

Cutting out

Step 1

From each of the cotton prints, cut three (3) 5½in x 11in rectangles, to give you a total of twenty-seven (27) rectangles.

Step 2

Put twelve (12) rectangles aside for the moment and cut the remaining fifteen (15) in half. You will only use twenty-four (24) of these 5½in squares.

Assembling the quilt

Step 1

Sew two different 5½in squares together to make a rectangle. Press the seam open or to one side. Sew this pieced unit to a  5½in x 11in rectangle and press the seam. Trim to 10½in square (Fig a).

How to make a kantha quilt fig b

Step 2

Repeat this process to make twelve (12) blocks, mixing up your fabrics differently in each one.

Step 3

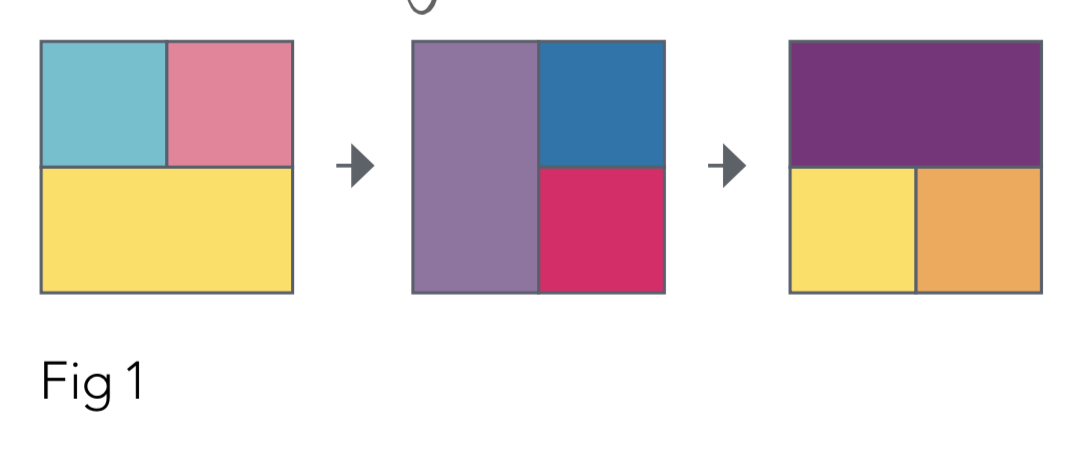
Sew three blocks together to form a row (Fig 1).

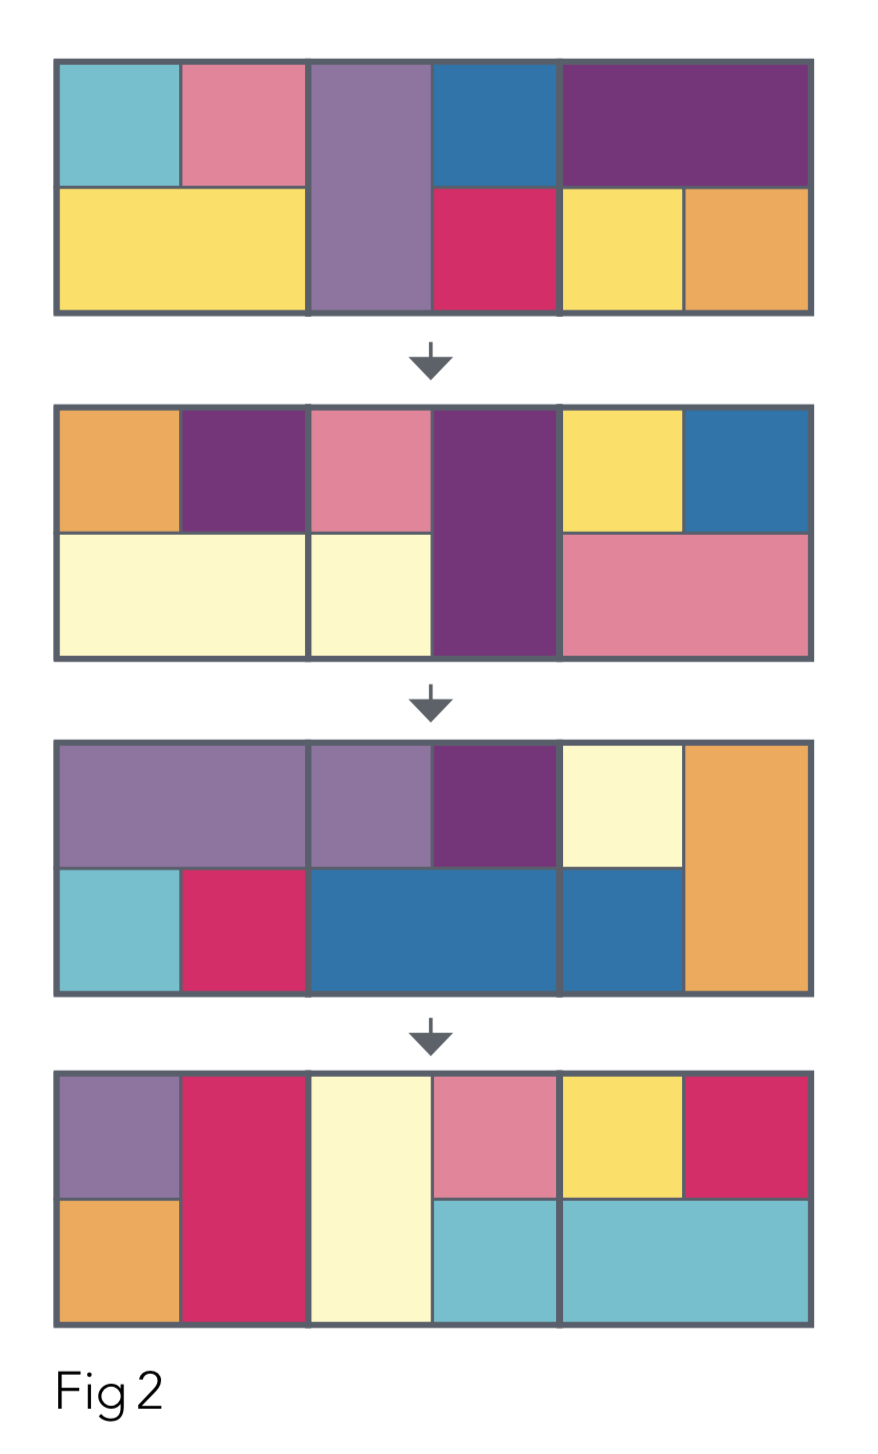
How to make a Kantha quilt Fig 1 How to make a Kantha quilt Fig 2 How to make a Kantha quilt Fig 3

Repeat to make four (4) rows, then sew these rows together (Fig 2).

How to make a Kantha quilt Fig 2

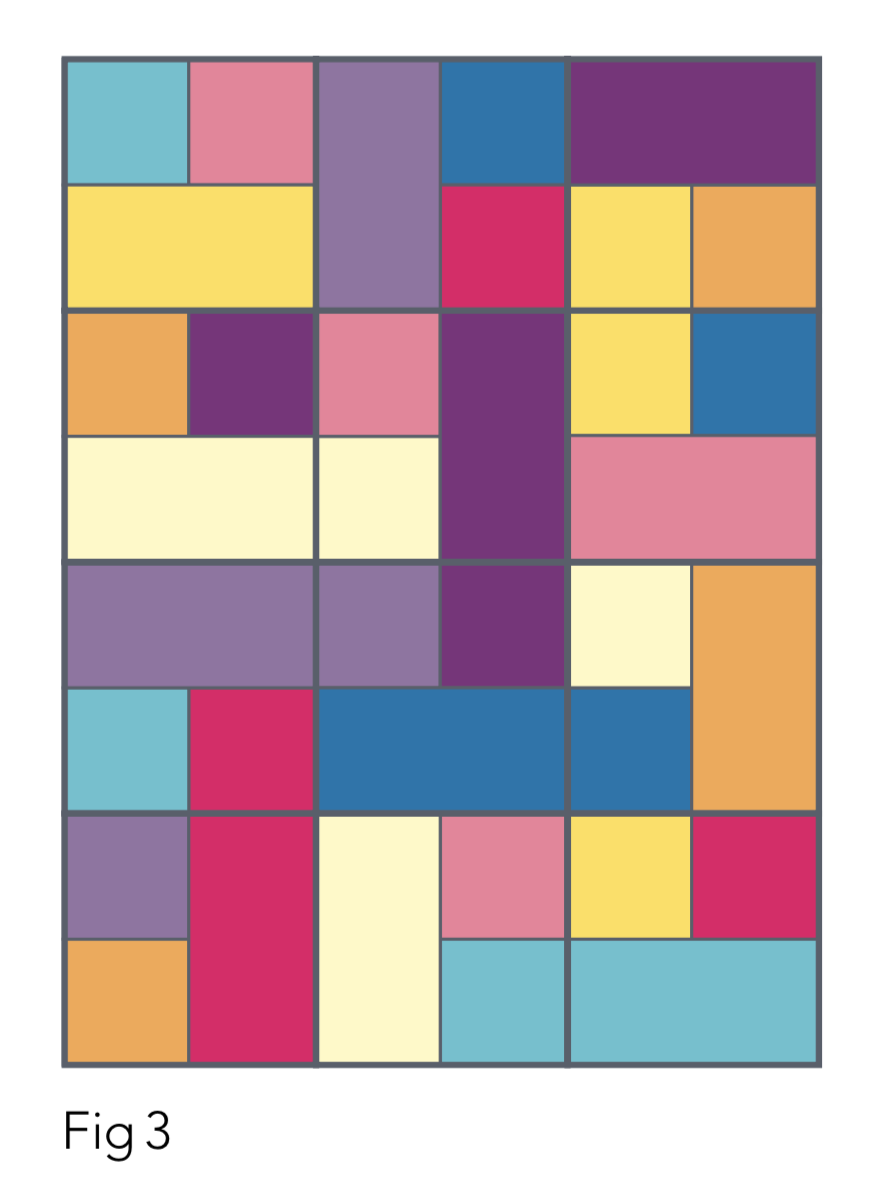
Make sure you mix up the blocks, rotating some so you can’t see the original block pattern (Fig 3).

How to make a Kantha quilt Fig 3

Quitling

Step 1

Layer the two pieces of solid fabric together and place your patchwork on top, right side up (Fig b). Press the layers together and then tack or use safety pins to secure them together.

How to make a kantha quilt fig b
Figure B

Step 2

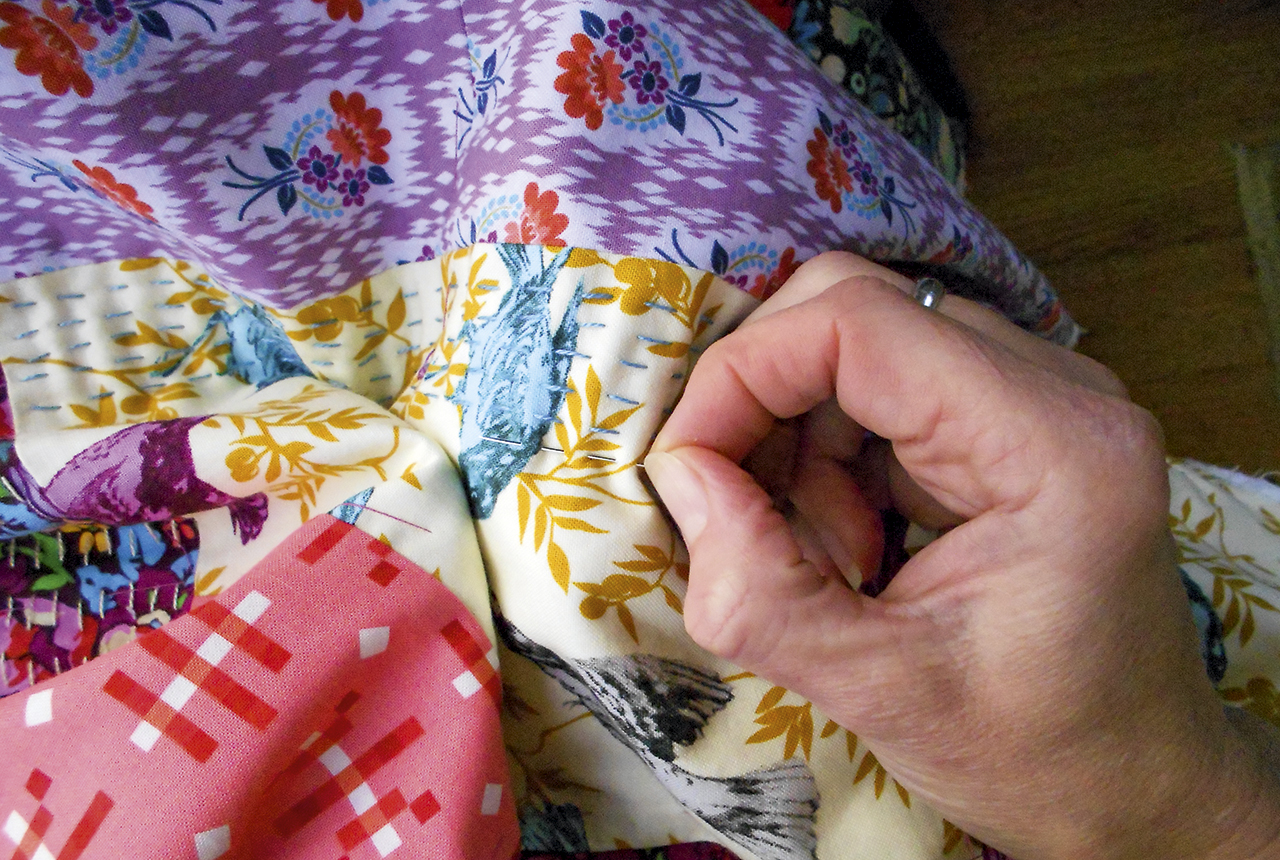
Choose one of the larger fabric sections to start your kantha stitching. Select a contrasting coloured thread. Sew a running stitch in lines, backwards and forwards, covering the chosen section. Gather a number of stitches at a time on your needle for extra speed (Fig c). Your stitches can be quite large and you can start and finish threads with knots on the back because you will be adding a separate backing. Try not to pull your stitches too tight and make sure they lay flat, especially at the end of the lines. Stitch a random selection of fabric areas, from single squares to longer strips in this way, using a different-coloured, contrasting thread each time.

How to make a kantha quilt fig c
Figure C

Finishing the quilt

Step 1

Remove tacking threads and/or pins and press the quilt from the front. Trim away any excess fabric and square up. Place the quilt on top of the flannel backing, right sides together, and trim the backing to the same size as the patchwork.

Step 2

Pin together around the four sides and then stitch around the outer edge using a 3/8in seam. Leave a gap for turning about 14in wide in the centre of one short side, starting and ending your stitching about 8in from the corners.

Step 3

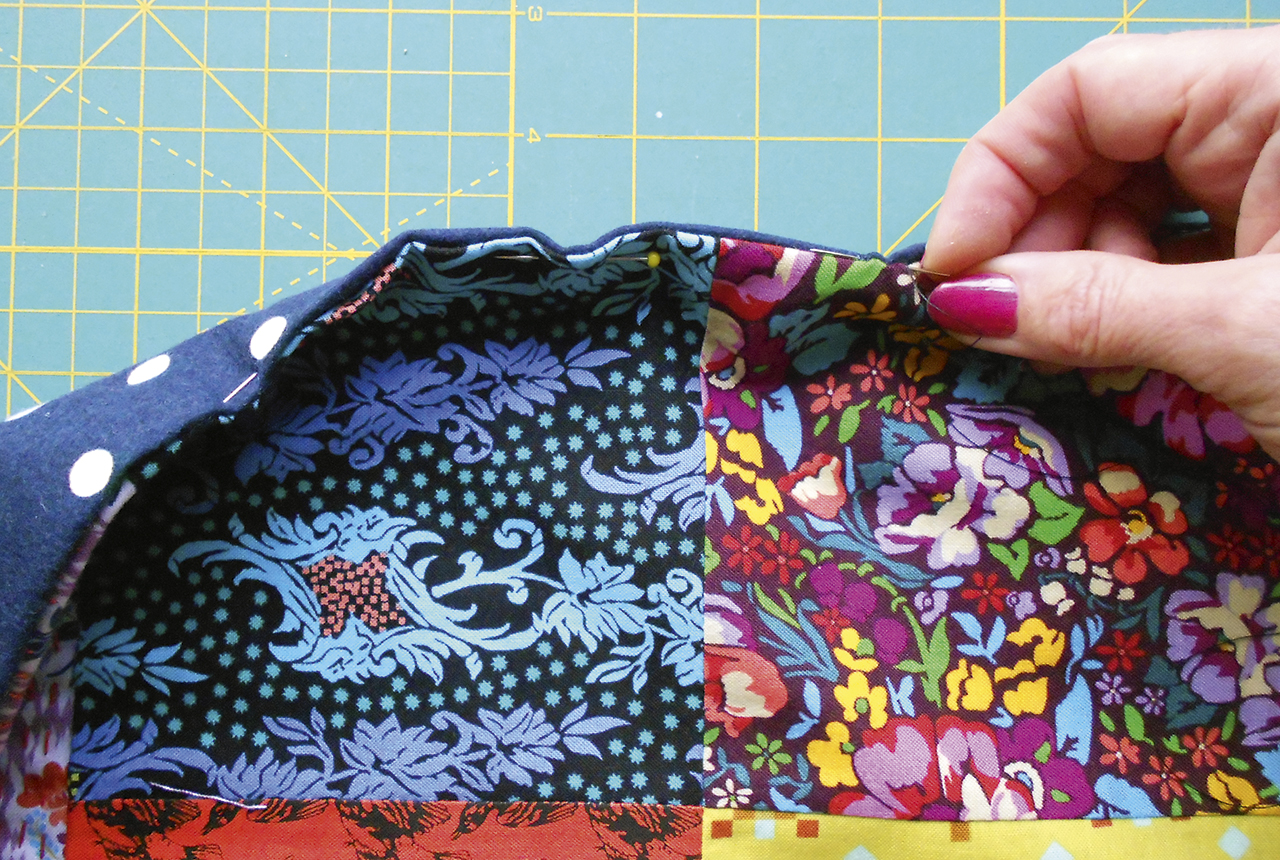
Snip off excess corner fabric, turn right side out and press well. Pin the gap closed and then hand sew using matching thread and a ladder stitch or similar (Fig d).

How to make a kantha quilt fig d
Figure D

Step 4

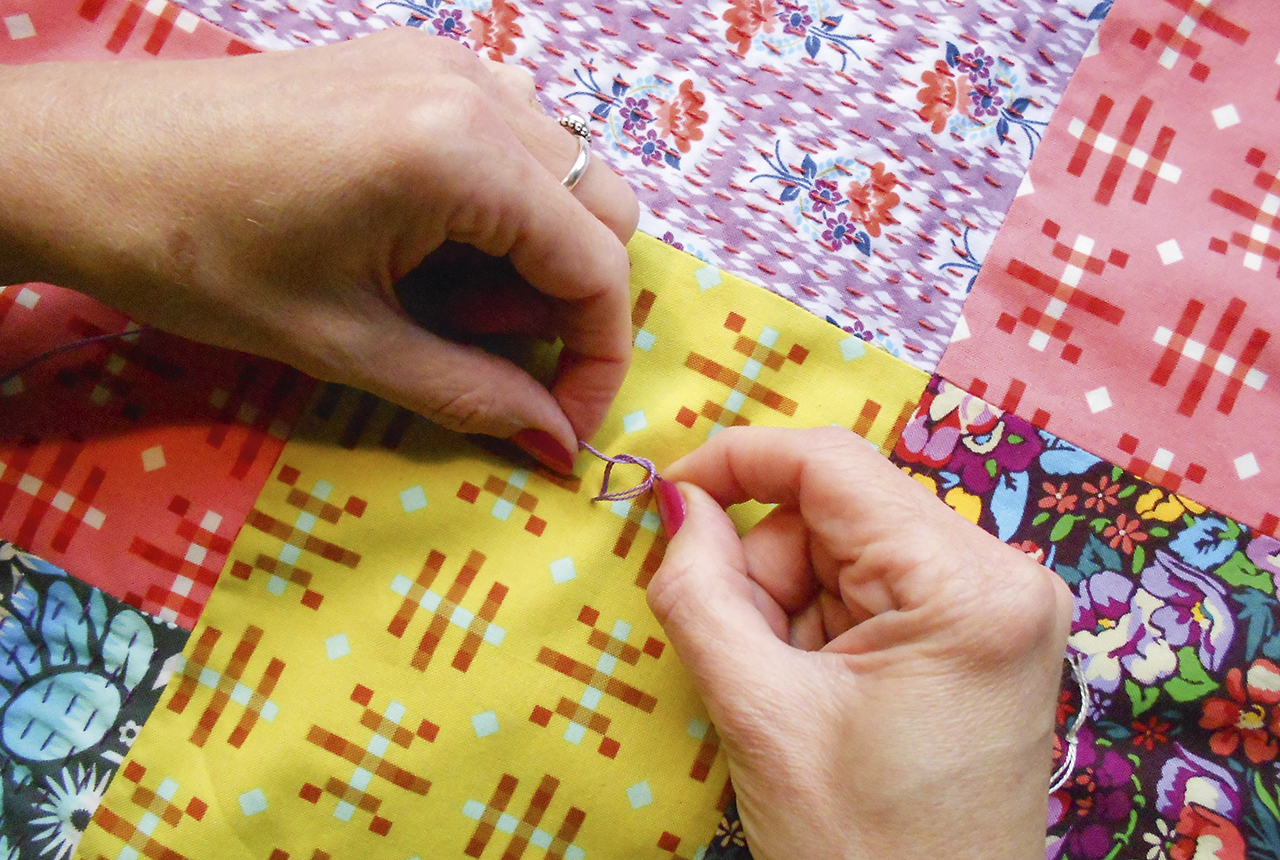
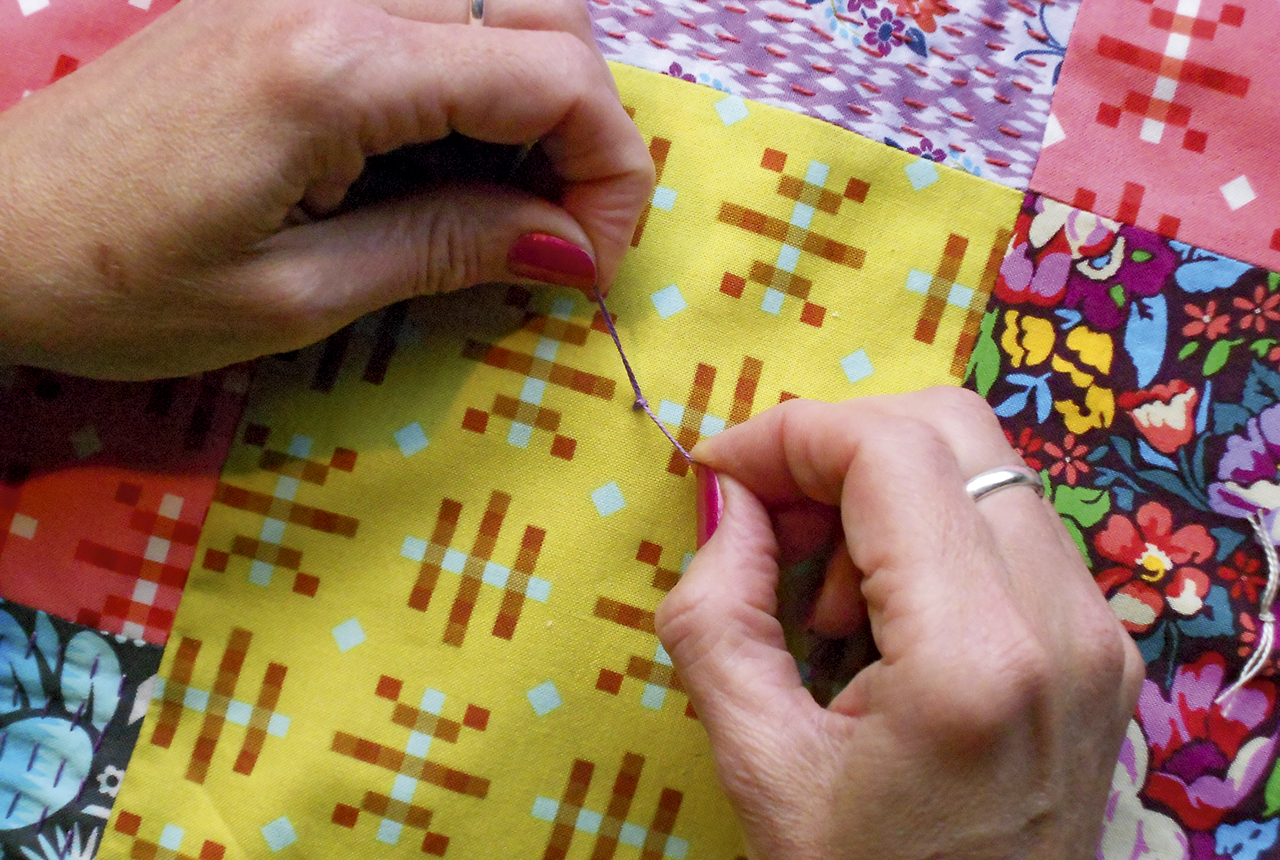
Finish the quilt by tying the layers together. Take a double length of perlé cotton and sew a small stitch from the right side, through to the back and up to the front again. Tie the ends together with a simple reef or square knot (Fig e).

[pullquote quote="Using a ‘false’ back means you can avoid the fiddly starting and finishing knots of traditional hand quilting and therefore sew faster!" /]

How to make a kantha quilt fig e
Figure E

Repeat the knot, alternating the direction of the thread ends (Fig f). Repeat this process to add these ties all over the top of the quilt, at each intersection and in the centre of fabric areas with no kantha stitching, using different coloured threads throughout.

How to make a kantha quilt fig f
Figure F

How to make a kantha quilt

Enjoy stitching your own striking Kantha quilt

By learning how to make a Kantha quilt you’re paying homage to the incredible culture it originates from. They’re also a great way of using up spare fat quarters or materials from your stash.

Once you’ve mastered the Kantha style knot, you’ll be able to use it on a myriad of projects. The only thing stopping you is your imagination!

Discover more incredible quilting projects with Gathered

If you’ve enjoyed learning how to make a Kantha quilt then you’ll love our free quilting patterns.

There’s everything from baby quilt patterns to Log Cabin quilts.