Cutting out
Step 1
Cut from fabric, seven hexagons each for the front and back of the sachet, adding ¼in seam allowance on all sides to allow the fabric to cover the paper templates.
Covering the flowers
Step 1
Use glue or thread to baste the fabric to the papers. Press with an iron to set the edges. Don’t remove the papers yet.
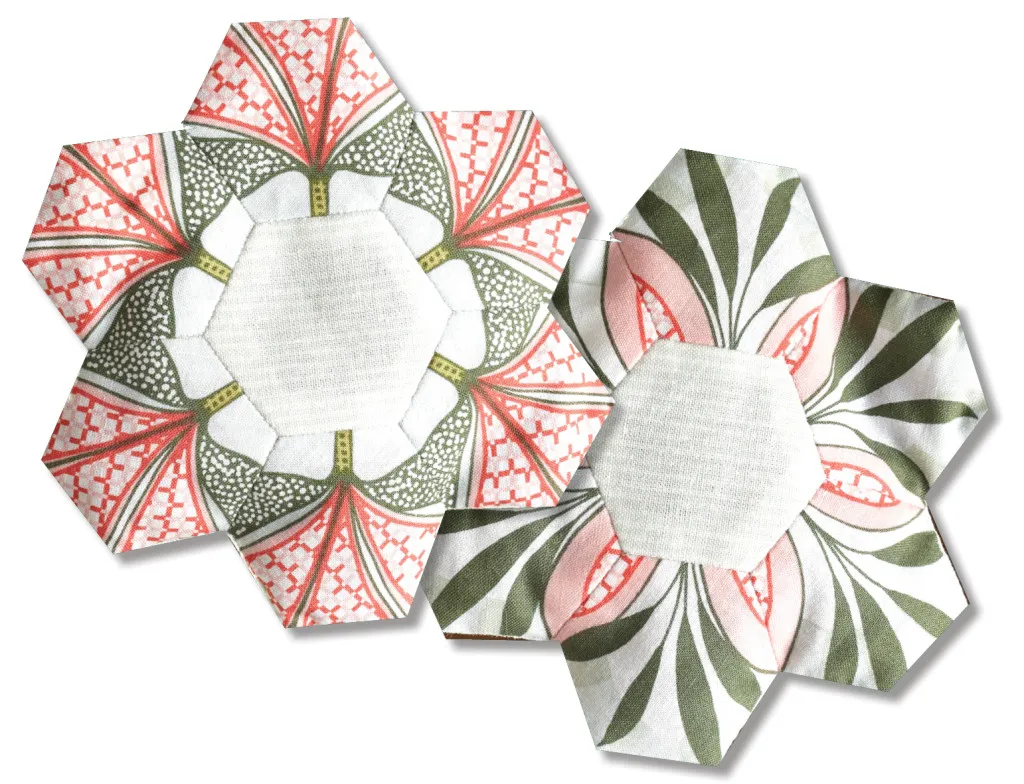
Assembling a flower
Step 1
Choose one hexagon for the centre of your flower. Sew a hexagon ‘petal’ to the flower centre using whip stitch (don’t sew through the paper).
Step 2
Sew on the second petal, placing it face to face with the flower’s centre and sewing from the outer edge. When you reach the centre of the V, make a knot to secure your stitches, before repositioning the petal to sew along the remaining edge to be attached. Fold the hexagon to align these edges. Carry on attaching petals in this way.
Step 3
When you come to the final petal, place it face to face with an adjacent petal and sew around the U shape, from outer edge to outer edge, realigning sides and folding hexagons where necessary.
Step 4
Now make a second flower in the same way for the back of the sachet. Make this using the same fabric.
Removing the papers
Step 1
Before removing the papers, press both flowers with an iron, to ‘set’ the stitches and form crisp edges. Remove the papers gently, to avoid distorting the outer edges of the hexagons.
Attaching the ribbon
Step 1
Fold the 6½in ribbon in half across the length and sew the ends together by hand or machine. Very gently pull out one of the seam allowances on the outer sides of the flower (front or back). Sew the ribbon in place centrally, sewing only through the ribbon and seam allowance, not the right side of the flower.
Sewing front and back together
Step 1
Place the two flowers wrong sides together and pin or clip in place, aligning edges perfectly. Leave one side unpinned, for the lavender at the end (but not the side where the ribbon sits).
Step 2
Use ladder stitch to sew the two flowers together. Bring your needle through the fold of the fabric, so that you can begin sewing from the corner point in one of the hexagon’s outer folds. Now, enter the other flower’s petal exactly opposite where your needle emerged, allowing the needle to travel along a little way inside the fold, before re-emerging. Don’t pull the stitches tight at this point, allow them to form a tiny ladder between the two flowers. Return to the other flower once more, entering exactly opposite where the needle emerged from, travelling along parallel to the folded inside edge and re-emerging a short distance along. Repeat this for four or five stitches, before pulling the thread taut and watching as the stitches disappear from sight. I never get tired of seeing this happen! Continue all around the perimeter of the flower.
Step 3
When you reach the hanging ribbon, sew it first to one side of the flower and then track back to affix the other side, before continuing.
Inserting the lavender
Step 1
Use a small plastic funnel, or create one from rolled paper, to pour the lavender into the sachet. Finally, sew closed the final seam.