“My sweet little girl loves to play pretend," Megan tells us. "She also loves to tote all of her little trinkets around with her. A sweet portable house with finger puppets or her little horses is the perfect handmade toy that will keep her entertained and imagining endlessly. You can take some creative liberty in the appliqué on the outside of the house or change the pockets on the inside to make it your own.”
To see more of Megan's designs and tutorials over at quiltstory.blogspot.co.uk or keep up to date with her on Instagram @quiltstorymeg. Read on to find out how to make your own easy sew playhouse, we think it's a great way to use your quilty skills to make one-of-a-kind Christmas gifts!
How to sew a patchwork play house
You will need...
- Outer house fabric: one (1) fat quarter
- Inner house fabric: 3/8yd
- Roof fabric: one (1) fat eighth
- Inner pocket fabrics: ¼yd each of two (2) prints
- Scraps: three (3) different prints for door, windows and shutters
- Trim: ¾yd
- Batting: 28in x 16in
- Medium-weight fusible interfacing: two (2) 24in x 4in rectangles
- Fusible webbing
- Small piece of Velcro
- Vanishing pen
- Greaseproof paper
- Spray adhesive
Finished size
12in x 11in approx
Notes
- Wash and press all fabrics well before cutting.
- Seam allowances are ¼in, unless otherwise noted.
- Press seams open, unless otherwise instructed.
- RST = right sides together.
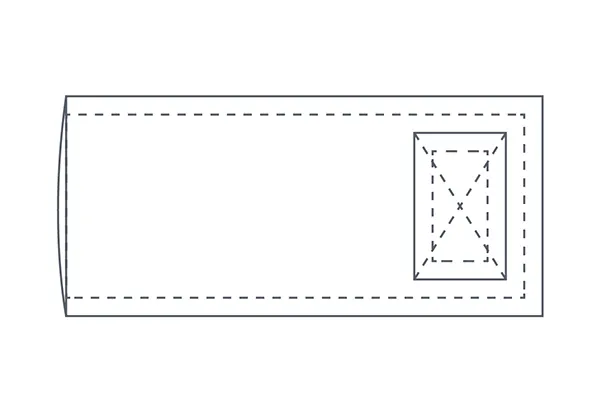
- You can download our free Playhouse sewing templates here.
Fabrics used
Megan used fabrics from the Sundrops collection by Corey Yoder for Moda Fabrics.
Easy-sew playhouse: step by step
Cutting out
Step 1
Cut your fabrics as follows:
- From the outer house fabric cut two (2) 12½in x 7½in rectangles and two (2) 3½in x 2in rectangles.
- From the roof fabric cut two (2) 12½in x 4½in rectangles.
- From each inner pocket fabric cut one (1) 24in x 8in rectangle.
- From the batting cut one (1) 3in x 1in rectangle and then set aside the remainder.
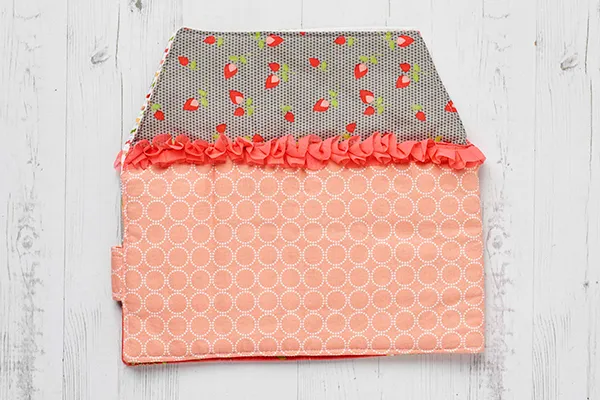
Making the outer house
Step 2
Take the roof fabric rectangles. For each one, on each side edge, measure and mark 1/4in up from the both bottom corners. Then, on the top edge, measure and mark 2in in from each corner. On each side join up the side and top marks, and then cut along the lines to create your roof pieces.

Step 3
Take a roof piece and sew it to the top of an outer house 121/2in x 71/2in rectangle. Repeat. You will now have the outer front and outer back house. Cut the length of trim in half. Sew a piece of trim over the seam line between the roof and the outer house rectangle of each house piece
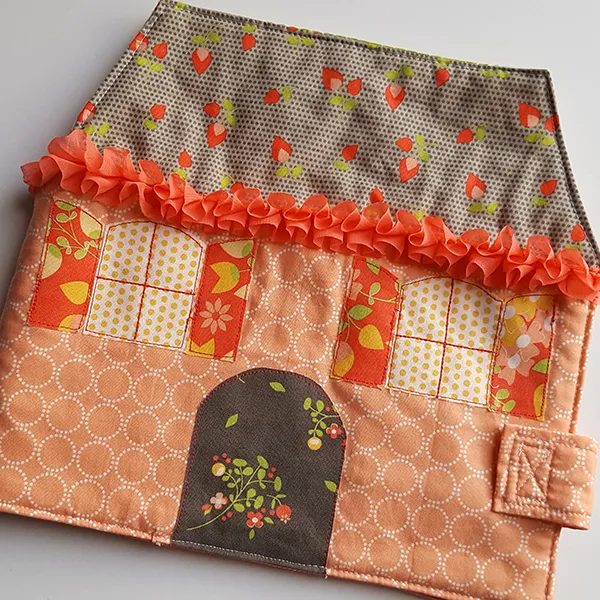
Step 4
Using the templates, trace one door, two windows and four shutters onto the paper side of fusible webbing and cut out roughly. Fuse the motifs onto the wrong side of the appropriate fabric and cut out neatly on the drawn lines.
Step 5
Remove the backing paper and place the motifs on the outer front house. Position the door centrally along the bottom edge, then position the windows and shutters evenly just beneath the trim. Once you are happy, fuse the motifs in place and then stitch to secure. Megan stitched around the outside of each piece and made a cross over each window.
Step 6
Place the outer house ½in x 2in rectangles RST. Sew up one long edge, along the short edge and down the other long edge – leave the second short edge open. Trim the corners and then turn right sides out and press. Insert the 3in x 1in batting rectangle inside and then topstitch around the three joined edges. Firmly stitch one half of the velcro to the top to complete the closure.
Step 7
Take the outer front house and measure the midway point on the right-hand side edge of the house rectangle. Position the other half of the velcro at this point approx 1in in from the edge and then sew in place.
Step 8
Place the outer front house and outer back house RST and join on one side edge, making sure that the seam is on the left-hand side of the front and the right-hand side of the back. Sew only along the house section – do not join the roof pieces. Press. This completes the outer house.
Making the inner house
Step 9
Open out the outer house and place it flat onto pattern or greaseproof paper, then trace around it to make a template. Use this template to cut out one (1) inner house from the inner house fabric. Use the template to cut out a piece of batting and then trim this so it is ¼in smaller all around than the outer and inner house pieces.
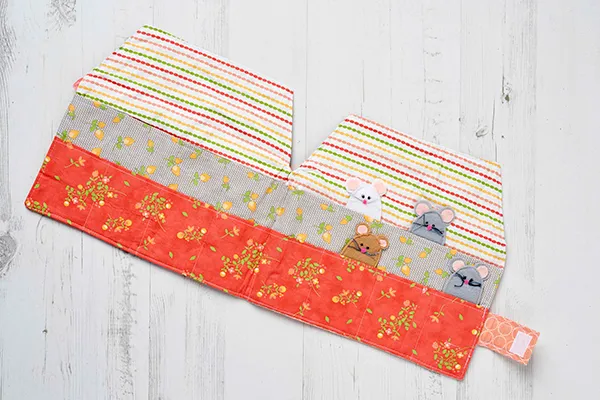
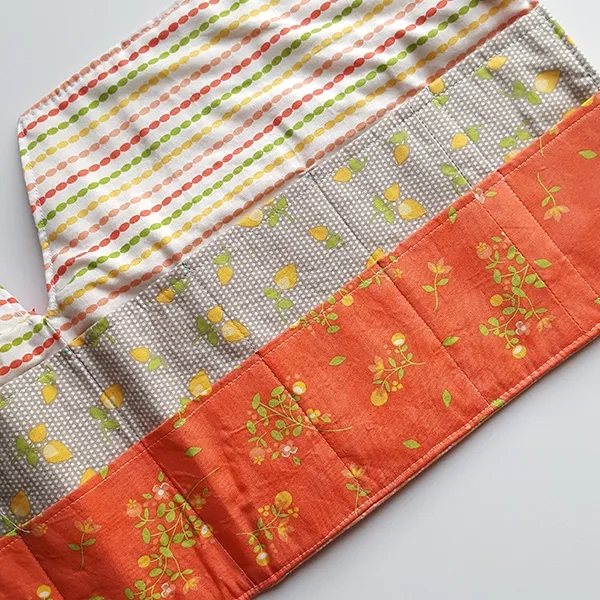
Adding the pockets
Step 9
Take one 8in x 24in inner pocket piece and fold in half so it measures 4in x 24in. Press. Place one of the interfacing rectangles inside, making sure it goes right up to the fold. Fuse in place. Topstitch across the top (folded edge) of the pocket. Repeat with the remaining inner pocket and interfacing rectangles.
Step 10
Place the inner house piece right side up. Place one pocket on top so its top edge is 6in up from the bottom raw edge of the house piece. Then place the second pocket on top with its raw edges aligned with the bottom raw edge of the house piece. Pin in place and then baste around the bottom and side edges to attach the pockets to the inner house piece.
Step 11
Using a vanishing pen or chalk, mark vertical lines spaced approx 3in apart down both pockets. Stitch along each mark to create smaller pockets.
Completing the house
Step 12
Spray baste the batting to the wrong side of the inner house. Place the outer house RST with the inner house. Matching up the raw edges, place the closure between the inner and outer house, positioning it in the centre of the side and making sure that the velcro is facing the inner house piece.
TOP TIP! Add embroidered or appliqué details for a cute personalised present
Step 13
Stitch all around to join, leaving a 3in–4in gap along the bottom edge. Turn right side out through the gap, poking out the edges to give a crisp finish. Turn under the fabric at the gap and then press. Topstitch around the entire house, closing the gap as you go.