Making the Heatwave block
Step 1
Cutting out
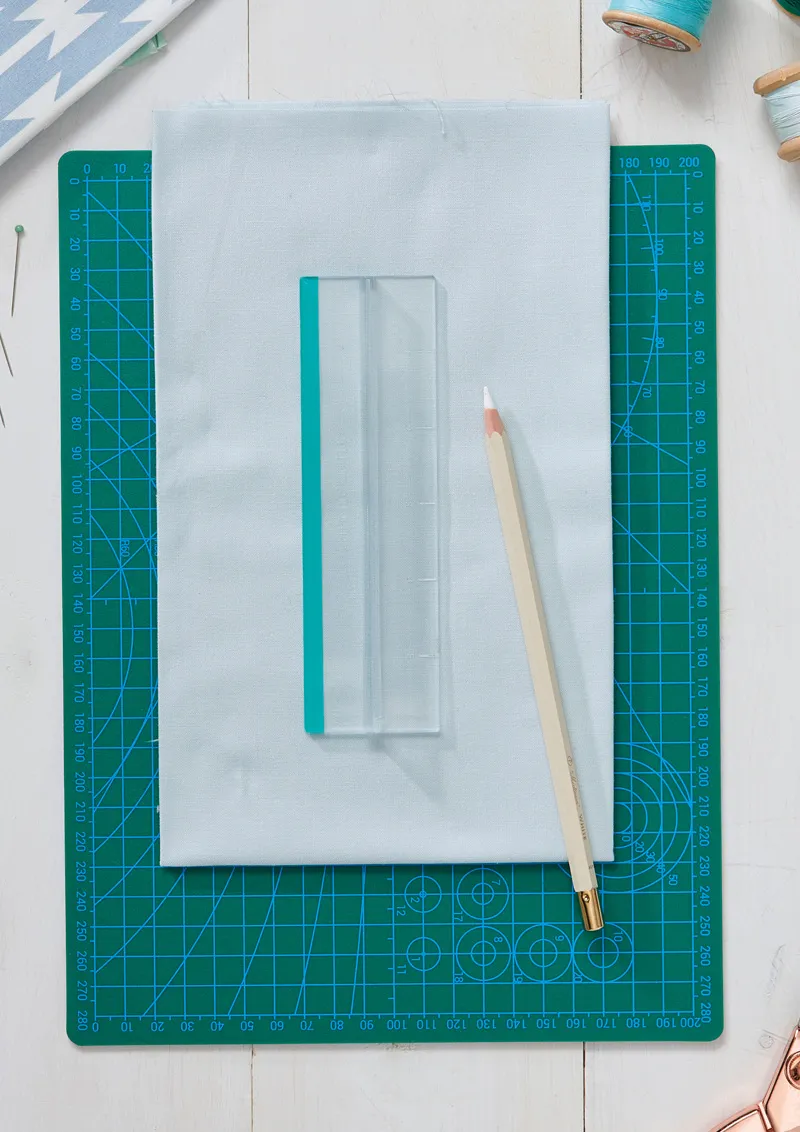
For this block, all the fabric pieces will be pre-cut before piecing using the freezer paper template method. Trace Sections A and B from the original template onto freezer paper including all number and letter details: the outline will be on the dull paper side (Fig A, below). As the shapes in Sections A and B are repeated, these pieces will be reused for the remaining sections.

Step 2
Cut out each freezer paper piece along the seam lines. Arrange the pieces on the wrong side of your fabric, with the waxy side against the fabric, leaving approx. 1⁄2in seam allowance around each shape. Press in place using a hot, dry iron.
Step 3
Cut out your pieces, adding a seam allowance around the edge of each one (Fig B, below). If you’re new to FPP, use a 1⁄2in seam allowance to give you extra “wiggle room” for piecing. Once cooled, you can peel the paper away from the fabric and reuse to cut more pieces. Cut the following:
- Piece A1: cut eight (8) for A1, B4, C1, D4, E1, F4, G1, H4
- Piece A2: cut eight (8) for A2, B1, C2, D1, E2, F1, G2, H1
- Piece A3: cut four (4) for A3, C3, E3, G3
- Piece A4: cut four (4) for A4, C4, E4, G4
- Piece B2: cut four (4) for B2, D2, F2, H2
- Piece B3: cut four (4) for B3, D3, F3, H3

Step 4
Cut out the original template. Cut along the inner dashed lines to create eight separate Sections, A, B, C, D, E, F, G and H.
Piecing the block
Step 1
Complete Sections A, C, E and G. These sections are identical so chain piecing works well here.
Step 2
Complete Sections B, D, F and H, chain piece as before.
Step 3
Join Section A to B, matching the seam points with pins and sewing from the A and B points to the outer edge. Press the joining seam open. Repeat joining C to D, E to F, and G to H.
Step 4
Join AB to CD, sewing from the inner points to the outer edge. Press the joining seam towards C. Repeat with EF to GH, pressing the joining seam towards G.
Step 5
Starting in the block centre and stitching to the outer edge, join ABCD to EFGH; the centre seams should nest together. Flip over and repeat from the block centre to the outer edge, overlapping the centre stitches. Press seam open.
Step 6
Carefully remove template paper. Press and trim block to measure 61⁄2in square.

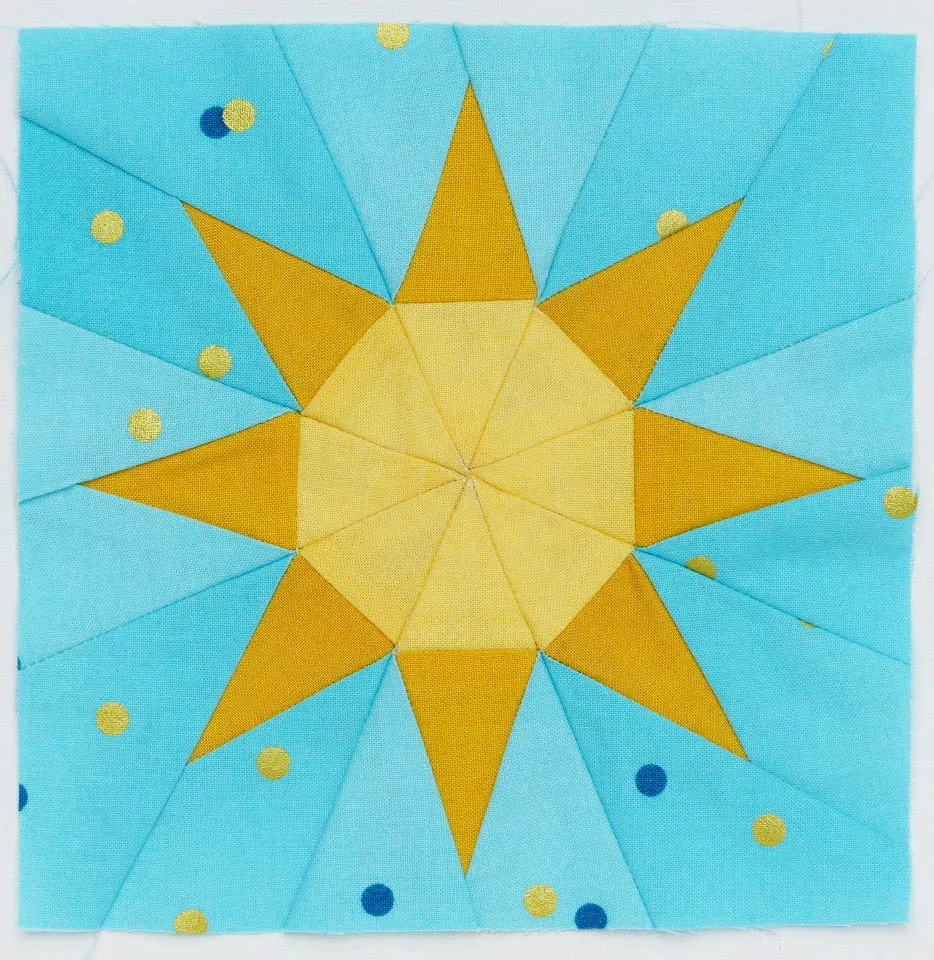
To make the Sunny Spells block
Step 1
Cutting out
Using the freezer paper template method as detailed in Heatwave, trace and pre-cut pieces A2, A3, B2, B3, B4, B5, C3, D2, D3, D5 and D6 adding your seam allowance around the edges.
Step 2
Cut the following:
- Light yellow: 21⁄2in x 3in rectangle for A4, 21⁄2in square for B1, 21⁄2in x 31⁄4in rectangle for D7
- Dark yellow: 21⁄2in x 5in rectangle for A1
- White: 5in square for C1, 31⁄2in square for D1
- Aqua: 2in x 3in rectangle for C2, 2in x 21⁄2in rectangle for D4
Step 3
Cut out the original template cutting along the inner dashed lines to create four separate sections, A, B, C and D.
Piecing the block
Step 1
Complete Sections A, B, C and D using the corresponding fabric pieces.
Step 2
Join B to C, matching the seam points with pins. Press seam towards C.
Step 3
Join A to BC, matching the seam points with pins and sewing from the A and B points to the outer edge. Press the joining seam open.
Step 4
Join D to ABC, matching the seam points with pins and sewing from where A meets D downwards. Press the seam towards D.
Step 5
Carefully remove template paper. Press and trim block to measure 61⁄2in square.
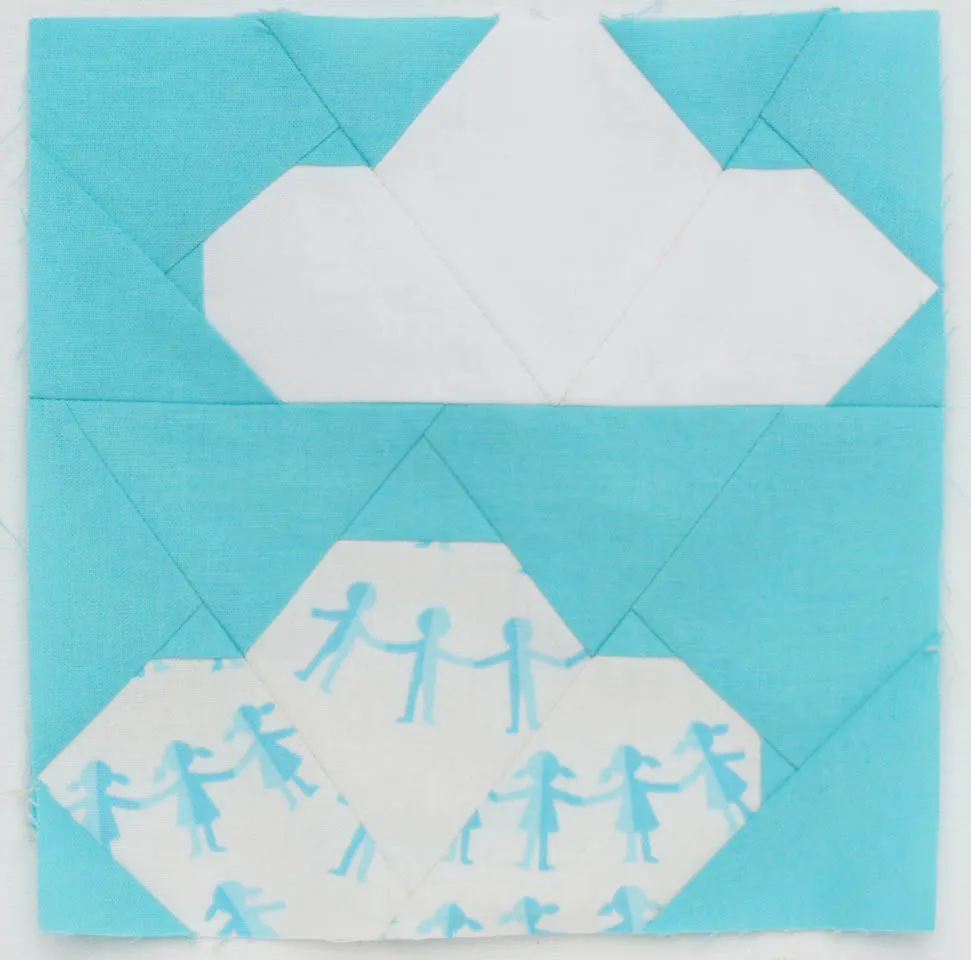
To make the Cloudy Skies block
Step 1
Cutting out
Trace the original template onto freezer paper including all number and letter details using the freezer paper template method (see the Heatwave block for details). Pre-cut all the fabric pieces adding your seam allowance around all edges.
Step 2
Cut out the original template. Cut along the inner dashed lines to create six separate sections, A, B, C, D, E and F.
Piecing the block
Step 1
Complete Sections A, B, and C using the corresponding fabric pieces.
Step 2
Join A to B matching the seam points with pins and sewing from the A1/B1 points to the outer edge. Press seam open.
Step 3
Join C to AB, matching as before and sewing from the B1/C1 points to the outer edge. Press seam open.
Step 4
Repeat steps 3-5 with Sections D, E and F, joining F to DE.
Step 5
Join ABC above DEF. Press seam open.
Step 6
Carefully remove template paper. Press and trim block to measure 61⁄2in square.
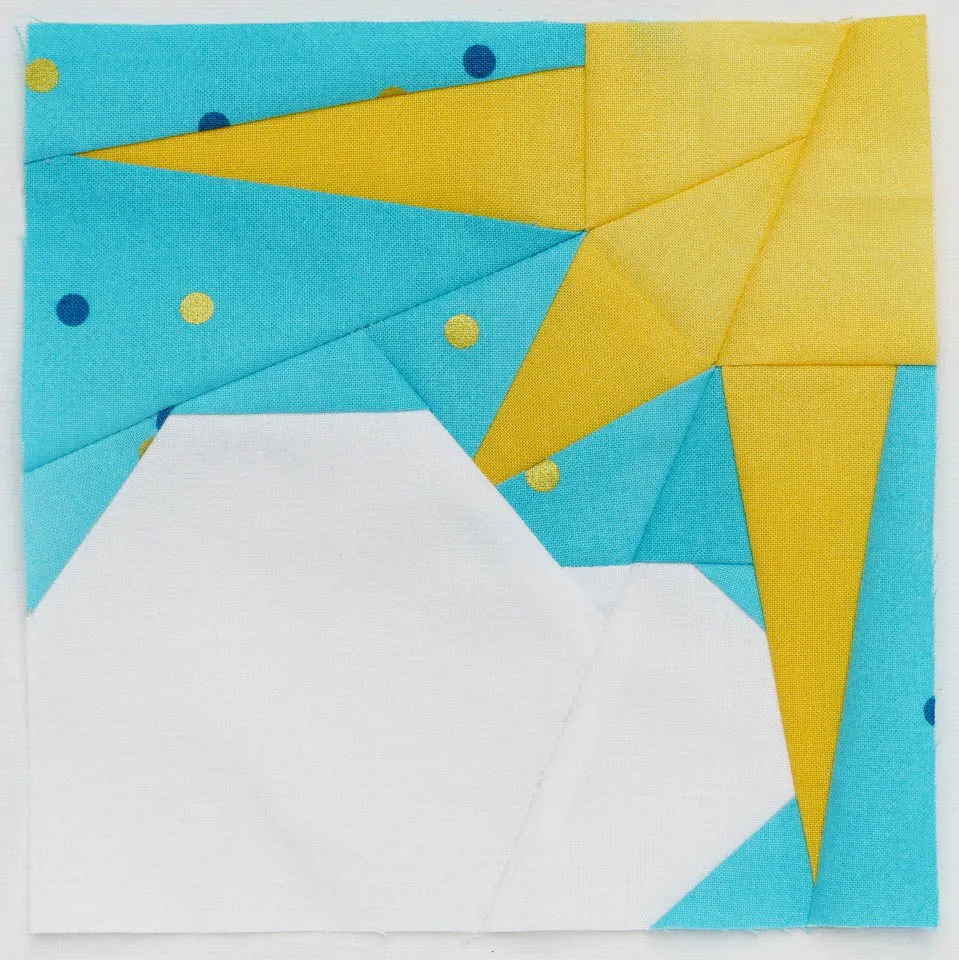
To make the Light Breeze block
Step 1
Cutting out
Trace piece A3 from the original template onto freezer paper using the freezer paper template method (see the Heatwave block for details). This will be reused for C3, E3 and G3.
Step 2
Using the A3 freezer paper piece and the aqua fabric, cut four (4) A3 pieces your seam allowance around all edges. These are for A3, C3, E3, G3.
Step 3
Cut the following:
- Aqua: cut four (4) 3in squares for B3, D3, F3, H3, cut two (2) 21⁄2in squares then subcut each square along diagonal to make four HSTs for B2, D2, F2, H2
- White: cut two (2) 21⁄2in squares then subcut each square along diagonal to make four HSTs for A2, C2, E2, G2, cut four (4) 2in x 3in rectangles for pieces B1, D1, F1, H1
- Navy: cut four (4) 2in x 3in rectangles for pieces A1, C1, E1, G1.
Step 4
Cut out the original template. Cut along the inner dashed lines to create eight separate sections, A, B, C, D, E, F, G and H.
Piecing the block
Step 1
Sections A, C, E and G are identical so complete using the chain piecing technique. Repeat with Sections B, D, F, and H.
Step 2
Join A to B matching the seam points with pins and sewing from A2/B1 to the outer edge. Press seam open. Repeat joining C to D, E to F, and G to H.
Step 3
Join AB to GH matching the seam points with pins and sewing from A/ G to the outer edge. Repeat with CD to EF.
Step 4
Join ABGH to CDEF: start the seam from the centre, sew to the outer edge, flip the fabric over and start the seam again from the opposite end overlapping the centre stitches. Press seam open.
Step 5
Carefully remove template paper. Press and trim block to measure 61⁄2in square.
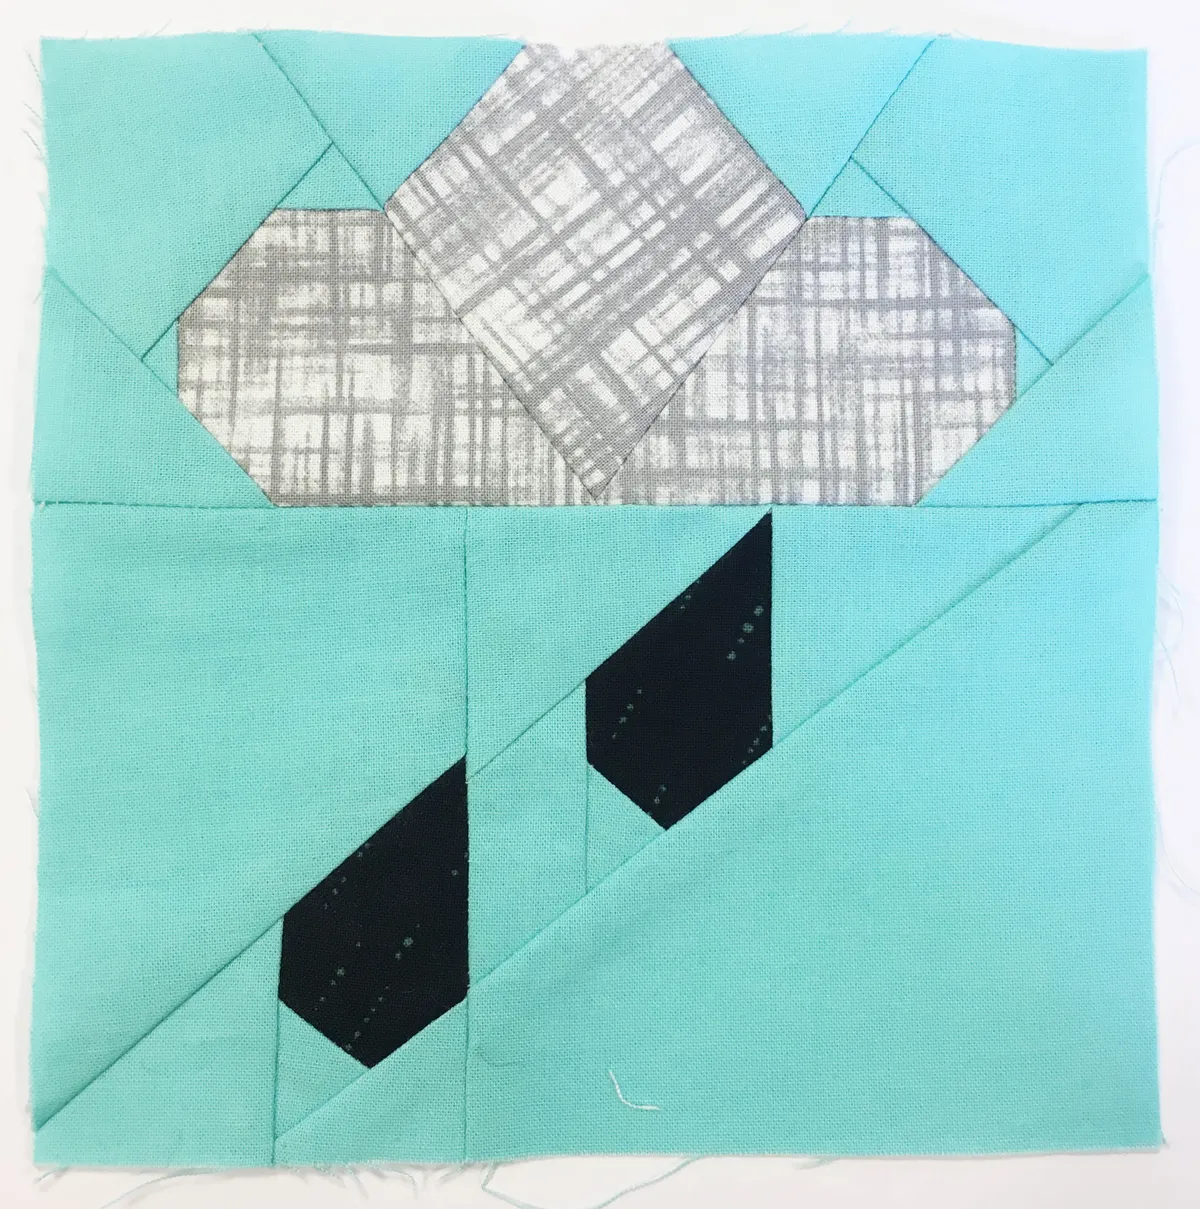
To make the Rain Shower block
Step 1
Cutting out
Trace the entire original template onto freezer paper including all number and letter details using the freezer paper template method (see the Heatwave block for details). Pre-cut all the fabric pieces adding your seam allowance around all edges.
Step 2
Cut out the original template. Cut along the inner dashed lines to create five separate sections, A, B, C, D and E.
Piecing the block
Step 1
Complete sections A, B, C, D and E using the corresponding fabric pieces.
Step 2
Join A to B matching the seam points with pins and sewing from the A1 and B1 points to the outer edge. Press seam open.
Step 3
Join C to AB, matching the seam points with pins and sewing from the B1/C1 points to the outer edge. Press seam open.
Step 4
Join D to E sewing from the top to the bottom edge. Press seam open.
Step 5
Join ABC above DE. Press seam open.
Step 6
Carefully remove template paper. Press and trim block to measure 61⁄2in square.
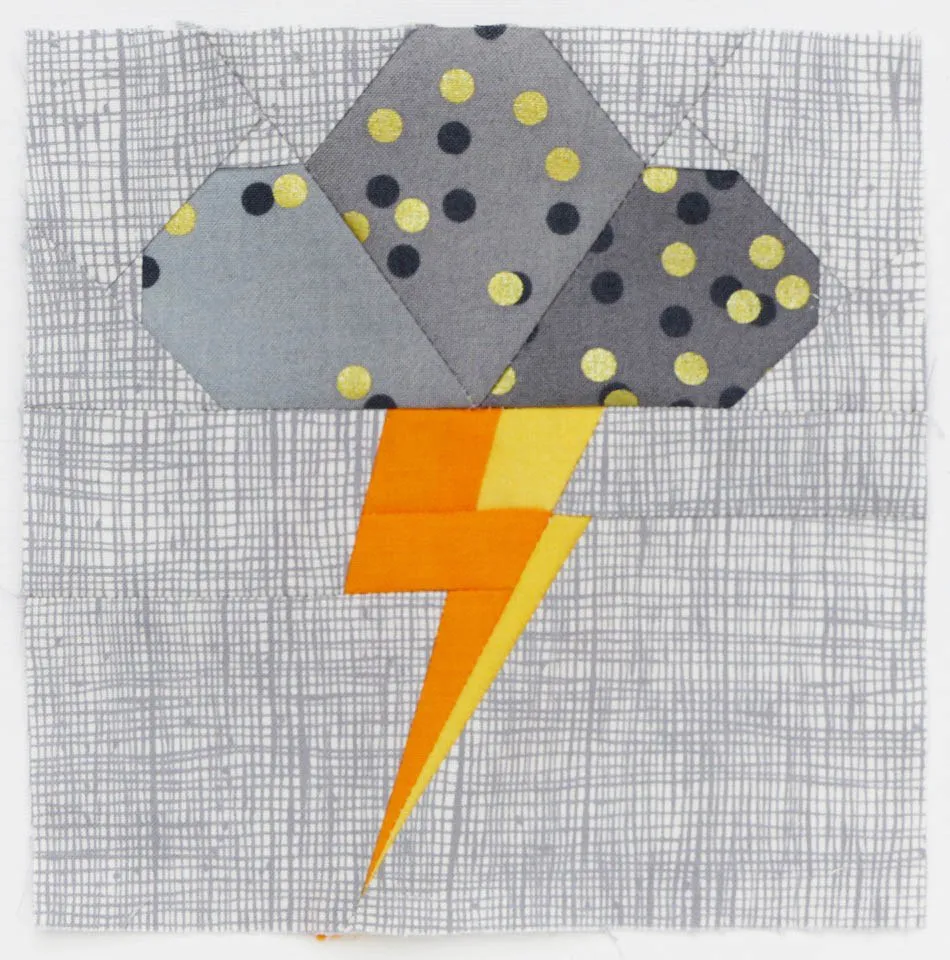
To make the Stormy Night block
Step 1
Cutting out
Reuse the traced freezer paper templates from Rainy to make the cloud (Sections A, B and C). Trace the lower D, E and F lightning bolt sections onto freezer paper, including all number and letter details and using the freezer paper template method (see the Heatwave block for details). Precut all the fabric pieces adding your seam allowance around all edges.
Step 2
Cut out the original template. Cut along the inner dashed lines to create six separate sections, A, B, C, D, E and F.
Piecing the block
Step 1
Complete Sections A, B and C following steps 3-5 of Rain Shower.
Step 2
Complete Sections D, E and F.
Step 3
Join D to E sewing from E1/D3 the top to the side edge. Press the seam open.
Step 4
Join DE to F above DE matching the seam points with pins and sewing from D1/F3 points to the lower edge. Press seam open.
Step 5
Join ABC to DEF. Press seam open.
Step 6
Carefully remove template paper. Press and trim block to measure 61⁄2in square.
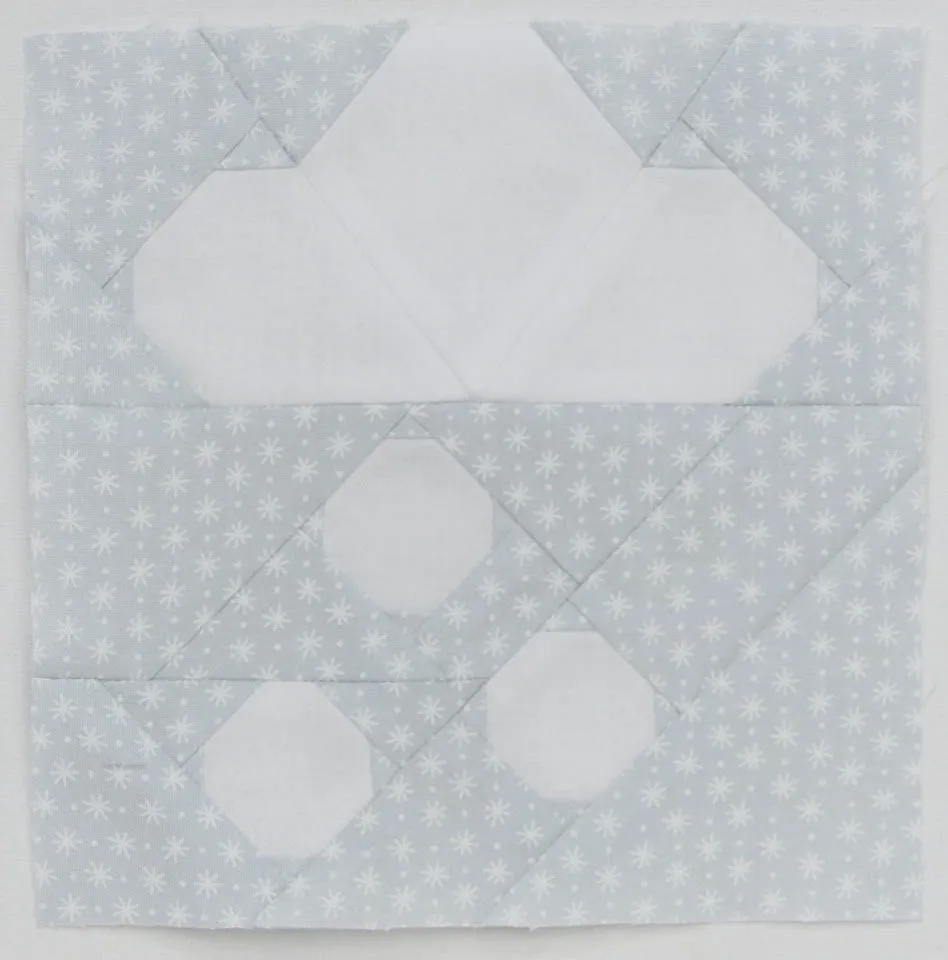
To make the Snow Day block
Step 1
Cutting out
For this block, reuse the traced freezer paper templates from Rainy to make the cloud section. Trace the lower D, E and F sections that form the snow onto freezer paper, including all number and letter details and using the freezer paper template method (see the Heatwave block for details). Precut all the fabric pieces adding your seam allowance around all edges.
Step 2
Cut out the original template. Cut along the inner dashed lines to create six separate sections, A, B, C, D, E and F.
Piecing the block
Step 1
Complete Sections A, B and C, following steps 3-5 from Rain Shower.
Step 2
Complete Sections D, E and F.
Step 3
Join D to E sewing from D6/E5 to the side edge. Press seam open.
Step 4
Join DE to F, press seam open.
Step 5
Join ABC to DEF. Press seam open.
Step 6
Carefully remove template paper. Press and trim block to measure 61⁄2in square.
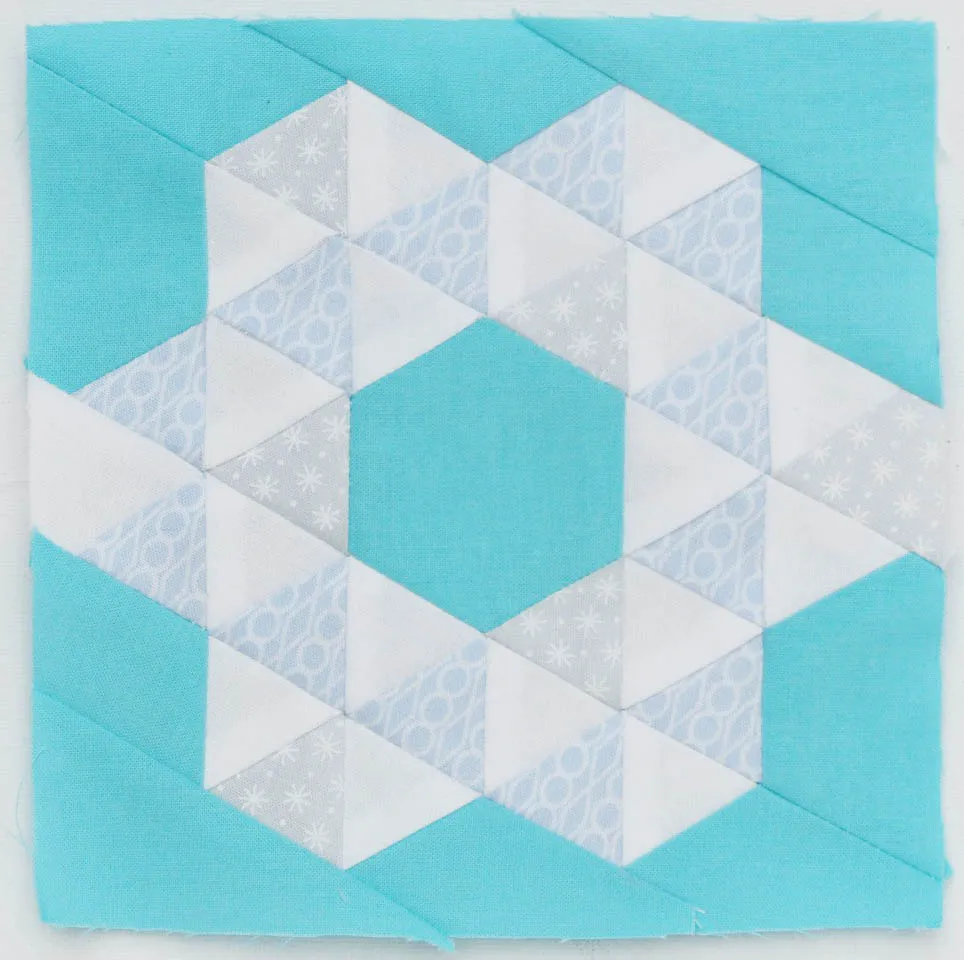
To make the Early Frost block
Step 1
Cutting out
Use the freezer paper template method as detailed in Heatwave to trace pieces A1 (I5), A5 (I1), A6 (I6), B1 (H10), C2 (G2); the brackets show the other repeat piece of each shape. From the aqua fabric, cut two identical fabric pieces with each freezer paper template adding your seam allowance around all edges.
Step 2
Cut the following:
- White: cut two (2) strips each measuring 2in x 18in. Using a 60-degree ruler or a freezer paper/plastic template, place the bottom edge of the triangle along the long horizontal edge of the fabric (if using a template, the top tip of the triangle will hang over the fabric) and cut, then rotate the triangle 180-degrees for each new cut. Continue cutting eighteen (18) 2in triangles for pieces A3, B3, B5, B7, B9, C1, D2, D4, E3, F1, F3, H1, H3, H5, H7, H9, I2 and I4.
- Light blue: from the strip cut twelve (12) 2in triangles for pieces for pieces A2, A4, B4, B8, D1, D3, F2, G1, H2, H4, H6 and H8.
- Grey: from the strip cut six (6) 2in triangles for pieces B2, B6, B10, E2, F4 and I3
- Aqua: 3in x 31⁄2in rectangle for E1
Step 3
Cut out the original template. Cut along the inner dashed lines to create nine separate sections, A, B, C, D, E, F, G, H and I.
Piecing the block
Step 1
Complete Sections A and I, B and H, C and G, D and F, and E.
Step 2
Join A to B, pressing the seam open. Join H to I, pressing the seam open.
Step 3
Join C to D. Press seam towards D. Join F to G. Press seam open.
Step 4
Join CD to E (on the E1/E2 edge). Press seam open. Join FG to ADE along the E1/E3 edge. Press seam open.
Step 5
Join AB above CDEFG, pressing seam open. Join HI below ABCDEFG, pressing seam open.
Step 6
Carefully remove template paper. Press and trim block to measure 61⁄2in square.